
Knowledgebase (2370)
Children categories
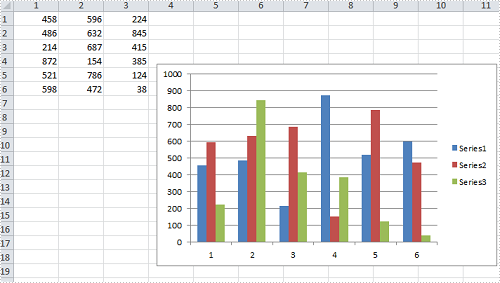
Sometimes, we create a spreadsheet that contains a wonderful chart, we may still want to adjust the size and position of the chart in order to make the chart mostly matches the Excel page. In this article, I'll introduce you how to resize a chart to a suitable scale and how to move a chart to a desired position in C#, VB.NET via Spire.XLS.
Within the class of Spire.Xls.Chart, we can set the parameters of XlsShape.LeftColum and XlsShape.TopRow to move a chart to any location on a worksheet, while the size of the chart can be changed by setting the parameters of XlsShape.Width and XlsShape.Height. More details would be as follows:
Test File:
Code Snippet for Resize and Move Chart
Step 1: Create a new instance of workbook and load the test file.
Workbook workbook = new Workbook();
workbook.LoadFromFile("sample.xlsx", ExcelVersion.Version2010);
Step 2: Get the chart from the first worksheet.
Worksheet sheet = workbook.Worksheets[0];
Chart chart = sheet.Charts[0];
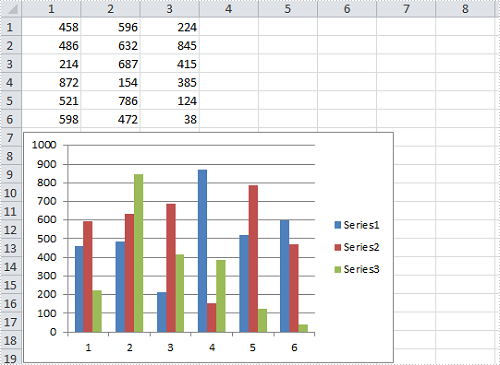
Step 3: Set position of the chart.
chart.LeftColumn = 1;
chart.TopRow = 7;
Step 4: Resize the chart.
chart.Width = 400;
chart.Height = 250;
Step 5: Save the changes to a new file.
workbook.SaveToFile("result.xlsx", ExcelVersion.Version2010);
Result:
Full Code:
using Spire.Xls;
namespace ResizeandMoveExcel
{
    class Program
    {

        static void Main(string[] args)
        {

            Workbook workbook = new Workbook();
            workbook.LoadFromFile("sample.xlsx", ExcelVersion.Version2010);

            Worksheet sheet = workbook.Worksheets[0];
            Chart chart = sheet.Charts[0];

            chart.LeftColumn = 1;
            chart.TopRow = 7;

            chart.Width = 400;
            chart.Height = 250;

            workbook.SaveToFile("result.xlsx", ExcelVersion.Version2010);
        }
    }
}
Imports Spire.Xls
Namespace ResizeandMoveExcel
	Class Program

		Private Shared Sub Main(args As String())

			Dim workbook As New Workbook()
			workbook.LoadFromFile("sample.xlsx", ExcelVersion.Version2010)

			Dim sheet As Worksheet = workbook.Worksheets(0)
			Dim chart As Chart = sheet.Charts(0)

			chart.LeftColumn = 1
			chart.TopRow = 7

			chart.Width = 400
			chart.Height = 250

			workbook.SaveToFile("result.xlsx", ExcelVersion.Version2010)
		End Sub
	End Class
End Namespace
Textbox is been widely used in Excel workbooks to give abstract and introduce information for a part of the excel documents. Spire.XLS supports to insert textbox in Excel worksheet and edit the setting of the textbox. We have already shown you how to remove the borderline of textbox in Excel chart. This tutorial will demonstrate how to set the font and background for TextBox in Excel in C#.
Firstly, make sure that Spire.XLS for .NET has been installed on your machine. And then, adds Spire.XLS.dll as reference in the downloaded Bin folder thought the below path: "..\Spire.XLS\Bin\NET4.0\ Spire.XLS.dll".
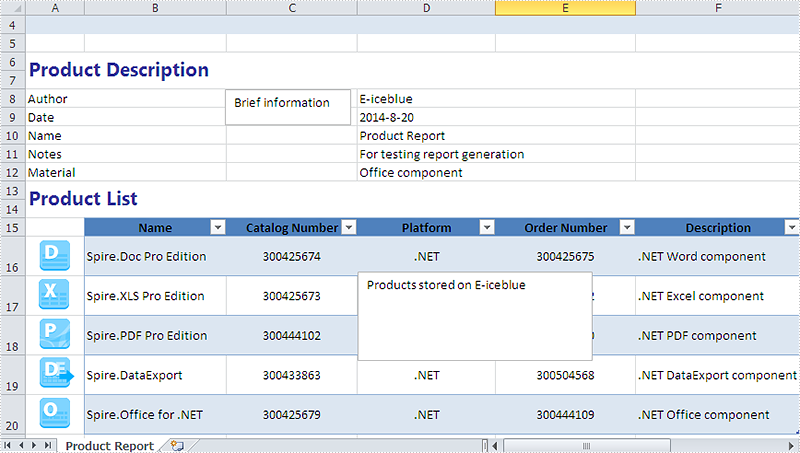
Now it comes to the details of how to set the text font and background color for textbox in Excel in C# and view the textbox before editing:
Step 1: Create a new instance of workbook and load an Excel file with textbox from file.
Workbook workbook = new Workbook();
workbook.LoadFromFile("sample.xlsx");
Step 2: Get the worksheet named in "Product Report" which contains textbox.
Worksheet sheet = workbook.Worksheets["Product Report"];
Step 3: Get the second textbox which will be edited.
XlsTextBoxShape shape = sheet.TextBoxes[1] as XlsTextBoxShape;
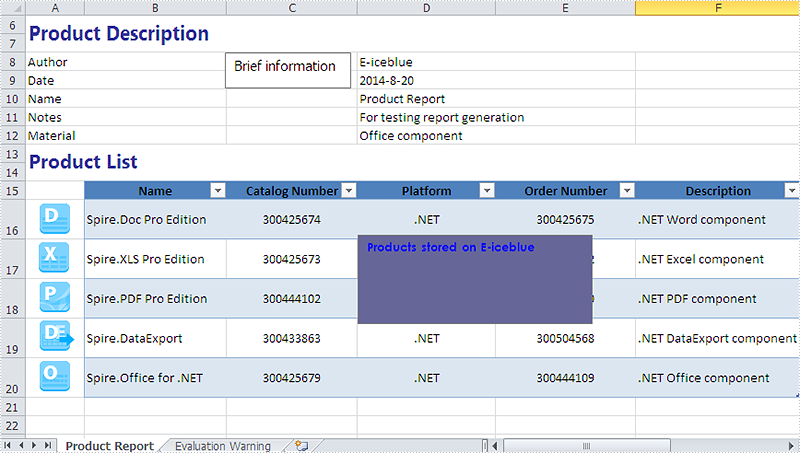
Step 4: Set the font and background color for the second textbox.
//Set the font
ExcelFont font = workbook.CreateFont();
font.FontName = "Century Gothic";
font.Size = 10;
font.IsBold = true;
font.Color = Color.Blue;
(new RichText(shape.RichText)).SetFont(0, shape.Text.Length - 1, font);
//set background color
shape.Fill.FillType = ShapeFillType.SolidColor;
shape.Fill.ForeKnownColor = ExcelColors.BlueGray;
Step 5: Save the document to file and launch it.
string output = "result.xlsx";
workbook.SaveToFile(output,ExcelVersion.Version2010);
System.Diagnostics.Process.Start(output);
Effective screenshot after set the font and background color for textbox in Excel chart:
Full codes:
using Spire.Xls;
using Spire.Xls.Core.Spreadsheet.Shapes;
using System.Drawing;
namespace setFontandBackgroundforTextbox
{
    class Program
    {
        static void Main(string[] args)
        {
            Workbook workbook = new Workbook();
            workbook.LoadFromFile("sample.xlsx");
            Worksheet sheet = workbook.Worksheets["Product Report"];
            XlsTextBoxShape shape = sheet.TextBoxes[1] as XlsTextBoxShape;

            //set font
            ExcelFont font = workbook.CreateFont();
            //font.IsStrikethrough = true;
            font.FontName = "Century Gothic";
            font.Size = 10;
            font.IsBold = true;
            font.Color = Color.Blue;
            (new RichText(shape.RichText)).SetFont(0, shape.Text.Length - 1, font);
            //set background color
            shape.Fill.FillType = ShapeFillType.SolidColor;
            shape.Fill.ForeKnownColor = ExcelColors.BlueGray;

            string output = "result.xlsx";
            workbook.SaveToFile(output,ExcelVersion.Version2010);
            System.Diagnostics.Process.Start(output);

        }
    }
Format Data Labels of Series Chart in Presentation in C#, VB.NET
2014-09-04 08:33:56 Written by KoohjiBy default, Microsoft PowerPoint automatically hides the data labels when we create a series chart on presentation slide. In order to make your readers have an intuitive understanding of your chart, you can choose to set formatting of label to display series name, category name, value, percentage and adjust its displayed position. In this article, I would like to show you how to format data labels in PowerPoint presentation via Spire.Presentation.
In the class of Spire.Presentation.Charts.ChartDataLabel, it contains properties like LabelValueVisible, PercentageVisible, SeriesNameVisible, CategoryNameVisible, Position and etc , which will enable us to easily manage the data labels formatting as you desired. Look at the pie chart below, it is not that informative if it doesn’t display data labels.
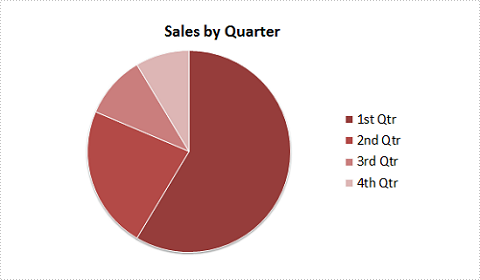
Now, let's format pie chart to display percentages in data labels with following code snippet:
Step 1: Create a new instance of Presentation class and load test the file that contains the pie chart.
Presentation ppt = new Presentation();
ppt.LoadFromFile("Test.pptx");
Step 2: Get the chart from presentation slide.
IChart chart = ppt.Slides[0].Shapes[0] as IChart;
Step 3: Get chart's series.
ChartSeriesFormatCollection sers = chart.Series;
Step 4: Set the position of legend on chart.
chart.ChartLegend.Position = ChartLegendPositionType.TopRight;
Step 5: Initialize four instance of series label and set parameters of each label.
ChartDataLabel cd1 = sers[0].DataLabels.Add();
cd1.PercentageVisible = true;
cd1.Position = ChartDataLabelPosition.Center;

ChartDataLabel cd2 = sers[0].DataLabels.Add();
cd2.PercentageVisible = true;
cd2.Position = ChartDataLabelPosition.Center;

ChartDataLabel cd3 = sers[0].DataLabels.Add();
cd3.PercentageVisible = true;
cd3.Position = ChartDataLabelPosition.Center;

ChartDataLabel cd4 = sers[0].DataLabels.Add();
cd4.PercentageVisible = true;
cd4.Position = ChartDataLabelPosition.Center;
Step 6: Save the changes to a new .pptx file.
ppt.SaveToFile("Result.pptx", FileFormat.Pptx2007);
Result:

Full Code:
using Spire.Presentation;
using Spire.Presentation.Charts;
using Spire.Presentation.Collections;

namespace FormatData
{

    class Program
    {
        static void Main(string[] args)
        {

            Presentation ppt = new Presentation();
            ppt.LoadFromFile("Test.pptx");

            IChart chart = ppt.Slides[0].Shapes[0] as IChart;
            ChartSeriesFormatCollection sers = chart.Series;
            chart.ChartLegend.Position = ChartLegendPositionType.TopRight;

            ChartDataLabel cd1 = sers[0].DataLabels.Add();
            cd1.PercentageVisible = true;
            cd1.Position = ChartDataLabelPosition.Center;
            ChartDataLabel cd2 = sers[0].DataLabels.Add();
            cd2.PercentageVisible = true;
            cd2.Position = ChartDataLabelPosition.Center;
            ChartDataLabel cd3 = sers[0].DataLabels.Add();
            cd3.PercentageVisible = true;
            cd3.Position = ChartDataLabelPosition.Center;
            ChartDataLabel cd4 = sers[0].DataLabels.Add();
            cd4.PercentageVisible = true;
            cd4.Position = ChartDataLabelPosition.Center;

            ppt.SaveToFile("Result.pptx", FileFormat.Pptx2007);

        }
    }
}
Imports Spire.Presentation
Imports Spire.Presentation.Charts
Imports Spire.Presentation.Collections

Namespace FormatData

	Class Program
		Private Shared Sub Main(args As String())

			Dim ppt As New Presentation()
			ppt.LoadFromFile("Test.pptx")

			Dim chart As IChart = TryCast(ppt.Slides(0).Shapes(0), IChart)
			Dim sers As ChartSeriesFormatCollection = chart.Series
			chart.ChartLegend.Position = ChartLegendPositionType.TopRight

			Dim cd1 As ChartDataLabel = sers(0).DataLabels.Add()
			cd1.PercentageVisible = True
			cd1.Position = ChartDataLabelPosition.Center
			Dim cd2 As ChartDataLabel = sers(0).DataLabels.Add()
			cd2.PercentageVisible = True
			cd2.Position = ChartDataLabelPosition.Center
			Dim cd3 As ChartDataLabel = sers(0).DataLabels.Add()
			cd3.PercentageVisible = True
			cd3.Position = ChartDataLabelPosition.Center
			Dim cd4 As ChartDataLabel = sers(0).DataLabels.Add()
			cd4.PercentageVisible = True
			cd4.Position = ChartDataLabelPosition.Center

			ppt.SaveToFile("Result.pptx", FileFormat.Pptx2007)

		End Sub
	End Class
End Namespace
