
Knowledgebase (2370)
Children categories
How to Expand/Collapse the rows in an existing Pivot Table in C#
2014-07-25 02:52:19 Written by AdministratorPivot table displays the data in sort, count total or give the average of the data stored in one table or spreadsheet. So it gives readers clear information of the data's trends and patterns rather than a large amount of similar data. Sometimes, there are so many rows in one pivot table and we may need to expand or collapse them to make the pivot table more clearly.
By using Spire.XLS for .NET, developers can create pivot table. This article will show you how to expand and collapse the rows in an existing Pivot table in C#.
Firstly, make sure that Spire.XLS for .NET (version7.5.5 or above) has been installed on your machine. And then, adds Spire.XLS.dll as reference in the downloaded Bin folder thought the below path: "..\Spire.XLS\Bin\NET4.0\ Spire.XLS.dll".
//Create a new excel document
Workbook book = new Workbook();
//load an excel document with Pivot table from the file
book.LoadFromFile("test.xlsx");
//Find the Pivot Table sheet
Worksheet sheet = book.Worksheets["Pivot Table"];
//Get the data in Pivot Table
Spire.Xls.Core.Spreadsheet.PivotTables.XlsPivotTable pivotTable = sheet.PivotTables[0] as Spire.Xls.Core.Spreadsheet.PivotTables.XlsPivotTable;
//Calculate Data
pivotTable.CalculateData();
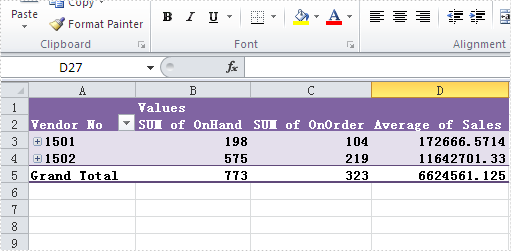
//Collapse the rows
(pivotTable.PivotFields["Vendor No"] as Spire.Xls.Core.Spreadsheet.PivotTables.XlsPivotField).HideItemDetail("1501", true);
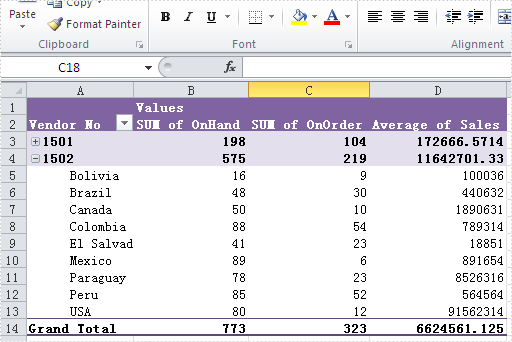
//Expand the rows
(pivotTable.PivotFields["Vendor No"] as Spire.Xls.Core.Spreadsheet.PivotTables.XlsPivotField).HideItemDetail("1502", false);
//Save the document to file
book.SaveToFile("result.xlsx", ExcelVersion.Version2007);
Effective screenshots:
Collapse the rows in Pivot table in C#
Expand the rows in Pivot table in C#
Full codes:
using Spire.Xls;

namespace HighlightValues
{
    class  Program
    {
        static void Main(string[] args)
        {
            Workbook book = new Workbook();
            book.LoadFromFile("test.xlsx");
            Worksheet sheet = book.Worksheets["Pivot Table"];

            Spire.Xls.Core.Spreadsheet.PivotTables.XlsPivotTable pivotTable = sheet.PivotTables[0] as Spire.Xls.Core.Spreadsheet.PivotTables.XlsPivotTable;
            pivotTable.CalculateData();
            (pivotTable.PivotFields["Vendor No"] as Spire.Xls.Core.Spreadsheet.PivotTables.XlsPivotField).HideItemDetail("1501", true);
            (pivotTable.PivotFields["Vendor No"] as Spire.Xls.Core.Spreadsheet.PivotTables.XlsPivotField).HideItemDetail("1502", true);

            book.SaveToFile("result_1.xlsx", ExcelVersion.Version2007);

            (pivotTable.PivotFields["Vendor No"] as Spire.Xls.Core.Spreadsheet.PivotTables.XlsPivotField).HideItemDetail("1502", false);
            book.SaveToFile("result_2.xlsx", ExcelVersion.Version2007);
        }
    }
}
Convert TIFF to PDF in C# – Multi-Page & Batch Examples
2014-07-22 03:46:39 Written by Administrator
Converting TIFF to PDF using C# is a common requirement in .NET document processing workflows. Developers often need to transform scanned documents or multi-page TIFF files into PDF format for better compatibility, easier distribution, and standardized document management.
TIFF files are widely used in scanning and archiving systems, especially for storing multiple pages in a single file. However, they are not always ideal for sharing or cross-platform viewing, while PDF provides a more universal and consistent format.
With Spire.PDF for .NET, you can efficiently convert TIFF images to PDF using simple and reliable C# code. This article demonstrates how to perform TIFF to PDF conversion in .NET, including handling multi-page TIFF images, adjusting page layouts, and applying best practices for real-world applications.
1. Understanding the Task
TIFF (Tagged Image File Format) is a flexible image format that supports multiple pages within a single file. This makes it popular for:
- Scanned documents: Multi-page contracts, invoices, and forms
- Document archiving: Preserving document history in a single file
- Medical imaging: Storing diagnostic images with multiple views
- Fax transmissions: Traditional fax systems often use TIFF format
Converting TIFF to PDF offers several advantages:
- Universal compatibility: PDF viewers are available on all platforms
- Smaller file size: PDF compression can reduce storage requirements
- Better distribution: PDF is the standard for document sharing
- Enhanced security: PDF supports encryption and access controls
2. Convert TIFF to PDF Using Spire.PDF
This section provides step-by-step examples for converting TIFF images to PDF using Spire.PDF in C#.
Install Spire.PDF for .NET
First, install the library via NuGet Package Manager:
Install-Package FreeSpire.PDF
Or using the .NET CLI:
dotnet add package FreeSpire.PDF
You can also download the Spire.PDF for .NET package and add it to your project manually.
Convert a Single-Page TIFF to PDF
For single-page TIFF files, the simplest approach is to create a PDF page that matches the original image dimensions and draw the image directly onto it. This ensures the TIFF content fills the entire PDF page without unwanted margins or scaling issues.
using Spire.Pdf;
using Spire.Pdf.Graphics;
using System.Drawing;

// Load the TIFF image
PdfImage tiffImage = PdfImage.FromFile("Sample_Page.tiff");

// Create a new PDF document
PdfDocument pdf = new PdfDocument();

// Remove default page margins
pdf.PageSettings.Margins.All = 0;

// Get image dimensions
float width = tiffImage.PhysicalDimension.Width;
float height = tiffImage.PhysicalDimension.Height;

// Add a PDF page with the same size as the TIFF image
PdfPageBase page = pdf.Pages.Add(new SizeF(width, height));

// Draw the image to fully fill the page
page.Canvas.DrawImage(tiffImage, 0, 0, width, height);

// Save the PDF document
pdf.SaveToFile("Sample_Page.pdf");
pdf.Close();

Key API calls:
PdfImage.FromFile: Loads the TIFF image into a PDF-compatible objectPageSettings.Margins.All: Removes default margins to allow full-page renderingPages.Add(SizeF): Creates a PDF page that matches the TIFF dimensionsCanvas.DrawImage: Draws the TIFF image to completely fill the pageSaveToFile: Saves the converted PDF file
This method preserves the original TIFF dimensions and ensures the output PDF displays the image cleanly across the full page.
For more image-to-PDF scenarios, see how to convert images to PDF in C#.
Convert Multi-Page TIFF to PDF
Multi-page TIFF files contain multiple frames, with each frame representing a separate page. During conversion, you can iterate through each frame and create a PDF page that matches the dimensions of the current TIFF frame to preserve the original layout.
using Spire.Pdf;
using Spire.Pdf.Graphics;
using System.Drawing;
using System.Drawing.Imaging;

// Load the multi-page TIFF file
Image tiffImage = Image.FromFile("Sample89.tiff");

// Get frame information
FrameDimension dimension = new FrameDimension(tiffImage.FrameDimensionsList[0]);
int frameCount = tiffImage.GetFrameCount(dimension);

// Create a new PDF document
PdfDocument pdf = new PdfDocument();

// Remove default margins
pdf.PageSettings.Margins.All = 0;

// Process each TIFF frame
for (int i = 0; i < frameCount; i++)
{
    // Select current frame
    tiffImage.SelectActiveFrame(dimension, i);

    // Convert current frame to PdfImage
    PdfImage pdfImage = PdfImage.FromImage(tiffImage);

    // Get current frame dimensions
    float width = pdfImage.PhysicalDimension.Width;
    float height = pdfImage.PhysicalDimension.Height;

    // Create a PDF page matching the frame size
    PdfPageBase page = pdf.Pages.Add(new SizeF(width, height));

    // Draw the frame to fill the page
    page.Canvas.DrawImage(pdfImage, 0, 0, width, height);
}

// Save the PDF document
pdf.SaveToFile("Sample89.pdf");
pdf.Close();

// Release resources
tiffImage.Dispose();
Key concepts:
FrameDimension: Identifies the frame collection in a multi-page TIFF fileGetFrameCount: Retrieves the total number of TIFF pagesSelectActiveFrame: Switches to a specific TIFF frame for processingPages.Add(SizeF): Creates a PDF page that matches each TIFF page sizeCanvas.DrawImage: Renders each TIFF frame onto the corresponding PDF page
This approach preserves all pages in the original TIFF file while ensuring each page fully occupies the PDF canvas without extra margins or scaling issues.
Fit TIFF Images into Standard PDF Pages
In some workflows, the output PDF must follow a standard page size such as A4 or Letter for printing, document sharing, or archival purposes. Instead of creating a PDF page based on the original TIFF dimensions, you can scale the image proportionally to fit within a fixed page size while keeping it horizontally centered.
using Spire.Pdf;
using Spire.Pdf.Graphics;

PdfDocument pdf = new PdfDocument();
PdfImage image = PdfImage.FromFile("Sample_Page.tiff");

// Create an A4 page with margins
PdfPageBase page = pdf.Pages.Add(PdfPageSize.A4, new PdfMargins(20));

// Calculate proportional scaling
float scale = Math.Min(
    page.Canvas.ClientSize.Width / image.PhysicalDimension.Width,
    page.Canvas.ClientSize.Height / image.PhysicalDimension.Height
);

// Calculate final image size
float width = image.PhysicalDimension.Width * scale;
float height = image.PhysicalDimension.Height * scale;

// Center horizontally and align to the top
float x = (page.Canvas.ClientSize.Width - width) / 2;

// Draw image onto the PDF page
page.Canvas.DrawImage(image, x, 0, width, height);

// Save the PDF file
pdf.SaveToFile("Sample89.pdf");
pdf.Close();
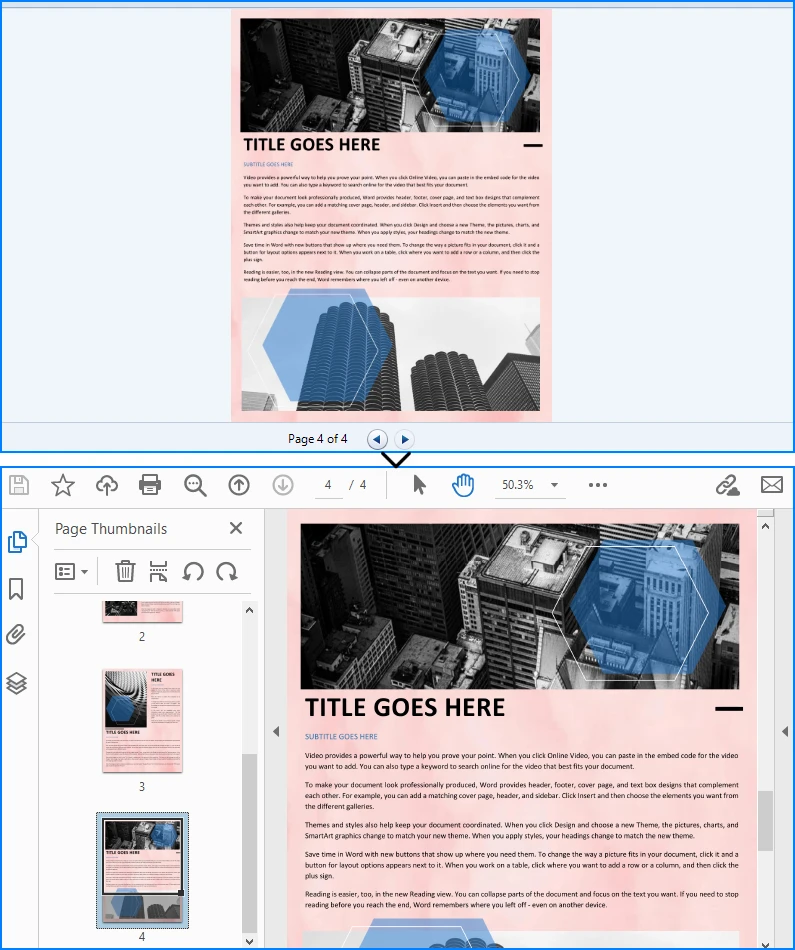
The Generated PDF will fit the standard page size while maintaining the original image dimensions.
Why use this approach?
- Standardized output: Ensures all converted PDFs use consistent page sizes such as A4 or Letter
- Better for printing: Prevents unusually sized PDF pages caused by large TIFF dimensions
- Maintains aspect ratio: Scales the image proportionally without distortion
- Cleaner document formatting: Keeps content properly aligned for business and archival workflows
This method works well when you need TIFF files to fit standardized PDF layouts rather than preserving their original dimensions.
You can also explore more PDF layout and page settings tutorials using C#.
3. Advanced TIFF to PDF Conversion Scenarios
For production applications, you often need additional control over the conversion process.
Batch Convert Multiple TIFF Files
In document management systems, scanned archives, or automated workflows, you may need to convert multiple TIFF files into PDF format at once. The following example processes all TIFF files in a folder and converts each file into a separate PDF while preserving the original image dimensions.
using Spire.Pdf;
using Spire.Pdf.Graphics;
using System.Drawing;
using System.IO;

string inputFolder = @"C:\Documents\TIFF";
string outputFolder = @"C:\Documents\PDF";

// Create the output folder if it doesn't exist
Directory.CreateDirectory(outputFolder);

// Process all TIFF files in the folder
foreach (string tiffFile in Directory.GetFiles(inputFolder, "*.tiff"))
{
    PdfImage image = PdfImage.FromFile(tiffFile);

    using (PdfDocument pdf = new PdfDocument())
    {
        // Create a PDF page matching the TIFF dimensions
        PdfPageBase page = pdf.Pages.Add(
            new SizeF(
                image.PhysicalDimension.Width,
                image.PhysicalDimension.Height
            )
        );

        // Draw the TIFF image onto the page
        page.Canvas.DrawImage(
            image,
            0,
            0,
            image.PhysicalDimension.Width,
            image.PhysicalDimension.Height
        );

        // Generate output file path
        string outputFile = Path.Combine(
            outputFolder,
            Path.GetFileNameWithoutExtension(tiffFile) + ".pdf"
        );

        // Save PDF
        pdf.SaveToFile(outputFile);
    }
}
Why use batch conversion?
- Automatically processes large numbers of TIFF files
- Reduces manual conversion work
- Preserves original image dimensions for each file
- Useful for archive migration and document automation workflows
This method works well for converting large collections of single-page TIFF files. If your folder contains multi-page TIFF documents, you can combine this approach with the multi-page conversion logic introduced earlier.
Merge Multiple TIFF Files into One PDF
If you need to combine several TIFF images into a single PDF document, you can add each TIFF file as a separate PDF page. This is useful when consolidating scanned documents, invoices, or image-based reports into one file.
using Spire.Pdf;
using Spire.Pdf.Graphics;
using System.Drawing;

string[] tiffFiles =
{
    "Page1.tiff",
    "Page2.tiff",
    "Page3.tiff"
};

PdfDocument pdf = new PdfDocument();

foreach (string file in tiffFiles)
{
    PdfImage image = PdfImage.FromFile(file);

    float width = image.PhysicalDimension.Width;
    float height = image.PhysicalDimension.Height;

    // Create page matching TIFF dimensions
    PdfPageBase page = pdf.Pages.Add(new SizeF(width, height));

    // Draw TIFF image
    page.Canvas.DrawImage(image, 0, 0, width, height);
}

// Save merged PDF
pdf.SaveToFile("CombinedDocument.pdf");
pdf.Close();
Benefits of merging TIFF files:
- Combine multiple scanned pages into one PDF
- Simplify document sharing
- Preserve original image quality
- Useful for contracts, invoices, and archived records
This method works best when each TIFF file should appear as an individual page in a single PDF document.
If you need to combine multiple converted PDF files into one document, you can also check how to merge PDF files in C#.
Handle Large TIFF Files Efficiently
Large multi-page TIFF files can consume significant memory during conversion. To improve performance, process each frame sequentially and release resources immediately after use.
using Spire.Pdf;
using Spire.Pdf.Graphics;
using System.Drawing;
using System.Drawing.Imaging;

// Process large TIFF files efficiently
using (Image tiffImage = Image.FromFile("LargeDocument.tiff"))
using (PdfDocument pdf = new PdfDocument())
{
    FrameDimension dimension =
        new FrameDimension(tiffImage.FrameDimensionsList[0]);

    int frameCount = tiffImage.GetFrameCount(dimension);

    for (int i = 0; i < frameCount; i++)
    {
        // Activate current frame
        tiffImage.SelectActiveFrame(dimension, i);

        using (PdfImage image = PdfImage.FromImage(tiffImage))
        {
            float width = image.PhysicalDimension.Width;
            float height = image.PhysicalDimension.Height;

            // Create page matching frame size
            PdfPageBase page = pdf.Pages.Add(
                new SizeF(width, height)
            );

            // Draw current frame
            page.Canvas.DrawImage(
                image,
                0,
                0,
                width,
                height
            );
        }
    }

    pdf.SaveToFile("LargeDocument.pdf");
}
Memory optimization tips:
- Use
usingstatements to automatically release resources - Process TIFF frames one at a time
- Avoid loading multiple large images simultaneously
- Improve performance when converting high-resolution scanned documents
This approach is particularly useful for large archival TIFF files, medical scans, and enterprise document migration tasks.
4. Common Issues and Solutions
When converting TIFF to PDF, developers may encounter the following issues.
Multi-Page TIFF Not Fully Converted
Symptoms: Only the first page appears in the PDF output.
Cause: Frames in the TIFF file are not properly iterated.
Solution: Use GetFrameCount and SelectActiveFrame to process each frame.
int frameCount = tiffImage.GetFrameCount(dimension);

for (int i = 0; i < frameCount; i++)
{
    tiffImage.SelectActiveFrame(dimension, i);
    // Process each frame
}
Image Distortion or Layout Issues
Symptoms: Image appears stretched or does not fit properly in the PDF page.
Cause: Incorrect scaling when fitting TIFF into a fixed-size page (e.g., A4).
Solution: Use proportional scaling while keeping aspect ratio.
float scale = Math.Min(
    page.Canvas.ClientSize.Width / image.PhysicalDimension.Width,
    page.Canvas.ClientSize.Height / image.PhysicalDimension.Height
);

float width = image.PhysicalDimension.Width * scale;
float height = image.PhysicalDimension.Height * scale;
High Memory Usage with Large Files
Symptoms: Slow performance or memory issues when processing large TIFF files.
Cause: Loading multi-page TIFF into memory without proper disposal.
Solution: Process frames sequentially and release resources promptly.
using (Image tiffImage = Image.FromFile("Large.tiff"))
using (PdfDocument pdf = new PdfDocument())
{
    // Process frames one by one
}
Unsupported TIFF Format
Symptoms: Errors occur when loading certain TIFF files.
Cause: Non-standard compression or color formats in the TIFF file.
Solution: Ensure the TIFF uses standard formats supported by the library.
Conclusion
Converting TIFF to PDF in C# is a straightforward process with Spire.PDF for .NET. The library provides efficient methods for handling both single-page and multi-page TIFF files while maintaining image quality and layout accuracy.
By following the examples and best practices demonstrated in this article, developers can implement reliable TIFF to PDF conversion for various scenarios including document archiving, batch processing, and enterprise document management systems.
If you want to evaluate the functionality of Spire.PDF for .NET, you can apply for a free trial license.
FAQ
How do I convert a multi-page TIFF to PDF in C#?
Use FrameDimension to access each frame in the TIFF file, then create a separate PDF page for each frame. The GetFrameCount method returns the total number of frames, and SelectActiveFrame allows you to process each frame individually.
What is the best approach for converting TIFF to PDF in .NET?
Using a dedicated library like Spire.PDF for .NET provides the most reliable and efficient solution. It handles image loading and PDF generation with minimal code while supporting multi-page TIFF files.
Does converting TIFF to PDF reduce file size?
PDF compression can reduce file size compared to uncompressed TIFF files. However, the actual size reduction depends on the original TIFF compression, image content, and PDF settings. High-resolution images may still result in large PDF files.
Can I convert TIFF to PDF without installing Microsoft Office or additional software?
Yes. Spire.PDF for .NET operates independently and does not require Microsoft Office, Adobe Acrobat, or any other external software. It performs all conversion operations using its own rendering engine.
How can I maintain image quality when converting TIFF to PDF?
To preserve image quality, avoid unnecessary scaling and match PDF page dimensions to the TIFF image size for best results.
How to reset page number for each section start at 1 in a word document in C#
2014-07-17 09:27:54 Written by KoohjiSections are widely used by developers to set different formatting or layout options to each different section, such as use the different header and footer information for different sections and reset page number for each section dynamically. With the help of Spire.Doc for .NET, we can easily insert word section and remove word section in C# and VB.NET. We will show you how to reset page numbering that starts at 1 for each section easily by using Spire.Doc.
Firstly make sure Spire.Doc for .NET has been installed correctly and then add Spire.Doc.dll as reference in the downloaded Bin folder though the below path: "..\Spire.Doc\Bin\NET4.0\ Spire.Doc.dll". Here comes to the codes of how to reset page numbering for each section.
Step 1: Load three different word documents
Document document1 = new Document();
document1.LoadFromFile("..\\..\\1.docx");

Document document2 = new Document();
document2.LoadFromFile("..\\..\\2.docx");

Document document3 = new Document();
document3.LoadFromFile("..\\..\\3.docx");
Step 2: Use section method to combine all documents into one word document
foreach (Section sec in document2.Sections)
{
document1.Sections.Add(sec.Clone());
}
foreach (Section sec in document3.Sections)
{
document1.Sections.Add(sec.Clone());
}
Step 3: Traverse the document
//Traverse every section of document1
foreach (Section sec in document1.Sections)
{
//Traverse every object of the footer
foreach (DocumentObject obj in sec.HeadersFooters.Footer.ChildObjects)
{
if (obj.DocumentObjectType == DocumentObjectType.StructureDocumentTag)
{
DocumentObject para = obj.ChildObjects[0];
foreach (DocumentObject item in para.ChildObjects)
                        {
if (item.DocumentObjectType == DocumentObjectType.Field)
Step 4: Find the field type FieldNumPages and change it to FieldSectionPages
//Find the item and its field type is FieldNumPages
if ((item as Field).Type == FieldType.FieldNumPages)
{
//Change field type to FieldSectionPages
(item as Field).Type = FieldType.FieldSectionPages;
Step 5: Restart page number of section and set the starting page number to 1
document1.Sections[1].PageSetup.RestartPageNumbering = true;
document1.Sections[1].PageSetup.PageStartingNumber = 1;

document1.Sections[2].PageSetup.RestartPageNumbering = true;
document1.Sections[2].PageSetup.PageStartingNumber = 1;
Step 6: Save the document to file and launch it.
document1.SaveToFile("sample.docx",FileFormat.Docx);
System.Diagnostics.Process.Start("sample.docx");
Full codes:
namespace ResetPageNumber
{
    class Program
    {
        static void Main(string[] args)
        {
            Document document1 = new Document();
            document1.LoadFromFile("..\\..\\1.docx");

            Document document2 = new Document();
            document2.LoadFromFile("..\\..\\2.docx");

            Document document3 = new Document();
            document3.LoadFromFile("..\\..\\3.docx");

            foreach (Section sec in document2.Sections)
            {
                document1.Sections.Add(sec.Clone());
            }

            foreach (Section sec in document3.Sections)
            {
                document1.Sections.Add(sec.Clone());

            }
            foreach (Section sec in document1.Sections)
            {
                foreach (DocumentObject obj in sec.HeadersFooters.Footer.ChildObjects)
                {
                    if (obj.DocumentObjectType == DocumentObjectType.StructureDocumentTag)
                    {
                        DocumentObject para = obj.ChildObjects[0];
                        foreach (DocumentObject item in para.ChildObjects)
                        {
                            if (item.DocumentObjectType == DocumentObjectType.Field)
                            {
                                if ((item as Field).Type == FieldType.FieldNumPages)
                                {
                                    (item as Field).Type = FieldType.FieldSectionPages;
                                }
                            }
                        }
                    }
                }
            }

            document1.Sections[1].PageSetup.RestartPageNumbering = true;
            document1.Sections[1].PageSetup.PageStartingNumber = 1;

            document1.Sections[2].PageSetup.RestartPageNumbering = true;
            document1.Sections[2].PageSetup.PageStartingNumber = 1;

            document1.SaveToFile("sample.docx",FileFormat.Docx);
            System.Diagnostics.Process.Start("sample.docx");
        }
    }
}
