
Knowledgebase (2370)
Children categories
Before we start our topic, let us first play a game. At the top of this page, there are nine categories. When we move our mouse on .NET, a dropdown list which shows all e-iceblue .NET products is displayed as the picture below:
Imagine, if we demonstrate every product on .NET out of the dropdown list on the top, what will this page be? The webpage will be rambling and disordered. As a result, visitors will hardly search what they want and finally have to leave disappointedly.
By the same token, if we do not merge PDF files of similar content to one document, all the information of various classes will mix together. We have no choice but to spend much time on finding the right files. While our work turns more efficient when we use PDF merge function. Furthermore, opening more PDF files at the same time always annoys people in that the windows are mistakenly switched. Finally, merge PDF does not mean gathering tens of PDF files into one. More reasonable choice is to amalgamate PDF files of few pages into single one. Those of numerous pages should be combined with merged PDF files in one folder for the convenience of reading.
Spire.PDF for WPF, as a professional PDF component, is a best hand for users to merge multiple PDF files on WPF application with C#, VB.NET. The whole procedure can be performed by below three simple steps.
Step 1. Create a C#/VB.NET Project
- Free download and correctly install Spire.PDF for WPF on system.
- Create “PDF merge” project in WPF Application with C#/VB.NET.
- Add a button in MainWindow.
- Add Spire.Pdf.Wpf.dll and System.Drawing as references.
Step 2 Merge PDF Files into One
            //pdf document list
            String[] files = new String[]
            {
                @"D:\e-iceblue\Spire.PDF\Demos\Data\DigitalSignature.pdf",
                @"D:\e-iceblue\Spire.PDF\Demos\Data\Sample2.pdf",
                @"D:\e-iceblue\Spire.PDF\Demos\Data\ImageWaterMark.pdf"
            };
'pdf document list
Dim files As [String]() = New [String]() {"D:\e-iceblue\Spire.PDF\Demos\Data\DigitalSignature.pdf", "D:\e-iceblue\Spire.PDF\Demos\Data\Sample2.pdf", "D:\e-iceblue\Spire.PDF\Demos\Data\ImageWaterMark.pdf"}
Step 2. Open the three PDF files in a new document and import all pages into a new one
           //open pdf documents
            PdfDocument[] docs = new PdfDocument[files.Length];
            for (int i = 0; i < files.Length; i++)
            {
                docs[i] = new PdfDocument(files[i]);
            }
            //append document
            docs[0].AppendPage(docs[1]);
            //import pages
            for (int i = 0; i < docs[2].Pages.Count; i = i + 2)
            {
                docs[0].InsertPage(docs[2], i);
            }
	'open pdf documents
	Dim docs As PdfDocument() = New PdfDocument(files.Length - 1) {}
	For i As Integer = 0 To files.Length - 1
		docs(i) = New PdfDocument(files(i))
	Next
	'append document
	docs(0).AppendPage(docs(1))
	'import pages
	Dim i As Integer = 0
	While i < docs(2).Pages.Count
		docs(0).InsertPage(docs(2), i)
		i = i + 2
	End While
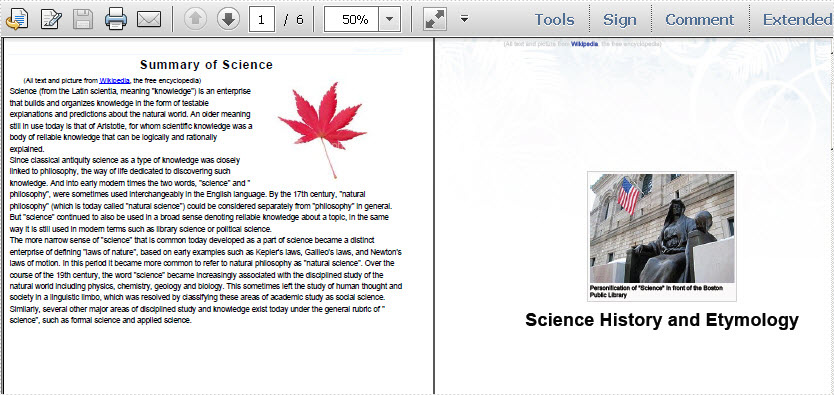
Step 3. Save and Preview the Merged PDF File
            docs[0].SaveToFile("MergeDocuments.pdf");
            foreach (PdfDocument doc in docs)
            {
                doc.Close();
            }
            PDFDocumentViewer("MergeDocuments.pdf");
docs(0).SaveToFile("MergeDocuments.pdf")
For Each doc As PdfDocument In docs
	doc.Close()
Next
PDFDocumentViewer("MergeDocuments.pdf")
Effective Screeshot
Spire.PDF is a PDF document creation component that enables your .NET/Silverlight/WPF applications to read, write and manipulate PDF documents without using Adobe Acrobat.
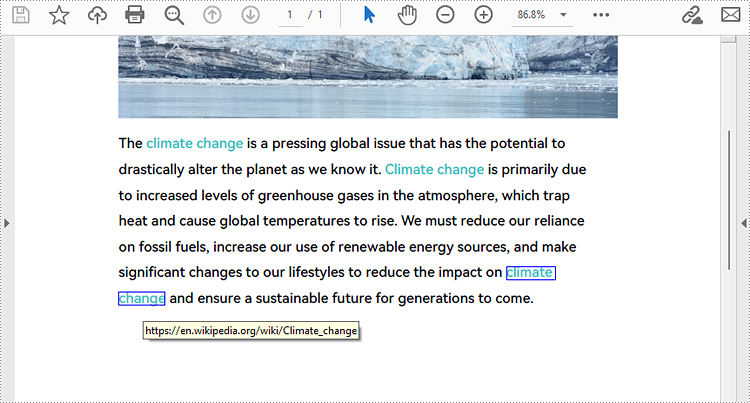
Hyperlinks in PDF are a valuable feature that enables readers to effortlessly access a given webpage. By including hyperlinks in a PDF, it becomes easier to offer readers supplementary information about the document or direct them to relevant resources. When a reader clicks on a hyperlink, the corresponding page opens immediately in the browser. In this article, we will demonstrate how to add hyperlinks to existing text in a PDF document through .NET programs using Spire.PDF for .NET.
Install Spire.PDF for .NET
To begin with, you need to add the DLL files included in the Spire.PDF for.NET package as references in your .NET project. The DLL files can be either downloaded from this link or installed via NuGet.
PM> Install-Package Spire.PDF
Insert a Hyperlink to Existing Text in PDF with C#/VB.NET
Hyperlinks in PDF documents are inserted to the page as annotation elements. Adding a hyperlink to existing text in a PDF document requires locating the text first. Once the location has been obtained, an object of PdfUriAnnotation class with the link can be created and added to the position. The detailed steps are as follows:
- Create an object of PdfDocument class and load a PDF file using PdfDocument.LoadFromFile() method.
- Get the first page using PdfDocument.Pages property.
- Create an object of PdfTextFinder class and set the finder options using PdfTextFinder.Options.Parameter property.
- Find the specified text in the page using PdfTextFinder.Find() method and get the third occurrence.
- Loop through the text bounds of the specified occurrence (because the text being searched may span multiple lines and have more than one bound, the retrieved text bounds are stored in a list to accommodate this variability).
- Create an object of PdfUriAnnotation class within the text bound and set the URL, border, and border color using properties under PdfUriAnnotation class.
- Insert the hyperlink to the page annotations using PdfPageBase.AnnotationsWidget.Add(PdfUriAnnotation) method.
- Save the PDF file using PdfDocument.SaveToFile() method.
- C#
- VB.NET
using Spire.Pdf;
using Spire.Pdf.Annotations;
using Spire.Pdf.Texts;
using System.Collections.Generic;
using System.Drawing;
using TextFindParameter = Spire.Pdf.Texts.TextFindParameter;

namespace ChangeHyperlink
{
    internal class Program
    {
        static void Main(string[] args)
        {
            //Create an object of PdfDocument class
            PdfDocument pdf = new PdfDocument();

            //Load a PDF file
            pdf.LoadFromFile("Sample.pdf");

            //Get the first page
            PdfPageBase page = pdf.Pages[0];

            //Create an object of PdfTextFinder and set the finder options
            PdfTextFinder finder = new PdfTextFinder(page);
            finder.Options.Parameter = TextFindParameter.IgnoreCase;

            //Find the specified text in the page and get the third occurrence
            List<PdfTextFragment> collection = finder.Find("climate change");
            PdfTextFragment fragment = collection[2];

            //Loop through the text bounds of the specified occurrence
            foreach (RectangleF bounds in fragment.Bounds)
            {
                //Create a hyperlink annotation
                PdfUriAnnotation url = new PdfUriAnnotation(bounds);
                //Set the URL of the hyperlink
                url.Uri = "https://en.wikipedia.org/wiki/Climate_change";
                //Set the border of the hyperlink annotation
                url.Border = new PdfAnnotationBorder(1f);
                //Set the color of the border
                url.Color = Color.Blue;
                //Add the hyperlink annotation to the page
                page.Annotations.Add(url);
            }

            //Save the PDF file
            pdf.SaveToFile("AddHyperlinks.pdf");
            pdf.Dispose();
        }
    }
}
Apply for a Temporary License
If you'd like to remove the evaluation message from the generated documents, or to get rid of the function limitations, please request a 30-day trial license for yourself.
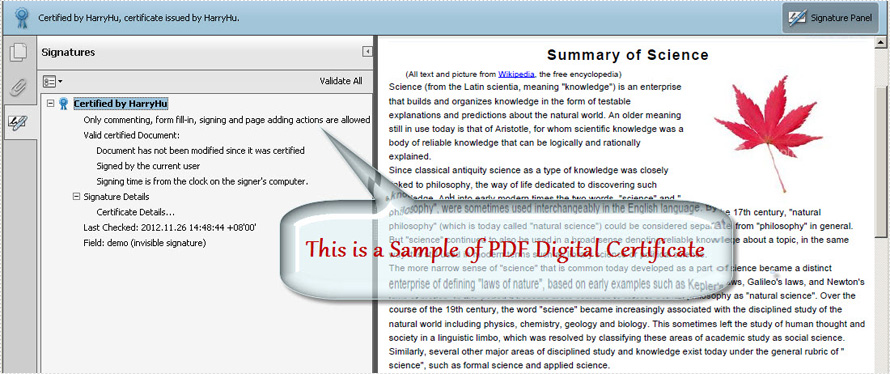
Digital Certificate, known as identity certificate, is an electronic document that uses a digital signature to bind together a public key with an identity. As long as the PDF digital certificate is created, it demonstrates the authority of a digital document. This section will introduce a solution to create PDF digital certificate for WPF via a WPF PDF component.
Spire.PDF for WPF , a WPF library which can fully control your PDF documents, enables you to create PDF digital certificate in a simple way. First, please see the effect of this digital certificate task as below picture:
Before viewing the code, please Download Spire.PDF for WPF and install it in system.
In this solution, first you need to load your .pfx file from system. Then, create a new instance of Spire.Pdf.Security.PdfCertificate class with two parameters passed, one is the certificate file and the other is the password of the imported .pfx file. After creating a PdfSignature class instance, you can add DocumentPermissions to be AllowComments, AllowFormFill and ForbidChanges.
When you create the PdfSignature class instance, there are four parameters. The parameter "page" enables you to choose which PDF page you decide to sign the digital certificate.
String pfxPath = @"..\Data\Demo.pfx";
PdfCertificate cert = new PdfCertificate(pfxPath, "e-iceblue");
PdfSignature signature = new PdfSignature(doc, page, cert, "demo");
signature.ContactInfo = "Harry Hu";
signature.Certificated = true;
signature.DocumentPermissions = PdfCertificationFlags.AllowFormFill;
Dim pfxPath As String = "..\Data\Demo.pfx"
Dim cert As New PdfCertificate(pfxPath, "e-iceblue")
Dim signature As New PdfSignature(doc, page, cert, "demo")
signature.ContactInfo = "Harry Hu"
signature.Certificated = True
signature.DocumentPermissions = PdfCertificationFlags.AllowFormFill
Spire.PDF for WPF enables your WPF applications to read, write and manipulate PDF documents without using Adobe Acrobat or any third party component library, click to know more about this WPF PDF component.
