Shapes are graphic elements in Excel that enhance the visual appeal of a worksheet and convey information intuitively, such as arrows, rectangles, ovals, and stars. With shapes, you can add annotations, process-flow indicators, or decorative elements next to your data, making reports more vivid and easier to read. Spire.XLS for JavaScript runs entirely in the browser via WebAssembly, using a virtual file system (VFS) to manage input and output files — no backend server required. It provides a complete API for adding shapes and customizing their appearance (such as fill, rotation angle, text, and shadow), reading text and images from shapes, and deleting specified or all shapes.
This article covers three core features:
For installation and project setup, refer to Integrating Spire.XLS for JavaScript in a React Project. The examples below assume Spire.XLS is installed and the WebAssembly module is initialized.
Add Shapes to Excel
Adding shapes to Excel can highlight key data and beautify the layout of a worksheet. With Spire.XLS for JavaScript, you can add a shape and set its position (row, column) and size (width, height) at once using the PrstGeomShapes.AddPrstGeomShape() method, and then customize its appearance through the shape's properties — set solid, gradient, texture, or picture fill via Fill, add text via Text, set the rotation angle via Rotation, apply a shadow effect via Shadow, and control visibility via Visible. The steps are as follows:
- Create a
Workbookobject and get the default worksheet. - Add shapes using
PrstGeomShapes.AddPrstGeomShape(), setting the shape type, position, and size through the parameters. - Set solid, gradient, texture, or picture fill for the shapes via the
Fillproperty. - Add text to a shape via the
Textproperty, and set the rotation angle via theRotationproperty. - Set a shadow effect for a shape via the
Shadowproperty. - Save the workbook to an Excel file using
SaveToFile().
Below is a complete code example demonstrating how to add and customize various shapes in React:
function App() {
  const addShapes = async () => {
    // Get the Spire.XLS WASM module
    const xlsModule = window.wasmModule?.spirexls;

    // Check if the module is ready
    if (!xlsModule) {
      alert('Spire.Xls is not ready yet');
      return;
    }

    // Load the picture into the virtual file system (VFS)
    await window.spire.FetchFileToVFS('SpireXls.png', '', `${process.env.PUBLIC_URL}/image/`);

    // Create a new workbook and get the default worksheet
    const workbook = new xlsModule.Workbook();
    let sheet = workbook.Worksheets.get(0);

    // Add a triangle shape and fill it with a solid color
    let triangle = sheet.PrstGeomShapes.AddPrstGeomShape(2, 2, 100, 100, xlsModule.PrstGeomShapeType.Triangle);
    triangle.Fill.ForeColor = xlsModule.Color.get_Yellow();
    triangle.Fill.FillType = xlsModule.ShapeFillType.SolidColor;
    // Add text to the triangle and set its rotation angle
    triangle.Text = 'Triangle';
    triangle.Rotation = 45;

    // Add a heart shape and fill it with a gradient color
    let heart = sheet.PrstGeomShapes.AddPrstGeomShape(2, 5, 100, 100, xlsModule.PrstGeomShapeType.Heart);
    heart.Fill.ForeColor = xlsModule.Color.get_Red();
    heart.Fill.FillType = xlsModule.ShapeFillType.Gradient;
    // Set the shadow style for the heart
    heart.Shadow.Angle = 90;
    heart.Shadow.Distance = 10;
    heart.Shadow.Size = 150;
    heart.Shadow.Color = xlsModule.Color.get_Gray();
    heart.Shadow.Blur = 30;
    heart.Shadow.Transparency = 1;
    heart.Shadow.HasCustomStyle = true;

    // Add an arrow shape
    let arrow = sheet.PrstGeomShapes.AddPrstGeomShape(10, 2, 100, 100, xlsModule.PrstGeomShapeType.CurvedRightArrow);

    // Add a cloud shape and fill it with a picture
    let cloud = sheet.PrstGeomShapes.AddPrstGeomShape(10, 5, 100, 100, xlsModule.PrstGeomShapeType.Cloud);
    cloud.Fill.CustomPicture({ im: new xlsModule.Stream('SpireXls.png'), name: 'SpireXls.png' });

    // Save the workbook
    const outputFileName = 'AddShapes.xlsx';
    workbook.SaveToFile(outputFileName);
    workbook.Dispose();

    // Read the file from VFS and trigger download
    const fileArray = window.dotnetRuntime.Module.FS.readFile(outputFileName);
    const blob = new Blob([fileArray], { type: 'application/vnd.openxmlformats-officedocument.spreadsheetml.sheet' });
    const url = URL.createObjectURL(blob);
    const a = document.createElement('a');
    a.href = url;
    a.download = outputFileName;
    a.click();
    URL.revokeObjectURL(url);
  };

  return (
    <div style={{ textAlign: 'center', height: '300px' }}>
      <h1>Add Shapes</h1>
      <button onClick={addShapes}>
        Generate
      </button>
    </div>
  );
}

export default App;
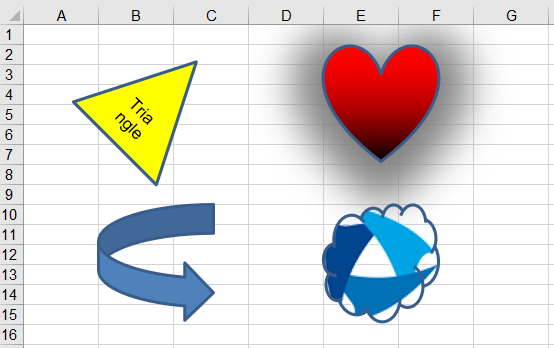
Shapes added to Excel with Spire.XLS for JavaScript
Read Text and Images from Excel Shapes
Reading the text and images from shapes helps you extract the data inside shapes in batch, or reuse and archive shape resources. With Spire.XLS for JavaScript, you can load an Excel file containing shapes, get a specified shape by index via PrstGeomShapes.get(), then read its text content via the Text property and get its fill picture via Fill.Picture. The steps are as follows:
- Create a
Workbookobject and load an existing Excel file containing shapes. - Get the worksheet via
workbook.Worksheets.get(). - Get a specified shape by index using
sheet.PrstGeomShapes.get(). - Read the text in the shape via the
Textproperty. - Read the fill picture in the shape via the
Fill.Pictureproperty. - Save the read text and image as txt and png files.
Below is a complete code example demonstrating how to read text and images from shapes in React (the example loads the AddShapes.xlsx file generated in the previous section):
function App() {
  const readShapes = async () => {
    // Get the Spire.XLS WASM module
    const xlsModule = window.wasmModule?.spirexls;

    // Check if the module is ready
    if (!xlsModule) {
      alert('Spire.Xls is not ready yet');
      return;
    }

    // Load the sample file containing shapes into the virtual file system (VFS)
    let excelFileName = 'AddShapes.xlsx';
    await window.spire.FetchFileToVFS(excelFileName, '', `${process.env.PUBLIC_URL}data/`);

    // Create a workbook object and load the existing file
    const workbook = new xlsModule.Workbook();
    workbook.LoadFromFile({ fileName: excelFileName });

    // Get the first worksheet
    let sheet = workbook.Worksheets.get(0);

    // Get the first shape (triangle) and read the text inside it
    let triangle = sheet.PrstGeomShapes.get(0);
    let text = triangle.Text;

    // Get the fourth shape (cloud) and read the picture inside it
    let cloud = sheet.PrstGeomShapes.get(3);
    let image = cloud.Fill.Picture;
    const imageFileName = 'ExtractImageFromShape.png';
    image.Save(imageFileName);

    workbook.Dispose();

    // Save the read text to a txt file and trigger download
    const textFileName = 'ExtractTextFromShape.txt';
    const textBlob = new Blob([`The text in the first shape is: ${text}`], { type: 'text/plain;charset=utf-8' });
    const textUrl = URL.createObjectURL(textBlob);
    const a1 = document.createElement('a');
    a1.href = textUrl;
    a1.download = textFileName;
    a1.click();
    URL.revokeObjectURL(textUrl);

    // Read the image file from VFS and trigger download
    const fileArray = window.dotnetRuntime.Module.FS.readFile(imageFileName);
    const blob = new Blob([fileArray], { type: 'application/png' });
    const url = URL.createObjectURL(blob);
    const a = document.createElement('a');
    a.href = url;
    a.download = imageFileName;
    a.click();
    URL.revokeObjectURL(url);
  };

  return (
    <div style={{ textAlign: 'center', height: '300px' }}>
      <h1>Read Text and Image from Shapes</h1>
      <button onClick={readShapes}>
        Generate
      </button>
    </div>
  );
}

export default App;
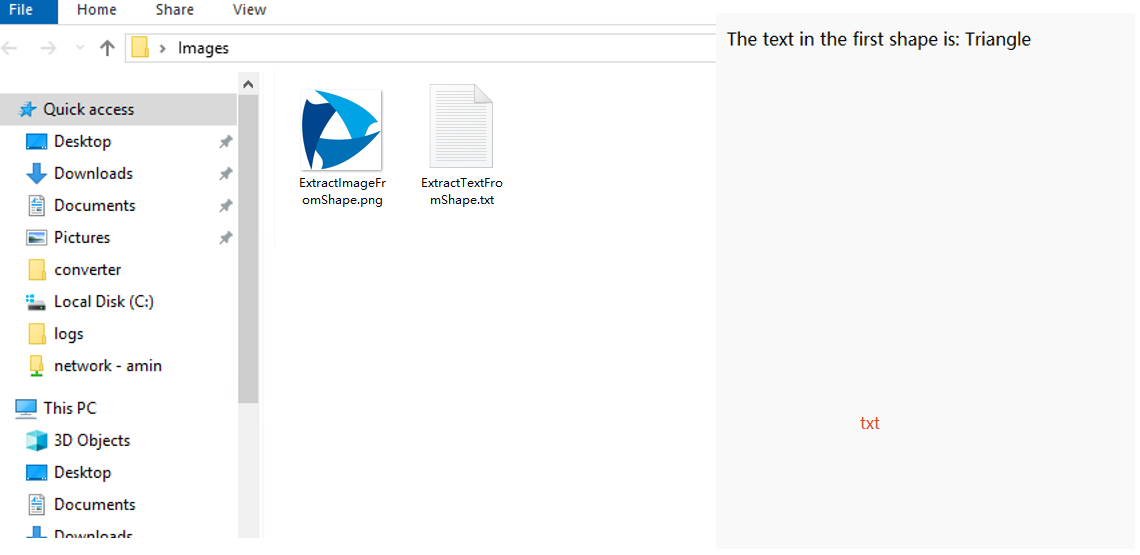
Text and images read from Excel shapes with Spire.XLS for JavaScript
Delete Shapes in Excel
When shapes are no longer needed, deleting them in time keeps the worksheet clean and reduces the file size. With Spire.XLS for JavaScript, you can delete a specified shape via the Remove() method, or iterate through the shape collection and call Remove() on each shape to clear all shapes in a worksheet. The steps are as follows:
- Create a
Workbookobject and load an existing Excel file containing shapes. - Get the worksheet via
workbook.Worksheets.get(). - Get a specified shape using
sheet.PrstGeomShapes.get(), and call itsRemove()method to delete the shape. - Save the workbook to an Excel file using
SaveToFile().
Below is a complete code example demonstrating how to delete shapes in React (the example loads the AddShapes.xlsx file generated in the previous section):
function App() {
  const deleteShapes = async () => {
    // Get the Spire.XLS WASM module
    const xlsModule = window.wasmModule?.spirexls;

    // Check if the module is ready
    if (!xlsModule) {
      alert('Spire.Xls is not ready yet');
      return;
    }

    // Load the sample file containing shapes into the virtual file system (VFS)
    let excelFileName = 'AddShapes.xlsx';
    await window.spire.FetchFileToVFS(excelFileName, '', `${process.env.PUBLIC_URL}data/`);

    // Create a workbook object and load the existing file
    const workbook = new xlsModule.Workbook();
    workbook.LoadFromFile({ fileName: excelFileName });

    // Get the first worksheet
    let sheet = workbook.Worksheets.get(0);

    // Delete the first shape in the worksheet
    sheet.PrstGeomShapes.get(0).Remove();

    // Delete all the shapes in the worksheet
    // for (let i = sheet.PrstGeomShapes.Count - 1; i >= 0; i--) {
    //   sheet.PrstGeomShapes.get(i).Remove();
    // }

    // Save the workbook
    const outputFileName = 'DeleteShapes.xlsx';
    workbook.SaveToFile(outputFileName);
    workbook.Dispose();

    // Read the file from VFS and trigger download
    const fileArray = window.dotnetRuntime.Module.FS.readFile(outputFileName);
    const blob = new Blob([fileArray], { type: 'application/vnd.openxmlformats-officedocument.spreadsheetml.sheet' });
    const url = URL.createObjectURL(blob);
    const a = document.createElement('a');
    a.href = url;
    a.download = outputFileName;
    a.click();
    URL.revokeObjectURL(url);
  };

  return (
    <div style={{ textAlign: 'center', height: '300px' }}>
      <h1>Delete Shapes</h1>
      <button onClick={deleteShapes}>
        Generate
      </button>
    </div>
  );
}

export default App;
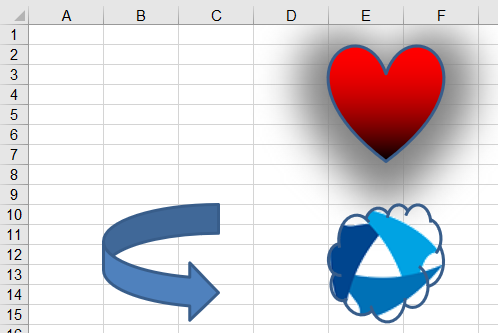
Specified shape deleted from Excel with Spire.XLS for JavaScript
FAQ
How to get the name and type of a shape?
Cause: When a worksheet contains many shapes, you may need to identify and locate shapes by their name or type rather than by index.
Solution: Read the Name and PrstShapeType properties of the shape to get its name and type:
// Get the worksheet
let sheet = workbook.Worksheets.get(0);
// Get the first shape
let shape = sheet.PrstGeomShapes.get(0);
// Get the name of the shape
let shapeName = shape.Name;
// Get the type of the shape
let shapeType = shape.PrstShapeType;
How to check whether a shape is currently visible?
Cause: After loading shapes from a file, you may need to determine whether a shape is hidden so that you can decide whether to process it further.
Solution: Read the Visible property of the shape to know its visibility state:
// Get the worksheet
let sheet = workbook.Worksheets.get(0);
// Get the first shape
let shape = sheet.PrstGeomShapes.get(0);
// Check whether the shape is visible
let isVisible = shape.Visible;
Get a Free License
Spire.XLS for JavaScript offers a 30-day full-featured free trial license with no functional limitations. Apply here to evaluate before purchasing.
