Python: Add or Remove Sections in PowerPoint
In PowerPoint, sections are a powerful tool for organizing and managing slides. By dividing slides into different sections, you can better organize content, navigate through your presentation, and present information in a more structured manner. This article will demonstrate how to add and remove sections in a PowerPoint presentation using Spire.Presentation for Python.
- Add a Section at the End of a PowerPoint
- Insert a Section Before a Specified Section
- Add a Section Before a Specified Slide in PowerPoint
- Remove a Section from a PowerPoint
Install Spire.PDF for Python
This scenario requires Spire.Presentation for Python and plum-dispatch v1.7.4. They can be easily installed in your Windows through the following pip command.
pip install Spire.Presentation
If you are unsure how to install, please refer to this tutorial: How to Install Spire.Presentation for Python on Windows
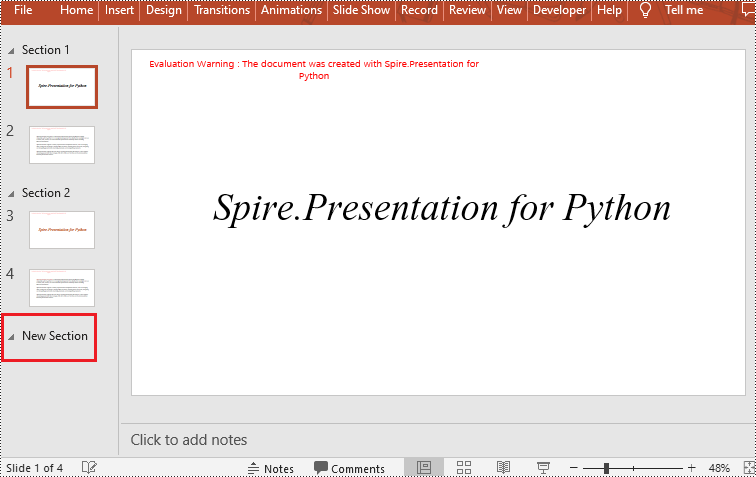
Add a Section at the End of a PowerPoint in Python
Spire.Presentation for Python provides the Presentation.SectionList.Append(section_name) method to add a section at the end of a presentation. Here are the specific steps to perform this operation:
- Create a Presentation class instance.
- Load a PowerPoint document using Presentation.LoadFromFile() method.
- Add a section at the end using the Presentation.SectionList.Append() method.
- Save the document using Presentation.SaveToFile() method.
- Python
from spire.presentation.common import *
from spire.presentation import *

# Create a new presentation object
presentation = Presentation()

# Load a sample PowerPoint presentation
presentation.LoadFromFile("sample.pptx")

# Append a new section
presentation.SectionList.Append("New Section")

# Save the presentation
presentation.SaveToFile("AddSection.pptx", FileFormat.Pptx2013)

# Dispose of the presentation object
presentation.Dispose()
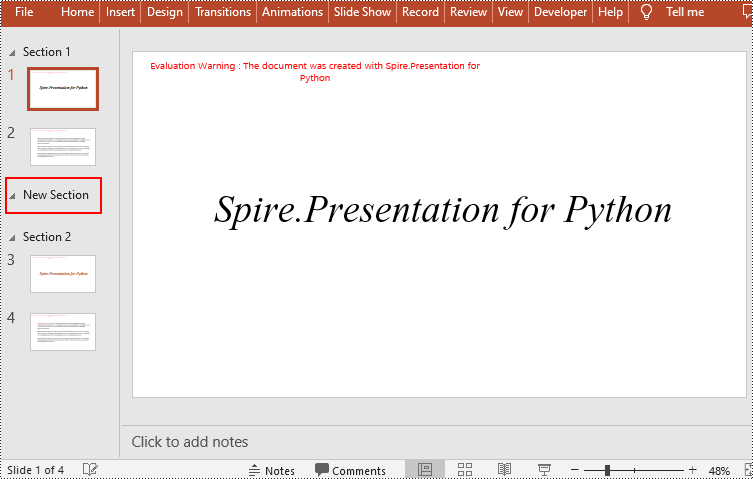
Insert a Section Before a Specified Section in Python
You can also use the Presentation.SectionList.Insert(index, section_name) method to insert a new section before a specific section. Here are the detailed steps:
- Create a Presentation class instance.
- Load a PowerPoint document using Presentation.LoadFromFile() method.
- Insert a new section before a specific section using the Presentation.SectionList.Insert() method, where index is the position of the specific section.
- Save the document using Presentation.SaveToFile() method.
- Python
from spire.presentation.common import *
from spire.presentation import *

# Create a new presentation object
presentation = Presentation()

# Load a sample PowerPoint presentation
presentation.LoadFromFile("sample.pptx")

# Insert a new section before the second section
presentation.SectionList.Insert(1," New Section")

# Save the presentation
presentation.SaveToFile("AddSection.pptx", FileFormat.Pptx2013)

# Dispose of the presentation object
presentation.Dispose()
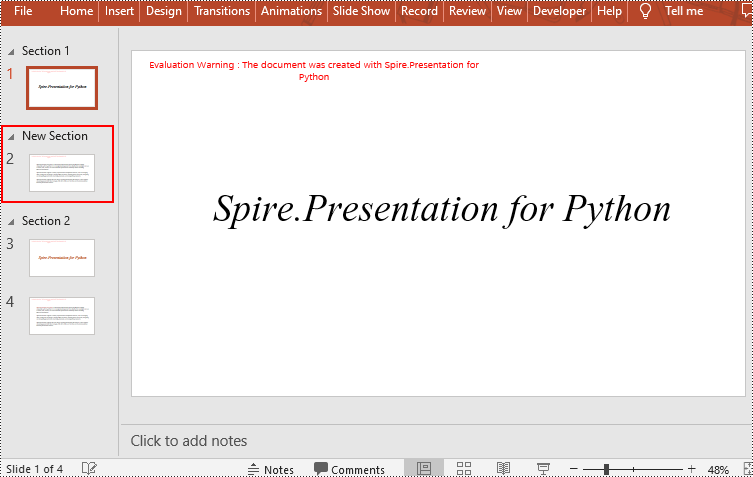
Add a Section Before a Specified Slide in Python
You can also use the Presentation.SectionList.Add(section_name, slide) method to insert a new section before a specific slide. Here are the detailed steps:
- Create a Presentation class instance.
- Load a PowerPoint document using Presentation.LoadFromFile() method.
- Insert a new section before a specific slide using the Presentation.SectionList.Add() method
- Save the document using Presentation.SaveToFile() method.
- Python
from spire.presentation.common import *
from spire.presentation import *

# Create a new presentation object
presentation = Presentation()

# Load a sample PowerPoint presentation
presentation.LoadFromFile("sample.pptx")

# Get the second slide
slide=presentation.Slides[1]

# Add a new section before the second slide
presentation.SectionList.Add("New Section",slide)

# Save the presentation
presentation.SaveToFile("AddSection.pptx", FileFormat.Pptx2013)

# Dispose of the presentation object
presentation.Dispose()
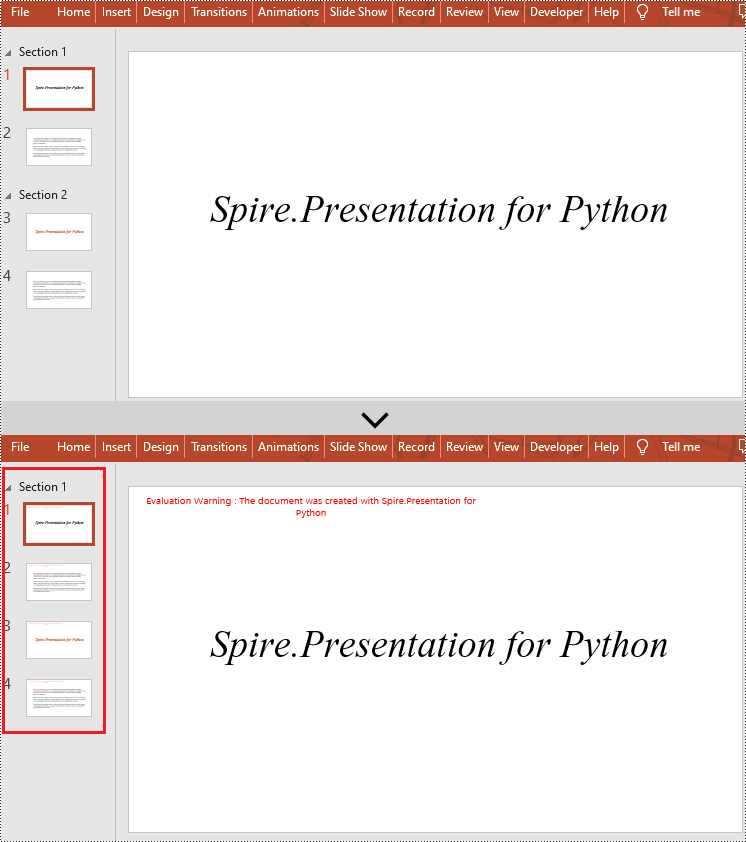
Remove a Section from a PowerPoint in Python
If you don't need a specific section, you can simply remove it using the Presentation.SectionList.RemoveAt(index_to_remove) method. Please note that removing a section does not delete the slides within that section. Here are the steps to delete a specific section while preserving its slides:
- Create a Presentation class instance.
- Load a PowerPoint document using Presentation.LoadFromFile() method.
- Remove a specific section using the Presentation.SectionList.RemoveAt(index_to_remove) method, which takes an integer index as a parameter. You can also remove all sections using the Presentation.Slides.RemoveAll() method.
- Save the document using Presentation.SaveToFile() method.
- Python
from spire.presentation.common import *
from spire.presentation import *

# Create a new presentation object
presentation = Presentation()

# Load a sample PowerPoint presentation
presentation.LoadFromFile("sample.pptx")

# Remove the second section
presentation.SectionList.RemoveAt(1)

# # Remove all sections
# presentation.SectionList.RemoveAll()

# Save the presentation
presentation.SaveToFile("RemoveSection.pptx", FileFormat.Pptx2013)

# Dispose of the presentation object
presentation.Dispose()
Apply for a Temporary License
If you'd like to remove the evaluation message from the generated documents, or to get rid of the function limitations, please request a 30-day trial license for yourself.
Python: Attach Files to a PDF Document
By incorporating supplemental resources directly into the PDF, it consolidates all relevant information in a single file, making it easier to organize, share, and archive. This feature enables users to seamlessly share supporting documents, images, or multimedia elements, eliminating the need for separate file transfers or external links. It streamlines communication, improves efficiency, and ensures that recipients have convenient access to all the necessary resources within the PDF itself. In this article, you will learn how to attach files to a PDF document in Python with the help of Spire.PDF for Python.
Install Spire.PDF for Python
This scenario requires Spire.PDF for Python and plum-dispatch v1.7.4. They can be easily installed in your Windows through the following pip command.
pip install Spire.PDF
If you are unsure how to install, please refer to this tutorial: How to Install Spire.PDF for Python on Windows
Background Knowledge
There are generally two types of attachments in PDF, namely document level attachment and annotation attachment. Both are supported by Spire.PDF for Python. The table below lists the differences between them.
| Attachment type | Represented by | Definition |
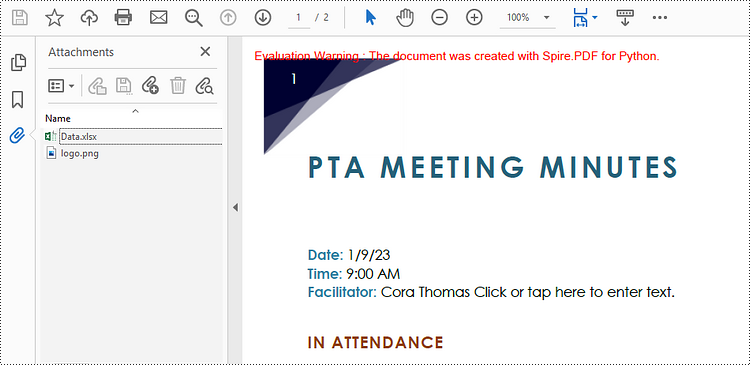
| Document level attachment | PdfAttachment class | A file attached to a PDF at the document level won't appear on a page, but can be viewed in the "Attachments" panel of a PDF reader. |
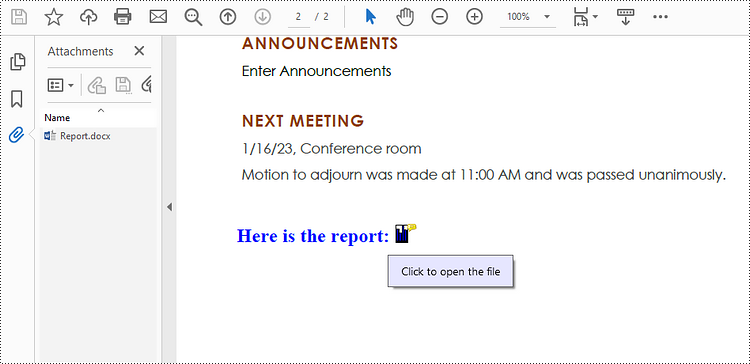
| Annotation attachment | PdfAnnotationAttachment class | A file attached as an annotation can be found on a page or in the "Attachment" panel. An Annotation attachment is shown as a paper clip icon on the page; reviewers can double-click the icon to open the file. |
Attach Files to a PDF Document in Python
To attach files to PDFs at the document level, you first need to create a PdfAttachment object based on an external file, and then you can add it to a PDF document using the PdfDocument.Attachments.Add() method. The following are the detailed steps.
- Create a PdfDocument object.
- Load a PDF document using PdfDocument.LoadFromFile() method.
- Create a PdfAttachment object based on an external file.
- Add the attachment to the document using PdfDocument.Attachments.Add() method.
- Save the document to a different PDF file using PdfDocument.SaveToFile() method.
- Python
from spire.pdf import *
from spire.pdf.common import *

# Create a PdfDocument object
doc = PdfDocument()

# Load a sample PDF file
doc.LoadFromFile("C:\\Users\\Administrator\\Desktop\\Input.pdf")

# Create PdfAttachment objects based on external files
attachment_one = PdfAttachment("C:\\Users\\Administrator\\Desktop\\Data.xlsx")
attachment_two = PdfAttachment("C:\\Users\\Administrator\\Desktop\\logo.png")

# Add the attachments to PDF
doc.Attachments.Add(attachment_one)
doc.Attachments.Add(attachment_two)

# Save to file
doc.SaveToFile("output/Attachment.pdf")
Attach Files as Annotations in PDF in Python
An annotation attachment is represented by the PdfAttachmentAnnotation class. Create an instance of this class, specify its attributes such as bounds, flag and text, and then add it to a specified page using the PdfPageBase.AnnotationsWidget.Add() method.
Below are the steps to attach files as annotations in PDF using Spire.PDF for Python.
- Create a PdfDocument object.
- Load a PDF document using PdfDocument.LoadFromFile() method.
- Get a specific page to add annotation through PdfDocument.Pages[] property.
- Create a PdfAttachmentAnnotation object based on an external file.
- Add the annotation attachment to the page using PdfPageBase.AnnotationsWidget.Add() method.
- Save the document to a different PDF file using PdfDocument.SaveToFile() method.
- Python
from spire.pdf import *
from spire.pdf.common import *

# Create a PdfDocument object
doc = PdfDocument()

# Load a sample PDF file
doc.LoadFromFile("C:\\Users\\Administrator\\Desktop\\Input.pdf")

# Get a specific page
page = doc.Pages.get_Item(1)

# Draw a string on PDF
str = ""Here is the report:""
font = PdfTrueTypeFont(""Times New Roman"", 16.0, PdfFontStyle.Bold, True)
x = 50.0
y = doc.Pages.get_Item(0).ActualSize.Height - 300.0
page.Canvas.DrawString(str, font, PdfBrushes.get_Blue(), x, y)

# Create a PdfAttachmentAnnotation object based on an external file
data = Stream("C:\\Users\\Administrator\\Desktop\\Data.xlsx")
size = font.MeasureString(str);
bounds = RectangleF((x + size.Width + 5.0), y, 10.0, 15.0)
annotation = PdfAttachmentAnnotation(bounds, "Report.docx", data);

# Set color, flag, icon and text of the annotation
annotation.Color = PdfRGBColor(Color.get_Blue())
annotation.Flags = PdfAnnotationFlags.Default
annotation.Icon = PdfAttachmentIcon.Graph
annotation.Text = "Click to open the file"

# Add the attachment annotation to PDF
page.AnnotationsWidget.Add(annotation)

# Save to file
doc.SaveToFile("output/AnnotationAttachment.pdf")
Apply for a Temporary License
If you'd like to remove the evaluation message from the generated documents, or to get rid of the function limitations, please request a 30-day trial license for yourself.
Python: Split a PDF Page into Multiple Pages
Sometimes, when dealing with PDF documents, there is a need to split a page into different sections based on content or layout. For instance, splitting a mixed-layout page with both horizontal and vertical content into two separate parts. This type of splitting is not commonly available in basic PDF management functions but can be important for academic papers, magazine ads, or mixed-layout designs. This article explains how to use Spire.PDF for Python to perform horizontal or vertical PDF page splitting.
Install Spire.PDF for Python
This scenario requires Spire.PDF for Python and plum-dispatch v1.7.4. They can be easily installed in your Windows through the following pip command.
pip install Spire.PDF
If you are unsure how to install, please refer to this tutorial: How to Install Spire.PDF for Python on Windows
Split PDF Page Horizontally or Vertically with Python
Spire.PDF for Python not only supports splitting a PDF document into multiple PDF documents, but also allows splitting a specific page within a PDF into two or more pages. Here are the detailed steps to split a page:
- Create an instance of the PdfDocument class.
- Load the source PDF document using the PdfDocument.LoadFromFile() method.
- Retrieve the page(s) to be split using PdfDocument.Pages[].
- Create a new PDF document and set its page margins to 0.
- Set the width or height of the new document to half of the source document.
- Add a page to the new PDF document using the PdfDocument.Pages.Add() method.
- Create a template for the source document's page using the PdfPageBase.CreateTemplate() method.
- Draw the content of the source page onto the new page using the PdfTemplate.Draw() method.
- Save the split document using the PdfDocument.SaveToFile() method.
- Python
from spire.pdf.common import *
from spire.pdf import *

# Create a PdfDocument object
pdf = PdfDocument()

# Load the PDF document
pdf.LoadFromFile("Terms of service.pdf")

# Get the first page
page = doc.Pages.get_Item(0)

# Create a new PDF document and remove the page margins
newpdf = PdfDocument()
newpdf.PageSettings.Margins.All=0

# Horizontal splitting: Set the width of the new document's page to be the same as the width of the first page of the original document, and the height to half of the first page's height
newpdf.PageSettings.Width=page.Size.Width
newpdf.PageSettings.Height=page.Size.Height/2

'''
# Vertical splitting: Set the width of the new document's page to be half of the width of the first page of the original document, and the height to the same as the first page's height
newpdf.PageSettings.Width=page.Size.Width/2
newpdf.PageSettings.Height=page.Size.Height
'''

# Add a new page to the new PDF document
newPage = newpdf.Pages.Add()

# Set the text layout format
format = PdfTextLayout()
format.Break=PdfLayoutBreakType.FitPage
format.Layout=PdfLayoutType.Paginate

# Create a template based on the first page of the original document and draw it onto the new page of the new document, automatically paginating when the page is filled
page.CreateTemplate().Draw(newPage, PointF(0.0, 0.0), format)

# Save the document
newpdf.SaveToFile("HorizontalSplitting.pdf")

# Close the objects
newpdf.Close()
pdf.Close()
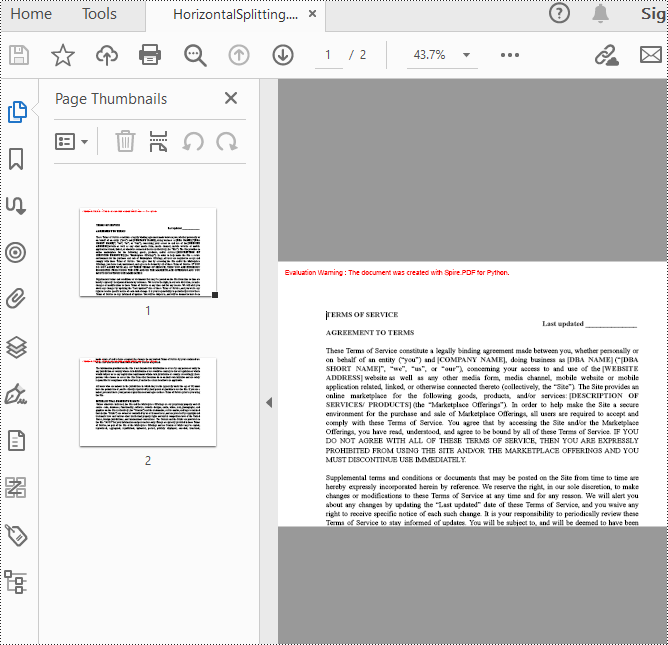
The result of horizontal splitting is as follows:
The result of vertical splitting is as follows:
Apply for a Temporary License
If you'd like to remove the evaluation message from the generated documents, or to get rid of the function limitations, please request a 30-day trial license for yourself.
Python: Create a Fillable Form in Word
Creating a fillable form in Word allows you to design a document that can be easily completed and customized by others. Whether you need to collect information, gather feedback, or create an interactive document, fillable forms provide a convenient way to capture data electronically. By adding various elements such as text fields, checkboxes, dropdown menus, and more, you can tailor the form to your specific requirements.
To create a fillable form in Word, you probably need to use the following tools.
- Content Controls: The areas where users input information in a form.
- Tables: Tables are used in forms to align text and form fields, and to create borders and boxes.
- Protection: Allows users to populate fields but not to make changes to the rest of the document.
In Word, content controls serve as containers for structured documents, allowing users to organize content within a document. Word 2013 provides ten types of content controls. This article introduces how to create a fillable form in Word that includes the following seven commonly-used content controls using Spire.Doc for Python.
| Content Control | Description |
| Plain Text | A text field limited to plain text, so no formatting can be included. |
| Rich Text | A text field that can contain formatted text or other items, such as tables, pictures, or other content controls. |
| Picture | Accepts a single picture. |
| Drop-Down List | A drop-down list displays a predefined list of items for the user to choose from. |
| Combo Box | A combo box enables users to select a predefined value in a list or type their own value in the text box of the control. |
| Check Box | A check box provides a graphical widget that allows the user to make a binary choice: yes (checked) or no (not checked). |
| Date Picker | Contains a calendar control from which the user can select a date. |
Install Spire.Doc for Python
This scenario requires Spire.Doc for Python and plum-dispatch v1.7.4. They can be easily installed in your Windows through the following pip command.
pip install Spire.Doc
If you are unsure how to install, please refer to this tutorial: How to Install Spire.Doc for Python on Windows
Create a Fillable Form in Word in Python
Spire.Doc for Python offers the StructureDocumentTagInline class, which is utilized to generate structured document tags within a paragraph. By utilizing the SDTProperties property and SDTContent property of this class, one can define the properties and content of the current structured document tag. Below are the step-by-step instructions for creating a fill form in a Word document in Python.
- Create a Document object.
- Add a section using Document.AddSection() method.
- Add a table using Section.AddTable() method.
- Add a paragraph to a specific table cell using TableCell.AddParagraph() method.
- Create an instance of StructureDocumentTagInline class, and add it to the paragraph as a child object using Paragraph.ChildObjects.Add() method.
- Specify the type, content and other attributes of the structured document tag through the SDTProperties property and the SDTContent property of the StructureDocumentTagInline object.
- Prevent users from editing content outside form fields using Document.Protect() method.
- Save the document using Document.SaveToFile() method.
- Python
from spire.doc import *
from spire.doc.common import *
# Create a Document object
doc = Document()
# Add a section
section = doc.AddSection()
# Add a table
table = section.AddTable(True)
table.ResetCells(7, 2)
table.SetColumnWidth(0, 120, CellWidthType.Point)
table.SetColumnWidth(1, 350, CellWidthType.Point)
# Add text to the cells of the first column
paragraph = table.Rows.get_Item(0).Cells.get_Item(0).AddParagraph()
paragraph.AppendText("Name")
paragraph = table.Rows[1].Cells[0].AddParagraph()
paragraph.AppendText("Profile")
paragraph = table.Rows[2].Cells[0].AddParagraph()
paragraph.AppendText("Photo")
paragraph = table.Rows[3].Cells[0].AddParagraph()
paragraph.AppendText("Country")
paragraph = table.Rows[4].Cells[0].AddParagraph()
paragraph.AppendText("Hobbies")
paragraph = table.Rows[5].Cells[0].AddParagraph()
paragraph.AppendText("Birthday")
paragraph = table.Rows[6].Cells[0].AddParagraph()
paragraph.AppendText("Sex")
# Add a plain text content control to the cell (0,1)
paragraph = table.Rows[0].Cells[1].AddParagraph()
sdt = StructureDocumentTagInline(doc)
paragraph.ChildObjects.Add(sdt)
sdt.SDTProperties.SDTType = SdtType.Text
sdt.SDTProperties.Alias = "Plain Text"
sdt.SDTProperties.Tag = "Plain Text"
sdt.SDTProperties.IsShowingPlaceHolder = True
text = SdtText(True)
text.IsMultiline = False
sdt.SDTProperties.ControlProperties = text
textRange = TextRange(doc)
textRange.Text = "your name here"
sdt.SDTContent.ChildObjects.Add(textRange)
# Add a rich text content control to the cell (1,1)
paragraph = table.Rows[1].Cells[1].AddParagraph()
sdt = StructureDocumentTagInline(doc)
paragraph.ChildObjects.Add(sdt)
sdt.SDTProperties.SDTType = SdtType.RichText
sdt.SDTProperties.Alias = "Rich Text"
sdt.SDTProperties.Tag = "Rich Text"
sdt.SDTProperties.IsShowingPlaceHolder = True
text = SdtText(True)
text.IsMultiline = False
sdt.SDTProperties.ControlProperties = text
textRange = TextRange(doc)
textRange.Text = "brief introduction of yourself"
sdt.SDTContent.ChildObjects.Add(textRange )
# Add a picture content control to the cell (2,1)
paragraph = table.Rows[2].Cells[1].AddParagraph()
sdt = StructureDocumentTagInline(doc)
paragraph.ChildObjects.Add(sdt)
sdt.SDTProperties.SDTType = SdtType.Picture
sdt.SDTProperties.Alias = "Picture"
sdt.SDTProperties.Tag = "Picture"
sdtPicture = SdtPicture(True)
sdt.SDTProperties.ControlProperties = sdtPicture
pic = DocPicture(doc)
pic.LoadImage("C:\\Users\\Administrator\\Desktop\\placeHolder.png")
sdt.SDTContent.ChildObjects.Add(pic)
# Add a dropdown list content control to the cell (3,1)
paragraph = table.Rows[3].Cells[1].AddParagraph();
sdt = StructureDocumentTagInline(doc)
sdt.SDTProperties.SDTType = SdtType.DropDownList
sdt.SDTProperties.Alias = "Dropdown List"
sdt.SDTProperties.Tag = "Dropdown List"
paragraph.ChildObjects.Add(sdt)
stdList = SdtDropDownList()
stdList.ListItems.Add(SdtListItem("USA", "1"))
stdList.ListItems.Add(SdtListItem("China", "2"))
stdList.ListItems.Add(SdtListItem("Briza", "3"))
stdList.ListItems.Add(SdtListItem("Austrilia", "4"))
sdt.SDTProperties.ControlProperties = stdList;
textRange = TextRange(doc)
textRange .Text = stdList.ListItems[0].DisplayText
sdt.SDTContent.ChildObjects.Add(textRange )
# Add two check box content controls to the cell (4,1)
paragraph = table.Rows[4].Cells[1].AddParagraph()
sdt = StructureDocumentTagInline(doc)
paragraph.ChildObjects.Add(sdt)
sdt.SDTProperties.SDTType = SdtType.CheckBox
sdtCheckBox = SdtCheckBox()
sdt.SDTProperties.ControlProperties = sdtCheckBox
textRange = TextRange(doc)
sdt.ChildObjects.Add(textRange)
sdtCheckBox.Checked = False
paragraph.AppendText(" Movie")
paragraph = table.Rows[4].Cells[1].AddParagraph();
sdt = StructureDocumentTagInline(doc)
paragraph.ChildObjects.Add(sdt)
sdt.SDTProperties.SDTType = SdtType.CheckBox
sdtCheckBox = SdtCheckBox()
sdt.SDTProperties.ControlProperties = sdtCheckBox
textRange = TextRange(doc)
sdt.ChildObjects.Add(textRange)
sdtCheckBox.Checked = False
paragraph.AppendText(" Game")
# Add a date picker content control to the cell (5,1)
paragraph = table.Rows[5].Cells[1].AddParagraph()
sdt = StructureDocumentTagInline(doc)
paragraph.ChildObjects.Add(sdt)
sdt.SDTProperties.SDTType = SdtType.DatePicker
sdt.SDTProperties.Alias = "Date Picker"
sdt.SDTProperties.Tag = "Date Picker"
stdDate = SdtDate()
stdDate.CalendarType = CalendarType.Default
stdDate.DateFormat = "yyyy.MM.dd"
stdDate.FullDate = DateTime.get_Now()
sdt.SDTProperties.ControlProperties = stdDate
textRange = TextRange(doc)
textRange.Text = "your birth date"
sdt.SDTContent.ChildObjects.Add(textRange)
# Add a combo box content control to the cell (6,1)
paragraph = table.Rows[6].Cells[1].AddParagraph()
sdt = StructureDocumentTagInline(doc)
paragraph.ChildObjects.Add(sdt)
sdt.SDTProperties.SDTType = SdtType.ComboBox
sdt.SDTProperties.Alias = "Combo Box"
sdt.SDTProperties.Tag = "Combo Box"
stdComboBox = SdtComboBox()
stdComboBox.ListItems.Add(SdtListItem("Male"))
stdComboBox.ListItems.Add(SdtListItem("Female"))
sdt.SDTProperties.ControlProperties = stdComboBox
textRange = TextRange(doc)
textRange.Text = stdComboBox.ListItems[0].DisplayText
sdt.SDTContent.ChildObjects.Add(textRange)
# Allow users to edit the form fields only
doc.Protect(ProtectionType.AllowOnlyFormFields, "permission-psd")
# Save to file
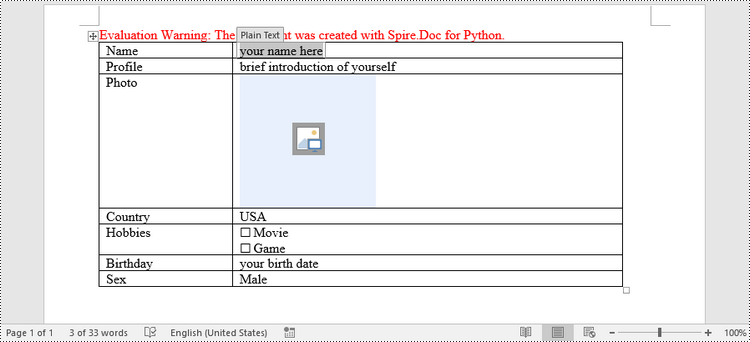
doc.SaveToFile("output/Form.docx", FileFormat.Docx2013)
Apply for a Temporary License
If you'd like to remove the evaluation message from the generated documents, or to get rid of the function limitations, please request a 30-day trial license for yourself.
Python: Add, Edit, or Delete Bookmarks in PDF
PDF bookmarks are navigational aids that allow users to quickly locate and jump to specific sections or pages in a PDF document. Through a simple click, users can arrive at the target location, which eliminates the need to manually scroll or search for specific content in a lengthy document. In this article, you will learn how to programmatically add, modify and delete bookmarks in PDF files using Spire.PDF for Python.
- Add Bookmarks to a PDF Document
- Edit Bookmarks in a PDF Document
- Delete Bookmarks from a PDF Document
Install Spire.PDF for Python
This scenario requires Spire.PDF for Python and plum-dispatch v1.7.4. They can be easily installed in your Windows through the following pip command.
pip install Spire.PDF
If you are unsure how to install, please refer to this tutorial: How to Install Spire.PDF for Python on Windows
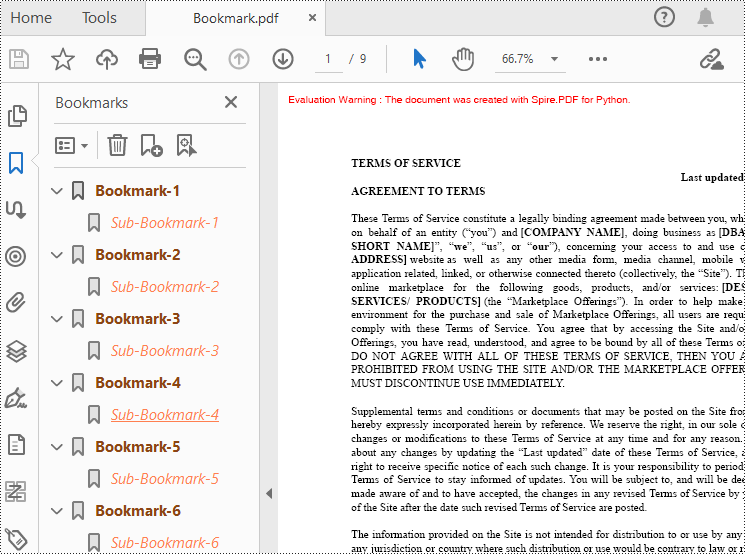
Add Bookmarks to a PDF Document in Python
Spire.PDF for Python provides a method to add bookmarks to a PDF document: PdfDocument. Bookmarks.Add(). You can use this method to create primary bookmarks for the PDF document and use the PdfBookmarkCollection.Add() method to add sub-bookmarks to the primary bookmarks. Additionally, the PdfBookmark class offers other methods to set properties such as destination, text color, and text style for the bookmarks. The following are the detailed steps for adding bookmarks to a PDF document.
- Create a PdfDocument class instance.
- Load a PDF document using PdfDocument.LoadFromFile() method.
- Add a parent bookmark to the document using PdfDocument.Bookmarks.Add() method.
- Create a PdfDestination class object and set the destination of the parent bookmark using PdfBookmark.Action property.
- Set the text color and style of the parent bookmark.
- Create a PdfBookmarkCollection class object to add sub-bookmark to the parent bookmark using PdfBookmarkCollection.Add() method.
- Use the above methods to set the destination, text color, and text style of the sub-bookmark.
- Save the document using PdfDocument.SaveToFile() method.
- Python
from spire.pdf.common import *
from spire.pdf import *

# Create a PdfDocument object
doc = PdfDocument()

# Load a PDF file
doc.LoadFromFile("Terms of service.pdf")

# Loop through the pages in the PDF file
for i in range(doc.Pages.Count):
     page = doc.Pages.get_Item(i)

    # Set the title and destination for the bookmark
    bookmarkTitle = "Bookmark-{0}".format(i+1)
    bookmarkDest = PdfDestination(page, PointF(0.0, 0.0))

    # Create and configure the bookmark
    bookmark = doc.Bookmarks.Add(bookmarkTitle)
    bookmark.Color = PdfRGBColor(Color.get_SaddleBrown())
    bookmark.DisplayStyle = PdfTextStyle.Bold
    bookmark.Action = PdfGoToAction(bookmarkDest)

    # Create a collection to hold child bookmarks
    bookmarkColletion = PdfBookmarkCollection(bookmark)

    # Set the title and destination for the child bookmark
    childBookmarkTitle = "Sub-Bookmark-{0}".format(i+1)
    childBookmarkDest = PdfDestination(page, PointF(0.0, 100.0))

    # Create and configure the child bookmark
    childBookmark = bookmarkColletion.Add(childBookmarkTitle)
    childBookmark.Color = PdfRGBColor(Color.get_Coral())
    childBookmark.DisplayStyle = PdfTextStyle.Italic
    childBookmark.Action = PdfGoToAction(childBookmarkDest)

# Save the PDF file
outputFile = "Bookmark.pdf"
doc.SaveToFile(outputFile)

# Close the document
doc.Close()
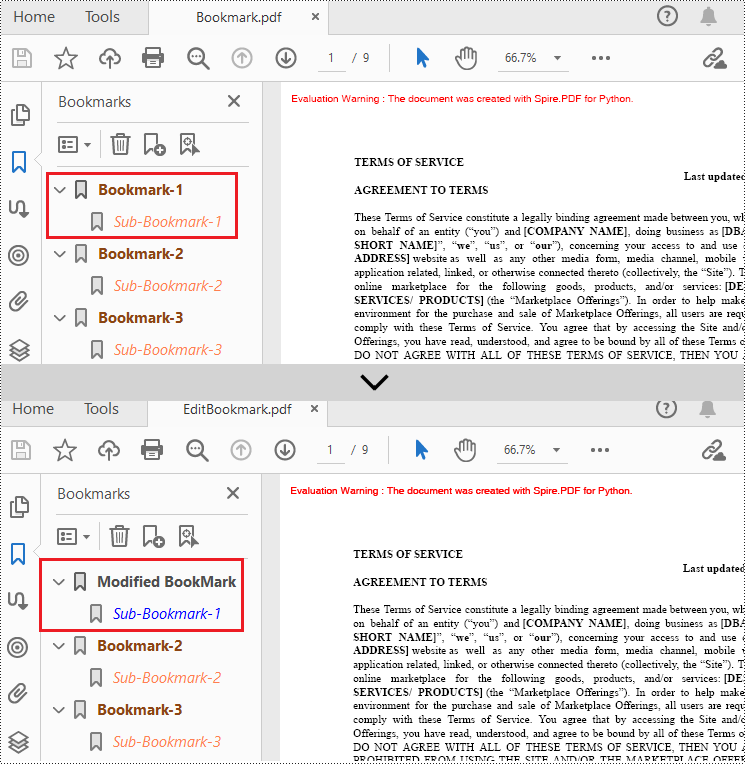
Edit Bookmarks in a PDF Document
If you need to update the existing bookmarks, you can use the methods of PdfBookmark class to rename the bookmarks and change their text color, text style. The following are the detailed steps.
- Create a PdfDocument class instance.
- Load a PDF document using PdfDocument.LoadFromFile() method.
- Get a specified bookmark using PdfDocument.Bookmarks[] property.
- Change the title of the bookmark using PdfBookmark.Title property.
- Change the font color of the bookmark using PdfBookmark.Color property.
- Change the text style of the bookmark using PdfBookmark.DisplayStyle property.
- Change the text color and style of the sub-bookmark using the above methods.
- Save the result document using PdfDocument.SaveToFile() method.
- Python
from spire.pdf.common import *
from spire.pdf import *

# Create a PdfDocument object
doc = PdfDocument()

# Load a PDF file
doc.LoadFromFile("Bookmark.pdf")

# Get the first bookmark
bookmark = doc.Bookmarks.get_Item(0)

# Change the title of the bookmark
bookmark.Title = "Modified BookMark"

# Set the color of the bookmark
bookmark.Color = PdfRGBColor(Color.get_Black())

# Set the outline text style of the bookmark
bookmark.DisplayStyle = PdfTextStyle.Bold

# Edit child bookmarks of the parent bookmark
pBookmark = PdfBookmarkCollection(bookmark)
for i in range(pBookmark.Count):
    childBookmark = pBookmark.get_Item(i)
    childBookmark.Color = PdfRGBColor(Color.get_Blue())
    childBookmark.DisplayStyle = PdfTextStyle.Regular

# Save the PDF document
outputFile = "EditBookmark.pdf"

# Close the document
doc.SaveToFile(outputFile)
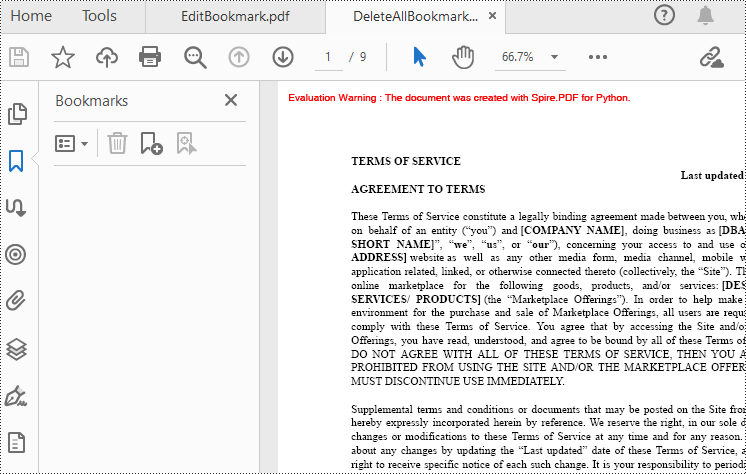
Delete Bookmarks from a PDF Document
Spire.PDF for Python also provides methods to delete any bookmark in a PDF document. PdfDocument.Bookmarks.RemoveAt() method is used to remove a specific primary bookmark, PdfDocument.Bookmarks.Clear() method is used to remove all bookmarks, and PdfBookmarkCollection.RemoveAt() method is used to remove a specific sub-bookmark of a primary bookmark. The detailed steps of removing bookmarks form a PDF document are as follows.
- Create a PdfDocument class instance.
- Load a PDF document using PdfDocument.LoadFromFile() method.
- Get the first bookmark using PdfDocument.Bookmarks[] property.
- Remove a specified sub-bookmark of the first bookmark using PdfBookmarkCollection.RemoveAt() method.
- Remove a specified bookmark including its sub-bookmarks using PdfDocument.Bookmarks.RemoveAt() method.
- Remove all bookmarks in the PDF file using PdfDocument.Bookmarks.Clear() method.
- Save the document using PdfDocument.SaveToFile() method.
- Python
from spire.pdf.common import *
from spire.pdf import *

# Create a PdfDocument object
doc = PdfDocument()

# Load a PDF file
doc.LoadFromFile("Bookmark.pdf")

# # Delete the first bookmark
# doc.Bookmarks.RemoveAt(0)

# # Get the first bookmark
# bookmark = doc.Bookmarks.get_Item(0)

# # Remove the first child bookmark from first parent bookmark
# pBookmark = PdfBookmarkCollection(bookmark)
# pBookmark.RemoveAt(0)

#Remove all bookmarks
doc.Bookmarks.Clear()

# Save the PDF document
output = "DeleteAllBookmarks.pdf"
doc.SaveToFile(output)

# Close the document
doc.Close()
Apply for a Temporary License
If you'd like to remove the evaluation message from the generated documents, or to get rid of the function limitations, please request a 30-day trial license for yourself.
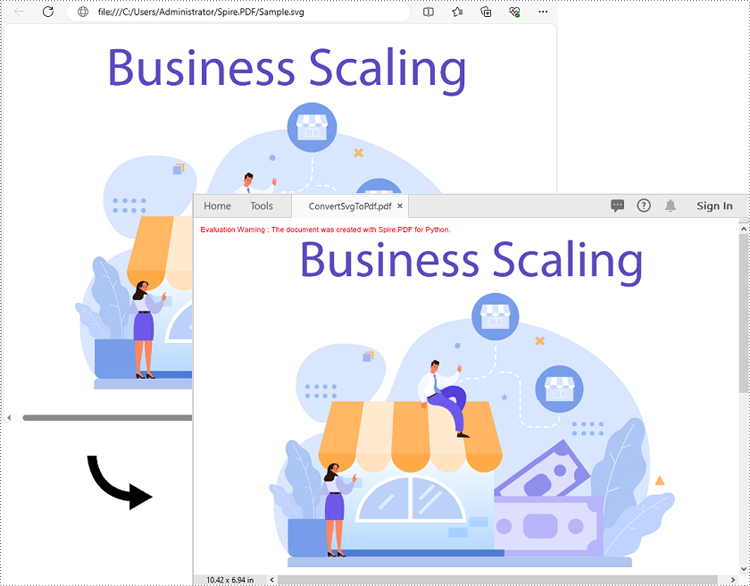
Python: Convert SVG to PDF
SVG files are commonly used for web graphics and vector-based illustrations because they can be scaled and adjusted easily. PDF, on the other hand, is a versatile format widely supported across different devices and operating systems. Converting SVG to PDF allows for easy sharing of graphics and illustrations, ensuring that recipients can open and view the files without requiring specialized software or worrying about browser compatibility issues. In this article, we will demonstrate how to convert SVG files to PDF format in Python using Spire.PDF for Python.
Install Spire.PDF for Python
This scenario requires Spire.PDF for Python and plum-dispatch v1.7.4. They can be easily installed in your Windows through the following pip command.
pip install Spire.PDF
If you are unsure how to install, please refer to this tutorial: How to Install Spire.PDF for Python on Windows
Convert SVG to PDF in Python
Spire.PDF for Python provides the PdfDocument.LoadFromSvg() method, which allows users to load an SVG file. Once loaded, users can use the PdfDocument.SaveToFile() method to save the SVG file as a PDF file. The detailed steps are as follows.
- Create an object of the PdfDocument class.
- Load an SVG file using PdfDocument.LoadFromSvg() method.
- Save the SVG file to PDF format using PdfDocument.SaveToFile() method.
- Python
from spire.pdf.common import *
from spire.pdf import *

# Create a PdfDocument object
doc = PdfDocument()
# Load an SVG file
doc.LoadFromSvg("Sample.svg")

# Save the SVG file to PDF format
doc.SaveToFile("ConvertSvgToPdf.pdf", FileFormat.PDF)
# Close the PdfDocument object
doc.Close()
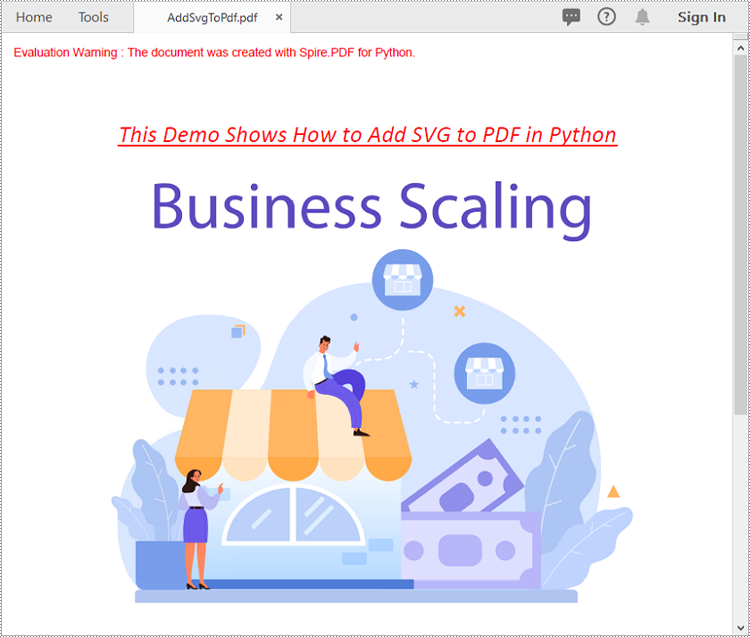
Add SVG to PDF in Python
In addition to converting SVG to PDF directly, Spire.PDF for Python also supports adding SVG files to specific locations in PDF. The detailed steps are as follows.
- Create an object of the PdfDocument class.
- Load an SVG file using PdfDocument.LoadFromSvg() method.
- Create a template based on the content of the SVG file using PdfDocument. Pages[].CreateTemplate() method.
- Get the width and height of the template.
- Create another object of the PdfDocument class and load a PDF file using PdfDocument.LoadFromFile() method.
- Draw the template with a custom size at a specific location in the PDF file using PdfDocument.Pages[].Canvas.DrawTemplate() method.
- Save the result file using PdfDocument.SaveToFile() method.
- Python
from spire.pdf.common import *
from spire.pdf import *

# Create a PdfDocument object
doc1 = PdfDocument()
# Load an SVG file
doc1.LoadFromSvg("Sample.svg")

# Create a template based on the content of the SVG
template = doc1.Pages.get_Item(0).CreateTemplate()

# Get the width and height of the template
width = template.Width
height = template.Height

# Create another PdfDocument object
doc2 = PdfDocument()
# Load a PDF file
doc2.LoadFromFile(""Sample.pdf"")

# Draw the template with a custom size at a specific location on the first page of the loaded PDF file
doc2.Pages.get_Item(0).Canvas.DrawTemplate(template, PointF(10.0, 100.0), SizeF(width*0.8, height*0.8))


# Save the result file
doc2.SaveToFile("AddSvgToPdf.pdf", FileFormat.PDF)
# Close the PdfDocument objects
doc2.Close()
doc1.Close()
Apply for a Temporary License
If you'd like to remove the evaluation message from the generated documents, or to get rid of the function limitations, please request a 30-day trial license for yourself.
Python: Edit or Remove Comments in Excel
Comment in Excel is primarily used to add additional instructions or notes to cells. With this feature, users can add relevant content next to a specific cell to explain the data, provide contextual information, or give instructions. It also helps users to better organize and manage the data in the Excel workbook and improve the understanding and readability of the data. Spire.XLS for Python supports adding comments to Excel files. If necessary, you can also use this library to edit the content of the comments or delete unnecessary comments. In this article, we will show you how to edit or remove existing comments in Excel on Python platforms using Spire.XLS for Python.
Install Spire.XLS for Python
This scenario requires Spire.XLS for Python and plum-dispatch v1.7.4. They can be easily installed in your Windows through the following pip commands.
pip install Spire.XLS
If you are unsure how to install, please refer to this tutorial: How to Install Spire.XLS for Python on Windows
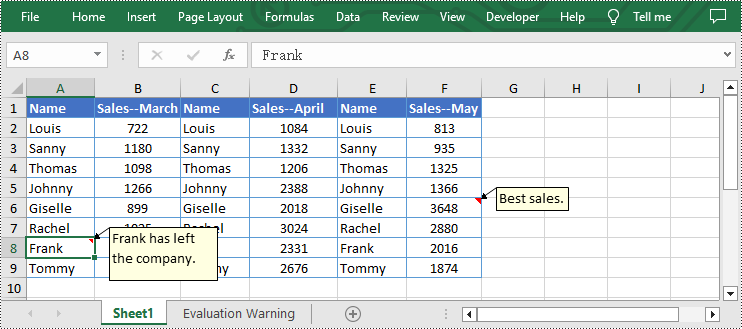
Edit Existing Comments in Excel Using Python
Spire.XLS for Python allows users to edit existing comments in Excel, including setting new text or changing comment box size. The following are detailed steps.
- Create a Workbook instance.
- Load an Excel file from disk using Workbook.LoadFromFile() method.
- Get the first worksheet of the Excel file using Workbook.Worksheets[] property.
- Set new text for the existing comments using Worksheet.Range[].Comment.Text property.
- Set the height and width of the existing comment by using Worksheet.Range[].Comment.Height and Worksheet.Range[].Comment.Width properties.
- Automatically adapt to the size of the comment by setting the Worksheet.Range.Comment.AutoSize property to "True".
- Save the result file using Workbook.SaveToFile() method.
- Python
from spire.xls import *
from spire.xls.common import *

inputFile = "C:/Users/Administrator/Desktop/Sample.xlsx"
outputFile = "C:/Users/Administrator/Desktop/EditExcelComment.xlsx"

# Create a Workbook instance
workbook = Workbook()

# Load an Excel file from disk
workbook.LoadFromFile(inputFile)

# Get the first worksheet of this file
sheet = workbook.Worksheets[0]

# Set new text for the existing comments
sheet.Range["A8"].Comment.Text = "Frank has left the company."
sheet.Range["F6"].Comment.Text = "Best sales."

# Set the height and width of the comment of A8
sheet.Range["A8"].Comment.Height = 60
sheet.Range["A8"].Comment.Width = 100

# Automatically adapt to the size of the comment of F6
sheet.Range["F6"].Comment.AutoSize = True

# Save the result file
workbook.SaveToFile(outputFile, ExcelVersion.Version2013)
workbook.Dispose()
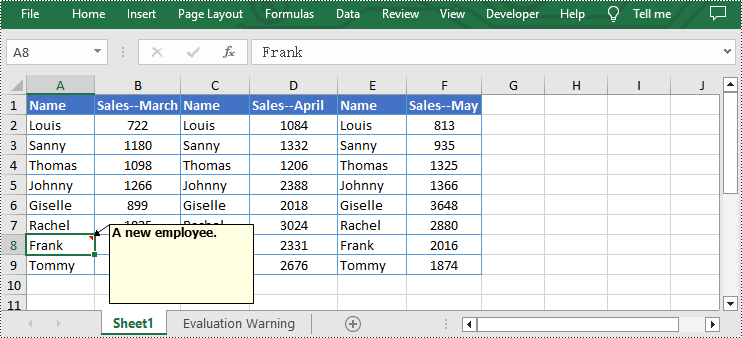
Remove Existing Comments from Excel Using Python
The Worksheet.Range[].Comment.Remove() method offered by Spire.XLS for Python allows users to remove a specified comment easily. The detailed steps are as follows.
- Create a Workbook instance.
- Load an Excel file from disk using Workbook.LoadFromFile() method.
- Get the first worksheet of the Excel file using Workbook.Worksheets[] property.
- Remove the comment by using Worksheet.Range[].Comment.Remove() method.
- Save the document to another file using Workbook.SaveToFile() method.
- Python
from spire.xls import *
from spire.xls.common import *

inputFile = "C:/Users/Administrator/Desktop/Sample.xlsx"
outputFile = "C:/Users/Administrator/Desktop/RemoveExcelComment.xlsx"

# Create a Workbook instance
workbook = Workbook()

# Load an Excel file from disk
workbook.LoadFromFile(inputFile)

# Get the first worksheet of this file
sheet = workbook.Worksheets[0]

# Remove the comment from the sheet
sheet.Range["F6"].Comment.Remove()

# Save the result file
workbook.SaveToFile(outputFile, ExcelVersion.Version2013)
workbook.Dispose()
Apply for a Temporary License
If you'd like to remove the evaluation message from the generated documents, or to get rid of the function limitations, please request a 30-day trial license for yourself.
Python: Create a Bar Chart in Excel
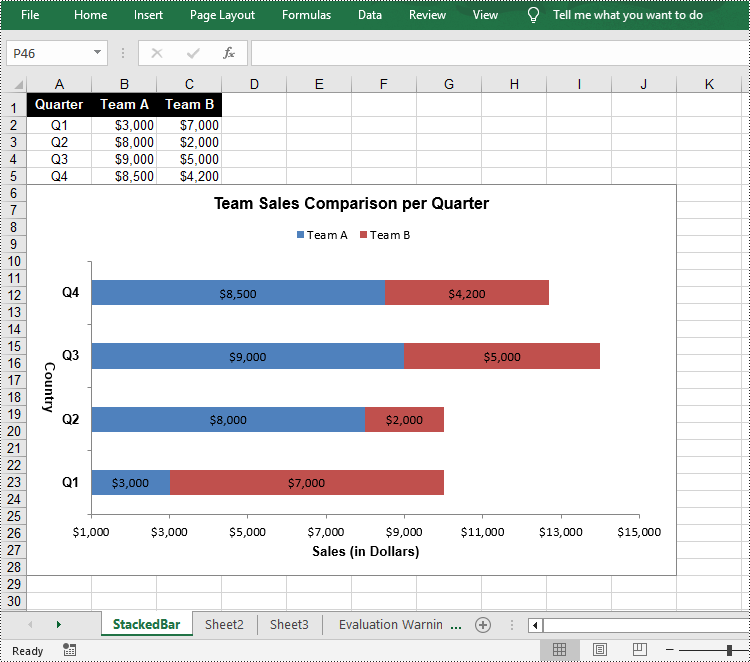
A bar chart is a type of graph that represents categorical data using rectangular bars. It is somewhat like a column chart, but with bars that extend horizontally from the Y-axis. The length of each bar corresponds to the value represented by a particular category or group, and changes, trends, or rankings can be quickly identified by comparing the lengths of the bars. In this article, you will learn how to create a clustered or stacked bar chart in Excel in Python using Spire.XLS for Python.
Install Spire.XLS for Python
This scenario requires Spire.XLS for Python and plum-dispatch v1.7.4. They can be easily installed in your Windows through the following pip command.
pip install Spire.XLS
If you are unsure how to install, please refer to this tutorial: How to Install Spire.XLS for Python on Windows
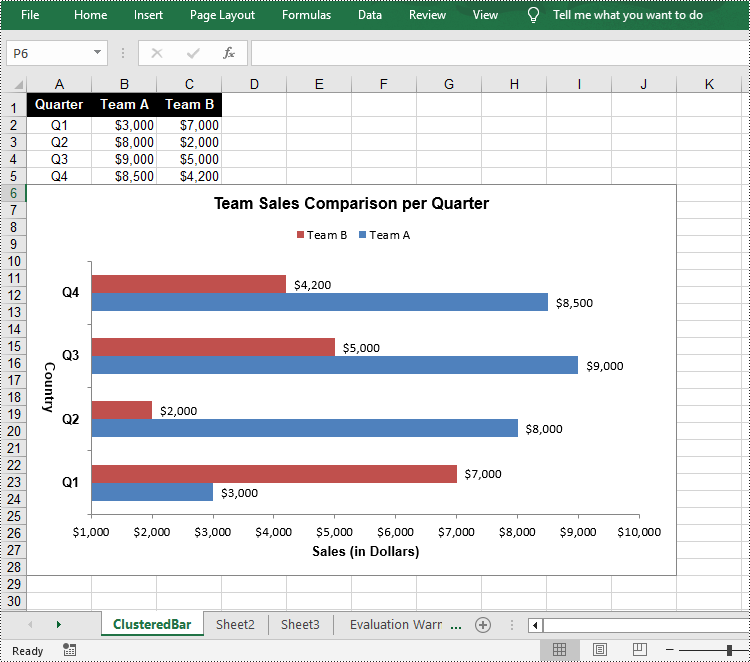
Create a Clustered Bar Chart in Excel in Python
The Worksheet.Chart.Add(ExcelChartType chartType) method provided by Spire.XLS for Python allows to add a chart to a worksheet. To add a clustered bar chart in Excel, you can set the chart type to BarClustered. The following are the steps.
- Create a Workbook object.
- Get a specific worksheet using Workbook.Worksheets[index] property.
- Add chart data to specified cells and set the cell styles.
- Add a clustered bar char to the worksheet using Worksheet.Chart.Add(ExcelChartType.BarClustered) method.
- Set data range for the chart using Chart.DataRange property.
- Set position, title, category axis and value axis for the chart.
- Save the result file using Workbook.SaveToFile() method.
- Python
from spire.xls import *

# Create a Workbook instance
workbook = Workbook()

# Get the first sheet and set its name
sheet = workbook.Worksheets[0]
sheet.Name = "ClusteredBar"

# Add chart data to specified cells
sheet.Range["A1"].Value = "Quarter"
sheet.Range["A2"].Value = "Q1"
sheet.Range["A3"].Value = "Q2"
sheet.Range["A4"].Value = "Q3"
sheet.Range["A5"].Value = "Q4"
sheet.Range["B1"].Value = "Team A"
sheet.Range["B2"].NumberValue = 3000
sheet.Range["B3"].NumberValue = 8000
sheet.Range["B4"].NumberValue = 9000
sheet.Range["B5"].NumberValue = 8500
sheet.Range["C1"].Value = "Team B"
sheet.Range["C2"].NumberValue = 7000
sheet.Range["C3"].NumberValue = 2000
sheet.Range["C4"].NumberValue = 5000
sheet.Range["C5"].NumberValue = 4200

# Set cell style
sheet.Range["A1:C1"].RowHeight = 18
sheet.Range["A1:C1"].Style.Color = Color.get_Black()
sheet.Range["A1:C1"].Style.Font.Color = Color.get_White()
sheet.Range["A1:C1"].Style.Font.IsBold = True
sheet.Range["A1:C1"].Style.VerticalAlignment = VerticalAlignType.Center
sheet.Range["A1:C1"].Style.HorizontalAlignment = HorizontalAlignType.Center
sheet.Range["A2:A5"].Style.HorizontalAlignment = HorizontalAlignType.Center
sheet.Range["B2:C5"].Style.NumberFormat = "\"$\"#,##0"

# Add a clustered bar chart to the sheet
chart = sheet.Charts.Add(ExcelChartType.BarClustered)

# Set data range of the chart
chart.DataRange = sheet.Range["A1:C5"]
chart.SeriesDataFromRange = False

# Set position of the chart
chart.LeftColumn = 1
chart.TopRow = 6
chart.RightColumn = 11
chart.BottomRow = 29

# Set and format chart title
chart.ChartTitle = "Team Sales Comparison per Quarter"
chart.ChartTitleArea.IsBold = True
chart.ChartTitleArea.Size = 12

# Set and format category axis
chart.PrimaryCategoryAxis.Title = "Country"
chart.PrimaryCategoryAxis.Font.IsBold = True
chart.PrimaryCategoryAxis.TitleArea.IsBold = True
chart.PrimaryCategoryAxis.TitleArea.TextRotationAngle = 90

# Set and format value axis
chart.PrimaryValueAxis.Title = "Sales (in Dollars)"
chart.PrimaryValueAxis.HasMajorGridLines = False
chart.PrimaryValueAxis.MinValue = 1000
chart.PrimaryValueAxis.TitleArea.IsBold = True

# Show data labels for data points
for cs in chart.Series:
    cs.Format.Options.IsVaryColor = True
    cs.DataPoints.DefaultDataPoint.DataLabels.HasValue = True

# Set legend position
chart.Legend.Position = LegendPositionType.Top

#Save the result file
workbook.SaveToFile("ClusteredBarChart.xlsx", ExcelVersion.Version2016)
workbook.Dispose()
Create a Stacked Bar Chart in Excel in Python
To create a stacked bar chart, you just need to change the Excel chart type to BarStacked. The following are the steps.
- Create a Workbook object.
- Get a specific worksheet using Workbook.Worksheets[index] property.
- Add chart data to specified cells and set the cell styles.
- Add a clustered bar char to the worksheet using Worksheet.Chart.Add(ExcelChartType.BarStacked) method.
- Set data range for the chart using Chart.DataRange property.
- Set position, title, category axis and value axis for the chart.
- Save the result file using Workbook.SaveToFile() method.
- Python
from spire.xls import *

# Create a Workbook instance
workbook = Workbook()

# Get the first sheet and set its name
sheet = workbook.Worksheets[0]
sheet.Name = "StackedBar"

# Add chart data to specified cells
sheet.Range["A1"].Value = "Quarter"
sheet.Range["A2"].Value = "Q1"
sheet.Range["A3"].Value = "Q2"
sheet.Range["A4"].Value = "Q3"
sheet.Range["A5"].Value = "Q4"
sheet.Range["B1"].Value = "Team A"
sheet.Range["B2"].NumberValue = 3000
sheet.Range["B3"].NumberValue = 8000
sheet.Range["B4"].NumberValue = 9000
sheet.Range["B5"].NumberValue = 8500
sheet.Range["C1"].Value = "Team B"
sheet.Range["C2"].NumberValue = 7000
sheet.Range["C3"].NumberValue = 2000
sheet.Range["C4"].NumberValue = 5000
sheet.Range["C5"].NumberValue = 4200

# Set cell style
sheet.Range["A1:C1"].RowHeight = 18
sheet.Range["A1:C1"].Style.Color = Color.get_Black()
sheet.Range["A1:C1"].Style.Font.Color = Color.get_White()
sheet.Range["A1:C1"].Style.Font.IsBold = True
sheet.Range["A1:C1"].Style.VerticalAlignment = VerticalAlignType.Center
sheet.Range["A1:C1"].Style.HorizontalAlignment = HorizontalAlignType.Center
sheet.Range["A2:A5"].Style.HorizontalAlignment = HorizontalAlignType.Center
sheet.Range["B2:C5"].Style.NumberFormat = "\"$\"#,##0"

# Add a clustered bar chart to the sheet
chart = sheet.Charts.Add(ExcelChartType.BarStacked)

# Set data range of the chart
chart.DataRange = sheet.Range["A1:C5"]
chart.SeriesDataFromRange = False

# Set position of the chart
chart.LeftColumn = 1
chart.TopRow = 6
chart.RightColumn = 11
chart.BottomRow = 29

# Set and format chart title
chart.ChartTitle = "Team Sales Comparison per Quarter"
chart.ChartTitleArea.IsBold = True
chart.ChartTitleArea.Size = 12

# Set and format category axis
chart.PrimaryCategoryAxis.Title = "Country"
chart.PrimaryCategoryAxis.Font.IsBold = True
chart.PrimaryCategoryAxis.TitleArea.IsBold = True
chart.PrimaryCategoryAxis.TitleArea.TextRotationAngle = 90

# Set and format value axis
chart.PrimaryValueAxis.Title = "Sales (in Dollars)"
chart.PrimaryValueAxis.HasMajorGridLines = False
chart.PrimaryValueAxis.MinValue = 1000
chart.PrimaryValueAxis.TitleArea.IsBold = True

# Show data labels for data points
for cs in chart.Series:
    cs.Format.Options.IsVaryColor = True
    cs.DataPoints.DefaultDataPoint.DataLabels.HasValue = True

# Set legend position
chart.Legend.Position = LegendPositionType.Top

#Save the result file
workbook.SaveToFile("StackedBarChart.xlsx", ExcelVersion.Version2016)
workbook.Dispose()
Apply for a Temporary License
If you'd like to remove the evaluation message from the generated documents, or to get rid of the function limitations, please request a 30-day trial license for yourself.
Python: Find and Replace Data in Excel
The Find and Replace feature in Excel allows you to quickly find specific values and perform targeted replacements based on specific requirements. With it, all occurrences of a specific value can be updated at once, which can significantly improve productivity when working with large data sets. In this article, you will learn how to programmatically find and replace data in Excel in Python using Spire.XLS for Python.
- Find and Replace Data in a Worksheet in Excel
- Find and Replace Data in a Specific Cell Range in Excel
Install Spire.XLS for Python
This scenario requires Spire.XLS for Python and plum-dispatch v1.7.4. They can be easily installed in your Windows through the following pip command.
pip install Spire.XLS
If you are unsure how to install, please refer to this tutorial: How to Install Spire.XLS for Python on Windows
Find and Replace Data in an Excel Worksheet in Python
Spire.XLS for Python offers the Worksheet.FindAllString() method to find the cells containing specific data values in an Excel worksheet. Once the cells are found, you can use the CellRange.Text property to update their values with new values. The detailed steps are as follows:
- Create a Workbook object.
- Load an Excel file using Workbook.LoadFromFile() method.
- Get a specific worksheet using Workbook.Worksheets[] property.
- Find the cells containing a specific value in the worksheet using Worksheet.FindAllString() method.
- Iterate through the found cells.
- Replace the value of each found cell with another value using CellRange.Text property.
- Set a background color to highlight the cell using CellRange.Style.Color property.
- Save the result file using Workbook.SaveToFile() method.
- Python
from spire.xls import *
from spire.xls.common import *

# Create a Workbook object
workbook = Workbook()

# Load an Excel document from disk
workbook.LoadFromFile("input.xlsx")

# Get the first worksheet
worksheet = workbook.Worksheets[0]

# Find the cells with the specific string value “Total” in the worksheet
ranges = worksheet.FindAllString("Total", False, False)

# Iterate through the found cells
for range in ranges:
    # Replace the value of the cell with another value
    range.Text = "Sum"

    # Set a background color for the cell
    range.Style.Color = Color.get_Yellow()

# Save the result file
workbook.SaveToFile("FindAndReplaceData.xlsx", ExcelVersion.Version2016)
workbook.Dispose()
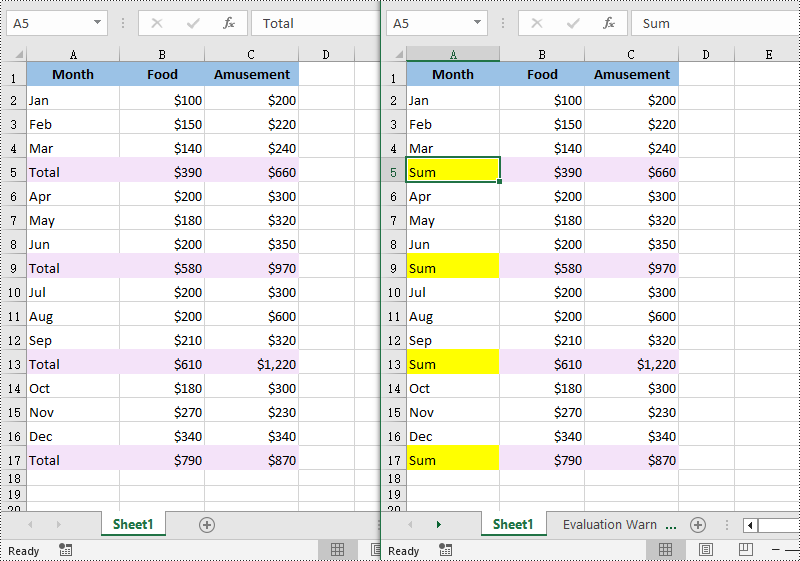
Find and Replace Data in a Specific Cell Range in Excel in Python
Spire.XLS for Python also allows you to find the cells containing a specific value in a cell range through the CellRange.FindAllString() method. Then you can update the value of each found cell with another value using the CellRange.Text property. The detailed steps are as follows:
- Create a Workbook object.
- Load an Excel file using Workbook.LoadFromFile() method.
- Get a specific worksheet using Workbook.Worksheets[] property.
- Get a specific cell range of the worksheet using Worksheet.Range[] property.
- Find the cells with a specific value in the cell range using CellRange.FindAllString() method.
- Iterate through the found cells.
- Replace the value of each found cell with another value using CellRange.Text property.
- Set a background color to highlight the cell using CellRange.Style.Color property.
- Save the result file using Workbook.SaveToFile() method.
- Python
from spire.xls import *
from spire.xls.common import *

# Create a Workbook object
workbook = Workbook()

# Load an Excel document from disk
workbook.LoadFromFile("input.xlsx")

# Get the first worksheet
sheet = workbook.Worksheets[0]

# Get a specific cell range
range = sheet.Range["A6:C13"]

# Find the cells with the specific value "Total" in the cell range
cells = range.FindAllString("Total", False, False)

# Iterate through the found cells
for cell in cells:

    # Replace the value of the cell with another value
    cell.Text = "Sum"

    # Set a background color for the cell
    cell.Style.Color = Color.get_Yellow()

# Save the result file
workbook.SaveToFile("ReplaceDataInCellRange.xlsx", ExcelVersion.Version2016)
workbook.Dispose()

Apply for a Temporary License
If you'd like to remove the evaluation message from the generated documents, or to get rid of the function limitations, please request a 30-day trial license for yourself.
Python: Insert Headers and Footers in Word
Headers and footers in Word are sections at the top and bottom margins of each page. They can contain additional information such as page numbers, document titles, dates, author names, and other identifying details. By default, the headers or footers on all pages are the same, but in certain scenarios, you can also insert different headers or footers on the first page, odd pages, or even pages. This article will demonstrate how to insert headers and footers into a Word document in Python using Spire.Doc for Python.
- Insert Headers and Footers into a Word Document
- Add Different Headers and Footers for the First Page and Other Pages
- Add Different Headers and Footers for Odd and Even Pages
Install Spire.Doc for Python
This scenario requires Spire.Doc for Python and plum-dispatch v1.7.4. They can be easily installed in your Windows through the following pip commands.
pip install Spire.Doc
If you are unsure how to install, please refer to this tutorial: How to Install Spire.Doc for Python on Windows
Insert Headers and Footers into a Word Document in Python
To insert a header or a footer into a Word document, you first need to get them through the Section.HeadersFooters.Header and Section.HeadersFooters.Footer properties, and then add paragraphs to them to insert pictures, text, page numbers, dates, or other information.
The following are steps to add headers and footers in Word:
- Create a Document object.
- Load a Word document using Document.LoadFromFile() method.
- Get a specified section using Document.Sections[] property.
- Add Header
- Get header using Section.HeadersFooters.Header property.
- Add a paragraph to the header using HeaderFooter.AddParagraph() method and set paragraph alignment.
- Add an image to the header paragraph using Paragraph.AppendPicture() method, and then set the text wrapping style and position of the image.
- Add text to the header paragraph using Paragraph.AppendText() method, and then set the font name, size, color, etc.
- Add Footer
- Get footer using Section.HeadersFooters.Footer property.
- Add a paragraph to the footer and then add text to the footer paragraph.
- Get the borders of the footer paragraph using Paragraph.Format.Borders property, and then set the top border style and space.
- Save the result document using Document.SaveToFile() method.
- Python
from spire.doc import *
from spire.doc.common import *

# Create a Document object
document = Document()

# Load a Word document
document.LoadFromFile("Sample.docx")

# Get a specific section
section = document.Sections.get_Item(0)

# Get header
header = section.HeadersFooters.Header

# Add a paragraph to the header and set its alignment style
headerParagraph = header.AddParagraph()
headerParagraph.Format.HorizontalAlignment = HorizontalAlignment.Left

# Add an image to the header paragraph and set its text wrapping style, position
headerPicture = headerParagraph.AppendPicture("Logo.png")
headerPicture.TextWrappingStyle = TextWrappingStyle.Square
headerPicture.VerticalOrigin = VerticalOrigin.Line
headerPicture.VerticalAlignment = ShapeVerticalAlignment.Center

# Add text to the header paragraph and set its font style
text = headerParagraph.AppendText("E-iceblue Co. Ltd."+ "\nYour Office Development Master")
text.CharacterFormat.FontName = "Arial"
text.CharacterFormat.FontSize = 10
text.CharacterFormat.Bold = True
text.CharacterFormat.TextColor = Color.get_Blue()

# Get footer
footer = section.HeadersFooters.Footer

# Add a paragraph to the footer paragraph and set its alignment style
footerParagraph = footer.AddParagraph()
footerParagraph.Format.HorizontalAlignment = HorizontalAlignment.Center

# Add text to the footer paragraph and set its font style
text = footerParagraph.AppendText("Copyright © 2013 e-iceblue. All Rights Reserved.")
text.CharacterFormat.FontName = "Arial"
text.CharacterFormat.FontSize = 10

# Set the border of the footer paragraph
footerParagraph.Format.Borders.Top.BorderType = BorderStyle.Single
footerParagraph.Format.Borders.Top.Space = 0.05

# Save the result file
document.SaveToFile("HeaderAndFooter.docx", FileFormat.Docx)
document.Close()
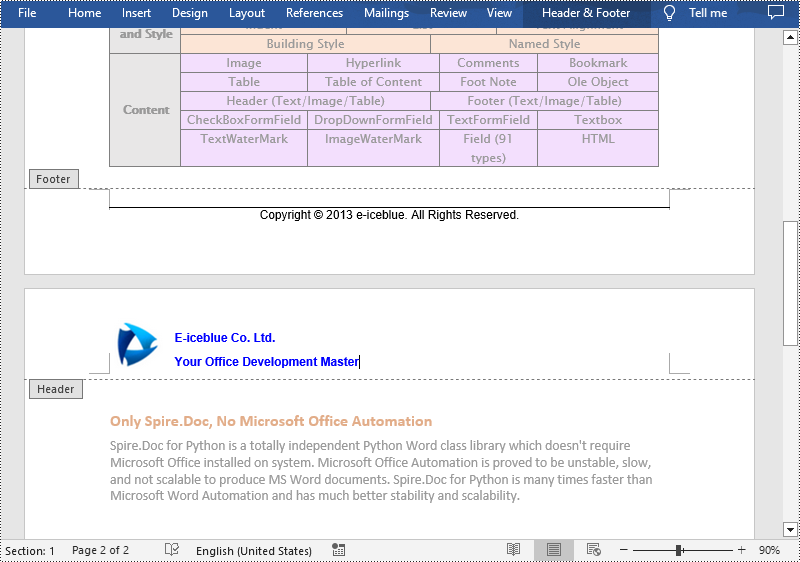
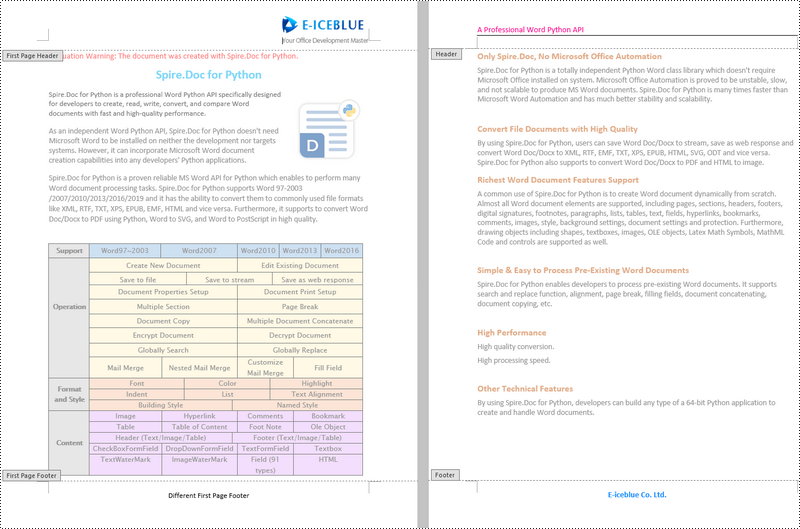
Add Different Headers and Footers for the First Page and Other Pages in Word in Python
Sometimes you may need to insert a header and footer only on the first page, or you may want the header and footer on the first page different from other pages.
Spire.Doc for Python offers the Section.PageSetup.DifferentFirstPageHeaderFooter property to enable a different first page header or footer. The following are the detailed steps to accomplish the task.
- Create a Document object.
- Load a Word document using Document.LoadFromFile() method.
- Get a specified section using Document.Sections[] property.
- Enable different headers and footers for the first page and other pages by setting the Section.PageSetup.DifferentFirstPageHeaderFooter property to True.
- Get the first page header using Section.HeadersFooters.FirstPageHeader property.
- Add a paragraph to the first page header and then add an image to the header paragraph.
- Get the first page footer using Section.HeadersFooters.FirstPageFooter property.
- Add a paragraph to the first page footer and then add text to the footer paragraph.
- Set headers and footers for other pages. (There's no need to set this if you only need the header & footer for the first page.)
- Save the result document using Document.SaveToFile() method.
- Python
from spire.doc import *
from spire.doc.common import *

# Create a Document object
doc = Document()

# Load a Word document
doc.LoadFromFile("Sample.docx")

# Get a specific section
section = document.Sections.get_Item(0)

# Enable different headers and footers for the first page and other pages
section.PageSetup.DifferentFirstPageHeaderFooter = True

# Add a paragraph to the first page header and set its alignment style
headerParagraph = section.HeadersFooters.FirstPageHeader.AddParagraph()
headerParagraph.Format.HorizontalAlignment = HorizontalAlignment.Right

# Add an image to the header paragraph
headerimage = headerParagraph.AppendPicture("E-iceblue.png")

# Add a paragraph to the first page footer and set its alignment style
footerParagraph = section.HeadersFooters.FirstPageFooter.AddParagraph()
footerParagraph.Format.HorizontalAlignment = HorizontalAlignment.Center

# Add text to the footer paragraph and set its font style
text = footerParagraph.AppendText("Different First Page Footer")
text.CharacterFormat.FontSize = 11

# Set the header & footer for other pages. If you only headers & footers for the first page, don't set this.
para = section.HeadersFooters.Header.AddParagraph()
para.Format.HorizontalAlignment = HorizontalAlignment.Left
paraText = para.AppendText("A Professional Word Python API")
paraText.CharacterFormat.FontSize = 12
paraText.CharacterFormat.TextColor = Color.get_DeepPink()
para.Format.Borders.Bottom.BorderType = BorderStyle.Single
para.Format.Borders.Bottom.Space = 0.05

paragraph = section.HeadersFooters.Footer.AddParagraph()
paragraph.Format.HorizontalAlignment = HorizontalAlignment.Center
paraText = paragraph.AppendText("E-iceblue Co. Ltd.")
paraText.CharacterFormat.FontSize = 12
paraText.CharacterFormat.Bold = True
paraText.CharacterFormat.TextColor = Color.get_DodgerBlue()

# Save the result document
doc.SaveToFile("DifferentFirstPage.docx", FileFormat.Docx)
doc.Close()
Add Different Headers and Footers for Odd and Even Pages in Word in Python
To have different headers and footers on odd and even pages, Spire.Doc for Python provides the Section.PageSetup.DifferentOddAndEvenPagesHeaderFooter property. The following are the detailed steps.
- Create a Document object.
- Load a Word document using Document.LoadFromFile() method.
- Get a specified section using Document.Sections[] property.
- Enable different headers and footers for the odd and even pages by setting the Section.PageSetup.DifferentOddAndEvenPagesHeaderFooter property to True.
- Get the header and footer of odd pages using Section.HeadersFooters.OddHeader and Section.HeadersFooters.OddFooter properties.
- Add paragraphs to the header and footer of odd pages and then add text to them.
- Get the header and footer of even pages using Section.HeadersFooters.EvenHeader and Section.HeadersFooters.EvenFooter properties.
- Add paragraphs to the header and footer of even pages and then add text to them.
- Save the result document using Document.SaveToFile() method.
- Python
from spire.doc import *
from spire.doc.common import *

# Create a Document object
doc = Document()

# Load a Word document
doc.LoadFromFile("Sample.docx")

# Get a specific section
section = document.Sections.get_Item(0)

# Enable different headers and footers for the odd and even pages
section.PageSetup.DifferentOddAndEvenPagesHeaderFooter = True

# Add headers and footers to odd pages
OHpara = section.HeadersFooters.OddHeader.AddParagraph()
OHtext = OHpara.AppendText("Odd Page Header")
OHpara.Format.HorizontalAlignment = HorizontalAlignment.Center
OHtext.CharacterFormat.FontName = "Arial"
OHtext.CharacterFormat.FontSize = 12
OHtext.CharacterFormat.TextColor = Color.get_Red()

OFpara = section.HeadersFooters.OddFooter.AddParagraph()
OFtext = OFpara.AppendText("Odd Page Footer")
OFpara.Format.HorizontalAlignment = HorizontalAlignment.Center
OFtext.CharacterFormat.FontName = "Arial"
OFtext.CharacterFormat.FontSize = 12
OFtext.CharacterFormat.TextColor = Color.get_Red()

# Add headers and footers to even pages
EHpara = section.HeadersFooters.EvenHeader.AddParagraph()
EHtext = EHpara.AppendText("Even Page Header")
EHpara.Format.HorizontalAlignment = HorizontalAlignment.Center
EHtext.CharacterFormat.FontName = "Arial"
EHtext.CharacterFormat.FontSize = 12
EHtext.CharacterFormat.TextColor = Color.get_Blue()

EFpara = section.HeadersFooters.EvenFooter.AddParagraph()
EFtext = EFpara.AppendText("Even Page Footer")
EFpara.Format.HorizontalAlignment = HorizontalAlignment.Center
EFtext.CharacterFormat.FontName = "Arial"
EFtext.CharacterFormat.FontSize = 12
EFtext.CharacterFormat.TextColor = Color.get_Blue()

# Save the result document
doc.SaveToFile("OddAndEvenHeaderFooter.docx", FileFormat.Docx)
doc.Close()
Apply for a Temporary License
If you'd like to remove the evaluation message from the generated documents, or to get rid of the function limitations, please request a 30-day trial license for yourself.