C# para ler arquivos Excel e exportar dados para DataTable e banco de dados
Índice
Instalar com Nuget
Install-Package Spire.XLS
Links Relacionados
Ler arquivos Excel em C# é um requisito comum para muitas aplicações, seja para análise de dados, relatórios ou integração com banco de dados. Embora as bibliotecas Interop da Microsoft possam ser usadas, elas têm limitações (como exigir que o Excel esteja instalado). Em vez disso, exploraremos uma abordagem mais eficiente usando o Spire.XLS, uma biblioteca .NET que permite ler e escrever arquivos Excel sem Interop. Este artigo aborda:
- Biblioteca C# .NET para Ler Excel Sem Interop
- Como Ler um Arquivo Excel em C#
- Ler Dados do Excel para um DataTable
- Ler Dados do Excel para um Banco de Dados
- Conclusão
- Perguntas Frequentes
Biblioteca C# .NET para Ler Excel Sem Interop
O Excel Interop da Microsoft exige que o Excel esteja instalado na máquina, tornando-o inadequado para aplicações do lado do servidor. Em vez disso, bibliotecas como o Spire.XLS oferecem uma solução leve e de alto desempenho, sem dependências do Excel.
Por que usar o Spire.XLS?
- Nenhuma Instalação do Excel Necessária – Funciona de forma independente.
- Suporta .NET Core & .NET Framework – Compatibilidade multiplataforma.
- Ler/Escrever Arquivos Excel – Suporta .xls, .xlsx e .xlsm.
- Importar para DataTable & Bancos de Dados – Integração perfeita com ADO.NET.
Instalação do Spire.XLS
Para começar, instale a biblioteca via Gerenciador de Pacotes NuGet:
Install-Package Spire.XLS
Alternativamente, você pode baixar o Spire.XLS for .NET do nosso site oficial e referenciar o arquivo DLL manualmente.
Como Ler um Arquivo Excel em C#
Esta seção demonstra como ler um arquivo Excel em C# usando a biblioteca Spire.XLS. O processo envolve carregar o arquivo, acessar planilhas e recuperar valores de células programaticamente. Isso é útil para automatizar a extração de dados, processar relatórios do Excel ou integrar dados de planilhas em aplicações.
Passo 1. Importar Namespace Necessário
Para utilizar a funcionalidade do Spire.XLS, você precisa importar seu namespace. Isso dá acesso a classes como Workbook e Worksheet, que são essenciais para operações com arquivos Excel.
- C#
using Spire.Xls;Passo 2. Carregar um Arquivo Excel
Para carregar um arquivo Excel, crie um objeto Workbook e chame o método LoadFromFile. Isso lê o arquivo na memória, permitindo manipulação posterior.
- C#
Workbook wb = new Workbook();
wb.LoadFromFile("input.xlsx");
Passo 3. Obter uma Planilha Específica
Arquivos Excel podem conter várias planilhas. Você pode acessar uma planilha específica indexando a coleção Worksheets (baseada em zero). A primeira planilha está no índice 0, a segunda no 1, e assim por diante.
- C#
Worksheet sheet = wb.Worksheets[0]; //Primeira planilhaPasso 4. Recuperar Valor de uma Célula Específica
Para recuperar o valor de uma célula, use a propriedade CellRange.Value. Especifique os índices de linha e coluna (começando em 1) para localizar a célula. Isso é útil para extrair dados estruturados como cabeçalhos ou registros individuais.
- C#
CellRange cell = sheet.Range[1, 1]; // Linha1, Coluna 1 (A1)
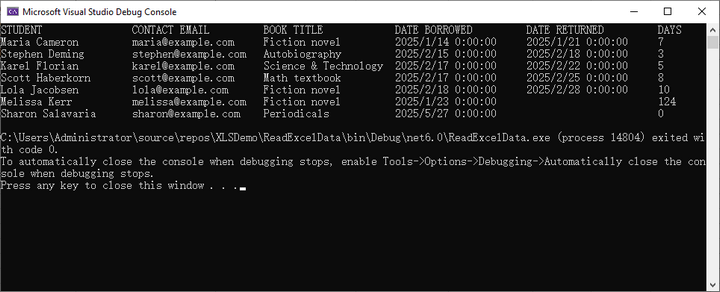
string value = cell.Value;Abaixo está um exemplo completo de leitura de dados de uma planilha inteira e impressão no console:
- C#
using Spire.Xls;

namespace ReadExcelData
{
    class Program
    {
        static void Main(string[] args)
        {
            // Create a Workbook object
            Workbook wb = new Workbook();

            // Load an existing Excel file
            wb.LoadFromFile("C:\\Users\\Administrator\\Desktop\\Input.xlsx");

            // Get the first worksheet
            Worksheet sheet = wb.Worksheets[0];

            // Get the cell range containing data
            CellRange locatedRange = sheet.AllocatedRange;

            // Iterate through the rows
            for (int i = 0; i < locatedRange.Rows.Length; i++)
            {
                // Iterate through the columns
                for (int j = 0; j < locatedRange.Rows[i].ColumnCount; j++)
                {
                    // Get data of a specific cell
                    string cellValue = locatedRange[i + 1, j + 1].Value?.ToString() ?? "N/A";

                    // Align output with a width of 22
                    Console.Write($"{cellValue,-22}");
                }
                Console.WriteLine();
            }
        }
    }
}
Resultado:
Ler Dados do Excel para um DataTable
Exportar dados do Excel para um DataTable permite uma integração perfeita com controles de UI como DataGridView ou processamento de dados de backend. O Spire.XLS simplifica este processo com seu método integrado ExportDataTable(), que converte automaticamente os dados da planilha em um DataTable estruturado, preservando os cabeçalhos das colunas e os tipos de dados.
Passo 1. Importar Namespace Necessário
Inclua o namespace Spire.XLS para acessar as classes essenciais.
- C#
using Spire.Xls;Passo 2. Criar um Formulário e Evento de Clique de Botão
Crie um formulário (por exemplo, Form1) e adicione um botão com um manipulador de eventos para ler o arquivo Excel.
- C#
public partial class Form1 : Form
{
    public Form1()
    {
        InitializeComponent();
    }

    private void button1_Click(object sender, EventArgs e)
    {
        // O código irá aqui
    }
}
Passo 3. Carregar o Workbook
Dentro do evento de clique do botão, crie um objeto Workbook e carregue o arquivo Excel.
- C#
Workbook wb = new Workbook();
wb.LoadFromFile("C:\\Users\\Administrator\\Desktop\\Input.xlsx");
Passo 4. Exportar Dados para DataTable
Acesse uma planilha específica por seu índice e exporte seus dados para um DataTable usando o método ExportDataTable.
- C#
DataTable dataTable = wb.Worksheets[0].ExportDataTable();Passo 5. Vincular Dados ao DataGridView
Supondo que você tenha um controle DataGridView em seu formulário, vincule o DataTable ao DataGridView para exibir os dados.
- C#
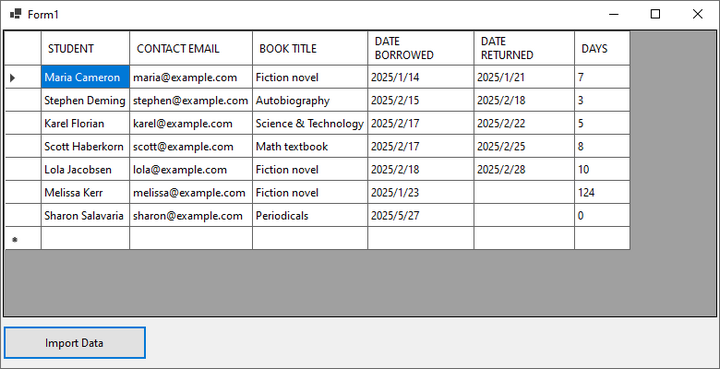
dataGridView1.DataSource = dataTable;O seguinte é o código completo para ler dados de um arquivo Excel em um DataTable e exibi-lo em um controle DataGridView do Windows Forms:
- C#
using Spire.Xls;
using System.Data;

namespace ReadExcelIntoDataTable
{
    public partial class Form1 : Form
    {
        public Form1()
        {
            InitializeComponent();
        }

        private void button1_Click(object sender, EventArgs e)
        {
            // Create a Workbook object
            Workbook wb = new Workbook();

            // Load an existing Excel file
            wb.LoadFromFile("C:\\Users\\Administrator\\Desktop\\Input.xlsx");

            // Get the first worksheet
            Worksheet sheet = wb.Worksheets[0];

            // Export data from worksheet into a DataTable
            DataTable dataTable = sheet.ExportDataTable();

            // Bind DataTable to DataGridView
            dataGridView1.DataSource = dataTable;

            // Dispose resources
            wb.Dispose();
        }
    }
}Resultado:
Ler Dados do Excel para um Banco de Dados
A integração de dados do Excel com um banco de dados pode otimizar o gerenciamento de dados. Abaixo, vamos percorrer o processo de leitura de um arquivo Excel e importação de seu conteúdo para um banco de dados MySQL. Este método é ideal para automatizar a migração de dados, relatórios ou sincronizar dados do Excel com um banco de dados estruturado.
Passo 1. Instalar a Biblioteca de Dados MySQL
Para interagir com bancos de dados MySQL em suas aplicações .NET, você precisará instalar a biblioteca MySql.Data. Este pacote NuGet fornece as classes e métodos necessários para conectar e manipular bancos de dados MySQL.
- C#
Install-Package MySql.DataPasso 2. Importar Namespaces Necessários
Antes de trabalhar com arquivos Excel e MySQL, você deve incluir os namespaces necessários. O Spire.XLS é usado para operações com Excel, enquanto o MySql.Data.MySqlClient permite a conectividade com o banco de dados MySQL.
- C#
using Spire.Xls;
using MySql.Data.MySqlClient;
Passo 3. Extrair Cabeçalhos e Dados do Excel
O trecho de código a seguir demonstra como extrair cabeçalhos e dados do arquivo Excel. Os cabeçalhos são limpos para evitar conflitos de nomenclatura de colunas do MySQL, enquanto os dados são armazenados em um formato estruturado para inserção posterior.
- C#
// Create a Workbook object
Workbook wb = new Workbook();

// Load an Excel document
wb.LoadFromFile("C:\\Users\\Administrator\\Desktop\\Input.xlsx");

// Get a specific sheet
Worksheet sheet = wb.Worksheets[0];

// Retrieve headers
List<string> headers = new List<string>();
for (int col = 1; col <= sheet.LastColumn; col++)
{
    string header = sheet.Range[1, col].Value?.ToString();
    // Removing spaces to avoid conflicts with MySQL column names
    string cleanHeader = header?.Replace(" ", "");
    headers.Add($"`{cleanHeader}`");
}

// Retrieve data
List<List<string>> data = new List<List<string>>();
for (int row = 2; row <= sheet.LastRow; row++) {
    List<string> record = new List<string>();
    for (int col = 1; col <= sheet.LastColumn; col++)
    {
        record.Add(sheet.Range[row, col].Value?.ToString() ?? string.Empty);
    }
    data.Add(record);
}
Passo 4. Conectar a um Banco de Dados MySQL
Uma conexão com o banco de dados MySQL é estabelecida usando uma string de conexão, que inclui detalhes do servidor, credenciais e o nome do banco de dados de destino. A instrução using garante a liberação adequada dos recursos.
- C#
string connectionString = "server=localhost;user=root;password=yourpassword;database=yourdatabase;";
using (MySqlConnection connection = new MySqlConnection(connectionString))
{
    connection.Open();
    // A conexão está estabelecida; execute as operações do banco de dados aqui
}
Passo 5. Criar Dinamicamente uma Tabela no MySQL
Este passo gera dinamicamente uma tabela MySQL com colunas que correspondem aos cabeçalhos do Excel. Por simplicidade, todas as colunas são definidas como VARCHAR(255), mas os tipos de dados podem ser ajustados com base nos requisitos.
- C#
// Create a table with dynamic columns based on headers
List<string> columns = new List<string>();
foreach (string header in headers)
{
    // Assuming all header values are VARCHAR for simplicity; adjust types as needed
    columns.Add($"{header} VARCHAR(255)");
}

// Create a table in database
string columnsSql = string.Join(", ", columns);
string createTableQuery = $ @"
    CREATE TABLE IF NOT EXISTS my_table (
        id INT AUTO_INCREMENT PRIMARY KEY,
        {columnsSql}
)";

// Execute the create table query
using (MySqlCommand createCommand = new MySqlCommand(createTableQuery, connection))
{
    createCommand.ExecuteNonQuery();
}
Passo 6. Preencher a Tabela com Dados
Os dados extraídos do Excel são inseridos na tabela MySQL usando consultas parametrizadas para prevenir injeção de SQL. Cada linha do arquivo Excel é mapeada para um registro de banco de dados correspondente.
- C#
// Prepare the SQL INSERT statement
string placeholders = string.Join(", ", new string[headers.Count].Select(h => "?"));
string insertQuery = $"INSERT INTO my_table ({string.Join(", ", headers.Select(h => h.Trim('`')))}) VALUES ({placeholders})";

// Insert data into the table
foreach (List<string> record in data)
{
    using (MySqlCommand insertCommand = new MySqlCommand(insertQuery, connection))
    {
        for (int i = 0; i < record.Count; i++)
        {
            insertCommand.Parameters.AddWithValue($" @2024\本地文件打包__20180302\Spire.Web\trunk\src\website\components\com_virtuemart\themes\default\templates\browse\includes\browse_searchparameter_form.tpl.php{i}", record[i]);
        }
        insertCommand.ExecuteNonQuery();
    }
}
Aqui está o código completo para importar dados de um arquivo Excel para uma tabela MySQL:
- C#
using Spire.Xls;
using MySql.Data.MySqlClient;

namespace ExcelToMySQL
{
    class Program
    {
        static void Main(string[] args)
        {
            // Create a Workbook object
            Workbook wb = new Workbook();

            // Load an Excel document
            wb.LoadFromFile("C:\\Users\\Administrator\\Desktop\\Input.xlsx");

            // Get a specific sheet
            Worksheet sheet = wb.Worksheets[0];

            // Retrieve headers
            List<string> headers = new List<string>();
            for (int col = 1; col <= sheet.LastColumn; col++)
            {
                string header = sheet.Range[1, col].Value?.ToString();
                // Removing spaces to avoid conflicts with MySQL column names
                string cleanHeader = header?.Replace(" ", "");
                headers.Add($"`{cleanHeader}`");
            }

            // Retrieve data
            List<List<string>> data = new List<List<string>>();
            for (int row = 2; row <= sheet.LastRow; row++)
            {
                List<string> record = new List<string>();
                for (int col = 1; col <= sheet.LastColumn; col++)
                {
                    record.Add(sheet.Range[row, col].Value?.ToString() ?? string.Empty);
                }
                data.Add(record);
            }

            // Establish a connection to the MySQL database
            string connectionString = "server=localhost;user=root;password=admin;database=excel_db;";
            using (MySqlConnection connection = new MySqlConnection(connectionString))
            {
                connection.Open();

                // Create a table with dynamic columns based on headers
                List<string> columns = new List<string>();
                foreach (string header in headers)
                {
                    // Assuming all header values are VARCHAR for simplicity; adjust types as needed
                    columns.Add($"{header} VARCHAR(255)");
                }

                // Create a table in database
                string columnsSql = string.Join(", ", columns);
                string createTableQuery = $ @"
                    CREATE TABLE IF NOT EXISTS my_table (
                        id INT AUTO_INCREMENT PRIMARY KEY,
                        {columnsSql}
                    )";

                // Execute the create table query
                using (MySqlCommand createCommand = new MySqlCommand(createTableQuery, connection))
                {
                    createCommand.ExecuteNonQuery();
                }

                // Prepare the SQL INSERT statement
                string placeholders = string.Join(", ", new string[headers.Count].Select(h => "?"));
                string insertQuery = $"INSERT INTO my_table ({string.Join(", ", headers.Select(h => h.Trim('`')))}) VALUES ({placeholders})";

                // Insert data into the table
                foreach (List<string> record in data)
                {
                    using (MySqlCommand insertCommand = new MySqlCommand(insertQuery, connection))
                    {
                        for (int i = 0; i < record.Count; i++)
                        {
                            insertCommand.Parameters.AddWithValue($" @2024\本地文件打包__20180302\Spire.Web\trunk\src\website\components\com_virtuemart\themes\default\templates\browse\includes\browse_searchparameter_form.tpl.php{i}", record[i]);
                        }
                        insertCommand.ExecuteNonQuery();
                    }
                }
            }

            Console.WriteLine("Dados exportados com sucesso!");
        }
    }
}Resultado:

Conclusão
Ler arquivos Excel em C# nunca foi tão fácil, graças a bibliotecas como o Spire.XLS. Este guia o orientou no processo de carregar arquivos Excel, ler seu conteúdo e até mesmo importar os dados para um banco de dados MySQL. Com essas técnicas, você pode aprimorar significativamente as capacidades de manipulação de dados de suas aplicações.
Perguntas Frequentes
Q1: Posso ler arquivos Excel protegidos por senha?
R: Sim, o Spire.XLS suporta a leitura de arquivos Excel criptografados usando:
- C#
wb.OpenPassword = "psd";
wb.LoadFromFile("file.xlsx");
Q2: Como leio os resultados da fórmula em vez da própria fórmula?
R: Você tem duas opções para recuperar os resultados da fórmula:
Para células individuais:
Verifique se uma célula contém uma fórmula usando CellRange.HasFormula e obtenha o valor com CellRange.FormulaValue:
- C#
CellRange cell = sheet.Range[1, 1];
if (cell.HasFormula)
{
    string result = cell.FormulaValue.ToString();
}
Para exportação em massa para DataTable:
Use Worksheet.ExportDataTable() com computedFormulaValue: true para exportar valores calculados:
- C#
DataTable data = sheet.ExportDataTable(range, exportColumnNames: true, computedFormulaValue: true);Q3: Como posso ler dados do Excel para um DataTable?
R: Use o método Worksheet.ExportDataTable() fornecido pelo Spire.XLS.
Q4: Como posso ler um arquivo Excel linha por linha?
R: Consulte o seguinte código:
- C#
Workbook workbook = new Workbook();
workbook.LoadFromFile("input.xlsx");
Worksheet sheet = workbook.Worksheets[0];

for (int row = 1; row <= sheet.LastRow; row++)
{
    for (int col = 1; col <= sheet.LastColumn; col++)
    {
        string cellValue = sheet.Range[row, col].Value?.ToString() ?? string.Empty;
        Console.WriteLine(cellValue);
    }
}
Obtenha uma Licença Gratuita
Para experimentar plenamente as capacidades do Spire.XLS for .NET sem quaisquer limitações de avaliação, você pode solicitar uma licença de avaliação gratuita de 30 dias.
Veja Também
C# zum Lesen von Excel-Dateien und zum Exportieren von Daten in DataTable und Datenbank
Inhaltsverzeichnis
Mit Nuget installieren
Install-Package Spire.XLS
Verwandte Links
Das Lesen von Excel-Dateien in C# ist eine häufige Anforderung für viele Anwendungen, sei es für Datenanalyse, Berichterstattung oder Datenbankintegration. Während die Interop-Bibliotheken von Microsoft verwendet werden können, haben sie Einschränkungen (z. B. die Notwendigkeit, dass Excel installiert ist). Stattdessen werden wir einen effizienteren Ansatz mit Spire.XLS untersuchen, einer .NET-Bibliothek, die das Lesen und Schreiben von Excel-Dateien ohne Interop ermöglicht. Dieser Artikel behandelt:
- C# .NET-Bibliothek zum Lesen von Excel ohne Interop
- Wie man eine Excel-Datei in C# liest
- Excel-Daten in eine DataTable einlesen
- Excel-Daten in eine Datenbank einlesen
- Fazit
- FAQs
C# .NET-Bibliothek zum Lesen von Excel ohne Interop
Microsofts Excel Interop erfordert, dass Excel auf dem Computer installiert ist, was es für serverseitige Anwendungen ungeeignet macht. Stattdessen bieten Bibliotheken wie Spire.XLS eine leichtgewichtige, hochleistungsfähige Lösung ohne Abhängigkeiten von Excel.
Warum Spire.XLS verwenden?
- Keine Excel-Installation erforderlich – Funktioniert unabhängig.
- Unterstützt .NET Core & .NET Framework – Plattformübergreifende Kompatibilität.
- Excel-Dateien lesen/schreiben – Unterstützt .xls, .xlsx und .xlsm.
- Import in DataTable & Datenbanken – Nahtlose Integration mit ADO.NET.
Installation von Spire.XLS
Um zu beginnen, installieren Sie die Bibliothek über den NuGet Package Manager:
Install-Package Spire.XLS
Alternativ können Sie Spire.XLS für .NET von unserer offiziellen Website herunterladen und die DLL-Datei manuell referenzieren.
Wie man eine Excel-Datei in C# liest
Dieser Abschnitt zeigt, wie man eine Excel-Datei in C# mit der Spire.XLS-Bibliothek liest. Der Prozess umfasst das Laden der Datei, den Zugriff auf Arbeitsblätter und das programmgesteuerte Abrufen von Zellwerten. Dies ist nützlich für die Automatisierung der Datenextraktion, die Verarbeitung von Excel-Berichten oder die Integration von Tabellenkalkulationsdaten in Anwendungen.
Schritt 1. Notwendigen Namespace importieren
Um die Funktionalität von Spire.XLS zu nutzen, müssen Sie dessen Namespace importieren. Dies ermöglicht den Zugriff auf Klassen wie Workbook und Worksheet, die für Excel-Dateioperationen unerlässlich sind.
- C#
using Spire.Xls;Schritt 2. Eine Excel-Datei laden
Um eine Excel-Datei zu laden, erstellen Sie ein Workbook-Objekt und rufen Sie die Methode LoadFromFile auf. Dadurch wird die Datei in den Speicher gelesen, was eine weitere Bearbeitung ermöglicht.
- C#
Workbook wb = new Workbook();
wb.LoadFromFile("input.xlsx");
Schritt 3. Ein bestimmtes Arbeitsblatt abrufen
Excel-Dateien können mehrere Arbeitsblätter enthalten. Sie können auf ein bestimmtes Blatt zugreifen, indem Sie die Worksheets-Sammlung indizieren (nullbasiert). Das erste Blatt befindet sich am Index 0, das zweite am Index 1 und so weiter.
- C#
Worksheet sheet = wb.Worksheets[0]; //Erstes BlattSchritt 4. Wert einer bestimmten Zelle abrufen
Um den Wert einer Zelle abzurufen, verwenden Sie die Eigenschaft CellRange.Value. Geben Sie die Zeilen- und Spaltenindizes (beginnend bei 1) an, um die Zelle zu lokalisieren. Dies ist nützlich zum Extrahieren strukturierter Daten wie Kopfzeilen oder einzelner Datensätze.
- C#
CellRange cell = sheet.Range[1, 1]; // Zeile1, Spalte 1 (A1)
string value = cell.Value;
Unten finden Sie ein vollständiges Beispiel zum Lesen von Daten aus einem gesamten Arbeitsblatt und zum Ausgeben in der Konsole:
- C#
using Spire.Xls;

namespace ReadExcelData
{
    class Program
    {
        static void Main(string[] args)
        {
            // Erstellen Sie ein Workbook-Objekt
            Workbook wb = new Workbook();

            // Laden Sie eine vorhandene Excel-Datei
            wb.LoadFromFile("C:\\Users\\Administrator\\Desktop\\Input.xlsx");

            // Holen Sie sich das erste Arbeitsblatt
            Worksheet sheet = wb.Worksheets[0];

            // Holen Sie sich den Zellbereich, der Daten enthält
            CellRange locatedRange = sheet.AllocatedRange;

            // Iterieren Sie durch die Zeilen
            for (int i = 0; i < locatedRange.Rows.Length; i++)
            {
                // Iterieren Sie durch die Spalten
                for (int j = 0; j < locatedRange.Rows[i].ColumnCount; j++)
                {
                    // Holen Sie sich die Daten einer bestimmten Zelle
                    string cellValue = locatedRange[i + 1, j + 1].Value?.ToString() ?? "N/A";

                    // Richten Sie die Ausgabe mit einer Breite von 22 aus
                    Console.Write($"{cellValue,-22}");
                }
                Console.WriteLine();
            }
        }
    }
}
Ergebnis:
Excel-Daten in eine DataTable einlesen
Das Exportieren von Excel-Daten in eine DataTable ermöglicht eine nahtlose Integration mit UI-Steuerelementen wie DataGridView oder der Backend-Datenverarbeitung. Spire.XLS vereinfacht diesen Prozess mit seiner integrierten Methode ExportDataTable(), die Arbeitsblattdaten automatisch in eine strukturierte DataTable konvertiert und dabei Spaltenüberschriften und Datentypen beibehält.
Schritt 1. Notwendigen Namespace importieren
Fügen Sie den Spire.XLS-Namespace hinzu, um auf wesentliche Klassen zuzugreifen.
- C#
using Spire.Xls;Schritt 2. Ein Formular und ein Button-Klick-Ereignis erstellen
Erstellen Sie ein Formular (z. B. Form1) und fügen Sie eine Schaltfläche mit einem Ereignishandler zum Lesen der Excel-Datei hinzu.
- C#
public partial class Form1 : Form
{
    public Form1()
    {
        InitializeComponent();
    }

    private void button1_Click(object sender, EventArgs e)
    {
        // Der Code kommt hierher
    }
}
Schritt 3. Das Arbeitsbuch laden
Erstellen Sie innerhalb des Button-Klick-Ereignisses ein Workbook-Objekt und laden Sie die Excel-Datei.
- C#
Workbook wb = new Workbook();
wb.LoadFromFile("C:\\Users\\Administrator\\Desktop\\Input.xlsx");
Schritt 4. Daten in DataTable exportieren
Greifen Sie über seinen Index auf ein bestimmtes Arbeitsblatt zu und exportieren Sie seine Daten mit der Methode ExportDataTable in eine DataTable.
- C#
DataTable dataTable = wb.Worksheets[0].ExportDataTable();Schritt 5. Daten an DataGridView binden
Angenommen, Sie haben ein DataGridView-Steuerelement in Ihrem Formular, binden Sie die DataTable an das DataGridView, um die Daten anzuzeigen.
- C#
dataGridView1.DataSource = dataTable;Das Folgende ist der vollständige Code zum Lesen von Daten aus einer Excel-Datei in eine DataTable und zum Anzeigen in einem Windows Forms DataGridView-Steuerelement:
- C#
using Spire.Xls;
using System.Data;

namespace ReadExcelIntoDataTable
{
    public partial class Form1 : Form
    {
        public Form1()
        {
            InitializeComponent();
        }

        private void button1_Click(object sender, EventArgs e)
        {
            // Erstellen Sie ein Workbook-Objekt
            Workbook wb = new Workbook();

            // Laden Sie eine vorhandene Excel-Datei
            wb.LoadFromFile("C:\\Users\\Administrator\\Desktop\\Input.xlsx");

            // Holen Sie sich das erste Arbeitsblatt
            Worksheet sheet = wb.Worksheets[0];

            // Exportieren Sie Daten aus dem Arbeitsblatt in eine DataTable
            DataTable dataTable = sheet.ExportDataTable();

            // Binden Sie die DataTable an das DataGridView
            dataGridView1.DataSource = dataTable;

            // Geben Sie Ressourcen frei
            wb.Dispose();
        }
    }
}Ergebnis:
Excel-Daten in eine Datenbank einlesen
Die Integration von Excel-Daten in eine Datenbank kann die Datenverwaltung optimieren. Im Folgenden führen wir Sie durch den Prozess des Lesens einer Excel-Datei und des Imports ihres Inhalts in eine MySQL-Datenbank. Diese Methode ist ideal für die Automatisierung der Datenmigration, die Berichterstellung oder die Synchronisierung von Excel-Daten mit einer strukturierten Datenbank.
Schritt 1. MySQL-Datenbibliothek installieren
Um mit MySQL-Datenbanken in Ihren .NET-Anwendungen zu interagieren, müssen Sie die Bibliothek MySql.Data installieren. Dieses NuGet-Paket stellt die notwendigen Klassen und Methoden zur Verfügung, um eine Verbindung zu MySQL-Datenbanken herzustellen und diese zu bearbeiten.
- C#
Install-Package MySql.DataSchritt 2. Notwendige Namespaces importieren
Bevor Sie mit Excel-Dateien und MySQL arbeiten, müssen Sie die erforderlichen Namespaces einbinden. Spire.XLS wird für Excel-Operationen verwendet, während MySql.Data.MySqlClient die Konnektivität zu MySQL-Datenbanken ermöglicht.
- C#
using Spire.Xls;
using MySql.Data.MySqlClient;
Schritt 3. Kopfzeilen und Daten aus Excel extrahieren
Der folgende Codeausschnitt zeigt, wie Kopfzeilen und Daten aus der Excel-Datei extrahiert werden. Die Kopfzeilen werden bereinigt, um Konflikte bei der Benennung von MySQL-Spalten zu vermeiden, während die Daten in einem strukturierten Format für das spätere Einfügen gespeichert werden.
- C#
// Erstellen Sie ein Workbook-Objekt
Workbook wb = new Workbook();

// Laden Sie ein Excel-Dokument
wb.LoadFromFile("C:\\Users\\Administrator\\Desktop\\Input.xlsx");

// Holen Sie sich ein bestimmtes Blatt
Worksheet sheet = wb.Worksheets[0];

// Rufen Sie die Kopfzeilen ab
List<string> headers = new List<string>();
for (int col = 1; col <= sheet.LastColumn; col++)
{
    string header = sheet.Range[1, col].Value?.ToString();
    // Leerzeichen entfernen, um Konflikte mit MySQL-Spaltennamen zu vermeiden
    string cleanHeader = header?.Replace(" ", "");
    headers.Add($"`{cleanHeader}`");
}

// Rufen Sie die Daten ab
List<List<string>> data = new List<List<string>>();
for (int row = 2; row <= sheet.LastRow; row++) {
    List<string> record = new List<string>();
    for (int col = 1; col <= sheet.LastColumn; col++)
    {
        record.Add(sheet.Range[row, col].Value?.ToString() ?? string.Empty);
    }
    data.Add(record);
}
Schritt 4. Mit einer MySQL-Datenbank verbinden
Eine Verbindung zur MySQL-Datenbank wird über eine Verbindungszeichenfolge hergestellt, die Serverdetails, Anmeldeinformationen und den Namen der Zieldatenbank enthält. Die using-Anweisung stellt die ordnungsgemäße Freigabe von Ressourcen sicher.
- C#
string connectionString = "server=localhost;user=root;password=yourpassword;database=yourdatabase;";
using (MySqlConnection connection = new MySqlConnection(connectionString))
{
    connection.Open();
    // Die Verbindung ist hergestellt; führen Sie hier Datenbankoperationen durch
}
Schritt 5. Dynamisch eine Tabelle in MySQL erstellen
Dieser Schritt generiert dynamisch eine MySQL-Tabelle mit Spalten, die den Excel-Kopfzeilen entsprechen. Der Einfachheit halber werden alle Spalten als VARCHAR(255) festgelegt, aber die Datentypen können je nach Anforderungen angepasst werden.
- C#
// Erstellen Sie eine Tabelle mit dynamischen Spalten basierend auf den Kopfzeilen
List<string> columns = new List<string>();
foreach (string header in headers)
{
    // Annahme, dass alle Kopfzeilenwerte zur Vereinfachung VARCHAR sind; passen Sie die Typen nach Bedarf an
    columns.Add($"{header} VARCHAR(255)");
}

// Erstellen Sie eine Tabelle in der Datenbank
string columnsSql = string.Join(", ", columns);
string createTableQuery = $ @"
    CREATE TABLE IF NOT EXISTS my_table (
        id INT AUTO_INCREMENT PRIMARY KEY,
        {columnsSql}
)";

// Führen Sie die Abfrage zum Erstellen der Tabelle aus
using (MySqlCommand createCommand = new MySqlCommand(createTableQuery, connection))
{
    createCommand.ExecuteNonQuery();
}
Schritt 6. Die Tabelle mit Daten füllen
Die extrahierten Excel-Daten werden mithilfe parametrisierter Abfragen in die MySQL-Tabelle eingefügt, um SQL-Injection zu verhindern. Jede Zeile aus der Excel-Datei wird einem entsprechenden Datenbankdatensatz zugeordnet.
- C#
// Bereiten Sie die SQL-INSERT-Anweisung vor
string placeholders = string.Join(", ", new string[headers.Count].Select(h => "?"));
string insertQuery = $"INSERT INTO my_table ({string.Join(", ", headers.Select(h => h.Trim('`')))}) VALUES ({placeholders})";

// Fügen Sie Daten in die Tabelle ein
foreach (List<string> record in data)
{
    using (MySqlCommand insertCommand = new MySqlCommand(insertQuery, connection))
    {
        for (int i = 0; i < record.Count; i++)
        {
            insertCommand.Parameters.AddWithValue($" @2024\本地文件打包__20180302\Spire.Web\trunk\src\website\components\com_virtuemart\themes\default\templates\browse\includes\browse_searchparameter_form.tpl.php{i}", record[i]);
        }
        insertCommand.ExecuteNonQuery();
    }
}
Hier ist der vollständige Code zum Importieren von Daten aus einer Excel-Datei in eine MySQL-Tabelle:
- C#
using Spire.Xls;
using MySql.Data.MySqlClient;

namespace ExcelToMySQL
{
    class Program
    {
        static void Main(string[] args)
        {
            // Erstellen Sie ein Workbook-Objekt
            Workbook wb = new Workbook();

            // Laden Sie ein Excel-Dokument
            wb.LoadFromFile("C:\\Users\\Administrator\\Desktop\\Input.xlsx");

            // Holen Sie sich ein bestimmtes Blatt
            Worksheet sheet = wb.Worksheets[0];

            // Rufen Sie die Kopfzeilen ab
            List<string> headers = new List<string>();
            for (int col = 1; col <= sheet.LastColumn; col++)
            {
                string header = sheet.Range[1, col].Value?.ToString();
                // Leerzeichen entfernen, um Konflikte mit MySQL-Spaltennamen zu vermeiden
                string cleanHeader = header?.Replace(" ", "");
                headers.Add($"`{cleanHeader}`");
            }

            // Rufen Sie die Daten ab
            List<List<string>> data = new List<List<string>>();
            for (int row = 2; row <= sheet.LastRow; row++)
            {
                List<string> record = new List<string>();
                for (int col = 1; col <= sheet.LastColumn; col++)
                {
                    record.Add(sheet.Range[row, col].Value?.ToString() ?? string.Empty);
                }
                data.Add(record);
            }

            // Stellen Sie eine Verbindung zur MySQL-Datenbank her
            string connectionString = "server=localhost;user=root;password=admin;database=excel_db;";
            using (MySqlConnection connection = new MySqlConnection(connectionString))
            {
                connection.Open();

                // Erstellen Sie eine Tabelle mit dynamischen Spalten basierend auf den Kopfzeilen
                List<string> columns = new List<string>();
                foreach (string header in headers)
                {
                    // Annahme, dass alle Kopfzeilenwerte zur Vereinfachung VARCHAR sind; passen Sie die Typen nach Bedarf an
                    columns.Add($"{header} VARCHAR(255)");
                }

                // Erstellen Sie eine Tabelle in der Datenbank
                string columnsSql = string.Join(", ", columns);
                string createTableQuery = $ @"
                    CREATE TABLE IF NOT EXISTS my_table (
                        id INT AUTO_INCREMENT PRIMARY KEY,
                        {columnsSql}
                    )";

                // Führen Sie die Abfrage zum Erstellen der Tabelle aus
                using (MySqlCommand createCommand = new MySqlCommand(createTableQuery, connection))
                {
                    createCommand.ExecuteNonQuery();
                }

                // Bereiten Sie die SQL-INSERT-Anweisung vor
                string placeholders = string.Join(", ", new string[headers.Count].Select(h => "?"));
                string insertQuery = $"INSERT INTO my_table ({string.Join(", ", headers.Select(h => h.Trim('`')))}) VALUES ({placeholders})";

                // Fügen Sie Daten in die Tabelle ein
                foreach (List<string> record in data)
                {
                    using (MySqlCommand insertCommand = new MySqlCommand(insertQuery, connection))
                    {
                        for (int i = 0; i < record.Count; i++)
                        {
                            insertCommand.Parameters.AddWithValue($" @2024\本地文件打包__20180302\Spire.Web\trunk\src\website\components\com_virtuemart\themes\default\templates\browse\includes\browse_searchparameter_form.tpl.php{i}", record[i]);
                        }
                        insertCommand.ExecuteNonQuery();
                    }
                }
            }

            Console.WriteLine("Daten erfolgreich exportiert!");
        }
    }
}Ergebnis:
Fazit
Das Lesen von Excel-Dateien in C# war noch nie einfacher, dank Bibliotheken wie Spire.XLS. Dieser Leitfaden hat Sie durch den Prozess des Ladens von Excel-Dateien, des Lesens ihrer Inhalte und sogar des Imports der Daten in eine MySQL-Datenbank geführt. Mit diesen Techniken können Sie die Datenverarbeitungsfähigkeiten Ihrer Anwendungen erheblich verbessern.
FAQs
F1: Kann ich passwortgeschützte Excel-Dateien lesen?
A: Ja, Spire.XLS unterstützt das Lesen verschlüsselter Excel-Dateien mit:
- C#
wb.OpenPassword = "psd";
wb.LoadFromFile("file.xlsx");
F2: Wie lese ich Formelergebnisse anstelle der Formel selbst?
A: Sie haben zwei Möglichkeiten, Formelergebnisse abzurufen:
Für einzelne Zellen:
Prüfen Sie mit CellRange.HasFormula, ob eine Zelle eine Formel enthält, und rufen Sie den Wert mit CellRange.FormulaValue ab:
- C#
CellRange cell = sheet.Range[1, 1];
if (cell.HasFormula)
{
    string result = cell.FormulaValue.ToString();
}
Für den Massenexport in eine DataTable:
Verwenden Sie Worksheet.ExportDataTable() mit computedFormulaValue: true, um berechnete Werte zu exportieren:
- C#
DataTable data = sheet.ExportDataTable(range, exportColumnNames: true, computedFormulaValue: true);F3: Wie kann ich Excel-Daten in eine DataTable einlesen?
A: Verwenden Sie die von Spire.XLS bereitgestellte Methode Worksheet.ExportDataTable().
F4: Wie kann ich eine Excel-Datei zeilenweise lesen?
A: Beziehen Sie sich auf den folgenden Code:
- C#
Workbook workbook = new Workbook();
workbook.LoadFromFile("input.xlsx");
Worksheet sheet = workbook.Worksheets[0];

for (int row = 1; row <= sheet.LastRow; row++)
{
    for (int col = 1; col <= sheet.LastColumn; col++)
    {
        string cellValue = sheet.Range[row, col].Value?.ToString() ?? string.Empty;
        Console.WriteLine(cellValue);
    }
}
Holen Sie sich eine kostenlose Lizenz
Um die Funktionen von Spire.XLS für .NET ohne Evaluierungseinschränkungen vollständig zu erleben, können Sie eine kostenlose 30-Tage-Testlizenz anfordern.
Siehe auch
C# per leggere file Excel ed esportare dati in DataTable e database
Indice
Installa con Nuget
Install-Package Spire.XLS
Link Correlati
La lettura di file Excel in C# è un requisito comune per molte applicazioni, sia per l'analisi dei dati, la reportistica o l'integrazione di database. Sebbene sia possibile utilizzare le librerie Interop di Microsoft, esse presentano delle limitazioni (come la necessità che Excel sia installato). Esploreremo invece un approccio più efficiente utilizzando Spire.XLS, una libreria .NET che consente di leggere e scrivere file Excel senza Interop. Questo articolo tratta:
- Libreria C# .NET per Leggere Excel Senza Interop
- Come Leggere un File Excel in C#
- Leggere Dati Excel in una DataTable
- Leggere Dati Excel in un Database
- Conclusione
- Domande Frequenti
Libreria C# .NET per Leggere Excel Senza Interop
L'Interop di Excel di Microsoft richiede che Excel sia installato sulla macchina, rendendolo inadatto per le applicazioni lato server. Invece, librerie come Spire.XLS offrono una soluzione leggera e ad alte prestazioni senza dipendenze da Excel.
Perché usare Spire.XLS?
- Nessuna Installazione di Excel Richiesta – Funziona in modo indipendente.
- Supporta .NET Core e .NET Framework – Compatibilità multipiattaforma.
- Leggi/Scrivi File Excel – Supporta .xls, .xlsx e .xlsm.
- Importa in DataTable e Database – Integrazione perfetta con ADO.NET.
Installazione di Spire.XLS
Per iniziare, installa la libreria tramite il NuGet Package Manager:
Install-Package Spire.XLS
In alternativa, puoi scaricare Spire.XLS per .NET dal nostro sito ufficiale e fare riferimento manualmente al file DLL.
Come Leggere un File Excel in C#
Questa sezione dimostra come leggere un file Excel in C# utilizzando la libreria Spire.XLS. Il processo prevede il caricamento del file, l'accesso ai fogli di lavoro e il recupero programmatico dei valori delle celle. Ciò è utile per automatizzare l'estrazione dei dati, elaborare report di Excel o integrare i dati dei fogli di calcolo nelle applicazioni.
Passaggio 1. Importa lo Spazio dei Nomi Necessario
Per utilizzare la funzionalità di Spire.XLS, è necessario importare il suo spazio dei nomi. Ciò dà accesso a classi come Workbook e Worksheet, che sono essenziali per le operazioni sui file Excel.
- C#
using Spire.Xls;Passaggio 2. Carica un File Excel
Per caricare un file Excel, crea un oggetto Workbook e chiama il metodo LoadFromFile. Questo legge il file in memoria, consentendo ulteriori manipolazioni.
- C#
Workbook wb = new Workbook();
wb.LoadFromFile("input.xlsx");
Passaggio 3. Ottieni un Foglio di Lavoro Specifico
I file Excel possono contenere più fogli di lavoro. È possibile accedere a un foglio specifico indicizzando la raccolta Worksheets (in base zero). Il primo foglio si trova all'indice 0, il secondo all'1, e così via.
- C#
Worksheet sheet = wb.Worksheets[0]; //Primo foglioPassaggio 4. Recupera il Valore di una Cella Specifica
Per recuperare il valore di una cella, utilizzare la proprietà CellRange.Value. Specificare gli indici di riga e colonna (a partire da 1) per individuare la cella. Ciò è utile per estrarre dati strutturati come intestazioni o record individuali.
- C#
CellRange cell = sheet.Range[1, 1]; // Riga 1, Colonna 1 (A1)
string value = cell.Value;
Di seguito è riportato un esempio completo di lettura dei dati da un intero foglio di lavoro e della loro stampa sulla console:
- C#
using Spire.Xls;

namespace ReadExcelData
{
    class Program
    {
        static void Main(string[] args)
        {
            // Crea un oggetto Workbook
            Workbook wb = new Workbook();

            // Carica un file Excel esistente
            wb.LoadFromFile("C:\\Users\\Administrator\\Desktop\\Input.xlsx");

            // Ottieni il primo foglio di lavoro
            Worksheet sheet = wb.Worksheets[0];

            // Ottieni l'intervallo di celle contenente i dati
            CellRange locatedRange = sheet.AllocatedRange;

            // Itera attraverso le righe
            for (int i = 0; i < locatedRange.Rows.Length; i++)
            {
                // Itera attraverso le colonne
                for (int j = 0; j < locatedRange.Rows[i].ColumnCount; j++)
                {
                    // Ottieni i dati di una cella specifica
                    string cellValue = locatedRange[i + 1, j + 1].Value?.ToString() ?? "N/A";

                    // Allinea l'output con una larghezza di 22
                    Console.Write($"{cellValue,-22}");
                }
                Console.WriteLine();
            }
        }
    }
}
Risultato:
Leggi i Dati di Excel in una DataTable
L'esportazione dei dati di Excel in una DataTable consente un'integrazione perfetta con i controlli dell'interfaccia utente come DataGridView o l'elaborazione dei dati di backend. Spire.XLS semplifica questo processo con il suo metodo integrato ExportDataTable(), che converte automaticamente i dati del foglio di lavoro in una DataTable strutturata preservando le intestazioni delle colonne e i tipi di dati.
Passaggio 1. Importa lo Spazio dei Nomi Necessario
Includi lo spazio dei nomi Spire.XLS per accedere alle classi essenziali.
- C#
using Spire.Xls;Passaggio 2. Crea un Modulo e un Evento Click del Pulsante
Crea un modulo (ad es. Form1) e aggiungi un pulsante con un gestore di eventi per la lettura del file Excel.
- C#
public partial class Form1 : Form
{
    public Form1()
    {
        InitializeComponent();
    }

    private void button1_Click(object sender, EventArgs e)
    {
        // Il codice andrà qui
    }
}
Passaggio 3. Carica la Cartella di Lavoro
All'interno dell'evento click del pulsante, crea un oggetto Workbook e carica il file Excel.
- C#
Workbook wb = new Workbook();
wb.LoadFromFile("C:\\Users\\Administrator\\Desktop\\Input.xlsx");
Passaggio 4. Esporta i Dati in DataTable
Accedi a un foglio di lavoro specifico tramite il suo indice ed esporta i suoi dati in una DataTable utilizzando il metodo ExportDataTable.
- C#
DataTable dataTable = wb.Worksheets[0].ExportDataTable();Passaggio 5. Associa i Dati a DataGridView
Supponendo di avere un controllo DataGridView sul modulo, associa la DataTable al DataGridView per visualizzare i dati.
- C#
dataGridView1.DataSource = dataTable;Di seguito è riportato il codice completo per leggere i dati da un file Excel in una DataTable e visualizzarli in un controllo DataGridView di Windows Forms:
- C#
using Spire.Xls;
using System.Data;

namespace ReadExcelIntoDataTable
{
    public partial class Form1 : Form
    {
        public Form1()
        {
            InitializeComponent();
        }

        private void button1_Click(object sender, EventArgs e)
        {
            // Crea un oggetto Workbook
            Workbook wb = new Workbook();

            // Carica un file Excel esistente
            wb.LoadFromFile("C:\\Users\\Administrator\\Desktop\\Input.xlsx");

            // Ottieni il primo foglio di lavoro
            Worksheet sheet = wb.Worksheets[0];

            // Esporta i dati dal foglio di lavoro in una DataTable
            DataTable dataTable = sheet.ExportDataTable();

            // Associa la DataTable a DataGridView
            dataGridView1.DataSource = dataTable;

            // Rilascia le risorse
            wb.Dispose();
        }
    }
}Risultato:
Leggi i Dati di Excel in un Database
L'integrazione dei dati di Excel con un database può semplificare la gestione dei dati. Di seguito, illustreremo il processo di lettura di un file Excel e di importazione del suo contenuto in un database MySQL. Questo metodo è ideale per automatizzare la migrazione dei dati, la creazione di report o la sincronizzazione dei dati di Excel con un database strutturato.
Passaggio 1. Installa la Libreria Dati MySQL
Per interagire con i database MySQL nelle tue applicazioni .NET, dovrai installare la libreria MySql.Data. Questo pacchetto NuGet fornisce le classi e i metodi necessari per connettersi e manipolare i database MySQL.
- C#
Install-Package MySql.DataPassaggio 2. Importa gli Spazi dei Nomi Necessari
Prima di lavorare con file Excel e MySQL, è necessario includere gli spazi dei nomi richiesti. Spire.XLS viene utilizzato per le operazioni su Excel, mentre MySql.Data.MySqlClient abilita la connettività al database MySQL.
- C#
using Spire.Xls;
using MySql.Data.MySqlClient;
Passaggio 3. Estrai Intestazioni e Dati da Excel
Il seguente frammento di codice dimostra come estrarre intestazioni e dati dal file Excel. Le intestazioni vengono pulite per evitare conflitti di denominazione delle colonne MySQL, mentre i dati vengono archiviati in un formato strutturato per un inserimento successivo.
- C#
// Crea un oggetto Workbook
Workbook wb = new Workbook();

// Carica un documento Excel
wb.LoadFromFile("C:\\Users\\Administrator\\Desktop\\Input.xlsx");

// Ottieni un foglio specifico
Worksheet sheet = wb.Worksheets[0];

// Recupera intestazioni
List<string> headers = new List<string>();
for (int col = 1; col <= sheet.LastColumn; col++)
{
    string header = sheet.Range[1, col].Value?.ToString();
    // Rimozione degli spazi per evitare conflitti con i nomi delle colonne MySQL
    string cleanHeader = header?.Replace(" ", "");
    headers.Add($"`{cleanHeader}`");
}

// Recupera dati
List<List<string>> data = new List<List<string>>();
for (int row = 2; row <= sheet.LastRow; row++) {
    List<string> record = new List<string>();
    for (int col = 1; col <= sheet.LastColumn; col++)
    {
        record.Add(sheet.Range[row, col].Value?.ToString() ?? string.Empty);
    }
    data.Add(record);
}
Passaggio 4. Connettiti a un Database MySQL
Viene stabilita una connessione al database MySQL utilizzando una stringa di connessione, che include i dettagli del server, le credenziali e il nome del database di destinazione. L'istruzione using garantisce il corretto smaltimento delle risorse.
- C#
string connectionString = "server=localhost;user=root;password=yourpassword;database=yourdatabase;";
using (MySqlConnection connection = new MySqlConnection(connectionString))
{
    connection.Open();
    // La connessione è stabilita; eseguire qui le operazioni sul database
}
Passaggio 5. Crea Dinamicamente una Tabella in MySQL
Questo passaggio genera dinamicamente una tabella MySQL con colonne corrispondenti alle intestazioni di Excel. Per semplicità, tutte le colonne sono impostate come VARCHAR(255), ma i tipi di dati possono essere regolati in base ai requisiti.
- C#
// Crea una tabella con colonne dinamiche basate sulle intestazioni
List<string> columns = new List<string>();
foreach (string header in headers)
{
    // Supponendo che tutti i valori di intestazione siano VARCHAR per semplicità; regolare i tipi secondo necessità
    columns.Add($"{header} VARCHAR(255)");
}

// Crea una tabella nel database
string columnsSql = string.Join(", ", columns);
string createTableQuery = $ @"
    CREATE TABLE IF NOT EXISTS my_table (
        id INT AUTO_INCREMENT PRIMARY KEY,
        {columnsSql}
)";

// Esegui la query di creazione della tabella
using (MySqlCommand createCommand = new MySqlCommand(createTableQuery, connection))
{
    createCommand.ExecuteNonQuery();
}
Passaggio 6. Popola la Tabella con i Dati
I dati Excel estratti vengono inseriti nella tabella MySQL utilizzando query con parametri per prevenire l'iniezione di SQL. Ogni riga del file Excel viene mappata a un record di database corrispondente.
- C#
// Prepara l'istruzione SQL INSERT
string placeholders = string.Join(", ", new string[headers.Count].Select(h => "?"));
string insertQuery = $"INSERT INTO my_table ({string.Join(", ", headers.Select(h => h.Trim('`')))}) VALUES ({placeholders})";

// Inserisci i dati nella tabella
foreach (List<string> record in data)
{
    using (MySqlCommand insertCommand = new MySqlCommand(insertQuery, connection))
    {
        for (int i = 0; i < record.Count; i++)
        {
            insertCommand.Parameters.AddWithValue($" @2024\本地文件打包__20180302\Spire.Web\trunk\src\website\components\com_virtuemart\themes\default\templates\browse\includes\browse_searchparameter_form.tpl.php{i}", record[i]);
        }
        insertCommand.ExecuteNonQuery();
    }
}
Ecco il codice completo per importare i dati da un file Excel in una tabella MySQL:
- C#
using Spire.Xls;
using MySql.Data.MySqlClient;

namespace ExcelToMySQL
{
    class Program
    {
        static void Main(string[] args)
        {
            // Crea un oggetto Workbook
            Workbook wb = new Workbook();

            // Carica un documento Excel
            wb.LoadFromFile("C:\\Users\\Administrator\\Desktop\\Input.xlsx");

            // Ottieni un foglio specifico
            Worksheet sheet = wb.Worksheets[0];

            // Recupera intestazioni
            List<string> headers = new List<string>();
            for (int col = 1; col <= sheet.LastColumn; col++)
            {
                string header = sheet.Range[1, col].Value?.ToString();
                // Rimozione degli spazi per evitare conflitti con i nomi delle colonne MySQL
                string cleanHeader = header?.Replace(" ", "");
                headers.Add($"`{cleanHeader}`");
            }

            // Recupera dati
            List<List<string>> data = new List<List<string>>();
            for (int row = 2; row <= sheet.LastRow; row++)
            {
                List<string> record = new List<string>();
                for (int col = 1; col <= sheet.LastColumn; col++)
                {
                    record.Add(sheet.Range[row, col].Value?.ToString() ?? string.Empty);
                }
                data.Add(record);
            }

            // Stabilisci una connessione al database MySQL
            string connectionString = "server=localhost;user=root;password=admin;database=excel_db;";
            using (MySqlConnection connection = new MySqlConnection(connectionString))
            {
                connection.Open();

                // Crea una tabella con colonne dinamiche basate sulle intestazioni
                List<string> columns = new List<string>();
                foreach (string header in headers)
                {
                    // Supponendo che tutti i valori di intestazione siano VARCHAR per semplicità; regolare i tipi secondo necessità
                    columns.Add($"{header} VARCHAR(255)");
                }

                // Crea una tabella nel database
                string columnsSql = string.Join(", ", columns);
                string createTableQuery = $ @"
                    CREATE TABLE IF NOT EXISTS my_table (
                        id INT AUTO_INCREMENT PRIMARY KEY,
                        {columnsSql}
                    )";

                // Esegui la query di creazione della tabella
                using (MySqlCommand createCommand = new MySqlCommand(createTableQuery, connection))
                {
                    createCommand.ExecuteNonQuery();
                }

                // Prepara l'istruzione SQL INSERT
                string placeholders = string.Join(", ", new string[headers.Count].Select(h => "?"));
                string insertQuery = $"INSERT INTO my_table ({string.Join(", ", headers.Select(h => h.Trim('`')))}) VALUES ({placeholders})";

                // Inserisci i dati nella tabella
                foreach (List<string> record in data)
                {
                    using (MySqlCommand insertCommand = new MySqlCommand(insertQuery, connection))
                    {
                        for (int i = 0; i < record.Count; i++)
                        {
                            insertCommand.Parameters.AddWithValue($" @2024\本地文件打包__20180302\Spire.Web\trunk\src\website\components\com_virtuemart\themes\default\templates\browse\includes\browse_searchparameter_form.tpl.php{i}", record[i]);
                        }
                        insertCommand.ExecuteNonQuery();
                    }
                }
            }

            Console.WriteLine("Dati esportati con successo!");
        }
    }
}Risultato:
Conclusione
Leggere file Excel in C# non è mai stato così facile, grazie a librerie come Spire.XLS. Questa guida ti ha illustrato il processo di caricamento dei file Excel, la lettura del loro contenuto e persino l'importazione dei dati in un database MySQL. Con queste tecniche, puoi migliorare notevolmente le capacità di gestione dei dati delle tue applicazioni.
Domande Frequenti
D1: Posso leggere file Excel protetti da password?
R: Sì, Spire.XLS supporta la lettura di file Excel crittografati utilizzando:
- C#
wb.OpenPassword = "psd";
wb.LoadFromFile("file.xlsx");
D2: Come posso leggere i risultati delle formule invece della formula stessa?
R: Hai due opzioni per recuperare i risultati delle formule:
Per singole celle:
Verifica se una cella contiene una formula usando CellRange.HasFormula e ottieni il valore con CellRange.FormulaValue:
- C#
CellRange cell = sheet.Range[1, 1];
if (cell.HasFormula)
{
    string result = cell.FormulaValue.ToString();
}
Per l'esportazione di massa in DataTable:
Usa Worksheet.ExportDataTable() con computedFormulaValue: true per esportare i valori calcolati:
- C#
DataTable data = sheet.ExportDataTable(range, exportColumnNames: true, computedFormulaValue: true);D3: Come posso leggere i dati di Excel in una DataTable?
R: Usa il metodo Worksheet.ExportDataTable() fornito da Spire.XLS.
D4: Come posso leggere un file Excel riga per riga?
R: Fare riferimento al seguente codice:
- C#
Workbook workbook = new Workbook();
workbook.LoadFromFile("input.xlsx");
Worksheet sheet = workbook.Worksheets[0];

for (int row = 1; row <= sheet.LastRow; row++)
{
    for (int col = 1; col <= sheet.LastColumn; col++)
    {
        string cellValue = sheet.Range[row, col].Value?.ToString() ?? string.Empty;
        Console.WriteLine(cellValue);
    }
}
Ottieni una Licenza Gratuita
Per sperimentare appieno le funzionalità di Spire.XLS per .NET senza alcuna limitazione di valutazione, puoi richiedere una licenza di prova gratuita di 30 giorni.
Vedi Anche
Python: Add or Remove Sections in PowerPoint
In PowerPoint, sections are a powerful tool for organizing and managing slides. By dividing slides into different sections, you can better organize content, navigate through your presentation, and present information in a more structured manner. This article will demonstrate how to add and remove sections in a PowerPoint presentation using Spire.Presentation for Python.
- Add a Section at the End of a PowerPoint
- Insert a Section Before a Specified Section
- Add a Section Before a Specified Slide in PowerPoint
- Remove a Section from a PowerPoint
Install Spire.PDF for Python
This scenario requires Spire.Presentation for Python and plum-dispatch v1.7.4. They can be easily installed in your Windows through the following pip command.
pip install Spire.Presentation
If you are unsure how to install, please refer to this tutorial: How to Install Spire.Presentation for Python on Windows
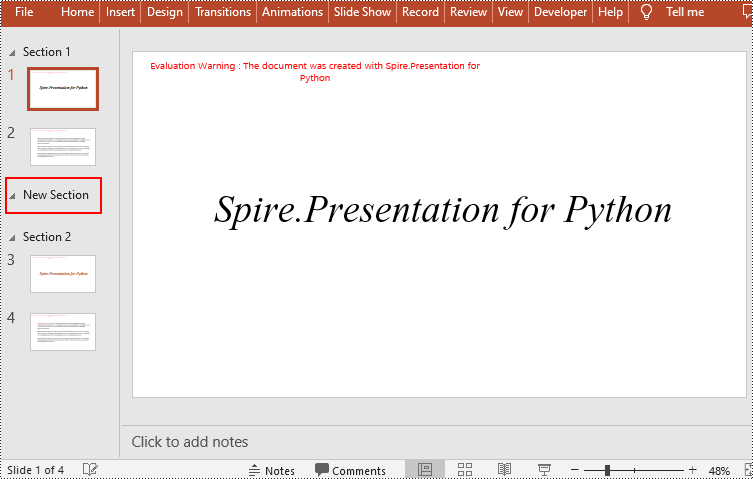
Add a Section at the End of a PowerPoint in Python
Spire.Presentation for Python provides the Presentation.SectionList.Append(section_name) method to add a section at the end of a presentation. Here are the specific steps to perform this operation:
- Create a Presentation class instance.
- Load a PowerPoint document using Presentation.LoadFromFile() method.
- Add a section at the end using the Presentation.SectionList.Append() method.
- Save the document using Presentation.SaveToFile() method.
- Python
from spire.presentation.common import *
from spire.presentation import *

# Create a new presentation object
presentation = Presentation()

# Load a sample PowerPoint presentation
presentation.LoadFromFile("sample.pptx")

# Append a new section
presentation.SectionList.Append("New Section")

# Save the presentation
presentation.SaveToFile("AddSection.pptx", FileFormat.Pptx2013)

# Dispose of the presentation object
presentation.Dispose()
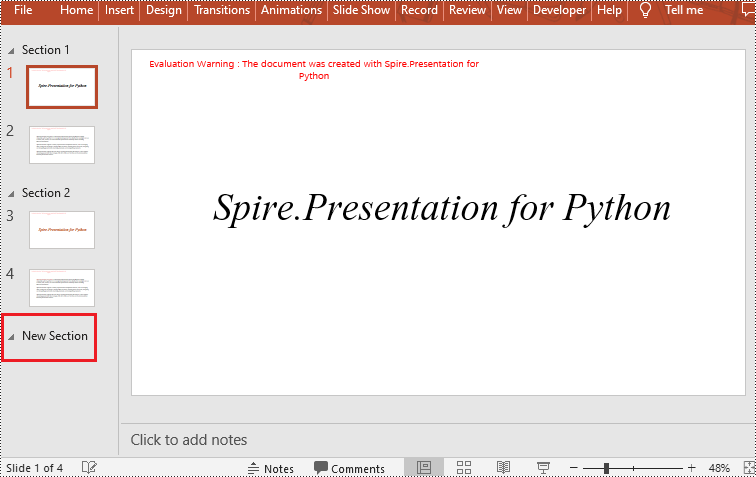
Insert a Section Before a Specified Section in Python
You can also use the Presentation.SectionList.Insert(index, section_name) method to insert a new section before a specific section. Here are the detailed steps:
- Create a Presentation class instance.
- Load a PowerPoint document using Presentation.LoadFromFile() method.
- Insert a new section before a specific section using the Presentation.SectionList.Insert() method, where index is the position of the specific section.
- Save the document using Presentation.SaveToFile() method.
- Python
from spire.presentation.common import *
from spire.presentation import *

# Create a new presentation object
presentation = Presentation()

# Load a sample PowerPoint presentation
presentation.LoadFromFile("sample.pptx")

# Insert a new section before the second section
presentation.SectionList.Insert(1," New Section")

# Save the presentation
presentation.SaveToFile("AddSection.pptx", FileFormat.Pptx2013)

# Dispose of the presentation object
presentation.Dispose()
Add a Section Before a Specified Slide in Python
You can also use the Presentation.SectionList.Add(section_name, slide) method to insert a new section before a specific slide. Here are the detailed steps:
- Create a Presentation class instance.
- Load a PowerPoint document using Presentation.LoadFromFile() method.
- Insert a new section before a specific slide using the Presentation.SectionList.Add() method
- Save the document using Presentation.SaveToFile() method.
- Python
from spire.presentation.common import *
from spire.presentation import *

# Create a new presentation object
presentation = Presentation()

# Load a sample PowerPoint presentation
presentation.LoadFromFile("sample.pptx")

# Get the second slide
slide=presentation.Slides[1]

# Add a new section before the second slide
presentation.SectionList.Add("New Section",slide)

# Save the presentation
presentation.SaveToFile("AddSection.pptx", FileFormat.Pptx2013)

# Dispose of the presentation object
presentation.Dispose()
Remove a Section from a PowerPoint in Python
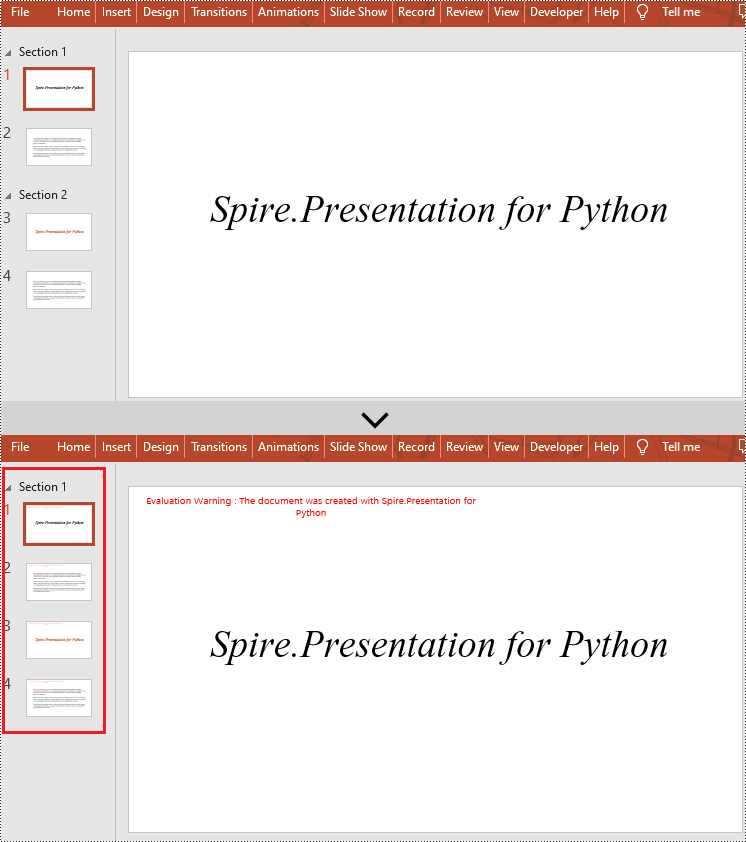
If you don't need a specific section, you can simply remove it using the Presentation.SectionList.RemoveAt(index_to_remove) method. Please note that removing a section does not delete the slides within that section. Here are the steps to delete a specific section while preserving its slides:
- Create a Presentation class instance.
- Load a PowerPoint document using Presentation.LoadFromFile() method.
- Remove a specific section using the Presentation.SectionList.RemoveAt(index_to_remove) method, which takes an integer index as a parameter. You can also remove all sections using the Presentation.Slides.RemoveAll() method.
- Save the document using Presentation.SaveToFile() method.
- Python
from spire.presentation.common import *
from spire.presentation import *

# Create a new presentation object
presentation = Presentation()

# Load a sample PowerPoint presentation
presentation.LoadFromFile("sample.pptx")

# Remove the second section
presentation.SectionList.RemoveAt(1)

# # Remove all sections
# presentation.SectionList.RemoveAll()

# Save the presentation
presentation.SaveToFile("RemoveSection.pptx", FileFormat.Pptx2013)

# Dispose of the presentation object
presentation.Dispose()
Apply for a Temporary License
If you'd like to remove the evaluation message from the generated documents, or to get rid of the function limitations, please request a 30-day trial license for yourself.
Python: Attach Files to a PDF Document
By incorporating supplemental resources directly into the PDF, it consolidates all relevant information in a single file, making it easier to organize, share, and archive. This feature enables users to seamlessly share supporting documents, images, or multimedia elements, eliminating the need for separate file transfers or external links. It streamlines communication, improves efficiency, and ensures that recipients have convenient access to all the necessary resources within the PDF itself. In this article, you will learn how to attach files to a PDF document in Python with the help of Spire.PDF for Python.
Install Spire.PDF for Python
This scenario requires Spire.PDF for Python and plum-dispatch v1.7.4. They can be easily installed in your Windows through the following pip command.
pip install Spire.PDF
If you are unsure how to install, please refer to this tutorial: How to Install Spire.PDF for Python on Windows
Background Knowledge
There are generally two types of attachments in PDF, namely document level attachment and annotation attachment. Both are supported by Spire.PDF for Python. The table below lists the differences between them.
| Attachment type | Represented by | Definition |
| Document level attachment | PdfAttachment class | A file attached to a PDF at the document level won't appear on a page, but can be viewed in the "Attachments" panel of a PDF reader. |
| Annotation attachment | PdfAnnotationAttachment class | A file attached as an annotation can be found on a page or in the "Attachment" panel. An Annotation attachment is shown as a paper clip icon on the page; reviewers can double-click the icon to open the file. |
Attach Files to a PDF Document in Python
To attach files to PDFs at the document level, you first need to create a PdfAttachment object based on an external file, and then you can add it to a PDF document using the PdfDocument.Attachments.Add() method. The following are the detailed steps.
- Create a PdfDocument object.
- Load a PDF document using PdfDocument.LoadFromFile() method.
- Create a PdfAttachment object based on an external file.
- Add the attachment to the document using PdfDocument.Attachments.Add() method.
- Save the document to a different PDF file using PdfDocument.SaveToFile() method.
- Python
from spire.pdf import *
from spire.pdf.common import *
# Create a PdfDocument object
doc = PdfDocument()
# Load a sample PDF file
doc.LoadFromFile("C:\\Users\\Administrator\\Desktop\\Input.pdf")
# Create PdfAttachment objects based on external files
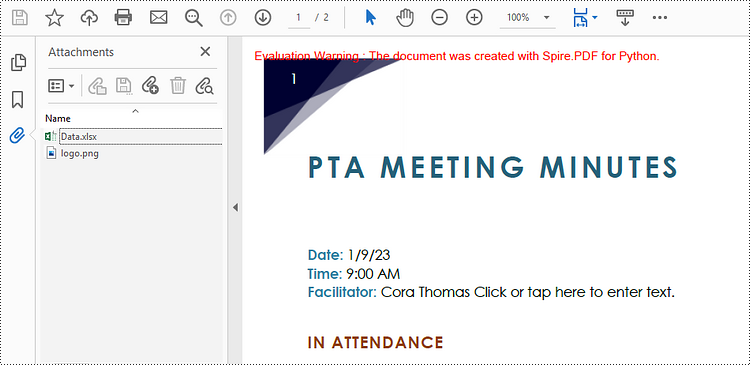
attachment_one = PdfAttachment("C:\\Users\\Administrator\\Desktop\\Data.xlsx")
attachment_two = PdfAttachment("C:\\Users\\Administrator\\Desktop\\logo.png")
# Add the attachments to PDF
doc.Attachments.Add(attachment_one)
doc.Attachments.Add(attachment_two)
# Save to file
doc.SaveToFile("output/Attachment.pdf")
Attach Files as Annotations in PDF in Python
An annotation attachment is represented by the PdfAttachmentAnnotation class. Create an instance of this class, specify its attributes such as bounds, flag and text, and then add it to a specified page using the PdfPageBase.AnnotationsWidget.Add() method.
Below are the steps to attach files as annotations in PDF using Spire.PDF for Python.
- Create a PdfDocument object.
- Load a PDF document using PdfDocument.LoadFromFile() method.
- Get a specific page to add annotation through PdfDocument.Pages[] property.
- Create a PdfAttachmentAnnotation object based on an external file.
- Add the annotation attachment to the page using PdfPageBase.AnnotationsWidget.Add() method.
- Save the document to a different PDF file using PdfDocument.SaveToFile() method.
- Python
from spire.pdf import *
from spire.pdf.common import *
# Create a PdfDocument object
doc = PdfDocument()
# Load a sample PDF file
doc.LoadFromFile("C:\\Users\\Administrator\\Desktop\\Input.pdf")
# Get a specific page
page = doc.Pages.get_Item(1)
# Draw a string on PDF
str = ""Here is the report:""
font = PdfTrueTypeFont(""Times New Roman"", 16.0, PdfFontStyle.Bold, True)
x = 50.0
y = doc.Pages.get_Item(0).ActualSize.Height - 300.0
page.Canvas.DrawString(str, font, PdfBrushes.get_Blue(), x, y)
# Create a PdfAttachmentAnnotation object based on an external file
data = Stream("C:\\Users\\Administrator\\Desktop\\Data.xlsx")
size = font.MeasureString(str);
bounds = RectangleF((x + size.Width + 5.0), y, 10.0, 15.0)
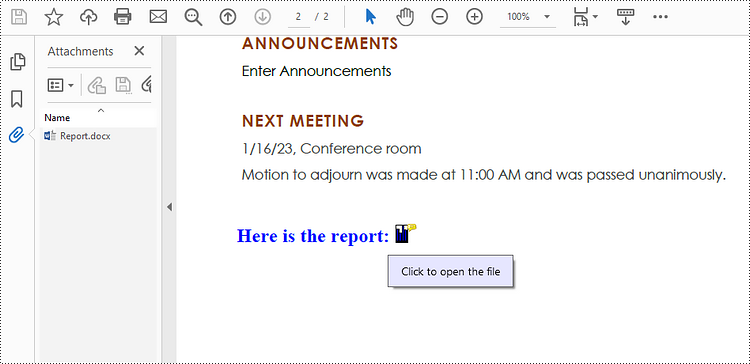
annotation = PdfAttachmentAnnotation(bounds, "Report.docx", data);
# Set color, flag, icon and text of the annotation
annotation.Color = PdfRGBColor(Color.get_Blue())
annotation.Flags = PdfAnnotationFlags.Default
annotation.Icon = PdfAttachmentIcon.Graph
annotation.Text = "Click to open the file"
# Add the attachment annotation to PDF
page.AnnotationsWidget.Add(annotation)
# Save to file
doc.SaveToFile("output/AnnotationAttachment.pdf")
Apply for a Temporary License
If you'd like to remove the evaluation message from the generated documents, or to get rid of the function limitations, please request a 30-day trial license for yourself.
Python: Split a PDF Page into Multiple Pages
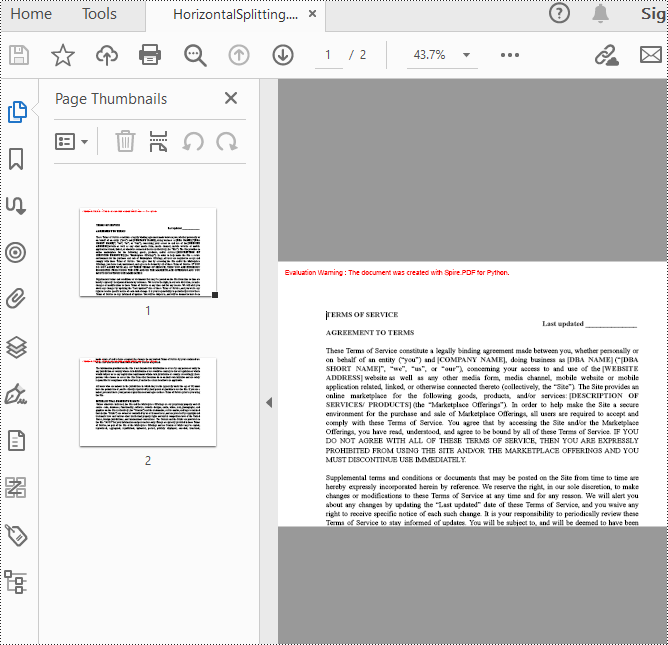
Sometimes, when dealing with PDF documents, there is a need to split a page into different sections based on content or layout. For instance, splitting a mixed-layout page with both horizontal and vertical content into two separate parts. This type of splitting is not commonly available in basic PDF management functions but can be important for academic papers, magazine ads, or mixed-layout designs. This article explains how to use Spire.PDF for Python to perform horizontal or vertical PDF page splitting.
Install Spire.PDF for Python
This scenario requires Spire.PDF for Python and plum-dispatch v1.7.4. They can be easily installed in your Windows through the following pip command.
pip install Spire.PDF
If you are unsure how to install, please refer to this tutorial: How to Install Spire.PDF for Python on Windows
Split PDF Page Horizontally or Vertically with Python
Spire.PDF for Python not only supports splitting a PDF document into multiple PDF documents, but also allows splitting a specific page within a PDF into two or more pages. Here are the detailed steps to split a page:
- Create an instance of the PdfDocument class.
- Load the source PDF document using the PdfDocument.LoadFromFile() method.
- Retrieve the page(s) to be split using PdfDocument.Pages[].
- Create a new PDF document and set its page margins to 0.
- Set the width or height of the new document to half of the source document.
- Add a page to the new PDF document using the PdfDocument.Pages.Add() method.
- Create a template for the source document's page using the PdfPageBase.CreateTemplate() method.
- Draw the content of the source page onto the new page using the PdfTemplate.Draw() method.
- Save the split document using the PdfDocument.SaveToFile() method.
- Python
from spire.pdf.common import *
from spire.pdf import *

# Create a PdfDocument object
pdf = PdfDocument()

# Load the PDF document
pdf.LoadFromFile("Terms of service.pdf")

# Get the first page
page = doc.Pages.get_Item(0)

# Create a new PDF document and remove the page margins
newpdf = PdfDocument()
newpdf.PageSettings.Margins.All=0

# Horizontal splitting: Set the width of the new document's page to be the same as the width of the first page of the original document, and the height to half of the first page's height
newpdf.PageSettings.Width=page.Size.Width
newpdf.PageSettings.Height=page.Size.Height/2

'''
# Vertical splitting: Set the width of the new document's page to be half of the width of the first page of the original document, and the height to the same as the first page's height
newpdf.PageSettings.Width=page.Size.Width/2
newpdf.PageSettings.Height=page.Size.Height
'''

# Add a new page to the new PDF document
newPage = newpdf.Pages.Add()

# Set the text layout format
format = PdfTextLayout()
format.Break=PdfLayoutBreakType.FitPage
format.Layout=PdfLayoutType.Paginate

# Create a template based on the first page of the original document and draw it onto the new page of the new document, automatically paginating when the page is filled
page.CreateTemplate().Draw(newPage, PointF(0.0, 0.0), format)

# Save the document
newpdf.SaveToFile("HorizontalSplitting.pdf")

# Close the objects
newpdf.Close()
pdf.Close()
The result of horizontal splitting is as follows:
The result of vertical splitting is as follows:
Apply for a Temporary License
If you'd like to remove the evaluation message from the generated documents, or to get rid of the function limitations, please request a 30-day trial license for yourself.
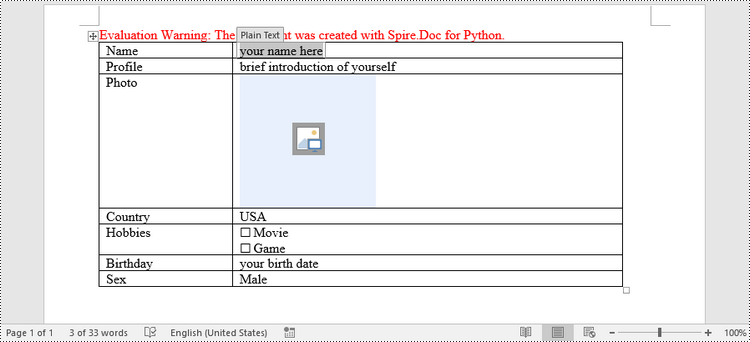
Python: Create a Fillable Form in Word
Creating a fillable form in Word allows you to design a document that can be easily completed and customized by others. Whether you need to collect information, gather feedback, or create an interactive document, fillable forms provide a convenient way to capture data electronically. By adding various elements such as text fields, checkboxes, dropdown menus, and more, you can tailor the form to your specific requirements.
To create a fillable form in Word, you probably need to use the following tools.
- Content Controls: The areas where users input information in a form.
- Tables: Tables are used in forms to align text and form fields, and to create borders and boxes.
- Protection: Allows users to populate fields but not to make changes to the rest of the document.
In Word, content controls serve as containers for structured documents, allowing users to organize content within a document. Word 2013 provides ten types of content controls. This article introduces how to create a fillable form in Word that includes the following seven commonly-used content controls using Spire.Doc for Python.
| Content Control | Description |
| Plain Text | A text field limited to plain text, so no formatting can be included. |
| Rich Text | A text field that can contain formatted text or other items, such as tables, pictures, or other content controls. |
| Picture | Accepts a single picture. |
| Drop-Down List | A drop-down list displays a predefined list of items for the user to choose from. |
| Combo Box | A combo box enables users to select a predefined value in a list or type their own value in the text box of the control. |
| Check Box | A check box provides a graphical widget that allows the user to make a binary choice: yes (checked) or no (not checked). |
| Date Picker | Contains a calendar control from which the user can select a date. |
Install Spire.Doc for Python
This scenario requires Spire.Doc for Python and plum-dispatch v1.7.4. They can be easily installed in your Windows through the following pip command.
pip install Spire.Doc
If you are unsure how to install, please refer to this tutorial: How to Install Spire.Doc for Python on Windows
Create a Fillable Form in Word in Python
Spire.Doc for Python offers the StructureDocumentTagInline class, which is utilized to generate structured document tags within a paragraph. By utilizing the SDTProperties property and SDTContent property of this class, one can define the properties and content of the current structured document tag. Below are the step-by-step instructions for creating a fill form in a Word document in Python.
- Create a Document object.
- Add a section using Document.AddSection() method.
- Add a table using Section.AddTable() method.
- Add a paragraph to a specific table cell using TableCell.AddParagraph() method.
- Create an instance of StructureDocumentTagInline class, and add it to the paragraph as a child object using Paragraph.ChildObjects.Add() method.
- Specify the type, content and other attributes of the structured document tag through the SDTProperties property and the SDTContent property of the StructureDocumentTagInline object.
- Prevent users from editing content outside form fields using Document.Protect() method.
- Save the document using Document.SaveToFile() method.
- Python
from spire.doc import *
from spire.doc.common import *

# Create a Document object
doc = Document()

# Add a section
section = doc.AddSection()

# Add a table
table = section.AddTable(True)
table.ResetCells(7, 2)
table.SetColumnWidth(0, 120, CellWidthType.Point)
table.SetColumnWidth(1, 350, CellWidthType.Point)

# Add text to the cells of the first column
paragraph = table.Rows.get_Item(0).Cells.get_Item(0).AddParagraph()
paragraph.AppendText("Name")
paragraph = table.Rows[1].Cells[0].AddParagraph()
paragraph.AppendText("Profile")
paragraph = table.Rows[2].Cells[0].AddParagraph()
paragraph.AppendText("Photo")
paragraph = table.Rows[3].Cells[0].AddParagraph()
paragraph.AppendText("Country")
paragraph = table.Rows[4].Cells[0].AddParagraph()
paragraph.AppendText("Hobbies")
paragraph = table.Rows[5].Cells[0].AddParagraph()
paragraph.AppendText("Birthday")
paragraph = table.Rows[6].Cells[0].AddParagraph()
paragraph.AppendText("Sex")

# Add a plain text content control to the cell (0,1)
paragraph = table.Rows[0].Cells[1].AddParagraph()
sdt = StructureDocumentTagInline(doc)
paragraph.ChildObjects.Add(sdt)
sdt.SDTProperties.SDTType = SdtType.Text
sdt.SDTProperties.Alias = "Plain Text"
sdt.SDTProperties.Tag = "Plain Text"
sdt.SDTProperties.IsShowingPlaceHolder = True
text = SdtText(True)
text.IsMultiline = False
sdt.SDTProperties.ControlProperties = text
textRange = TextRange(doc)
textRange.Text = "your name here"
sdt.SDTContent.ChildObjects.Add(textRange)

# Add a rich text content control to the cell (1,1)
paragraph = table.Rows[1].Cells[1].AddParagraph()
sdt = StructureDocumentTagInline(doc)
paragraph.ChildObjects.Add(sdt)
sdt.SDTProperties.SDTType = SdtType.RichText
sdt.SDTProperties.Alias = "Rich Text"
sdt.SDTProperties.Tag = "Rich Text"
sdt.SDTProperties.IsShowingPlaceHolder = True
text = SdtText(True)
text.IsMultiline = False
sdt.SDTProperties.ControlProperties = text
textRange = TextRange(doc)
textRange.Text = "brief introduction of yourself"
sdt.SDTContent.ChildObjects.Add(textRange )

# Add a picture content control to the cell (2,1)
paragraph = table.Rows[2].Cells[1].AddParagraph()
sdt = StructureDocumentTagInline(doc)
paragraph.ChildObjects.Add(sdt)
sdt.SDTProperties.SDTType = SdtType.Picture
sdt.SDTProperties.Alias = "Picture"
sdt.SDTProperties.Tag = "Picture"
sdtPicture = SdtPicture(True)
sdt.SDTProperties.ControlProperties = sdtPicture
pic = DocPicture(doc)
pic.LoadImage("C:\\Users\\Administrator\\Desktop\\placeHolder.png")
sdt.SDTContent.ChildObjects.Add(pic)

# Add a dropdown list content control to the cell (3,1)
paragraph = table.Rows[3].Cells[1].AddParagraph();
sdt = StructureDocumentTagInline(doc)
sdt.SDTProperties.SDTType = SdtType.DropDownList
sdt.SDTProperties.Alias = "Dropdown List"
sdt.SDTProperties.Tag = "Dropdown List"
paragraph.ChildObjects.Add(sdt)
stdList = SdtDropDownList()
stdList.ListItems.Add(SdtListItem("USA", "1"))
stdList.ListItems.Add(SdtListItem("China", "2"))
stdList.ListItems.Add(SdtListItem("Briza", "3"))
stdList.ListItems.Add(SdtListItem("Austrilia", "4"))
sdt.SDTProperties.ControlProperties = stdList;
textRange = TextRange(doc)
textRange .Text = stdList.ListItems[0].DisplayText
sdt.SDTContent.ChildObjects.Add(textRange )

# Add two check box content controls to the cell (4,1)
paragraph = table.Rows[4].Cells[1].AddParagraph()
sdt = StructureDocumentTagInline(doc)
paragraph.ChildObjects.Add(sdt)
sdt.SDTProperties.SDTType = SdtType.CheckBox
sdtCheckBox = SdtCheckBox()
sdt.SDTProperties.ControlProperties = sdtCheckBox
textRange = TextRange(doc)
sdt.ChildObjects.Add(textRange)
sdtCheckBox.Checked = False
paragraph.AppendText(" Movie")

paragraph = table.Rows[4].Cells[1].AddParagraph();
sdt = StructureDocumentTagInline(doc)
paragraph.ChildObjects.Add(sdt)
sdt.SDTProperties.SDTType = SdtType.CheckBox
sdtCheckBox = SdtCheckBox()
sdt.SDTProperties.ControlProperties = sdtCheckBox
textRange = TextRange(doc)
sdt.ChildObjects.Add(textRange)
sdtCheckBox.Checked = False
paragraph.AppendText(" Game")

# Add a date picker content control to the cell (5,1)
paragraph = table.Rows[5].Cells[1].AddParagraph()
sdt = StructureDocumentTagInline(doc)
paragraph.ChildObjects.Add(sdt)
sdt.SDTProperties.SDTType = SdtType.DatePicker
sdt.SDTProperties.Alias = "Date Picker"
sdt.SDTProperties.Tag = "Date Picker"
stdDate = SdtDate()
stdDate.CalendarType = CalendarType.Default
stdDate.DateFormat = "yyyy.MM.dd"
stdDate.FullDate = DateTime.get_Now()
sdt.SDTProperties.ControlProperties = stdDate
textRange = TextRange(doc)
textRange.Text = "your birth date"
sdt.SDTContent.ChildObjects.Add(textRange)

# Add a combo box content control to the cell (6,1)
paragraph = table.Rows[6].Cells[1].AddParagraph()
sdt = StructureDocumentTagInline(doc)
paragraph.ChildObjects.Add(sdt)
sdt.SDTProperties.SDTType = SdtType.ComboBox
sdt.SDTProperties.Alias = "Combo Box"
sdt.SDTProperties.Tag = "Combo Box"
stdComboBox = SdtComboBox()
stdComboBox.ListItems.Add(SdtListItem("Male"))
stdComboBox.ListItems.Add(SdtListItem("Female"))
sdt.SDTProperties.ControlProperties = stdComboBox
textRange = TextRange(doc)
textRange.Text = stdComboBox.ListItems[0].DisplayText
sdt.SDTContent.ChildObjects.Add(textRange)

# Allow users to edit the form fields only
doc.Protect(ProtectionType.AllowOnlyFormFields, "permission-psd")

# Save to file
doc.SaveToFile("output/Form.docx", FileFormat.Docx2013)
Apply for a Temporary License
If you'd like to remove the evaluation message from the generated documents, or to get rid of the function limitations, please request a 30-day trial license for yourself.
Python: Add, Edit, or Delete Bookmarks in PDF
PDF bookmarks are navigational aids that allow users to quickly locate and jump to specific sections or pages in a PDF document. Through a simple click, users can arrive at the target location, which eliminates the need to manually scroll or search for specific content in a lengthy document. In this article, you will learn how to programmatically add, modify and delete bookmarks in PDF files using Spire.PDF for Python.
- Add Bookmarks to a PDF Document
- Edit Bookmarks in a PDF Document
- Delete Bookmarks from a PDF Document
Install Spire.PDF for Python
This scenario requires Spire.PDF for Python and plum-dispatch v1.7.4. They can be easily installed in your Windows through the following pip command.
pip install Spire.PDF
If you are unsure how to install, please refer to this tutorial: How to Install Spire.PDF for Python on Windows
Add Bookmarks to a PDF Document in Python
Spire.PDF for Python provides a method to add bookmarks to a PDF document: PdfDocument. Bookmarks.Add(). You can use this method to create primary bookmarks for the PDF document and use the PdfBookmarkCollection.Add() method to add sub-bookmarks to the primary bookmarks. Additionally, the PdfBookmark class offers other methods to set properties such as destination, text color, and text style for the bookmarks. The following are the detailed steps for adding bookmarks to a PDF document.
- Create a PdfDocument class instance.
- Load a PDF document using PdfDocument.LoadFromFile() method.
- Add a parent bookmark to the document using PdfDocument.Bookmarks.Add() method.
- Create a PdfDestination class object and set the destination of the parent bookmark using PdfBookmark.Action property.
- Set the text color and style of the parent bookmark.
- Create a PdfBookmarkCollection class object to add sub-bookmark to the parent bookmark using PdfBookmarkCollection.Add() method.
- Use the above methods to set the destination, text color, and text style of the sub-bookmark.
- Save the document using PdfDocument.SaveToFile() method.
- Python
from spire.pdf.common import *
from spire.pdf import *

# Create a PdfDocument object
doc = PdfDocument()

# Load a PDF file
doc.LoadFromFile("Terms of service.pdf")

# Loop through the pages in the PDF file
for i in range(doc.Pages.Count):
     page = doc.Pages.get_Item(i)

    # Set the title and destination for the bookmark
    bookmarkTitle = "Bookmark-{0}".format(i+1)
    bookmarkDest = PdfDestination(page, PointF(0.0, 0.0))

    # Create and configure the bookmark
    bookmark = doc.Bookmarks.Add(bookmarkTitle)
    bookmark.Color = PdfRGBColor(Color.get_SaddleBrown())
    bookmark.DisplayStyle = PdfTextStyle.Bold
    bookmark.Action = PdfGoToAction(bookmarkDest)

    # Create a collection to hold child bookmarks
    bookmarkColletion = PdfBookmarkCollection(bookmark)

    # Set the title and destination for the child bookmark
    childBookmarkTitle = "Sub-Bookmark-{0}".format(i+1)
    childBookmarkDest = PdfDestination(page, PointF(0.0, 100.0))

    # Create and configure the child bookmark
    childBookmark = bookmarkColletion.Add(childBookmarkTitle)
    childBookmark.Color = PdfRGBColor(Color.get_Coral())
    childBookmark.DisplayStyle = PdfTextStyle.Italic
    childBookmark.Action = PdfGoToAction(childBookmarkDest)

# Save the PDF file
outputFile = "Bookmark.pdf"
doc.SaveToFile(outputFile)

# Close the document
doc.Close()
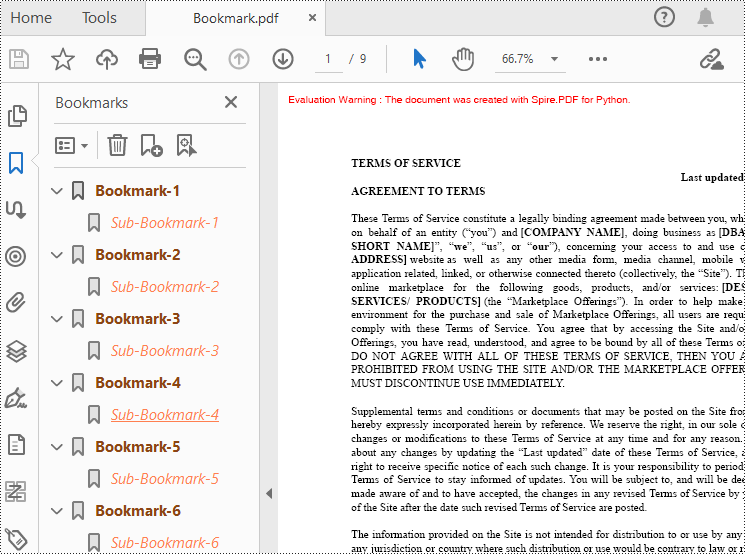
Edit Bookmarks in a PDF Document
If you need to update the existing bookmarks, you can use the methods of PdfBookmark class to rename the bookmarks and change their text color, text style. The following are the detailed steps.
- Create a PdfDocument class instance.
- Load a PDF document using PdfDocument.LoadFromFile() method.
- Get a specified bookmark using PdfDocument.Bookmarks[] property.
- Change the title of the bookmark using PdfBookmark.Title property.
- Change the font color of the bookmark using PdfBookmark.Color property.
- Change the text style of the bookmark using PdfBookmark.DisplayStyle property.
- Change the text color and style of the sub-bookmark using the above methods.
- Save the result document using PdfDocument.SaveToFile() method.
- Python
from spire.pdf.common import *
from spire.pdf import *

# Create a PdfDocument object
doc = PdfDocument()

# Load a PDF file
doc.LoadFromFile("Bookmark.pdf")

# Get the first bookmark
bookmark = doc.Bookmarks.get_Item(0)

# Change the title of the bookmark
bookmark.Title = "Modified BookMark"

# Set the color of the bookmark
bookmark.Color = PdfRGBColor(Color.get_Black())

# Set the outline text style of the bookmark
bookmark.DisplayStyle = PdfTextStyle.Bold

# Edit child bookmarks of the parent bookmark
pBookmark = PdfBookmarkCollection(bookmark)
for i in range(pBookmark.Count):
    childBookmark = pBookmark.get_Item(i)
    childBookmark.Color = PdfRGBColor(Color.get_Blue())
    childBookmark.DisplayStyle = PdfTextStyle.Regular

# Save the PDF document
outputFile = "EditBookmark.pdf"

# Close the document
doc.SaveToFile(outputFile)
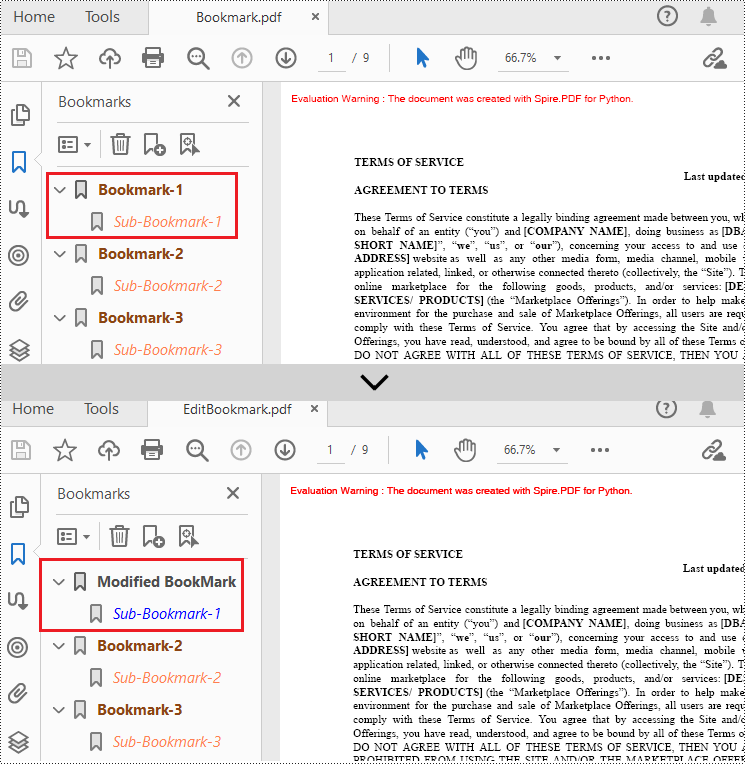
Delete Bookmarks from a PDF Document
Spire.PDF for Python also provides methods to delete any bookmark in a PDF document. PdfDocument.Bookmarks.RemoveAt() method is used to remove a specific primary bookmark, PdfDocument.Bookmarks.Clear() method is used to remove all bookmarks, and PdfBookmarkCollection.RemoveAt() method is used to remove a specific sub-bookmark of a primary bookmark. The detailed steps of removing bookmarks form a PDF document are as follows.
- Create a PdfDocument class instance.
- Load a PDF document using PdfDocument.LoadFromFile() method.
- Get the first bookmark using PdfDocument.Bookmarks[] property.
- Remove a specified sub-bookmark of the first bookmark using PdfBookmarkCollection.RemoveAt() method.
- Remove a specified bookmark including its sub-bookmarks using PdfDocument.Bookmarks.RemoveAt() method.
- Remove all bookmarks in the PDF file using PdfDocument.Bookmarks.Clear() method.
- Save the document using PdfDocument.SaveToFile() method.
- Python
from spire.pdf.common import *
from spire.pdf import *

# Create a PdfDocument object
doc = PdfDocument()

# Load a PDF file
doc.LoadFromFile("Bookmark.pdf")

# # Delete the first bookmark
# doc.Bookmarks.RemoveAt(0)

# # Get the first bookmark
# bookmark = doc.Bookmarks.get_Item(0)

# # Remove the first child bookmark from first parent bookmark
# pBookmark = PdfBookmarkCollection(bookmark)
# pBookmark.RemoveAt(0)

#Remove all bookmarks
doc.Bookmarks.Clear()

# Save the PDF document
output = "DeleteAllBookmarks.pdf"
doc.SaveToFile(output)

# Close the document
doc.Close()
Apply for a Temporary License
If you'd like to remove the evaluation message from the generated documents, or to get rid of the function limitations, please request a 30-day trial license for yourself.
Python: Convert SVG to PDF
SVG files are commonly used for web graphics and vector-based illustrations because they can be scaled and adjusted easily. PDF, on the other hand, is a versatile format widely supported across different devices and operating systems. Converting SVG to PDF allows for easy sharing of graphics and illustrations, ensuring that recipients can open and view the files without requiring specialized software or worrying about browser compatibility issues. In this article, we will demonstrate how to convert SVG files to PDF format in Python using Spire.PDF for Python.
Install Spire.PDF for Python
This scenario requires Spire.PDF for Python and plum-dispatch v1.7.4. They can be easily installed in your Windows through the following pip command.
pip install Spire.PDF
If you are unsure how to install, please refer to this tutorial: How to Install Spire.PDF for Python on Windows
Convert SVG to PDF in Python
Spire.PDF for Python provides the PdfDocument.LoadFromSvg() method, which allows users to load an SVG file. Once loaded, users can use the PdfDocument.SaveToFile() method to save the SVG file as a PDF file. The detailed steps are as follows.
- Create an object of the PdfDocument class.
- Load an SVG file using PdfDocument.LoadFromSvg() method.
- Save the SVG file to PDF format using PdfDocument.SaveToFile() method.
- Python
from spire.pdf.common import *
from spire.pdf import *

# Create a PdfDocument object
doc = PdfDocument()
# Load an SVG file
doc.LoadFromSvg("Sample.svg")

# Save the SVG file to PDF format
doc.SaveToFile("ConvertSvgToPdf.pdf", FileFormat.PDF)
# Close the PdfDocument object
doc.Close()
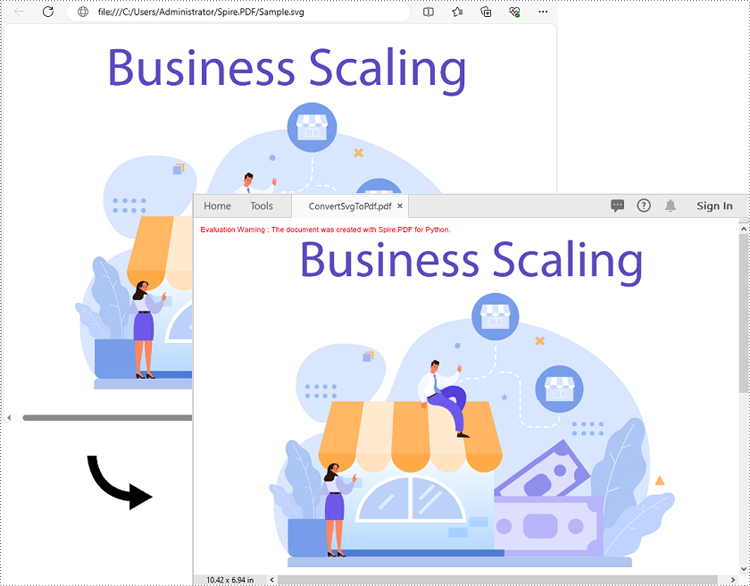
Add SVG to PDF in Python
In addition to converting SVG to PDF directly, Spire.PDF for Python also supports adding SVG files to specific locations in PDF. The detailed steps are as follows.
- Create an object of the PdfDocument class.
- Load an SVG file using PdfDocument.LoadFromSvg() method.
- Create a template based on the content of the SVG file using PdfDocument. Pages[].CreateTemplate() method.
- Get the width and height of the template.
- Create another object of the PdfDocument class and load a PDF file using PdfDocument.LoadFromFile() method.
- Draw the template with a custom size at a specific location in the PDF file using PdfDocument.Pages[].Canvas.DrawTemplate() method.
- Save the result file using PdfDocument.SaveToFile() method.
- Python
from spire.pdf.common import *
from spire.pdf import *

# Create a PdfDocument object
doc1 = PdfDocument()
# Load an SVG file
doc1.LoadFromSvg("Sample.svg")

# Create a template based on the content of the SVG
template = doc1.Pages.get_Item(0).CreateTemplate()

# Get the width and height of the template
width = template.Width
height = template.Height

# Create another PdfDocument object
doc2 = PdfDocument()
# Load a PDF file
doc2.LoadFromFile(""Sample.pdf"")

# Draw the template with a custom size at a specific location on the first page of the loaded PDF file
doc2.Pages.get_Item(0).Canvas.DrawTemplate(template, PointF(10.0, 100.0), SizeF(width*0.8, height*0.8))


# Save the result file
doc2.SaveToFile("AddSvgToPdf.pdf", FileFormat.PDF)
# Close the PdfDocument objects
doc2.Close()
doc1.Close()
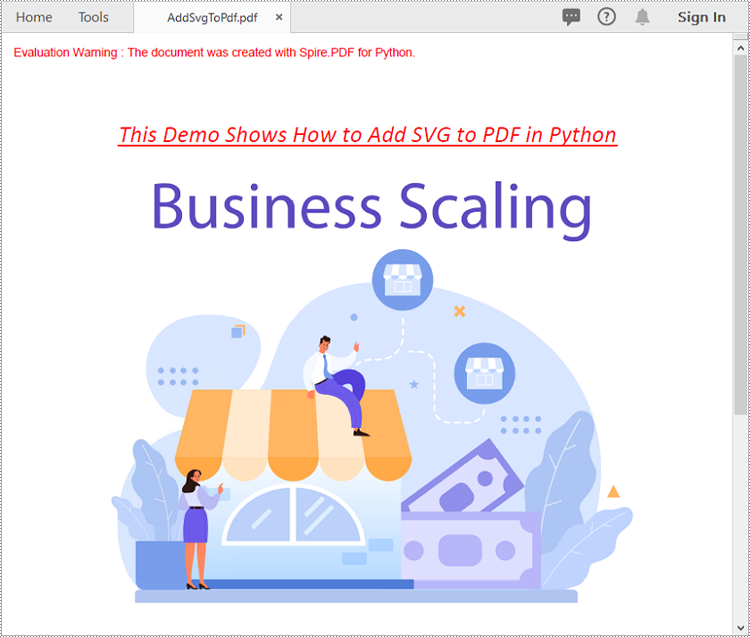
Apply for a Temporary License
If you'd like to remove the evaluation message from the generated documents, or to get rid of the function limitations, please request a 30-day trial license for yourself.
Python: Edit or Remove Comments in Excel
Comment in Excel is primarily used to add additional instructions or notes to cells. With this feature, users can add relevant content next to a specific cell to explain the data, provide contextual information, or give instructions. It also helps users to better organize and manage the data in the Excel workbook and improve the understanding and readability of the data. Spire.XLS for Python supports adding comments to Excel files. If necessary, you can also use this library to edit the content of the comments or delete unnecessary comments. In this article, we will show you how to edit or remove existing comments in Excel on Python platforms using Spire.XLS for Python.
Install Spire.XLS for Python
This scenario requires Spire.XLS for Python and plum-dispatch v1.7.4. They can be easily installed in your Windows through the following pip commands.
pip install Spire.XLS
If you are unsure how to install, please refer to this tutorial: How to Install Spire.XLS for Python on Windows
Edit Existing Comments in Excel Using Python
Spire.XLS for Python allows users to edit existing comments in Excel, including setting new text or changing comment box size. The following are detailed steps.
- Create a Workbook instance.
- Load an Excel file from disk using Workbook.LoadFromFile() method.
- Get the first worksheet of the Excel file using Workbook.Worksheets[] property.
- Set new text for the existing comments using Worksheet.Range[].Comment.Text property.
- Set the height and width of the existing comment by using Worksheet.Range[].Comment.Height and Worksheet.Range[].Comment.Width properties.
- Automatically adapt to the size of the comment by setting the Worksheet.Range.Comment.AutoSize property to "True".
- Save the result file using Workbook.SaveToFile() method.
- Python
from spire.xls import *
from spire.xls.common import *

inputFile = "C:/Users/Administrator/Desktop/Sample.xlsx"
outputFile = "C:/Users/Administrator/Desktop/EditExcelComment.xlsx"

# Create a Workbook instance
workbook = Workbook()

# Load an Excel file from disk
workbook.LoadFromFile(inputFile)

# Get the first worksheet of this file
sheet = workbook.Worksheets[0]

# Set new text for the existing comments
sheet.Range["A8"].Comment.Text = "Frank has left the company."
sheet.Range["F6"].Comment.Text = "Best sales."

# Set the height and width of the comment of A8
sheet.Range["A8"].Comment.Height = 60
sheet.Range["A8"].Comment.Width = 100

# Automatically adapt to the size of the comment of F6
sheet.Range["F6"].Comment.AutoSize = True

# Save the result file
workbook.SaveToFile(outputFile, ExcelVersion.Version2013)
workbook.Dispose()
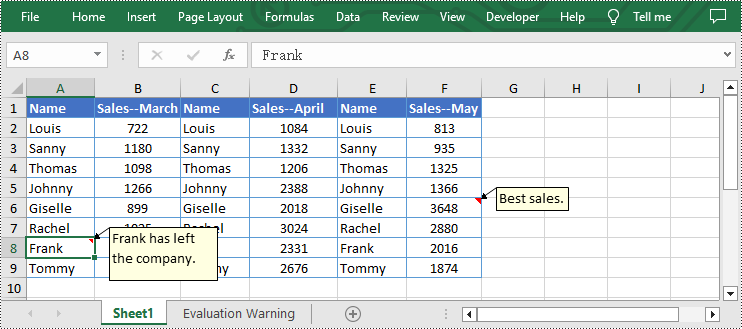
Remove Existing Comments from Excel Using Python
The Worksheet.Range[].Comment.Remove() method offered by Spire.XLS for Python allows users to remove a specified comment easily. The detailed steps are as follows.
- Create a Workbook instance.
- Load an Excel file from disk using Workbook.LoadFromFile() method.
- Get the first worksheet of the Excel file using Workbook.Worksheets[] property.
- Remove the comment by using Worksheet.Range[].Comment.Remove() method.
- Save the document to another file using Workbook.SaveToFile() method.
- Python
from spire.xls import *
from spire.xls.common import *

inputFile = "C:/Users/Administrator/Desktop/Sample.xlsx"
outputFile = "C:/Users/Administrator/Desktop/RemoveExcelComment.xlsx"

# Create a Workbook instance
workbook = Workbook()

# Load an Excel file from disk
workbook.LoadFromFile(inputFile)

# Get the first worksheet of this file
sheet = workbook.Worksheets[0]

# Remove the comment from the sheet
sheet.Range["F6"].Comment.Remove()

# Save the result file
workbook.SaveToFile(outputFile, ExcelVersion.Version2013)
workbook.Dispose()
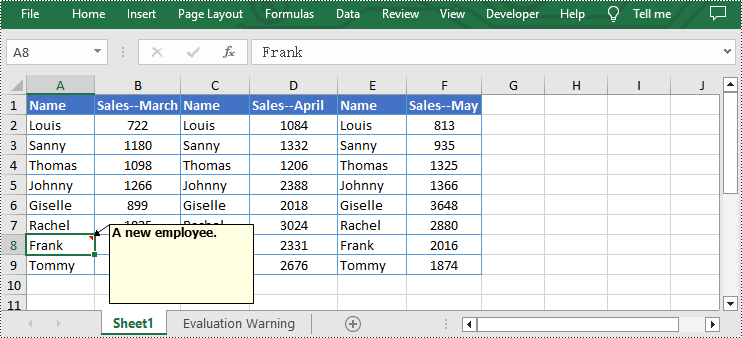
Apply for a Temporary License
If you'd like to remove the evaluation message from the generated documents, or to get rid of the function limitations, please request a 30-day trial license for yourself.