Java: Add Security Permissions to a PDF Document
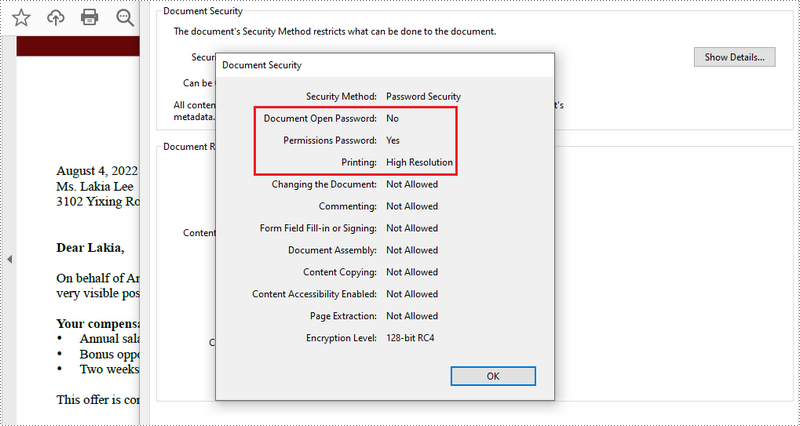
PDF documents can be secured in several ways. When PDFs are protected with a permission password, readers can open the document without needing to enter a password, but they may not have permission to further manipulate the document, such as printing or copying the content. In this article, you will learn how to set security permissions for a PDF document in Java using Spire.PDF for Java library.
Install Spire.PDF for Java
First, you're required to add the Spire.Pdf.jar file as a dependency in your Java program. The JAR file can be downloaded from this link. If you use Maven, you can easily import the JAR file in your application by adding the following code to your project's pom.xml file.
<repositories>
    <repository>
        <id>com.e-iceblue</id>
        <name>e-iceblue</name>
        <url>https://repo.e-iceblue.com/nexus/content/groups/public/</url>
    </repository>
</repositories>
<dependencies>
    <dependency>
        <groupId>e-iceblue</groupId>
        <artifactId>spire.pdf</artifactId>
        <version>12.7.0</version>
    </dependency>
</dependencies>
Add Security Permissions to a PDF Document in Java
Below are the steps to apply security permissions to a PDF document using Spire.PDF for Java.
- Create a PdfDocument object.
- Load a sample PDF file using PdfDocument.loadFileFile() method.
- Specify open password and permission password. The open password can be set to empty so that the generated document will not require a password to open.
- Encrypt the document with the open password and permission password, and set the security permissions using PdfDocument.getSecurity().encypt() method. This method takes PdfPermissionsFlags enumeration as a parameter, which defines user access permissions for an encrypted document.
- Save the document to another PDF file using PdfDocument.saveToFile() method.
- Java
//Create a PdfDocument object
PdfDocument pdf= new PdfDocument();

//Load a sample PDF file
pdf.loadFromFile("C:\\Users\\Administrator\\Desktop\\sample.pdf");
String output = "output/changeSecurityPermission_output.pdf";

// Create a PdfSecurityPolicy with the specified user password and owner password
PdfSecurityPolicy securityPolicy = new PdfPasswordSecurityPolicy("userpassword", "ownerpassword");

// Create a PdfDocumentPrivilege with desired permissions (e.g., allow filling form fields)
PdfDocumentPrivilege privilege = new PdfDocumentPrivilege();
privilege.setAllowFillFormFields(true);
privilege.setAllowPrint(true);

// Encrypt the PDF document using the specified security policy
pdf.encrypt(securityPolicy);

// Save the encrypted PDF document to the output file path
pdf.saveToFile(output, FileFormat.PDF);

// Close the PDF document to release resources
pdf.close();

// Dispose of the PDF document to free up system resources
pdf.dispose();
Apply for a Temporary License
If you'd like to remove the evaluation message from the generated documents, or to get rid of the function limitations, please request a 30-day trial license for yourself.
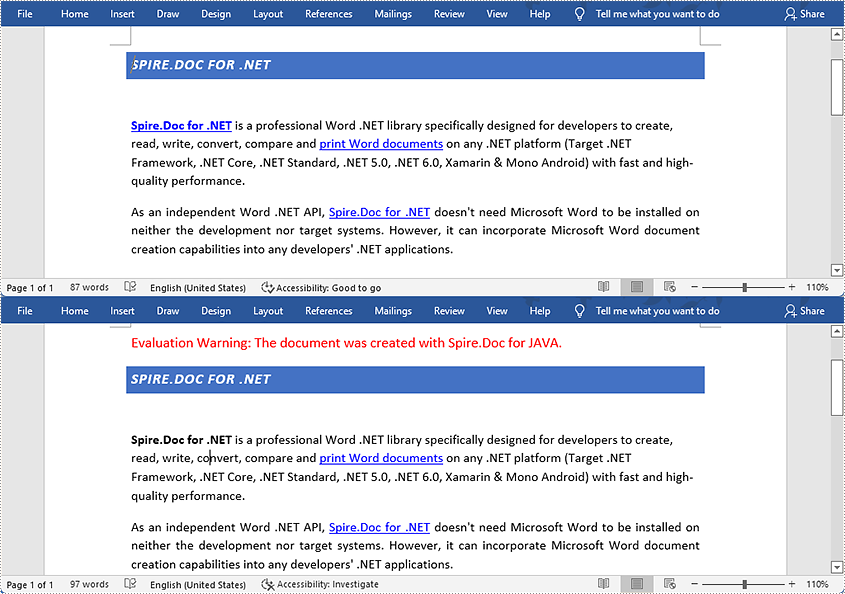
Java: Find and Extract Hyperlinks in Word Documents
Hyperlinks in Word documents can lead readers to a webpage, an external file, an email address, and a specific place of the document being read. They are commonly used in Word documents for their convenience. This article will teach you how to use Spire.Doc for Java to find and extract hyperlinks in Word documents, including hypertexts and links.
- Find and Extract a Specified Hyperlink in a Word Document
- Find and Extract All the Hyperlinks in a Word Document
Install Spire.Doc for Java
First, you're required to add the Spire.Doc.jar file as a dependency in your Java program. The JAR file can be downloaded from this link. If you use Maven, you can easily import the JAR file in your application by adding the following code to your project's pom.xml file.
<repositories>
    <repository>
        <id>com.e-iceblue</id>
        <name>e-iceblue</name>
        <url>https://repo.e-iceblue.com/nexus/content/groups/public/</url>
    </repository>
</repositories>
<dependencies>
    <dependency>
        <groupId>e-iceblue</groupId>
        <artifactId>spire.doc</artifactId>
        <version>14.7.0</version>
    </dependency>
</dependencies>
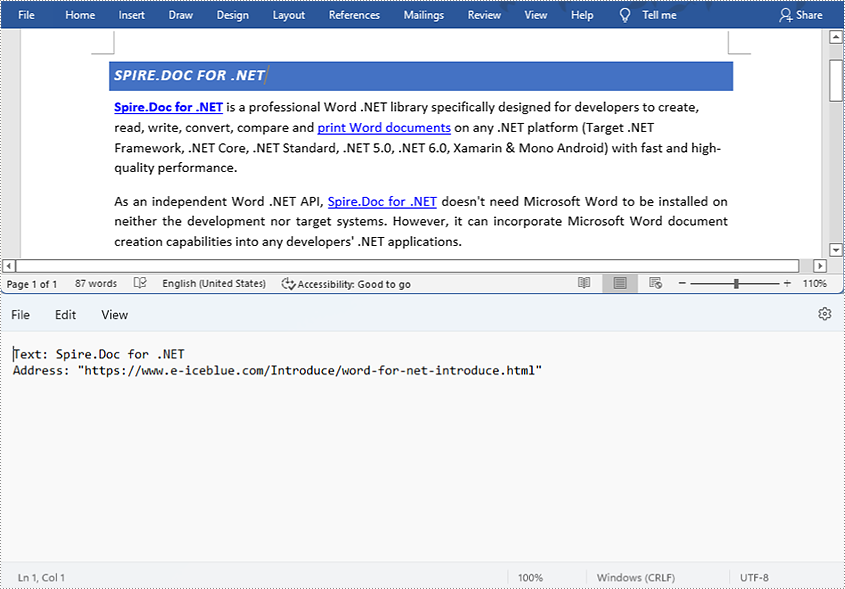
Find and Extract a Specified Hyperlink in a Word Document
The detailed steps are as follows:
- Create a Document instance and load a Word document from disk using Document.loadFromFile() method.
- Create an object of ArrayList<Field>.
- Iterate through the items in the sections to find all hyperlinks.
- Get the text of the first hyperlink using Field.get().getFieldText() method and get its link using Field.get().getValue() method.
- Save the text and the link of the first hyperlink to a TXT file using custom method writeStringToText().
- Java
import com.spire.doc.*;
import com.spire.doc.documents.*;
import com.spire.doc.fields.Field;
import java.io.*;
import java.util.ArrayList;
public class findHyperlinks {
public static void main(String[] args) throws IOException {
//Create a Document instance and load a Word document from file
String input = "D:/testp/test.docx";
Document doc = new Document();
doc.loadFromFile(input);
//Create an object of ArrayList
ArrayListField> hyperlinks = new ArrayList();
//Iterate through the items in the sections to find all hyperlinks
for (Section section : (IterableSection>) doc.getSections()) {
for (DocumentObject object : (IterableDocumentObject>) section.getBody().getChildObjects()) {
if (object.getDocumentObjectType().equals(DocumentObjectType.Paragraph)) {
Paragraph paragraph = (Paragraph) object;
for (DocumentObject cObject : (IterableDocumentObject>) paragraph.getChildObjects()) {
if (cObject.getDocumentObjectType().equals(DocumentObjectType.Field)) {
Field field = (Field) cObject;
if (field.getType().equals(FieldType.Field_Hyperlink)) {
hyperlinks.add(field);
}
}
}
}
}
}
//Get the text and the address of the first hyperlink
String hyperlinksText = hyperlinks.get(0).getFieldText();
String hyperlinkAddress = hyperlinks.get(0).getValue();
//Save the text and the link of the first hyperlink to a TXT file
String output = "D:/javaOutput/HyperlinkTextAndLink.txt";
writeStringToText("Text:\r\n" + hyperlinksText+ "\r\n" + "Link:\r\n" + hyperlinkAddress, output);
}
//Create a method to write the text and link of hyperlinks to a TXT file
public static void writeStringToText(String content, String textFileName) throws IOException {
File file = new File(textFileName);
if (file.exists())
{
file.delete();
}
FileWriter fWriter = new FileWriter(textFileName, true);
try {
fWriter.write(content);
} catch (IOException ex) {
ex.printStackTrace();
} finally {
try {
fWriter.flush();
fWriter.close();
} catch (IOException ex) {
ex.printStackTrace();
}
}
}
}
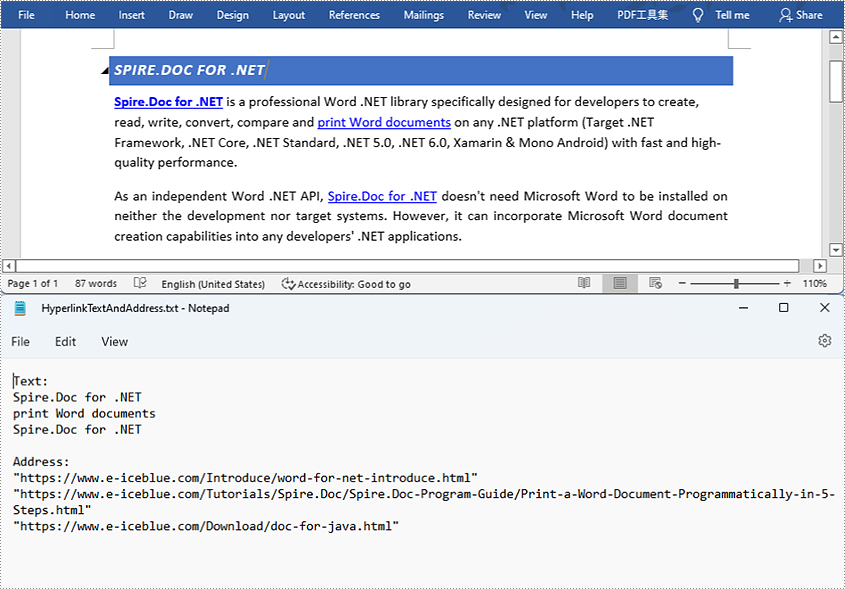
Find and Extract All the Hyperlinks in a Word Document
The detailed steps are as follows:
- Create a Document instance and load a Word document from disk using Document.loadFromFile() method.
- Create an object of ArrayList<Field>.
- Iterate through the items in the sections to find all hyperlinks.
- Get the texts of the hyperlinks using Field.get().getFieldText() method and get their links using Field.get().getValue() method.
- Save the text and the links of the hyperlinks to a TXT file using custom method writeStringToText().
- Java
import com.spire.doc.*;
import com.spire.doc.documents.*;
import com.spire.doc.fields.Field;
import java.io.*;
import java.util.ArrayList;
public class findHyperlinks {
public static void main(String[] args) throws IOException {
//Create a Document instance and load a Word document from file
String input = "D:/testp/test.docx";
Document doc = new Document();
doc.loadFromFile(input);
//Create an object of ArrayList
ArrayListField> hyperlinks = new ArrayList();
String hyperlinkText = "";
String hyperlinkAddress = "";
//Iterate through the items in the sections to find all hyperlinks
for (Section section : (IterableSection>) doc.getSections()) {
for (DocumentObject object : (IterableDocumentObject>) section.getBody().getChildObjects()) {
if (object.getDocumentObjectType().equals(DocumentObjectType.Paragraph)) {
Paragraph paragraph = (Paragraph) object;
for (DocumentObject cObject : (IterableDocumentObject>) paragraph.getChildObjects()) {
if (cObject.getDocumentObjectType().equals(DocumentObjectType.Field)) {
Field field = (Field) cObject;
if (field.getType().equals(FieldType.Field_Hyperlink)) {
hyperlinks.add(field);
}
}
}
}
}
}
//Save the texts and the links of the hyperlinks to a TXT file
String output = "D:/javaOutput/HyperlinksTextsAndLinks.txt";
writeStringToText("Text:\r\n " + hyperlinkText + "\r\n" + "Link:\r\n" + hyperlinkAddress + "\r\n", output);
}
//Create a method to write the text and link of hyperlinks to a TXT file
public static void writeStringToText(String content, String textFileName) throws IOException {
File file = new File(textFileName);
if (file.exists())
{
file.delete();
}
FileWriter fWriter = new FileWriter(textFileName, true);
try {
fWriter.write(content);
} catch (IOException ex) {
ex.printStackTrace();
} finally {
try {
fWriter.flush();
fWriter.close();
} catch (IOException ex) {
ex.printStackTrace();
}
}
}
}
Apply for a Temporary License
If you'd like to remove the evaluation message from the generated documents, or to get rid of the function limitations, please request a 30-day trial license for yourself.
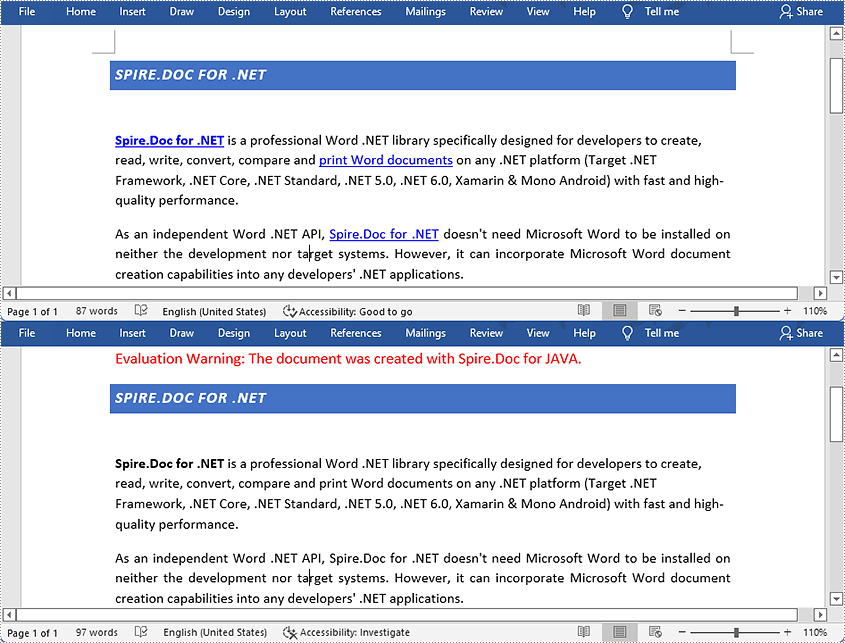
Java: Remove Hyperlinks in Word Documents
Hyperlinks usually appear on texts. By clicking on a hyperlink, we can access a website, a document, an email address, or other elements. Some Word documents, especially those that are generated from web content, may contain irritating hyperlinks, such as advertisements. This article shows you how to programmatically remove one hyperlink or all hyperlinks in a Word document using Spire.Doc for Java.
Install Spire.Doc for Java
First, you're required to add the Spire.Doc.jar file as a dependency in your Java program. The JAR file can be downloaded from this link. If you use Maven, you can easily import the JAR file in your application by adding the following code to your project's pom.xml file.
<repositories>
    <repository>
        <id>com.e-iceblue</id>
        <name>e-iceblue</name>
        <url>https://repo.e-iceblue.com/nexus/content/groups/public/</url>
    </repository>
</repositories>
<dependencies>
    <dependency>
        <groupId>e-iceblue</groupId>
        <artifactId>spire.doc</artifactId>
        <version>14.7.0</version>
    </dependency>
</dependencies>
Remove a Specified Hyperlink in a Word Document
The detailed steps to remove a specified hyperlink in a Word file are as follows:
- Create a Document object and load a Word document from disk using Document.loadFromFile() method.
- Find all the hyperlinks using custom method FindAllHyperlinks().
- Flatten the first hyperlink using custom method FlattenHyperlinks().
- Save the document using Document.saveToFile() method.
- Java
import com.spire.doc.*;
import com.spire.doc.documents.DocumentObjectType;
import com.spire.doc.documents.Paragraph;
import com.spire.doc.documents.UnderlineStyle;
import com.spire.doc.fields.Field;
import com.spire.doc.fields.TextRange;

import java.awt.*;
import java.util.ArrayList;

public class removeHyperlink {
    public static void main(String[] args) {
        //Create a Document object and load a Word document from disk
        String input = "D:/testp/test.docx";
        Document doc = new Document();
        doc.loadFromFile(input);

        //Find all hyperlinks
        ArrayList<Field> hyperlinks = FindAllHyperlinks(doc);

        //Flatten the first hyperlink
        FlattenHyperlinks(hyperlinks.get(0));

        //Save the document to file
        String output = "D:/javaOutput/RemoveHyperlinks.docx";
        doc.saveToFile(output, FileFormat.Docx);
    }

     //Iterate through the items in the sections to find all hyperlinks
        for (Section section : (Iterable<Section>)document.getSections())
        {
            for (DocumentObject object : (Iterable<DocumentObject>)section.getBody().getChildObjects())
            {
                if (object.getDocumentObjectType().equals(DocumentObjectType.Paragraph))
                {
                    Paragraph paragraph = (Paragraph) object;
                    for (DocumentObject cObject : (Iterable<DocumentObject>)paragraph.getChildObjects())
                    {
                    Paragraph paragraph = (Paragraph) object;
                    for (DocumentObject cObject : (Iterable)paragraph.getChildObjects())
                    {
                        if (cObject.getDocumentObjectType().equals(DocumentObjectType.Field))
                        {
                            Field field = (Field) cObject;
                            if (field.getType().equals(FieldType.Field_Hyperlink))
                            {
                                hyperlinks.add(field);
                            }
                        }
                    }
                }
            }
        }
        return hyperlinks;
    }

    //Create a method FlattenHyperlinks() to flatten the hyperlink field
    public static void FlattenHyperlinks(Field field)
    {
        int ownerParaIndex = field.getOwnerParagraph().getOwnerTextBody().getChildObjects().indexOf(field.getOwnerParagraph());
        int fieldIndex = field.getOwnerParagraph().getChildObjects().indexOf(field);
        Paragraph sepOwnerPara = field.getSeparator().getOwnerParagraph();
        int sepOwnerParaIndex = field.getSeparator().getOwnerParagraph().getOwnerTextBody().getChildObjects().indexOf(field.getSeparator().getOwnerParagraph());
        int sepIndex = field.getSeparator().getOwnerParagraph().getChildObjects().indexOf(field.getSeparator());
        int endIndex = field.getEnd().getOwnerParagraph().getChildObjects().indexOf(field.getEnd());
        int endOwnerParaIndex = field.getEnd().getOwnerParagraph().getOwnerTextBody().getChildObjects().indexOf(field.getEnd().getOwnerParagraph());
        FormatFieldResultText(field.getSeparator().getOwnerParagraph().getOwnerTextBody(), sepOwnerParaIndex, endOwnerParaIndex, sepIndex, endIndex);
        field.getEnd().getOwnerParagraph().getChildObjects().removeAt(endIndex);"
        for (int i = sepOwnerParaIndex; i >= ownerParaIndex; i--)
        {
            if (i == sepOwnerParaIndex && i == ownerParaIndex)
            {
                for (int j = sepIndex; j >= fieldIndex; j--)
                {
                    field.getOwnerParagraph().getChildObjects().removeAt(j);
                }
            }
            else if (i == ownerParaIndex)
            {
                for (int j = field.getOwnerParagraph().getChildObjects().getCount() - 1; j >= fieldIndex; j--)
                {
                    field.getOwnerParagraph().getChildObjects().removeAt(j);
                }
            }
            else if (i == sepOwnerParaIndex)
            {
                for (int j = sepIndex; j >= 0; j--)
                {
                    sepOwnerPara.getChildObjects().removeAt(j);
                }
            }
            else
            {
                field.getOwnerParagraph().ownerTextBody().getChildObjects().removeAt(i);
            }
        }
    }

    //Create a method FormatFieldResultText() to remove the font color and underline format of the hyperlinks
    private static void FormatFieldResultText(Body ownerBody, int sepOwnerParaIndex, int endOwnerParaIndex, int sepIndex, int endIndex)
    {
        for (int i = sepOwnerParaIndex; i <= endOwnerParaIndex; i++)
        {
            Paragraph para = (Paragraph) ownerBody.getChildObjects().get(i);
            if (i == sepOwnerParaIndex && i == endOwnerParaIndex)
            {
                for (int j = sepIndex + 1; j < endIndex; j++)
                {
                    FormatText((TextRange)para.getChildObjects().get(j));
                }
            }
            else if (i == sepOwnerParaIndex)
            {
                for (int j = sepIndex + 1; j < para.getChildObjects().getCount(); j++)
                {
                    FormatText((TextRange)para.getChildObjects().get(j));
                }
            }
            else if (i == endOwnerParaIndex)
            {
                for (int j = 0; j < endIndex; j++)
                {
                    FormatText((TextRange)para.getChildObjects().get(j));
                }
            }
            else
            {
                for (int j = 0; j < para.getChildObjects().getCount(); j++)
                {
                    FormatText((TextRange)para.getChildObjects().get(j));
                }
            }
        }
    }

    //Create a method FormatText() to change the color of the text to black and remove the underline
    private static void FormatText(TextRange tr)
    {
        //Set the text color to black
        tr.getCharacterFormat().setTextColor(Color.black);

        //Set the text underline style to none
        tr.getCharacterFormat().setUnderlineStyle(UnderlineStyle.None);
    }
}
Remove All the Hyperlinks in a Word Document
The detailed steps to remove all the hyperlinks in a Word file are as follows:
- Create a Document object and load a Word document from disk using Document.loadFromFile() method.
- Find all the hyperlinks using custom method FindAllHyperlinks().
- Loop through the hyperlinks, and invoke the custom method FlattenHyperlinks() to flatten the specific hyperlink.
- Save the document using Document.saveToFile() method.
- Java
import com.spire.doc.*;
import com.spire.doc.documents.DocumentObjectType;
import com.spire.doc.documents.Paragraph;
import com.spire.doc.documents.UnderlineStyle;
import com.spire.doc.fields.Field;
import com.spire.doc.fields.TextRange;
import java.awt.*;
import java.util.ArrayList;
public class removeHyperlink {
public static void main(String[] args) {
//Create a Document object and load a Word document from disk
String input = "D:/testp/test.docx";
Document doc = new Document();
doc.loadFromFile(input);
//Find all the hyperlinks
ArrayList<Field> hyperlinks = FindAllHyperlinks(doc);
//Loop through the hyperlinks, and flatten the specific hyperlink.
for (int i = hyperlinks.size() -1; i >= 0; i--)
{
FlattenHyperlinks(hyperlinks.get(i));
}
//Save the document to file
String output = "D:/javaOutput/RemoveHyperlinks.docx";
doc.saveToFile(output, FileFormat.Docx);
}
//Create a method FindAllHyperlinks() to get all the hyperlinks from the sample document
private static ArrayList FindAllHyperlinks(Document document)
{
ArrayListField> hyperlinks = new ArrayList();
//Iterate through the items in the sections to find all hyperlinks
for (Section section : (Iterable<Section>)document.getSections())
{
for (DocumentObject object : (Iterable<DocumentObject>)section.getBody().getChildObjects())
{
if (object.getDocumentObjectType().equals(DocumentObjectType.Paragraph))
{
Paragraph paragraph = (Paragraph) object;
for (DocumentObject cObject : (Iterable<DocumentObject>)paragraph.getChildObjects())
{
if (cObject.getDocumentObjectType().equals(DocumentObjectType.Field))
{
Field field = (Field) cObject;
if (field.getType().equals(FieldType.Field_Hyperlink))
{
hyperlinks.add(field);
}
}
}
}
}
}
return hyperlinks;
}
//Create a method FlattenHyperlinks() to flatten the hyperlink field
public static void FlattenHyperlinks(Field field)
{
int ownerParaIndex = field.getOwnerParagraph().getOwnerTextBody().getChildObjects().indexOf(field.getOwnerParagraph());
int fieldIndex = field.getOwnerParagraph().getChildObjects().indexOf(field);
Paragraph sepOwnerPara = field.getSeparator().getOwnerParagraph();
int sepOwnerParaIndex = field.getSeparator().getOwnerParagraph().getOwnerTextBody().getChildObjects().indexOf(field.getSeparator().getOwnerParagraph());
int sepIndex = field.getSeparator().getOwnerParagraph().getChildObjects().indexOf(field.getSeparator());
int endIndex = field.getEnd().getOwnerParagraph().getChildObjects().indexOf(field.getEnd());
int endOwnerParaIndex = field.getEnd().getOwnerParagraph().getOwnerTextBody().getChildObjects().indexOf(field.getEnd().getOwnerParagraph());
FormatFieldResultText(field.getSeparator().getOwnerParagraph().getOwnerTextBody(), sepOwnerParaIndex, endOwnerParaIndex, sepIndex, endIndex);
field.getEnd().getOwnerParagraph().getChildObjects().removeAt(endIndex);"
for (int i = sepOwnerParaIndex; i >= ownerParaIndex; i--)
{
if (i == sepOwnerParaIndex && i == ownerParaIndex)
{
for (int j = sepIndex; j >= fieldIndex; j--)
{
field.getOwnerParagraph().getChildObjects().removeAt(j);
}
}
else if (i == ownerParaIndex)
{
for (int j = field.getOwnerParagraph().getChildObjects().getCount() - 1; j >= fieldIndex; j--)
{
field.getOwnerParagraph().getChildObjects().removeAt(j);
}
}
else if (i == sepOwnerParaIndex)
{
for (int j = sepIndex; j >= 0; j--)
{
sepOwnerPara.getChildObjects().removeAt(j);
}
}
else
{
field.getOwnerParagraph().ownerTextBody().getChildObjects().removeAt(i);
}
}
}
//Create a method FormatFieldResultText() to format the texts
private static void FormatFieldResultText(Body ownerBody, int sepOwnerParaIndex, int endOwnerParaIndex, int sepIndex, int endIndex)
{
for (int i = sepOwnerParaIndex; i <= endOwnerParaIndex; i++)
{
Paragraph para = (Paragraph) ownerBody.getChildObjects().get(i);
if (i == sepOwnerParaIndex && i == endOwnerParaIndex)
{
for (int j = sepIndex + 1; j < endIndex; j++)
{
FormatText((TextRange)para.getChildObjects().get(j));
}
}
else if (i == sepOwnerParaIndex)
{
for (int j = sepIndex + 1; j < para.getChildObjects().getCount(); j++)
{
FormatText((TextRange)para.getChildObjects().get(j));
}
}
else if (i == endOwnerParaIndex)
{
for (int j = 0; j < endIndex; j++)
{
FormatText((TextRange)para.getChildObjects().get(j));
}
}
else
{
for (int j = 0; j < para.getChildObjects().getCount(); j++)
{
FormatText((TextRange)para.getChildObjects().get(j));
}
}
}
}
//Create a method FormatText() to change the color of the text to black and remove the underline
private static void FormatText(TextRange tr)
{
//Set the text color to black
tr.getCharacterFormat().setTextColor(Color.black);
//Set the text underline style to none
tr.getCharacterFormat().setUnderlineStyle(UnderlineStyle.None);
}
}
Apply for a Temporary License
If you'd like to remove the evaluation message from the generated documents, or to get rid of the function limitations, please request a 30-day trial license for yourself.
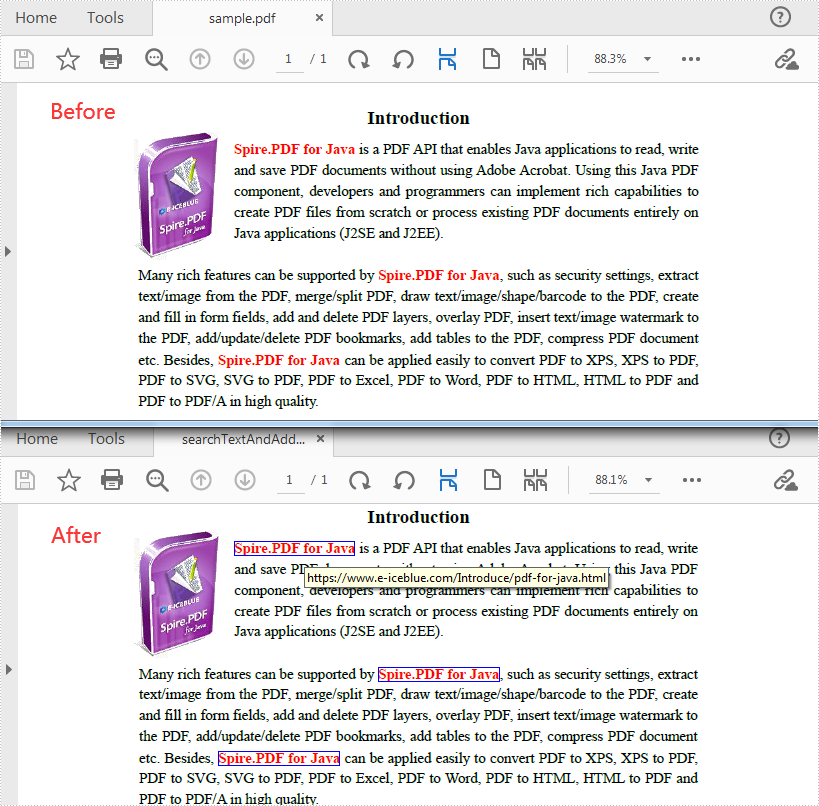
Java: Find Text and Add Hyperlinks for Them in PDF
A hyperlink refers to an icon, graphic, or text that links to another file or object. It is one of the most commonly used features for manipulating documents. Spire.PDF for Java supports creating a new PDF document and adding various hyperlinks to it, including ordinary links, hypertext links, email links and document links. This article will show you how to add hyperlinks to specific text in an existing PDF.
Install Spire.PDF for Java
First of all, you need to add the Spire.Pdf.jar file as a dependency in your Java program. The JAR file can be downloaded from this link. If you use Maven, you can easily import the JAR file by adding the following code to your project's pom.xml file.
<repositories>
    <repository>
        <id>com.e-iceblue</id>
        <name>e-iceblue</name>
        <url>https://repo.e-iceblue.com/nexus/content/groups/public/</url>
    </repository>
</repositories>
<dependencies>
    <dependency>
        <groupId>e-iceblue</groupId>
        <artifactId>spire.pdf</artifactId>
        <version>12.7.0</version>
    </dependency>
</dependencies>
Find Text and Add Hyperlinks for Them in PDF
With Spire PDF for Java, you can find all matched text in a specific PDF page and add hyperlinks to them. Here are the detailed steps to follow.
- Create a PdfDocument instance and load a sample PDF document using PdfDocument.loadFromFile()method.
- Get a specific page of the document using PdfDocument.getPages().get() method.
- Find all matched text in the page using PdfPageBase.findText(String searchPatternText, boolean isSearchWholeWord) method, and return a PdfTextFindCollection object.
- Create a PdfUriAnnotation instance based on the bounds of a specific find result.
- Set a URL address for the annotation using PdfUriAnnotation.set(String value) method and set its border and color as well.
- Add the URL annotation to the PDF annotation collection as a new annotation using PdfPageBase.getAnnotationWidget().add() method.
- Save the document using PdfDocument.saveToFile() method.
- Java
import com.spire.pdf.*;
import com.spire.pdf.annotations.*;
import com.spire.pdf.general.find.*;
import com.spire.pdf.graphics.PdfRGBColor;
import java.awt.*;
public class SearchTextAndAddHyperlink {
public static void main(String[] args) {
//Create a PdfDocument instance
PdfDocument pdf = new PdfDocument();
//Load a sample PDF document
pdf.loadFromFile("C:\\Users\\Test1\\Desktop\\sample.pdf");
//Get the first page
PdfPageBase page = pdf.getPages().get(0);
// Find all matched strings and return the reesult oject
ListPdfTextFragment> results = null;
PdfTextFindOptions findOptions = new PdfTextFindOptions();
findOptions.setTextFindParameter(EnumSet.of(TextFindParameter.WholeWord));
//loop through the find collection
for(PdfTextFragment find : results)
{
// Create a PdfUriAnnotation instance to add hyperlinks for the searched text
Rectangle2D[] linkBounds = find.getBounds();
PdfUriAnnotation uri = new PdfUriAnnotation(linkBounds[0]);
uri.setUri("https://www.e-iceblue.com/Introduce/pdf-for-java.html");
uri.setBorder(new PdfAnnotationBorder(1f));
uri.setColor(new PdfRGBColor(Color.blue));
page.getAnnotationsWidget().add(uri);
}
//Save the document
pdf.saveToFile("output/searchTextAndAddHyperlink.pdf");
}
}
Apply for a Temporary License
If you'd like to remove the evaluation message from the generated documents, or to get rid of the function limitations, please request a 30-day trial license for yourself.
C#/VB.NET: Replace a Picture in Excel
Sometimes after you have finished an Excel workbook, you may need to replace some of the existing pictures with better ones for the purpose of making the workbook more appealing and persuasive. In this tutorial, you will learn how to replace a picture in Excel using Spire.XLS for .NET.
Install Spire.XLS for .NET
To begin with, you need to add the DLL files included in the Spire.XLS for .NET package as references in your .NET project. The DLLs files can be either downloaded from this link or installed via NuGet.
- Package Manager
PM> Install-Package Spire.XLS
Replace a Picture in Excel
The following are the detailed steps to replace a picture with another one using Spire.XLS for .NET.
- Create a Workbook object.
- Load a sample file using Workbook.LoadFromFile() method.
- Use Workbook.Worksheets[0] to get the first worksheet.
- Use Worksheet.Pictures[0] property to get the first picture from the first worksheet
- Use Image.FromFile() method to load an image from the specified file, and set it as a new value of ExcelPicture.Picture property. To do so, the original picture will be replaced with the new one.
- Save the document using Workbook.SaveToFile() method.
- C#
- VB.NET
using Spire.Xls;
using Spire.Xls.Collections;
namespace ReplacePictureinExcel
{
    class Program
    {
        static void Main(string[] args)
        {
            //Create a Workbook instance
            Workbook workbook = new Workbook();
            //Load the Excel file
            workbook.LoadFromFile("input.xls");

            //Get the first sheet
            Worksheet sheet = workbook.Worksheets[0];

            //Get Excel picture collection
            PicturesCollection pictureCollection = sheet.Pictures;

            //Get the first picture from the collection
            ExcelPicture excelPicture = pictureCollection[0];

            // Creates an Image from the specified file.
            excelPicture.Picture = System.Drawing.Image.FromFile("input.png");

            //Save the document
            workbook.SaveToFile("ReplaceImage.xlsx", ExcelVersion.Version2013);
        }
    }
}
Imports Spire.Xls
Imports Spire.Xls.Collections
Imports System.Drawing

Namespace ReplacePictureinExcel
	Class Program
		Private Shared Sub Main(args As String())

			'Create a Workbook instance
			Dim workbook As New Workbook()
			'Load the Excel file
			workbook.LoadFromFile(Input.xls)

			'Get the first sheet
			Dim sheet As Worksheet = workbook.Worksheets(0)

			'Get Excel picture collection
			Dim pictureCollection As PicturesCollection = sheet.Pictures

			'Get the first picture from the collection
			Dim excelPicture As ExcelPicture = pictureCollection(0)

			' Creates an Image from the specified file.
			excelPicture.Picture = Image.FromFile(image)

			'Save the document
			workbook.SaveToFile("ReplaceImage.xlsx", ExcelVersion.Version2013)
		End Sub
	End Class
End Namespace
The original file:
The generated file:

Apply for a Temporary License
If you'd like to remove the evaluation message from the generated documents, or to get rid of the function limitations, please request a 30-day trial license for yourself.
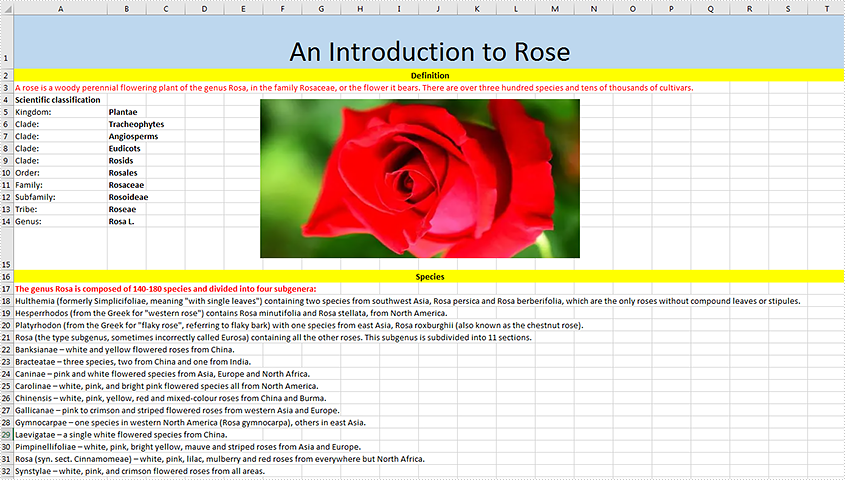
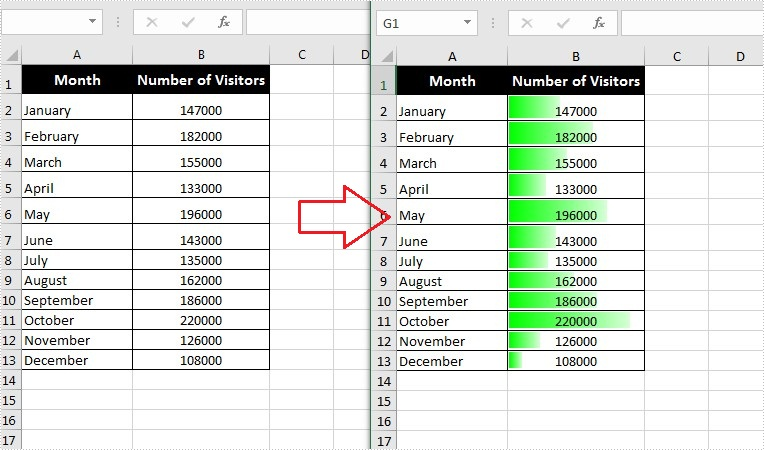
Java: Add Data Bars in Excel
Data bars are a type of conditional formatting Microsoft Excel offers for visualizing the values in Excel cells. They can help you compare the values quickly because a cell with a longer bar represents a larger value, while a cell with a shorter bar represents a smaller value. This article will introduce how to add data bars in a range of cells using Spire.XLS for Java.
Install Spire.XLS for Java
First of all, you're required to add the Spire.Xls.jar file as a dependency in your Java program. The JAR file can be downloaded from this link. If you use Maven, you can easily import the JAR file in your application by adding the following code to your project's pom.xml file.
<repositories>
    <repository>
        <id>com.e-iceblue</id>
        <name>e-iceblue</name>
        <url>https://repo.e-iceblue.com/nexus/content/groups/public/</url>
    </repository>
</repositories>
<dependencies>
    <dependency>
        <groupId>e-iceblue</groupId>
        <artifactId>spire.xls</artifactId>
        <version>16.6.5</version>
    </dependency>
</dependencies>
Add Data Bars in Excel
The following are steps to add data bars in a range of Excel cells through conditional formatting:
- Create a Workbook instance.
- Load an Excel file using Workbook.loadFromFile() method.
- Get the worksheets collection using Workbook.getWorksheets() method, and then get the first worksheet using WorksheetsCollection.get() method.
- Get a specific cell range using Worksheet.getCellRange() method.
- Add a new conditional formatting to the cell range using ConditionalFormats. addCondition(), and then set the type of the new conditional formatting to DataBar using ConditionalFormatWrapper.setFormatType() method.
- Set the color of the data bar using DataBar.setBarColor() method.
- Save the document to another file using Workbook.saveToFile() method.
- Java
import com.spire.xls.*;
import com.spire.xls.core.IConditionalFormat;
import com.spire.xls.core.spreadsheet.collections.XlsConditionalFormats;

import java.awt.*;

public class applyDataBars {
    public static void main(String[] args) {
        //Create a Workbook instance
        Workbook workbook = new Workbook();

        //Load an Excel file
        workbook.loadFromFile("C:\\Users\\Administrator\\Desktop\\test.xlsx");

        //Get the first worksheet.
        Worksheet sheet = workbook.getWorksheets().get(0);

        //Add a conditional formatting and specify ranges
        XlsConditionalFormats conditional = sheet.getConditionalFormats().add();
        conditional.addRange(sheet.getCellRange("B2:B13"));

        //Add the conditional formatting of data bars
        IConditionalFormat format = conditional.addCondition();
        format.setFormatType( ConditionalFormatType.DataBar);

        //Set color for the data bars
        format.getDataBar().setBarColor( Color.GREEN);

        //Save to file
        workbook.saveToFile("ApplyDataBars.xlsx", ExcelVersion.Version2013);
    }
}
Apply for a Temporary License
If you'd like to remove the evaluation message from the generated documents, or to get rid of the function limitations, please request a 30-day trial license for yourself.
Add Multiline Watermarks to PowerPoint in Java
This article demonstrates how to add multiline watermarks to a PowerPoint slide using Spire.Presentation for Java. To add watermarks to all slides, use one more for loop outside the two for loops in the following code snippet.
import com.spire.presentation.*;
import com.spire.presentation.Presentation;
import com.spire.presentation.drawing.*;

import java.awt.*;
import java.awt.geom.Rectangle2D;
import java.awt.image.BufferedImage;


//Create a Presentation object
Presentation presentation = new Presentation();

//Load the sample PowerPoint file
presentation.loadFromFile("C:\\Users\\Administrator\\Desktop\\Spire.Presentation.pptx");

//Specify watermark text
String watermarkText = "E-iceblue";

//Get the size of the watermark text
Image image = new BufferedImage(1, 1, BufferedImage.TYPE_INT_ARGB);
Graphics2D g2d = (Graphics2D) image.getGraphics();
Font font = new Font("Arial", Font.BOLD, 20);
g2d.setFont(font);
FontMetrics fm = g2d.getFontMetrics();
Rectangle2D strSize = fm.getStringBounds(watermarkText, g2d);

//Initialize x and y coordinate
float x = 30;
float y = 80;

for (int rowNum = 0; rowNum < 4; rowNum++) {
    for (int colNum = 0; colNum < 5; colNum++) {

        //Add a rectangle shape
        Rectangle2D rect = new Rectangle2D.Float(x, y, (float) strSize.getWidth() + 10, (float) strSize.getHeight());
        IAutoShape shape = presentation.getSlides().get(0).getShapes().appendShape(ShapeType.RECTANGLE, rect);

        //Set the style of the shape
        shape.getFill().setFillType(FillFormatType.NONE);
        shape.getShapeStyle().getLineColor().setColor(new Color(1, 1, 1, 0));
        shape.setRotation(-45);
        shape.getLocking().setSelectionProtection(true);
        shape.getLine().setFillType(FillFormatType.NONE);

        //Add watermark text to the shape
        shape.getTextFrame().setText(watermarkText);
        PortionEx textRange = shape.getTextFrame().getTextRange();

        //Set the style of the text range
        textRange.getFill().setFillType(FillFormatType.SOLID);
        textRange.getFill().getSolidColor().setColor(Color.pink);
        textRange.setLatinFont(new TextFont(font.getName()));
        textRange.setFontMinSize(font.getSize());

        x += (100 + strSize.getWidth());

    }
    x = 30;
    y += (100 + strSize.getHeight());
}

//Save the document
presentation.saveToFile("output/Watermark.pptx", FileFormat.PPTX_2013);
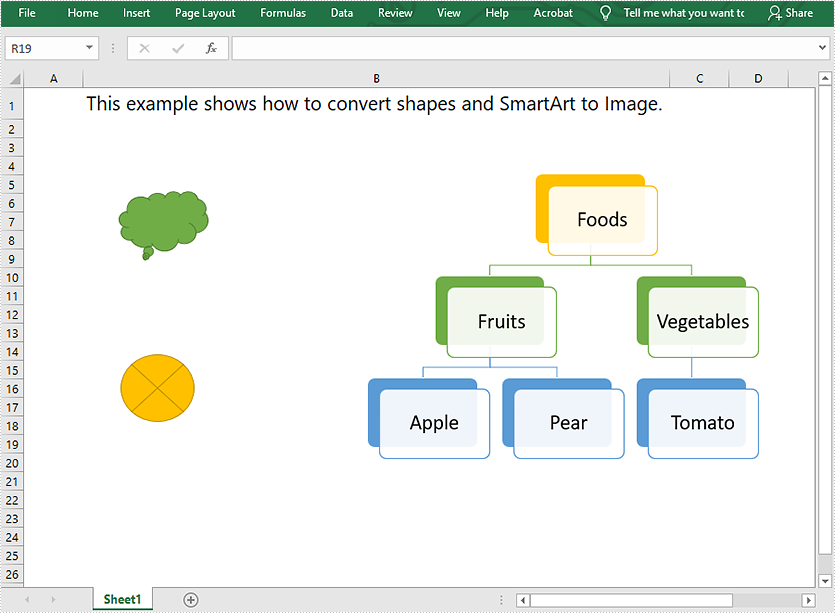
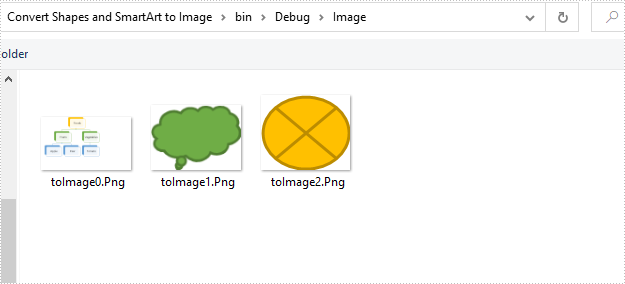
Convert Shapes and SmartArt in Excel to Image in C#, VB.NET
This article demonstrates how to convert shapes and SmartArt graphics in Excel to Image in C# using Spire.XLS for .NET.
The input Excel file:
using Spire.Xls;
using System.Collections.Generic;
using System.Drawing;
using System.Drawing.Imaging;

namespace Convert_Shapes_and_SmartArt_to_Image
{
    class Program
    {
        static void Main(string[] args)
        {
            //Create a Workbook object
            Workbook workbook = new Workbook();
            //Load the Excel file
            workbook.LoadFromFile("Sample.xlsx");

            //Get the first worksheet
            Worksheet sheet = workbook.Worksheets[0];

            //Create a SaveShapeTypeOption object
            SaveShapeTypeOption shapelist = new SaveShapeTypeOption();
            //Save shapes and SmartArt graphics in the worksheet to images
            List<Bitmap> images = sheet.SaveShapesToImage(shapelist);

            //Save images to file
            int index = 0;
            foreach (Image img in images)
            {
                img.Save("Image/" + "toImage" + index + ".Png", ImageFormat.Png);
                index++;
            }
        }
    }
}
Imports Spire.Xls
Imports System.Collections.Generic
Imports System.Drawing.Imaging

Namespace Convert_Shapes_and_SmartArt_to_Image
    Friend Class Program
        Private Shared Sub Main(ByVal args As String())
            'Create a Workbook object
            Dim workbook As Workbook = New Workbook()
            'Load the Excel file
            workbook.LoadFromFile("Sample.xlsx")

            'Get the first worksheet
            Dim sheet As Worksheet = workbook.Worksheets(0)

            'Create a SaveShapeTypeOption object
            Dim shapelist As SaveShapeTypeOption = New SaveShapeTypeOption()
            'Save shapes and SmartArt graphics in the worksheet to images
            Dim images As List(Of Bitmap) = sheet.SaveShapesToImage(shapelist)

            'Save images to file
            Dim index As Integer = 0

            For Each img As Image In images
                img.Save("Image/" & "toImage" & index & ".Png", ImageFormat.Png)
                index += 1
            Next
        End Sub
    End Class
End Namespace
Converted images:
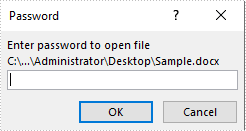
Verify If a Word Document is Password Protected in Java
This article demonstrates how to verify if a Word document is password protected or not using Spire.Doc for Java.
The following image shows that the input Word document is protected with password:
import com.spire.doc.Document;
public class DetectIfWordIsPasswordProtected {
public static void main(String []args){
//Detect if the Word document is password protected
boolean isPasswordProtected = Document.isEncrypted("C:\\Users\\Administrator\\Desktop\\Sample.docx");
if(isPasswordProtected)
{
System.out.println("The document is password protected.");
}
else
{
System.out.println("The document is not password protected.");
}
}
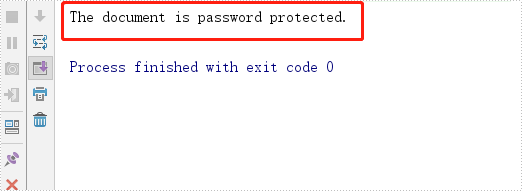
}
Output:
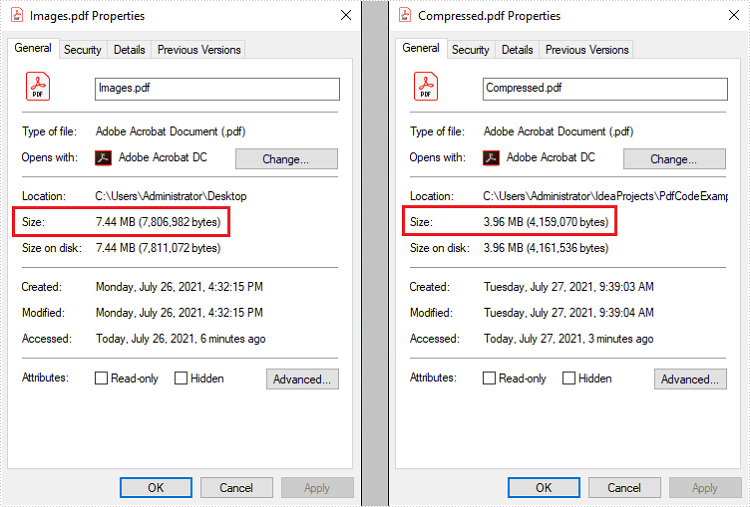
Compress High-resolution Images in PDF in Java
This article demonstrates how to compress high-resolution images of a PDF document using Spire.PDF for Java. Images in low-resolution will not be compressed anymore.
public static void main(String[] args) throws Exception {
        //Load the sample PDF document
        PdfDocument doc = new PdfDocument("C:\\Users\\Administrator\\Desktop\\Images.pdf");

        //Set IncrementalUpdate to false
        doc.getFileInfo().setIncrementalUpdate(false);

        //Declare a PdfPageBase variable
        PdfPageBase page;

        // Create the PdfImageHelper object
        PdfImageHelper imageHelper = new PdfImageHelper();

        //Loop through the pages
        for (int i = 0; i < doc.getPages().getCount(); i++) {

            //Get the specific page
            page = doc.getPages().get(i);
            if (page != null) {

                if(page.getImagesInfo() != null){

                    //Loop through the images in the page
                    for (PdfImageInfo info : imageHelper.getImagesInfo(page))

                        //Use tryCompressImage method the compress high-resolution images
                        info.tryCompressImage();
                    }
                }
            }
        //Save to file
        doc.saveToFile("output/Compressed.pdf");
        }