Extract Files from PDF Portfolio in Java
This article demonstrates how to extract files from a PDF portfolio in Java using Spire.PDF for Java.
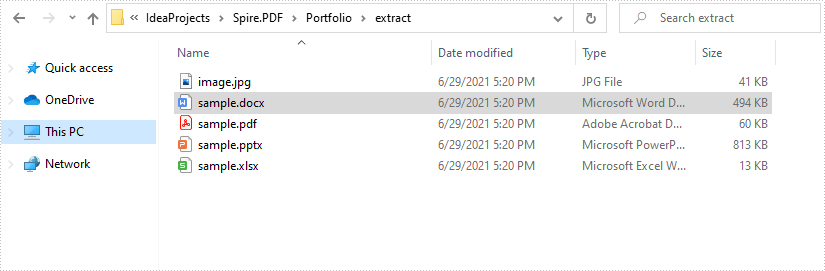
The input PDF:

import com.spire.pdf.PdfDocument;
import com.spire.pdf.attachments.PdfAttachment;

import java.io.*;

public class ReadPortfolio {
    public static void main(String []args) throws IOException {
        //Create a PdfDocument instance
        PdfDocument pdf = new PdfDocument();
        //Load the PDF file
        pdf.loadFromFile("Portfolio.pdf");

        //Loop through the attachments in the file
       for(Object obj : pdf.getAttachments()) {
            PdfAttachment attachment = (PdfAttachment) obj;
            //Extract files
            String fileName = attachment.getFileName();
            OutputStream fos = new FileOutputStream("extract/" + fileName);
            fos.write(attachment.getData());
        }

        pdf.dispose();
    }
}
Output:
C#/VB.NET: Add or Remove Digital Signatures in PowerPoint
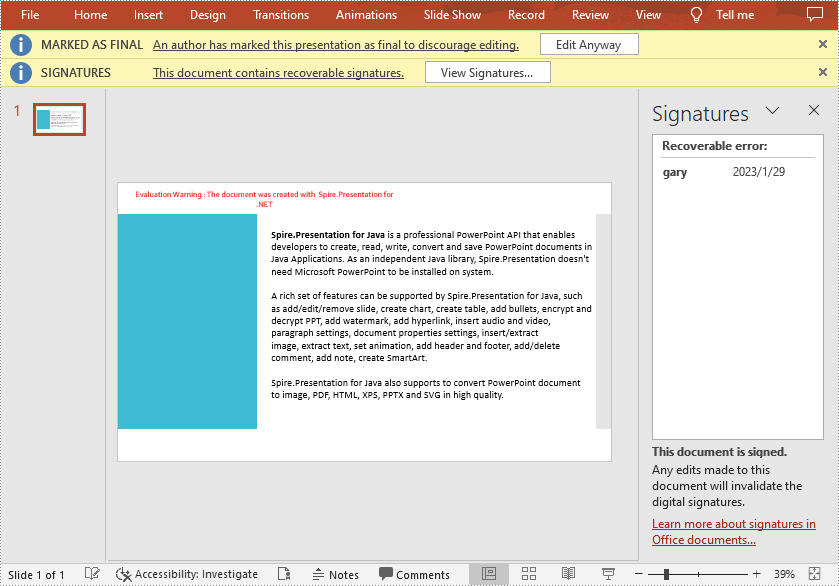
A digital signature is a modern alternative to signing documents manually on paper with pen. It uses an advanced mathematical technique to check the authenticity and integrity of digital documents, which guarantees that the contents in a digital document comes from the signer and has not been altered since then. Sometimes PowerPoint documents that contain confidential information may require a signature. In this article, you will learn how to programmatically add or remove digital signatures in PowerPoint using Spire.Presentation for .NET.
- Add a Digital Signature to PowerPoint in C# and VB.NET
- Remove All Digital Signatures from PowerPoint in C# and VB.NET
Install Spire.Presentation for .NET
To begin with, you need to add the DLL files included in the Spire.Presentation for.NET package as references in your .NET project. The DLL files can be either downloaded from this link or installed via NuGet.
PM> Install-Package Spire.Presentation
Add a Digital Signature to PowerPoint in C# and VB.NET
To add a digital signature, you'll need to have a valid signature certificate first. Then you can digitally sign a PowerPoint document with the certificate using Presentation.AddDigitalSignature (X509Certificate2 certificate, string comments, DateTime signTime) method. The detailed steps are as follows.
- Create a Presentation instance.
- Load a sample PowerPoint document using Presentation.LoadFromFile() method.
- Initializes an instance of X509Certificate2 class with the certificate file name and password.
- Add a digital signature to the PowerPoint document using Presentation.AddDigitalSignature (X509Certificate2 certificate, string comments, DateTime signTime) method.
- Save result document using Presentation.SaveToFile() method.
- C#
- VB.NET
using Spire.Presentation;
using System;

namespace AddDigitalSignature
{
    class Program
    {
        static void Main(string[] args)
        {
            //Create a Presentation instance
            Presentation ppt = new Presentation();

	    //Load a PowerPoint document
            ppt.LoadFromFile("Input.pptx");

            //Add a digital signature
            ppt.AddDigitalSignature("gary.pfx", "e-iceblue", "test", DateTime.Now);

            //Save the result document
            ppt.SaveToFile("AddDigitalSignature_result.pptx", FileFormat.Pptx2010);
            System.Diagnostics.Process.Start("AddDigitalSignature_result.pptx");

            //Dispose
            ppt.Dispose();
        }
    }
}
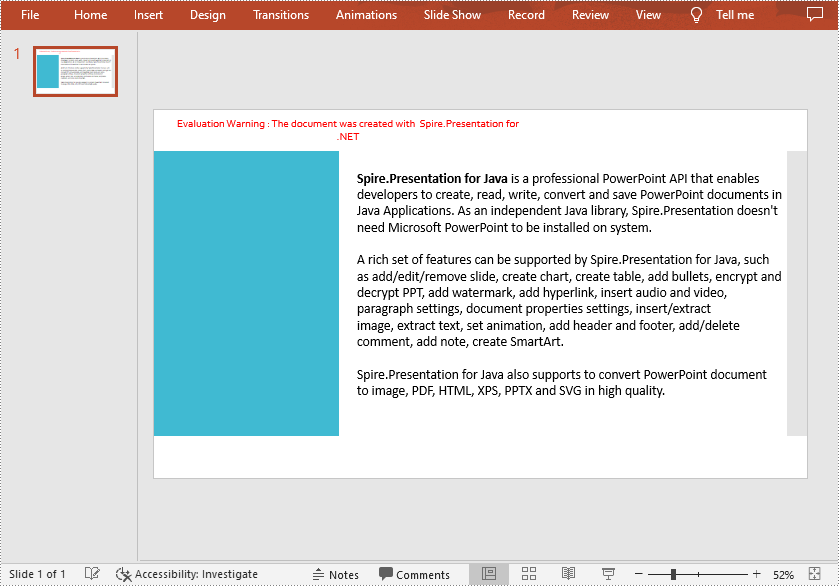
Remove All Digital Signatures from PowerPoint in C# and VB.NET
At some point you may need to remove the digital signatures from a PowerPoint document. Spire.Presentation for .NET provides the Presentation.RemoveAllDigitalSignatures() method to remove all digital signatures at once. The detailed steps are as follows:
- Create a Presentation instance.
- Load a sample PowerPoint document using Presentation.LoadFromFile() method.
- Determine if the document contains digital signatures using Presentation.IsDigitallySigned property.
- Remove all digital signatures from the document using Presentation.RemoveAllDigitalSignatures() method.
- Save the result document using Presentation.SaveToFile() method.
- C#
- VB.NET
using Spire.Presentation;

namespace RemoveDigitalSignature
{
    class Program
    {
        static void Main(string[] args)
        {
            //Create a Presentation instance
            Presentation ppt = new Presentation();

            //Load a PowerPoint document
            ppt.LoadFromFile("AddDigitalSignature.pptx");

            //Detect if the document is digitally signed
            if (ppt.IsDigitallySigned == true)
            {
                //Remove all digital signatures
                ppt.RemoveAllDigitalSignatures();
            }

            //Save the result document
            ppt.SaveToFile("RemoveDigitalSignature.pptx", FileFormat.Pptx2013);

        }
    }
}
Apply for a Temporary License
If you'd like to remove the evaluation message from the generated documents, or to get rid of the function limitations, please request a 30-day trial license for yourself.
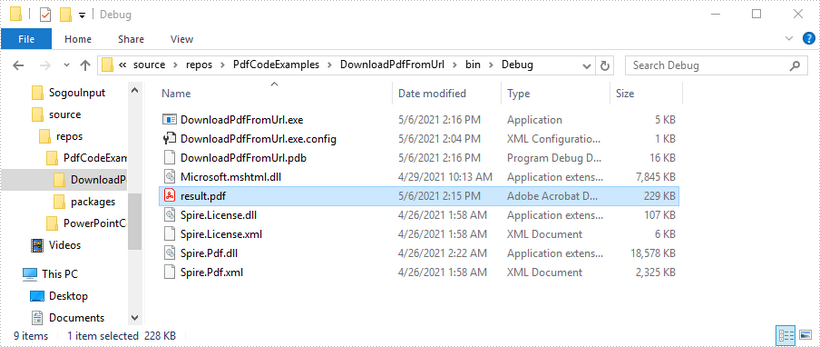
Download PDF Document from URL in C#/VB.NET
This article shows you how to download a PDF document from an URL using Spire.PDF with C# and VB.NET.
using System.IO;
using System.Net;
using Spire.Pdf;

namespace DownloadPdfFromUrl
{
    class Program
    {
        static void Main(string[] args)
        {
            //Create a PdfDocument object
            PdfDocument doc = new PdfDocument();

            //Create a WebClient object
            WebClient webClient = new WebClient();

            //Download data from URL and save as memory stream
            using (MemoryStream ms = new MemoryStream(webClient.DownloadData("https://www.e-iceblue.com/article/toDownload.pdf")))
            {
                //Load the stream
                doc.LoadFromStream(ms);
            }

            //Save to PDF file
            doc.SaveToFile("result.pdf", FileFormat.PDF);
        }
    }
}
Imports System.IO
Imports System.Net
Imports Spire.Pdf

Namespace DownloadPdfFromUrl
    Class Program
        Shared  Sub Main(ByVal args() As String)
            'Create a PdfDocument object
            Dim doc As PdfDocument = New PdfDocument()

            'Create a WebClient object
            Dim webClient As WebClient = New WebClient()

           'Download data from URL and save as memory stream
           Dim pdfData As Byte() = webClient.DownloadData(""https://www.e-iceblue.com/article/toDownload.pdf"")
           Using ms As New MemoryStream(pdfData)
           'Load the stream
           doc.LoadFromStream(ms)
 End Using

 'Save to PDF file
 doc.SaveToFile(""result.pdf"", FileFormat.PDF)
        End Sub
    End Class
End Namespace
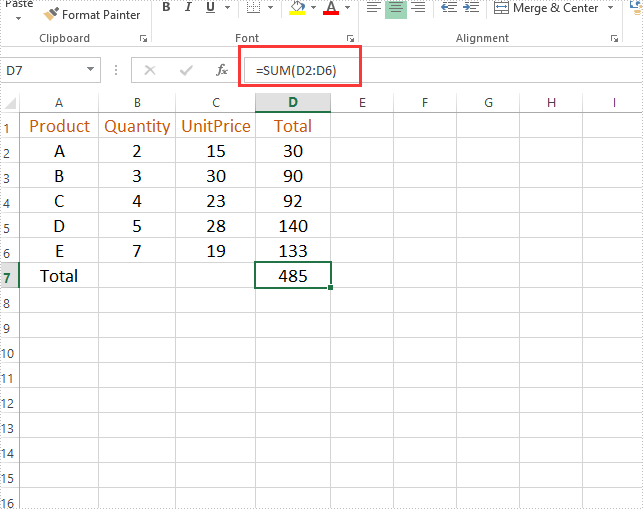
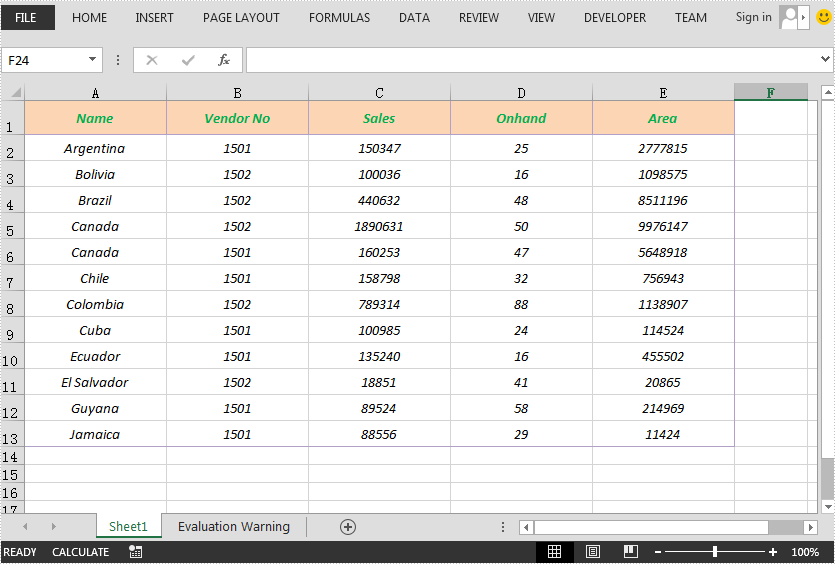
Java remove the formulas but keep the values on Excel worksheet
This article will demonstrate how to use Spire.XLS for Java to remove the formulas but keep the values on the Excel worksheet.
Firstly, view the original Excel:
String inputFile = "Sample.xlsx";
String outputFile="output/removeFormulasButKeepValues_result.xlsx";
//Create a workbook.
Workbook workbook = new Workbook();
//Load the file from disk.
workbook.loadFromFile(inputFile);
//Loop through worksheets.
for (Worksheet sheet : (Iterable<? extends Worksheet>) workbook.getWorksheets())
{
//Loop through cells.
for (CellRange cell : (Iterable<? extends CellRange>) sheet.getRange())
{
//If the cell contains formula, get the formula value, clear cell content, and then fill the formula value into the cell.
if (cell.hasFormula())
{
Object value = cell.getFormulaValue();
cell.clear(ExcelClearOptions.ClearContent);
cell.setValue(value.toString());
}
}
}
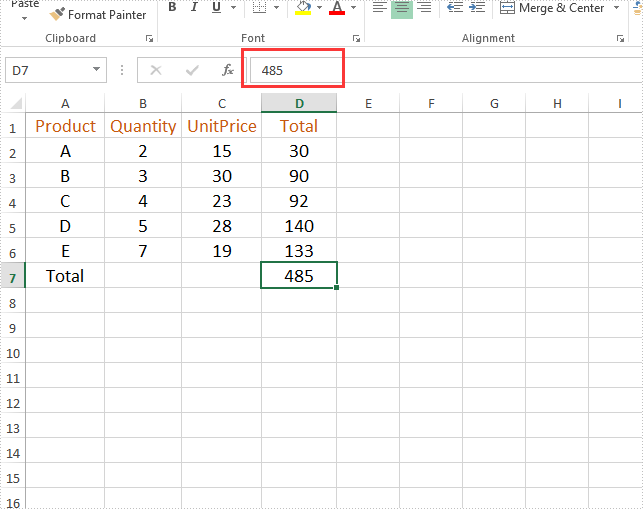
//Save to file
workbook.saveToFile(outputFile, ExcelVersion.Version2013);
Output:
Java: Get Coordinates of Text or Images in PDF
Getting the coordinates of text or images in a PDF helps accurately identify elements, making it easier to extract content. This is especially important for data analysis, where specific information needs to be pulled from complicated layouts. Additionally, knowing these coordinates allows users to add notes, marks, or stamps in the right places, improving document interactivity and collaboration by letting them highlight important sections or add comments exactly where they're needed.
In this article, you will learn how to get coordinates of the specified text or image in a PDF document using Java and Spire.PDF for Java library.
Install Spire.PDF for Java
First of all, you're required to add the Spire.Pdf.jar file as a dependency in your Java program. The JAR file can be downloaded from this link. If you use Maven, you can easily import the JAR file in your application by adding the following code to your project's pom.xml file.
<repositories>
    <repository>
        <id>com.e-iceblue</id>
        <name>e-iceblue</name>
        <url>https://repo.e-iceblue.com/nexus/content/groups/public/</url>
    </repository>
</repositories>
<dependencies>
    <dependency>
        <groupId>e-iceblue</groupId>
        <artifactId>spire.pdf</artifactId>
        <version>12.7.0</version>
    </dependency>
</dependencies>
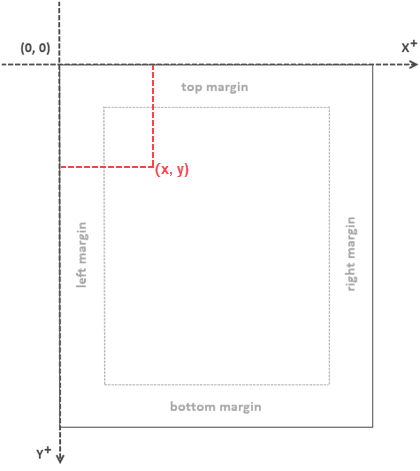
Coordinate System in Spire.PDF
When utilizing Spire.PDF for Java to work with an existing PDF document, it's important to note that the coordinate system's origin is positioned at the top-left corner of the page. The x-axis extends to the right, and the y-axis extends downward, as illustrated below.
Get Coordinates of the Specified Text in PDF
To start, you can use the PdfTextFinder.find() method to search for all occurrences of the specified text on the page, which results in a list of PdfTextFragment. After that, you can retrieve the coordinates of the first occurrence of the text using the PdfTextFragment.getPositions() method.
The steps to get coordinates of the specified text in PDF are as follows:
- Create a PdfDocument object.
- Load a PDF file using PdfDocument.loadFromFile() method.
- Get a specific page using PdfDocument.getPages().get() method.
- Search for all occurrences of the specified text on the page using PdfTextFinder.find() method and return results in a list of PdfTextFragment.
- Access a specific PdfTextFragment in the list, and get the coordinates of the fragment using PdfTextFragment.getPositions() method.
- Java
import com.spire.pdf.PdfDocument;
import com.spire.pdf.PdfPageBase;
import com.spire.pdf.texts.PdfTextFindOptions;
import com.spire.pdf.texts.PdfTextFinder;
import com.spire.pdf.texts.PdfTextFragment;
import com.spire.pdf.texts.TextFindParameter;
import java.awt.geom.Point2D;
import java.util.EnumSet;
import java.util.List;
public class GetTextCoordinates {
public static void main(String[] args) {
// Create a PdfDocument object
PdfDocument doc = new PdfDocument();
// Load a PDF file
doc.loadFromFile("C:\\Users\\Administrator\\Desktop\\Input.pdf");
// Get a specific page
PdfPageBase page = doc.getPages().get(0);
// Create a PdfTextFinder object
PdfTextFinder finder = new PdfTextFinder(page);
// Set the find options
PdfTextFindOptions options = new PdfTextFindOptions();
options.setTextFindParameter(EnumSet.of(TextFindParameter.IgnoreCase));
finder.setOptions(options);
// Find all instances of the text
List fragments = finder.find("Personal Data");
// Get a specific text fragment
PdfTextFragment fragment = (PdfTextFragment)fragments.get(0);
// Get the positions of the text (If the text spans multiple lines, there will be more than one position)
Point2D[] positions = fragment.getPositions();
// Get its first position
double x = positions[0].getX();
double y = positions[0].getY();
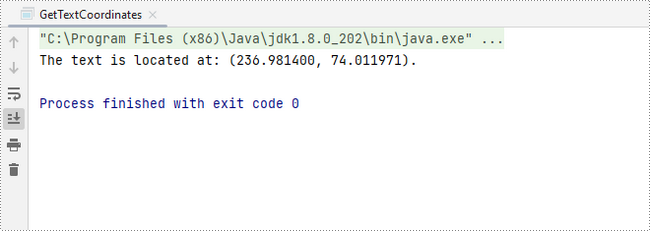
// Print result
System.out.println(String.format("The text is located at: (%f, %f).",x,y));
}
}
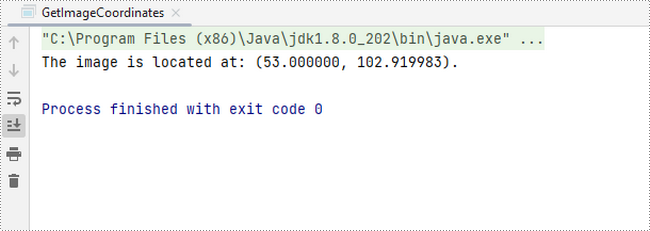
Get Coordinates of the Specified Image in PDF
To begin, you can use the PdfImageHelper.getImagesInfo() method to retrieve information about all images on the specified page, storing the results in an array of PdfImageInfo. Next, you can obtain the X and Y coordinates of a specific image using the PdfImageInfo.getBounds().getX() and PdfImageInfo.getBounds().getY() methods.
The steps to get coordinates of the specified image in PDF are as follows:
- Create a PdfDocument object.
- Load a PDF file using PdfDocument.loadFromFile() method.
- Get a specific page using PdfDocument.getPages().get() method.
- Retrieve all the image information on the page using PdfImageHelper.getImagesInfo() method and return results in an array of PdfImageInfo.
- Get X and Y coordinates of a specific image using PdfImageInfo.getBounds().getX() and PdfImageInfo.getBounds().getY() methods
- Java
import com.spire.pdf.PdfDocument;
import com.spire.pdf.PdfPageBase;
import com.spire.pdf.utilities.PdfImageHelper;
import com.spire.pdf.utilities.PdfImageInfo;

public class GetImageCoordinates {

    public static void main(String[] args) {

        // Create a PdfDocument object
        PdfDocument doc = new PdfDocument();

        // Load a PDF file
        doc.loadFromFile("C:\\Users\\Administrator\\Desktop\\Input2.pdf");

        // Get a specific page
        PdfPageBase page = doc.getPages().get(0);

        // Create a PdfImageHelper object
        PdfImageHelper helper = new PdfImageHelper();

        // Get image information from the page
        PdfImageInfo[] imageInfo = helper.getImagesInfo(page);

        // Get X, Y coordinates of the first image
        double x = imageInfo[0].getBounds().getX();
        double y = imageInfo[0].getBounds().getY();

        // Print result
        System.out.println(String.format("The image is located at: (%f, %f).",x,y));
    }
}
Apply for a Temporary License
If you'd like to remove the evaluation message from the generated documents, or to get rid of the function limitations, please request a 30-day trial license for yourself.
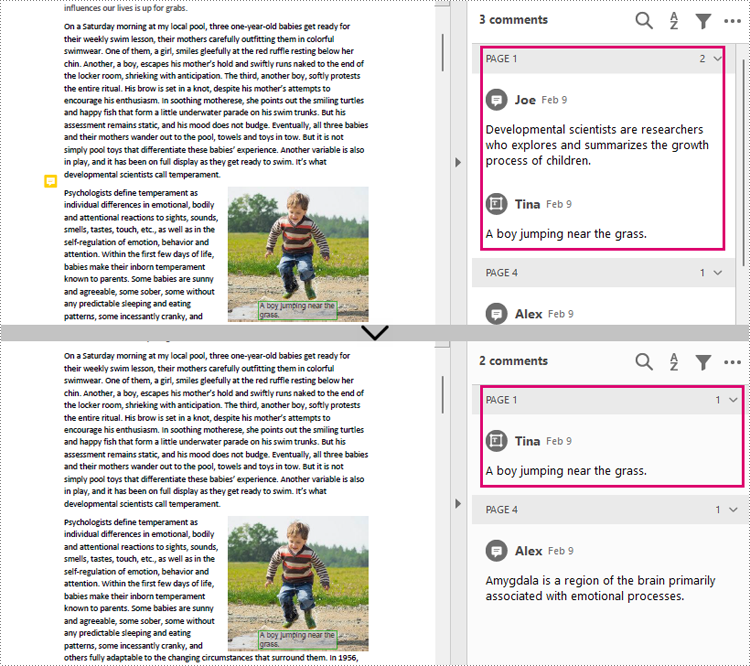
Java: Remove Annotations from PDF Documents
PDF annotations are notes or markers added to documents, which are great for making comments, giving explanations, giving feedback, etc. Co-creators of documents often communicate with annotations. However, when the issues associated with the annotations have been dealt with or the document has been finalized, it is necessary to remove the annotations to make the document more concise and professional. This article shows how to delete PDF annotations programmatically using Spire.PDF for Java.
- Remove the Specified Annotation
- Remove All Annotations from a Page
- Remove All Annotations from a PDF Document
Install Spire.PDF for Java
First of all, you're required to add the Spire.Pdf.jar file as a dependency in your Java program. The JAR file can be downloaded from this link. If you use Maven, you can easily import the JAR file in your application by adding the following code to your project's pom.xml file.
<repositories>
    <repository>
        <id>com.e-iceblue</id>
        <name>e-iceblue</name>
        <url>https://repo.e-iceblue.com/nexus/content/groups/public/</url>
    </repository>
</repositories>
<dependencies>
    <dependency>
        <groupId>e-iceblue</groupId>
        <artifactId>spire.pdf</artifactId>
        <version>12.7.0</version>
    </dependency>
</dependencies>
Remove the Specified Annotation
Annotations are page-level document elements. Therefore, deleting an annotation requires getting the page where the annotation is located first, and then you can use the PdfPageBase.getAnnotationsWidget().removeAt() method to delete the annotation. The detailed steps are as follows.
- Create a PdfDocument instance.
- Load a PDF document using PdfDocument.loadFromFile() method.
- Get the first page using PdfDocument.getPages().get() method.
- Remove the first annotation from this page using PdfPageBase.getAnnotationsWidget().removeAt() method.
- Save the document using PdfDocument.saveToFile() method.
- Java
import com.spire.pdf.PdfDocument;
import com.spire.pdf.PdfPageBase;

public class RemoveAnnotation {
    public static void main(String[] args) {

        //Create an object of PdfDocument
        PdfDocument pdf = new PdfDocument();

        //Load a PDF document
        pdf.loadFromFile("C:/Annotations.pdf");

        //Get the first page
        PdfPageBase page = pdf.getPages().get(0);

        //Remove the first annotation
        page.getAnnotationsWidget().removeAt(0);

        //Save the document
        pdf.saveToFile("RemoveOneAnnotation.pdf");
    }
}
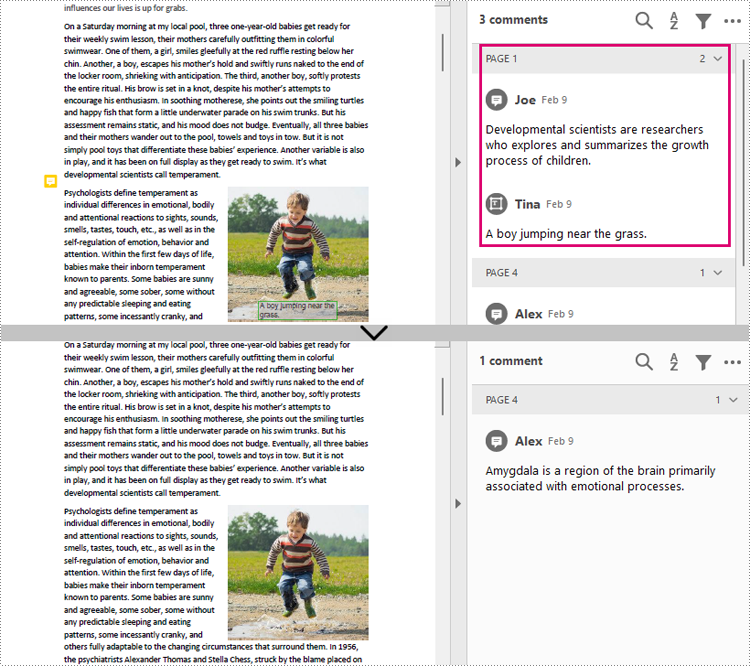
Remove All Annotations from a Page
Spire.PDF for Java also provides PdfPageBase.getAnnotationsWidget().clear() method to remove all annotations in the specified page. The detailed steps are as follows.
- Create a PdfDocument instance.
- Load a PDF document using PdfDocument.loadFromFile() method.
- Get the first page using PdfDocument.getPages().get() method.
- Remove all annotations from the page using PdfPageBase.getAnnotationsWidget().clear() method.
- Save the document using PdfDocument.saveToFile() method.
- Java
import com.spire.pdf.PdfDocument;
import com.spire.pdf.PdfPageBase;

public class RemoveAllAnnotationPage {
    public static void main(String[] args) {

        //Create an object of PdfDocument
        PdfDocument pdf = new PdfDocument();

        //Load a PDF document
        pdf.loadFromFile("C:/Annotations.pdf");

        //Get the first page
        PdfPageBase page = pdf.getPages().get(0);

        //Remove all annotations in the page
        page.getAnnotationsWidget().clear();

        //Save the document
        pdf.saveToFile("RemoveAnnotationsPage.pdf");
    }
}
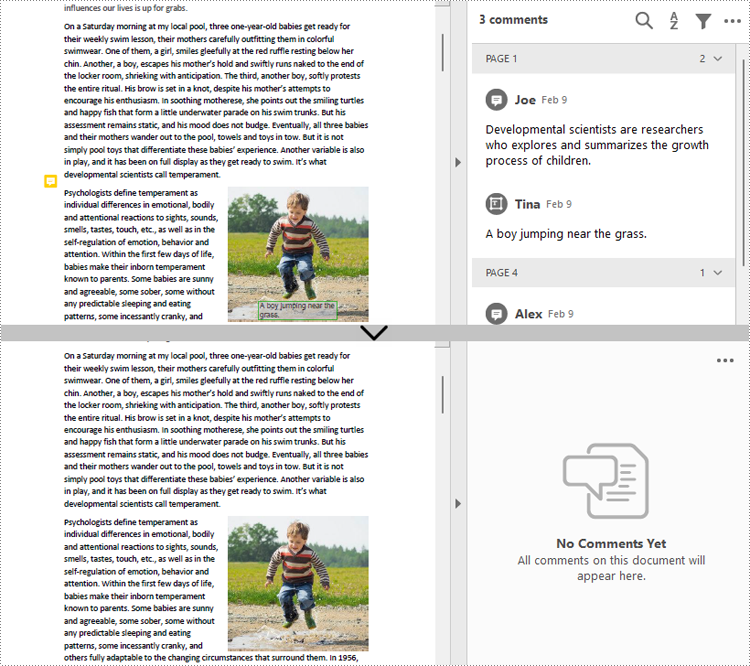
Remove All Annotations from a PDF Document
To remove all annotations from a PDF document, we need to loop through all pages in the document and delete all annotations from each page. The detailed steps are as follows.
- Create a PdfDocument instance.
- Load a PDF document using PdfDocument.loadFromFile() method.
- Loop through all pages to delete annotations.
- Delete annotations in each page using PdfPageBase.getAnnotationsWidget().clear() method.
- Save the document using PdfDocument.saveToFile() method.
- Java
import com.spire.pdf.PdfDocument;
import com.spire.pdf.PdfPageBase;

public class RemoveAllAnnotations {
    public static void main(String[] args) {

        //Create an object of PdfDocument
        PdfDocument pdf = new PdfDocument();

        //Load a PDF document
        pdf.loadFromFile("C:/Users/Sirion/Desktop/Annotations.pdf");

        //Loop through the pages in the document
        for (Object page : (Iterable) pdf.getPages()) {
            PdfPageBase pageBase = (PdfPageBase) page;
            //Remove annotations in each page
            pageBase.getAnnotationsWidget().clear();
        }


        //Save the document
        pdf.saveToFile("RemoveAllAnnotations.pdf");
    }
}
Apply for a Temporary License
If you'd like to remove the evaluation message from the generated documents, or to get rid of the function limitations, please request a 30-day trial license for yourself.
Add Line Numbers to a PDF in C#/VB.NET
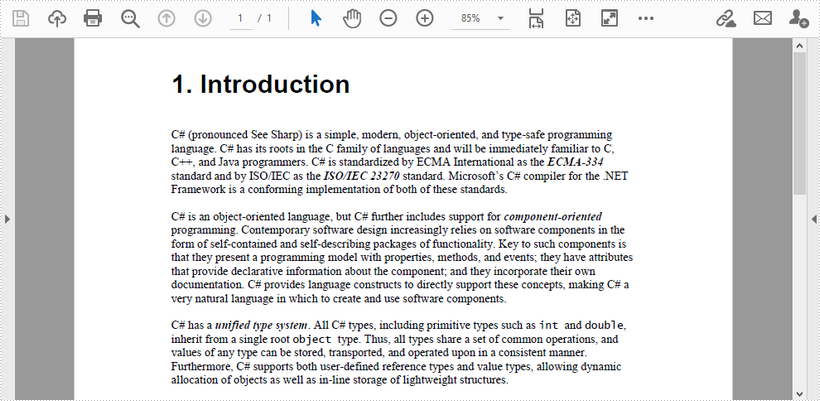
This article demonstrates how to add line numbers before chunks of text in a PDF page by using Spire.PDF for .NET.
Below is a screenshot of the input document.
using Spire.Pdf;
using Spire.Pdf.General.Find;
using Spire.Pdf.Graphics;
using System.Drawing;

namespace AddLineNumber
{
    class Program
    {
        static void Main(string[] args)
        {
     //Create a PdfDocument object
     PdfDocument doc = new PdfDocument();

     //Load PDF document
     doc.LoadFromFile(@"C:\Users\Administrator\Desktop\input.pdf");

     //Get the first page
     PdfPageBase page = doc.Pages[0];

     //Find specified text in the first line
     PdfTextFinder finder = new PdfTextFinder(page);
     finder.Options.Parameter = Spire.Pdf.Texts.TextFindParameter.WholeWord;
     PdfTextFragment topLine = finder.Find("C# (pronounced See Sharp)")[0];

     //Get line height
     float lineHeight = topLine.Bounds[0].Height;

     //Get a Y coordinate for the starting position of line numbers
     float y = topLine.Bounds[0].Location.Y - 2;

     //Find specified text in the second line
     PdfTextFinder secondfinder = new PdfTextFinder(page);
     secondfinder.Options.Parameter = Spire.Pdf.Texts.TextFindParameter.WholeWord;
     PdfTextFragment secondLine = secondfinder.Find("language. C#")[0];

     //Calculate line spacing
     float lineSpacing = secondLine.Bounds[0].Top - topLine.Bounds[0].Bottom;

     //Find specified text in the last line
     PdfTextFinder bottomfinder = new PdfTextFinder(page);
     bottomfinder.Options.Parameter = Spire.Pdf.Texts.TextFindParameter.WholeWord;
     PdfTextFragment bottomLine = bottomfinder.Find("allocation of objects")[0];

     //Get the bottom Y coordinate of the last line, which is the height of the line number area
     float height = bottomLine.Bounds[0].Bottom;

     //Create a font with the same size as the text in the PDF
     PdfFont font = new PdfFont(PdfFontFamily.TimesRoman, 11f);

     int i = 1;
     while (y < height)
     {
         //Draw line numbers at the beginning of each line
         page.Canvas.DrawString(i.ToString(), font, PdfBrushes.Black, new PointF(15, y));
         y += lineHeight + lineSpacing;
         i++;
     }

     //Save the document
     doc.SaveToFile("result.pdf");
        }
    }
}
Imports Spire.Pdf
Imports Spire.Pdf.General.Find
Imports Spire.Pdf.Graphics
Imports System.Drawing

Namespace AddLineNumber
    Class Program
        Shared  Sub Main(ByVal args() As String)
        'Create a PdfDocument object
        Dim doc As New PdfDocument()

        'Load PDF document
        doc.LoadFromFile("C:\Users\Administrator\Desktop\input.pdf")

        'Get the first page
        Dim page As PdfPageBase = doc.Pages(0)

        'Find specified text in the first line
        Dim finder As New PdfTextFinder(page)
        finder.Options.Parameter = Spire.Pdf.Texts.TextFindParameter.WholeWord
        Dim topLine As PdfTextFragment = finder.Find("C# (pronounced See Sharp)")(0)

        'Get line height
        Dim lineHeight As Single = topLine.Bounds(0).Height

        'Get a Y coordinate for the starting position of line numbers
        Dim y As Single = topLine.Bounds(0).Location.Y - 2

        'Find specified text in the second line
        Dim secondfinder As New PdfTextFinder(page)
        secondfinder.Options.Parameter = Spire.Pdf.Texts.TextFindParameter.WholeWord
        Dim secondLine As PdfTextFragment = secondfinder.Find("language. C#")(0)

        'Calculate line spacing
        Dim lineSpacing As Single = secondLine.Bounds(0).Top - topLine.Bounds(0).Bottom

        'Find specified text in the last line
        Dim bottomfinder As New PdfTextFinder(page)
        bottomfinder.Options.Parameter = Spire.Pdf.Texts.TextFindParameter.WholeWord
        Dim bottomLine As PdfTextFragment = bottomfinder.Find("allocation of objects")(0)

        'Get the bottom Y coordinate of the last line, which is the height of the line number area
        Dim height As Single = bottomLine.Bounds(0).Bottom

        'Create a font with the same size as the text in the PDF
        Dim font As PdfFont = New PdfFont(PdfFontFamily.TimesRoman, 11.0F)

        Dim i As Integer = 1
        While y < height
            'Draw line numbers at the beginning of each line
            page.Canvas.DrawString(i.ToString(), font, PdfBrushes.Black, New PointF(15, y))
            y += lineHeight + lineSpacing
            i += 1
        End While

        'Save the document
        doc.SaveToFile("result.pdf")

        End Sub
    End Class
End Namespace
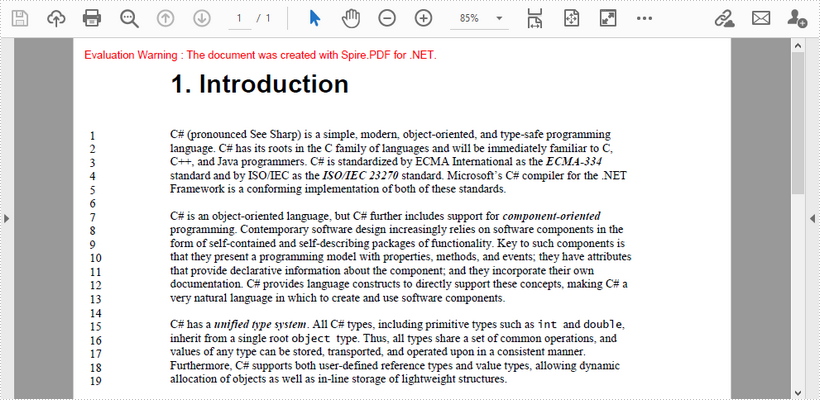
Output
Get the differences by comparing two Word documents in C#/VB.NET
We have introduced how to compare two Word documents in C# and VB.NET. From Spire.Doc V8.12.14, it supports to get the differences between two Word documents in a structure list. This article will show you how to use Spire.Doc to get the differences by comparing two Word documents.
using Spire.Doc;
using Spire.Doc.Documents;
using Spire.Doc.Fields;
using Spire.Doc.Formatting.Revisions;
using System;

namespace GetWordDifferences
    {
    class Program
    {
        static void Main(string[] args)

        {
            //Load the first Word document
            Document doc1 = new Document();
            doc1.LoadFromFile("Sample1.docx");

            //Load the second Word document
            Document doc2 = new Document();
            doc2.LoadFromFile("Sample2.docx");

            //Compare the two Word documents
            doc1.Compare(doc2, "Author");

            foreach (Section sec in doc1.Sections)
            {
                foreach (DocumentObject docItem in sec.Body.ChildObjects)
                {
                    if (docItem is Paragraph)
{
                        Paragraph para = docItem as Paragraph;
                        if (para.IsInsertRevision)
                        {
                            EditRevision insRevison = para.InsertRevision;
                            EditRevisionType insType = insRevison.Type;
                            string insAuthor = insRevison.Author;
                            DateTime insDateTime = insRevison.DateTime;
                        }

                        else if (para.IsDeleteRevision)
                        {
                            EditRevision delRevison = para.DeleteRevision;
                            EditRevisionType delType = delRevison.Type;
                            string delAuthor = delRevison.Author;
                            DateTime delDateTime = delRevison.DateTime;
                        }

                        foreach (ParagraphBase paraItem in para.ChildObjects)
                        {
                            if (paraItem.IsInsertRevision)
                            {
                                EditRevision insRevison = paraItem.InsertRevision;
                                EditRevisionType insType = insRevison.Type;
                                string insAuthor = insRevison.Author;
                                DateTime insDateTime = insRevison.DateTime;
                            }

                            else if (paraItem.IsDeleteRevision)
                            {
                                EditRevision delRevison = paraItem.DeleteRevision;
                                EditRevisionType delType = delRevison.Type;
                                string delAuthor = delRevison.Author;
                                DateTime delDateTime = delRevison.DateTime;
                            }

                        }
                    }
                }
            }

            //Get the difference about revisions
            DifferRevisions differRevisions = new DifferRevisions(doc1);
            var insetRevisionsList = differRevisions.InsertRevisions;
            var deletRevisionsList = differRevisions.DeleteRevisions;
        }
    }
 }
Imports Spire.Doc
Imports Spire.Doc.Documents
Imports Spire.Doc.Fields
Imports Spire.Doc.Formatting.Revisions
Imports System

Namespace GetWordDifferences

    Class Program

        Private Shared Sub Main(ByVal args() As String)
            'Load the first Word document
            Dim doc1 As Document = New Document
            doc1.LoadFromFile("Sample1.docx")
            'Load the second Word document
            Dim doc2 As Document = New Document
            doc2.LoadFromFile("Sample2.docx")
            'Compare the two Word documents
            doc1.Compare(doc2, "Author")
            For Each sec As Section In doc1.Sections
                For Each docItem As DocumentObject In sec.Body.ChildObjects
                    If (TypeOf docItem Is Paragraph) Then
                        Dim para As Paragraph = CType(docItem,Paragraph)
                        If para.IsInsertRevision Then
                            Dim insRevison As EditRevision = para.InsertRevision
                            Dim insType As EditRevisionType = insRevison.Type
                            Dim insAuthor As String = insRevison.Author
                            Dim insDateTime As DateTime = insRevison.DateTime
                        ElseIf para.IsDeleteRevision Then
                            Dim delRevison As EditRevision = para.DeleteRevision
                            Dim delType As EditRevisionType = delRevison.Type
                            Dim delAuthor As String = delRevison.Author
                            Dim delDateTime As DateTime = delRevison.DateTime
                        End If

                        For Each paraItem As ParagraphBase In para.ChildObjects
                            If paraItem.IsInsertRevision Then
                                Dim insRevison As EditRevision = paraItem.InsertRevision
                                Dim insType As EditRevisionType = insRevison.Type
                                Dim insAuthor As String = insRevison.Author
                                Dim insDateTime As DateTime = insRevison.DateTime
                            ElseIf paraItem.IsDeleteRevision Then
                                Dim delRevison As EditRevision = paraItem.DeleteRevision
                                Dim delType As EditRevisionType = delRevison.Type
                                Dim delAuthor As String = delRevison.Author
                                Dim delDateTime As DateTime = delRevison.DateTime
                            End If

                        Next
                    End If

                Next
            Next
            'Get the difference about revisions
            Dim differRevisions As DifferRevisions = New DifferRevisions(doc1)
            Dim insetRevisionsList = differRevisions.InsertRevisions
            Dim deletRevisionsList = differRevisions.DeleteRevisions
        End Sub
    End Class
End Namespace
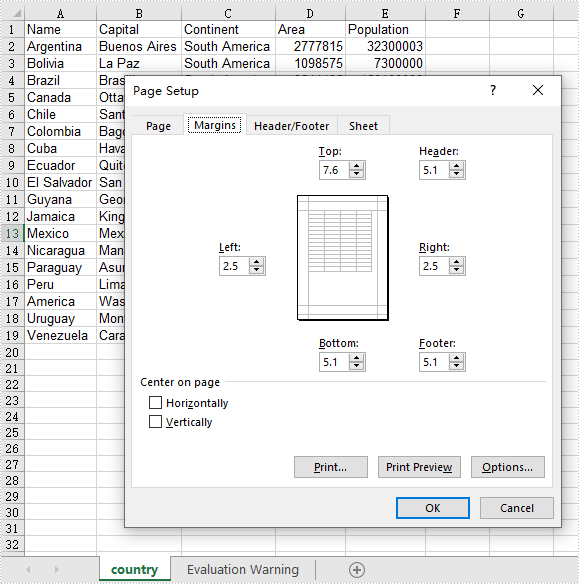
Java set Excel print page margins
This article demonstrates how to set Excel page margins before printing the Excel worksheets in Java applications. By using Spire.XLS for Java, we could set top margin, bottom margin, left margin, right margin, header margin, and footer margin. Please note that the unit for margin is inch on Spire.XLS for Java while On Microsoft Excel, it is cm (1 inch=2.54 cm).
import com.spire.xls.*;

public class setMargins {
    public static void main(String[] args) {

        String outputFile="output/setMarginsOfExcel.xlsx";

        //Load the sample document from file
        Workbook workbook = new Workbook();
        workbook.loadFromFile("Sample.xlsx");

        //Get the first worksheet.
        Worksheet sheet = workbook.getWorksheets().get(0);

        //Get the PageSetup object of the first worksheet.
        PageSetup pageSetup = sheet.getPageSetup();

        //Set the page margins of bottom, left, right and top.
        pageSetup.setBottomMargin(2);
        pageSetup.setLeftMargin(1);
        pageSetup.setRightMargin(1);
        pageSetup.setTopMargin(3);

        //Set the margins of header and footer.
        pageSetup.setHeaderMarginInch(2);
        pageSetup.setFooterMarginInch(2);

        //Save to file.
        workbook.saveToFile(outputFile, ExcelVersion.Version2013);

    }
}
Output:
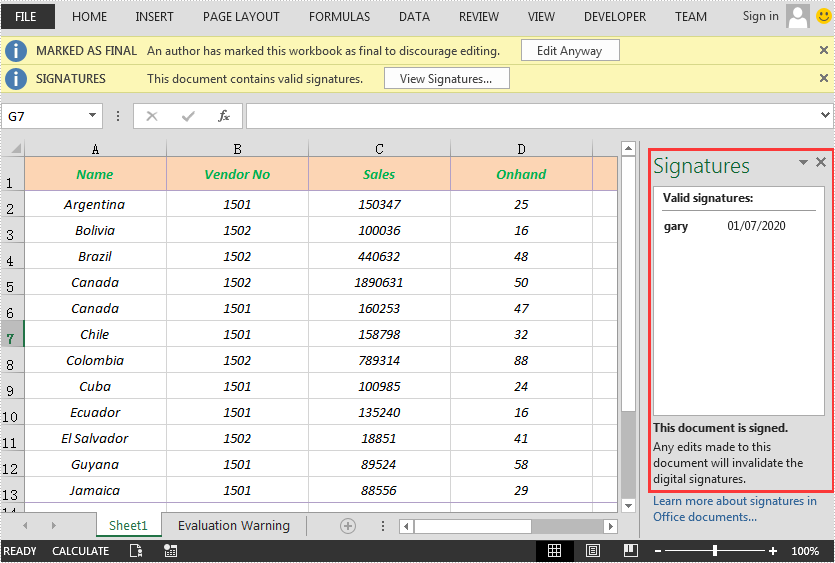
C#/VB.NET: Add or Delete Digital Signature in Excel
A digital signature is a type of electronic signature that can be used to verify the authenticity and integrity of digital documents. It can help recipients identify where the digital documents originate from and whether they have been changed by a third party after they were signed. In this article, we will demonstrate how to add or delete digital signatures in Excel in C# and VB.NET using Spire.XLS for .NET.
- Add a Digital Signature to Excel in C# and VB.NET
- Delete All Digital Signatures from Excel in C# and VB.NET
Install Spire.XLS for .NET
To begin with, you need to add the DLL files included in the Spire.XLS for .NET package as references in your .NET project. The DLL files can be either downloaded from this link or installed via NuGet.
PM> Install-Package Spire.XLS
Add a Digital Signature to Excel in C# and VB.NET
You can add a digital signature to protect the integrity of an Excel file. Once the digital signature is added, the file becomes read-only to discourage further editing. If someone makes changes to the file, the digital signature will become invalid immediately.
Spire.XLS for .NET provides the AddDigitalSignature method of Workbook class to add digital signatures to an Excel file. The detailed steps are as follows:
- Initialize an instance of the Workbook class.
- Load an Excel file using Workbook.LoadFromFile() method.
- Initialize an instance of the X509Certificate2 class with the specified certificate (.pfx) file path and the password of the .pfx file.
- Initialize an instance of the DateTime class.
- Add a digital signature to the file using Workbook.AddDigitalSignature(X509Certificate2, string, DateTime) method.
- Save the result file using Workbook.SaveToFile() method.
- C#
- VB.NET
using Spire.Xls;
using Spire.Xls.Core.MergeSpreadsheet.Interfaces;
using System;
using System.Security.Cryptography.X509Certificates;

namespace AddSignatureInExcel
{
    class Program
    {
        static void Main(string[] args)
        {
            //Create a Workbook instance
            Workbook workbook = new Workbook();

            //Load an Excel file
            workbook.LoadFromFile("Sample.xlsx");

            //Add digital signature to the file
            X509Certificate2 cert = new X509Certificate2("gary.pfx", "e-iceblue");

            // Define the path to the certificate file
            string certificatePath = "gary.pfx";

            DateTime certtime = new DateTime(2020, 7, 1, 7, 10, 36);

            // Add a digital signature to the workbook using the certificate
            IDigitalSignatures signature = workbook.AddDigitalSignature(certificatePath, "e-iceblue", "Signed by Gary Zhang", certtime);

            //Save the result file
            workbook.SaveToFile("AddDigitalSignature.xlsx", FileFormat.Version2013);
        }
    }
}
Delete All Digital Signatures from Excel in C# and VB.NET
Spire.XLS for .NET provides the RemoveAllDigitalSignatures method of Workbook class for developers to remove digital signatures from an Excel file. The detailed steps are as follows:
- Initialize an instance of the Workbook class.
- Load an Excel file using Workbook.LoadFromFile() method.
- Remove all digital signatures from the file using Workbook.RemoveAllDigitalSignatures() method.
- Save the result file using Workbook.SaveToFile() method.
- C#
- VB.NET
using Spire.Xls;

namespace DeleteSignatureInExcel
{
    class Program
    {
        static void Main(string[] args)
        {
            //Create a Workbook instance
            Workbook workbook = new Workbook();
            //Load an Excel file
            workbook.LoadFromFile("AddDigitalSignature.xlsx");

            //Remove all the digital signatures in the file
            workbook.RemoveAllDigitalSignatures();

            //Save the result file
            workbook.SaveToFile("RemoveDigitalSignature.xlsx", FileFormat.Version2013);
        }
    }
}
Apply for a Temporary License
If you'd like to remove the evaluation message from the generated documents, or to get rid of the function limitations, please request a 30-day trial license for yourself.