Java: Add Text Watermark to PowerPoint
Text watermark refers to a transparent or translucent logo or information added in the form of text on documents, images or other media. This feature is also applicable to PowerPoint presentations. Overlaying text watermarks on slides helps users identify copyright ownership, protect document security, or convey other information. In this article, we will show you how to add text watermark to PowerPoint slide using Spire.Presentation for Java.
Install Spire.Presentation for Java
First of all, you're required to add the Spire.Presentation.jar file as a dependency in your Java program. The JAR file can be downloaded from this link. If you use Maven, you can easily import the JAR file in your application by adding the following code to your project's pom.xml file.
<repositories>
    <repository>
        <id>com.e-iceblue</id>
        <name>e-iceblue</name>
        <url>https://repo.e-iceblue.com/nexus/content/groups/public/</url>
    </repository>
</repositories>
<dependencies>
    <dependency>
        <groupId>e-iceblue</groupId>
        <artifactId>spire.presentation</artifactId>
        <version>11.5.1</version>
    </dependency>
</dependencies>
Add a Single Text Watermark to Slide
Spire.Presentation for Java supports adding a single text watermark by inserting a shape to slide using Presentation.getSlides().get().getShapes().appendShape() method. And Then set text of it by calling IAutoShape.getTextFrame().setText() method. The following are detailed steps.
- Create a Presentation object and load a sample file using Presentation.loadFromFile() method.
- Set the width and height of watermark string.
- Create a Rectangle2D.Double object and specify the position and size of the rectangle shape by calling Presentation.getSlideSize().getSize().getWidth() and Presentation.getSlideSize().getSize().getHeight() methods.
- Add the rectangle shape to the first slide using Presentation.getSlides().get().getShapes().appendShape() method.
- Set the style of the shape.
- Set text of the shape by using IAutoShape.getTextFrame().setText() and get the specific range using IAutoShape.getTextFrame().getTextRange() method.
- Set the style of the text range.
- Save the result file using Presentation.saveToFile() method.
- Java
import com.spire.presentation.*;
import com.spire.presentation.drawing.FillFormatType;
import java.awt.*;
import java.awt.geom.Rectangle2D;
public class InsertSingleWatermark {
public static void main(String[] args) throws Exception {
//Create a Presentation object and load a sample file
Presentation presentation = new Presentation();
presentation.loadFromFile("sample.pptx");
//Set the width and height of watermark string
int width= 400;
int height= 300;
//Define the position and size of shape
Rectangle2D.Double rect = new Rectangle2D.Double((presentation.getSlideSize().getSize().getWidth() - width) / 2,
(presentation.getSlideSize().getSize().getHeight() - height) / 2, width, height);
//Add the shape to the first slide
IAutoShape shape = presentation.getSlides().get(0).getShapes().appendShape(ShapeType.RECTANGLE, rect);
//Set the style of shape
shape.getFill().setFillType(FillFormatType.NONE);
shape.getShapeStyle().getLineColor().setColor(Color.white);
shape.setRotation(-45);
shape.getLocking().setSelectionProtection(true);
shape.getLine().setFillType(FillFormatType.NONE);
//Add text to shape
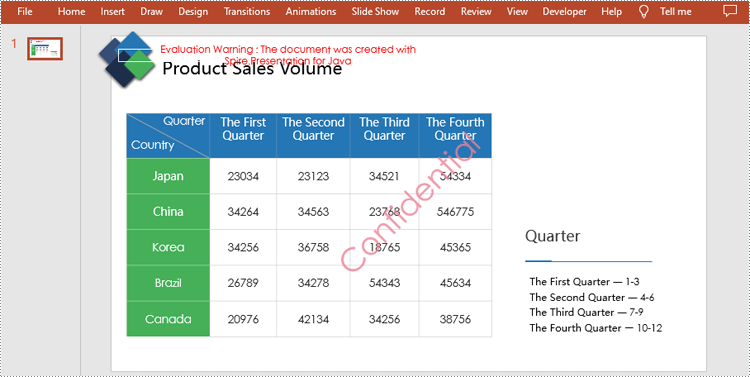
shape.getTextFrame().setText("Confidential");
PortionEx textRange = shape.getTextFrame().getTextRange();
//Set the style of the text range
textRange.getFill().setFillType(FillFormatType.SOLID);
textRange.setFontHeight(50);
Color color = new Color(237,129,150,200);
textRange.getFill().getSolidColor().setColor(color);
//Save the result document
presentation.saveToFile("output/SingleWatermark.pptx", FileFormat.PPTX_2010);
presentation.dispose();
}
}
Add a Tiled Text Watermark to Slide
By calling Presentation.getSlides().get().getShapes().appendShape() method multiple times in a loop, multiple rectangle shapes can be added at different positions to achieve the effect of tiled watermarks. The following are detailed steps.
- Create a Presentation object and load a sample file using Presentation.loadFromFile() method.
- Set the text of watermarks and measure the size of the watermark text.
- Initialize x and y coordinate of the watermark. And then add multiple rectangle shapes to slides by calling Presentation.getSlides().get().getShapes().appendShape() method for multiple times in a loop.
- Set the style of the shapes.
- Add text to the shapes by using IAutoShape.getTextFrame().setText() method and get the specific ranges using IAutoShape.getTextFrame().getTextRange() method.
- Set the style of the text ranges.
- Save the result file using Presentation.saveToFile() method.
- Java
import com.spire.presentation.*;
import com.spire.presentation.Presentation;
import com.spire.presentation.drawing.*;
import java.awt.*;
import java.awt.geom.Rectangle2D;
import java.awt.image.BufferedImage;
public class InsertTiledWatermark {
public static void main(String[] args) throws Exception{
//Create a Presentation object and load a sample file
Presentation presentation = new Presentation();
presentation.loadFromFile(""sample.pptx"");
//Set the text of watermarks
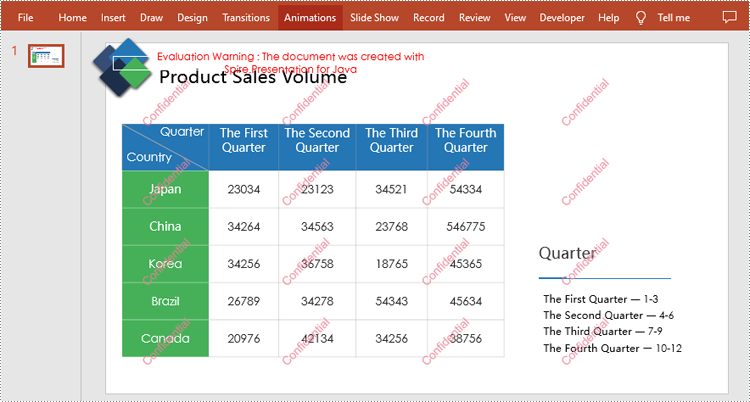
String watermarkText = ""Confidential"";
//Measure the size of the watermark text
Image image = new BufferedImage(1, 1, BufferedImage.TYPE_INT_ARGB);
Graphics2D g2d = (Graphics2D) image.getGraphics();
Font font = new Font(""Arial"", Font.BOLD, 20);
g2d.setFont(font);
FontMetrics fm = g2d.getFontMetrics();
Rectangle2D strSize = fm.getStringBounds(watermarkText, g2d);
//Initialize x and y coordinate
float x = 30;
float y = 80;
for (int rowNum = 0; rowNum < 4; rowNum++) {
for (int colNum = 0; colNum < 3; colNum++) {
//Add rectangle shapes to the first slide
Rectangle2D rect = new Rectangle2D.Float(x, y, (float) strSize.getWidth() + 10, (float) strSize.getHeight());
IAutoShape shape = presentation.getSlides().get(0).getShapes().appendShape(ShapeType.RECTANGLE, rect);
//Set the style of the shapes
shape.getFill().setFillType(FillFormatType.NONE);
shape.getShapeStyle().getLineColor().setColor(new Color(1, 1, 1, 0));
shape.setRotation(-45);
shape.getLocking().setSelectionProtection(true);
shape.getLine().setFillType(FillFormatType.NONE);
//Add watermark text to the shapes
shape.getTextFrame().setText(watermarkText);
PortionEx textRange = shape.getTextFrame().getTextRange();
//Set the style of the text ranges
textRange.getFill().setFillType(FillFormatType.SOLID);
textRange.setLatinFont(new TextFont(font.getName()));
textRange.setFontMinSize(font.getSize());
Color color = new Color(237,129,150,200);
textRange.getFill().getSolidColor().setColor(color);
x += (100 + strSize.getWidth());
}
x = 30;
y += (100 + strSize.getHeight());
}
//Save the result document
presentation.saveToFile(""output/TiledWatermark.pptx"", FileFormat.PPTX_2013);
presentation.dispose();
}
}
Apply for a Temporary License
If you'd like to remove the evaluation message from the generated documents, or to get rid of the function limitations, please request a 30-day trial license for yourself.
Java: Set the Background Color or Background Image for PDF
Proper backgrounds can make different content elements of PDF documents better matched and improve the visual impression and reading experience of PDF documents. Besides, it's important to add different backgrounds to PDF documents for different usage scenarios to enhance the professionalism of the documents. This article will show how to use Spire.PDF for Java to set the background color and background image for PDF documents.
Install Spire.PDF for Java
First, you're required to add the Spire.Pdf.jar file as a dependency in your Java program. The JAR file can be downloaded from this link. If you use Maven, you can easily import the JAR file in your application by adding the following code to your project's pom.xml file.
<repositories>
    <repository>
        <id>com.e-iceblue</id>
        <name>e-iceblue</name>
        <url>https://repo.e-iceblue.com/nexus/content/groups/public/</url>
    </repository>
</repositories>
<dependencies>
    <dependency>
        <groupId>e-iceblue</groupId>
        <artifactId>spire.pdf</artifactId>
        <version>12.7.0</version>
    </dependency>
</dependencies>
Add Background Color to PDF Documents in Java
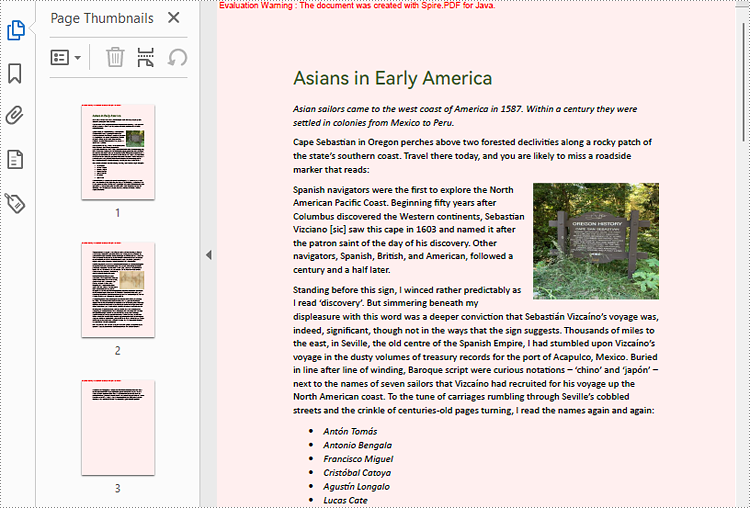
As setting the background of a PDF document needs to be done page by page, we can loop through all the pages in the document and use the PdfPageBase.setBackgroundColor() method to set the background color for each page. The following are the detailed steps:
- Create an object of PdfDocument.
- Load a PDF document using PdfDocument.loadFromFile() method.
- Loop through the pages in the PDF document and add a background color to each page using PdfPageBase.setBackgroundColor() method. You can also use the PdfPageBase.setBackgroudOpacity() method to set the opacity of the background.
- Save the document using PdfDocument.saveToFile() method.
- Java
import com.spire.pdf.PdfDocument;
import com.spire.pdf.PdfPageBase;

import java.awt.*;

public class SetPDFBackgroundColor {
    public static void main(String[] args) {

        //Create an object of PdfDocument
        PdfDocument pdf = new PdfDocument();

        //Load a PDF file
        pdf.loadFromFile("Sample.pdf");

        //Loop through the pages in the PDF file
        for(Object obj : (Iterable) pdf.getPages()) {
            PdfPageBase page = (PdfPageBase) obj;
            //Set the background color for each page
            page.setBackgroundColor(Color.PINK);
            //Set the opacity of the background
            page.setBackgroudOpacity(0.2f);
        }


        //Save the PDF file
        pdf.saveToFile("BackgroundColor.pdf");
    }
}
Add Background Picture to PDF Documents in Java
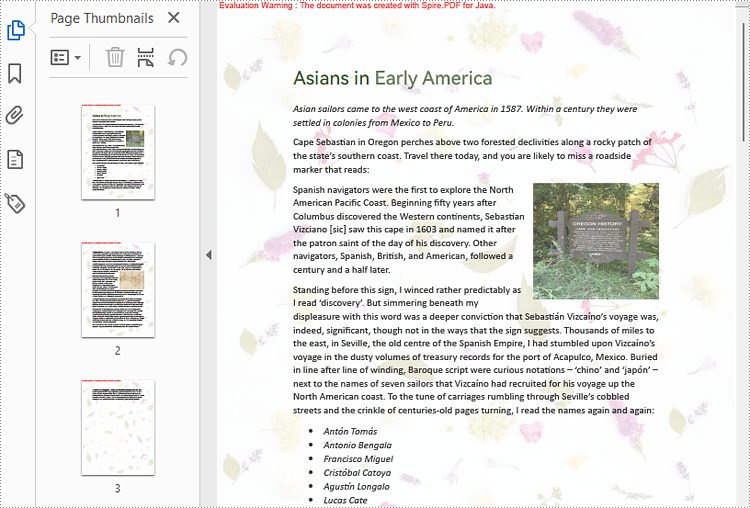
Spire.PDF for Java provides the PdfPageBase.setBackgroundImage() to set a picture as the PDF page background. The detailed steps for adding an image background to a PDF document are as follows:
- Create an object of PdfDocument.
- Load a PDF document using PdfDocument.loadFromFile() method.
- Loop through the pages in the PDF document and add a background picture to each page using PdfPageBase.setBackgroundImage() method. You can also use the PdfPageBase.setBackgroudOpacity() method to set the opacity of the background.
- Save the document using PdfDocument.saveToFile() method.
- Java
import com.spire.pdf.PdfDocument;
import com.spire.pdf.PdfPageBase;

import javax.imageio.ImageIO;
import java.awt.image.BufferedImage;
import java.io.File;
import java.io.IOException;

public class SetPDFBackgroundImage {
    public static void main(String[] args) throws IOException {

        //Create an object of PdfDocument
        PdfDocument pdf = new PdfDocument();

        //Load a PDF file
        pdf.loadFromFile("Sample.pdf");

        //Load an image
        BufferedImage background = ImageIO.read(new File("background.jpg"));

        //Loop through the pages in the PDF file
        for(Object obj : (Iterable) pdf.getPages()) {
            PdfPageBase page = (PdfPageBase) obj;
            //Set the background color for each page
            page.setBackgroundColor(Color.PINK);
            //Set the opacity of the background
            page.setBackgroudOpacity(0.2f);
        }

        //Save the PDF file
        pdf.saveToFile("BackgroundImage.pdf");
    }
}
Apply for a Temporary License
If you'd like to remove the evaluation message from the generated documents, or to get rid of the function limitations, please request a 30-day trial license for yourself.
Java: Create Tables in a PDF Document
A table represents information or data in the form of horizontal rows and vertical columns. Creating tables is often more efficient than describing the data in the paragraph text, especially when the data is numerical or large. The tabular data presentation makes it easier to read and understand. In this article, you will learn how to create tables in a PDF document in Java using Spire.PDF for Java.
Spire.PDF for Java offers the PdfTable and the PdfGrid class to work with the tables in a PDF document. The PdfTable class is used to quickly create simple, regular tables without too much formatting, while the PdfGrid class is used to create more complex tables.
The table below lists the differences between these two classes.
| PdfTable | PdfGrid | |
| Formatting | ||
| Row | Can be set through events. No API support. | Can be set through API. |
| Column | Can be set through API. | Can be set through API. |
| Cell | Can be set through events. No API support. | Can be set through API. |
| Others | ||
| Column span | Not support. | Can be set through API. |
| Row span | Can be set through events. No API support. | Can be set through API. |
| Nested table | Can be set through events. No API support. | Can be set through API. |
| Events | BeginCellLayout, EndCellLayout, BeginRowLayout, EndRowLayout, BeginPageLayout, EndPageLayout. | BeginPageLayout, EndPageLayout. |
The following sections demonstrate how to create a table in PDF using the PdfTable class and the PdfGrid class, respectively.
Install Spire.PDF for Java
First of all, you're required to add the Spire.Pdf.jar file as a dependency in your Java program. The JAR file can be downloaded from this link. If you use Maven, you can easily import the JAR file in your application by adding the following code to your project's pom.xml file.
<repositories>
    <repository>
        <id>com.e-iceblue</id>
        <name>e-iceblue</name>
        <url>https://repo.e-iceblue.com/nexus/content/groups/public/</url>
    </repository>
</repositories>
<dependencies>
    <dependency>
        <groupId>e-iceblue</groupId>
        <artifactId>spire.pdf</artifactId>
        <version>12.7.0</version>
    </dependency>
</dependencies>
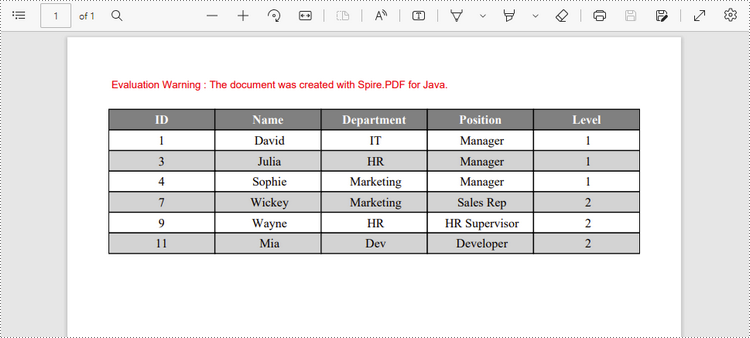
Create a Table in PDF Using PdfTable Class
The following are the steps to create a table using the PdfTable class using Spire.PDF for Java.
- Create a PdfDocument object.
- Add a page to it using PdfDocument.getPages().add() method.
- Create a Pdftable object.
- Set the table style using the methods under PdfTableStyle object which is returned by PdfTable.getTableStyle() method.
- Insert data to table using PdfTable.setDataSource() method.
- Set row height and row color through BeginRowLayout event.
- Draw table on the PDF page using PdfTable.draw() method.
- Save the document to a PDF file using PdfDocument.saveToFile() method.
- Java
import com.spire.data.table.DataTable;
import com.spire.pdf.PdfDocument;
import com.spire.pdf.PdfPageBase;
import com.spire.pdf.PdfPageSize;
import com.spire.pdf.graphics.*;
import com.spire.pdf.tables.*;

import java.awt.*;
import java.awt.geom.Point2D;

public class CreateTable {

    public static void main(String[] args) {

        //Create a PdfDocument object
        PdfDocument doc = new PdfDocument();

        //Add a page
        PdfPageBase page = doc.getPages().add(PdfPageSize.A4, new PdfMargins(40));

        //Create a PdfTable object
        PdfTable table = new PdfTable();

        //Set font for header and the rest cells
        table.getStyle().getDefaultStyle().setFont(new PdfTrueTypeFont(new Font("Times New Roman", Font.PLAIN, 12), true));
        table.getStyle().getHeaderStyle().setFont(new PdfTrueTypeFont(new Font("Times New Roman", Font.BOLD, 12), true));

        //Define data
        String[] data = {"ID;Name;Department;Position;Level",
                "1; David; IT; Manager; 1",
                "3; Julia; HR; Manager; 1",
                "4; Sophie; Marketing; Manager; 1",
                "7; Wickey; Marketing; Sales Rep; 2",
                "9; Wayne; HR; HR Supervisor; 2",
                "11; Mia; Dev; Developer; 2"};
        String[][] dataSource = new String[data.length][];
        for (int i = 0; i < data.length; i++) {
            dataSource[i] = data[i].split("[;]", -1);
        }

        //Set data as the table data
        table.setDataSource(dataSource);

        //Set the first row as header row
        table.getStyle().setHeaderSource(PdfHeaderSource.Rows);
        table.getStyle().setHeaderRowCount(1);

        //Show header(the header is hidden by default)
        table.getStyle().setShowHeader(true);

        //Set font color and background color of header row
        table.getStyle().getHeaderStyle().setBackgroundBrush(PdfBrushes.getGray());
        table.getStyle().getHeaderStyle().setTextBrush(PdfBrushes.getWhite());

        //Set text alignment in header row
        table.getStyle().getHeaderStyle().setStringFormat(new PdfStringFormat(PdfTextAlignment.Center, PdfVerticalAlignment.Middle));

        //Set text alignment in other cells
        for (int i = 0; i < table.getColumns().getCount(); i++) {
            table.getColumns().get(i).setStringFormat(new PdfStringFormat(PdfTextAlignment.Center, PdfVerticalAlignment.Middle));
        }

        //Register with BeginRowLayout event
        table.addBeginRowLayoutEventHandler(new BeginRowLayoutEventHandler() {

            public void invoke(Object sender, BeginRowLayoutEventArgs args) {
                Table_BeginRowLayout(sender, args);

            }
        });


        //Draw table on the page
        table.draw(page, new Point2D.Float(0, 30));

        //Save the document to a PDF file
        doc.saveToFile("output/PdfTable.pdf");

    }

    //Event handler
    private static void Table_BeginRowLayout(Object sender, BeginRowLayoutEventArgs args) {

        //Set row height
        args.setMinimalHeight(20f);

        //Alternate color of rows except the header row
        if (args.getRowIndex() == 0) {
            return;
        }
        if (args.getRowIndex() % 2 == 0) {
            args.getCellStyle().setBackgroundBrush(PdfBrushes.getLightGray());
        } else {
            args.getCellStyle().setBackgroundBrush(PdfBrushes.getWhite());
        }
    }
}
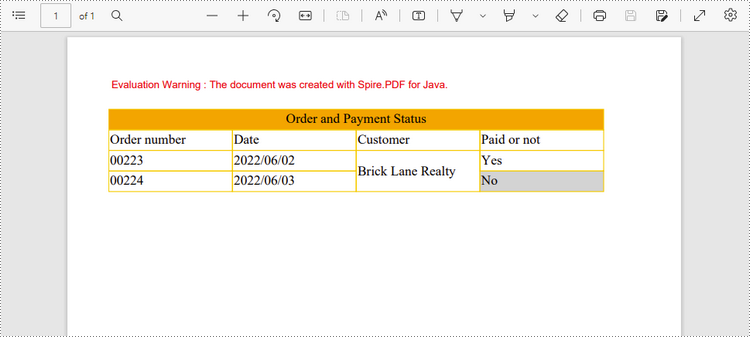
Create a Table in PDF Using PdfGrid Class
Below are the steps to create a table in PDF using the PdfGrid class using Spire.PDF for Java.
- Create a PdfDocument object.
- Add a page to it using PdfDocument.getPages().add() method.
- Create a PdfGrid object.
- Set the table style using the methods under the PdfGridStyle object which is returned by PdfGrid.getStyle() method.
- Add rows and columns to the table using PdfGrid.getRows().add() method and PdfGrid.getColumns().add() method.
- Insert data to specific cells using PdfGridCell.setValue() method.
- Span cells across columns or rows using PdfGridCell.setRowSpan() method or PdfGridCell.setColumnSpan() method.
- Set the formatting of a specific cell using PdfGridCell.setStringFormat() method and the methods under PdfGridCellStyle object.
- Draw table on the PDF page using PdfGrid.draw() method.
- Save the document to a PDF file using PdfDocument.saveToFile() method.
- Java
import com.spire.pdf.*;
import com.spire.pdf.graphics.*;
import com.spire.pdf.grid.PdfGrid;
import com.spire.pdf.grid.PdfGridRow;

import java.awt.*;
import java.awt.geom.Point2D;

public class CreateGrid {

    public static void main(String[] args) {

        //Create a PdfDocument object
        PdfDocument doc = new PdfDocument();

        //Add a page
        PdfPageBase page = doc.getPages().add(PdfPageSize.A4,new PdfMargins(40));

        //Create a PdfGrid
        PdfGrid grid = new PdfGrid();

        //Set cell padding
        grid.getStyle().setCellPadding(new PdfPaddings(1, 1, 1, 1));

        //Set font
        grid.getStyle().setFont(new PdfTrueTypeFont(new Font("Times New Roman", Font.PLAIN, 13), true));

        //Add rows and columns
        PdfGridRow row1 = grid.getRows().add();
        PdfGridRow row2 = grid.getRows().add();
        PdfGridRow row3 = grid.getRows().add();
        PdfGridRow row4 = grid.getRows().add();
        grid.getColumns().add(4);

        //Set column width
        for (int i = 0; i < grid.getColumns().getCount(); i++) {

            grid.getColumns().get(i).setWidth(120);
        }

        //Write data into specific cells
        row1.getCells().get(0).setValue("Order and Payment Status");
        row2.getCells().get(0).setValue("Order number");
        row2.getCells().get(1).setValue("Date");
        row2.getCells().get(2).setValue ("Customer");
        row2.getCells().get(3).setValue("Paid or not");
        row3.getCells().get(0).setValue("00223");
        row3.getCells().get(1).setValue("2022/06/02");
        row3.getCells().get(2).setValue("Brick Lane Realty");
        row3.getCells().get(3).setValue("Yes");
        row4.getCells().get(0).setValue("00224");
        row4.getCells().get(1).setValue("2022/06/03");
        row4.getCells().get(3).setValue("No");

        //Span cell across columns
        row1.getCells().get(0).setColumnSpan(4);

        //Span cell across rows
        row3.getCells().get(2).setRowSpan(2);

        //Set text alignment of specific cells
        row1.getCells().get(0).setStringFormat(new PdfStringFormat(PdfTextAlignment.Center));
        row3.getCells().get(2).setStringFormat(new PdfStringFormat(PdfTextAlignment.Left, PdfVerticalAlignment.Middle));

        //Set background color of specific cells
        row1.getCells().get(0).getStyle().setBackgroundBrush(PdfBrushes.getOrange());
        row4.getCells().get(3).getStyle().setBackgroundBrush(PdfBrushes.getLightGray());

        //Format cell border
        PdfBorders borders = new PdfBorders();
        borders.setAll(new PdfPen(new PdfRGBColor(Color.ORANGE), 0.8f));
        for (int i = 0; i < grid.getRows().getCapacity(); i++) {

            PdfGridRow gridRow = grid.getRows().get(i);
            gridRow.setHeight(20f);
            for (int j = 0; j < gridRow.getCells().getCount(); j++) {
                gridRow.getCells().get(j).getStyle().setBorders(borders);
            }

        }

        //Draw table on the page
        grid.draw(page, new Point2D.Float(0, 30));

        //Save the document to a PDF file
        doc.saveToFile("output/PdfGrid.pdf");
    }
}
Apply for a Temporary License
If you'd like to remove the evaluation message from the generated documents, or to get rid of the function limitations, please request a 30-day trial license for yourself.
Java: Encrypt or Decrypt PDF Files
For PDF documents that contain confidential or sensitive information, you may want to password protect these documents to ensure that only the designated person can access the information. This article will demonstrate how to programmatically encrypt a PDF document and decrypt a password-protected document using Spire.PDF for Java.
Install Spire.PDF for Java
First of all, you're required to add the Spire.Pdf.jar file as a dependency in your Java program. The JAR file can be downloaded from this link. If you use Maven, you can easily import the JAR file in your application by adding the following code to your project's pom.xml file.
<repositories>
    <repository>
        <id>com.e-iceblue</id>
        <name>e-iceblue</name>
        <url>https://repo.e-iceblue.com/nexus/content/groups/public/</url>
    </repository>
</repositories>
<dependencies>
    <dependency>
        <groupId>e-iceblue</groupId>
        <artifactId>spire.pdf</artifactId>
        <version>12.7.0</version>
    </dependency>
</dependencies>
Encrypt a PDF File with Password
There are two kinds of passwords for encrypting a PDF file - open password and permission password. The former is set to open the PDF file, while the latter is set to restrict printing, contents copying, commenting, etc. If a PDF file is secured with both types of passwords, it can be opened with either password.
The PdfDocument.getSecurity().encrypt(java.lang.String openPassword, java.lang.String permissionPassword, java.util.EnumSet<PdfPermissionsFlags> permissions, PdfEncryptionKeySize keySize) method offered by Spire.PDF for Java allows you to set both open password and permission password to encrypt PDF files. The detailed steps are as follows.
- Create a PdfDocument instance.
- Load a sample PDF file using PdfDocument.loadFromFile() method.
- Set open password, permission password, encryption key size and permissions.
- Encrypt the PDF file using PdfDocument.getSecurity().encrypt(java.lang.String openPassword, java.lang.String permissionPassword, java.util.EnumSet<PdfPermissionsFlags> permissions, PdfEncryptionKeySize keySize) method.
- Save the result file using PdfDocument.saveToFile () method.
- Java
import java.util.EnumSet;

import com.spire.pdf.PdfDocument;
import com.spire.pdf.security.PdfEncryptionKeySize;
import com.spire.pdf.security.PdfPermissionsFlags;

public class EncryptPDF {

    public static void main(String[] args) {

        // Input file path
        String input = "data/encryption.pdf";

        // Output file path
        String output = "output/encryption_output.pdf";

        // Create a new PDF document object
        PdfDocument doc = new PdfDocument();

        // Load the PDF document from the input file path
        doc.loadFromFile(input);

        // Create a password-based security policy with open and permission passwords
        PdfSecurityPolicy securityPolicy = new PdfPasswordSecurityPolicy("openPwd", "permissionPwd");

        // Set the encryption algorithm to AES 256-bit
        securityPolicy.setEncryptionAlgorithm(PdfEncryptionAlgorithm.AES_256);

        // Set document privilege to forbid all actions
        securityPolicy.setDocumentPrivilege(PdfDocumentPrivilege.getForbidAll());

        // Allow degraded printing
        securityPolicy.getDocumentPrivilege().setAllowDegradedPrinting(true);

        // Allow modification of annotations
        securityPolicy.getDocumentPrivilege().setAllowModifyAnnotations(true);

        // Allow document assembly
        securityPolicy.getDocumentPrivilege().setAllowAssembly(true);

        // Allow modification of document contents
        securityPolicy.getDocumentPrivilege().setAllowModifyContents(true);

        // Allow filling form fields
        securityPolicy.getDocumentPrivilege().setAllowFillFormFields(true);

        // Allow printing
        securityPolicy.getDocumentPrivilege().setAllowPrint(true);

        // Allow printing
        doc.encrypt(securityPolicy);

        // Save the encrypted document to the output file path
        doc.saveToFile(output, FileFormat.PDF);

        // Dispose of the document resources
        doc.dispose();

    }

}
Remove Password to Decrypt a PDF File
When you need to remove the password from a PDF file, you can set the open password and permission password to empty while calling the PdfDocument.getSecurity().encrypt(java.lang.String openPassword, java.lang.String permissionPassword, java.util.EnumSet<PdfPermissionsFlags> permissions, PdfEncryptionKeySize keySize, java.lang.String originalPermissionPassword) method. The detailed steps are as follows.
- Create a PdfDocument object.
- Load the encrypted PDF file with password using PdfDocument.loadFromFile(java.lang.String filename, java.lang.String password) method.
- Decrypt the PDF file by setting the open password and permission password to empty using PdfDocument.getSecurity().encrypt(java.lang.String openPassword, java.lang.String permissionPassword, java.util.EnumSet<PdfPermissionsFlags> permissions, PdfEncryptionKeySize keySize, java.lang.String originalPermissionPassword) method.
- Save the result file using PdfDocument.saveToFile() method.
- Java
import com.spire.pdf.PdfDocument;
import com.spire.pdf.security.PdfEncryptionKeySize;
import com.spire.pdf.security.PdfPermissionsFlags;

public class DecryptPDF {

    public static void main(String[] args) throws Exception {

        // Specify the input and output file paths
        String input = "data/decryption.pdf";
        String output = "output/decryption_result.pdf";

        //load the pdf document.
        PdfDocument doc = new PdfDocument();
        doc.loadFromFile(input, "test");

        //decrypt the document
        doc.decrypt();

        //save the file
        doc.saveToFile(output, FileFormat.PDF);

        // Close the PDF document to release resources
        doc.close();

        // Dispose of the PDF document to free up system resources
        doc.dispose();

    }
}

Apply for a Temporary License
If you'd like to remove the evaluation message from the generated documents, or to get rid of the function limitations, please request a 30-day trial license for yourself.
Get Paragraphs by Style Name in Word in C#, VB.NET
By using Spire.Doc, you can not only retrieve the style names of all paragraphs in a Word document, but also get the paragraphs with a specific style name. This is useful especially when you need to get the text in Title, Heading 1, Subtitle, etc.
| Paragraph Style Names in Word | Paragraph Style Names in Spire.Doc |
| Title | Title |
| Heading 1 | Heading1 |
| Heading 2 | Heading2 |
| Heading 3 | Heading3 |
| Heading 4 | Heading3 |
| Subtitle | Subtitle |
Step 1: Load a sample Word file when initializing the Document object.
Document doc = new Document("sample.docx");
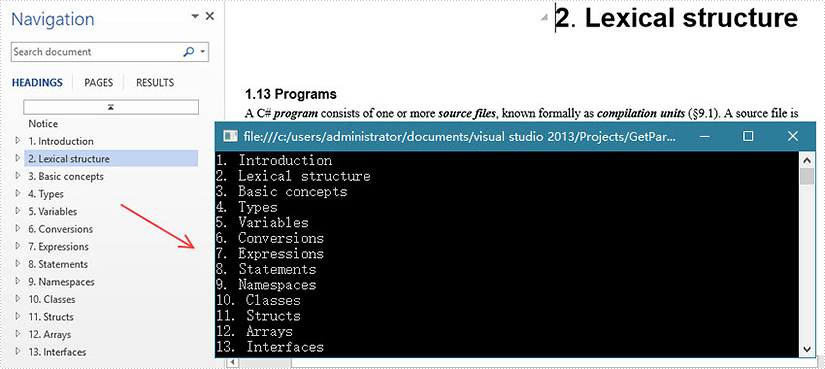
Step 2: Traverse the sections and paragraphs in the document and determine if the paragraph style name is "Heading1", if so, write the paragraph text on screen.
foreach (Section section in doc.Sections)
{
    foreach (Paragraph paragraph in section.Paragraphs)
    {
        if (paragraph.StyleName == "Heading1")
        {
            Console.WriteLine(paragraph.Text);
        }
    }
}
Output:
Full Code:
using Spire.Doc;
using Spire.Doc.Documents;
using System;
namespace GetParagh
{
 class Program
    {

     static void Main(string[] args)
     {
         Document doc = new Document("sample.docx");
         foreach (Section section in doc.Sections)
         {
             foreach (Paragraph paragraph in section.Paragraphs)
             {
                 if (paragraph.StyleName == "Heading1")
                 {
                     Console.WriteLine(paragraph.Text);
                 }
             }
         }
     }

    }
}
Imports Spire.Doc
Imports Spire.Doc.Documents
Namespace GetParagh
	Class Program

		Private Shared Sub Main(args As String())
			Dim doc As New Document("sample.docx")
			For Each section As Section In doc.Sections
				For Each paragraph As Paragraph In section.Paragraphs
					If paragraph.StyleName = "Heading1" Then
						Console.WriteLine(paragraph.Text)
					End If
				Next
			Next
		End Sub

	End Class
End Namespace
Replace Bookmark with a Table in Word Documents in C#, VB.NET
Bookmarks are a great way to specify important locations on a Word document. Spire.Doc supports to access the bookmarks within the document and insert objects such as text, image and table at the bookmark location. This article will show you how to access a specific bookmark and replace the current bookmark content with a table.
Step 1: Load a template Word document.
Document doc = new Document();
doc.LoadFromFile(@"C:\Users\Administrator\Desktop\employee.docx");
Step 2: Create a Table object.
Table table = new Table(doc,true);
Step 3: Fill the table with sample data.
DataTable dt = new DataTable();
dt.Columns.Add("id", typeof(string));
dt.Columns.Add("name", typeof(string));
dt.Columns.Add("job", typeof(string));
dt.Columns.Add("email", typeof(string));
dt.Columns.Add("salary", typeof(string));
dt.Rows.Add(new string[] { "Emp_ID", "Name", "Job", "E-mail", "Salary" });
dt.Rows.Add(new string[] { "0241","Andrews", "Engineer", "andrews@outlook.com" ,"3.8K"});
dt.Rows.Add(new string[] { "0242","White", "Manager", "white@outlook.com","4.2K" });
dt.Rows.Add(new string[] { "0243","Martin", "Secretary", "martin@gmail.com", "3.5K" });
table.ResetCells(dt.Rows.Count, dt.Columns.Count);
for (int i = 0; i < dt.Rows.Count; i++)
{
    for (int j = 0; j < dt.Columns.Count; j++)
    {
        table.Rows[i].Cells[j].AddParagraph().AppendText(dt.Rows[i][j].ToString());
    }
}
Step 4: Get the specific bookmark by its name.
BookmarksNavigator navigator = new BookmarksNavigator(doc);
navigator.MoveToBookmark("bookmark_employee");
Step 5: Create a TextBodyPart instance and add the table to it.
TextBodyPart part = new TextBodyPart(doc);
part.BodyItems.Add(table);
Step 6: Replace the current bookmark content with the TextBodyPart object.
navigator.ReplaceBookmarkContent(part);
Step 7: Save the file.
doc.SaveToFile("output.docx", FileFormat.Docx2013);
Result:

Full Code:
using Spire.Doc;
using Spire.Doc.Documents;
using System.Data;
namespace ReplaceBookmark
{
    class Program
    {

        static void Main(string[] args)
        {

            Document doc = new Document();
            doc.LoadFromFile(@"C:\Users\Administrator\Desktop\employee.docx");

            Table table = new Table(doc, true);
            DataTable dt = new DataTable();
            dt.Columns.Add("id", typeof(string));
            dt.Columns.Add("name", typeof(string));
            dt.Columns.Add("job", typeof(string));
            dt.Columns.Add("email", typeof(string));
            dt.Columns.Add("salary", typeof(string));
            dt.Rows.Add(new string[] { "Emp_ID", "Name", "Job", "E-mail", "Salary" });
            dt.Rows.Add(new string[] { "0241", "Andrews", "Engineer", "andrews@outlook.com", "3.8K" });
            dt.Rows.Add(new string[] { "0242", "White", "Manager", "white@outlook.com", "4.2K" });
            dt.Rows.Add(new string[] { "0243", "Martin", "Secretary", "martin@gmail.com", "3.5K" });
            table.ResetCells(dt.Rows.Count, dt.Columns.Count);
            for (int i = 0; i < dt.Rows.Count; i++)
            {
                for (int j = 0; j < dt.Columns.Count; j++)
                {
                    table.Rows[i].Cells[j].AddParagraph().AppendText(dt.Rows[i][j].ToString());
                }
            }

            BookmarksNavigator navigator = new BookmarksNavigator(doc);
            navigator.MoveToBookmark("bookmark_employee");
            TextBodyPart part = new TextBodyPart(doc);
            part.BodyItems.Add(table);
            navigator.ReplaceBookmarkContent(part);
            doc.SaveToFile("output.docx", FileFormat.Docx2013);
            System.Diagnostics.Process.Start("output.docx");

        }
    }
}
Imports Spire.Doc
Imports Spire.Doc.Documents
Imports System.Data
Namespace ReplaceBookmark
	Class Program

		Private Shared Sub Main(args As String())

			Dim doc As New Document()
			doc.LoadFromFile("C:\Users\Administrator\Desktop\employee.docx")

			Dim table As New Table(doc, True)
			Dim dt As New DataTable()
			dt.Columns.Add("id", GetType(String))
			dt.Columns.Add("name", GetType(String))
			dt.Columns.Add("job", GetType(String))
			dt.Columns.Add("email", GetType(String))
			dt.Columns.Add("salary", GetType(String))
			dt.Rows.Add(New String() {"Emp_ID", "Name", "Job", "E-mail", "Salary"})
			dt.Rows.Add(New String() {"0241", "Andrews", "Engineer", "andrews@outlook.com", "3.8K"})
			dt.Rows.Add(New String() {"0242", "White", "Manager", "white@outlook.com", "4.2K"})
			dt.Rows.Add(New String() {"0243", "Martin", "Secretary", "martin@gmail.com", "3.5K"})
			table.ResetCells(dt.Rows.Count, dt.Columns.Count)
			For i As Integer = 0 To dt.Rows.Count - 1
				For j As Integer = 0 To dt.Columns.Count - 1
					table.Rows(i).Cells(j).AddParagraph().AppendText(dt.Rows(i)(j).ToString())
				Next
			Next

			Dim navigator As New BookmarksNavigator(doc)
			navigator.MoveToBookmark("bookmark_employee")
			Dim part As New TextBodyPart(doc)
			part.BodyItems.Add(table)
			navigator.ReplaceBookmarkContent(part)
			doc.SaveToFile("output.docx", FileFormat.Docx2013)
			System.Diagnostics.Process.Start("output.docx")

		End Sub
	End Class
End Namespace
Detect if a PDF file is PDF/A in C#
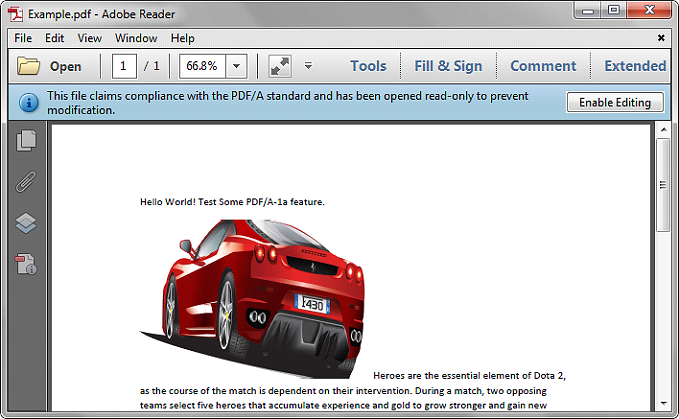
Spire.PDF provides developers two methods to detect if a PDF file is PDF/A. The one is to use PdfDocument.Conformance property, the other is to use PdfDocument.XmpMetaData property. The following examples demonstrate how we can detect if a PDF file is PDF/A using these two methods.
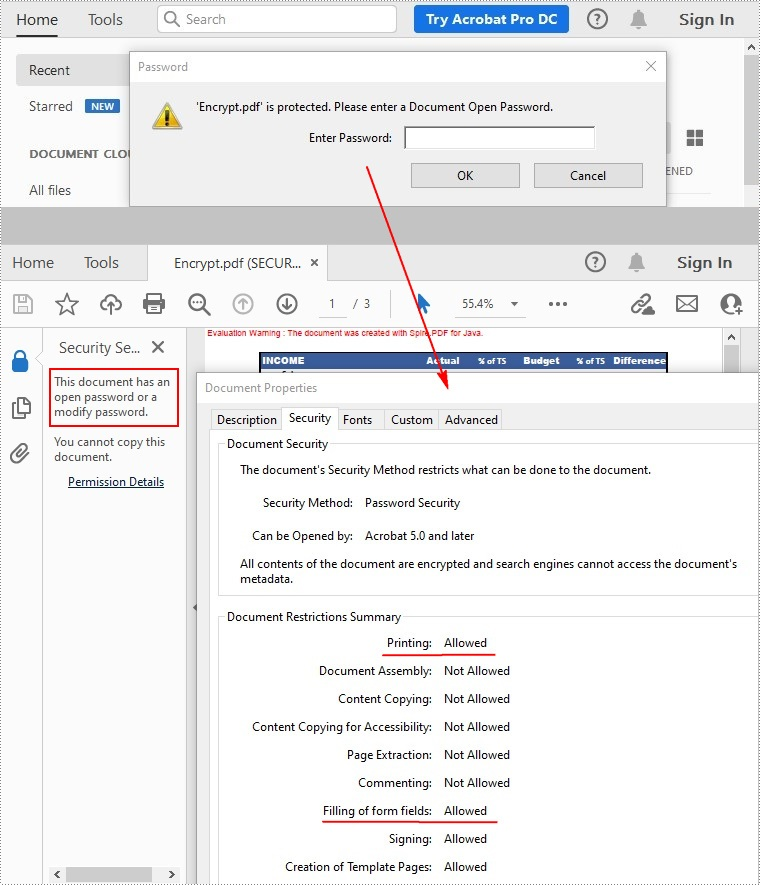
Below is the screenshot of the sample file we used for demonstration:
Using PdfDocument.Conformance
using Spire.Pdf;
using System;
namespace Detect
{
class Program
{
static void Main(string[] args)
{
//Initialize a PdfDocument object
PdfDocument pdf = new PdfDocument();
//Load the PDF file
pdf.LoadFromFile("Example.pdf");
//Get the conformance level of the PDF file
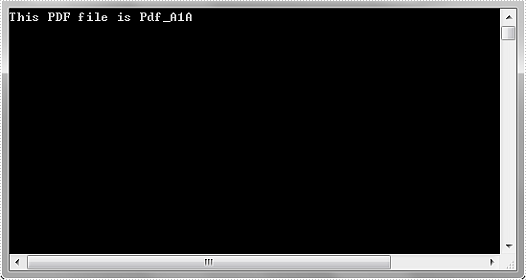
PdfConformanceLevel conformance = pdf.Conformance;
Console.WriteLine("This PDF file is " + conformance.ToString());
}
}
}
Output:
Create a Cross-Reference to Bookmark in Word in C#, VB.NET
A cross-reference refers to related information elsewhere in the same document. You can create cross-references to any existing items such as headings, footnotes, bookmarks, captions, and numbered paragraphs. This article will show you how to create a cross-reference to bookmark using Spire.Doc with C# and VB.NET.
Step 1: Create a Document instance.
Document doc = new Document();
Section section = doc.AddSection();
Step 2: Insert a bookmark.
Paragraph paragraph = section.AddParagraph();
paragraph.AppendBookmarkStart("MyBookmark");
paragraph.AppendText("Text inside a bookmark");
paragraph.AppendBookmarkEnd("MyBookmark");
Step 3: Create a cross-reference field, and link it to the bookmark through bookmark name.
Field field = new Field(doc);
field.Type = FieldType.FieldRef;
field.Code = @"REF MyBookmark \p \h";
Step 4: Add a paragraph, and insert the field to the paragraph.
paragraph = section.AddParagraph();
paragraph.AppendText("For more information, see ");
paragraph.ChildObjects.Add(field);
Step 5: Insert a FieldSeparator object to the paragraph, which works as separator in a field.
FieldMark fieldSeparator= new FieldMark(doc, FieldMarkType.FieldSeparator);
paragraph.ChildObjects.Add(fieldSeparator);
Step 6: Set the display text of the cross-reference field.
TextRange tr = new TextRange(doc);
tr.Text = "above";
paragraph.ChildObjects.Add(tr);
Step 7: Insert a FieldEnd object to the paragraph, which is used to mark the end of a field.
FieldMark fieldEnd = new FieldMark(doc, FieldMarkType.FieldEnd);
paragraph.ChildObjects.Add(fieldEnd);
Step 8: Save to file.
doc.SaveToFile("output.docx", FileFormat.Docx2013);
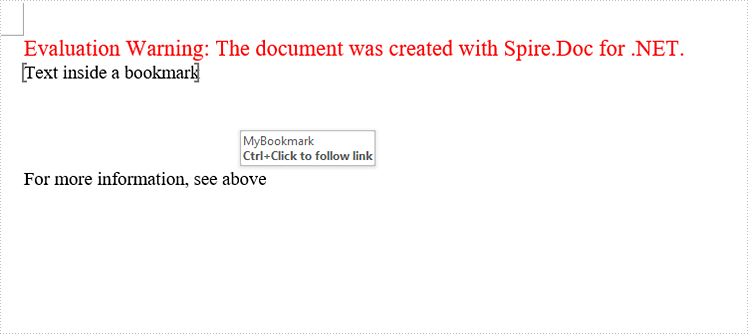
Output:
The cross-reference appears as a link that takes the reader to the referenced item.
Full Code:
using Spire.Doc;
using Spire.Doc.Documents;
using Spire.Doc.Fields;
namespace CreatCR
{
    class Program
    {
        static void Main(string[] args)
        {
            Document doc = new Document();
            Section section = doc.AddSection();
            //create a bookmark
            Paragraph paragraph = section.AddParagraph();
            paragraph.AppendBookmarkStart("MyBookmark");
            paragraph.AppendText("Text inside a bookmark");
            paragraph.AppendBookmarkEnd("MyBookmark");
            //insert line breaks
            for (int i = 0; i < 4; i++)
            {
                paragraph.AppendBreak(BreakType.LineBreak);
            }
            //create a cross-reference field, and link it to bookmark
            Field field = new Field(doc);
            field.Type = FieldType.FieldRef;
            field.Code = @"REF MyBookmark \p \h";
            //insert field to paragraph
            paragraph = section.AddParagraph();
            paragraph.AppendText("For more information, see ");
            paragraph.ChildObjects.Add(field);
            //insert FieldSeparator object
            FieldMark fieldSeparator = new FieldMark(doc, FieldMarkType.FieldSeparator);
            paragraph.ChildObjects.Add(fieldSeparator);
            //set display text of the field
            TextRange tr = new TextRange(doc);
            tr.Text = "above";
            paragraph.ChildObjects.Add(tr);
            //insert FieldEnd object to mark the end of the field
            FieldMark fieldEnd = new FieldMark(doc, FieldMarkType.FieldEnd);
            paragraph.ChildObjects.Add(fieldEnd);
            //save file
            doc.SaveToFile("output.docx", FileFormat.Docx2013);

        }
    }
}
Imports Spire.Doc
Imports Spire.Doc.Documents
Imports Spire.Doc.Fields
Namespace CreatCR
	Class Program
		Private Shared Sub Main(args As String())
			Dim doc As New Document()
			Dim section As Section = doc.AddSection()
			'create a bookmark
			Dim paragraph As Paragraph = section.AddParagraph()
			paragraph.AppendBookmarkStart("MyBookmark")
			paragraph.AppendText("Text inside a bookmark")
			paragraph.AppendBookmarkEnd("MyBookmark")
			'insert line breaks
			For i As Integer = 0 To 3
				paragraph.AppendBreak(BreakType.LineBreak)
			Next
			'create a cross-reference field, and link it to bookmark
			Dim field As New Field(doc)
			field.Type = FieldType.FieldRef
			field.Code = "REF MyBookmark \p \h"
			'insert field to paragraph
			paragraph = section.AddParagraph()
			paragraph.AppendText("For more information, see ")
			paragraph.ChildObjects.Add(field)
			'insert FieldSeparator object
			Dim fieldSeparator As New FieldMark(doc, FieldMarkType.FieldSeparator)
			paragraph.ChildObjects.Add(fieldSeparator)
			'set display text of the field
			Dim tr As New TextRange(doc)
			tr.Text = "above"
			paragraph.ChildObjects.Add(tr)
			'insert FieldEnd object to mark the end of the field
			Dim fieldEnd As New FieldMark(doc, FieldMarkType.FieldEnd)
			paragraph.ChildObjects.Add(fieldEnd)
			'save file
			doc.SaveToFile("output.docx", FileFormat.Docx2013)

		End Sub
	End Class
End Namespace
Highlight Duplicate and Unique Values in Excel Using C#
Using Excel conditional formatting, we can quickly find and highlight the duplicate and unique values in a selected cell range. In this article, we’re going to show you how to programmatically highlight duplicate and unique values with different colors using Spire.XLS and conditional formatting.
Detail steps:
Step 1: Initialize an object of Workbook class and Load the Excel file.
Workbook workbook = new Workbook();
workbook.LoadFromFile("Input.xlsx");
Step 2: Get the first worksheet.
Worksheet sheet = workbook.Worksheets[0];
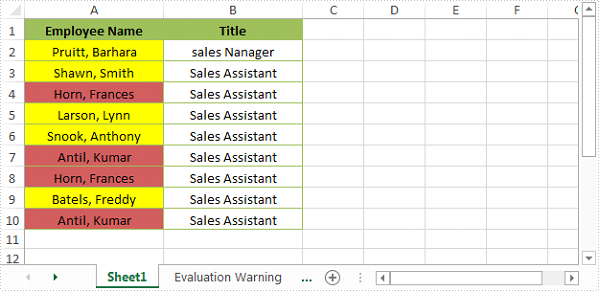
Step 3: Use conditional formatting to highlight duplicate values in range "A2:A10" with IndianRed color.
XlsConditionalFormats xcfs1 = sheet.ConditionalFormats.Add();
xcfs1.AddRange(sheet.Range["A2:A10"]);

IConditionalFormat format1 = xcfs1.AddCondition();
format1.FormatType = ConditionalFormatType.DuplicateValues;
format1.BackColor = Color.IndianRed;
Step 4: Use conditional formatting to highlight unique values in range "A2:A10" with Yellow color.
IConditionalFormat format2 = xcfs1.AddCondition();
format2.FormatType = ConditionalFormatType.UniqueValues;
format2.BackColor = Color.Yellow;"
Step 5: Save the file.
workbook.SaveToFile("HighlightDuplicates.xlsx", ExcelVersion.Version2013);
Screenshot:
Full code:
using Spire.Xls;
using Spire.Xls.Core;
using Spire.Xls.Core.Spreadsheet.Collections;
using System.Drawing;

namespace HighlightDuplicateandUniqueValues
{
    class Program
    {
        static void Main(string[] args)
        {
            //Load the Excel file
            Workbook workbook = new Workbook();
            workbook.LoadFromFile("Input.xlsx");

            //Get the first worksheet
            Worksheet sheet = workbook.Worksheets[0];

            //Use conditional formatting to highlight duplicate values in range "A2:A10" with IndianRed color
            XlsConditionalFormats xcfs1 = sheet.ConditionalFormats.Add();
            xcfs1.AddRange(sheet.Range["A2:A10"]);

            IConditionalFormat format1 = xcfs1.AddCondition();
            format1.FormatType = ConditionalFormatType.DuplicateValues;
            format1.BackColor = Color.IndianRed;

            //Use conditional formatting to highlight unique values in range "A2:A10" with Yellow color
            IConditionalFormat format2 = xcfs1.AddCondition();
            format2.FormatType = ConditionalFormatType.UniqueValues;
            format2.BackColor = Color.Yellow;

            //Save the file
            workbook.SaveToFile("HighlightDuplicates.xlsx", ExcelVersion.Version2013);

        }
    }
}
PDF Security: Encrypt or Decrypt PDF Files in C# .NET
Before diving into the full tutorial, watch this short demonstration video to learn how PDF encryption and decryption works in C#:
In today's digital landscape, PDFs carry sensitive contracts, financial reports, and personal data. A single breach can lead to compliance violations or intellectual property theft. To protect your PDFs from unauthorized access, it’s necessary to encrypt them.
Spire.PDF for .NET provides enterprise-grade PDF security solution, enabling developers to easily implement PDF encryption/decryption workflows in .NET applications. This article will provide practical examples to show you how to use C# to encrypt PDF or decrypt PDF.
- .NET Library for PDF Security
- What is Involved in PDF Encryption?
- How to Encrypt a PDF in C# (Code Example)
- How to Decrypt a PDF in C# (Steps & Code)
- FAQs
.NET Library for PDF Security
Why Use Spire.PDF?
Spire.PDF is a robust, standalone .NET library designed to create, edit, convert and secure PDF documents without Adobe Acrobat. Speaking of its security features, it enables developers to:
- Apply AES/RC4 encryption with password protection
- Restrict printing/copying/editing permissions
- Support .NET Framework, ASP.NET Core, and .NET 5+
Installation Guide
Method 1: NuGet Package Manager (Recommended)
- Open your project in Visual Studio
- Go to “Tools -> NuGet Package Manager -> Package Manager Console”
- Run the following:
PM> Install-Package Spire.PDF
Method 2: Manual Installation
- Download DLL from Spire.PDF Official Site
- Right-click your project in Solution Explorer
- Go to “Add-> Reference -> Browse -> Select Spire.PDF.dll”.
What is Involved in PDF Encryption?
Spire.PDF allows developers to encrypt PDF with passwords, set encryption algorithm, and set permissions. Below is a comprehensive technical breakdown:
User & Owner Passwords
- User Password (Open Password): Required to open and view the PDF.
- Owner Password (Permissions Password): Controls security permissions (printing, copying, editing)
Critical Security Rule: The owner password overrides user password restrictions. If a PDF file is encrypted with both passwords, it can be opened with either one. 
Example code:
PdfSecurityPolicy securityPolicy = new PdfPasswordSecurityPolicy(
"user123",   // Open password
"e-iceblue"   // Permission password
);
Encryption Algorithms (RC4 and AES Encrypt)
Spire.PDF supports industry-standard encryption methods with varying key strengths:
| Algorithm | Key Length | Security Level | Use Case |
|---|---|---|---|
| AES | 128/256-bit | Military-grade | Sensitive documents (Default) |
| RC4 | 40/128-bit | Legacy | Backward compatibility |
Example code:
securityPolicy.EncryptionAlgorithm = PdfEncryptionAlgorithm.AES_256;
Permission Flags
Permission flags control user actions on encrypted PDF documents after opening. These flags are controlled via the properties of the PdfDocumentPrivilege class. Here are some common permission flags.
| Properties | Description |
|---|---|
| AllowContentCopying | Gets or sets the permission which allow copy contents or not. |
| AllowPrint | Gets or sets the permission which allow print or not. |
| AllowModifyContents | Gets or sets the permission which allow modify contents or not. |
| AllowFillFormFields | Gets or sets the permission which allow fill in form fields or not. |
| AllowAll | All allowed. |
| ForbidAll | All forbidden. |
Example code:
securityPolicy.DocumentPrivilege.AllowPrint = false;  // Disable printing
securityPolicy.DocumentPrivilege.AllowContentCopying = false;  // Disable copying
How to Encrypt a PDF in C# (Code Example)
The following C# code password protects a PDF file with AES-256 encryption and restrict permissions.
using Spire.Pdf;

namespace EncryptPDF
{
    class Program
    {
        static void Main(string[] args)
        {
            // Create a PdfDocument object
            PdfDocument pdf = new PdfDocument();

            // Load a sample PDF file
            pdf.LoadFromFile("sample.pdf");

            // Specify the user and owner passwords
            string userPassword = "user123";
            string ownerPassword = "e-iceblue";

            // Create a PdfSecurityPolicy object with the two passwords
            PdfSecurityPolicy securityPolicy = new PdfPasswordSecurityPolicy(userPassword, ownerPassword);

            // Set encryption algorithm
            securityPolicy.EncryptionAlgorithm = PdfEncryptionAlgorithm.AES_256;

            // Set document permissions (If you do not set, the default is ForbidAll)
            securityPolicy.DocumentPrivilege = PdfDocumentPrivilege.AllowAll;

            // Restrict printing and content copying
            securityPolicy.DocumentPrivilege.AllowPrint = false;
            securityPolicy.DocumentPrivilege.AllowContentCopying = false;

            // Encrypt the PDF file
            pdf.Encrypt(securityPolicy);

            // Save the result file
            pdf.SaveToFile("EncryptPDF.pdf", FileFormat.PDF);
        }
    }
}
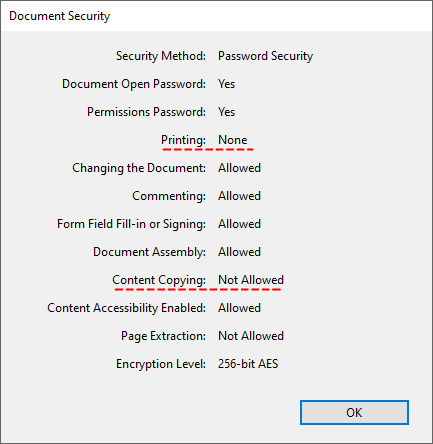
The encrypted PDF will:
- Require a password to open.

- Block printing and copying content. Retain all other permissions (editing, form filling, etc.).
How to Decrypt a PDF in C# (Steps & Code)
Decrypt PDF removes passwords and restrictions, allowing full access to the document. With Spire.PDF, you can decrypt a password-protected PDF file in C# with <5 lines of code.
Main Steps:
- Open Encrypted PDF: Load your encrypted PDF file with the owner password.
- Remove Encryption: Invoke the Decrypt() method to remove all security restrictions.
- Save Decrypted PDF: Call the SaveToFile() method to save the decrypted PDF to the specified file path.
Code Example:
The following C# code removes the PDF passwords and restores access.
using Spire.Pdf;

namespace DecryptPDF
{
    class Program
    {
        static void Main(string[] args)
        {
            // Create a PdfDocument object
            PdfDocument pdf = new PdfDocument();

            // Load a sample PDF file with owner password
            pdf.LoadFromFile("EncryptPDF.pdf", "e-iceblue");

            // Decrypt the PDF file
            pdf.Decrypt();

            // Save the Decrypted PDF
            pdf.SaveToFile("DecryptPDF.pdf");
        }
    }
}
Open the decrypted PDF:

Conclusion
Securing PDFs with encryption is essential for protecting sensitive data. With Spire.PDF for .NET, developers can effortlessly encrypt, decrypt, and manage permissions in PDF files using C#. The .NET PDF library’s comprehensive features and straightforward implementation make it an ideal choice for enhancing document security in enterprise applications.
Next Steps:
- Getting started with Spire.PDF and request a free 30-day trial license to fully evaluate it.
- Explore the Online Documentation for more PDF protection features such as adding digital signatures, adding watermarks, and more.
FAQs
Q1: Can I encrypt a PDF without a user password?
A: Yes. Set the user password to an empty string and use the owner password to control permissions.
Q2: What encryption standards are supported?
A: Spire.PDF supports:
- 40-bit RC4 (legacy)
- 128-bit RC4/AES (standard)
- 256-bit AES (highest security)
Recommend 256-bit AES for sensitive data compliance (e.g., HIPAA, GDPR).
Q3: How to handle incorrect passwords when decrypting?
A: Use try-catch blocks to handle exceptions:
try
{
    pdf.LoadFromFile("EncryptPDF.pdf", " wrongPassword");

}
catch (Exception ex)
{
    Console.WriteLine($"Error: {ex.Message}");
}
Q4. How to check if a PDF is encrypted?
A: Use the PdfDocument.IsPasswordProtected(string fileName) method. A comprehensive guide can be found at: Check Whether a PDF is Password Protected in C#