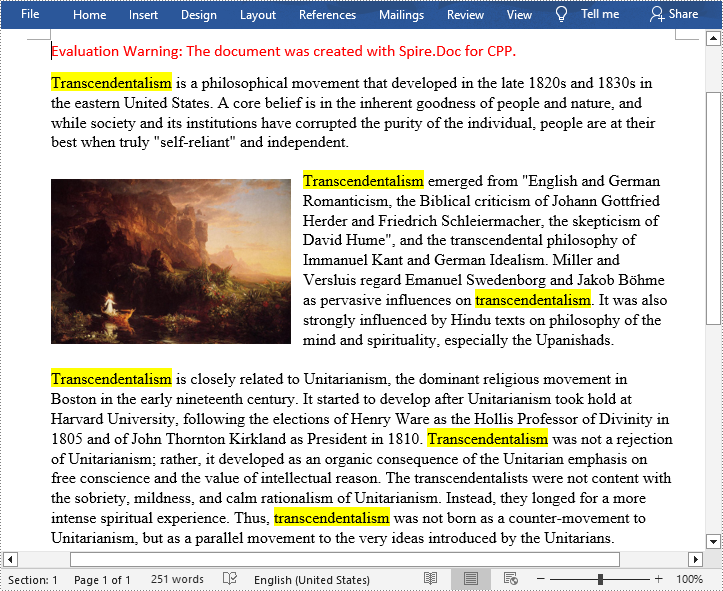
C++: Find and Highlight Text in Word
In a large document, it is inevitable to use the find function when you want to quickly locate specific key information. At the same time, highlighting them with a bright color is also an effective way to make them stand out to grab the reader's attention. In this article, you will learn how to programmatically find and highlight text in a Word document using Spire.Doc for C++.
- Find and Highlight All Instances of a Specified Text in Word
- Find and Highlight the First Instance of a Specified Text in Word
Install Spire.Doc for C++
There are two ways to integrate Spire.Doc for C++ into your application. One way is to install it through NuGet, and the other way is to download the package from our website and copy the libraries into your program. Installation via NuGet is simpler and more recommended. You can find more details by visiting the following link.
Integrate Spire.Doc for C++ in a C++ Application
Find and Highlight All Instances of a Specified Text in Word in C++
Spire.Doc for C++ offers the Document->FindAllString(LPCWSTR_S matchString, bool caseSensitive, bool wholeWord) method to find all instances of a specified text string, and then you can iterate through these instances to highlight them with a bright color. The following are the detailed steps.
- Create a Document instance.
- Load a Word document using Document->LoadFromFile() method.
- Find all matching text in the document using Document->FindAllString() method.
- Loop through all matching text in the document.
- Get the text range of a specific matching text using TextSelection->GetAsOneRange() method, and then set its highlight color using TextRange->GetCharacterFormat()->SetHighlightColor() method.
- Save the result document using Document->SaveToFile() method.
- C++
#include "Spire.Doc.o.h"

using namespace Spire::Doc;

int main() {
 //Specify the input and output file paths
 std::wstring inputFile = L"Data\\input1.docx";
 std::wstring outputFile = L"Output\\FindAndHighlightAll.docx";

 //Create a Document instance
 intrusive_ptr<Document> document = new Document();

 //Load a Word document from disk
 document->LoadFromFile(inputFile.c_str());

 //Find all matching text in the document
 std::vector<intrusive_ptr<TextSelection>> textSelections = document->FindAllString(L"Transcendentalism", false, true);

 //Loop through all matching text and set highlight color for them
 for (auto selection : textSelections)
 {
  selection->GetAsOneRange()->GetCharacterFormat()->SetHighlightColor(Color::GetYellow());
 }

 //Save the result document
 document->SaveToFile(outputFile.c_str(), FileFormat::Docx);
 document->Close();
}
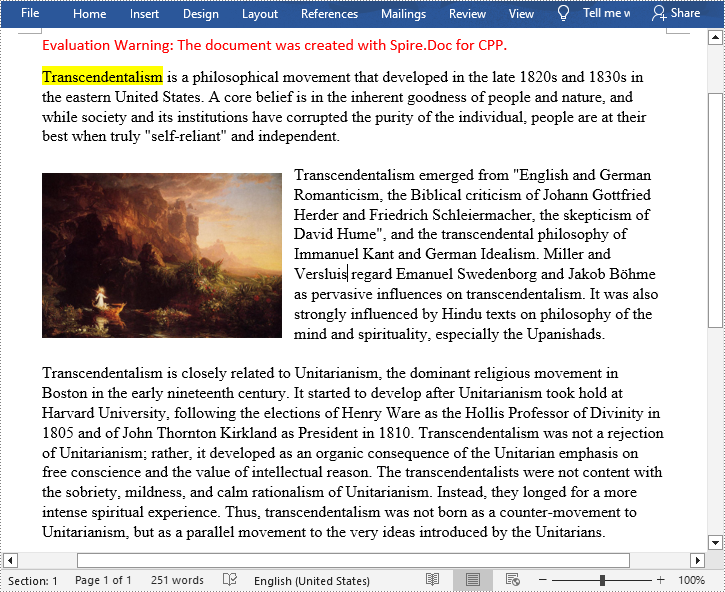
Find and Highlight the First Instance of a Specified Text in Word in C++
You can also use the Document->FindString(LPCWSTR_S matchString, bool caseSensitive, bool wholeWord) method to find only the first instance of a specified text string and then set highlight color for it. The following are the detailed steps.
- Create a Document instance.
- Load a Word document using Document->LoadFromFile() method.
- Find the first matching text using Document->FindString() method.
- Get the text range of the first matching text using TextSelection->GetAsOneRange() method, and then set its highlight color using TextRange->GetCharacterFormat()->SetHighlightColor() method.
- Save the result document using Document->SaveToFile() method.
- C++
#include "Spire.Doc.o.h"

using namespace Spire::Doc;
int main() {
 //Specify the input and output file paths
 std::wstring inputFile = L"Data\\input1.docx";
 std::wstring outputFile = L"Output\\FindAndHighlight.docx";

 //Create a Document instance
 intrusive_ptr<Document> document = new Document();

 //Load a Word document from disk
 document->LoadFromFile(inputFile.c_str());

 //Find the first matching text
 intrusive_ptr<TextSelection> textSelection = document->FindString(L"Transcendentalism", false, true);

 //Set highlight color for the text
 textSelection->GetAsOneRange()->GetCharacterFormat()->SetHighlightColor(Color::GetYellow());

 //Save the result document
 document->SaveToFile(outputFile.c_str(), FileFormat::Docx);
 document->Close();
}
Apply for a Temporary License
If you'd like to remove the evaluation message from the generated documents, or to get rid of the function limitations, please request a 30-day trial license for yourself.
C++: Insert or Read Formulas and Functions in Excel
Formulas and functions are fundamental features of Microsoft Excel that allow users to perform a variety of mathematical, statistical, and logical operations on data. Formulas are expressions that can be entered into cells to automate calculations, usually consisting of cell references, constants, and operators that specify the calculation to be performed. Functions, on the other hand, are pre-built formulas that perform specific tasks, such as calculating the sum, average, maximum, or minimum value of a range of cells. Both formulas and functions are essential tools for anyone working with data in Excel. Whether you are analyzing financial data, experimental data, or any other dataset, using formulas and functions can help you quickly and accurately perform calculations on your data and gain insights from it. In this article, you will learn how to insert or Read formulas and functions in an Excel file in C++ using Spire.XLS for C++.
Install Spire.XLS for C++
There are two ways to integrate Spire.XLS for C++ into your application. One way is to install it through NuGet, and the other way is to download the package from our website and copy the libraries into your program. Installation via NuGet is simpler and more recommended. You can find more details by visiting the following link.
Integrate Spire.XLS for C++ in a C++ Application
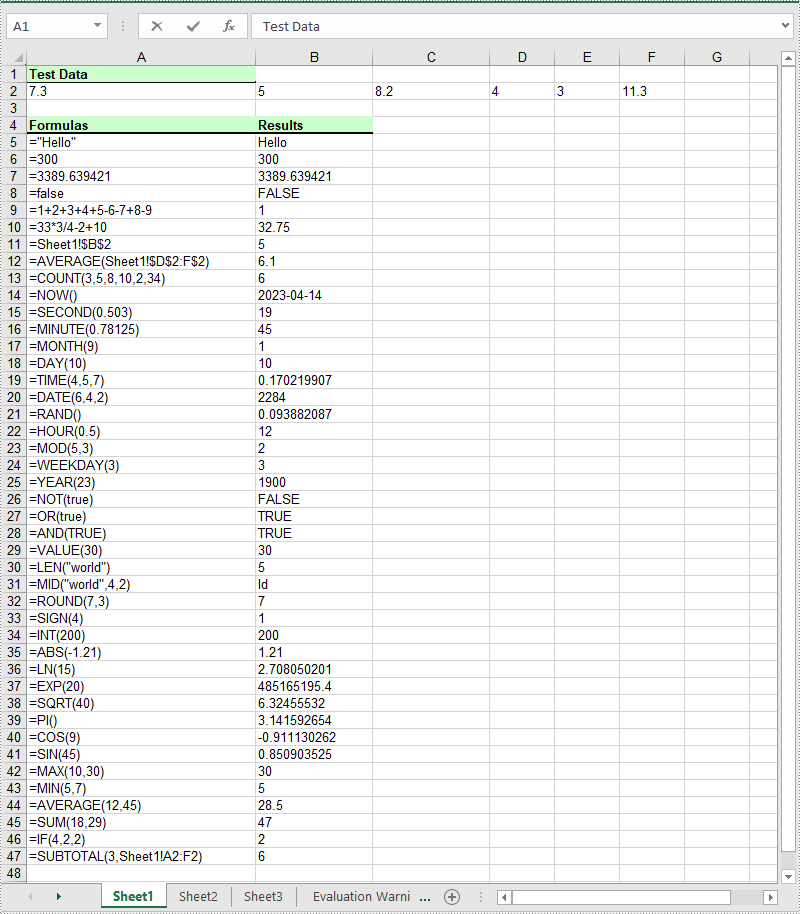
Insert Formulas and Functions into Excel in C++
The Worksheet->GetRange(int row, int column)->SetFormula(LPCWSTR_S value) method in Spire.XLS for C++ is used to add formulas or functions to specific cells in an Excel worksheet. The main steps are as follows:
- Initialize an instance of the Workbook class.
- Get a specific worksheet by its index using the Workbook->GetWorksheets()->Get(int index) method.
- Add some text and numeric data to specific cells of the worksheet using the Worksheet->GetRange(int row, int column)->SetText(LPCWSTR_S value) and Worksheet->GetRange(int row, int column)->SetNumberValue(double value) methods.
- Add text and formulas to specific cells of the worksheet using the Worksheet->GetRange(int row, int column)->SetText(LPCWSTR_S value) and the Worksheet->GetRange(int row, int column)->SetFormula(LPCWSTR_S value) methods.
- Add text and functions to specific cells of the worksheet using the Worksheet->GetRange(int row, int column)->SetText(LPCWSTR_S value) and the Worksheet->GetRange(int row, int column)->SetFormula(LPCWSTR_S value) methods.
- Save the result file using Workbook->SaveToFile(LPCWSTR_S fileName, ExcelVersion version) method.
- C++
#include "Spire.Xls.o.h";

using namespace Spire::Xls;
using namespace std;

int main()
{
    //Initialize an instance of the Workbook class
    intrusive_ptr<Worksheet> workbook = new Workbook();

    //Get the first worksheet
    intrusive_ptr<Worksheet> sheet = dynamic_pointer_cast<Worksheet>(workbook->GetWorksheets()->Get(0));

    //Declare two variables: currentRow, currentFormula
    int currentRow = 1;
    wstring currentFormula = L"";

    //Add text to the worksheet and set cell style
    sheet->GetRange(currentRow, 1)->SetText(L"Test Data:");
    sheet->GetRange(currentRow, 1)->GetStyle()->GetFont()->SetIsBold(true);
    sheet->GetRange(currentRow, 1)->GetStyle()->SetFillPattern(ExcelPatternType::Solid);
    sheet->GetRange(currentRow, 1)->GetStyle()->SetKnownColor(ExcelColors::LightGreen1);
    sheet->GetRange(currentRow, 1)->GetStyle()->GetBorders()->Get(BordersLineType::EdgeBottom)->SetLineStyle(LineStyleType::Medium);

    //Add some numeric data to the worksheet
    sheet->GetRange(++currentRow, 1)->SetNumberValue(7.3);
    sheet->GetRange(currentRow, 2)->SetNumberValue(5);
    sheet->GetRange(currentRow, 3)->SetNumberValue(8.2);
    sheet->GetRange(currentRow, 4)->SetNumberValue(4);
    sheet->GetRange(currentRow, 5)->SetNumberValue(3);
    sheet->GetRange(currentRow, 6)->SetNumberValue(11.3);

    currentRow++;

    //Add text to the worksheet and set cell style
    sheet->GetRange(++currentRow, 1)->SetText(L"Formulas");
    sheet->GetRange(currentRow, 2)->SetText(L"Results");
    sheet->GetRange(currentRow, 1, currentRow, 2)->GetStyle()->GetFont()->SetIsBold(true);
    sheet->GetRange(currentRow, 1, currentRow, 2)->GetStyle()->SetKnownColor(ExcelColors::LightGreen1);
    sheet->GetRange(currentRow, 1, currentRow, 2)->GetStyle()->SetFillPattern(ExcelPatternType::Solid);
    sheet->GetRange(currentRow, 1, currentRow, 2)->GetStyle()->GetBorders()->Get(BordersLineType::EdgeBottom)->SetLineStyle(LineStyleType::Medium);

    //Add text and formulas to the worksheet
    currentFormula = (L"=\"Hello\"");
    sheet->GetRange(++currentRow, 1)->SetText((L"'" + currentFormula).c_str());
    sheet->GetRange(currentRow, 2)->SetFormula(currentFormula.c_str());

    currentFormula = (L"=300");
    sheet->GetRange(++currentRow, 1)->SetText((L"'" + currentFormula).c_str());
    sheet->GetRange(currentRow, 2)->SetFormula(currentFormula.c_str());

    currentFormula = (L"=3389.639421");
    sheet->GetRange(++currentRow, 1)->SetText((L"'" + currentFormula).c_str());
    sheet->GetRange(currentRow, 2)->SetFormula(currentFormula.c_str());

    currentFormula = (L"=false");
    sheet->GetRange(++currentRow, 1)->SetText((L"'" + currentFormula).c_str());
    sheet->GetRange(currentRow, 2)->SetFormula(currentFormula.c_str());

    currentFormula = (L"=1+2+3+4+5-6-7+8-9");
    sheet->GetRange(++currentRow, 1)->SetText((L"'" + currentFormula).c_str());
    sheet->GetRange(currentRow, 2)->SetFormula(currentFormula.c_str());

    currentFormula = (L"=33*3/4-2+10");
    sheet->GetRange(++currentRow, 1)->SetText((L"'" + currentFormula).c_str());
    sheet->GetRange(currentRow, 2)->SetFormula(currentFormula.c_str());

    currentFormula = (L"=Sheet1!$B$2");
    sheet->GetRange(++currentRow, 1)->SetText((L"'" + currentFormula).c_str());
    sheet->GetRange(currentRow, 2)->SetFormula(currentFormula.c_str());

    //Add text and Functions to the worksheet
    //AVERAGE
    currentFormula = (L"=AVERAGE(Sheet1!$D$2:F$2)");
    sheet->GetRange(++currentRow, 1)->SetText((L"'" + currentFormula).c_str());
    sheet->GetRange(currentRow, 2)->SetFormula(currentFormula.c_str());

    //COUNT
    currentFormula = (L"=COUNT(3,5,8,10,2,34)");
    sheet->GetRange(++currentRow, 1)->SetText((L"'" + currentFormula).c_str());
    sheet->GetRange(currentRow, 2)->SetFormula(currentFormula.c_str());

    //NOW
    currentFormula = (L"=NOW()");
    sheet->GetRange(++currentRow, 1)->SetText((L"'" + currentFormula).c_str());
    sheet->GetRange(currentRow, 2)->SetFormula(currentFormula.c_str());
    sheet->GetRange(currentRow, 2)->GetStyle()->SetNumberFormat(L"yyyy-MM-DD");

    //SECOND
    currentFormula = (L"=SECOND(0.503)");
    sheet->GetRange(++currentRow, 1)->SetText((L"'" + currentFormula).c_str());
    sheet->GetRange(currentRow++, 2)->SetFormula(currentFormula.c_str());

    //MINUTE
    currentFormula = (L"=MINUTE(0.78125)");
    sheet->GetRange(currentRow, 1)->SetText((L"'" + currentFormula).c_str());
    sheet->GetRange(currentRow++, 2)->SetFormula(currentFormula.c_str());

    //MONTH
    currentFormula = (L"=MONTH(9)");
    sheet->GetRange(currentRow, 1)->SetText((L"'" + currentFormula).c_str());
    sheet->GetRange(currentRow++, 2)->SetFormula(currentFormula.c_str());

    //DAY
    currentFormula = (L"=DAY(10)");
    sheet->GetRange(currentRow, 1)->SetText((L"'" + currentFormula).c_str());
    sheet->GetRange(currentRow++, 2)->SetFormula(currentFormula.c_str());

    //TIME
    currentFormula = (L"=TIME(4,5,7)");
    sheet->GetRange(currentRow, 1)->SetText((L"'" + currentFormula).c_str());
    sheet->GetRange(currentRow++, 2)->SetFormula(currentFormula.c_str());

    //DATE
    currentFormula = (L"=DATE(6,4,2)");
    sheet->GetRange(currentRow, 1)->SetText((L"'" + currentFormula).c_str());
    sheet->GetRange(currentRow++, 2)->SetFormula(currentFormula.c_str());

    //RAND
    currentFormula = (L"=RAND()");
    sheet->GetRange(currentRow, 1)->SetText((L"'" + currentFormula).c_str());
    sheet->GetRange(currentRow++, 2)->SetFormula(currentFormula.c_str());

    //HOUR
    currentFormula = (L"=HOUR(0.5)");
    sheet->GetRange(currentRow, 1)->SetText((L"'" + currentFormula).c_str());
    sheet->GetRange(currentRow++, 2)->SetFormula(currentFormula.c_str());

    //MOD
    currentFormula = (L"=MOD(5,3)");
    sheet->GetRange(currentRow, 1)->SetText((L"'" + currentFormula).c_str());
    sheet->GetRange(currentRow++, 2)->SetFormula(currentFormula.c_str());

    //WEEKDAY
    currentFormula = (L"=WEEKDAY(3)");
    sheet->GetRange(currentRow, 1)->SetText((L"'" + currentFormula).c_str());
    sheet->GetRange(currentRow++, 2)->SetFormula(currentFormula.c_str());

    //YEAR
    currentFormula = (L"=YEAR(23)");
    sheet->GetRange(currentRow, 1)->SetText((L"'" + currentFormula).c_str());
    sheet->GetRange(currentRow++, 2)->SetFormula(currentFormula.c_str());

    //NOT
    currentFormula = (L"=NOT(true)");
    sheet->GetRange(currentRow, 1)->SetText((L"'" + currentFormula).c_str());
    sheet->GetRange(currentRow++, 2)->SetFormula(currentFormula.c_str());

    //OR
    currentFormula = (L"=OR(true)");
    sheet->GetRange(currentRow, 1)->SetText((L"'" + currentFormula).c_str());
    sheet->GetRange(currentRow++, 2)->SetFormula(currentFormula.c_str());

    //AND
    currentFormula = (L"=AND(TRUE)");
    sheet->GetRange(currentRow, 1)->SetText((L"'" + currentFormula).c_str());
    sheet->GetRange(currentRow++, 2)->SetFormula(currentFormula.c_str());

    //VALUE
    currentFormula = (L"=VALUE(30)");
    sheet->GetRange(currentRow, 1)->SetText((L"'" + currentFormula).c_str());
    sheet->GetRange(currentRow++, 2)->SetFormula(currentFormula.c_str());

    //LEN
    currentFormula = (L"=LEN(\"world\")");
    sheet->GetRange(currentRow, 1)->SetText((L"'" + currentFormula).c_str());
    sheet->GetRange(currentRow++, 2)->SetFormula(currentFormula.c_str());

    //MID
    currentFormula = (L"=MID(\"world\",4,2)");
    sheet->GetRange(currentRow, 1)->SetText((L"'" + currentFormula).c_str());
    sheet->GetRange(currentRow++, 2)->SetFormula(currentFormula.c_str());

    //ROUND
    currentFormula = (L"=ROUND(7,3)");
    sheet->GetRange(currentRow, 1)->SetText((L"'" + currentFormula).c_str());
    sheet->GetRange(currentRow++, 2)->SetFormula(currentFormula.c_str());

    //SIGN
    currentFormula = (L"=SIGN(4)");
    sheet->GetRange(currentRow, 1)->SetText((L"'" + currentFormula).c_str());
    sheet->GetRange(currentRow++, 2)->SetFormula(currentFormula.c_str());

    //INT
    currentFormula = (L"=INT(200)");
    sheet->GetRange(currentRow, 1)->SetText((L"'" + currentFormula).c_str());
    sheet->GetRange(currentRow++, 2)->SetFormula(currentFormula.c_str());

    //ABS
    currentFormula = (L"=ABS(-1.21)");
    sheet->GetRange(currentRow, 1)->SetText((L"'" + currentFormula).c_str());
    sheet->GetRange(currentRow++, 2)->SetFormula(currentFormula.c_str());

    //LN
    currentFormula = (L"=LN(15)");
    sheet->GetRange(currentRow, 1)->SetText((L"'" + currentFormula).c_str());
    sheet->GetRange(currentRow++, 2)->SetFormula(currentFormula.c_str());

    //EXP
    currentFormula = (L"=EXP(20)");
    sheet->GetRange(currentRow, 1)->SetText((L"'" + currentFormula).c_str());
    sheet->GetRange(currentRow++, 2)->SetFormula(currentFormula.c_str());

    //SQRT
    currentFormula = (L"=SQRT(40)");
    sheet->GetRange(currentRow, 1)->SetText((L"'" + currentFormula).c_str());
    sheet->GetRange(currentRow++, 2)->SetFormula(currentFormula.c_str());

    //PI
    currentFormula = (L"=PI()");
    sheet->GetRange(currentRow, 1)->SetText((L"'" + currentFormula).c_str());
    sheet->GetRange(currentRow++, 2)->SetFormula(currentFormula.c_str());

    //COS
    currentFormula = (L"=COS(9)");
    sheet->GetRange(currentRow, 1)->SetText((L"'" + currentFormula).c_str());
    sheet->GetRange(currentRow++, 2)->SetFormula(currentFormula.c_str());

    //SIN
    currentFormula = (L"=SIN(45)");
    sheet->GetRange(currentRow, 1)->SetText((L"'" + currentFormula).c_str());
    sheet->GetRange(currentRow++, 2)->SetFormula(currentFormula.c_str());

    //MAX
    currentFormula = (L"=MAX(10,30)");
    sheet->GetRange(currentRow, 1)->SetText((L"'" + currentFormula).c_str());
    sheet->GetRange(currentRow++, 2)->SetFormula(currentFormula.c_str());

    //MIN
    currentFormula = (L"=MIN(5,7)");
    sheet->GetRange(currentRow, 1)->SetText((L"'" + currentFormula).c_str());
    sheet->GetRange(currentRow++, 2)->SetFormula(currentFormula.c_str());

    //AVERAGE
    currentFormula = (L"=AVERAGE(12,45)");
    sheet->GetRange(currentRow, 1)->SetText((L"'" + currentFormula).c_str());
    sheet->GetRange(currentRow++, 2)->SetFormula(currentFormula.c_str());

    //SUM
    currentFormula = (L"=SUM(18,29)");
    sheet->GetRange(currentRow, 1)->SetText((L"'" + currentFormula).c_str());
    sheet->GetRange(currentRow++, 2)->SetFormula(currentFormula.c_str());

    //IF
    currentFormula = (L"=IF(4,2,2)");
    sheet->GetRange(currentRow, 1)->SetText((L"'" + currentFormula).c_str());
    sheet->GetRange(currentRow++, 2)->SetFormula(currentFormula.c_str());

    //SUBTOTAL
    currentFormula = (L"=SUBTOTAL(3,Sheet1!A2:F2)");
    sheet->GetRange(currentRow, 1)->SetText((L"'" + currentFormula).c_str());
    sheet->GetRange(currentRow++, 2)->SetFormula(currentFormula.c_str());

    //Set width of the 1st, 2nd and 3rd columns
    sheet->SetColumnWidth(1, 32);
    sheet->SetColumnWidth(2, 16);
    sheet->SetColumnWidth(3, 16);

    //Create a cell style
    intrusive_ptr<CellStyle> style = workbook->GetStyles()->Add(L"Style");
    //Set the horizontal alignment as left
    style->SetHorizontalAlignment(HorizontalAlignType::Left);
    //Apply the style to the worksheet
    sheet->ApplyStyle(style);

    //Save the result file
    workbook->SaveToFile(L"InsertFormulasAndFunctions.xlsx", ExcelVersion::Version2016);
    workbook->Dispose();
}
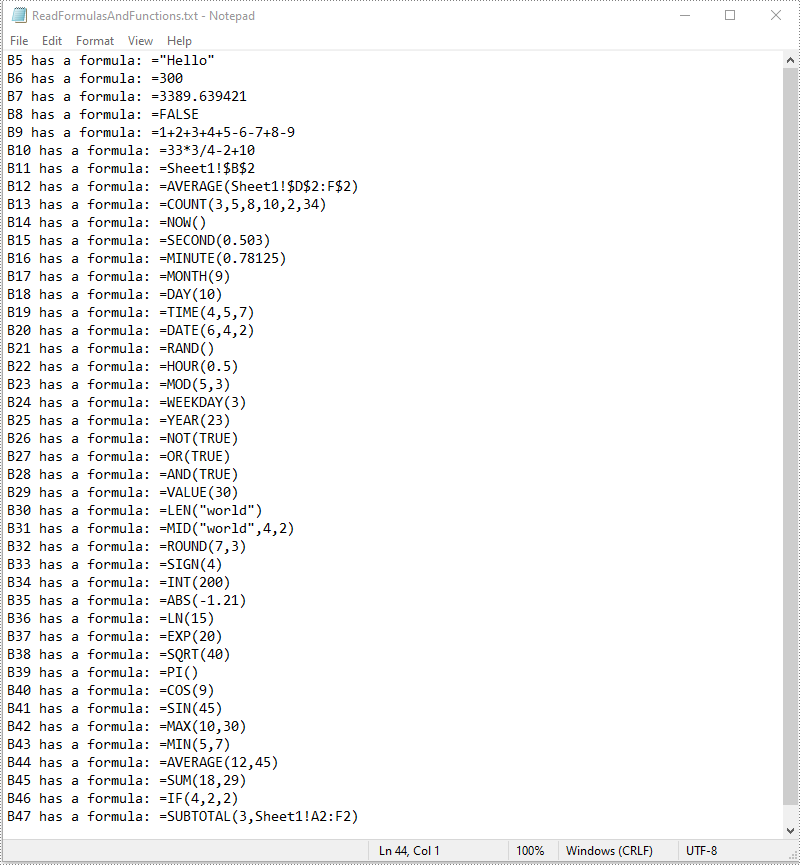
Read Formulas and Functions in Excel in C++
To read formulas and functions in an Excel worksheet, you need to iterate through all the cells in the worksheet, after that, find the cells containing formulas or functions using the Cell->GetHasFormula() method, then get the formulas or functions of the cells using the CellRange->GetFormula() method. The detailed steps are as follows:
- Initialize an instance of the Workbook class.
- Load an Excel file using the Workbook->LoadFromFile() method.
- Get a specific worksheet by its index using the Workbook->GetWorksheets()->Get(int index) method.
- Access the used range of the worksheet using the Worksheet->GetAllocatedRange() method.
- Declare a wstring variable.
- Iterate through all the cells in the used range.
- Find the cells containing formulas/functions using the Cell->GetHasFormula() method.
- Get the names and the formulas/functions of the cells using the CellRange->GetRangeAddressLocal() and CellRange->GetFormula() methods.
- Append the cell names and formulas/functions to the wstring variable.
- Write the content of the wstring variable into a .txt file.
- C++
#include "Spire.Xls.o.h";

using namespace Spire::Xls;
using namespace std;

int main()
{
    //Initialize an instance of the Workbook class
    intrusive_ptr<Worksheet> workbook = new Workbook();
    //Load an Excel file
    workbook->LoadFromFile(L"InsertFormulasAndFunctions.xlsx");

    //Get the first worksheet
    intrusive_ptr<Worksheet> sheet = dynamic_pointer_cast<Worksheet>(workbook->GetWorksheets()->Get(0));

    //Access the used range of the worksheet
    intrusive_ptr<CellRange> usedRange = dynamic_pointer_cast<CellRange>(sheet->GetAllocatedRange());

    //Declare a wstring variable
    wstring buffer = L"";
    //Loop through all the cells in the used range
    for (int i = 0; i < usedRange->GetCells()->GetCount(); i++)
    {
        intrusive_ptr<CellRange> cell = usedRange->GetCells()->GetItem(i);
        //Detect if the current cell has formula/function
        if (cell->GetHasFormula())
        {
            //Get the cell name
            wstring cellName = cell->GetRangeAddressLocal();
            //Get the formula/function
            wstring formula = cell->GetFormula();
            //Append the cell name and formula/function to the wstring variable
            buffer += ((cellName + L" has a formula: " + formula + L"\n").c_str());
        }
    }

    //Write the content of the wstring variable into a .txt file
    wofstream write(L"ReadFormulasAndFunctions.txt");
    auto LocUtf8 = locale(locale(""), new std::codecvt_utf8<wchar_t>);
    write.imbue(LocUtf8);
    write << buffer;
    write.close();
    workbook->Dispose();
}
Apply for a Temporary License
If you'd like to remove the evaluation message from the generated documents, or to get rid of the function limitations, please request a 30-day trial license for yourself.
C++: Group or Ungroup Rows and Columns in Excel
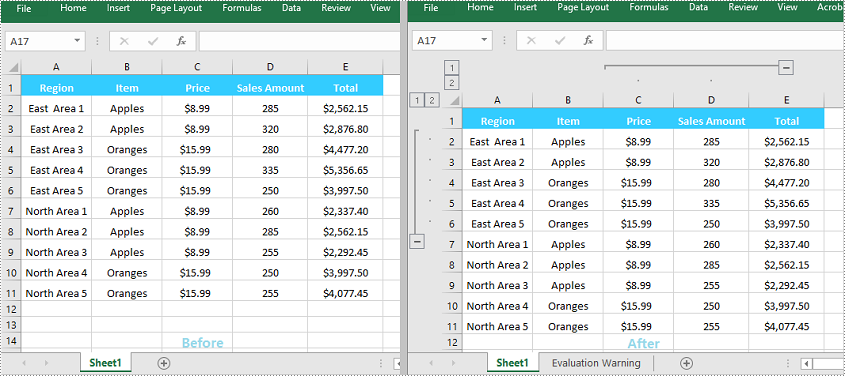
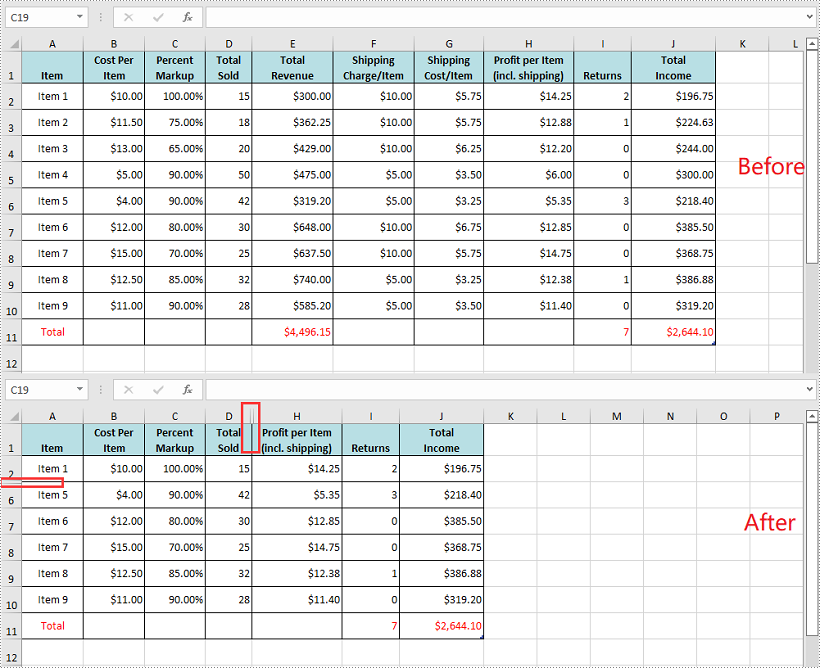
Grouping rows and columns in Excel is a valuable feature that can simplify working with large or complex datasets. This feature enables you to hide or show individual sections of data for better viewing and analysis. For instance, if you have a worksheet with data for various regions or departments, you can group the rows for each region or department together. Once grouped, you can collapse or expand each group as required, which makes it easier for you to focus on specific parts of the data while keeping the rest of the worksheet unaffected. In this article, you will learn how to group or ungroup rows and columns, along with how to expand or collapse groups in Excel in C++ using Spire.XLS for C++.
- Group Rows and Columns in Excel in C++
- Ungroup Rows and Columns in Excel in C++
- Expand or Collapse Groups in Excel in C++
Install Spire.XLS for C++
There are two ways to integrate Spire.XLS for C++ into your application. One way is to install it through NuGet, and the other way is to download the packageThere are two ways to integrate Spire.XLS for C++ into your application. One way is to install it through NuGet, and the other way is to download the package from our website and copy the libraries into your program. Installation via NuGet is simpler and more recommended. You can find more details by visiting the following link.from our website and copy the libraries into your program. Installation via NuGet is simpler and more recommended. You can find more details by visiting the following link.
Integrate Spire.XLS for C++ in a C++ Application
Group Rows and Columns in Excel in C++
The XlsWorksheet->GroupByRows(int firstRow, int lastRow, bool isCollapsed) and XlsWorksheet->GroupByColumns (int firstColumn, int lastColumn, bool isCollapsed) methods in Spire.XLS for C++ can be used to group specific rows and columns in an Excel worksheet. The detailed steps are as follows:
- Initialize an instance of the Workbook class.
- Load an Excel file using the Workbook->LoadFromFile(LPCWSTR_S fileName) method.
- Get a specific worksheet by its index using the Workbook->GetWorksheets()->Get(int index) method.
- Group specific rows in the worksheet using the XlsWorksheet->GroupByRows(int firstRow, int lastRow, bool isCollapsed) method.
- Group specific columns in the worksheet using the XlsWorksheet->GroupByColumns (int firstColumn, int lastColumn, bool isCollapsed) method.
- Save the result file using the Workbook->SaveToFile (LPCWSTR_S fileName, ExcelVersion version) method.
- C++
#include "Spire.Xls.o.h";

using namespace Spire::Xls;

int main()
{
	//Initialize an instance of the Workbook class
	intrusive_ptr<Workbook> workbook = new Workbook();

	//Load an Excel file
	workbook->LoadFromFile(L"Sample.xlsx");

	//Get the first worksheet
	intrusive_ptr<Worksheet> sheet = dynamic_pointer_cast<Worksheet>(workbook->GetWorksheets()->Get(0));

	//Group the 2nd, 3rd, 4th, 5th and 6th rows
	sheet->GroupByRows(2, 6, false);
	//Group the 3rd and 4th columns
	sheet->GroupByColumns(3, 4, false);

	//Save the result file
	workbook->SaveToFile(L"GroupRowsAndColumns.xlsx", ExcelVersion::Version2013);
	workbook->Dispose();
}
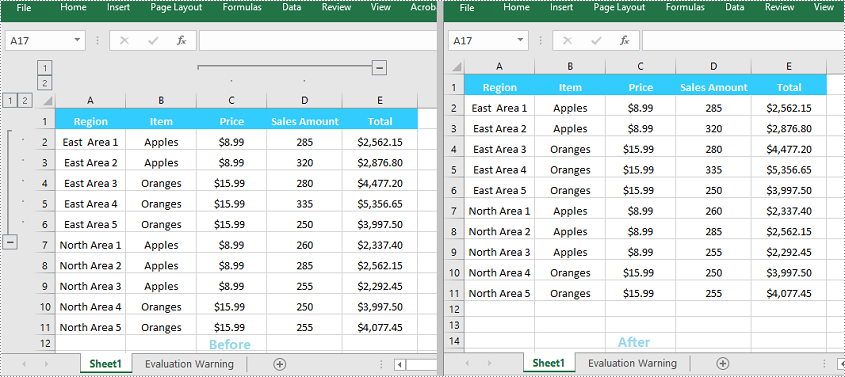
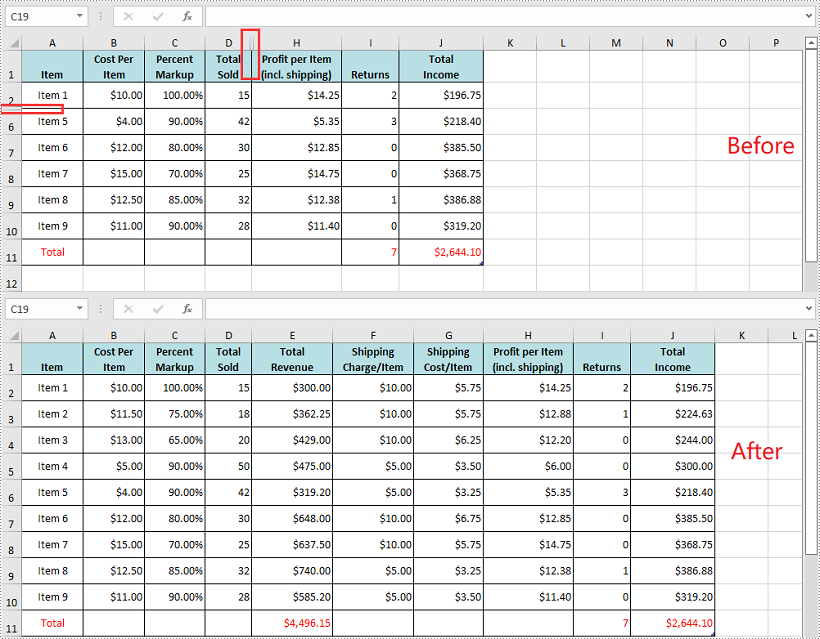
Ungroup Rows and Columns in Excel in C++
By ungrouping rows and columns, you can restore each cell to its initial, standalone state, helping you view the data as it was originally presented.
Spire.XLS for C++ offers the XlsWorksheet->UngroupByRows(int firstRow, int lastRow) and XlsWorksheet->UngroupByColumns (int firstColumn, int lastColumn) methods to help you ungroup rows and columns. The detailed steps are as follows:
- Initialize an instance of the Workbook class.
- Load an Excel file using the Workbook->LoadFromFile(LPCWSTR_S fileName) method.
- Get a specific worksheet by its index using the Workbook->GetWorksheets()->Get(int index) method.
- Ungroup specific rows in the worksheet using the XlsWorksheet->UngroupByRows(int firstRow, int lastRow) method.
- Ungroup specific columns in the worksheet using the XlsWorksheet->UngroupByColumns (int firstColumn, int lastColumn) method.
- Save the result file using the Workbook->SaveToFile (LPCWSTR_S fileName, ExcelVersion version) method.
- C++
#include "Spire.Xls.o.h";

using namespace Spire::Xls;

int main()
{
	//Initialize an instance of the Workbook class
	intrusive_ptr<Workbook> workbook = new Workbook();

	//Load an Excel file
	workbook->LoadFromFile(L" GroupRowsAndColumns.xlsx");

	//Get the first worksheet
	intrusive_ptr<Worksheet> sheet = dynamic_pointer_cast<Worksheet>(workbook->GetWorksheets()->Get(0));

	//Ungroup the 2nd, 3rd, 4th, 5th and 6th rows
	sheet->UngroupByRows(2, 6);

	//Ungroup the 3rd and 4th columns
	sheet->UngroupByColumns(3, 4);

	//Save the result file
	workbook->SaveToFile(L"UngroupRowsAndColumns.xlsx", ExcelVersion::Version2013);
	workbook->Dispose();
}
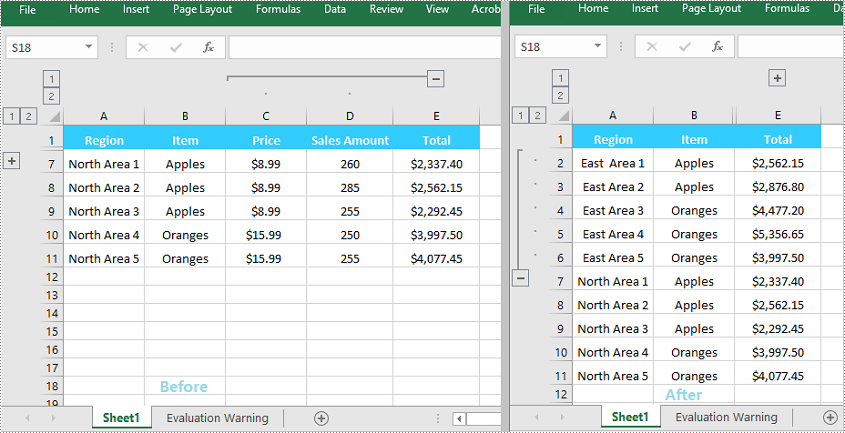
Expand or Collapse Groups in Excel in C++
When grouping rows or columns in Excel, you can click the expand (+) or collapse (-) button to show or hide the grouped data. In Spire.XLS for C++, you can use the Worksheet->GetRange(LPCWSTR_S name)->ExpandGroup(GroupByType groupBy) method or the Worksheet->GetRange(LPCWSTR_S name)->CollapseGroup(GroupByType groupBy) method to achieve the same expanding or collapsing effect. The detailed steps are as follows:
- Initialize an instance of the Workbook class.
- Load an Excel file using the Workbook->LoadFromFile(LPCWSTR_S fileName) method.
- Get a specific worksheet by its index using the Workbook->GetWorksheets()->Get(int index) method.
- Expand a specific group using the Worksheet->GetRange(LPCWSTR_S name)->ExpandGroup(GroupByType groupBy) method.
- Collapse a specific group using the Worksheet->GetRange(LPCWSTR_S name)->CollapseGroup(GroupByType groupBy) method.
- Save the result file using the Workbook->SaveToFile (LPCWSTR_S fileName, ExcelVersion version) method.
- C++
#include "Spire.Xls.o.h";

using namespace Spire::Xls;

int main()
{
	//Initialize an instance of the Workbook class
	intrusive_ptr<Workbook> workbook = new Workbook();

	//Load an Excel file
	workbook->LoadFromFile(L"Input.xlsx");

	//Get the first worksheet
	intrusive_ptr<Worksheet> sheet = dynamic_pointer_cast<Worksheet>(workbook->GetWorksheets()->Get(0));

	//Expand a group
	sheet->GetRange(L"A2:E6")->ExpandGroup(GroupByType::ByRows);

	//Collapse a group
	sheet->GetRange(L"C1:D11")->CollapseGroup(GroupByType::ByColumns);

	//Save the result file
	workbook->SaveToFile(L"ExpandOrCollapseGroups.xlsx", ExcelVersion::Version2013);
	workbook->Dispose();
}
Apply for a Temporary License
If you'd like to remove the evaluation message from the generated documents, or to get rid of the function limitations, please request a 30-day trial license for yourself.
C++: Compare Two Word Documents for Differences
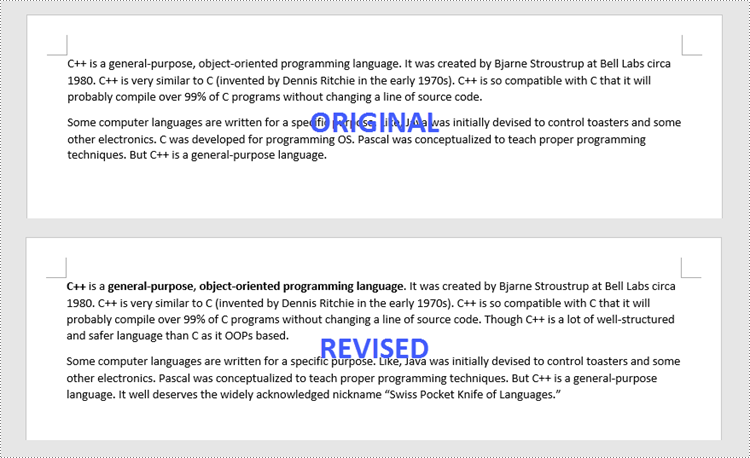
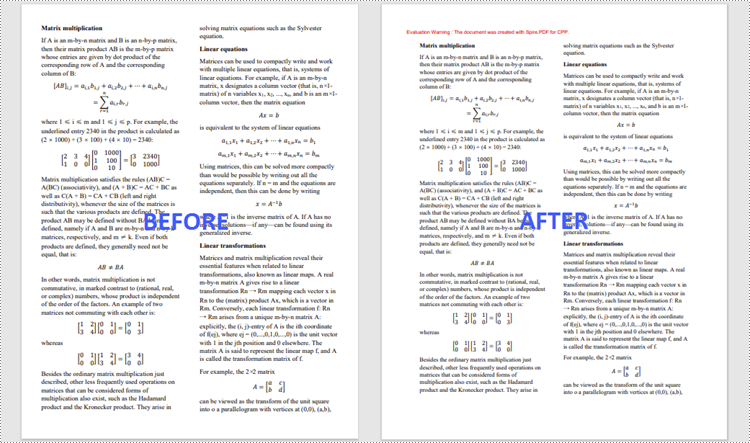
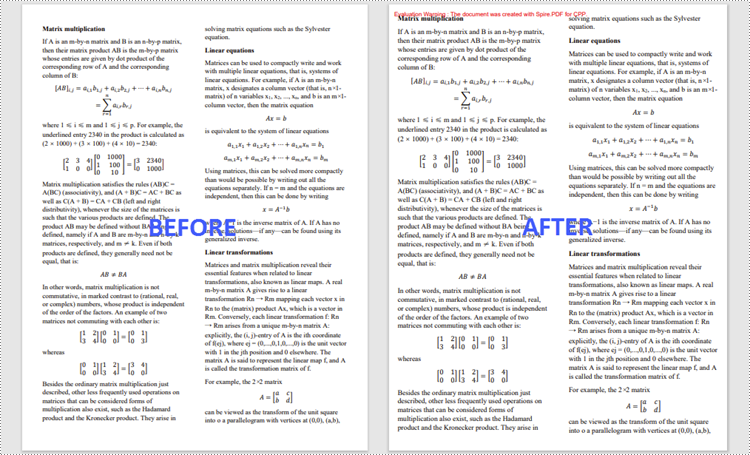
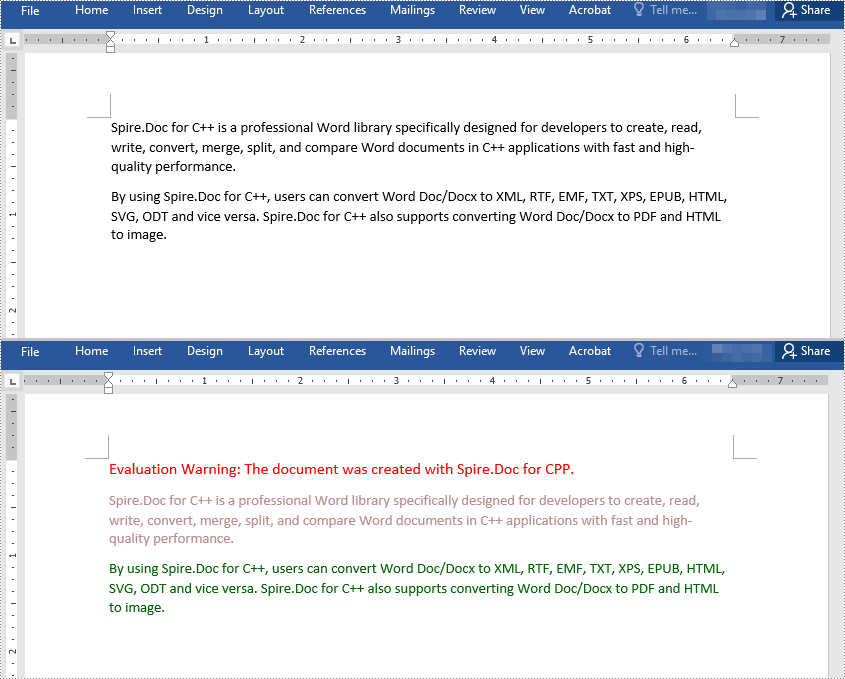
Comparison of two versions of a document is the process of checking the new version against the previous one to identify changes made by different contributors. By comparing documents, legal staffs can easily review contracts to determine what changes have been made or still need to be made, and teachers can quickly compare student papers to determine whether or not necessary changes have been applied. In this article, you will learn how to compare two Word documents in C++ using Spire.Doc for C++.
The following is a screenshot of the two Word documents we’re going to compare.
Install Spire.Doc for C++
There are two ways to integrate Spire.Doc for C++ into your application. One way is to install it through NuGet, and the other way is to download the package from our website and copy the libraries into your program. Installation via NuGet is simpler and more recommended. You can find more details by visiting the following link.
Integrate Spire.Doc for C++ in a C++ Application
Compare Two Word Documents in C++
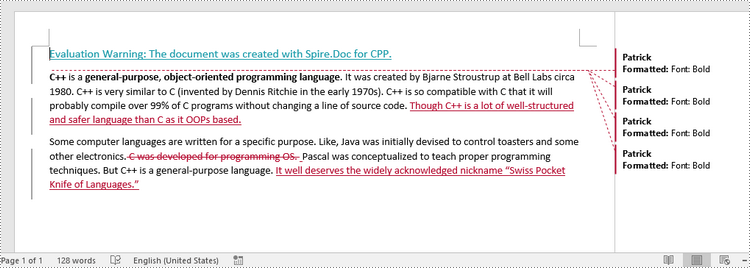
Spire.Doc for C++ allows to compare two Word documents and save the result in a third document. When opening this document with MS Word, you can see all changes that have been made to the original document, including insertions, deletions as well as formatting modifications. The following are the detailed steps.
- Load two Word documents separately while initialing two different Document objects.
- Compare these two documents using Document->Compare() method.
- Save the result in a third Word document using Document->SaveToFile() method.
- C++
#include "Spire.Doc.o.h"

using namespace Spire::Doc;

int main() {

 //Load the first document
 intrusive_ptr<Document> doc1 = new Document(L"C:\\Users\\Administrator\\Desktop\\Original.docx");

 //Load the second document
 intrusive_ptr<Document> doc2 = new Document(L"C:\\Users\\Administrator\\Desktop\\Revised.docx");

 //Compare the second document on the basis of the first document
 doc1->Compare(doc2, L"Patrick");

 //Save to a docx file
 doc1->SaveToFile(L"output/Result.docx", Spire::Doc::FileFormat::Docx2013);

 doc1->Close();
 doc2->Close();
}
Apply for a Temporary License
If you'd like to remove the evaluation message from the generated documents, or to get rid of the function limitations, please request a 30-day trial license for yourself.
C++: Add, Read or Delete Speaker Notes in PowerPoint
Speaker notes are hidden notes that can be added to slides to help recall some important or key information. Speaker notes are only visible to the presenter, so adding speaker notes in PowerPoint will not affect the overall visual effectiveness of the document. In this article, you will learn how to programmatically add, read or delete speaker notes in a PowerPoint presentation using Spire.Presentation for C++.
- Add Speaker Notes in PowerPoint in C++
- Read Speaker Notes in PowerPoint in C++
- Delete Speaker Notes in PowerPoint in C++
Install Spire.Presentation for C++
There are two ways to integrate Spire.Presentation for C++ into your application. One way is to install it through NuGet, and the other way is to download the package from our website and copy the libraries into your program. Installation via NuGet is simpler and more recommended. You can find more details by visiting the following link.
Integrate Spire.Presentation for C++ in a C++ Application
Add Speaker Notes in PowerPoint in C++
There are a number of benefits to using speaker notes in a PowerPoint presentation, such as it can help you stay on point and also appear more confident during a presentation. The following are the steps to add speaker notes to a specified slide.
- Create a Presentation instance and load a PowerPoint document using Presentation->LoadFromFile() method.
- Get a specified slide using Presentation->GetSlides()->GetItem(slideIndex) method.
- Add a notes slide to the slide using ISlide->AddNotesSlide() method.
- Create a TextParagraph instance.
- Set text for the paragraph using TextParagraph->SetText() method, and then append the paragraph to the notes slide using NotesSlide->GetNotesTextFrame()->GetParagraphs()->Append() method.
- Save the result document using Presentation->SaveToFile() method.
- C++
#include "Spire.Presentation.o.h";
using namespace Spire::Presentation;
using namespace std;
int main()
{
//Specify the input and output file paths
std::wstring inputFile = L"Data\\Template.pptx";
std::wstring outputFile = L"SpeakerNotes.pptx";
//Create a Presentation instance
intrusive_ptr<Presentation> ppt = new Presentation();
//Load a sample PowerPoint document from disk
ppt->LoadFromFile(inputFile.c_str());
//Get the second slide
intrusive_ptr<ISlide> slide = ppt->GetSlides()->GetItem(1);
//Add a notes slide
intrusive_ptr<NotesSlide> notesSlide = slide->AddNotesSlide();
//Add paragraphs to the notes slide and set the content of the speaker notes
intrusive_ptrTextParagraph> paragraph = new TextParagraph();
paragraph->SetText(L"Tips for making effective presentations:");
notesSlide->GetNotesTextFrame()->GetParagraphs()->Append(paragraph);
paragraph = new TextParagraph();
paragraph->SetText(L"Use the slide master feature to create a consistent and simple design template.");
notesSlide->GetNotesTextFrame()->GetParagraphs()->Append(paragraph);
paragraph = new TextParagraph();
paragraph->SetText(L"Simplify and limit the number of words on each screen.");
notesSlide->GetNotesTextFrame()->GetParagraphs()->Append(paragraph);
paragraph = new TextParagraph();
paragraph->SetText(L"Use contrasting colors for text and background.");
notesSlide->GetNotesTextFrame()->GetParagraphs()->Append(paragraph);
//Set the bullet type and bullet style for specific paragraphs on the notes slide
for (int i = 1; i < notesSlide->GetNotesTextFrame()->GetParagraphs()->GetCount(); i++)
{
notesSlide->GetNotesTextFrame()->GetParagraphs()->GetItem(i)->SetBulletType(TextBulletType::Numbered);
notesSlide->GetNotesTextFrame()->GetParagraphs()->GetItem(i)->SetBulletStyle(NumberedBulletStyle::BulletArabicPeriod);
}
//Save the result file
ppt->SaveToFile(outputFile.c_str(), FileFormat::Pptx2013);
ppt->Dispose();
}

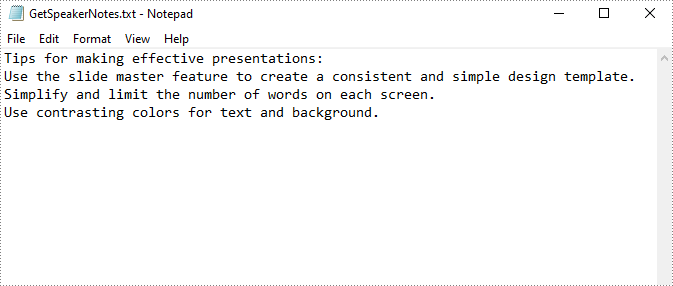
Read Speaker Notes in PowerPoint in C++
To get speaker notes from a notes slide, Spire.Presentation for C++ offers the NotesSlide->GetNotesTextFrame()->GetText() method. The following are the detailed steps.
- Create a Presentation instance and load a PowerPoint document using Presentation->LoadFromFile() method.
- Get a specified slide using Presentation->GetSlides()->GetItem(slideIndex) method.
- Get the notes slide from the slide using ISlide->GetNotesSlide() method.
- Get the speaker notes from the notes slide using NotesSlide->GetNotesTextFrame()->GetText() method, and then save them to a .txt file.
- C++
#include "Spire.Presentation.o.h";
using namespace Spire::Presentation;
using namespace std;
int main()
{
//Specify the input and output file paths
std::wstring inputFile = L"SpeakerNotes.pptx";
std::wstring outputFile = L"GetSpeakerNotes.txt";
//Create a Presentation instance
intrusive_ptrPresentation> presentation = new Presentation();
//Load a sample PowerPoint document
presentation->LoadFromFile(inputFile.c_str());
//Get the second slide
intrusive_ptr<ISlide> slide = presentation->GetSlides()->GetItem(1);
//Get the notes slide from the second slide
intrusive_ptr<NotesSlide> notesSlide = slide->GetNotesSlide();
//Get the speaker notes and save to txt file
wofstream desFile(outputFile, ios::out);
desFile << notesSlide->GetNotesTextFrame()->GetText() << endl;
desFile.close();
presentation->Dispose();
}
Delete Speaker Notes in PowerPoint in C++
With Spire.Presentation for C++, you are also allowed to remove all speaker notes at once or just remove a specified speaker note from the notes slide. The following are the detailed steps.
- Create a Presentation instance and load a PowerPoint document using Presentation->LoadFromFile() method.
- Get a specified slide using Presentation->GetSlides()->GetItem(slideIndex) method.
- Get the notes slide from the slide using ISlide->GetNotesSlide() method.
- Remove all speaker notes from the notes slide using NotesSlide->GetNotesTextFrame()->GetParagraphs()->Clear() method or remove a specific speaker note from the notes slide using NotesSlide->GetNotesTextFrame()->GetParagraphs()->RemoveAt(paragraphIndex) method.
- Save the result document using Presentation->SaveToFile() method.
- C++
#include "Spire.Presentation.o.h";

using namespace Spire::Presentation;
using namespace std;

int main()
{
	//Specify the input and output file paths
	std::wstring inputFile = L"SpeakerNotes.pptx";
	std::wstring outputFile = L"RemoveSpeakerNotes.pptx";

	//Create a Presentation instance
	intrusive_ptr<Presentation> presentation = new Presentation();


	//Load a sample PowerPoint document
	presentation->LoadFromFile(inputFile.c_str());

	//Get the second slide
	intrusive_ptr<ISlide> slide = presentation->GetSlides()->GetItem(1);

	//Get the notes slide from the second slide
	intrusive_ptr<NotesSlide> notesSlide = slide->GetNotesSlide();

	//Remove all the speaker notes from notes slide
	notesSlide->GetNotesTextFrame()->GetParagraphs()->Clear();

	//Remove a specific speak note from notes slide
	//notesSlide->GetNotesTextFrame()->GetParagraphs()->RemoveAt(1);

	//Save the result file
	presentation->SaveToFile(outputFile.c_str(), FileFormat::Pptx2013);
	presentation->Dispose();
}

Apply for a Temporary License
If you'd like to remove the evaluation message from the generated documents, or to get rid of the function limitations, please request a 30-day trial license for yourself.
C++: Hide or Show Rows and Columns in Excel
Sometimes, certain rows and columns of an Excel file may contain sensitive or confidential information. Before presenting the file to others, it is critical to hide these specific rows and columns to prevent unauthorized people from viewing this information. After the representation, you can show the hidden rows and columns to redisplay the information as needed. In this article, we will demonstrate how to hide or show rows and columns in Excel in C++ using Spire.XLS for C++.
- Hide Specific Rows and Columns in Excel in C++
- Show Specific Hidden Rows and Columns in Excel in C++
- Hide Multiple Rows and Columns at Once in Excel in C++
- Show All Hidden Rows and Columns in Excel in C++
Install Spire.XLS for C++
There are two ways to integrate Spire.XLS for C++ into your application. One way is to install it through NuGet, and the other way is to download the package from our website and copy the libraries into your program. Installation via NuGet is simpler and more recommended. You can find more details by visiting the following link.
Integrate Spire.XLS for C++ in a C++ Application
Hide Specific Rows and Columns in Excel in C++
You can hide specific rows and columns in an Excel worksheet by using the XlsWorksheet->HideRow(int rowIndex) and XlsWorksheet->HideColumn(int columnIndex) methods. The detailed steps are as follows:
- Initialize an instance of the Workbook class.
- Load an Excel file using Workbook->LoadFromFile() method.
- Get a specific worksheet using Workbook->GetWorksheets()->Get(int index) method.
- Hide specific rows in the worksheet using XlsWorksheet->HideRow(int rowIndex) method.
- Hide Specific columns in the worksheet using XlsWorksheet->HideColumn(int columnIndex) method.
- Save the result file using Workbook->SaveToFile() method.
- C++
#include "Spire.Xls.o.h";

using namespace Spire::Xls;

int main()
{
	//Initialize an instance of the workbook class
	intrusive_ptr<Workbook> workbook = new Workbook();
	//Load an Excel file
	workbook->LoadFromFile(L"Input.xlsx");

	//Get the first worksheet
	intrusive_ptr<Worksheet> sheet = dynamic_pointer_cast<Worksheet>(workbook->GetWorksheets()->Get(0));

	//Hide the 3rd and the 7th rows
	sheet->HideRow(3);
	sheet->HideRow(7);

	//Hide the 3rd and the 6th columns
	sheet->HideColumn(3);
	sheet->HideColumn(6);

	//Save the result file
	workbook->SaveToFile(L"HideRowsAndColumns.xlsx", ExcelVersion::Version2013);
	workbook->Dispose();
}
Show Specific Hidden Rows and Columns in Excel in C++
To show specific hidden rows and columns in an Excel worksheet, you can use the XlsWorksheet->ShowRow(int rowIndex) and XlsWorksheet->ShowColumn(int columnIndex) methods. The detailed steps are as follows:
- Initialize an instance of the Workbook class.
- Load an Excel file using Workbook->LoadFromFile() method.
- Get a specific worksheet using Workbook->GetWorksheets()->Get(int index) method.
- Show specific hidden rows in the worksheet using XlsWorksheet->ShowRow(int rowIndex) method.
- Show specific hidden columns in the worksheet using XlsWorksheet->ShowColumn(int columnIndex) method.
- Save the result file using Workbook->SaveToFile() method.
- C++
#include "Spire.Xls.o.h";

using namespace Spire::Xls;

int main()
{
	//Initialize an instance of the workbook class
	intrusive_ptr<Workbook> workbook = new Workbook();
	//Load an Excel file
	workbook->LoadFromFile(L"HideRowsAndColumns.xlsx");

	//Get the first worksheet
	intrusive_ptr<Worksheet> sheet = dynamic_pointer_cast<Worksheet>(workbook->GetWorksheets()->Get(0));

	//Show the 3rd and the 7th rows
	sheet->ShowRow(3);
	sheet->ShowRow(7);

	//Show the 3rd and the 6th columns
	sheet->ShowColumn(3);
	sheet->ShowColumn(6);

	//Save the result file
	workbook->SaveToFile(L"ShowRowsAndColumns.xlsx", ExcelVersion::Version2013);
	workbook->Dispose();
}
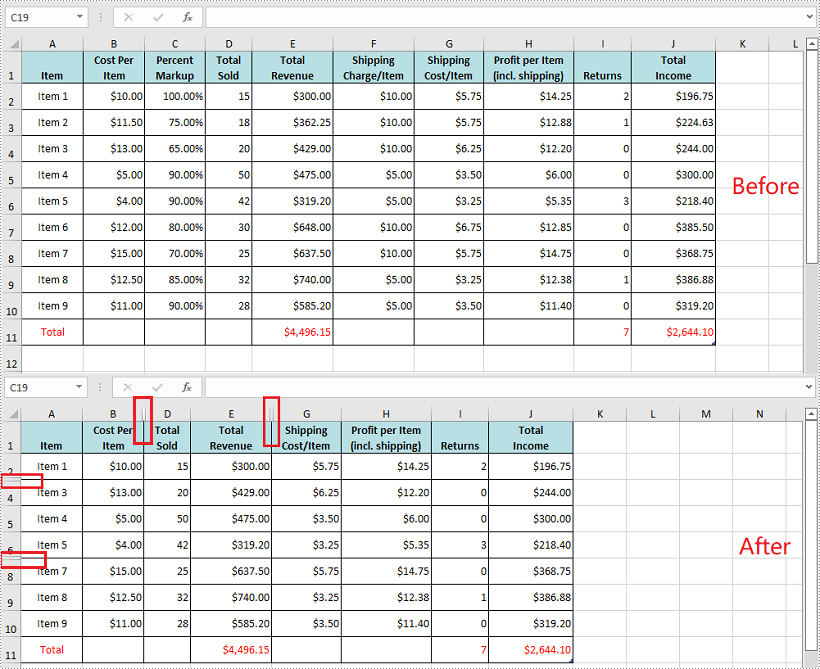
Hide Multiple Rows and Columns at Once in Excel in C++
You can hide multiple adjacent rows and columns at once by using the XlsWorksheet->HideRows(int rowIndex, int rowCount) and XlsWorksheet->HideColumns(int columnIndex, int columnCount) methods. The detailed steps are as follows:
- Initialize an instance of the Workbook class.
- Load an Excel file using Workbook->LoadFromFile() method.
- Get a specific worksheet using Workbook->GetWorksheets()->Get(int index) method.
- Hide multiple adjacent rows in the worksheet at once using XlsWorksheet->HideRows(int rowIndex, int rowCount) method.
- Hide multiple adjacent columns in the worksheet at once using XlsWorksheet->HideColumns(int columnIndex, int columnCount) method.
- Save the result file using Workbook->SaveToFile() method.
- C++
#include "Spire.Xls.o.h";

using namespace Spire::Xls;

int main()
{
	//Initialize an instance of the workbook class
	intrusive_ptr<Workbook> workbook = new Workbook();
	//Load an Excel file
	workbook->LoadFromFile(L"Input.xlsx");

	//Get the first worksheet
	intrusive_ptr<Worksheet> sheet = dynamic_pointer_cast<Worksheet>(workbook->GetWorksheets()->Get(0));

	//Hide the 3rd, 4th and 5th rows
	sheet->HideRows(3, 3);

	//Hide the 5th, 6th and 7th columns
	sheet->HideColumns(5, 3);

	//Save the result file
	workbook->SaveToFile(L"HideMultipleRowsAndColumns.xlsx", ExcelVersion::Version2013);
	workbook->Dispose();
}
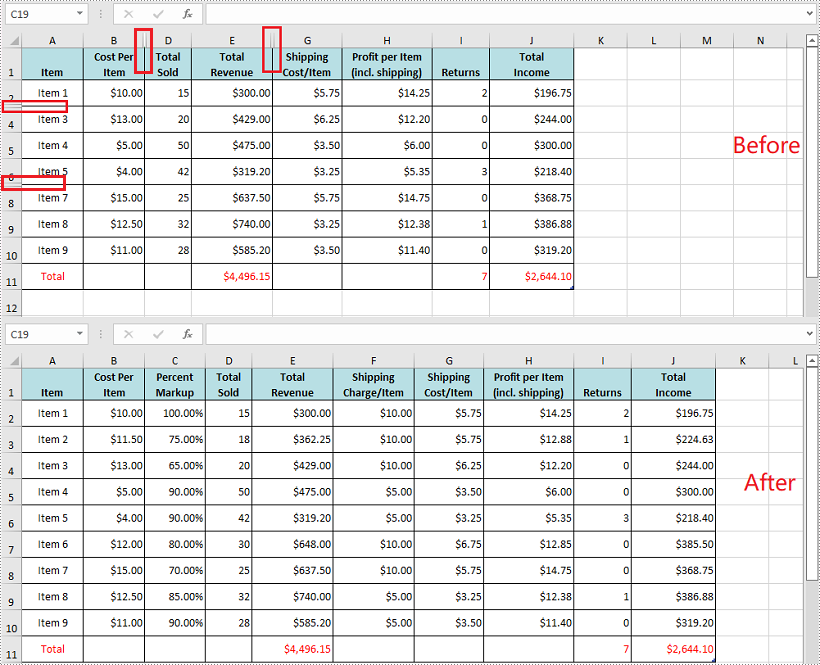
Show All Hidden Rows and Columns in Excel in C++
To show all the hidden rows and columns in an Excel worksheet, you need to iterate through all the rows and columns in the worksheet, then find the hidden rows and columns and call the XlsWorksheet->ShowRow(int rowIndex) and XlsWorksheet->ShowColumn(int columnIndex) methods to redisplay them. The detailed steps are as follows:
- Initialize an instance of the Workbook class.
- Load an Excel file using Workbook->LoadFromFile() method.
- Get a specific worksheet using Workbook->GetWorksheets()->Get(int index) method.
- Iterate through all the rows in the worksheet, then find the hidden rows using XlsWorksheet->GetRowIsHide(int rowIndex) method.
- Show the hidden rows using XlsWorksheet->ShowRow(int rowIndex) method.
- Iterate through all the columns in the worksheet, then find the hidden columns using XlsWorksheet->GetColumnIsHide(int columnIndex) method.
- Show the hidden columns using XlsWorksheet->ShowColumn(int columnIndex) method.
- Save the result file using Workbook->SaveToFile() method.
- C++
#include "Spire.Xls.o.h";

using namespace Spire::Xls;

int main()
{
	//Initialize an instance of the workbook class
	intrusive_ptr<Workbook> workbook = new Workbook();
	//Load an Excel file
	workbook->LoadFromFile(L"HideMultipleRowsAndColumns.xlsx");

	//Get the first worksheet
	intrusive_ptr<Worksheet> sheet = dynamic_pointer_cast<Worksheet>(workbook->GetWorksheets()->Get(0));

	//Iterate through all the rows in the worksheet
	for (int i = 1; i <= sheet->GetLastRow(); i++)
	{
		//Check if the current row is hidden
		if (sheet->GetRowIsHide(i))
		{
			sheet->ShowRow(i);
		}
	}

	//Iterate through all the columns in the worksheet
	for (int j = 1; j <= sheet->GetLastColumn(); j++)
	{
		//Check if the current column is hidden
		if (sheet->GetColumnIsHide(j))
		{
			//Show the hidden column
			sheet->ShowColumn(j);
		}
	}

	//Save the result file
	workbook->SaveToFile(L"ShowAllHiddenRowsAndColumns.xlsx", ExcelVersion::Version2013);
	workbook->Dispose();
}
Apply for a Temporary License
If you'd like to remove the evaluation message from the generated documents, or to get rid of the function limitations, please request a 30-day trial license for yourself.
C++: Change the Margins of a PDF Document
Margins are the empty and unused spaces between the document's content and edges. The margins generally don't contain any text or image, and their primary purpose is to prevent text from colliding with document boundaries. Depending on your needs, you can change the margins to become wider or narrower. In this article, you will learn how to increase or decrease the page margins of a PDF document in C++ using Spire.PDF for C++.
Install Spire.PDF for C++
There are two ways to integrate Spire.PDF for C++ into your application. One way is to install it through NuGet, and the other way is to download the package from our website and copy the libraries into your program. Installation via NuGet is simpler and more recommended. You can find more details by visiting the following link.
Integrate Spire.PDF for C++ in a C++ Application
Increase the Margins of a PDF Document in C++
The way to enlarge the margins of a PDF document is to create a new PDF that has a larger page size, and then draw the source page on the large page at the appropriate location. The following are the steps to increase the margins of a PDF document using Spire.PDF for C++.
- Load the original PDF document while initialing the PdfDocument object.
- Create another PdfDocument object, which is used to create a new PDF document that has a larger page size.
- Set the increasing values of the margins.
- Calculate the page size of the new PDF document.
- Loop through the pages in the original document, and create a template based on a specific page using PdfPageBase->CreateTemplate() method.
- Add a page to the new PDF document using PdfDocument->GetPages()->Add() method.
- Draw the template on the page at the coordinate (0, 0) using PdfTemplate->Draw() method.
- Save the new PDF document to file using PdfDocument->SaveToFile() method.
- C++
//Load the original PDF document
 PdfDocument* originalPdf = new PdfDocument(L"C:\\Users\\Administrator\\Desktop\\sample.pdf");

 //Get the first page
 boost::intrusive_ptr<PdfPageBase> firstPage = originalPdf->GetPages()->GetItem(0);

 //Create a new PdfDocument object
 PdfDocument* newPdf = new PdfDocument();

 //Set increasing value of the margins
 boost::intrusive_ptr<PdfMargins> margins = newPdf->GetPageSettings()->GetMargins();
 margins->SetTop(40);
 margins->SetBottom(40);
 margins->SetLeft(40);
 margins->SetRight(40);

 //Calculate the new page size
 SizeF* sizeF = new SizeF(firstPage->GetSize()->GetWidth() + margins->GetLeft() + margins->GetRight(), firstPage->GetSize()->GetHeight() + margins->GetTop() + margins->GetBottom());

 //Loop through the pages in the original document
 for (size_t i = 0; i < originalPdf->GetPages()->GetCount(); i++)
 {
     //Create a template based on a spcific page
     boost::intrusive_ptr<PdfTemplate> pdfTemplate = originalPdf->GetPages()->GetItem(i)->CreateTemplate();

     //Add a page to the new PDF
     boost::intrusive_ptr<PdfPageBase> page = newPdf->GetPages()->Add(sizeF);

     //Draw template on the page
     pdfTemplate->Draw(page, 0.0f, 0.0f);
 }
Decrease the Margins of a PDF Document in C++
The way to decrease the margins of a PDF is to create a new PDF that has a smaller page size, and then draw the source page on the small page at a specified coordinate. The following are the steps to decrease the margins of a PDF document using Spire.PDF for C++.
- Load the original PDF document while initialing the PdfDocument object.
- Create another PdfDocument object, which is used to create a new PDF document that has a smaller page size.
- Set the decreasing values of the margins.
- Calculate the page size of the new PDF document.
- Loop through the pages in the original document, and create a template based on a specific page using PdfPageBase->CreateTemplate() method.
- Add a page to the new PDF document using PdfDocument->GetPages()->Add() method.
- Draw the template on the page at a specified coordinate using PdfTemplate->Draw() method.
- Save the new PDF document to file using PdfDocument->SaveToFile() method.
- C++
#include "Spire.Pdf.o.h";

using namespace Spire::Pdf;

int main() {

    //Load the original PDF document
    PdfDocument* originalPdf = new PdfDocument(L"C:\\Users\\Administrator\\Desktop\\sample.pdf");

    //Get the first page
    PdfPageBase* firstPage = originalPdf->GetPages()->GetItem(0);

    //Create a new PdfDocument object
    PdfDocument* newPdf = new PdfDocument();

    //Set decreasing value
    double left = -20;
    double right = -20;
    double top = -20;
    double bottom = -20;

    //Calculate the new page size
    SizeF* sizeF = new SizeF(firstPage->GetSize()->GetWidth() + left + right, firstPage->GetSize()->GetHeight() + top + bottom);

    //Loop through the pages in the original document
    for (size_t i = 0; i < originalPdf->GetPages()->GetCount(); i++)
    {
        //Create a template based on a specific page
        PdfTemplate* pdfTemplate = originalPdf->GetPages()->GetItem(i)->CreateTemplate();

        //Add a page to the new PDF
        PdfPageBase* page = newPdf->GetPages()->Add(sizeF, new PdfMargins(0));

        //Draw template on the page
        pdfTemplate->Draw(page, left, top);
    }

    //Save the new document
    newPdf->SaveToFile(L"Output/DecreaseMargins.pdf", FileFormat::PDF);
    newPdf->Close();
    delete originalPdf;
    delete newPdf;
}
Apply for a Temporary License
If you'd like to remove the evaluation message from the generated documents, or to get rid of the function limitations, please request a 30-day trial license for yourself.
C++: Change Font Color in Word
Changing the font color in a Word document can be an effective way to emphasize important points. For example, if you are creating a report that contains crucial data, changing the font color of the data text to a brighter color can make it stand out from other text and quickly grab your reader's attention. Another benefit of changing the font color is that it can enhance the visual appearance and readability of the document. For instance, when preparing marketing materials, changing the font color of headings and subheadings to a different font color than the rest of the text can help create a clear information hierarchy, making the materials more attractive and easier to read. In this article, we will demonstrate how to change the font color in a Word document in C++ using Spire.Doc for C++.
- Change the Font Color of a Paragraph in Word in C++
- Change the Font Color of a Specific Text in Word in C++
Install Spire.Doc for C++
There are two ways to integrate Spire.Doc for C++ into your application. One way is to install it through NuGet, and the other way is to download the package from our website and copy the libraries into your program. Installation via NuGet is simpler and more recommended. You can find more details by visiting the following link.
Integrate Spire.Doc for C++ in a C++ Application
Change the Font Color of a Paragraph in Word in C++
To change the font color of a specific paragraph in a Word document, you can create a custom paragraph style with a specific font color, then add the style to the document and apply it to the paragraph you want to modify. The detailed steps are as follows:
- Create an instance of the Document class.
- Load a Word document using the Document->LoadFromFile() method.
- Access a specific section in the document by its index using the Document->GetSections()->GetItem(int index) method.
- Access the paragraph you want to modify by its index using the Section->GetParagraphs()->GetItem(int index) method.
- Create an instance of the ParagraphStyle class to define a custom paragraph style.
- Set the name and font color of the paragraph style using the ParagraphStyle->SetName() and ParagraphStyle->GetCharacterFormat()->SetTextColor() methods.
- Add the custom paragraph style to the document using the Document->GetStyles()->Add() method.
- Apply the custom paragraph style to the specific paragraph using the Paragraph->ApplyStyle() method.
- Save the modified document using the Document->SaveToFile() method.
- C++
#include "Spire.Doc.o.h";

using namespace Spire::Doc;

int main()
{
    //Create a Document instance
    intrusive_ptr<Document> document = new Document();

    //Load a Word document
    document->LoadFromFile(L"Sample.docx");

    //Get the first section
    intrusive_ptr<Section> section = document->GetSections()->GetItemInSectionCollection(0);

    //Change the font color of the first Paragraph
    intrusive_ptr<Paragraph> p1 = section->GetParagraphs()->GetItemInParagraphCollection(0);
    intrusive_ptr<ParagraphStyle> style1 = new ParagraphStyle(document);
    style1->SetName(L"Color1");
    style1->GetCharacterFormat()->SetTextColor(Color::GetRosyBrown());
    document->GetStyles()->Add(style1);
    p1->ApplyStyle(style1);

    //Change the font color of the second Paragraph
    intrusive_ptr<Paragraph> p2 = section->GetParagraphs()->GetItemInParagraphCollection(1);
    intrusive_ptr<ParagraphStyle> style2 = new ParagraphStyle(document);
    style2->SetName(L"Color2");
    style2->GetCharacterFormat()->SetTextColor(Color::GetDarkGreen());
    document->GetStyles()->Add(style2);
    p2->ApplyStyle(style2);

    //Save the result document
    document->SaveToFile(L"ChangeFontColorForParagraph.docx", FileFormat::Docx2013);
    document->Close();
}
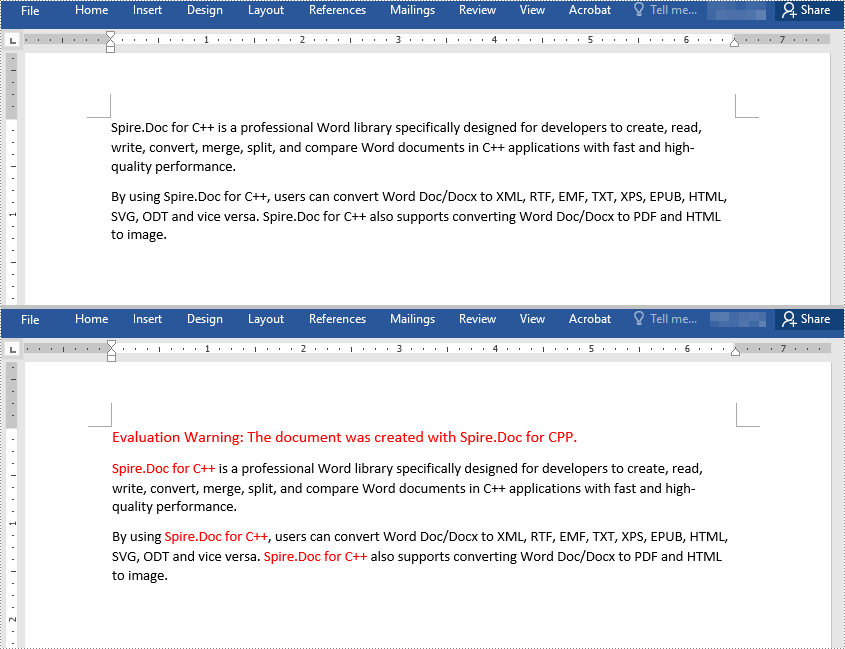
Change the Font Color of a Specific Text in Word in C++
To change the font color of a specific text in a Word document, you need to search for the text in the document, then change the font color of its all occurrences. The detailed steps are as follows:
- Create an instance of the Document class.
- Load a Word document using the Document->LoadFromFile() method.
- Find the text that you want to change the font color of using the Document->FindAllString() method.
- Iterate through all occurrences of the text and change the font color of each occurrence using the TextSelection->GetAsOneRange()->GetCharacterFormat()->SetTextColor() method.
- Save the result document using the Document->SaveToFile() method.
- C++
#include "Spire.Doc.o.h";

using namespace Spire::Doc;
using namespace std;

int main()
{
 //Create a Document instance
 intrusive_ptr<Document> document = new Document();

 //Load a Word document
 document->LoadFromFile(L"Sample.docx");

 //Find the text that you want to change the font color of
 vector<intrusive_ptr<TextSelection>> selection = document->FindAllString(L"Spire.Doc for C++", false, true);

 //Change the font color of all occurrences of the text
 for (auto text : selection)
 {
  text->GetAsOneRange()->GetCharacterFormat()->SetTextColor(Color::GetRed());
 }

 //Save the result document
 document->SaveToFile(L"ChangeFontColorForCertainText.docx", FileFormat::Docx2013);
 document->Close();
}
Apply for a Temporary License
If you'd like to remove the evaluation message from the generated documents, or to get rid of the function limitations, please request a 30-day trial license for yourself.
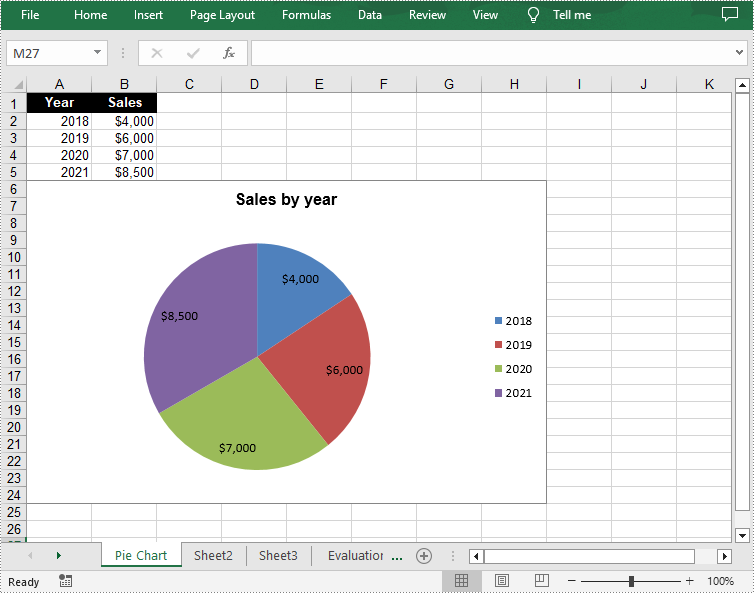
C++: Create a Pie Chart or a Doughnut Chart in Excel
Pie charts and donut charts are two similar types of charts used to show a percentage breakdown of data. Both charts are visually simple and provide an instant understanding of the part-to-whole relationship. In this article, you will learn how to programmatically create a pie chart or a doughnut chart in Excel using Spire.XLS for C++.
Install Spire.XLS for C++
There are two ways to integrate Spire.XLS for C++ into your application. One way is to install it through NuGet, and the other way is to download the package from our website and copy the libraries into your program. Installation via NuGet is simpler and more recommended. You can find more details by visiting the following link.
Integrate Spire.XLS for C++ in a C++ Application
Create a Pie Chart in Excel in C++
A pie chart is a circular graph divided into several sectors. To add a pie chart in a worksheet, you can use the Worksheet->GetCharts()->Add(ExcelChartType::Pie) method provided by Spire.XLS for C++. The following are the detailed steps.
- Create a Workbook object.
- Get a specified worksheet using Workbook->GetWorksheets()->Get() method.
- Add a pie chart to the worksheet using Worksheet->GetCharts()->Add(ExcelChartType::Pie) method.
- Add some data to specified cells and set the cell styles.
- Set data range for the chart using Chart->SetDataRange() method.
- Set the position and title of the chart.
- Get a specified series in the chart and set category labels and values for the series using ChartSerie->SetCategoryLabels() and ChartSerie->SetValues() methods.
- Show data labels for data points.
- Save the result file using Workbook->SaveToFile() method.
- C++
#include "Spire.Xls.o.h";

using namespace Spire::Xls;

int main()
{
	//Specify the output file path
	std::wstring outputFile = L"Output\\PieChart.xlsx";

	//Create a Workbook object
	intrusive_ptr<Workbook> workbook = new Workbook();

	//Get the first worksheet and set sheet name
	intrusive_ptr<Worksheet> sheet = dynamic_pointer_cast<Worksheet>(workbook->GetWorksheets()->Get(0));
	sheet->SetName(L"Pie Chart");

	//Add a pie chart to the worksheet
	intrusive_ptr<Chart> chart = nullptr;
	chart = sheet->GetCharts()->Add(ExcelChartType::Pie);

	//Set chart data
	sheet->GetRange(L"A1")->SetValue(L"Year");
	sheet->GetRange(L"A2")->SetValue(L"2018");
	sheet->GetRange(L"A3")->SetValue(L"2019");
	sheet->GetRange(L"A4")->SetValue(L"2020");
	sheet->GetRange(L"A5")->SetValue(L"2021");

	sheet->GetRange(L"B1")->SetValue(L"Sales");
	sheet->GetRange(L"B2")->SetNumberValue(4000);
	sheet->GetRange(L"B3")->SetNumberValue(6000);
	sheet->GetRange(L"B4")->SetNumberValue(7000);
	sheet->GetRange(L"B5")->SetNumberValue(8500);

	//Set cell styles
	sheet->GetRange(L"A1:B1")->SetRowHeight(15);
	sheet->GetRange(L"A1:B1")->GetStyle()->SetColor(Spire::Xls::Color::GetBlack());
	sheet->GetRange(L"A1:B1")->GetStyle()->GetFont()->SetColor(Spire::Xls::Color::GetWhite());
	sheet->GetRange(L"A1:B1")->GetStyle()->SetVerticalAlignment(VerticalAlignType::Center);
	sheet->GetRange(L"A1:B1")->GetStyle()->SetHorizontalAlignment(HorizontalAlignType::Center);

	//Set number format
	sheet->GetRange(L"B2:C5")->GetStyle()->SetNumberFormat(L"\"$\"#,##0");

	//Set data range for the chart
	chart->SetDataRange(sheet->GetRange(L"B2:B5"));
	chart->SetSeriesDataFromRange(false);

	//Set position of the chart
	chart->SetLeftColumn(1);
	chart->SetTopRow(6);
	chart->SetRightColumn(9);
	chart->SetBottomRow(25);

	//Set and format chart title
	chart->SetChartTitle(L"Sales by year");
	chart->GetChartTitleArea()->SetIsBold(true);
	chart->GetChartTitleArea()->SetSize(12);

	//Get a specified series in the chart
	intrusive_ptr<ChartSerie> cs = chart->GetSeries()->Get(0);

	//Set category labels for the series
	cs->SetCategoryLabels(sheet->GetRange(L"A2:A5"));

	//Set values for the series
	cs->SetValues(sheet->GetRange(L"B2:B5"));

	//Show data labels for data points
	cs->GetDataPoints()->GetDefaultDataPoint()->GetDataLabels()->SetHasValue(true);

	//Save the result file
	workbook->SaveToFile(outputFile.c_str(), ExcelVersion::Version2013);
	workbook->Dispose();
}
Create a Doughnut Chart in Excel in C++
The doughnut chart is a variant of the pie chart. It has a hole in the center which allows additional information to be displayed. The following are the steps to add a donut chart in an Excel worksheet.
- Create a Workbook object.
- Get a specified worksheet using Workbook->GetWorksheets()->Get() method.
- Add some data to specified cells and set the cell styles.
- Add a chart to the worksheet using Worksheet->GetCharts()->Add() method and then set its type as doughnut chart using Chart->SetChartType(ExcelChartType::Doughnut) method.
- Set data range for the chart using Chart->SetDataRange() method.
- Set the position and title of the chart.
- Show data labels for data points.
- Set the legend position of the chart using Chart->GetLegend()->SetPosition() method.
- Save the result file using Workbook->SaveToFile() method.
- C++
#include "Spire.Xls.o.h";

using namespace Spire::Xls;

int main()
{
	//Specify the output file path
	std::wstring outputFile = L"Output\\DoughnutChart.xlsx";

	//Create a Workbook object
	intrusive_ptr<Workbook> workbook = new Workbook();

	//Get the first worksheet
	intrusive_ptr<Worksheet> sheet = dynamic_pointer_cast<Worksheet>(workbook->GetWorksheets()->Get(0));

	//Insert data to specified cells
	sheet->GetRange(L"A1")->SetValue(L"Country");
	sheet->GetRange(L"A2")->SetValue(L"Cuba");
	sheet->GetRange(L"A3")->SetValue(L"Mexico");
	sheet->GetRange(L"A4")->SetValue(L"France");
	sheet->GetRange(L"A5")->SetValue(L"German");
	sheet->GetRange(L"B1")->SetValue(L"Sales");
	sheet->GetRange(L"B2")->SetNumberValue(6000);
	sheet->GetRange(L"B3")->SetNumberValue(8000);
	sheet->GetRange(L"B4")->SetNumberValue(9000);
	sheet->GetRange(L"B5")->SetNumberValue(8500);

	//Set cell styles
	sheet->GetRange(L"A1:B1")->SetRowHeight(15);
	sheet->GetRange(L"A1:B1")->GetStyle()->SetColor(Spire::Xls::Color::GetBlack());
	sheet->GetRange(L"A1:B1")->GetStyle()->GetFont()->SetColor(Spire::Xls::Color::GetWhite());
	sheet->GetRange(L"A1:B1")->GetStyle()->GetFont()->SetIsBold(true);
	sheet->GetRange(L"A1:B1")->GetStyle()->SetVerticalAlignment(VerticalAlignType::Center);
	sheet->GetRange(L"A1:B1")->GetStyle()->SetHorizontalAlignment(HorizontalAlignType::Center);

	//Add a doughnut chart to the worksheet
	intrusive_ptr<Chart> chart = sheet->GetCharts()->Add();
	chart->SetChartType(ExcelChartType::Doughnut);

	//Set data range for chart
	chart->SetDataRange(sheet->GetRange(L"A1:B5"));
	chart->SetSeriesDataFromRange(false);

	//Set position of the chart
	chart->SetLeftColumn(4);
	chart->SetTopRow(2);
	chart->SetRightColumn(12);
	chart->SetBottomRow(22);

	//Chart title
	chart->SetChartTitle(L"Market share by country");
	chart->GetChartTitleArea()->SetIsBold(true);
	chart->GetChartTitleArea()->SetSize(12);

	//Show data labels for data points
	for (int i = 0; i < chart->GetSeries()->GetCount(); i++)
	{
		intrusive_ptr<ChartSerie> cs = chart->GetSeries()->Get(i);
		cs->GetDataPoints()->GetDefaultDataPoint()->GetDataLabels()->SetHasPercentage(true);
	}

	//Set the legend position of the chart
	chart->GetLegend()->SetPosition(LegendPositionType::Top);

	//Save the result file
	workbook->SaveToFile(outputFile.c_str(), ExcelVersion::Version2013);
	workbook->Dispose();
}

Apply for a Temporary License
If you'd like to remove the evaluation message from the generated documents, or to get rid of the function limitations, please request a 30-day trial license for yourself.
C++: Create, Fill or Remove Form Fields in PDF
PDF form fields are digital elements that allow users to input and manipulate data within a PDF document. PDF form fields enable users to complete forms, surveys, questionnaires, and other types of documents electronically, which streamlines the process of data collection and eliminates the need for paper-based methods. In this article, you will learn how to create, fill, or remove form fields in a PDF document in C++ using Spire.PDF for C++.
Install Spire.PDF for C++
There are two ways to integrate Spire.PDF for C++ into your application. One way is to install it through NuGet, and the other way is to download the package from our website and copy the libraries into your program. Installation via NuGet is simpler and more recommended. You can find more details by visiting the following link.
Integrate Spire.PDF for C++ in a C++ Application
Create Form Fields in PDF in C++
Spire.PDF for C++ offers a set of useful classes that allow developers to create and edit various types of form fields in PDF, including text box, check box, combo box, list box, and radio button. The table below lists some of the core classes involved in this tutorial.
| Class | Description |
| PdfForm | Represents interactive form of the PDF document. |
| PdfField | Represents field of the PDF document's interactive form. |
| PdfTextBoxField | Represents text box field in the PDF form. |
| PdfCheckBoxField | Represents check box field in the PDF form. |
| PdfComboBoxField | Represents combo box field in the PDF Form. |
| PdfListBoxField | Represents list box field of the PDF form. |
| PdfListFieldItem | Represents an item of a list field. |
| PdfRadioButtonListField | Represents radio button field in the PDF form. |
| PdfRadioButtonListItem | Represents an item of a radio button list. |
| PdfButtonField | Represents button field in the PDF form. |
| PdfSignatureField | Represents signature field in the PDF form. |
To create a field, initialize an instance of the corresponding class. Specify its size and position in the document using SetBounds() method, and then add it to the PDF form using PdfForm->GetFields()->Add() method. The following are the steps to create various types of form fields in a PDF document using Spire.PDF for C++.
- Create a PdfDocument object.
- Add a page using PdfDocument->GetPages()->Add() method.
- Create a PdfTextBoxField object, set the properties of the field including Bounds, Font and Text, and then add it to the document using PdfForm->GetFields()->Add() method.
- Repeat the step 3 to add check boxes, combo boxes, list boxes, radio buttons, and buttons to the document.
- Save the document to a PDF file using PdfDocument->SaveToFile() method.
- C++
#include "Spire.Pdf.o.h";

using namespace Spire::Pdf;
using namespace std;

int main() {

    //Create a PdfDocument object
    PdfDocument* doc = new PdfDocument();

    //Add a page
    intrusive_ptr<PdfPageBase> page = doc->GetPages()->Add();

    //Initialize x and y coordinates
    float baseX = 100;
    float baseY = 30;

    //Create two brush objects
    PdfSolidBrush* brush1 = new PdfSolidBrush(new PdfRGBColor(Spire::Pdf::Color::GetBlue()));
    PdfSolidBrush* brush2 = new PdfSolidBrush(new PdfRGBColor(Spire::Pdf::Color::GetBlack()));

    //Create a font
    PdfFont * font = new PdfFont(PdfFontFamily::TimesRoman, 12.0f, PdfFontStyle::Regular);

    //Add a textbox
    page->GetCanvas()->DrawString(L"TextBox:", font, brush1, 10, baseY);
    RectangleF* tbxBounds = new RectangleF(baseX, baseY, 150, 15);
    PdfTextBoxField* textBox = new PdfTextBoxField(page, L"textbox");
    textBox->SetBounds(tbxBounds);
    textBox->SetText(L"Hello World");
    textBox->SetFont(font);
    doc->GetForm()->GetFields()->Add(textBox);
    baseY += 25;

    //add two checkboxes
    page->GetCanvas()->DrawString(L"CheckBox:", font, brush1, 10, baseY);
    RectangleF* checkboxBound1 = new RectangleF(baseX, baseY, 15, 15);
    PdfCheckBoxField* checkBoxField1 = new PdfCheckBoxField(page, L"checkbox1");
    checkBoxField1->SetBounds(checkboxBound1);
    checkBoxField1->SetChecked(false);
    page->GetCanvas()->DrawString(L"Option 1", font, brush2, baseX + 20, baseY);

    RectangleF* checkboxBound2 = new RectangleF(baseX + 70, baseY, 15, 15);
    PdfCheckBoxField* checkBoxField2 = new PdfCheckBoxField(page, L"checkbox2");
    checkBoxField2->SetBounds(checkboxBound2);
    checkBoxField2->SetChecked(false);
    page->GetCanvas()->DrawString(L"Option 2", font, brush2, baseX + 90, baseY);
    doc->GetForm()->GetFields()->Add(checkBoxField1);
    doc->GetForm()->GetFields()->Add(checkBoxField2);
    baseY += 25;

    //Add a listbox
    page->GetCanvas()->DrawString(L"ListBox:", font, brush1, 10, baseY);
    RectangleF* listboxBound = new RectangleF(baseX, baseY, 150, 50);
    PdfListBoxField* listBoxField = new PdfListBoxField(page, L"listbox");
    listBoxField->GetItems()->Add(new PdfListFieldItem(L"Item 1", L"item1"));
    listBoxField->GetItems()->Add(new PdfListFieldItem(L"Item 2", L"item2"));
    listBoxField->GetItems()->Add(new PdfListFieldItem(L"Item 3", L"item3")); ;
    listBoxField->SetBounds(listboxBound);
    listBoxField->SetFont(font);
    listBoxField->SetSelectedIndex(0);
    doc->GetForm()->GetFields()->Add(listBoxField);
    baseY += 60;

    //Add two radio buttons
    page->GetCanvas()->DrawString(L"RadioButton:", font, brush1, 10, baseY);
    PdfRadioButtonListField* radioButtonListField = new PdfRadioButtonListField(page, L"radio");
    PdfRadioButtonListItem* radioItem1 = new PdfRadioButtonListItem(L"option1");
    RectangleF* radioBound1 = new RectangleF(baseX, baseY, 15, 15);
    radioItem1->SetBounds(radioBound1);
    page->GetCanvas()->DrawString(L"Option 1", font, brush2, baseX + 20, baseY);

    PdfRadioButtonListItem* radioItem2 = new PdfRadioButtonListItem(L"option2");
    RectangleF* radioBound2 = new RectangleF(baseX + 70, baseY, 15, 15);
    radioItem2->SetBounds(radioBound2);
    page->GetCanvas()->DrawString(L"Option 2", font, brush2, baseX + 90, baseY);
    radioButtonListField->GetItems()->Add(radioItem1);
    radioButtonListField->GetItems()->Add(radioItem2);
    radioButtonListField->SetSelectedIndex(0);
    doc->GetForm()->GetFields()->Add(radioButtonListField);
    baseY += 25;

    //Add a combobox
    page->GetCanvas()->DrawString(L"ComboBox:", font, brush1, 10, baseY);
    RectangleF* cmbBounds = new RectangleF(baseX, baseY, 150, 15);
    PdfComboBoxField* comboBoxField = new PdfComboBoxField(page, L"combobox");
    comboBoxField->SetBounds(cmbBounds);
    comboBoxField->GetItems()->Add(new PdfListFieldItem(L"Item 1", L"item1"));
    comboBoxField->GetItems()->Add(new PdfListFieldItem(L"Item 2", L"itme2"));
    comboBoxField->GetItems()->Add(new PdfListFieldItem(L"Item 3", L"item3"));
    comboBoxField->GetItems()->Add(new PdfListFieldItem(L"Item 4", L"item4"));
    comboBoxField->SetSelectedIndex(0);
    comboBoxField->SetFont(font);
    comboBoxField->SetEditable(true);
    doc->GetForm()->GetFields()->Add(comboBoxField);
    baseY += 25;

    //Add a button
    page->GetCanvas()->DrawString(L"Button:", font, brush1, 10, baseY);
    RectangleF* btnBounds = new RectangleF(baseX, baseY, 50, 15);
    PdfButtonField* buttonField = new PdfButtonField(page, L"button");
    buttonField->SetBounds(btnBounds);
    buttonField->SetText(L"Submit");
    buttonField->SetFont(font);
    PdfSubmitAction* submitAction = new PdfSubmitAction(L"https://www.e-iceblue.com/getformvalues.php");
    buttonField->GetActions()->SetMouseDown(submitAction);
    doc->GetForm()->GetFields()->Add(buttonField);

    //Save to file
    doc->SaveToFile(L"Output/FillableForm.pdf", FileFormat::PDF);
    doc->Close();
    delete doc;
}

Fill Form Fields in PDF in C++
In order to fill out a form, you need first get all the form fields from the PDF document, determine the type of a certain field, and then input a value or select a value from a predefined list. The following are the steps to fill form fields in an existing PDF document using Spire.PDF for C++.
- Create a PdfDocument object.
- Load a sample PDF document using PdfDocument->LoadFromFile() method.
- Get the form from the document using PdfDocument->GetForm() method.
- Get the form field widget collection using PdfFormWidget->GetFieldsWidget() method.
- Loop through the field widget collection to get a specific PdfField.
- Determine if the PdfField is a certain field type such as text box. If yes, set the text of the text box using PdfTextBoxFieldWidget->SetText() method.
- Repeat the step above to fill radio button, check box, combo box, and list box with values.
- Save the document to a PDF file using PdfDocument->SaveToFile() method.
- C++
#include "Spire.Pdf.o.h";

using namespace Spire::Pdf;
using namespace std;

int main() {

    //Create a PdfDocument object
    PdfDocument* doc = new PdfDocument();

    //Load a PDF file containing form fields
    doc->LoadFromFile(L"C:\\Users\\Administrator\\Desktop\\Form.pdf");

    //Get the form from the document
    intrusive_ptr<PdfFormWidget> form = Object::Convert<PdfFormWidget>(doc->GetForm());

    //Get the form widget collection
    intrusive_ptr<PdfFormFieldWidgetCollection> formWidgetCollection = form->GetFieldsWidget();

    //Loop through the widgets
    for (int i = 0; i < formWidgetCollection->GetCount(); i++)
    {
        //Get a specific field
        intrusive_ptr<PdfField> field = formWidgetCollection->GetItem(i);

        //Determine if the field is a text box
        wchar_t nm_w1[100];
        swprintf(nm_w1, 100, L"%hs", typeid(PdfTextBoxFieldWidget).name());
        LPCWSTR_S newName1 = nm_w1;
        if (wcscmp(newName1, field->GetInstanceTypeName()) == 0)
        {
            intrusive_ptr<PdfTextBoxFieldWidget> textBoxField = Object::Convert<PdfTextBoxFieldWidget>(field);
            wstring str = textBoxField->GetName();
            if (str == L"name")
            {
                //Set the text of text box
                textBoxField->SetText(L"Kaila Smith");
            }
        }

        //Determine if the field is a check box
        wchar_t nm_w2[100];
        swprintf(nm_w2, 100, L"%hs", typeid(PdfCheckBoxWidgetFieldWidget).name());
        LPCWSTR_S newName2 = nm_w2;
        if (wcscmp(newName2, field->GetInstanceTypeName()) == 0)
        {
            intrusive_ptr<PdfCheckBoxWidgetFieldWidget> checkBoxField = Object::Convert<PdfCheckBoxWidgetFieldWidget>(field);
            wstring str = checkBoxField->GetName();
            if (str == L"travel")
            {
                //Set the "Checked" status of check box
                checkBoxField->SetChecked(true);
            }
            else if (str == L"movie")
            {
                checkBoxField->SetChecked(true);
            }
        }

        //Determine if the field is a combo box
        wchar_t nm_w3[100];
        swprintf(nm_w3, 100, L"%hs", typeid(PdfListBoxWidgetFieldWidget).name());
        LPCWSTR_S newName3 = nm_w3;
        if (wcscmp(newName3, field->GetInstanceTypeName()) == 0)
        {
            intrusive_ptr<PdfListBoxWidgetFieldWidget> listBoxField = Object::Convert<PdfListBoxWidgetFieldWidget>(field);
            wstring str = listBoxField->GetName();
            if (str == L"country")
            {
                //Set the selected index of combo box
                vector<int> item = { 0 };
                listBoxField->SetSelectedIndex(item);
            }
        }

        //Determine if the field is a radio button
        wchar_t nm_w4[100];
        swprintf(nm_w4, 100, L"%hs", typeid(PdfRadioButtonListFieldWidget).name());
        LPCWSTR_S newName4 = nm_w4;
        if (wcscmp(newName4, field->GetInstanceTypeName()) == 0)
        {
            intrusive_ptr<PdfRadioButtonListFieldWidget> radioButtonListField = Object::Convert<PdfRadioButtonListFieldWidget>(field);
            wstring str = radioButtonListField->GetName();
            if (str == L"gender")
            {
                //Set the selected index of radio button
                radioButtonListField->SetSelectedIndex(1);
            }
        }

        //Determine if the field is a list box
        wchar_t nm_w5[100];
        swprintf(nm_w5, 100, L"%hs", typeid(PdfComboBoxWidgetFieldWidget).name());
        LPCWSTR_S newName5 = nm_w5;
        if (wcscmp(newName5, field->GetInstanceTypeName()) == 0)
        {
            intrusive_ptr<PdfComboBoxWidgetFieldWidget> comBoxField = Object::Convert<PdfComboBoxWidgetFieldWidget>(field);
            wstring str = comBoxField->GetName();
            if (str == L"degree")
            {
                //Set the selected index of list box
                vector<int> item = { 1 };
                comBoxField->SetSelectedIndex(item);
            }
        }
    }

    //Save to file
    doc->SaveToFile(L"Output/FillFormFields.pdf", FileFormat::PDF);
    doc->Close();
    delete doc;
}
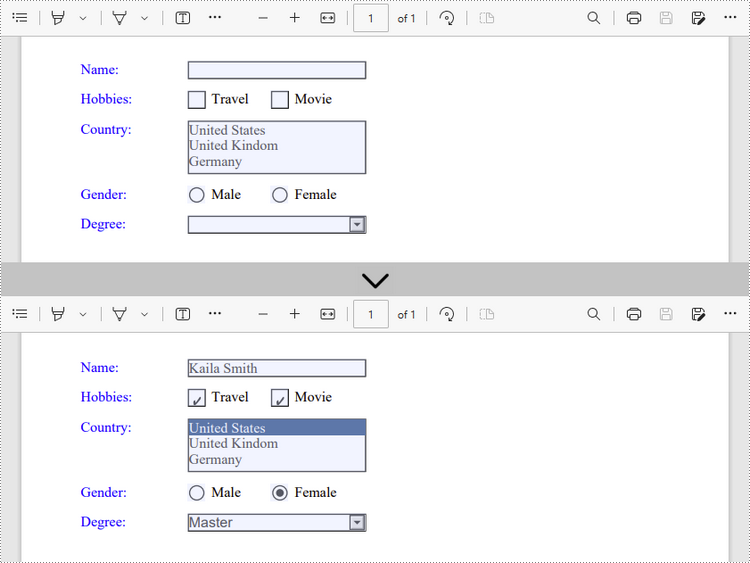
Remove Form Fields from PDF in C++
A form field in a PDF document can be accessed by its index or name and removed by PdfFieldCollection->Remove() method. The following are the steps to remove a particular field or all fields from a PDF document using Sprie.PDF for C++.
- Create a PdfDocument object.
- Load a sample PDF document using PdfDocument->LoadFromFile() method.
- Get the form from the document using PdfDocument->GetForm() method.
- Get the form field widget collection using PdfFormWidget->GetFieldsWidget() method.
- Get a specific field using PdfFormFieldWidgetCollection->GetItem() method, and remove it using PdfFieldCollection->Remove() method.
- To remove all fields at once, use PdfFieldCollection->Clear() method.
- Save the document to a PDF file using PdfDocument->SaveToFile() method.
- C++
#include "Spire.Pdf.o.h";

using namespace Spire::Pdf;
using namespace std;

int main() {

    //Create a PdfDocument object
    PdfDocument* doc = new PdfDocument();

    //Load a PDF file
    doc->LoadFromFile(L"C:\\Users\\Administrator\\Desktop\\Form.pdf");

    //Get the form from the document
    intrusive_ptr<PdfFormWidget> form = Object::Convert<PdfFormWidget>(doc->GetForm());

    //Get form widgets from the form
    intrusive_ptr<PdfFormFieldWidgetCollection> widgets = form->GetFieldsWidget();

    //Get a specific field by its name
    intrusive_ptr<PdfField> field = widgets->GetItem(L"name");

    //Remove the field
    widgets->Remove(field);

    //Remove all fields
    //widgets->Clear();

    //Save to file
    doc->SaveToFile(L"Output/DeleteFields.pdf", FileFormat::PDF);
    doc->Close();
    delete doc;
}
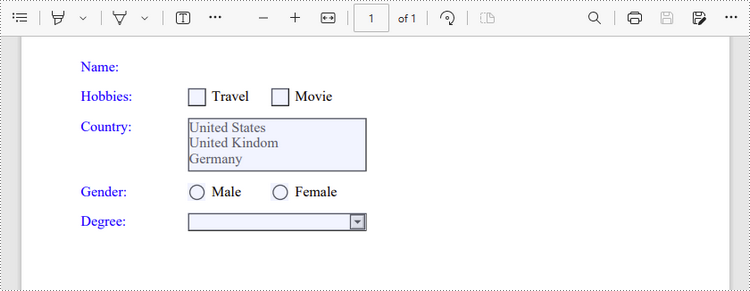
Apply for a Temporary License
If you'd like to remove the evaluation message from the generated documents, or to get rid of the function limitations, please request a 30-day trial license for yourself.