Rotate shapes on Word document in Java
This article demonstrates how to rotate shapes on a Word document using Spire.Doc for Java.
import com.spire.doc.Document;
import com.spire.doc.DocumentObject;
import com.spire.doc.FileFormat;
import com.spire.doc.Section;
import com.spire.doc.documents.*;
import com.spire.doc.fields.ShapeObject;
public class RotateShape {
public static void main(String[] args) throws Exception {
//Load the Sample Word document.
Document doc = new Document();
doc.loadFromFile("InsertShapes.docx");
//Get the first section
Section sec = doc.getSections().get(0);
//Traverse every paragraphs to get the shapes and rotate them
for ( Paragraph para: (Iterable<Paragraph>) sec.getParagraphs()) {
for (DocumentObject obj : (Iterable<DocumentObject>) para.getChildObjects()) {
if (obj instanceof ShapeObject) {
((ShapeObject) obj).setRotation(20);
}
}
}
//Save to file
doc.saveToFile("output/RotateShape.docx", FileFormat.Docx);
}
}
Effective screenshot after rotating the shapes on word:

Add Data Labels to Chart in PowerPoint in Java
This article demonstrates how to add data labels to a chart and set the appearance (border style and fill style) for the data labels in PowerPoint using Spire.Presentation for Java. Note some chart types like Surface3D, Surface3DNoColor, Contour and ContourNoColor do not support data labels.
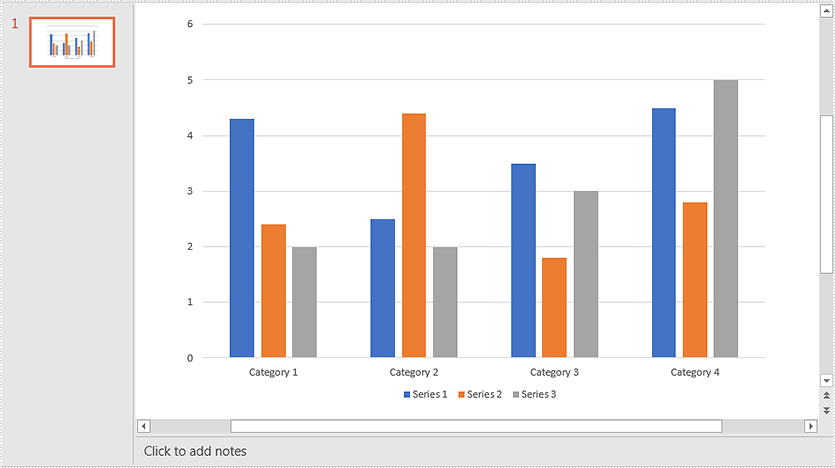
Below screenshot shows the original chart before adding data labels:
import com.spire.presentation.FileFormat;
import com.spire.presentation.ISlide;
import com.spire.presentation.Presentation;
import com.spire.presentation.charts.IChart;
import com.spire.presentation.charts.entity.ChartDataLabel;
import com.spire.presentation.charts.entity.ChartSeriesDataFormat;
import com.spire.presentation.drawing.FillFormatType;

import java.awt.*;

public class AddDataLabelsToChart {
    public static void main(String[] args) throws Exception {
        //Load the PowerPoint document
        Presentation ppt = new Presentation();
        ppt.loadFromFile("Chart.pptx");

        //Get the first slide
        ISlide slide = ppt.getSlides().get(0);
        //Get the chart in the slide
        IChart chart = (IChart)slide.getShapes().get(0);

        //Loop through the series in the chart
        for (ChartSeriesDataFormat series:(Iterable<ChartSeriesDataFormat>)chart.getSeries()) {
             ) {
            //Add data labels for the data points in each series
            for(int i = 0; i < 4; i++){
                ChartDataLabel dataLabel = series.getDataLabels().add();
                //Show label value
                dataLabel.setLabelValueVisible(true);
                //Show series name
                dataLabel.setSeriesNameVisible(true);
                //Set border line style
                dataLabel.getLine().setFillType(FillFormatType.SOLID);
                dataLabel.getLine().getSolidFillColor().setColor(Color.RED);
                //Set fill style
                dataLabel.getFill().setFillType(FillFormatType.SOLID);
                dataLabel.getFill().getSolidColor().setColor(Color.YELLOW);
            }
        }

        //Save the resultant document
        ppt.saveToFile("DataLabels.pptx", FileFormat.PPTX_2013);
    }
}
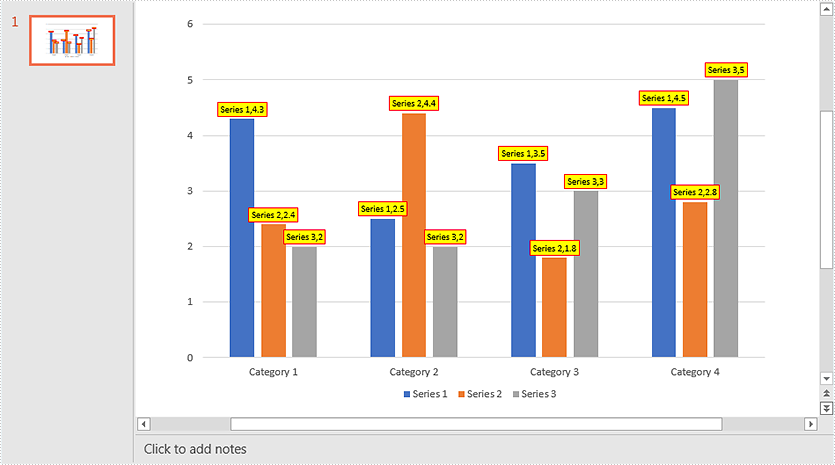
Output:
Add Tooltip to the Searched Text on PDF in C#
This article demonstrates how to add tooltip to the text on an existing PDF document in C#. Spire.PDF for .NET supports to create tooltips by adding invisible button over the searched text from the PDF file.
Step 1: Load the sample document file.
PdfDocument doc = new PdfDocument();
doc.LoadFromFile("Sample.pdf");
Step 2: Searched the text “Add tooltip to PDF” from the first page of the sample document and get the position of it.
PdfPageBase page = doc.Pages[0];
PdfTextFinder finder = new PdfTextFinder(page);
finder.Options.Parameter =TextFindParameter.WholeWord;
List<PdfTextFragment> result = finder.Find("Add tooltip to PDF");
RectangleF rec = result[0].Bounds[0];
Step 3: Create invisible button on text position
PdfButtonField field1 = new PdfButtonField(page, "field1");
field1.Bounds = rec;

field1.ToolTip = "E-iceblue Co. Ltd., a vendor of .NET, Java and WPF development components";
field1.BorderWidth = 0;
field1.BackColor = Color.Transparent;
field1.ForeColor = Color.Transparent;
field1.LayoutMode = PdfButtonLayoutMode.IconOnly;
field1.IconLayout.IsFitBounds = true;
Step 4: Set the content and format for the tooltip field.
field1.ToolTip = "E-iceblue Co. Ltd., a vendor of .NET, Java and WPF development components";
field1.BorderWidth = 0;
field1.BackColor = Color.Transparent;
field1.ForeColor = Color.Transparent;
field1.LayoutMode = PdfButtonLayoutMode.IconOnly;
field1.IconLayout.IsFitBounds = true;
Step 5: Save the document to file.
doc.SaveToFile("Addtooltip.pdf", FileFormat.PDF);
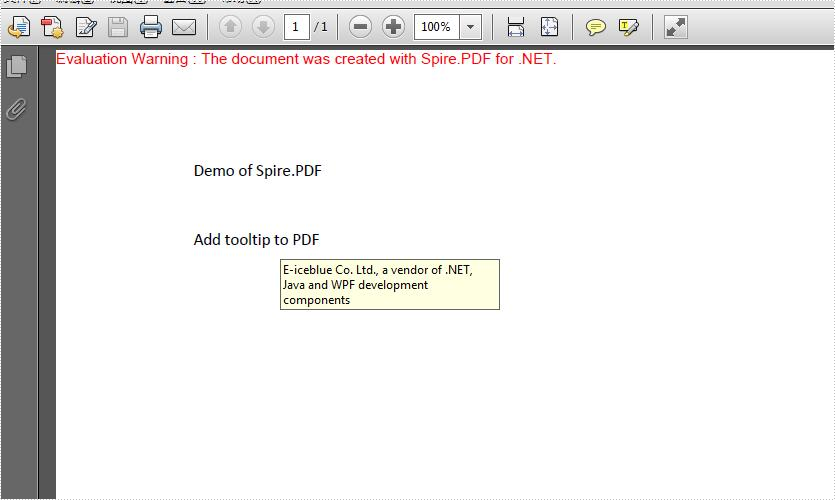
Effective screenshot after adding the tooltip to PDF:
using Spire.Pdf;
using Spire.Pdf.Fields;
using Spire.Pdf.Texts;
using System.Collections.Generic;
using System.Drawing;

namespace TooltipPDF
{
    class Program
    {
        static void Main(string[] args)
        {
            PdfDocument doc = new PdfDocument();
            doc.LoadFromFile("Sample.pdf");

            PdfPageBase page = doc.Pages[0];

            PdfTextFinder finder = new PdfTextFinder(page);
            finder.Options.Parameter =TextFindParameter.WholeWord;

            // Find the occurrences of the specified text
            List<PdfTextFragment> result = finder.Find("Add tooltip to PDF");
            RectangleF rec = result[0].Bounds[0];

            //Create invisible button on text position
            PdfButtonField field1 = new PdfButtonField(page, "field1");
            field1.Bounds = rec;

            field1.ToolTip = "E-iceblue Co. Ltd., a vendor of .NET, Java and WPF development components";
            field1.BorderWidth = 0;
            field1.BackColor = Color.Transparent;
            field1.ForeColor = Color.Transparent;
            field1.LayoutMode = PdfButtonLayoutMode.IconOnly;
            field1.IconLayout.IsFitBounds = true;

            doc.SaveToFile("Addtooltip.pdf", FileFormat.PDF);

        }
    }
}
Replace Text in PowerPoint in Java
This article demonstrates how to replace text in an exising PowerPoint document with new text using Spire.Presentation for Java.
import com.spire.presentation.*;
import java.util.HashMap;
import java.util.Map;
public class ReplaceText {
public static void main(String[] args) throws Exception {
//create a Presentation object
Presentation presentation = new Presentation();
//load the template file
presentation.loadFromFile("C:\\Users\\Administrator\\Desktop\\input.pptx");
//get the first slide
ISlide slide= presentation.getSlides().get(0);
//create a Map object
Map map = new HashMap();
//add several pairs of keys and values to the map
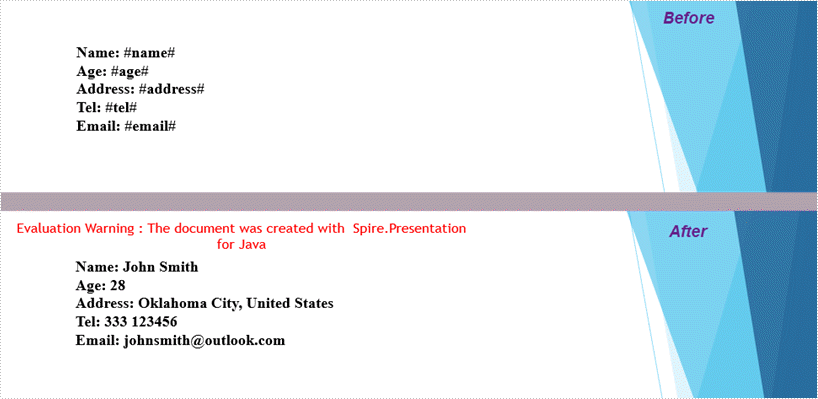
map.put("#name#","John Smith");
map.put("#age#","28");
map.put("#address#","Oklahoma City, United States");
map.put("#tel#","333 123456");
map.put("#email#","johnsmith@outlook.com");
//replace text in the slide
replaceText(slide,map);
//save to another file
presentation.saveToFile("output/ReplaceText.pptx", FileFormat.PPTX_2013);
}
/**
* Replace text within a slide
* @param slide Specifies the slide where the replacement happens
* @param map Where keys are existing strings in the document and values are the new strings to replace the old ones
*/
public static void replaceText(ISlide slide, Map<String,String> map) {
for (Object shape : slide.getShapes()
) {
if (shape instanceof IAutoShape) {
for (Object paragraph : ((IAutoShape) shape).getTextFrame().getParagraphs()
) {
ParagraphEx paragraphEx = (ParagraphEx)paragraph;
for (String key : map.keySet()
) {
if (paragraphEx.getText().contains(key)) {
paragraphEx.setText(paragraphEx.getText().replace(key, map.get(key)));
}
}
}
}
}
}
}
Set and Get Alternative Text (Alt Text) of PowerPoint Shapes in Java
Alternative text (Alt Text) can help people with vision or cognitive impairments understand shapes, pictures or other graphical content. This article demonstrates how to set and get the alternative text of a shape in a PowerPoint document using Spire.Presentation for Java.
Set alternative text
import com.spire.presentation.*;
import com.spire.presentation.drawing.FillFormatType;
import java.awt.*;
import java.awt.geom.Rectangle2D;
public class SetAltText {
public static void main(String[] args) throws Exception {
//instantiate a Presentation object
Presentation ppt = new Presentation();
//add a shape to the first slide
IAutoShape shape = ppt.getSlides().get(0).getShapes().appendShape(ShapeType.TRIANGLE, new Rectangle2D.Double(115, 130, 100, 100));
shape.getFill().setFillType(FillFormatType.SOLID);
shape.getFill().getSolidColor().setColor(Color.orange);
shape.getShapeStyle().getLineColor().setColor(Color.white);
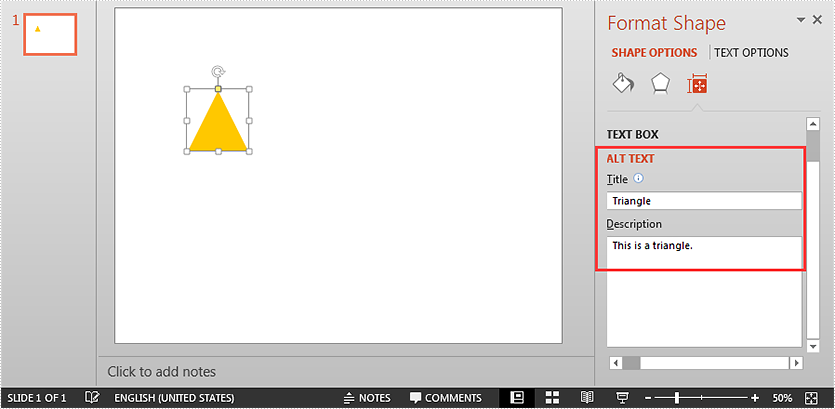
//set alt text (title and description) for the shape
shape.setAlternativeTitle("Triangle");
shape.setAlternativeText("This is a triangle.");
//save the resultant document
ppt.saveToFile("Output.pptx", FileFormat.PPTX_2013);
}
}
Get alternative text
import com.spire.presentation.*;
public class GetAltText {
public static void main(String[] args) throws Exception {
//load PowerPoint document
Presentation ppt = new Presentation();
ppt.loadFromFile("Output.pptx");
//get the first shape in the first slide
IShape shape = ppt.getSlides().get(0).getShapes().get(0);
//get the alt text (title and description) of the shape
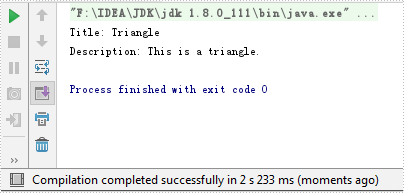
String altTitle = shape.getAlternativeTitle();
String altDescription = shape.getAlternativeText();
System.out.println("Title: " + altTitle);
System.out.println("Description: " + altDescription);
}
}
Set custom properties for PDF files in Java
We have already demonstrated how to set PDF Document Properties in Java. This article we will show you how to set custom properties for PDF files in Java.
import com.spire.pdf.*;
public class PDFCustomProperties {
public static void main(String[] args) throws Exception {
String inputPath = "Sample.pdf";
PdfDocument doc = new PdfDocument(inputPath);
doc.loadFromFile(inputPath);
//Set the custom properties
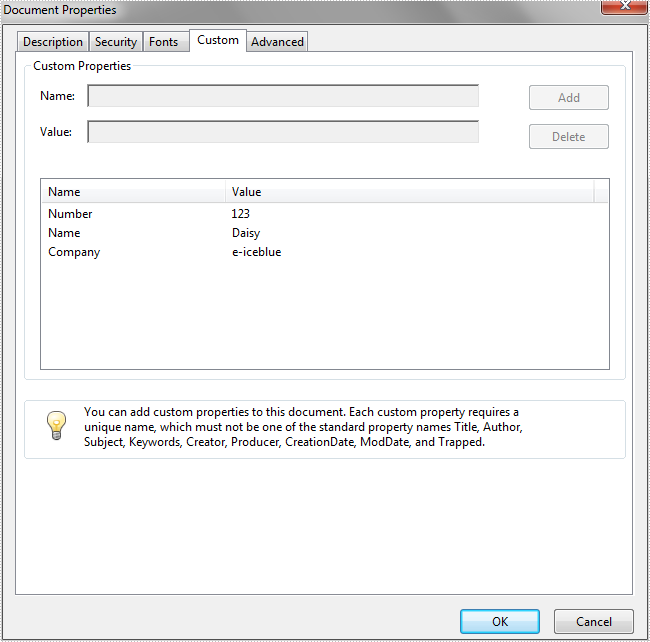
doc.getDocumentInformation().setCustomProperty("Number", "123");
doc.getDocumentInformation().setCustomProperty("Name", "Daisy");
doc.getDocumentInformation().setCustomProperty("Company", "e-iceblue");"
//Save the document to file
doc.saveToFile("Output/result.pdf");
doc.close();
}
}
Effective screenshot after adding custom properties to PDF document:
Java: Add, Modify, or Remove Footers in PowerPoint Documents
Adding, modifying, and removing footers in PowerPoint documents is crucial as footers can provide additional information and organizational structure to the document. By including page numbers, dates, author information, or custom text in the footer, it can help the audience better understand the presentation content and track document versions. Footers also enhance the professionalism and tidiness of the document, making it more visually appealing and readable. Modifying footers allows for updating information or adjusting formats as needed to ensure the document remains current and consistent. Removing footers can customize the document's appearance based on specific requirements or design preferences. This article will introduce how to use Spire.Presentation for Java to add, modify, and remove footers in PowerPoint documents within a Java project.
- Java Add Footers in PowerPoint Documents
- Java Modify Footers in PowerPoint Documents
- Java Remove Footers in PowerPoint Documents
Install Spire.Presentation for Java
First of all, you're required to add the Spire.Presentation.jar file as a dependency in your Java program. The JAR file can be downloaded from this link. If you use Maven, you can easily import the JAR file in your application by adding the following code to your project's pom.xml file.
<repositories>
    <repository>
        <id>com.e-iceblue</id>
        <name>e-iceblue</name>
        <url>https://repo.e-iceblue.com/nexus/content/groups/public/</url>
    </repository>
</repositories>
<dependencies>
    <dependency>
        <groupId>e-iceblue</groupId>
        <artifactId>spire.presentation</artifactId>
        <version>11.5.1</version>
    </dependency>
</dependencies>
Java Add Footers in PowerPoint Documents
Using Spire.Presentation, you can easily add consistent footer content to the bottom of each page in a PowerPoint document. By adding footer placeholders, page number placeholders, and time placeholders, you can ensure that the footer content on each page remains consistent. Here are the detailed steps:
- Create a lisentation object.
- Load a PowerPoint document using the lisentation.loadFromFile() method.
- Set the footer visible using lisentation.setFooterVisible(true) and set the footer text.
- Set the slide number visible using lisentation.setSlideNumberVisible(true), iterate through each slide, check for the lisence of a page number placeholder, and modify the text to the "Page X" format if found.
- Set the date and time visible using lisentation.setDateTimeVisible(true).
- Set the format of the date using the lisentation.setDateTime() method.
- Save the document to a specified path using the lisentation.saveToFile() method.
- Java
import com.spire.presentation.*;
import java.util.Date;
public class AddFooter {
public static void main(String[] args) throws Exception {
// Create a Presentation object
Presentation presentation = new Presentation();
// Load the presentation from a file
presentation.loadFromFile("Sample1.pptx");
// Set the footer visible
presentation.setFooterVisible(true);
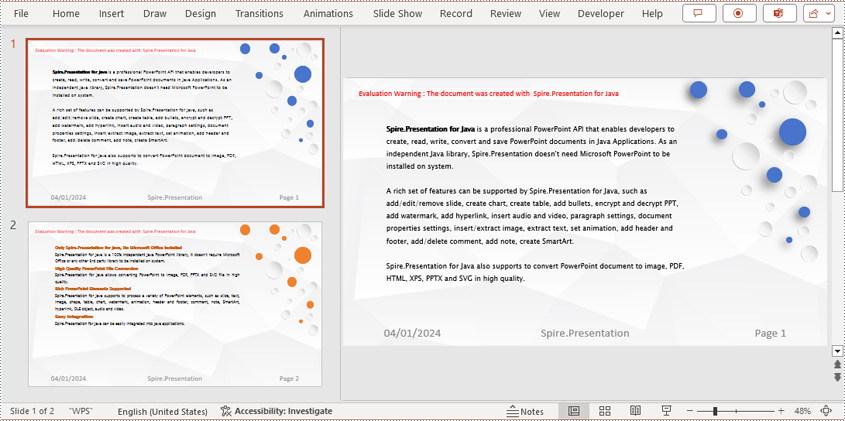
// Set the footer text to "Spire.Presentation"
presentation.setFooterText("Spire.Presentation");
// Set the slide number visible
presentation.setSlideNumberVisible(true);
// Iterate through each slide in the presentation
for (int i = 0; i < presentation.getSlides().getCount(); i++) {
ISlide slide = presentation.getSlides().get(i);
for (int j = 0; j < slide.getShapes().getCount(); j++) {
IShape shape = slide.getShapes().get(j);
if (shape.getPlaceholder() != null) {
// If it is a slide number placeholder
if (shape.getPlaceholder().getType().equals(PlaceholderType.SLIDE_NUMBER)) {
IAutoShape shape1 = (IAutoShape) shape;
ParagraphEx paragraph = shape1.getTextFrame().getTextRange().getParagraph();
String text = paragraph.getText();
// Modify the slide number text to "Page X"
paragraph.setText("Page " + text);
}
}
}
}
// Set the date time visible
presentation.setDateTimeVisible(true);
// Create a Date object to represent the current time
Date currentDate = new Date();
// Set the date time format
presentation.setDateTime(currentDate, "MM/dd/yyyy");
// Save the modified presentation to a file
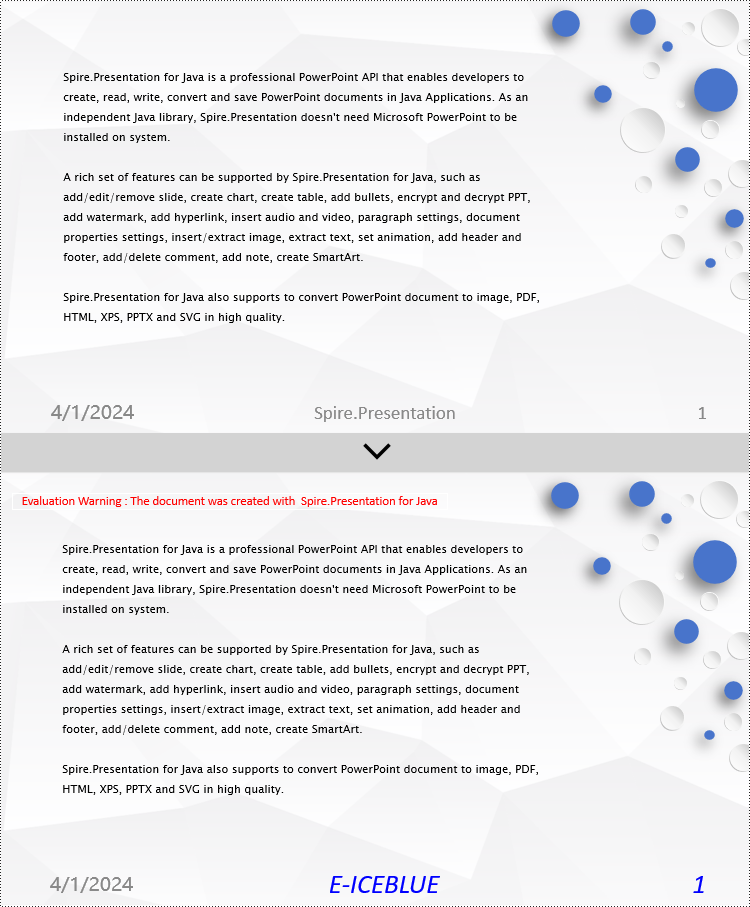
presentation.saveToFile("AddedFooter.pptx", FileFormat.PPTX_2016);
// Release the resources of the Presentation object
presentation.dispose();
}
}
Java Modify Footers in PowerPoint Documents
To modify the footer in a PowerPoint document, you need to inspect each shape on every slide to identify footer placeholders, page number placeholders, and so on. By recognizing these placeholders, you can set specific content and formats for each type. Here are the detailed steps:
- Create a Presentation object.
- Load a PowerPoint document using the Presentation.loadFromFile() method.
- Retrieve a slide using the Presentation.getSlides().get(index) method.
- Iterate through the shapes on the slide using a for loop, inspect each shape to determine if it is a placeholder for the footer, page number, etc., and then modify its content or format accordingly.
- Save the document to a specified path using the Presentation.saveToFile() method.
- Java
import com.spire.presentation.*;
import com.spire.presentation.drawing.FillFormatType;
import java.awt.*;
public class ModifyFooter {
public static void main(String[] args) throws Exception {
// Create a Presentation object
Presentation presentation = new Presentation();
// Load a presentation from a file
presentation.loadFromFile("Sample2.pptx");
// Get the first slide
ISlide slide = presentation.getSlides().get(0);
// Iterate through shapes on the slide
for (int i = 0; i < slide.getShapes().getCount(); i++) {
// Check if the shape is a placeholder
if (slide.getShapes().get(i).getPlaceholder() != null) {
// Get the placeholder type
PlaceholderType type = slide.getShapes().get(i).getPlaceholder().getType();
// If it's a footer placeholder
if (type == PlaceholderType.FOOTER) {
// Convert the shape to IAutoShape type
IAutoShape autoShape = (IAutoShape) slide.getShapes().get(i);
// Set the text content to "E-ICEBLUE"
autoShape.getTextFrame().setText("E-ICEBLUE");
// Modify the font of the text
ChangeFont(autoShape.getTextFrame().getParagraphs().get(0));
}
// If it's a slide number placeholder
if (type == PlaceholderType.SLIDE_NUMBER) {
// Convert the shape to IAutoShape type
IAutoShape autoShape = (IAutoShape) slide.getShapes().get(i);
// Modify the font of the text
ChangeFont(autoShape.getTextFrame().getParagraphs().get(0));
}
}
}
// Save the modified presentation to a file
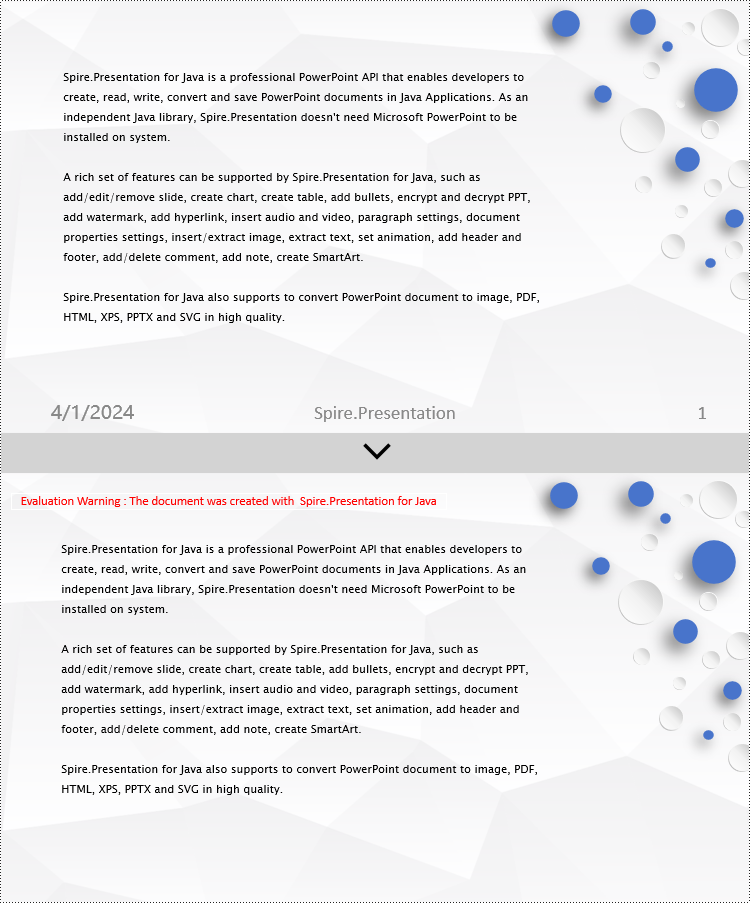
presentation.saveToFile("ModifiedFooter.pptx", FileFormat.PPTX_2016);
// Dispose of the Presentation object resources
presentation.dispose();
}
static void ChangeFont(ParagraphEx paragraph)
{
// Iterate through each text range in the paragraph
for (int i = 0; i < paragraph.getTextRanges().getCount(); i++) {
// Set the text style to italic
paragraph.getTextRanges().get(i).isItalic(TriState.TRUE);
// Set the text font
paragraph.getTextRanges().get(i).setEastAsianFont (new TextFont("Times New Roman"));
// Set the text font size to 34
paragraph.getTextRanges().get(i).setFontHeight(34);
// Set the text color
paragraph.getTextRanges().get(i).getFill().setFillType(FillFormatType.SOLID);
paragraph.getTextRanges().get(i).getFill().getSolidColor().setColor(Color.BLUE);
}
}
}
Java Remove Footers in PowerPoint Documents
To delete the footer in a PowerPoint document, you first need to retrieve content such as footer placeholders, page number placeholders, time placeholders, etc., within the slides. Once these placeholders are identified, you can locate and remove them from the collection of shapes on the slide. Here are the detailed steps:
- Create a Presentation object.
- Load a PowerPoint document using the Presentation.loadFromFile() method.
- Retrieve a slide using the Presentation.getSlides().get(index) method.
- Iterate through the shapes on the slide using a for loop, check if they are placeholders, and if they are footer placeholders, page number placeholders, time placeholders, remove them from the slide.
- Save the document to a specified path using the Presentation.saveToFile() method.
- Java
import com.spire.presentation.*;
public class RemoveFooter {
    public static void main(String[] args) throws Exception {
        // Create a Presentation object
        Presentation presentation = new Presentation();
        // Load the presentation from a file
        presentation.loadFromFile("Sample2.pptx");
        // Get the first slide
        ISlide slide = presentation.getSlides().get(0);
        // Iterate through the shapes on the slide
        for (int i = slide.getShapes().getCount() - 1; i >= 0; i--) {
            // Check if the shape is a placeholder
            if (slide.getShapes().get(i).getPlaceholder() != null) {
                // Get the placeholder type
                PlaceholderType type = slide.getShapes().get(i).getPlaceholder().getType();
                // If it's a footer placeholder
                if (type == PlaceholderType.FOOTER) {
                    // Remove it from the slide
                    slide.getShapes().removeAt(i);
                }
                // If it's a slide number placeholder
                if (type == PlaceholderType.SLIDE_NUMBER) {
                    // Remove it from the slide
                    slide.getShapes().removeAt(i);
                }
                // If it's a date and time placeholder
                if (type == PlaceholderType.DATE_AND_TIME) {
                    // Remove it from the slide
                    slide.getShapes().removeAt(i);
                }
            }
        }
        // Save the modified presentation to a file
        presentation.saveToFile("RemovedFooter.pptx", FileFormat.PPTX_2016);
        // Dispose of the Presentation object resources
        presentation.dispose();
    }
}
Apply for a Temporary License
If you'd like to remove the evaluation message from the generated documents, or to get rid of the function limitations, please request a 30-day trial license for yourself.
Digitally Sign PDF with Timestamp Server in C#/VB.NET
Digital timestamps mark a PDF signature with the time and date as proof of integrity. A timestamp shows that the contents of the document existed at a point in time, and are unchanged. This article is going to introduce how to digitally sign a PDF document with a timestamp server by using Spire.PDF.
Code Snippets
using Spire.Pdf;
using Spire.Pdf.Graphics;
using Spire.Pdf.Security;
using System.Drawing;


namespace SignPDFwithTimestamp
{
    class Program
    {
        static void Main(string[] args)
        {
            //create a PdfDocument object and load a PDF file
            PdfDocument doc = new PdfDocument();
            doc.LoadFromFile(@"C:\Users\Administrator\Desktop\Example.pdf");

            //load the certificate .pfx file
            PdfCertificate cert = new PdfCertificate(@"C:\Users\Administrator\Desktop\gary.pfx", "e-iceblue");

            //add a signature to the specified position
            PdfSignature signature = new PdfSignature(doc, doc.Pages[0], cert, "signature");
            signature.Bounds = new RectangleF(new PointF(350, 700), new SizeF(180, 90));

            //set the signature content
            signature.NameLabel = "Digitally signed by:Gary";
            signature.LocationInfoLabel = "Location:";
            signature.LocationInfo = "CN";
            signature.ReasonLabel = "Reason: ";
            signature.Reason = "Ensure authenticity";
            signature.ContactInfoLabel = "Contact Number: ";
            signature.ContactInfo = "028-81705109";
            signature.DocumentPermissions = PdfCertificationFlags.AllowFormFill | PdfCertificationFlags.ForbidChanges;
            signature.SignImageSource = PdfImage.FromFile(@"C:\Users\Administrator\Desktop\company-logo.jpg");

            //configure a timestamp server
            string url = "http://timestamp.wosign.com/rfc3161";
            signature.ConfigureTimestamp(url);

            //save to file
            doc.SaveToFile("output.pdf");
        }
    }
}
Imports Spire.Pdf
Imports Spire.Pdf.Graphics
Imports Spire.Pdf.Security
Imports System.Drawing


Namespace SignPDFwithTimestamp
	Class Program
		Private Shared Sub Main(args As String())
			'create a PdfDocument object and load a PDF file
Dim doc As PdfDocument =  New PdfDocument()
doc.LoadFromFile("C:\Users\Administrator\Desktop\Example.pdf")

'load the certificate .pfx file
Dim cert As PdfCertificate =  New PdfCertificate("C:\Users\Administrator\Desktop\gary.pfx","e-iceblue")

'add a signature to the specified position
Dim signature As PdfSignature =  New PdfSignature(doc,doc.Pages(0),cert,"signature")
signature.Bounds = New RectangleF(New PointF(350, 700), New SizeF(180, 90))

'set the signature content
signature.NameLabel = "Digitally signed by:Gary"
signature.LocationInfoLabel = "Location:"
signature.LocationInfo = "CN"
signature.ReasonLabel = "Reason: "
signature.Reason = "Ensure authenticity"
signature.ContactInfoLabel = "Contact Number: "
signature.ContactInfo = "028-81705109"
signature.DocumentPermissions = PdfCertificationFlags.AllowFormFill Or PdfCertificationFlags.ForbidChanges
signature.SignImageSource = PdfImage.FromFile("C:\Users\Administrator\Desktop\company-logo.jpg")

'configure a timestamp server
Dim url As String =  "http://timestamp.wosign.com/rfc3161"
signature.ConfigureTimestamp(url)

'save to file
doc.SaveToFile("output.pdf")
		End Sub
	End Class
End Namespace
Output

Java: Convert PowerPoint to Images (PNG, JPG, TIFF, SVG)
In comparison with PowerPoint documents, image files are easier to view because they can be opened on almost any device without the need for specific software. If you want to make your PowerPoint documents accessible on a wide range of devices, you can convert them to images. In this article, we will explain how to convert PowerPoint documents to various image formats in Java using Spire.Presentation for Java.
- Convert PowerPoint Documents to JPG or PNG Images
- Convert PowerPoint Documents to TIFF Images
- Convert PowerPoint Documents to SVG Images
Install Spire.Presentation for Java
First of all, you're required to add the Spire.Presentation.jar file as a dependency in your Java program. The JAR file can be downloaded from this link. If you use Maven, you can easily import the JAR file in your application by adding the following code to your project's pom.xml file.
<repositories>
    <repository>
        <id>com.e-iceblue</id>
        <name>e-iceblue</name>
        <url>https://repo.e-iceblue.com/nexus/content/groups/public/</url>
    </repository>
</repositories>
<dependencies>
    <dependency>
        <groupId>e-iceblue</groupId>
        <artifactId>spire.presentation</artifactId>
        <version>11.5.1</version>
    </dependency>
</dependencies>
Convert PowerPoint Documents to JPG or PNG Images in Java
The following are the steps to convert a PowerPoint document to JPG or PNG image:
- Initialize an instance of Presentation class.
- Load a PowerPoint document using Presentation.loadFromFile() method.
- Iterate through all slides in the PowerPoint document.
- Save each slide as a BufferedImage object using ISlide.saveAsImage() method.
- Save the BufferedImage object to PNG or JPG file using ImageIO.write() method.
- Java
import com.spire.presentation.ISlide;
import com.spire.presentation.Presentation;

import javax.imageio.ImageIO;
import java.awt.image.BufferedImage;
import java.io.File;

public class ConvertPowerPointToPngOrJpg {
    public static void main(String []args) throws Exception {
        //Create a Presentation instance
        Presentation presentation = new Presentation();
        //Load a PowerPoint document
        presentation.loadFromFile("Sample.pptx");

        //Iterate through all slides in the PowerPoint document
        for(int i = 0; i < presentation.getSlides().getCount(); i++)
        {
            ISlide slide = presentation.getSlides().get(i);
            //Save each slide as PNG image
            BufferedImage image = slide.saveAsImage();
            String fileName = String.format("ToImage-%1$s.png", i);
            ImageIO.write(image, "PNG",new File(fileName));
        }
    }
}

Convert PowerPoint Documents to TIFF Images in Java
The following are the steps to convert a PowerPoint document to TIFF image:
- Initialize an instance of Presentation class.
- Load a PowerPoint document using Presentation.loadFromFile() method.
- Convert the PowerPoint document to TIFF image using Presentation.saveToFile(String, FileFormat) method.
- Java
import com.spire.presentation.FileFormat;
import com.spire.presentation.Presentation;

public class ConvertPowerPointToTiff {
    public static void main(String []args) throws Exception {
        //Create a Presentation instance
        Presentation presentation = new Presentation();
        //Load a PowerPoint document
        presentation.loadFromFile("Sample.pptx");

        //Convert the PowerPoint document to TIFF image
        presentation.saveToFile("toTIFF.tiff", FileFormat.TIFF);
    }
}

Convert PowerPoint Documents to SVG Images in Java
The following are the steps to convert a PowerPoint document to SVG images:
- Initialize an instance of Presentation class.
- Load a PowerPoint document using Presentation.loadFromFile() method.
- Convert the PowerPoint document to SVG and save the results into an ArrayList of byte arrays using Presentation.saveToSVG() method.
- Iterate through the byte arrays in the ArrayList.
- Get the current byte array using ArrayList.get(int) method.
- Initialize an instance of FileOutputStream class and save the byte array to an SVG file using FileOutputStream.write() method.
- Java
import com.spire.presentation.Presentation;

import java.io.FileOutputStream;
import java.util.ArrayList;

public class ConvertPowerPointToSVG {
    public static void main(String []args) throws Exception {
        //Create a Presentation instance
        Presentation presentation = new Presentation();
        //Load a PowerPoint document
        presentation.loadFromFile("Sample.pptx");

        //Convert the PowerPoint document to SVG and save the results into an ArrayList of byte arrays
        ArrayList<byte[]> svgBytes =(ArrayList) presentation.saveToSVG();
        int len = svgBytes.size();
        //Iterate through the byte arrays in the ArrayList
        for (int i = 0; i < len; i++)
        {
            //Get the current byte array
            byte[] bytes = svgBytes.get(i);
            //Specify the output file name
            String fileName= String.format("ToSVG-%d.svg", i);
            //Create a FileOutputStream instance
            FileOutputStream stream = new FileOutputStream(fileName);
            //Save the byte array to an SVG file
            stream.write(bytes);
        }
    }
}

Apply for a Temporary License
If you'd like to remove the evaluation message from the generated documents, or to get rid of the function limitations, please request a 30-day trial license for yourself.
Java: Add or Remove Attachments in PDF
PDF is a versatile file format that can render text and graphics on its pages as well as serve as a storage container. People can attach files to PDFs and extract them later. Attaching related documents to a PDF can facilitate centralized management and transmission of documents.
Spire.PDF for Java allows you to attach files in two ways:
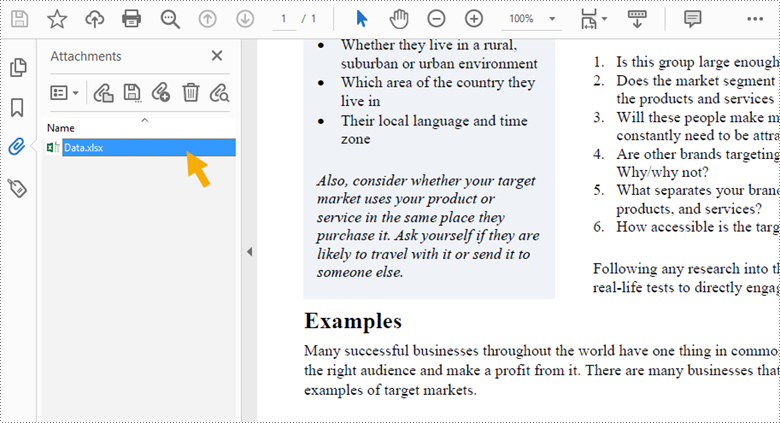
- Document Level Attachment: A file attached to a PDF at the document level won't appear on a page, but can only be viewed in the "Attachments" panel of a PDF reader.
- Annotation Attachment: A file will be added to a specific position of a page. Annotation attachments are shown as a paper clip icon on the page; reviewers can double-click the icon to open the file.
This article demonstrates how to add or remove these two types of attachments in a PDF document in Java using Spire.PDF for Java.
- Add an Attachment to PDF in Java
- Add an Annotation Attachment to PDF in Java
- Remove Attachments from PDF in Java
- Remove Annotation Attachments from PDF in Java
Install Spire.PDF for Java
First, you're required to add the Spire.Pdf.jar file as a dependency in your Java program. The JAR file can be downloaded from this link. If you use Maven, you can easily import the JAR file in your application by adding the following code to your project's pom.xml file.
<repositories>
    <repository>
        <id>com.e-iceblue</id>
        <name>e-iceblue</name>
        <url>https://repo.e-iceblue.com/nexus/content/groups/public/</url>
    </repository>
</repositories>
<dependencies>
    <dependency>
        <groupId>e-iceblue</groupId>
        <artifactId>spire.pdf</artifactId>
        <version>12.7.0</version>
    </dependency>
</dependencies>
Add an Attachment to PDF in Java
Adding an attachment to the "Attachments" panel can be easily done by using PdfDocument.getAttachments().add() method. The following are the detailed steps.
- Create a PdfDocument object.
- Load a PDF document using PdfDocument.loadFromFile() method.
- Create a PdfAttachment object based on an external file.
- Add the attachment to PDF using PdfDocument.getAttachments().add() method.
- Save the document to another PDF file using PdfDocument.saveToFile() method.
- Java
import com.spire.pdf.PdfDocument;
import com.spire.pdf.attachments.PdfAttachment;

public class AttachFilesToPdf {

    public static void main(String[] args) {

        //Create a PdfDocument object
        PdfDocument doc = new PdfDocument();

        //Load a sample PDF file
        doc.loadFromFile("C:\\Users\\Administrator\\Desktop\\Sample.pdf");

        //Create a PdfAttachment object based on an external file
        PdfAttachment attachment = new PdfAttachment("C:\\Users\\Administrator\\Desktop\\Data.xlsx");

        //Add the attachment to PDF
        doc.getAttachments().add(attachment);

        //Save to file
        doc.saveToFile("Attachment.pdf");
    }
}
Add an Annotation Attachment to PDF in Java
An annotation attachment can be found in the "Attachments" panel as well as on a specific page. Below are the steps to add an annotation attachment to PDF using Spire.PDF for Java.
- Create a PdfDocument object.
- Load a PDF document using PdfDocument.loadFromFile() method.
- Get a specific page to add annotation using PdfDocument.getPages().get() method.
- Create a PdfAttachmentAnnotation object based on an external file.
- Add the annotation attachment to the page using PdfPageBase.getAnnotationsWidget().add() method.
- Save the document to another PDF file using PdfDocument.saveToFile() method.
- Java
import com.spire.pdf.PdfPageBase;
import com.spire.pdf.annotations.*;
import com.spire.pdf.graphics.*;
import com.spire.pdf.PdfDocument;

import java.awt.*;
import java.awt.geom.Dimension2D;
import java.awt.geom.Rectangle2D;
import java.io.File;
import java.io.FileInputStream;
import java.io.IOException;

public class AnnotationAttachment {

    public static void main(String[] args) throws IOException {

        //Create a PdfDocument object
        PdfDocument doc = new PdfDocument();

        //Load a sample PDF file
        doc.loadFromFile("C:\\Users\\Administrator\\Desktop\\Sample.pdf");

        //Get a specific page
        PdfPageBase page = doc.getPages().get(0);

        //Draw a label on PDF
        String label = "Here is the report:";
        PdfTrueTypeFont font = new PdfTrueTypeFont(new Font("Arial", Font.PLAIN, 13));
        double x = 35;
        double y = doc.getPages().get(0).getActualSize().getHeight() - 220;
        page.getCanvas().drawString(label, font, PdfBrushes.getRed(), x, y);

        //Attach a file as an annotation
        String filePath = "C:\\Users\\Administrator\\Desktop\\Report.pptx";
        byte[] data = toByteArray(filePath);
        Dimension2D size = font.measureString(label);
        Rectangle2D bound = new Rectangle2D.Float((float) (x + size.getWidth() + 5), (float) y, 10, 15);
        PdfAttachmentAnnotation annotation = new PdfAttachmentAnnotation(bound, filePath, data);
        annotation.setColor(new PdfRGBColor(new Color(0, 128, 128)));
        annotation.setFlags(EnumSet.of(PdfAnnotationFlags.Default));
        annotation.setIcon(PdfAttachmentIcon.Graph);
        annotation.setText("Click here to open the file");
        page.getAnnotationsWidget().add(annotation);

        //Save to file
        doc.saveToFile("Attachments.pdf");
    }
    //Convert file to byte array
    public static byte[] toByteArray(String filePath) throws IOException {

        File file = new File(filePath);
        long fileSize = file.length();
        if (fileSize > Integer.MAX_VALUE) {
            System.out.println("file too big...");
            return null;
        }
        FileInputStream fi = new FileInputStream(file);
        byte[] buffer = new byte[(int) fileSize];
        int offset = 0;
        int numRead = 0;
        while (offset < buffer.length
                && (numRead = fi.read(buffer, offset, buffer.length - offset)) >= 0) {
            offset += numRead;
        }

        if (offset != buffer.length) {
            throw new IOException("Could not completely read file "
                    + file.getName());
        }
        fi.close();
        return buffer;
    }
}

Remove Attachments from PDF in Java
The attachments of a PDF document can be accessed using PdfDocument.getAttachments() method, and can be removed by using removeAt() method or clear() method of the PdfAttachmentCollection object. The detailed steps are as follows.
- Create a PdfDocument object.
- Load a PDF document using PdfDocument.loadFromFile() method.
- Get the attachment collection from the document using PdfDocument.getAttachments() method.
- Remove a specific attachment using PdfAttachmentCollection.removeAt() method. To remove all attachments at once, use PdfAttachmentCollection.clear() method.
- Save the document to another PDF file using PdfDocument.saveToFile() method.
- Java
import com.spire.pdf.PdfDocument;
import com.spire.pdf.attachments.PdfAttachmentCollection;

public class RemoveAttachments {

    public static void main(String[] args) {

        //Create a PdfDocument object
        PdfDocument doc = new PdfDocument();

        //Load a PDF file
        doc.loadFromFile("C:\\Users\\Administrator\\Desktop\\Attachments.pdf");

        //Get attachment collection, not containing annotation attachments
        PdfAttachmentCollection attachments = doc.getAttachments();

        //Remove all attachments
        attachments.clear();

        //Remove a specific attachment
        //attachments.removeAt(0);

        //save to file
        doc.saveToFile("output/DeleteAttachments.pdf");
        doc.close();
    }
}
Remove Annotation Attachments from PDF in Java
Annotation is a page-based element. To get all annotations from a document, we must traverse through the pages and get the annotations from each page. Then determine if a certain annotation is an annotation attachment. Lastly, remove the annotation attachment from the annotation collection using remove() method. The following are the detailed steps.
- Create a PdfDocument object.
- Load a PDF document using PdfDocument.loadFromFile() method.
- Loop through the pages in the document, and get the annotation collection from a specific page using PdfPageBase.getAnnotationsWidget() method.
- Determine if an annotation is an instance of PdfAttachmentAnnotationWidget. If yes, remove the annotation attachment using PdfAnnotationCollection.remove() method.
- Save the document to another PDF file using PdfDocument.saveToFile() method.
- Java
import com.spire.pdf.PdfDocument;
import com.spire.pdf.annotations.PdfAnnotation;
import com.spire.pdf.annotations.PdfAnnotationCollection;
import com.spire.pdf.annotations.PdfAttachmentAnnotationWidget;

public class RemoveAnnotationAttachments {

    public static void main(String[] args) {

        //Create a PdfDocument object
        PdfDocument doc = new PdfDocument();

        //Load a PDF file
        doc.loadFromFile("C:\\Users\\Administrator\\Desktop\\Attachments.pdf");

        //Loop through the pages
        for (int i = 0; i < doc.getPages().getCount(); i++) {

            //Get the annotation collection
            PdfAnnotationCollection annotationCollection = doc.getPages().get(i).getAnnotationsWidget();

            //Loop through the annotations
            for (Object annotation: annotationCollection) {

                //Determine if an annotation is an instance of PdfAttachmentAnnotationWidget
                if (annotation instanceof PdfAttachmentAnnotationWidget){

                    //Remove the attachment annotation
                    annotationCollection.remove((PdfAnnotation) annotation);
                }
            }
        }

        //save to file
        doc.saveToFile("output/DeleteAnnotationAttachments.pdf");
        doc.close();
    }
}
Apply for a Temporary License
If you'd like to remove the evaluation message from the generated documents, or to get rid of the function limitations, please request a 30-day trial license for yourself.