Fill Form Fields in PDF File in C#
We have already demonstrated how to create form fields in PDF file. This article mainly shows you how developers fill form field in PDF in C# only with 3 simple steps by using a standalone .NET PDF component Spire.PDF.
Make sure Spire.PDF for .NET has been installed correctly and then add Spire.Pdf.dll as reference in the downloaded Bin folder though the below path: "..\Spire.Pdf\Bin\NET4.0\ Spire.Pdf.dll". Here comes to the details of how developers Fill Form Fields by using Spire.PDF:
Step 1: Open the form that needs to fill the data
//Create a pdf document
PdfDocument doc = new PdfDocument();
//Load from file
doc.LoadFromFile(@"..\..\FormField.pdf");
Step 2: Update the data to the form
//Get form
PdfFormWidget formWidget = doc.Form as PdfFormWidget;
for (int i = 0; i < formWidget.FieldsWidget.List.Count; i++)
            {
                PdfField field = formWidget.FieldsWidget.List[i] as PdfField;


//Fill the data for textBoxField
if (field is PdfTextBoxFieldWidget)
   {
    PdfTextBoxFieldWidget textBoxField = field as PdfTextBoxFieldWidget;
    switch (textBoxField.Name)
     {

     case "email":
        textBoxField.Text = "support@e-iceblue.com";
    break;
     case "password":
        textBoxField.Password = true;
        textBoxField.Text = "e-iceblue";

//Fill the data for listBoxField
if (field is PdfListBoxWidgetFieldWidget)
  {
     PdfListBoxWidgetFieldWidget listBoxField = field as PdfListBoxWidgetFieldWidget;
     switch (listBoxField.Name)
       {

        case "email_format":
         int[] index = { 1 };
         listBoxField.SelectedIndex = index;
         break;


//Fill the data for comBoxField
if (field is PdfComboBoxWidgetFieldWidget)
  {
   PdfComboBoxWidgetFieldWidget comBoxField = field as PdfComboBoxWidgetFieldWidget;
   switch (comBoxField.Name)
    {

     case "title":
       int[] items = { 0 };
       comBoxField.SelectedIndex = items;
       break;


//Fill the data for checkBoxField
if (field is PdfCheckBoxWidgetFieldWidget)
  {
   PdfCheckBoxWidgetFieldWidget checkBoxField = field as PdfCheckBoxWidgetFieldWidget;
   switch (checkBoxField.Name)
    {

    case "agreement_of_terms":
      checkBoxField.Checked = true;
      break;
Step 3: Save and launch file
//Save the document to file in PDF format
doc.SaveToFile(@"../../FormFieldData.pdf.pdf");
//Launch the file
System.Diagnostics.Process.Start(@"../../FormFieldData.pdf.pdf");
Effective Screenshot:
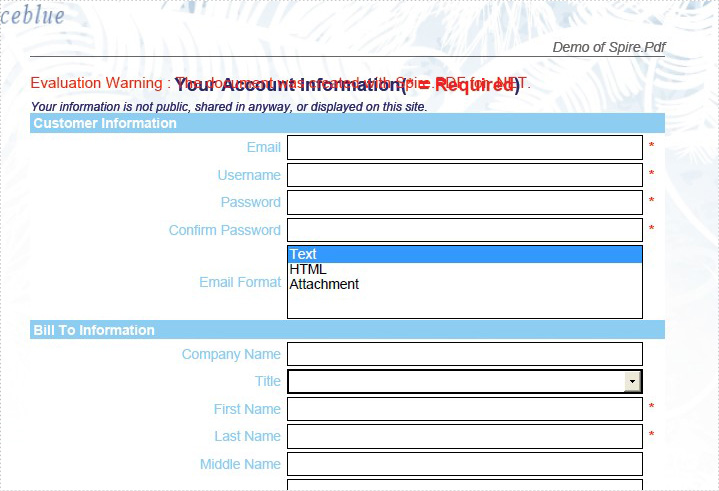
The original PDF with form fields:
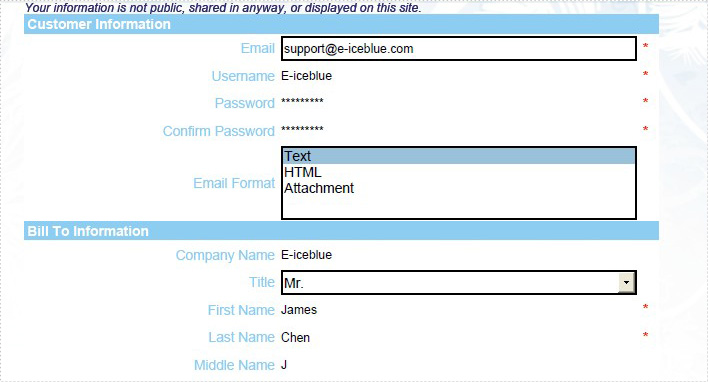
After fill the form fields:
View the full code as below:
using Spire.Pdf;
using Spire.Pdf.Fields;
using Spire.Pdf.Widget;


namespace FillFormFields
{
    class Program
    {
        static void Main(string []args){
            PdfDocument doc = new PdfDocument();
            doc.LoadFromFile(@"..\..\FormField.pdf");
            PdfFormWidget formWidget = doc.Form as PdfFormWidget;
            for (int i = 0; i < formWidget.FieldsWidget.List.Count; i++)
            {
                PdfField field = formWidget.FieldsWidget.List[i] as PdfField;
                if (field is PdfTextBoxFieldWidget)
                {
                    PdfTextBoxFieldWidget textBoxField = field as PdfTextBoxFieldWidget;
                    switch (textBoxField.Name)
                    {
                        case "email":
                            textBoxField.Text = "support@e-iceblue.com";
                            break;
                        case "username":
                            textBoxField.Text = "E-iceblue";
                            break;
                        case "password":
                            textBoxField.Password = true;
                            textBoxField.Text = "e-iceblue";
                            break;
                        case "password2":
                            textBoxField.Password = true;
                            textBoxField.Text = "e-iceblue";
                            break;
                        case "company_name ":
                            textBoxField.Text = "E-iceblue";
                            break;
                        case "first_name":
                            textBoxField.Text = "James";
                            break;
                        case "last_name":
                            textBoxField.Text = "Chen";
                            break;
                        case "middle_name":
                            textBoxField.Text = "J";
                            break;
                        case "address1":
                            textBoxField.Text = "Chengdu";
                            break;
                        case "address2":
                            textBoxField.Text = "Beijing";
                            break;
                        case "city":
                            textBoxField.Text = "Shanghai";
                            break;
                        case "postal_code":
                            textBoxField.Text = "11111";
                            break;
                        case "state":
                            textBoxField.Text = "Shanghai";
                            break;
                        case "phone":
                            textBoxField.Text = "1234567901";
                            break;
                        case "mobile_phone":
                            textBoxField.Text = "123456789";
                            break;
                        case "fax":
                            textBoxField.Text = "12121212";
                            break;
                    }
                }
                if (field is PdfListBoxWidgetFieldWidget)
                {
                    PdfListBoxWidgetFieldWidget listBoxField = field as PdfListBoxWidgetFieldWidget;
                    switch (listBoxField.Name)
                    {
                        case "email_format":
                            int[] index = { 1 };
                            listBoxField.SelectedIndex = index;
                            break;
                    }
                }

                if (field is PdfComboBoxWidgetFieldWidget)
                {
                    PdfComboBoxWidgetFieldWidget comBoxField = field as PdfComboBoxWidgetFieldWidget;
                    switch (comBoxField.Name)
                    {
                        case "title":
                            int[] items = { 0 };
                            comBoxField.SelectedIndex = items;
                            break;
                    }
                }

                if (field is PdfRadioButtonListFieldWidget)
                {
                    PdfRadioButtonListFieldWidget radioBtnField = field as PdfRadioButtonListFieldWidget;
                    switch (radioBtnField.Name)
                    {
                        case "country":
                            radioBtnField.SelectedIndex = 1;
                            break;
                    }
                }

                if (field is PdfCheckBoxWidgetFieldWidget)
                {
                    PdfCheckBoxWidgetFieldWidget checkBoxField = field as PdfCheckBoxWidgetFieldWidget;
                    switch (checkBoxField.Name)
                    {
                        case "agreement_of_terms":
                            checkBoxField.Checked = true;
                            break;
                    }
                }
                if (field is PdfButtonWidgetFieldWidget)
                {
                    PdfButtonWidgetFieldWidget btnField = field as PdfButtonWidgetFieldWidget;
                    switch (btnField.Name)
                    {
                        case "submit":
                            btnField.Text = "Submit";
                            break;
                    }
                }
            }
            doc.SaveToFile(@"../../FormFieldData.pdf.pdf");
            System.Diagnostics.Process.Start(@"../../FormFieldData.pdf.pdf");
        }
    }
}
Imports Spire.Pdf
Imports Spire.Pdf.Fields
Imports Spire.Pdf.Widget


Namespace FillFormFields
	Class Program
		Private Shared Sub Main(args As String())
			Dim doc As New PdfDocument()
			doc.LoadFromFile("..\..\FormField.pdf")
			Dim formWidget As PdfFormWidget = TryCast(doc.Form, PdfFormWidget)
			For i As Integer = 0 To formWidget.FieldsWidget.List.Count - 1
				Dim field As PdfField = TryCast(formWidget.FieldsWidget.List(i), PdfField)
				If TypeOf field Is PdfTextBoxFieldWidget Then
					Dim textBoxField As PdfTextBoxFieldWidget = TryCast(field, PdfTextBoxFieldWidget)
					Select Case textBoxField.Name
						Case "email"
							textBoxField.Text = "support@e-iceblue.com"
							Exit Select
						Case "username"
							textBoxField.Text = "E-iceblue"
							Exit Select
						Case "password"
							textBoxField.Password = True
							textBoxField.Text = "e-iceblue"
							Exit Select
						Case "password2"
							textBoxField.Password = True
							textBoxField.Text = "e-iceblue"
							Exit Select
						Case "company_name "
							textBoxField.Text = "E-iceblue"
							Exit Select
						Case "first_name"
							textBoxField.Text = "James"
							Exit Select
						Case "last_name"
							textBoxField.Text = "Chen"
							Exit Select
						Case "middle_name"
							textBoxField.Text = "J"
							Exit Select
						Case "address1"
							textBoxField.Text = "Chengdu"
							Exit Select
						Case "address2"
							textBoxField.Text = "Beijing"
							Exit Select
						Case "city"
							textBoxField.Text = "Shanghai"
							Exit Select
						Case "postal_code"
							textBoxField.Text = "11111"
							Exit Select
						Case "state"
							textBoxField.Text = "Shanghai"
							Exit Select
						Case "phone"
							textBoxField.Text = "1234567901"
							Exit Select
						Case "mobile_phone"
							textBoxField.Text = "123456789"
							Exit Select
						Case "fax"
							textBoxField.Text = "12121212"
							Exit Select
					End Select
				End If
				If TypeOf field Is PdfListBoxWidgetFieldWidget Then
					Dim listBoxField As PdfListBoxWidgetFieldWidget = TryCast(field, PdfListBoxWidgetFieldWidget)
					Select Case listBoxField.Name
						Case "email_format"
							Dim index As Integer() = {1}
							listBoxField.SelectedIndex = index
							Exit Select
					End Select
				End If

				If TypeOf field Is PdfComboBoxWidgetFieldWidget Then
					Dim comBoxField As PdfComboBoxWidgetFieldWidget = TryCast(field, PdfComboBoxWidgetFieldWidget)
					Select Case comBoxField.Name
						Case "title"
							Dim items As Integer() = {0}
							comBoxField.SelectedIndex = items
							Exit Select
					End Select
				End If

				If TypeOf field Is PdfRadioButtonListFieldWidget Then
					Dim radioBtnField As PdfRadioButtonListFieldWidget = TryCast(field, PdfRadioButtonListFieldWidget)
					Select Case radioBtnField.Name
						Case "country"
							radioBtnField.SelectedIndex = 1
							Exit Select
					End Select
				End If

				If TypeOf field Is PdfCheckBoxWidgetFieldWidget Then
					Dim checkBoxField As PdfCheckBoxWidgetFieldWidget = TryCast(field, PdfCheckBoxWidgetFieldWidget)
					Select Case checkBoxField.Name
						Case "agreement_of_terms"
							checkBoxField.Checked = True
							Exit Select
					End Select
				End If
				If TypeOf field Is PdfButtonWidgetFieldWidget Then
					Dim btnField As PdfButtonWidgetFieldWidget = TryCast(field, PdfButtonWidgetFieldWidget)
					Select Case btnField.Name
						Case "submit"
							btnField.Text = "Submit"
							Exit Select
					End Select
				End If
			Next
			doc.SaveToFile("../../FormFieldData.pdf.pdf")
			System.Diagnostics.Process.Start("../../FormFieldData.pdf.pdf")
		End Sub
	End Class
End Namespace
Add Action Chain to PDF in C#
PDF supports actions. And Spire.PDF, a very powerful .NET component enables developers to add action chain to PDF file. Action chain means an action get executed automatically after another one.
In this article, a solution is introduced to add action chain to PDF file.
Step 1: Set the action that gets performed right after PDF document is opened
String script
                = "app.alert({"
                + "    cMsg: \"I'll lead; you must follow me.\","
                + "    nIcon: 3,"
                + "    cTitle: \"JavaScript Action\""
                + "});";
PdfJavaScriptAction action1 = new PdfJavaScriptAction(script);
document.AfterOpenAction = action1;
Spire.PDF provides you a class called PdfJavaScriptAction that executes JavaScript code. Create a PdfJavaScriptAction instance “action1” using JavaScript code. And set the property AfterOpenAction of “document” to action1.
Step 2: Set the action that gets performed after “action1” using the property NextAction
script
                = "app.alert({"
                + "    cMsg: \"The firt page!\","
                + "    nIcon: 3,"
                + "    cTitle: \"JavaScript Action\""
                + "});";
PdfJavaScriptAction action2 = new PdfJavaScriptAction(script);
action1.NextAction = action2;
Step 3: Set the action that gets performed after “action2”
PdfDestination dest = new PdfDestination(pagetwo);
dest.Zoom = 1;
PdfGoToAction action3 = new PdfGoToAction(dest);
action2.NextAction = action3;
PdfDestination can mark a specified page or location in PDF. Create a PdfDestination instance “dest” using “pagetwo”. Then create a PdfGoToAction instance “action3” using “dest”.
Step 4: Set the action that gets performed after “action3”
script
                = "app.alert({"
                + "    cMsg: \"Oh sorry, it's the last page. I'm missing!\","
                + "    nIcon: 3,"
                + "    cTitle: \"JavaScript Action\""
                + "});";
PdfJavaScriptAction action4 = new PdfJavaScriptAction(script);
action3.NextAction = action4;
Step 5: Save the file
document.SaveToFile("result.pdf");
Full code:
using Spire.Pdf;
using Spire.Pdf.Actions;
using Spire.Pdf.General;
using Spire.Pdf.Graphics;
using System;
using System.Drawing;


namespace AddActionChain
{
    class Program
    {
        static void Main(string[] args)
        {
            PdfDocument document = new PdfDocument();

            PdfPageBase pageone = document.Pages.Add();
            pageone.Canvas.DrawString("This is Page One.",
                                   new PdfFont(PdfFontFamily.Helvetica, 20f),
                                   new PdfSolidBrush(Color.Black),
                                   10, 10);
            PdfPageBase pagetwo = document.Pages.Add();
            pagetwo.Canvas.DrawString("This is Page Two.",
                                   new PdfFont(PdfFontFamily.Helvetica, 20f),
                                   new PdfSolidBrush(Color.Black),
                                   10, 10);

            String script
                = "app.alert({"
                + "    cMsg: \"I'll lead; you must follow me.\","
                + "    nIcon: 3,"
                + "    cTitle: \"JavaScript Action\""
                + "});";
            PdfJavaScriptAction action1 = new PdfJavaScriptAction(script);
            document.AfterOpenAction = action1;

            script
                = "app.alert({"
                + "    cMsg: \"The first page!\","
                + "    nIcon: 3,"
                + "    cTitle: \"JavaScript Action\""
                + "});";
            PdfJavaScriptAction action2 = new PdfJavaScriptAction(script);
            action1.NextAction = action2;

            PdfDestination dest = new PdfDestination(pagetwo);
            dest.Zoom = 1;
            PdfGoToAction action3 = new PdfGoToAction(dest);
            action2.NextAction = action3;

            script
                = "app.alert({"
                + "    cMsg: \"Oh sorry, it's the last page. I'm missing!\","
                + "    nIcon: 3,"
                + "    cTitle: \"JavaScript Action\""
                + "});";
            PdfJavaScriptAction action4 = new PdfJavaScriptAction(script);
            action3.NextAction = action4;

            document.SaveToFile("result.pdf");

            System.Diagnostics.Process.Start("result.pdf");
        }
    }
}
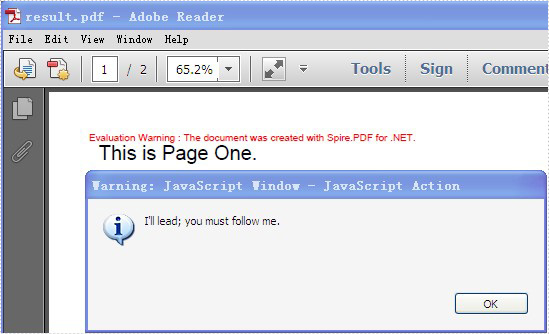
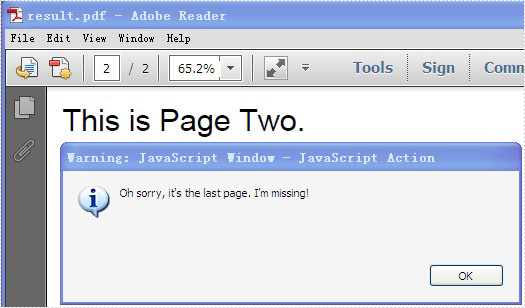
Screenshot:
Draw Text in PDF Document in Silverlight
Draw text in PDF document is an important part and it is not easy to finish. With the help of Spire.PDF, a PDF component, you can not only draw text in PDF document easily for .NET and WPF, you can do this job easily for Silverlight.
We have introduced how to draw text for PDF .NET and PDF WPF. This article will give clear information of how to draw text with C# code for Silverlight.
Make sure Spire.PDF (or Spire.Office) has been installed correctly. Add Spire.PDF.dll as reference in the downloaded Bin folder though the below path: "..\Spire.PDF\Bin\Silverlight4\ Spire.PDF.dll".
Here comes to the steps:
Step 1: Create a PDF document and a page
//create a pdf document
PdfDocument document = new PdfDocument();
//create one page
PdfPageBase page = document.Pages.Add();
Step 2: Draw Text
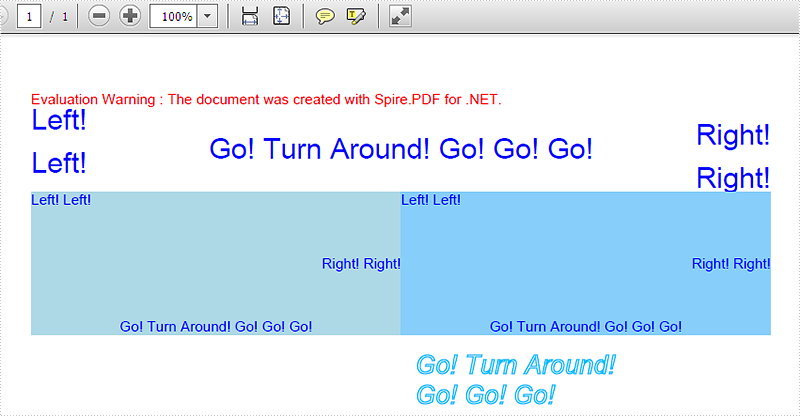
//Draw Text - alignment
PdfFont font = new PdfFont(PdfFontFamily.Helvetica, 20f);
PdfSolidBrush brush = new PdfSolidBrush(Color.FromArgb(10, 0, 255, 0));

PdfStringFormat leftAlignment = new PdfStringFormat(PdfTextAlignment.Left, PdfVerticalAlignment.Middle);
page.Canvas.DrawString("Left!", font, brush, 0, 20, leftAlignment);
page.Canvas.DrawString("Left!", font, brush, 0, 50, leftAlignment);

PdfStringFormat rightAlignment = new PdfStringFormat(PdfTextAlignment.Right, PdfVerticalAlignment.Middle);
page.Canvas.DrawString("Right!", font, brush, page.Canvas.ClientSize.Width, 30, rightAlignment);
page.Canvas.DrawString("Right!", font, brush, page.Canvas.ClientSize.Width, 60, rightAlignment);

PdfStringFormat centerAlignment = new PdfStringFormat(PdfTextAlignment.Center, PdfVerticalAlignment.Middle);
page.Canvas.DrawString("Go! Turn Around! Go! Go! Go!", font, brush, page.Canvas.ClientSize.Width / 2, 40, centerAlignment);

//Draw the text - align in rectangle
PdfFont font = new PdfFont(PdfFontFamily.Helvetica, 10f);
PdfSolidBrush brush = new PdfSolidBrush(Color.FromArgb(10, 0, 0, 255));
RectangleF rctg1 = new RectangleF(0, 70, page.Canvas.ClientSize.Width / 2, 100);
RectangleF rctg2 = new RectangleF(page.Canvas.ClientSize.Width / 2, 70, page.Canvas.ClientSize.Width / 2, 100);
page.Canvas.DrawRectangle(new PdfSolidBrush(Color.FromArgb(1, 0, 0, 100)), rctg1);
page.Canvas.DrawRectangle(new PdfSolidBrush(Color.FromArgb(1, 0, 0, 150)), rctg2);

PdfStringFormat leftAlignment = new PdfStringFormat(PdfTextAlignment.Left, PdfVerticalAlignment.Top);
page.Canvas.DrawString("Left! Left!", font, brush, rctg1, leftAlignment);
page.Canvas.DrawString("Left! Left!", font, brush, rctg2, leftAlignment);

PdfStringFormat rightAlignment = new PdfStringFormat(PdfTextAlignment.Right, PdfVerticalAlignment.Middle);
page.Canvas.DrawString("Right! Right!", font, brush, rctg1, rightAlignment);
page.Canvas.DrawString("Right! Right!", font, brush, rctg2, rightAlignment);

PdfStringFormat centerAlignment = new PdfStringFormat(PdfTextAlignment.Center, PdfVerticalAlignment.Bottom);
page.Canvas.DrawString("Go! Turn Around! Go! Go! Go!", font, brush, rctg1, centerAlignment);
page.Canvas.DrawString("Go! Turn Around! Go! Go! Go!", font, brush, rctg2, centerAlignment);

//Draw text - brush
String text = "Go! Turn Around! Go! Go! Go!";
PdfPen pen = PdfPens.DeepSkyBlue;
PdfSolidBrush brush = new PdfSolidBrush(Color.FromArgb(10, 0, 0, 0));
PdfStringFormat format = new PdfStringFormat();
PdfFont font = new PdfFont(PdfFontFamily.Helvetica, 18f, PdfFontStyle.Italic);
SizeF size = font.MeasureString(text, format);
RectangleF rctg= new RectangleF(page.Canvas.ClientSize.Width / 2 + 10, 180,
size.Width / 3 * 2, size.Height * 2);
page.Canvas.DrawString(text, font, pen, brush, rctg, format);
Step 3: Save the document to stream
using (Stream ms = saveFiledialog.OpenFile())
{
    document.SaveToStream(ms);

}
Now check the effective screenshot:
How to Unfreeze Excel Panes in C#, VB.NET
Excel Freeze Panes keeps rows and columns visible while the rest of the worksheet scrolls. Likewise, we need to unfreeze Excel panes due to work needs in some cases. This article aims at introducing the solution to unfreeze the Excel top row in c# and VB.NET through a utility Excel .NET library Spire.XLS.
First we need to complete the preparatory work:
- Download the latest Spire.XLS and install it on your machine.
- Add the Spire.XLS.dll files as reference.
- Open bin folder and select the three dll files under .NET 4.0.
- Right click property and select properties in its menu.
- Set the target framework as .NET 4.
- Add Spire.XLS as namespace.
Here comes to the explanation of the C# code:
Step 1: Create an instance of Spire.XLS.Workbook.
Workbook workbook = new Workbook();
Step 2: Load the file base on a specified file path.
workbook.LoadFromFile("sample.xls");
Step 3: Get the first worksheet.
Worksheet sheet = workbook.Worksheets[0];
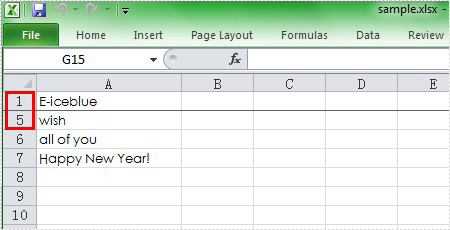
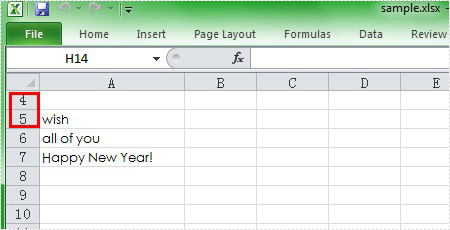
Step 4: Unfreeze the top row.
sheet.RemovePanes();
Step 5: Save as the generated file.
workbook.SaveToFile("sample.xls",ExcelVersion.Version97to2003);
Please preview the freeze panes effect screenshot:
And the unfreeze panes effect screenshot:
Here is the full code in C# and VB.NET:
using Spire.Xls;
namespace UnfreezeExcelPane
{
    class Program
    {

        static void Main(string[] args)
        {
            Workbook workbook = new Workbook();
            workbook.LoadFromFile("Sample.xls");
            Worksheet sheet = workbook.Worksheets[0];
            sheet.RemovePanes();
            workbook.SaveToFile("sample.xls", ExcelVersion.Version97to2003);

        }
    }
}
Imports Spire.Xls
Namespace UnfreezeExcelPane
	Class Program

		Private Shared Sub Main(args As String())
			Dim workbook As New Workbook()
			workbook.LoadFromFile("Sample.xls")
			Dim sheet As Worksheet = workbook.Worksheets(0)
			sheet.RemovePanes()
			workbook.SaveToFile("sample.xls", ExcelVersion.Version97to2003)

		End Sub
	End Class
End Namespace
Edit/Replace the Content of Word Bookmark with HTML Code
Bookmark can locate a range. Assuming the content of the range is some html code, how to change the content of the range. Spire.Doc supports bookmarks. And you can use Spire.Doc to fulfill the job.
In this article, a solution will be introduced. Spire.Doc provides you a method:
public void ReplaceBookmarkContent(TextBodyPart bodyPart)
Replace the content of bookmark with TextBodyPart bodyPart.
This method cannot handle html code directly. Here is what to do. First load the new html code to document. Then select the newly added data as TextBodyPart. At last, call the method to replace the content of the bookmark.
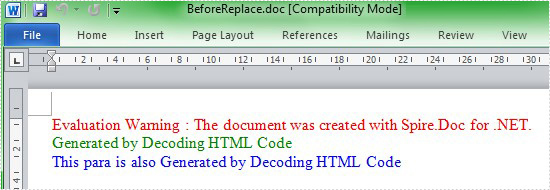
Step 1: Add bookmarks containing html code.
Paragraph p2 = section.AddParagraph();
p2.AppendBookmarkStart("bookmark2");
p2.AppendHTML("<p><font color='blue'>This para is also Generated by Decoding HTML Code</font></p>");
p2.AppendBookmarkEnd("bookmark2");
Step 2: Add new html code to document.
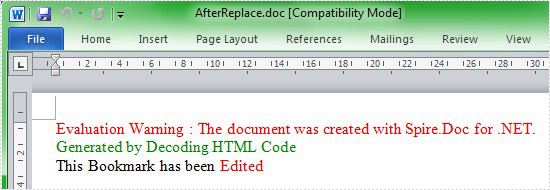
Section tempSection = document.AddSection();
String html
= "<p>This Bookmark has been <font color=\"#ff0000\">Edited</font></p>";
tempSection.AddParagraph().AppendHTML(html);
Step 3: Get the new added html as TextBodyPart.
ParagraphBase replacementFirstItem = tempSection.Paragraphs[0].Items.FirstItem as ParagraphBase;
ParagraphBase replacementLastItem  = tempSection.Paragraphs[tempSection.Paragraphs.Count - 1].Items.LastItem as ParagraphBase;
TextBodySelection selection = new TextBodySelection(replacementFirstItem, replacementLastItem);
TextBodyPart part = new TextBodyPart(selection);
Step 4: Locate the bookmark "bookmark2" and call the method ReplaceBookmarkContent to replace the content. Then remove the temp section.
BookmarksNavigator bookmarkNavigator = new BookmarksNavigator(document);
//locate the bookmark
bookmarkNavigator.MoveToBookmark("bookmark2");
//replace the content of bookmark
bookmarkNavigator.ReplaceBookmarkContent(part);
//remove temp section
document.Sections.Remove(tempSection);
Preview the original screenshot:
Preview the effect screenshot:
Here comes to the full code:
 using Spire.Doc;
using Spire.Doc.Documents;
using Spire.Doc.Fields;
using System;
namespace EditContent
{
    class Program
    {

        static void Main(string[] args)
        {
            Document document = new Document();
            Section section = document.AddSection();

            //create bookmarks
            Paragraph p1 = section.AddParagraph();
            p1.AppendBookmarkStart("bookmark1");
            p1.AppendHTML("<p><span style="color: blue;">This para is also Generated by Decoding HTML Code</span></p>");
            p1.AppendBookmarkEnd("bookmark1");

            Paragraph p2 = section.AddParagraph();
            p2.AppendBookmarkStart("bookmark2");
            p2.AppendHTML("<p><span style="color: blue;">This para is also Generated by Decoding HTML Code</span></p>");
            p2.AppendBookmarkEnd("bookmark2");
            document.SaveToFile("BeforeReplace.doc");

            //create a temp section to contain multiple paragraph.
            Section tempSection = document.AddSection();
            String html = "<p>This Bookmark has been <span>Edited</span></p>";
            tempSection.AddParagraph().AppendHTML(html);

            ParagraphBase replacementFirstItem = tempSection.Paragraphs[0].Items.FirstItem as ParagraphBase;
            ParagraphBase replacementLastItem = tempSection.Paragraphs[tempSection.Paragraphs.Count - 1].Items.LastItem as ParagraphBase;
            TextBodySelection selection = new TextBodySelection(replacementFirstItem, replacementLastItem);
            TextBodyPart part = new TextBodyPart(selection);

            BookmarksNavigator bookmarkNavigator = new BookmarksNavigator(document);
            //locate the bookmark
            bookmarkNavigator.MoveToBookmark("bookmark2");
            //replace the content of bookmark
            bookmarkNavigator.ReplaceBookmarkContent(part);
            //remove temp section
            document.Sections.Remove(tempSection);

            document.SaveToFile(@"AfterReplace.doc");

        }
    }
}
How to Insert Symbol in Word in C#
Sometimes we need to insert a symbol or special character in the paragraph. The article is introducing the solution to insert a symbol in Word with c# code. We will use Ä and Ë as the symbol examples to complete the process, with the help of a Word .NET API called Spire.Doc.
First we need to complete the preparatory work:
- Download the latest Spire.Doc and install it on your machine.
- Add the Spire.Doc.dll files as reference.
- Open bin folder and select the three dll files under .NET 4.0.
- Right click property and select properties in its menu.
- Set the target framework as .NET 4.
- Add Spire.Doc as namespace.
Here comes to the explanation of the code.
Step 1: Create an instance of Spire.Doc.Document.
Document document = new Document();
Step 2: Add a section.
Section section = document.AddSection();
Step 3: Add a paragraph.
Paragraph paragraph = section.AddParagraph();
Step 4: Use unicode characters to create symbol Ä.
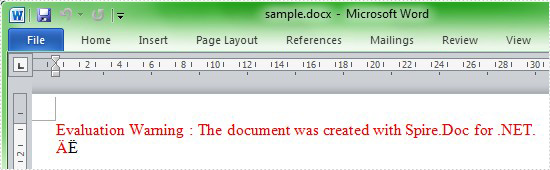
TextRange tr = paragraph.AppendText('\u00c4'.ToString());
In fact, the following step5 and step6 are just the option according to your requirement.
Step 5: Set the color of symbol Ä.
tr.CharacterFormat.TextColor = Color.Red;
Step 6: Add symbol Ë.
paragraph.AppendText('\u00cb'.ToString());
Step 7: Save to Word file.
document.SaveToFile("sample.docx", FileFormat.Docx);
Here is the full code:
using Spire.Doc;
using Spire.Doc.Documents;
using Spire.Doc.Fields;
using System.Drawing;
namespace InsertSymbol
{

    class Program
    {
        static void Main(string[] args)
        {
            Document document = new Document();
            Section section = document.AddSection();
            Paragraph paragraph = section.AddParagraph();
            TextRange tr = paragraph.AppendText('\u00c4'.ToString());
            tr.CharacterFormat.TextColor = Color.Red;
            paragraph.AppendText('\u00cb'.ToString());
            document.SaveToFile("sample.docx", FileFormat.Docx);
        }

    }
}
Preview the effect screenshot:
How to Digitally Sign PDFs with C# (Practical Code Tutorial)

Digital signatures provide authenticity, integrity, and non-repudiation for PDF documents, making them essential for legal contracts, financial documents, and other sensitive materials. In this comprehensive tutorial, we'll explore how to digitally sign PDFs in C# using the powerful Spire.PDF for .NET library. We'll cover basic signing, custom appearances, timestamps, and signature fields with detailed code explanations.
Table of Contents:
- .NET Library for Adding Digital Signatures to PDF
- How to Digitally Sign PDFs in C#
- Digitally Sign a PDF with a Certificate
- Customize PDF Signature Appearance
- Add a Timestamp to PDF Digital Signature
- Create a Signable Signature Field in PDF
- Conclusion
- FAQs
.NET Library for Adding Digital Signatures to PDF
Spire.PDF for .NET is a robust library that enables developers to create, read, edit, and convert PDF documents programmatically. For digital signatures, it provides comprehensive support through key classes in the Spire.Pdf.Interactive.DigitalSignatures namespace:
- PdfOrdinarySignatureMaker : The primary class for creating standard PDF signatures
- PdfSignature : Represents a digital signature in a PDF document
- PdfSignatureAppearance : Controls the visual representation of the signature
- PdfPKCS7Formatter : Handles cryptographic formatting including timestamps
- PdfSignatureField : Represents a signature field in an interactive PDF form
Before implementing any signature functionality, ensure you have:
- Spire.PDF for .NET installed via NuGet
- A valid digital certificate (PFX file) with private key access
- Proper permissions to sign documents
How to Digitally Sign PDFs in C#
- Step 1. Install Spire.PDF for .NET.
- Step 2. Use PdfDocument to load the PDF file.
- Step 3. Load the digital certificate file using X509Certificate2.
- Step 4. Use PdfOrdinarySignatureMaker to create and apply the digital signature.
- Step 5. Save the signed PDF with the embedded signature.
Digitally Sign a PDF with a Certificate
To sign a PDF, you need a digital certificate, usually in PFX format. This certificate serves to verify the identity of the signer. Below is a code snippet demonstrating how to sign a PDF using a digital certificate.
Code Example:
using Spire.Pdf;
using Spire.Pdf.Interactive.DigitalSignatures;
using System.Security.Cryptography.X509Certificates;

namespace DigitallySignPdf
{
    class Program
    {
        static void Main(string[] args)
        {
            // Create a PdfDocument object to work with PDF files
            PdfDocument doc = new PdfDocument();

            // Load an existing PDF file from the specified path
            doc.LoadFromFile("C:/Users/Administrator/Desktop/Input.pdf");

            // Specify the path to the PFX certificate and its password
            string filePath = "C:/Users/Administrator/Desktop/certificate.pfx";
            string password = "e-iceblue";

            // Load the X.509 certificate from the PFX file
            X509Certificate2 x509 = new X509Certificate2(filePath, password,
                X509KeyStorageFlags.MachineKeySet | X509KeyStorageFlags.EphemeralKeySet);

            // Create a PdfOrdinarySignatureMaker to handle the signature process using the loaded certificate
            PdfOrdinarySignatureMaker signatureMaker = new PdfOrdinarySignatureMaker(doc, x509);

            // Create the signature on the PDF document with a specified signature name
            signatureMaker.MakeSignature("signature 1");

            // Save the signed PDF to a new file
            doc.SaveToFile("Signed.pdf");

            // Release resources
            doc.Dispose();
        }
    }
}
Key Components Explained:
- PdfDocument : The central class representing the PDF document. It provides methods for loading, manipulating, and saving PDF files.
- X509Certificate2 : The .NET class for handling digital certificates. The key storage flags are crucial:
- MachineKeySet: Stores keys in the machine-level key store
- EphemeralKeySet: Prevents key persistence in memory for better security
- PdfOrdinarySignatureMaker : The workhorse for digital signatures. It:
- Manages the signing process
- Handles cryptographic operations
- Embeds the signature in the PDF
- MakeSignature() : The method that actually applies the signature. The string parameter names the signature, which must be unique within the document.
This basic implementation creates an invisible digital signature. The signature validates the document's integrity but doesn't provide a visual representation.
Output:
Customize PDF Signature Appearance
A digital signature can be customized to include additional information such as the signer's name, contact info, and even a visual signature image. This enhances the visual appeal and informational value of the signature.
Code Example:
using Spire.Pdf;
using Spire.Pdf.Graphics;
using Spire.Pdf.Interactive.DigitalSignatures;
using System.Security.Cryptography.X509Certificates;

namespace CustomSignatureAppearance
{
    class Program
    {
        static void Main(string[] args)
        {
            // Create a PdfDocument object to work with PDF files
            PdfDocument doc = new PdfDocument();

            // Load an existing PDF file from the specified path
            doc.LoadFromFile("C:/Users/Administrator/Desktop/Input.pdf");

            // Specify the path to the PFX certificate and its password
            string filePath = "C:/Users/Administrator/Desktop/certificate.pfx";
            string password = "e-iceblue";

            // Load the X.509 certificate from the PFX file
            X509Certificate2 x509 = new X509Certificate2(filePath, password,
                X509KeyStorageFlags.MachineKeySet | X509KeyStorageFlags.EphemeralKeySet);

            // Create a PdfOrdinarySignatureMaker to handle the signature process using the loaded certificate
            PdfOrdinarySignatureMaker signatureMaker = new PdfOrdinarySignatureMaker(doc, x509);

            // Get the signature
            PdfSignature signature = signatureMaker.Signature;

            // Configure the signature properties like the signer's name, contact information, location, and sign reason
            signature.Name = "Gary";
            signature.ContactInfo = "726349";
            signature.Location = "U.S.";
            signature.Reason = "This is the final version.";

            // Create a signature appearance
            PdfSignatureAppearance appearance = new PdfSignatureAppearance(signature);

            // Set labels for the signature
            appearance.NameLabel = "Signer: ";
            appearance.ContactInfoLabel = "Phone: ";
            appearance.LocationLabel = "Location: ";
            appearance.ReasonLabel = "Reason: ";

            // Load an image
            PdfImage image = PdfImage.FromFile("C:/Users/Administrator/Desktop/signature.png");

            // Set the image as the signature image
            appearance.SignatureImage = image;

            // Set the graphic mode as SignImageAndSignDetail
            appearance.GraphicMode = GraphicMode.SignImageAndSignDetail;

            // Get the last page
            PdfPageBase page = doc.Pages[doc.Pages.Count - 1];

            // Add the signature to a specified location of the page
            signatureMaker.MakeSignature("signature 1", page, 54.0f,  330.0f, 280.0f, 90.0f, appearance);

            // Save the signed PDF to a new file
            doc.SaveToFile("Signed.pdf");

            // Release resources
            doc.Dispose();
        }
    }
}
Key Features Explained:
-
PdfSignature Metadata :
- Name: Identifies the signer
- ContactInfo: Provides contact details
- Location: Geographical signing location
- Reason: Purpose of signing
-
PdfSignatureAppearance : Controls visual elements:
- Label customization for metadata fields
- Image integration via SignatureImage property
- Layout controlthrough GraphicMode (options: SignImageOnly, SignDetailOnly, SignImageAndSignDetail)
-
Precise Placement : The extended MakeSignature overload allows specifying:
- Target page
- X/Y coordinates
- Width/Height dimensions
Output:

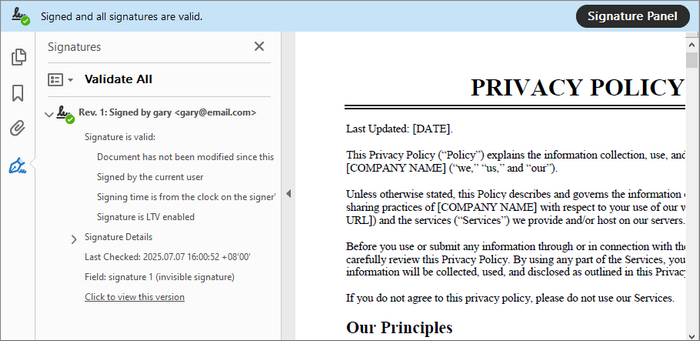
To enhance the visibility and trustworthiness of your digitally signed PDF when opened in Adobe Reader, you can enable a validation indicator by applying the following method:
signatureMaker.SetAcro6Layers(false);

Add a Timestamp to PDF Digital Signature
Timestamping a digital signature adds an additional layer of security by proving when the document was signed. This is particularly important for long-term validity.
Code Example:
using Spire.Pdf;
using Spire.Pdf.Interactive.DigitalSignatures;
using Spire.Pdf.Security;
using System.Security.Cryptography.X509Certificates;

namespace SignPdfWithTimestamp
{
    class Program
    {
        static void Main(string[] args)
        {
            // Load PDF document
            PdfDocument doc = new PdfDocument();
            doc.LoadFromFile("C:/Users/Administrator/Desktop/Input.pdf");

            // Specify the path to the PFX certificate and its password
            string filePath = "C:/Users/Administrator/Desktop/certificate.pfx";
            string password = "e-iceblue";

            // Load the X.509 certificate from the PFX file
            X509Certificate2 x509 = new X509Certificate2(filePath, password,
                X509KeyStorageFlags.MachineKeySet | X509KeyStorageFlags.EphemeralKeySet);

            // Initialize PDFPKCS#7Formatter
            PdfPKCS7Formatter formatter = new PdfPKCS7Formatter(x509, false);

            // Set the timestamp service to a public timestamp server
            formatter.TimestampService = new TSAHttpService("http://tsa.cesnet.cz:3161/tsa");

            // Initialize OCSP service for online certificate status checking
            formatter.OCSPService = new OCSPHttpService(null);

            // Apply signature
            PdfOrdinarySignatureMaker signatureMaker = new PdfOrdinarySignatureMaker(doc, formatter);
            signatureMaker.MakeSignature("signature 1");

            // Save and cleanup
            doc.SaveToFile("SignWithTimeStamp.pdf");
            doc.Dispose();
        }
    }
}
Timestamp Implementation Details:
- PdfPKCS7Formatter : Enhances basic signing with:
- Timestamp support
- OCSP revocation checking
- Advanced cryptographic formatting
- TSAHttpService : Connects to a Time Stamp Authority (TSA) server. Public TSAs include:
- http://timestamp.digicert.com
- http://tsa.cesnet.cz:3161/tsa
- http://timestamp.sectigo.com
- OCSPHttpService : Optional Online Certificate Status Protocol service for real-time certificate validity checking.
Output:

Create a Signable Signature Field in PDF
Digital signature fields allow users to sign PDF documents interactively. This is essential for forms that require user signatures.
Code Example:
using System.Drawing;
using Spire.Pdf;
using Spire.Pdf.Fields;
using Spire.Pdf.Graphics;

namespace AddDigitalSignatureFiled
{
    class Program
    {
        static void Main(string[] args)
        {
            // Initialize a new PdfDocument object
            PdfDocument doc = new PdfDocument();

            // Load the existing PDF from the specified path
            doc.LoadFromFile("C:/Users/Administrator/Desktop/Input.pdf");

            // Retrieve the last page of the document
            PdfPageBase page = doc.Pages[doc.Pages.Count - 1];

            // Create a signature field on the specified page
            PdfSignatureField signatureField = new PdfSignatureField(page, "signature");

            // Customize the appearance of the signature field
            signatureField.BorderWidth = 1.0f;
            signatureField.BorderStyle = PdfBorderStyle.Solid;
            signatureField.BorderColor = new PdfRGBColor(System.Drawing.Color.Black);
            signatureField.HighlightMode = PdfHighlightMode.Outline;
            signatureField.Bounds = new RectangleF(54.0f, 350.0f, 200.0f, 100.0f);

            // Enable form creation if none exists in the document
            doc.AllowCreateForm = (doc.Form == null);

            // Add the signature field to the document's form
            doc.Form.Fields.Add(signatureField);

            // Save the modified document to a new file
            doc.SaveToFile("SignatureField.pdf", FileFormat.PDF);
            doc.Dispose();
        }
    }
}
Signature Field Features:
- PdfSignatureField : Represents a signable field in a PDF form with properties for:
- Visual styling (border, color)
- Positioning and sizing
- Interaction behavior
- Form Handling : The code automatically handles PDF form creation if none exists.
- Deferred Signing : Fields can be added now and signed later by end-users or additional processes.
Output:

Conclusion
Digitally signing PDFs with C# using Spire.PDF provides a robust solution for document authentication. Throughout this tutorial, we've explored:
- Basic certificate-based signing
- Custom signature appearances with images and metadata
- Timestamp integration for long-term validation
- Signature fields for form-based workflows
By implementing these techniques, you can enhance document security, compliance, and user trust in your applications. Whether for contracts, legal documents, or internal approvals, Spire.PDF simplifies end-to-end digital signing while maintaining industry standards.
FAQs
Q1: How do I verify a digitally signed PDF?
Spire.PDF provides verification capabilities through the PdfSignature class. You can check the VerifySignature method to validate signatures programmatically. For detailed guide, refer to: Verify Digital Signature in PDF with C#.
Q2: What certificate formats are supported?
Spire.PDF works with standard X.509 certificates, typically in PFX/P12 format for signing as they contain both public and private keys.
Q3: Can I add multiple signatures to a PDF?
Yes, you can add multiple signatures either by creating multiple signature fields or by incrementally signing the document.
Q4: How do I handle certificate expiration?
Using timestamps ensures signatures remain valid after certificate expiration. For long-term validation, consider using LTV (Long-Term Validation) enabled signatures.
Q5: Does Spire.PDF offer additional security options beyond digital signatures?
Yes, Spire.PDF allows you to password-protect your PDF documents and set specific document permissions. These features can be used alongside digital signatures to further enhance security.
Get a Free License
To fully experience the capabilities of Spire.PDF for .NET without any evaluation limitations, you can request a free 30-day trial license.
C#: Verify or Get Digital Signatures in PDF
Securing PDFs with digital signatures is essential for ensuring the integrity and non-repudiation of the documents. With this in mind, the ability to verify the digital signatures is equally important. A valid signature means that the document hasn't been altered since it was signed and that it is indeed originated from the claimed source.
While dealing with the digital signatures, there are also times when you may want to get the certificates of the signatures to learn its issuer Information, subject information, serial number, and validity period, etc. In this article, you will learn how to verify or get the digital signatures in PDF in C# using Spire.PDF for .NET.
- Verify Digital Signatures in PDF Using C#
- Detect Whether a Signed PDF Has Been Modified Using C#
- Get the Certificates of Digital Signatures in PDF Using C#
Install Spire.PDF for .NET
To begin with, you need to add the DLL files included in the Spire.PDF for.NET package as references in your .NET project. The DLL files can be either downloaded from this link or installed via NuGet.
PM> Install-Package Spire.PDF
Verify Digital Signatures in PDF Using C#
Spire.PDF for .NET provides the PdfSignature.VerifySignature() method to check the validity of the digital signatures in a PDF document directly. The following are the detailed steps.
- Create a PdfDocument object.
- Load a PDF file using PdfDocument.LoadFromFile() method.
- Get the form in the PDF file using PdfDocument.Form property, and then get a collection of form fields using PdfFormWidget.FieldsWidget property.
- Iterate through all fields and get the signature fields.
- Get PDF signatures using PdfSignatureFieldWidget.Signature property.
- Check the validity of the PDF signatures using PdfSignature.VerifySignature() method.
- C#
using Spire.Pdf;
using Spire.Pdf.Security;
using Spire.Pdf.Widget;
namespace GetSignatureCertificate
{
class Program
{
static void Main(string[] args)
{
//Create a PdfDocument object
PdfDocument pdf = new PdfDocument();
//Load a PDF file
pdf.LoadFromFile("PDFSignature.pdf");
//Get a collection of form fields in the PDF file
PdfFormWidget pdfFormWidget = (PdfFormWidget)pdf.Form;
PdfFormFieldWidgetCollection pdfFormFieldWidgetCollection = pdfFormWidget.FieldsWidget;
//Iterate through all fields
for (int i = 0; i < pdfFormFieldWidgetCollection.Count; i++)
{
//Get the signature fields
if (pdfFormFieldWidgetCollection[i] is PdfSignatureFieldWidget)
{
PdfSignatureFieldWidget signatureFieldWidget = (PdfSignatureFieldWidget)pdfFormFieldWidgetCollection[i];
//Get the signatures
PdfSignature signature = signatureFieldWidget.Signature;
//Verify signatures
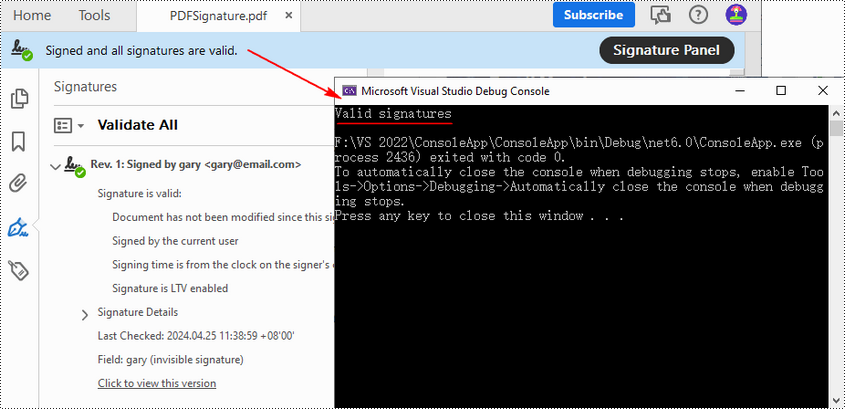
bool valid = signature.VerifySignature();
if (valid)
{
Console.WriteLine("Valid signatures");
}
else
{
Console.WriteLine("Invalid signatures");
}
}
}
}
}
}
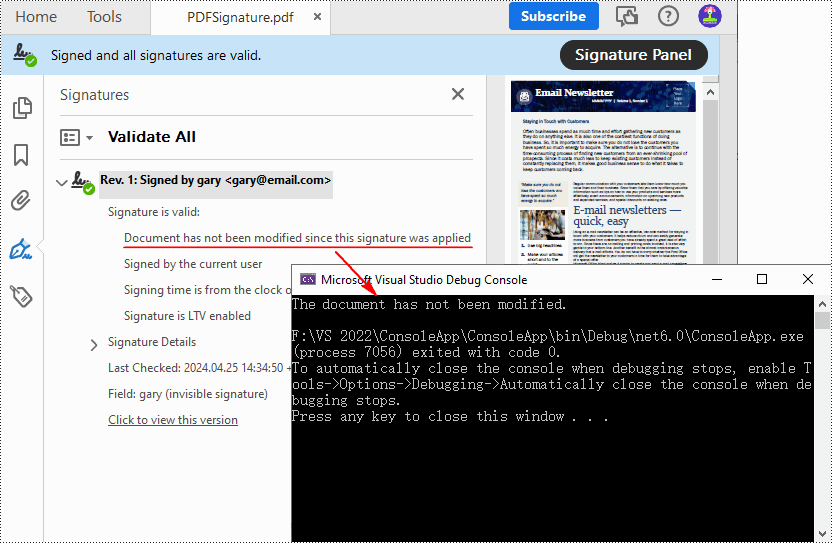
Detect Whether a Signed PDF Has Been Modified Using C#
To verify if a PDF document has been modified after signing, you can use the PdfSignature.VerifyDocModified() method. If the result shows that document has been tampered with, this means that the signature will become invalid and the integrity of the document will be compromised. The following are the detailed steps.
- Create a PdfDocument object.
- Load a PDF document using PdfDocument.LoadFromFile() method.
- Get the form in the PDF document using PdfDocument.Form property, and then get a collection of form fields using PdfFormWidget.FieldsWidget property.
- Iterate through all fields and get the signature fields.
- Get PDF signatures using PdfSignatureFieldWidget.Signature property.
- Verify if the document has been modified after signing using PdfSignature.VerifyDocModified() method.
- C#
using Spire.Pdf;
using Spire.Pdf.Security;
using Spire.Pdf.Widget;

namespace GetSignatureCertificate
{
    class Program
    {
        static void Main(string[] args)
        {

            //Create a PdfDocument object
            PdfDocument pdf = new PdfDocument();

            //Load a PDF document
            pdf.LoadFromFile("PDFSignature.pdf");

            //Get a collection of form fields in the PDF file
            PdfFormWidget pdfFormWidget = (PdfFormWidget)pdf.Form;
            PdfFormFieldWidgetCollection pdfFormFieldWidgetCollection = pdfFormWidget.FieldsWidget;

            for (int i = 0; i < pdfFormFieldWidgetCollection.Count; i++)
            {
                //Get the signature fields
                if (pdfFormFieldWidgetCollection[i] is PdfSignatureFieldWidget)
                {
                    PdfSignatureFieldWidget signatureFieldWidget = (PdfSignatureFieldWidget)pdfFormFieldWidgetCollection[i];

                    //Get the signatures
                    PdfSignature signature = signatureFieldWidget.Signature;

                    //Check if the document has been modified after signing
                    bool modified = signature.VerifyDocModified();
                    if (modified)
                    {
                        Console.WriteLine("The document has been modified.");
                    }
                    else
                    {
                        Console.WriteLine("The document has not been modified.");
                    }
                }
            }
        }
    }
}
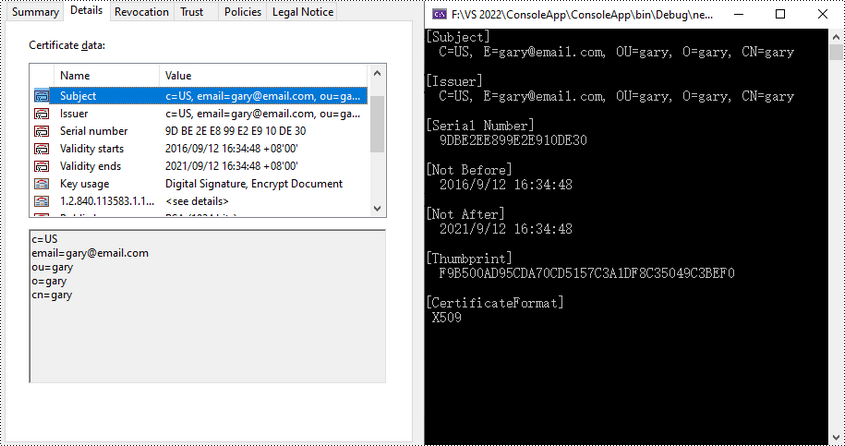
Get the Certificates of Digital Signatures in PDF Using C#
The digital certificates used to sign PDF files typically contain various pieces of information that verifies the identity of the issuer. With Spire.PDF for .NET, you can get the certificates in a PDF file through the PdfSignatureFieldWidget.Signature.Certificate property. The following are the detailed steps.
- Create a PdfDocument object.
- Load a PDF document using PdfDocument.LoadFromFile() method.
- Get the form in the PDF document using PdfDocument.Form property, and then get a collection of form fields using PdfFormWidget.FieldsWidget property.
- Iterate through all fields and get the signature fields.
- Get the certificate of the signature using PdfSignatureFieldWidget.Signature.Certificate property.
- Set to display the certificate in text format using PdfCertificate.ToString() method.
- Get the format of the certificate using PdfCertificate.GetFormat() method.
- Output the obtained certificate information.
- C#
using Spire.Pdf;
using Spire.Pdf.Widget;

namespace GetSignatureCertificate
{
    class Program
    {
        static void Main(string[] args)
        {
            //Create a PdfDocument object
            PdfDocument pdf = new PdfDocument();

            //Load a PDF file
            pdf.LoadFromFile("PDFSignature.pdf");

            //Get a collection of form fields in the PDF file
            PdfFormWidget pdfFormWidget = (PdfFormWidget)pdf.Form;
            PdfFormFieldWidgetCollection pdfFormFieldWidgetCollection = pdfFormWidget.FieldsWidget;

            //Iterate through all fields
            for (int i = 0; i < pdfFormFieldWidgetCollection.Count; i++)
            {
                //Get the signature fields
                if (pdfFormFieldWidgetCollection[i] is PdfSignatureFieldWidget)
                {
                    PdfSignatureFieldWidget signatureFieldWidget = (PdfSignatureFieldWidget)pdfFormFieldWidgetCollection[i];

                    //Get the certificate of the signature
                    string certificateInfo = signatureFieldWidget.Signature.Certificate.ToString();

                    //Get the format of the certificate
                    string format = signatureFieldWidget.Signature.Certificate.GetFormat();

                    //Output the certificate information
                    Console.WriteLine(certificateInfo + "\n" + "[CertificateFormat]\n " + format);
                }
            }
            Console.ReadKey();
        }
    }
}
Apply for a Temporary License
If you'd like to remove the evaluation message from the generated documents, or to get rid of the function limitations, please request a 30-day trial license for yourself.
C#: Convert HTML to PDF, XPS and XML
HTML is the standard format for web pages and online content. However, there are many scenarios where you may need to convert HTML documents into other file formats, such as PDF, XPS, and XML. Whether you're looking to generate a printable version of a web page, share HTML content in a more universally accepted format, or extract data from HTML for further processing, being able to reliably convert HTML documents to these alternate formats is an important skill to have. In this article, we will demonstrate how to convert HTML to PDF, XPS, and XML in C# using Spire.Doc for .NET.
- Convert HTML to PDF in C#
- Convert HTML String to PDF in C#
- Convert HTML to XPS in C#
- Convert HTML to XML in C#
Install Spire.Doc for .NET
To begin with, you need to add the DLL files included in the Spire.Doc for .NET package as references in your .NET project. The DLL files can be either downloaded from this link or installed via NuGet.
PM> Install-Package Spire.Doc
Convert HTML to PDF in C#
Converting HTML to PDF offers several advantages, including enhanced portability, consistent formatting, and easy sharing. PDF files retain the original layout, styling, and visual elements of the HTML content, ensuring that the document appears the same across different devices and platforms.
You can use the Document.SaveToFile(string filename, FileFormat.PDF) method to convert an HTML file to PDF format. The detailed steps are as follows.
- Create an instance of the Document object.
- Load an HTML file using the Document.LoadFromFile() method.
- Save the HTML file to PDF format using the Document.SaveToFile(string filename, FileFormat.PDF) method.
- C#
using Spire.Doc;
using Spire.Doc.Documents;

namespace ConvertHtmlToPdf
{
    internal class Program
    {
        static void Main(string[] args)
        {
            // Create an instance of the Document class
            Document doc = new Document();
            // Load an HTML file
            doc.LoadFromFile("Sample.html", FileFormat.Html, XHTMLValidationType.None);

            //Convert the HTML file to PDF format
            doc.SaveToFile("HtmlToPDF.pdf", FileFormat.PDF);
            doc.Close();
        }
    }
}

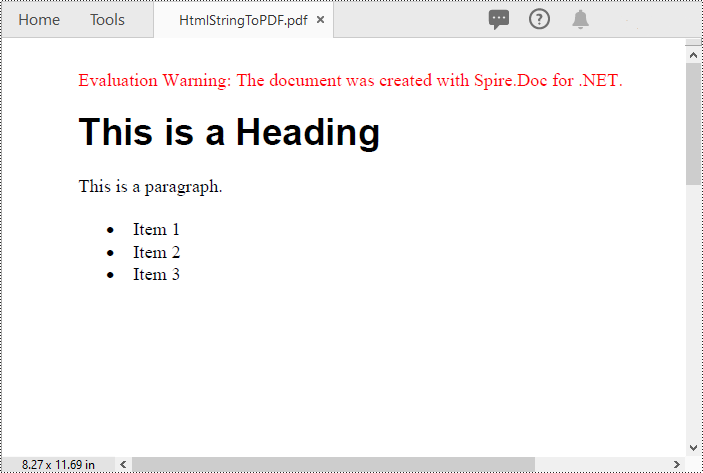
Convert HTML String to PDF in C#
In addition to converting HTML files to PDF, you are also able to convert HTML strings to PDF. Spire.Doc for .NET provides the Paragraph.AppendHTML() method to add an HTML string to a Word document. Once the HTML string has been added, you can convert the result document to PDF using the Document.SaveToFile(string filename, FileFormat.PDF) method. The detailed steps are as follows.
- Create an instance of the Document object.
- Add a paragraph to the document using the Document.AddSection().AddParagraph() method.
- Append an HTML string to the paragraph using the Paragraph.AppendHTML() method.
- Save the document to PDF format using the Document.SaveToFile(string filename, FileFormat.PDF) method.
- C#
using Spire.Doc;
using Spire.Doc.Documents;

namespace ConvertHtmlStringToPdf
{
    internal class Program
    {
        static void Main(string[] args)
        {
            // Create an instance of the Document class
            Document doc = new Document();
            // Add a paragraph to the document
            Paragraph para = doc.AddSection().AddParagraph();
            // Specify the HTML string
            string htmlString = @"<h1>This is a Heading</h1>
                                  <p>This is a paragraph.</p>
                                  <ul>
                                    <li>Item 1</li>
                                    <li>Item 2</li>
                                    <li>Item 3</li>
                                  </ul>";

            // Append the HTML string to the paragraph
            para.AppendHTML(htmlString);

            // Convert the document to PDF format
            doc.SaveToFile("HtmlStringToPDF.pdf", FileFormat.PDF);
            doc.Close();
        }
    }
}
Convert HTML to XPS in C#
XPS, or XML Paper Specification, is an alternative format to PDF that provides similar functionality and advantages. Converting HTML to XPS ensures the preservation of document layout, fonts, and images while maintaining high fidelity. XPS files are optimized for printing and can be viewed using XPS viewers or Windows' built-in XPS Viewer.
By using the Document.SaveToFile(string filename, FileFormat.XPS) method, you can convert HTML files to XPS format with ease. The detailed steps are as follows.
- Create an instance of the Document object.
- Load an HTML file using the Document.LoadFromFile() method.
- Save the HTML file to XPS format using the Document.SaveToFile(string filename, FileFormat.XPS) method.
- C#
using Spire.Doc;
using Spire.Doc.Documents;

namespace ConvertHtmlToXps
{
    internal class Program
    {
        static void Main(string[] args)
        {
            // Create an instance of the Document class
            Document doc = new Document();
            // Load an HTML file
            doc.LoadFromFile("Sample.html", FileFormat.Html, XHTMLValidationType.None);

            //Convert the HTML file to XPS format
            doc.SaveToFile("HtmlToXPS.xps", FileFormat.XPS);
            doc.Close();
        }
    }
}

Convert HTML to XML in C#
Converting HTML to XML unlocks the potential for data extraction, manipulation, and integration with other systems. XML is a flexible and extensible markup language that allows for structured representation of data. By converting HTML to XML, you can extract specific elements, organize data hierarchically, and perform data analysis or integration tasks using XML processing tools and techniques.
To convert HTML files to XML format, you can use the Document.SaveToFile(string filename, FileFormat.Xml) method. The detailed steps are as follows.
- Create an instance of the Document object.
- Load an HTML file using the Document.LoadFromFile() method.
- Save the HTML file to XML format using the Document.SaveToFile(string filename, FileFormat.Xml) method.
- C#
using Spire.Doc;
using Spire.Doc.Documents;

namespace ConvertHtmlToXml
{
    internal class Program
    {
        static void Main(string[] args)
        {
            // Create an instance of the Document class
            Document doc = new Document();
            // Load an HTML file
            doc.LoadFromFile("Sample.html", FileFormat.Html, XHTMLValidationType.None);

            //Convert the HTML file to XML format
            doc.SaveToFile("HtmlToXML.xml", FileFormat.Xml);
            doc.Close();
        }
    }
}

Apply for a Temporary License
If you'd like to remove the evaluation message from the generated documents, or to get rid of the function limitations, please request a 30-day trial license for yourself.
C#: Add Various Types of Annotations to PDF
PDF annotation tools allow you to highlight text, add sticky notes, draw shapes, and insert comments directly on PDF documents. This can be useful for providing feedback, taking notes, marking up designs, and collaborating on documents. Mastering PDF annotation features can streamline workflows and improve productivity when working with PDF files.
In this article, you will learn how to programmatically add various types of annotations to a PDF document using Spire.PDF for .NET in C#.
- Add a Markup Annotation to PDF
- Add a Free Text Annotation to PDF
- Add a Popup Annotation to PDF
- Add a Shape Annotation to PDF
- Add a Web Link Annotation to PDF
- Add a File Link Annotation to PDF
- Add a Document Link Annotation to PDF
Install Spire.PDF for .NET
To begin with, you need to add the DLL files included in the Spire.PDF for.NET package as references in your .NET project. The DLL files can be either downloaded from this link or installed via NuGet.
PM> Install-Package Spire.PDF
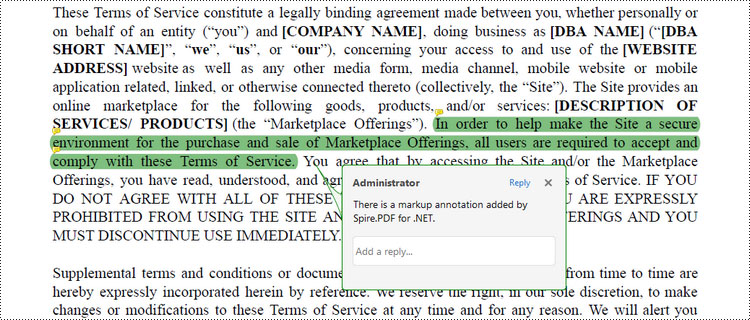
Add a Markup Annotation to PDF in C#
Markup annotation in PDF enables users to select and apply a colored background to emphasize or draw attention to specific text within the document.
Spire.PDF provides the PdfTextMarkupAnnotation class to work with this type of annotation. To add a markup annotation to PDF using Spire.PDF in C#, follow these steps.
- Create a PdfDocument object.
- Load a PDF document from the specified file path.
- Get a specific page from the document.
- Find the desired text from the page using the methods provided by the PdfTextFinder class.
- Create a PdfTextMarkupAnnotation object based on the text found.
- Add the annotation to the page using PdfPageBase.Annotations.Add() method.
- Save the document to a different PDF file.
- C#
using Spire.Pdf.Annotations;
using Spire.Pdf;
using Spire.Pdf.Texts;
using System.Drawing;

namespace AddMarkupAnnotation
{
    class Program
    {
        static void Main(string[] args)
        {
            // Create a PdfDocument object
            PdfDocument doc = new PdfDocument();

            // Load a PDF file
            doc.LoadFromFile("C:\\Users\\Administrator\\Desktop\\Terms of service.pdf");

            // Get a specific page
            PdfPageBase page = doc.Pages[0];

            // Create a PdfTextFinder object based on the page
            PdfTextFinder finder = new PdfTextFinder(page);

            // Set the find options
            finder.Options.Parameter = TextFindParameter.WholeWord;
            finder.Options.Parameter = TextFindParameter.IgnoreCase;

            // Find the instances of the specified text
            List<PdfTextFragment> fragments = finder.Find("In order to help make the Site a secure environment" +
                " for the purchase and sale of Marketplace Offerings, all users are required to accept and " +
                "comply with these Terms of Service.");

            // Get the first instance
            PdfTextFragment textFragment = fragments[0];

            // Specify annotation text
            String text = "There is a markup annotation added by Spire.PDF for .NET.";

            // Iterate through the bounds of the found text
            for (int i = 0; i < textFragment.Bounds.Length; i++)
            {
                // Get a specific bound
                RectangleF rect = textFragment.Bounds[i];

                // Create a text markup annotation
                PdfTextMarkupAnnotation annotation = new PdfTextMarkupAnnotation("Administrator", text, rect);

                // Set the markup color
                annotation.TextMarkupColor = Color.Green;

                // Add the annotation to the collection of the annotations
                page.Annotations.Add(annotation);
            }

            // Save result to file
            doc.SaveToFile("AddMarkups.pdf");

            // Dispose resources
            doc.Dispose();
        }
    }
}
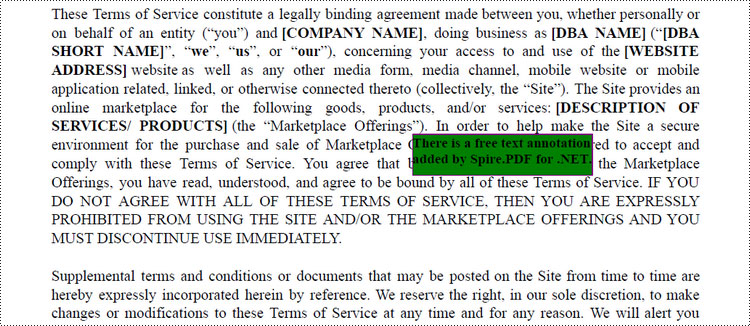
Add a Free Text Annotation to PDF in C#
Free Text Annotation in PDF files enables users to add handwritten-like or typed text directly onto the document, similar to taking notes on a printed document.
Spire.PDF provides the PdfFreeTextAnnotation to work with the free text annotations in PDF. Here is how you can use to create one in a PDF document.
- Create a PdfDocument object.
- Load a PDF document from the specified file path.
- Get a specific page from the document.
- Find the desired text from the page using the methods provided by the PdfTextFinder class.
- Specify the x and y coordinates to add annotation.
- Create a PdfFreeTextAnnotation object, and set its properties like text, font, border and color.
- Add the annotation to the page using PdfPageBase.Annotations.Add() method.
- Save the document to a different PDF file.
- C#
using Spire.Pdf.Annotations;
using Spire.Pdf.Texts;
using Spire.Pdf;
using Spire.Pdf.Graphics;
using System.Drawing;

namespace AddFreeTextAnnotation
{
    class Program
    {
        static void Main(string[] args)
        {
            // Create a PdfDocument object
            PdfDocument doc = new PdfDocument();

            // Load a PDF file
            doc.LoadFromFile("C:\\Users\\Administrator\\Desktop\\Terms of service.pdf");

            // Get a specific page
            PdfPageBase page = doc.Pages[0];

            // Create a PdfTextFinder object based on the page
            PdfTextFinder finder = new PdfTextFinder(page);

            // Set the find options
            finder.Options.Parameter = TextFindParameter.WholeWord;
            finder.Options.Parameter = TextFindParameter.IgnoreCase;

            // Find the instances of the specified text
            List<PdfTextFragment> fragments = finder.Find("Marketplace Offerings");

            // Get the first instance
            PdfTextFragment textFragment = fragments[0];

            // Get the text bound
            RectangleF rect = textFragment.Bounds[0];

            // Get the x and y coordinates to add annotation
            float x = rect.Right;
            float y = rect.Bottom;

            // Create a free text annotation
            RectangleF rectangle = new RectangleF(x, y, 130, 30);
            PdfFreeTextAnnotation textAnnotation = new PdfFreeTextAnnotation(rectangle);

            // Set the content of the annotation
            textAnnotation.Text = "There is a free text annotation\radded by Spire.PDF for .NET.";

            // Set other properties of annotation
            PdfFont font = new PdfFont(PdfFontFamily.TimesRoman, 10f, PdfFontStyle.Bold);
            PdfAnnotationBorder border = new PdfAnnotationBorder(1f);
            textAnnotation.Font = font;
            textAnnotation.Border = border;
            textAnnotation.BorderColor = Color.Purple;
            textAnnotation.Color = Color.Green;
            textAnnotation.Opacity = 1.0f;

            // Add the annotation to the collection of the annotations
            page.Annotations.Add(textAnnotation);

            // Save result to file
            doc.SaveToFile("FreeTextAnnotation.pdf");

            // Dispose resources
            doc.Dispose();
        }
    }
}
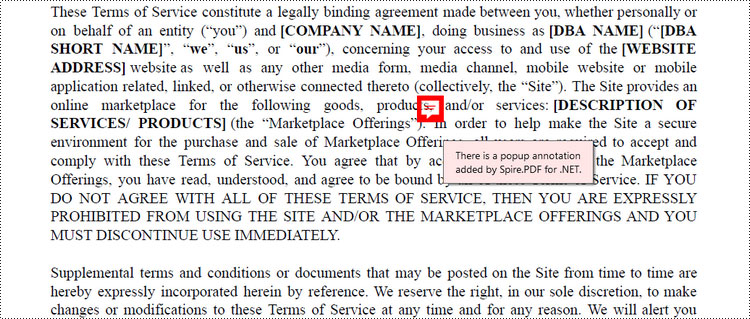
Add a Popup Annotation to PDF in C#
Popup Annotation in PDF files allows users to attach a small label or comment that pops up when clicked, revealing additional information or a short message.
Spire.PDF offers the PdfPopupAnnotation class to work with the popup annotation in PDF. The following are the steps to add a popup annotation to PDF using it.
- Create a PdfDocument object.
- Load a PDF document from the specified file path.
- Get a specific page from the document.
- Find the desired text from the page using the methods provided by the PdfTextFinder class.
- Specify the x and y coordinates to add annotation.
- Create a PdfPopupAnnotation object, and set its properties like text, icon and color.
- Add the annotation to the page using PdfPageBase.Annotations.Add() method.
- Save the document to a different PDF file.
- C#
using Spire.Pdf.Annotations;
using Spire.Pdf.Texts;
using Spire.Pdf;
using System.Drawing;

namespace AddPopupAnnotation
{
    class Program
    {
        static void Main(string[] args)
        {
            // Create a PdfDocument object
            PdfDocument doc = new PdfDocument();

            // Load a PDF file
            doc.LoadFromFile("C:\\Users\\Administrator\\Desktop\\Terms of service.pdf");

            // Get a specific page
            PdfPageBase page = doc.Pages[0];

            // Create a PdfTextFinder object based on the page
            PdfTextFinder finder = new PdfTextFinder(page);

            // Set the find options
            finder.Options.Parameter = TextFindParameter.WholeWord;
            finder.Options.Parameter = TextFindParameter.IgnoreCase;

            // Find the instances of the specified text
            List<PdfTextFragment> fragments = finder.Find("Marketplace Offerings");

            // Get the first instance
            PdfTextFragment textFragment = fragments[0];

            // Get the text bound
            RectangleF textBound = textFragment.Bounds[0];

            // Get the x and y coordinates to add annotation
            float x = textBound.Right + 5;
            float y = textBound.Top - 15;

            // Create a popup annotation
            RectangleF rectangle = new RectangleF(x, y, 30, 30);
            PdfPopupAnnotation popupAnnotation = new PdfPopupAnnotation(rectangle);

            // Set the annotation text
            popupAnnotation.Text = "There is a popup annotation\radded by Spire.PDF for .NET.";

            // Set the icon and color of the annotation
            popupAnnotation.Icon = PdfPopupIcon.Comment;
            popupAnnotation.Color = Color.Red;

            // Add the annotation to the collection of the annotations
            page.Annotations.Add(popupAnnotation);

            // Save result to file
            doc.SaveToFile("PopupAnnotation.pdf");

            // Dispose resources
            doc.Dispose();
        }
    }
}
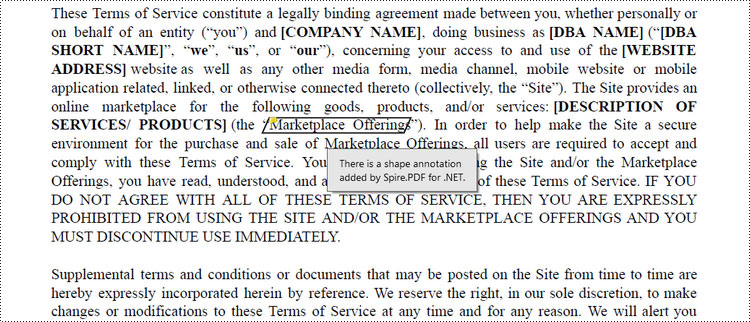
Add a Shape Annotation to PDF in C#
Shape Annotation in PDF refers to the ability to add graphical shapes such as rectangles, circles, lines, or arrows onto a PDF document to highlight or provide additional information.
Spire.PDF offers the PdfPolyLineAnnotation class that allows the user to create a custom shape annotation in a PDF document. Here are the detailed steps.
- Create a PdfDocument object.
- Load a PDF document from the specified file path.
- Get a specific page from the document.
- Find the desired text from the page using the methods provided by the PdfTextFinder class.
- Specify the coordinates to add annotation.
- Create a PdfPloyLineAnnotation object, and set the text of the annotation.
- Add the annotation to the page using PdfPageBase.Annotations.Add() method.
- Save the document to a different PDF file.
- C#
using Spire.Pdf.Annotations;
using Spire.Pdf.Texts;
using Spire.Pdf;
using System.Drawing;

namespace AddShapeAnnotation
{
    class Program
    {
        static void Main(string[] args)
        {
            // Create a PdfDocument object
            PdfDocument doc = new PdfDocument();

            // Load a PDF file
            doc.LoadFromFile("C:\\Users\\Administrator\\Desktop\\Terms of service.pdf");

            // Get a specific page
            PdfPageBase page = doc.Pages[0];

            // Create a PdfTextFinder object based on the page
            PdfTextFinder finder = new PdfTextFinder(page);

            // Set the find options
            finder.Options.Parameter = TextFindParameter.WholeWord;
            finder.Options.Parameter = TextFindParameter.IgnoreCase;

            // Find the instances of the specified text
            List<PdfTextFragment> fragments = finder.Find("Marketplace Offerings");

            // Get the first instance
            PdfTextFragment textFragment = fragments[0];

            // Get the text bound
            RectangleF textBound = textFragment.Bounds[0];

            // Get the coordinates to add annotation
            float left = textBound.Left;
            float top = textBound.Top;
            float right = textBound.Right;
            float bottom = textBound.Bottom;

            // Create a shape nnotation
            PdfPolyLineAnnotation polyLineAnnotation = new PdfPolyLineAnnotation(page, new PointF[] {
                new PointF(left, top), new PointF(right, top), new PointF(right - 5, bottom), new PointF(left - 5, bottom), new PointF(left, top) });

            // Set the annotation text
            polyLineAnnotation.Text = "There is a shape annotation\radded by Spire.PDF for .NET.";

            // Add the annotation to the collection of the annotations
            page.Annotations.Add(polyLineAnnotation);

            // Save result to file
            doc.SaveToFile("ShapeAnnotation.pdf");

            // Dispose resources
            doc.Dispose();
        }
    }
}
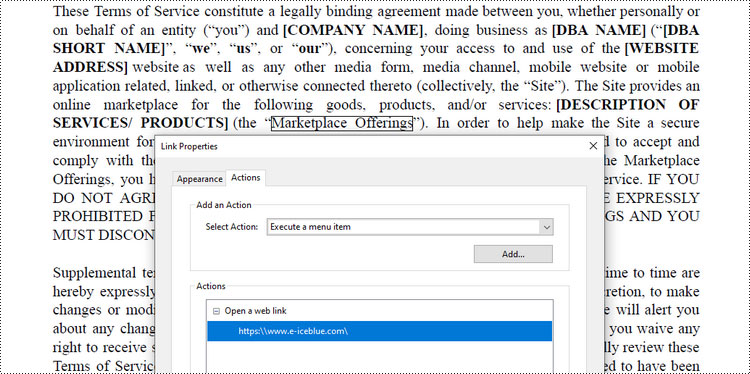
Add a Web Link Annotation to PDF in C#
Web Link Annotation in PDF documents allows users to embed hyperlinks that direct readers to websites when clicked.
Spire.PDF provides the PdfUrlAnnotation class to represent a web link annotation. The following are the steps to add a web link annotation using it.
- Create a PdfDocument object.
- Load a PDF document from the specified file path.
- Get a specific page from the document.
- Find the desired text from the page using the methods provided by the PdfTextFinder class.
- Create a PdfUrlAnnotation object based on the text found.
- Add the annotation to the page using PdfPageBase.Annotations.Add() method.
- Save the document to a different PDF file.
- C#
using Spire.Pdf.Annotations;
using Spire.Pdf.Texts;
using Spire.Pdf;
using System.Drawing;

namespace AddUrlAnnotation
{
    class Program
    {
        static void Main(string[] args)
        {
            // Create a PdfDocument object
            PdfDocument doc = new PdfDocument();

            // Load a PDF file
            doc.LoadFromFile("C:\\Users\\Administrator\\Desktop\\Terms of service.pdf");

            // Get a specific page
            PdfPageBase page = doc.Pages[0];

            // Create a PdfTextFinder object based on the page
            PdfTextFinder finder = new PdfTextFinder(page);

            // Set the find options
            finder.Options.Parameter = TextFindParameter.WholeWord;
            finder.Options.Parameter = TextFindParameter.IgnoreCase;

            // Find the instances of the specified text
            List<PdfTextFragment> fragments = finder.Find("Marketplace Offerings");

            // Get the first instance
            PdfTextFragment textFragment = fragments[0];

            // Get the text bound
            RectangleF textBound = textFragment.Bounds[0];

            // Create a Url annotation
            PdfUriAnnotation urlAnnotation = new PdfUriAnnotation(textBound, "https:\\\\www.e-iceblue.com\\");

            // Add the annotation to the collection of the annotations
            page.Annotations.Add(urlAnnotation);

            // Save result to file
            doc.SaveToFile("UrlAnnotation.pdf");

            // Dispose resources
            doc.Dispose();
        }
    }
}
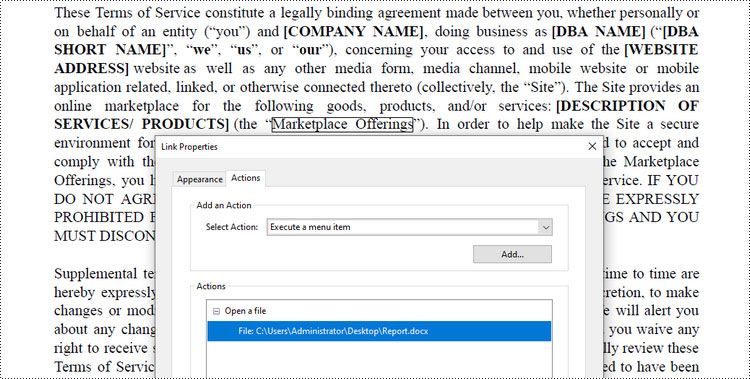
Add a File Link Annotation to PDF in C#
File link annotation in PDF documents refers to interactive links that allow users to navigate to external files directly from the PDF.
Spire.PDF offers the PdfFileLinkAnnotation class to work with the file link annotation. Here are the steps to add a file link annotation to a PDF document using it.
- Create a PdfDocument object.
- Load a PDF document from the specified file path.
- Get a specific page from the document.
- Find the desired text from the page using the methods provided by the PdfTextFinder class.
- Create a PdfFileLinkAnnotation object based on the text found.
- Add the annotation to the page using PdfPageBase.Annotations.Add() method.
- Save the document to a different PDF file.
- C#
using Spire.Pdf.Annotations;
using Spire.Pdf.Texts;
using Spire.Pdf;
using System.Drawing;

namespace AddFileLinkAnnotation
{
    class Program
    {
        static void Main(string[] args)
        {
            // Create a PdfDocument object
            PdfDocument doc = new PdfDocument();

            // Load a PDF file
            doc.LoadFromFile("C:\\Users\\Administrator\\Desktop\\Terms of service.pdf");

            // Get a specific page
            PdfPageBase page = doc.Pages[0];

            // Create a PdfTextFinder object based on the page
            PdfTextFinder finder = new PdfTextFinder(page);

            // Set the find options
            finder.Options.Parameter = TextFindParameter.WholeWord;
            finder.Options.Parameter = TextFindParameter.IgnoreCase;

            // Find the instances of the specified text
            List<PdfTextFragment> fragments = finder.Find("Marketplace Offerings");

            // Get the first instance
            PdfTextFragment textFragment = fragments[0];

            // Get the text bound
            RectangleF textBound = textFragment.Bounds[0];

            // Create a file link annotation
            PdfFileLinkAnnotation fileLinkAnnotation = new PdfFileLinkAnnotation(textBound, "C:\\Users\\Administrator\\Desktop\\Report.docx");

            // Add the annotation to the collection of the annotations
            page.Annotations.Add(fileLinkAnnotation);

            // Save result to file
            doc.SaveToFile("FileLinkAnnotation.pdf");

            // Dispose resources
            doc.Dispose();
        }
    }
}
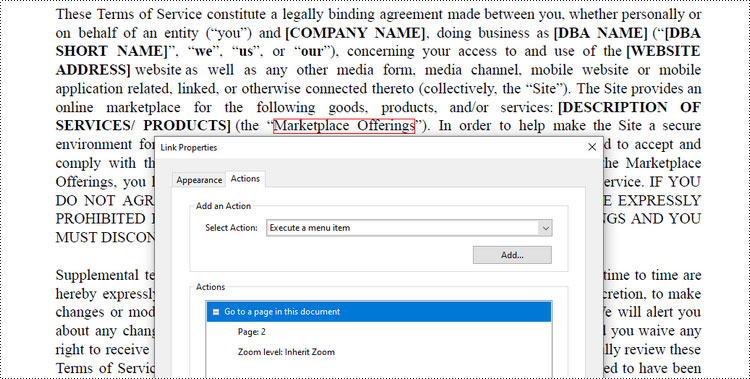
Add a Document Link Annotation to PDF in C#
Document link annotation in PDF files refers to hyperlinks that allow users to navigate between different pages or sections within the same PDF document.
Spire.PDF offers the PdfDocumentLinkAnnotation class to work with the document link annotation. Here are the steps to add a document link annotation to a PDF document using it.
- Create a PdfDocument object.
- Load a PDF document from the specified file path.
- Get a specific page from the document.
- Find the desired text from the page using the methods provided by the PdfTextFinder class.
- Create a PdfDocumentLinkAnnotation object based on the text found.
- Add the annotation to the page using PdfPageBase.Annotations.Add() method.
- Save the document to a different PDF file.
- C#
using Spire.Pdf.Annotations;
using Spire.Pdf.Texts;
using Spire.Pdf;
using Spire.Pdf.General;
using System.Drawing;

namespace AddDocumentLinkAnnotation
{
    class Program
    {
        static void Main(string[] args)
        {
            // Create a PdfDocument object
            PdfDocument doc = new PdfDocument();

            // Load a PDF file
            doc.LoadFromFile("C:\\Users\\Administrator\\Desktop\\Terms of service.pdf");

            // Get a specific page
            PdfPageBase page = doc.Pages[0];

            // Create a PdfTextFinder object based on the page
            PdfTextFinder finder = new PdfTextFinder(page);

            // Set the find options
            finder.Options.Parameter = TextFindParameter.WholeWord;
            finder.Options.Parameter = TextFindParameter.IgnoreCase;

            // Find the instances of the specified text
            List<PdfTextFragment> fragments = finder.Find("Marketplace Offerings");

            // Get the first instance
            PdfTextFragment textFragment = fragments[0];

            // Get the text bound
            RectangleF textBound = textFragment.Bounds[0];

            // Create a document link annotation
            PdfDocumentLinkAnnotation documentLinkAnnotation = new PdfDocumentLinkAnnotation(textBound);

            // Set the destination of the annotation
            documentLinkAnnotation.Destination = new PdfDestination(doc.Pages[1]);

            // Add the annotation to the collection of the annotations
            page.Annotations.Add(documentLinkAnnotation);

            // Save result to file
            doc.SaveToFile("DocumentLinkAnnotation.pdf");

            // Dispose resources
            doc.Dispose();
        }
    }
}
Apply for a Temporary License
If you'd like to remove the evaluation message from the generated documents, or to get rid of the function limitations, please request a 30-day trial license for yourself.