Spire.PDF 11.7.2 adds support for extracting custom PDF data
We're pleased to announce the release of Spire.PDF 11.7.2. This version adds support for extracting custom data values from PDFs. Additionally, it includes multiple bug fixes that improve PDF conversion, rendering, form field flattening, printing, and exception handling. More details are listed below.
Here is a list of changes made in this release
| Category | ID | Description |
| New feature | SPIREPDF-7505 | Adds GetCustomApplicationData() to support extracting custom PDF data values.
PdfDocument doc = new PdfDocument(inputFile); PdfApplicationData appplicationDataObject = doc.GetCustomApplicationData(); Dictionary<object, object> privateDataObject = appplicationDataObject.Private as Dictionary<object, object>; string privateData = privateDataObject["WinsertPrivateCatalogData"] as string; |
| Bug | SPIREPDF-5089 | Optimizes the time consumption of converting PDF to images. |
| Bug | SPIREPDF-6354 | Fixes the issue where Thai text displayed incorrectly when converting PDF to PDF/A-1A. |
| Bug | SPIREPDF-6689 | Fixes the incorrect transparency effect when highlighting PDF text. |
| Bug | SPIREPDF-7359 | Fixes incorrect rendering when drawing images to PDF pages. |
| Bug | SPIREPDF-7459 | Fixes the incorrect Flatten effect for PDF form fields. |
| Bug | SPIREPDF-7486 | Fixes the "ArgumentException" thrown during PDF compression. |
| Bug | SPIREPDF-7495 SPIREPDF-7561 |
Fixes the "NullReferenceException" thrown when converting PDF to TIFF. |
| Bug | SPIREPDF-7529 | Fixes shadow issues in printed PDF content. |
| Bug | SPIREPDF-7570 | Fixes Adobe errors when converting OFD to PDF. |
| Bug | SPIREPDF-7571 | Fixes the "InvalidOperationException" thrown when defining fonts. |
| Bug | SPIREPDF-7579 | Fixes the "NullReferenceException" thrown when converting PDF to images. |
| Bug | SPIREPDF-7581 | Fixes the "System.Exception" thrown when canceling print operations in netstandard DLL. |
| Bug | SPIREPDF-7589 | Fixes the "Value cannot be null" error when merging PDF files. |
Spire.PDF for Java 11.7.0 enhances the conversion from SVG to PDF
We’re pleased to announce the release of Spire.PDF for Java 11.7.0. This version enhances the conversion result from SVG to PDF and resolves two additional issues. More details are listed below.
Here is a list of changes made in this release
| Category | ID | Description |
| Bug | SPIREPDF-7513 | Fixed the issue where text search was failing. |
| Bug | SPIREPDF-7532 | Fixed the issue where the printed PDF content was scaled down when the system DPI was set to 150%. |
| Bug | SPIREPDF-7548 | Fixed the issue where SVG-to-PDF conversion produced incorrect results. |
Inserting Subscript in Excel with Java [Quick Guide]

Inserting subscript in Excel is a common requirement, especially when dealing with chemical formulas like CO₂, statistical footnotes, or scientific data. Using subscripts helps make data clearer and more polished, enhancing the professionalism of your documents. However, Excel’s built-in subscript feature is cumbersome and doesn’t support batch application, which can significantly slow down your workflow.
Fortunately, with the help of Java code, you can efficiently insert subscripts in Excel, freeing yourself from tedious manual work and making your tasks faster and more professional.
- Preparation
- Insert New Text with Subscript
- Apply Subscript to Existing Text
- Insert Subscript for Multiple Matches in Single Cell
- Conclusion
Preparation
Inserting a subscript in Excel using Java involves adding Java libraries. In today’s blog, we will use Spire.XLS for Java as an example to accomplish this task. Spire.XLS is a powerful Java component that works independently without relying on Microsoft Office. In addition to reading, editing, and converting Excel files, it allows users to perform advanced tasks as well.
To install it on your device, there are two options:
- If you are using Maven, add the following code to your pom.xml file:
<repositories>
    <repository>
        <id>com.e-iceblue</id>
        <name>e-iceblue</name>
        <url>https://repo.e-iceblue.com/nexus/content/groups/public/</url>
    </repository>
</repositories>
<dependencies>
    <dependency>
        <groupId>e-iceblue</groupId>
        <artifactId>spire.xls</artifactId>
        <version>16.4.1</version>
    </dependency>
</dependencies>
- If you prefer manual installation, download the Spire.XLS package and add the .jar file to your Java IDE.
Inserting Subscript in Excel: How to Insert New Text with Subscript
First, let’s see how to insert new text into an Excel cell with subscript formatting already applied. By setting the subscript when creating a new document, you can generate the final file directly without needing to reopen and adjust it later.
Steps—Inserting subscript in Excel when adding new text with Java:
- Create a Workbook and get a worksheet.
- Get a cell range using Worksheet.getCellRange() method.
- Specify text through CellRange.getRichText().setText() method.
- Create a font through Workbook.createFont() method.
- Set ExcelFont.isSubscript() to true.
- Apply the font to a text range in the cell using RichText.setFont(startIndex, endIndex, font) method.
The following code shows how to insert the text "R100-0.06" into cell B2 and set the subscript:
import com.spire.xls.*;

import java.awt.*;

public class InsertSubscriptNewText {

    public static void main(String[] args) {

        // Create a Workbook instance
        Workbook workbook = new Workbook();

        // Get the first worksheet
        Worksheet sheet = workbook.getWorksheets().get(0);

        // Insert text to B2
        sheet.getCellRange("B2").setText("This is an example of Subscript:");

        // Insert text to B3 and apply subscript effect
        CellRange range = sheet.getCellRange("B3");
        range.getRichText().setText("R100-0.06");
        ExcelFont font = workbook.createFont();
        font.isSubscript(true);
        font.setColor(Color.red);
        range.getRichText().setFont(4, 8, font);

        // Auto fit column width
        sheet.getAllocatedRange().autoFitColumns();

        // Save the document
        workbook.saveToFile("/SubscriptNewText.xlsx", ExcelVersion.Version2016);
    }
}
Result Preview:

Tip: By setting ExcelFont.isSuperscript() to true, you can apply superscript to text in Excel files.
Inserting Subscript in Excel: Apply Subscript to Existing Text
Although inserting subscripts while creating a new Excel file can simplify later work, in most cases, you’ll need to deal with existing files that already contain content. This section shows you how to quickly apply subscript formatting to existing text in Excel using Java.
Steps—Inserting subscript to Excel file with existing text:
- Create a Workbook instance and read an Excel file.
- Get a worksheet and get the cell range.
- Loop through cells in the cell range and find the text to apply subscript.
- Set the text in the cell’s rich text using RichText.setText() to preserve the existing content.
- Create a font by calling Workbook.createFont() method and configure it as Subscript by setting ExcelFont.isSubscript() to true.
- Apply the subscript using RichText.setFont(index, index, subFont) method.
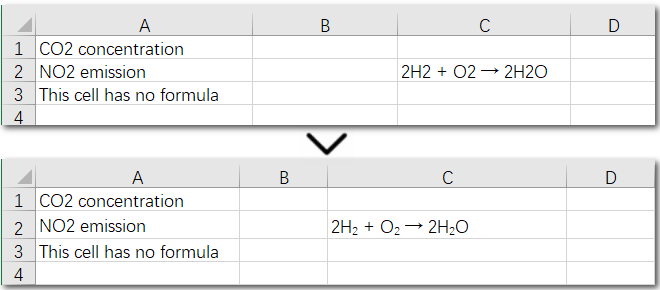
The following code demonstrates how to set subscripts for chemical formulas in the cells within the A1:A3 range:
import com.spire.xls.*;

public class SubscriptExistingContent {

    public static void main(String[] args) {
        // Create a Workbook and load an Excel file
        Workbook workbook = new Workbook();
        // Load an Excel file
        workbook.loadFromFile(("/test.xlsx"));

        // Get a worksheet
        Worksheet sheet = workbook.getWorksheets().get(0);

        // Loop through A1:A3
        for (int i = 1; i <= 3; i++) {
            CellRange cell = sheet.getCellRange("A" + i);
            String text = cell.getText();

            // Find "2" in cells
            int index = text.indexOf("2");
            if (index != -1) {
                // Set RichText to keep original text
cell.getRichText().setText(text);

                // Create font and set as subscript
                ExcelFont subFont = workbook.createFont();
                subFont.isSubscript(true);

                // Apply subscript to "2"
                cell.getRichText().setFont(index, index, subFont);
            }
        }

        // Auto fit columns
        sheet.getAllocatedRange().autoFitColumns();

        // Save the Excel file
        workbook.saveToFile("/SubscriptExistingContent.xlsx", ExcelVersion.Version2016);
    }
}
Result Preview:
The above code helps us find and set the first matching character as a subscript in an existing cell. But what if the same character appears multiple times in the same cell? How can we apply subscripts to all of them at once? Let’s explore this in the next section.
Inserting Subscript in Excel: Handle Multiple Matches in a Single Cell
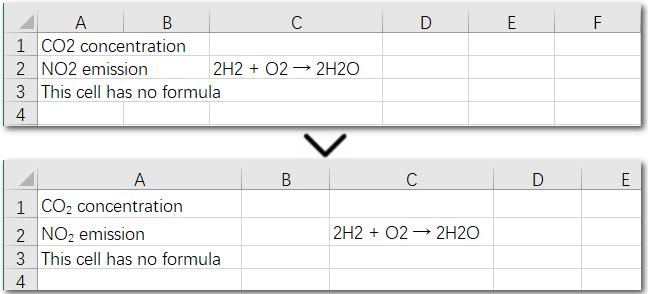
Using a search-and-apply method to set subscript formatting works well when there is only one instance in the cell that needs to be subscripted, such as in H₂. However, if the cell contains a chemical equation, the situation becomes more complex: there might be multiple places where subscripts are needed, along with normal numbers representing coefficients (e.g., 2H₂ + O₂ → 2H₂O). In this case, the solution is to set subscripts precisely by specifying the exact positions of the target characters in the text. Let’s take a look at the detailed steps.
Steps—Inserting multiple subscripts in Excel cells:
- Create a Workbook object and read an Excel file.
- Get a worksheet and a cell range.
- Read text in the cell range and set it to rich text using CellRange.getRichText().setText() method.
- Create a font by calling Workbook.createFont() method and configure it as subscript by setting ExcelFont.isSubscript() to true.
- Apply subscript to specific characters with CellRange.getRichText().setFont(index, index, subFont) method.
The following code demonstrates how to set subscripts for the necessary parts of the chemical equation “2H₂ + O₂ → 2H₂O” in cell C2:
import com.spire.xls.*;

public class SubscriptSpecificCell {

    public static void main(String[] args) {
        // Create a Workbook instance and load an Excel file
        Workbook workbook = new Workbook();
        workbook.loadFromFile(("/test.xlsx"));

        // Get the first worksheet
        Worksheet sheet = workbook.getWorksheets().get(0);

        // Get a cell range
        CellRange cell = sheet.getCellRange("C2");

        // Read text from C2
        String text = cell.getText();


        // Set text to RichText
        cell.getRichText().setText(text);

        // Create font object and set it as subscript
        ExcelFont subFont = workbook.createFont();
        subFont.isSubscript(true);

        // Set subscript for specific cell
        cell.getRichText().setFont(2, 2, subFont);
        cell.getRichText().setFont(7, 7, subFont);
        cell.getRichText().setFont(13, 13, subFont);

        // Auto fit columns
        sheet.getAllocatedRange().autoFitColumns();

        // Save the Excel file
        workbook.saveToFile("/SubscriptSpecificCell.xlsx", ExcelVersion.Version2016);
    }
}
Result Preview:
Conclusion
This guide provides a detailed explanation of how to set subscripts in Excel, whether you need to apply them to a single cell or a range of cells, and whether you’re formatting one instance or multiple occurrences. By the end of this page, inserting subscript in Excel will be a breeze for you. Give Spire.XLS a try and start creating professional Excel workbooks today!
Creating Word Documents with Python: A Step-By-Step Guide

Automating the creation of Word documents is a powerful way to generate reports, and produce professional-looking files. With Python, you can utilize various libraries for this purpose, and one excellent option is Spire.Doc for Python, specifically designed for handling Word documents.
This guide will provide a clear, step-by-step process for creating Word documents in Python using Spire.Doc. We’ll cover everything from setting up the library to adding formatted text, images, tables, and more. Whether you're generating reports, invoices, or any other type of document, thes techniques will equip you with the essential tools to enhance your workflow effectively.
Table of Contents:
- What's Sprie.Doc for Python?
- Set Up Spire.Doc in Your Python Project
- Step 1: Create a Blank Word Document
- Step 2: Add Formatted Text (Headings, Paragraphs)
- Step 3: Insert Images to a Word Document
- Step 4: Create and Format Tables
- Step 5: Add Numbered or Bulleted Lists
- Best Practices for Word Document Creation in Python
- FAQs
- Conclusion
What's Spire.Doc for Python?
Spire.Doc is a powerful library for creating, manipulating, and converting Word documents in Python. It enables developers to generate professional-quality documents programmatically without needing Microsoft Word. Here are some key features:
- Supports Multiple Formats : Works with DOCX, DOC, RTF, and HTML.
- Extensive Functionalities : Add text, images, tables, and charts.
- Styling and Formatting : Apply various styles for consistent document appearance.
- User-Friendly API: Simplifies automation of document generation processes.
- Versatile Applications : Ideal for generating reports, invoices, and other documents.
With Spire.Doc, you have the flexibility and tools to streamline your Word document creation tasks effectively.
Set Up Spire.Doc in Your Python Project
To get started with Spire.Doc in your Python project, follow these simple steps:
- Install Spire.Doc : First, you need to install the Spire.Doc library. You can do this using pip. Open your terminal or command prompt and run the following command:
pip install spire.doc
- Import the Library : Once installed, import the Spire.Doc module in your Python script to access its functionalities. You can do this with the following import statement:
from spire.doc import *
from spire.doc.common import *
With the setup complete, you can begin writing your Python code to create Word documents according to your needs.
Step 1: Create a Blank Word Document in Python
The first step in automating Word document creation is to create a blank document. To begin with, we create a Document object, which serves as the foundation of our Word document. We then add a section to organize content, and set the page size to A4 with 60-unit margins . These configurations are crucial for ensuring proper document layout and readability.
Below is the code to initialize a document and set up the page configuration:
# Create a Document object
doc = Document()

# Add a section
section = doc.AddSection()

# Set page size and page margins
section.PageSetup.PageSize = PageSize.A4()
section.PageSetup.Margins.All = 60

# Save the document
doc.SaveToFile("BlankDocument.docx")
doc.Dispose
Step 2: Add Formatted Text (Headings, Paragraphs)
1. Add Title, Headings, Paragraphs
In this step, we add text content by first creating paragraphs using the AddParagraph method, followed by inserting text with the AppendText method.
Different paragraphs can be styled using various BuiltInStyle options, such as Title , Heading1 , and Normal , allowing for quick generation of document elements. Additionally, the TextRange.CharacterFormat property can be used to adjust the font, size, and other styles of the text, ensuring a polished and organized presentation.
Below is the code to insert and format these elements:
# Add a title
title_paragraph = section.AddParagraph()
textRange = title_paragraph.AppendText("My First Document")
title_paragraph.ApplyStyle(BuiltinStyle.Title)
textRange.CharacterFormat.FontName = "Times New Properties"
textRange.CharacterFormat.FontSize = 24

# Add a heading
heading_paragraph = section.AddParagraph()
textRange = heading_paragraph.AppendText("This Is Heading1")
heading_paragraph.ApplyStyle(BuiltinStyle.Heading1)
textRange.CharacterFormat.FontName = "Times New Properties"
textRange.CharacterFormat.FontSize = 16

# Add a paragraph
normal_paragraph = section.AddParagraph()
textRange = normal_paragraph .AppendText("This is a sample paragraph.")
normal_paragraph .ApplyStyle(BuiltinStyle.Normal)
textRange.CharacterFormat.FontName = "Times New Properties"
textRange.CharacterFormat.FontSize = 12
2. Apply Formatting to Paragraph
To ensure consistent formatting across multiple paragraphs, we can create a ParagraphStyle that defines key properties such as font attributes (name, size, color, boldness) and paragraph settings (spacing, indentation, alignment) within a single object. This style can then be easily applied to the selected paragraphs for uniformity.
Below is the code to define and apply the paragraph style:
# Defined paragraph style
style = ParagraphStyle(doc)
style.Name = "paraStyle"
style.CharacterFormat.FontName = "Arial"
style.CharacterFormat.FontSize = 13
style.CharacterFormat.TextColor = Color.get_Red()
style.CharacterFormat.Bold = True
style.ParagraphFormat.AfterSpacing = 12
style.ParagraphFormat.BeforeSpacing = 12
style.ParagraphFormat.FirstLineIndent = 4
style.ParagraphFormat.LineSpacing = 10
style.ParagraphFormat.HorizontalAlignment = HorizontalAlignment.Left
doc.Styles.Add(style)

# Apply the style to the specific paragraph
normal_paragraph.ApplyStyle("paraStyle")
You may also like: How to Convert Text to Word and Word to Text in Python
Step 3: Insert Images to a Word Document
1. Insert an Image
In this step, we add an image to our document, allowing for visual enhancements that complement the text. We begin by creating a paragraph to host the image and then proceed to insert the desired image file usingthe Paragraph.AppendPicture method. After the image is inserted, we can adjust its dimensions and alignment to ensure it fits well within the document layout.
Below is the code to insert and format the image:
# Add a paragraph
paragraph = section.AddParagraph()

# Insert an image
picture = paragraph.AppendPicture("C:\\Users\\Administrator\\Desktop\\logo.png")

# Scale the image dimensions
picture.Width = picture.Width * 0.9
picture.Height = picture.Height * 0.9

# Set text wrapping style
picture.TextWrappingStyle = TextWrappingStyle.TopAndBottom

# Center-align the image horizontally
picture.HorizontalAlignment = HorizontalAlignment.Center
2. Position Image at Precise Location
To gain precise control over the positioning of images within your Word document, you can adjust both the horizontal and vertical origins and specify the image's coordinates in relation to these margins. This allows for accurate placement of the image, ensuring it aligns perfectly with the overall layout of your document.
Below is the code to set the image's position.
picture.HorizontalOrigin = HorizontalOrigin.LeftMarginArea
picture.VerticalOrigin = VerticalOrigin.TopMarginArea
picture.HorizontalPosition = 180.0
picture.VerticalPosition = 165.0
Note : Absolute positioning does not apply when using the Inline text wrapping style.
Step 4: Create and Format Tables
In this step, we will create a table within the document and customize its appearance and functionality. This includes defining the table's structure, adding header and data rows, and setting formatting options to enhance readability.
Steps for creating and customizing a table in Word:
- Add a Table : Use the Section.AddTablemethod to create a new table.
- Specify Table Data : Define the data that will populate the table.
- Set Rows and Columns : Specify the number of rows and columns with the Table.ResetCells method.
- Access Rows and Cells : Retrieve a specific row using Table.Rows[rowIndex] and a specific cell using TableRow.Cells[cellIndex] .
- Populate the Table : Add paragraphs with text to the designated cells.
- Customize Appearance : Modify the table and cell styles through the Table.TableFormat and TableCell.CellFormat properties.
The following code demonstrates how to add a teble when creating Word documents in Python:
# Add a table
table = section.AddTable(True)

# Specify table data
header_data = ["Header 1", "Header 2", "Header 3"]
row_data = [["Row 1, Col 1", "Row 1, Col 2", "Row 1, Col 3"],
            ["Row 2, Col 1", "Row 2, Col 2", "Row 2, Col 3"]]

# Set the row number and column number of table
table.ResetCells(len(row_data) + 1, len(header_data))

# Set the width of table
table.PreferredWidth = PreferredWidth(WidthType.Percentage, int(100))

# Get header row
headerRow = table.get_Item(0)
headerRow.IsHeader = True
headerRow.Height = 23
headerRow.RowFormat.BackColor = Color.get_DarkBlue()  # Header color

# Fill the header row with data and set the text formatting
for i in range(len(header_data)):
    headerRow.get_Item(i).CellFormat.VerticalAlignment = VerticalAlignment.Middle
    paragraph = headerRow.get_Item(i).AddParagraph()
    paragraph.Format.HorizontalAlignment = HorizontalAlignment.Center
    txtRange = paragraph.AppendText(header_data[i])
    txtRange.CharacterFormat.Bold = True
    txtRange.CharacterFormat.FontSize = 15
    txtRange.CharacterFormat.TextColor = Color.get_White()  # White text color

# Fill the rest rows with data and set the text formatting
for r in range(len(row_data)):
    dataRow = table.Rows.get_Item(r + 1)
    dataRow.Height = 20
    dataRow.HeightType = TableRowHeightType.Exactly

    for c in range(len(row_data[r])):
        dataRow.Cells[c].CellFormat.VerticalAlignment = VerticalAlignment.Middle
        paragraph = dataRow.Cells[c].AddParagraph()
        paragraph.Format.HorizontalAlignment = HorizontalAlignment.Center
        txtRange = paragraph.AppendText(row_data[r][c])
        txtRange.CharacterFormat.FontSize = 13

# Alternate row color
for j in range(1, table.Rows.Count):
    if j % 2 == 0:
        row2 = table.Rows[j]
        for f in range(row2.Cells.Count):
            row2.Cells[f].CellFormat.BackColor = Color.get_LightGray()  # Alternate row color

# Set the border of table
table.TableFormat.Borders.BorderType = BorderStyle.Single
table.TableFormat.Borders.LineWidth = 1.0
table.TableFormat.Borders.Color = Color.get_Black()
You may also like: How to Create Tables in Word Documents in Python
Step 5: Add Numbered or Bulleted Lists
In this step, we create and apply both numbered and bulleted lists to enhance the document's organization. Spire.Doc offers the ListStyle class to define and manage different types of lists with customizable formatting options. Once created, these styles can be applied to any paragraph in the document, ensuring a consistent look across all list items.
Steps for generating numbered/bulleted lists in Word:
- Define the List Style : Initialize a ListStyle for the numbered or bulleted list, specifying properties such as name, pattern type, and text position.
- Add the List Style to Document : Use the Document.ListStyles.Add() method to incorporate the new list style into the document's styles collection.
- Create List Items : For each item, create a paragraph and apply the corresponding list style using the Paragraph.ListFormat.ApplyStyle() method.
- Format Text Properties : Adjust font size and type for each item to ensure consistency and readability.
Below is the code to generate numbered and bulleted lists:
# Create a numbered list style
listStyle = ListStyle(doc, ListType.Numbered)
listStyle.Name = "numberedList"
listStyle.Levels[0].PatternType = ListPatternType.Arabic
listStyle.Levels[0].TextPosition = 60;
doc.ListStyles.Add(listStyle)

# Create a numbered list
for item in ["First item", "Second item", "Third item"]:
    paragraph = section.AddParagraph()
    textRange = paragraph.AppendText(item)
    textRange.CharacterFormat.FontSize = 13
    textRange.CharacterFormat.FontName = "Times New Roman"
    paragraph.ListFormat.ApplyStyle("numberedList")

# Create a bulleted list style
listStyle = ListStyle(doc, ListType.Bulleted)
listStyle.Name = "bulletedList"
listStyle.Levels[0].BulletCharacter = "\u00B7"
listStyle.Levels[0].CharacterFormat.FontName = "Symbol"
listStyle.Levels[0].TextPosition = 20
doc.ListStyles.Add(listStyle)

# Create a bulleted list
for item in ["Bullet item one", "Bullet item two", "Bullet item three"]:
    paragraph = section.AddParagraph()
    textRange = paragraph.AppendText(item)
    textRange.CharacterFormat.FontSize = 13
    textRange.CharacterFormat.FontName = "Times New Roman"
paragraph.ListFormat.ApplyStyle("bulletedList")
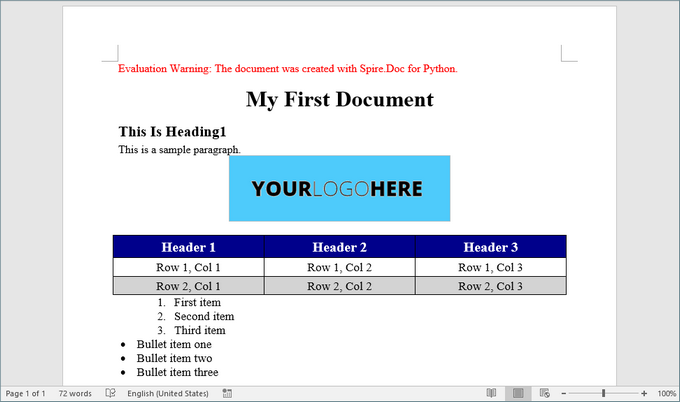
Here’s a screenshot of the Word document created using the code snippets provided above:
Best Practices for Word Document Creation in Python
- Reuse Styles : Define paragraph and list styles upfront to maintain consistency.
- Modular Code : Break document generation into functions (e.g., add_heading(), insert_table()) for reusability.
- Error Handling : Validate file paths and inputs to avoid runtime errors.
- Performance Optimization: Dispose of document objects (doc.Dispose()) to free resources.
- Use Templates : For complex documents, create MS Word templates with placeholders and replace them programmatically to save development time.
By implementing these practices, you can streamline document automation, reduce manual effort, and ensure professional-quality outputs.
FAQs
Q1: Does Spire.Doc support adding headers and footers to a Word document?
Yes, you can add and customize headers and footers, including page numbers, images, and custom text.
Q2. Can I generate Word documents on a server without Microsoft Office installed?
Yes, Spire.Doc works without Office dependencies, making it ideal for server-side automation.
Q3: Can I create Word documents from a template using Spire.Doc?
Of course, you can. Refer to the tutorial: Create Word Documents from Templates with Python
Q4: Can I convert Word documents to other formats using Spire.Doc?
Yes, Spire.Doc supports converting Word documents to various formats, including PDF, HTML, and plain text.
Q5. Can Spire.Doc edit existing Word documents?
Yes, Spire.Doc supports reading, editing, and saving DOCX/DOC files programmatically. Check out this documentation: How to Edit or Modify Word Documents in Pyhton
Conclusion
In this article, we've explored how to create Word documents in Python using the Spire.Doc library, highlighting its potential to enhance productivity while enabling the generation of highly customized and professional documents. By following the steps outlined in this guide, you can fully leverage Spire.Doc, making your document creation process both efficient and straightforward.
As you implement best practices and delve into the library's extensive functionalities, you'll discover that automating document generation significantly reduces manual effort, allowing you to concentrate on more critical tasks. Embrace the power of Python and elevate your document creation capabilities today!
Spire.Presentation for Python 10.6.4 adds support for the Linux arm64 platform
We're glad to announce the release of Spire.Presentation for Python 10.6.4. This version adds support for the Linux arm64 platform and a new feature to save shapes as SVG. What’s more, several issues that occurred when converting PowerPoint to images and loading files have been successfully fixed. Check below for the details.
Here is a list of all changes made in this release.
| Category | ID | Description |
| Adjustment | - | Upgrades the dependent SkiaSharp version to 3.116.1. |
| New feature | - | Adds support for Linux arm64 platform. |
| New feature |
SPIREPPT-2739 |
Supports saving shapes to SVG.
presentation = Presentation()
presentation.LoadFromFile(inputFile)
m=0
for i in range(presentation.Slides.Count):
    slide = presentation.Slides[i]
    for j in range (slide.Shapes.Count):
        shape = slide.Shapes[j]
        #stream = shape.SaveAsSvg()
        stream = shape.SaveAsSvgInSlide()
        stream.Save(outputFile+"Bug_2739_1_"+str(m)+".svg")
        stream.Flush()
        stream.Close()
        m=m+1
|
| Bug | SPIREPPT-2649 | Fixes the issue of incorrect content formatting when converting PowerPoint to images. |
| Bug | SPIREPPT-2674 | Fixes the issue that errors occurred when loading PowerPoint files. |
| Bug | SPIREPPT-2747 | Fixes the issue where setting “shape.TextFrame.AutofitType = TextAutofitType.Normal” did not work correctly. |
How to Convert TXT to Word or Word to TXT with Java Code

Plain text (.txt) files are simple and widely used, but they lack formatting and structure. If you need to enhance a TXT file with headings, fonts, tables, or images, converting it to a Word (.docx) file is a great solution.
In this tutorial, you'll learn how to convert a .txt file to a .docx Word document in Java using Spire.Doc for Java — a powerful library for Word document processing.
Why choose Spire.Doc for Java:
- The converted Word document preserves the line breaks and content from the TXT file.
- You can further modify fonts, add styles, or insert images using Spire.Doc's rich formatting APIs.
- Supported various output formats, including converting Word to PDF, Excel, TIFF, PostScript, etc.
Prerequisites
To convert TXT to Word with Spire.Doc for Java smoothly, you should download it from its official download page and add the Spire.Doc.jar file as a dependency in your Java program.
If you are using Maven, you can easily import the JAR file by adding the following code to your project's pom.xml file:
<repositories>
    <repository>
        <id>com.e-iceblue</id>
        <name>e-iceblue</name>
        <url>https://repo.e-iceblue.com/nexus/content/groups/public/</url>
    </repository>
</repositories>
<dependencies>
    <dependency>
        <groupId>e-iceblue</groupId>
        <artifactId>spire.doc</artifactId>
        <version>13.6.2</version>
    </dependency>
</dependencies>
Steps to Convert TXT to Word in Java
Now let's take a look at how to implement it in code. With Spire.Doc for Java, the process is straightforward. You can complete the conversion with just a few lines — no need for manual formatting or additional dependencies.
To help you better understand the code:
- Document is the core class that acts as an in-memory representation of a Word document.
- loadFromFile() uses internal parsers to read .txt content and wrap it into a single Word section with default font and margins.
- When saveToFile() is called, Spire.Doc automatically converts the plain text into a .docx file by generating a structured Word document in the OpenXML format.
Below is a step-by-step code example to help you get started quickly:
import com.spire.doc.Document;
import com.spire.doc.FileFormat;

public class ConvertTextToWord {

    public static void main(String[] args) {

        // Create a Text object
        Document txt = new Document();

        // Load a Word document
        txt.loadFromFile("C:\\Users\\Administrator\\Desktop\\Input.txt");

        // Save the document to Word
        txt.saveToFile("ToWord.docx", FileFormat.Docx);

        // Dispose resources
        doc.dispose();
    }
}
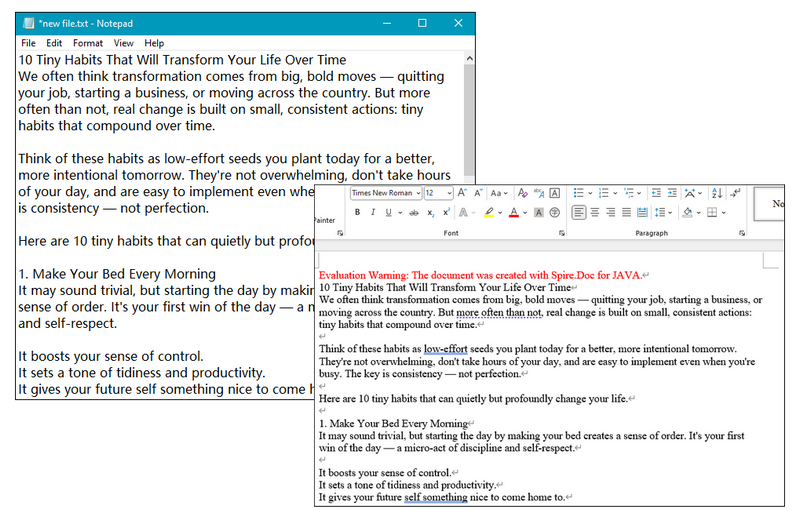
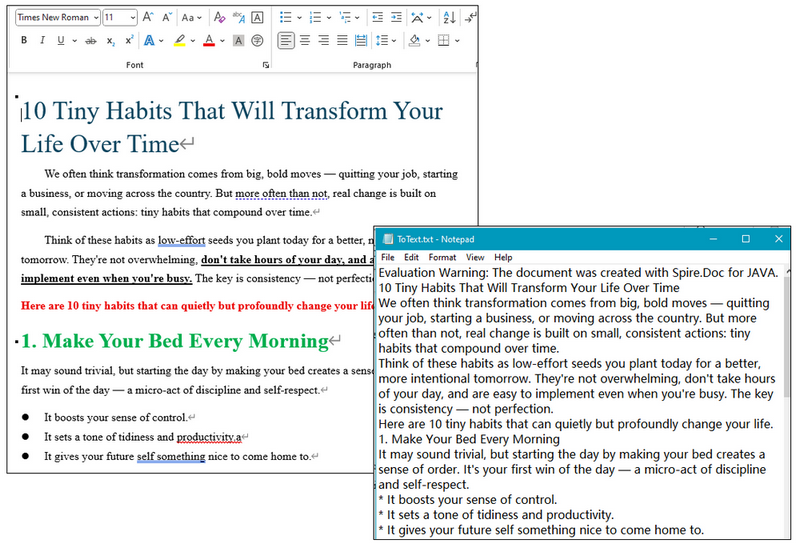
RESULT:
Tip:
After converting TXT files to DOC/DOCX, you can further customize the document's formatting as needed. To simplify this process, Spire.Doc for Java provides built-in support for editing text properties such as changing font color, inserting footnote, adding text and image watermark, etc.
How to Convert Word to TXT with Java
Except for TXT to Word conversion, Spire.Doc for Java also supports converting DOC/DOCX files to TXT format, making it easy to extract plain text from richly formatted Word documents. This functionality is especially useful when you need to strip out styling and layout to work with clean, raw content — such as for text analysis, search indexing, archiving, or importing into other systems that only support plain text.
Simply copy the code below and run the code to manage conversion:
import com.spire.doc.Document;
import com.spire.doc.FileFormat;

public class ConvertWordtoText {

    public static void main(String[] args) {

        // Create a Doc object
        Document doc = new Document();

        // Load a Word document
        doc.loadFromFile("C:\\Users\\Administrator\\Desktop\\Input.doc");

        // Save the document to Word
        doc.saveToFile("ToText.txt", FileFormat.Txt);

        // Dispose resources
        doc.dispose();
    }
}
RESULT:
Get a Free License
To remove evaluation watermarks and unlock full features, you can request a free 30-day license.
Conclusion
With Spire.Doc for Java, converting TXT to Word is fast, accurate, and doesn't require Microsoft Word to be installed. This is especially useful for Java developers working on reporting, document generation, or file conversion tools. Don't hesitate and give it a try now.
Send Email in C# via SMTP – HTML Format and File Attachment

Sending emails from a C# application is a common task in business and enterprise development. Whether you're delivering a project update, sending alerts, or automating reporting workflows, reliable email functionality is essential.
In this article, we’ll walk through how to send emails in C# using Spire.Email for .NET, a powerful component that simplifies SMTP communication and email formatting. We'll explore SMTP configuration, Gmail integration, HTML and plain-text content, file attachments, and multiple recipients.
Table of Contents
- 1. Project Setup
- 2. Send a Plain-Text Email via SMTP
- 3. Send HTML Email with Attachments via Gmail SMTP
- 4. Advanced Email Features with Spire.Email
- 5. Common Errors and Troubleshooting
- 6. Use Cases for Spire.Email
- 7. Free License
- 8. FAQ
1. Project Setup
To begin, create a .NET project (Console App or ASP.NET) and add the Spire.Email for .NET package.
Install via NuGet:
Install-Package Spire.Email
Or manually download the Spire.Email package and reference the Spire.Email.dll from your local installation package.
2. Send a Basic Email via SMTP in C#
The example below shows how to use Spire.Email to send a plain-text email through an SMTP server.
using Spire.Email;
using Spire.Email.Smtp;
// Configure the SMTP client
SmtpClient smtp = new SmtpClient();
smtp.Host = "smtp.example.com";
smtp.Port = 587;
smtp.Username = "your@example.com";
smtp.Password = "your_password";
smtp.ConnectionProtocols = ConnectionProtocols.StartTls;
// Create maill addresses
MailAddress sender = new MailAddress("your@example.com", "Sender Name");
MailAddress recipient = new MailAddress("recipient@example.com", "Recipient Name");
MailMessage message = new MailMessage(sender, recipient);
// Set the email content
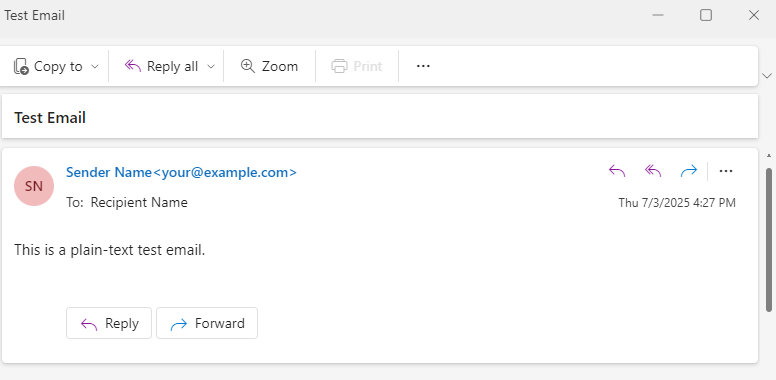
message.Subject = "Test Email";
message.BodyText = "This is a plain-text test email.";
// Send the email
smtp.SendOne(message);
Explanation:
- Uses MailAddress and MailMessage from Spire.Email
- Establishes a secure SMTP connection using ConnectionProtocols.StartTls
The screenshot below shows the actual email received using the above SMTP code.
3. Send HTML Email with Attachments via Gmail SMTP in C#
The following C# code example demonstrates how to send an HTML-formatted email using Gmail SMTP, including multiple recipients, a file attachment, and plain-text fallback for clients that do not support HTML.
using Spire.Email;
using Spire.Email.Smtp;

// Create MailAddress objects
MailAddress from = new MailAddress("your@gmail.com", "Your Name");
MailAddress to1 = new MailAddress("user1@example.com", "User One");
MailAddress to2 = new MailAddress("user2@example.com", "User Two");

// Create a mail message
MailMessage message = new MailMessage(from, to1);
message.To.Add(to2);
message.Cc.Add(new MailAddress("cc@example.com", "CC Person"));
message.Bcc.Add(new MailAddress("bcc@example.com"));

// Set the body HTML and text for the message
message.Subject = "Monthly Report - June 2025";
message.BodyHtml = "<h2 style='color:#2E86C1;'>Report Summary</h2><p>Please see the attached PDF report.</p>";
message.BodyText = "Report Summary - please see the attached PDF.";

// Add an attachment to the email
Attachment attachment = new Attachment(@"Sample.pdf");
message.Attachments.Add(attachment);

// Configure the SMTP client
SmtpClient smtp = new SmtpClient();
smtp.Host = "smtp.gmail.com";
smtp.Port = 587;
smtp.Username = "your@gmail.com";
smtp.Password = "your_app_password";
smtp.ConnectionProtocols = ConnectionProtocols.StartTls;

// Sen the email
smtp.SendOne(message);
Explanation:
- Uses MailAddress, MailMessage, Attachment, and SmtpClient from Spire.Email
- Combines BodyHtml and BodyText to support HTML and plain-text email clients
- Adds multiple recipients via To.Add(), Cc.Add(), and Bcc.Add()
- Sends email securely through Gmail using ConnectionProtocols.StartTls
Gmail requires App Passwords if 2FA is enabled.
The following screenshot shows the HTML-formatted email with rich text, CC and BCC recipients, and a PDF attachment, as received from Gmail SMTP.

Related article: How to Send an Email with Attachments in C#
4. Advanced Email Features with Spire.Email
This section demonstrates advanced C# email-sending capabilities using Spire.Email, including embedded images and batch dispatch.
// Prepare an email with embedded image
MailMessage message = new MailMessage(
    new MailAddress("your@domain.com", "Sender"),
    new MailAddress("client@domain.com", "Client"));

message.Subject = "Branding Update";
message.BodyHtml = "<h1>Our New Logo</h1><img src=\"cid:logo\">";
message.BodyText = "Please view this message in HTML to see the image.";

Attachment logo = new Attachment(@"C:\Images\logo.png");
logo.ContentId = "logo";
logo.DispositionType = "Inline";
message.Attachments.Add(logo);

// Prepare a second email
MailMessage message2 = new MailMessage(
    new MailAddress("your@domain.com"),
    new MailAddress("sales@domain.com"));
message2.Subject = "Weekly Summary";
message2.BodyText = "This is an automated weekly update.";

// Create SMTP client
SmtpClient smtp = new SmtpClient();
smtp.Host = "smtp.domain.com";
smtp.Port = 587;
smtp.Username = "your@domain.com";
smtp.Password = "your_password";
smtp.ConnectionProtocols = ConnectionProtocols.StartTls;

// Send one email
smtp.SendOne(message);

// Send emails in batch
smtp.SendSome(new List<MailMessage> { message, message2 });
Explanation:
Attachment.ContentIdandDispositionType = "Inline"allow inline images using CID references in HTML.SendOne()sends a single message.SendSome()sends multiple messages as a batch. Ideal for scheduled reports or group notifications.
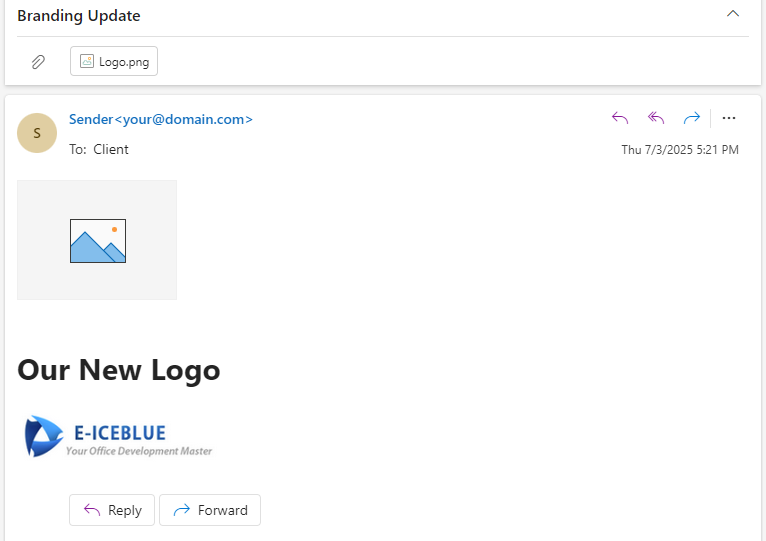
The following screenshot shows an email with an embedded company logo and a plain-text fallback, demonstrating how Spire.Email renders HTML content with inline images.
You may also like: Creating MSG Files with RTF Body and Attachments Using C#
5. Common Errors and Troubleshooting
| Error | Likely Cause |
|---|---|
| Authentication failed | Incorrect credentials or missing app password |
| Secure connection required | Use StartTLS or SSL in ConnectionProtocols |
| HTML content not displaying | Ensure BodyHtml and fallback BodyText are set |
| File not found | Incorrect file path for attachment |
6. Use Cases for Spire.Email
Spire.Email for .NET is suitable for:
- Daily/weekly automated reporting
- User signup and notification emails
- Order confirmations with attachments
- Form submission alerts
- Embedded-image newsletters
Its clean API removes the need to manually handle SMTP headers, MIME formatting, and encoding issues.
Conclusion
With Spire.Email for .NET, developers can quickly build robust and flexible email-sending features directly into C# applications. Whether the goal is to deliver transactional messages, generate styled reports, or dispatch scheduled newsletters, this component provides a clean, reliable API that simplifies every step of the process.
By supporting plain-text and HTML formats, attachments, Gmail SMTP, embedded images, and batch sending, Spire.Email helps streamline email integration without the overhead of external dependencies.
7. Apply for a Free Temporary License
To remove the evaluation warning in the email body or attachment footer, you can apply for a free temporary license:
Request a Free 1-Month License
Simply fill out the form and follow the instructions to apply the license in your project. This enables full feature access during evaluation.
8. FAQ
How to send HTML email in C#?
You can set the BodyHtml property of the MailMessage object to send an HTML email using Spire.Email. You can also include BodyText as a fallback for clients that don't support HTML.
How to send email to multiple recipients in C#?
Add multiple recipients using message.To.Add(), message.Cc.Add(), and message.Bcc.Add() methods. Spire.Email supports To, Cc, and Bcc fields.
How to use SMTP to send email in ASP.NET or MVC projects?
The SMTP usage in ASP.NET or MVC is the same as in Console applications. Simply configure the SmtpClient with host, port, credentials, and use the same SendOne() or SendSome() methods to dispatch your message.
How to Read Barcodes in Python: From Image Files or Bytes

Modern business systems, from retail checkout lanes to warehouse inventory tracking, rely heavily on barcode scanning, and Python-based solutions have become a popular choice due to their versatility and ease of use. In this article, we’ll explore how to read barcodes in Python using the Spire.Barcode for Python library, covering setup, scanning from image files or bytes, and customization options for improved accuracy.
Table of Contents:
- Python Library for Reading Barcodes
- Integrate Spire.Barcode into Your Python Application
- Read a Barcode from an Image File
- Read Multiple Barcodes from an Image File
- Read Barcodes from Image Bytes
- Adjust Barcode Recognition Settings
- Conclusion
- FAQs
Python Library for Reading Barcodes
Spire.Barcode for Python is a powerful library specifically crafted for creating and reading barcodes in Python applications. The library supports a variety of barcode formats, including:
- 1D Barcodes : Such as Code 128, Code 39, EAN-13, and UPC-A.
- 2D Barcodes : Including QR Code, DataMatrix, and PDF417.
Notable Features of Spire.Barcode
- Format Support : Capable of reading barcodes from various image formats, including PNG, JPG, BMP, GIF, and TIFF.
- Batch Scanning : Enables the detection of multiple barcodes within a single image file.
- Recognition Accuracy : Utilizes advanced algorithms to deliver reliable barcode detection.
- Customization : Allows users to specify barcode types and enable checksum verification for enhanced recognition efficiency.
This library provides the capability to read barcodes from both image files and bytes, along with extensive customization options to meet diverse requirements.
Integrate Spire.Barcode into Your Python Application
To get started with Spire.Barcode, you first need to install the library. You can do this via pip. Open your terminal and run:
pip install spire.barcode
Once you have installed the library, you will need a license key to unlock its full capabilities. You can obtain a trial license from our website. and set up the library in your Python script:
from spire.barcode import *

License.SetLicenseKey("your license key")
Now that you have the library in place, you can begin reading barcodes using Python.
Read a Barcode from an Image File in Python
Reading a single barcode from an image file is straightforward with Spire.Barcode. Here's how you can do it:
from spire.barcode import *

# Apply license key to unlock full capabilities
License.SetLicenseKey("your license key")

# Read barcode from an image file
result = BarcodeScanner.ScanOneFile("C:/Users/Administrator/Desktop/qr_code.png")

# Print the result
print(result)
Explanation
- License.SetLicenseKey() : Initializes the library with your license key.
- BarcodeScanner.ScanOneFile() : Reads a single barcode from the specified image file.
- The result is printed to the console, displaying the barcode's data.
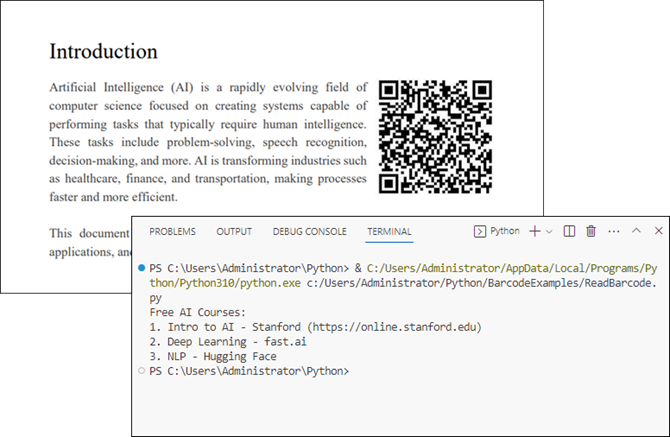
Output:
Read Multiple Barcodes from an Image File in Python
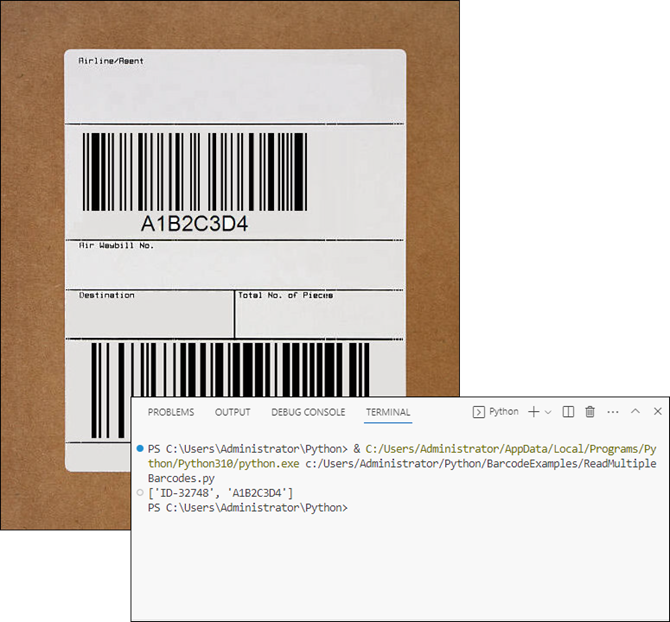
If you need to read multiple barcodes from a single image file, Spire.Barcode makes this easy as well. Here’s an example:
from spire.barcode import *

# Apply license key to unlock full capabilities
License.SetLicenseKey("your license key")

# Read multiple barcodes from stream
results = BarcodeScanner.ScanFile("C:/Users/Administrator/Desktop/barcodes.jpg")

# Print results
print(results)
Explanation
- BarcodeScanner.ScanFile() : Scans the entire image for multiple barcodes.
- The results are stored as a list. Each element in the list contains the data from a detected barcode.
Output:
Read Barcodes from Image Bytes in Python
In addition to reading barcodes directly from files, Spire.Barcode for Python supports decoding barcodes from in-memory image bytes . This approach is useful when working with dynamically loaded images (e.g., from APIs, databases, or user uploads).
Here’s how to do it:
from spire.barcode import *

# Apply license key to unlock full capabilities
License.SetLicenseKey("your license key")

# Read an image file into bytes
image_path = "C:/Users/Administrator/Desktop/barcodes.jpg"
with open(image_path, "rb") as file:
    image_bytes = file.read()

# Wrap bytes in Spire.Barcode's Stream object
stream = Stream(image_bytes)

# Read one barcode from stream
# result = BarcodeScanner.ScanOneStream(stream)

# Read multiple barcodes from stream
results = BarcodeScanner.ScanStream(stream)

# Print results
print(results)
Explanation
- image_bytes: Raw binary data read from an image file (e.g., PNG, JPG) or other sources like APIs or databases.
- Stream (Spire.Barcode class): Converts image_bytes into an in-memory stream compatible with Spire.Barcode’s scanner.
- BarcodeScanner.ScanStream() : Scans the stream for barcodes and returns a list of detected barcodes.
Adjust Barcode Recognition Settings
The BarcodeScanner class provides various methods to customize barcode recognition settings. This can help improve detection accuracy and efficiency. Some of the key methods include:
- ScanOneFileBarCodeTypeIncludeCheckSum(fileName: str, barcodeType: BarCodeType, IncludeCheckSum: bool)
- ScanFileBarCodeTypeIncludeCheckSum(fileName: str, barcodeType: BarCodeType, IncludeCheckSum: bool)
- ScanOneStreamBarCodeTypeIncludeCheckSum(stream: Stream, barcodeType: BarCodeType, IncludeCheckSum: bool)
- ScanStreamBarCodeTypeIncludeCheckSum(stream: Stream, barcodeType: BarCodeType, IncludeCheckSum: bool)
Here’s an example of how to specify a barcode type and include checksum verification:
from spire.barcode import *

# Apply license key to unlock full capabilities
License.SetLicenseKey("your license key")

# Specify the barcode type (e.g., EAN13)
barcode_type = BarCodeType.EAN13

# Read a barcode from an image file with checksum included
result = BarcodeScanner.ScanOneFileBarCodeTypeIncludeCheckSum("C:/Users/Administrator/Desktop/EAN_13.png", barcode_type, True)

# Print the result
print(result)
Explanation
- BarcodeType : Specifies the type of barcode you want to scan.
- IncludeCheckSum (bool): Determines whether to verify the checksum during scanning. Setting it to True can help catch errors in data.
Conclusion
In this article, we explored how to read barcodes in Python using the Spire.Barcode library. We covered the setup process, reading single and multiple barcodes from image files, and reading from image bytes. Additionally, we discussed how to customize barcode detection settings for improved accuracy. With these tools at your disposal, you can easily integrate barcode scanning capabilities into your Python applications.
FAQs
Q1: What types of barcodes can I read with Spire.Barcode?
Spire.Barcode supports a wide range of barcode formats, including QR codes, UPC, EAN, Code 128, Code 39, and many others.
Q2: Do I need a license to use Spire.Barcode?
Yes, a license key is required to unlock the full functionality of the library. You can obtain a free 30-day trial license from our website.
Q3: Can I read barcodes from a webcam using Spire.Barcode?
While Spire.Barcode does not directly support webcam input, you can capture images from a webcam and then read barcodes from those images using the library.
Q4: How can I improve barcode scanning accuracy?
You can improve accuracy by specifying the barcode type and enabling checksum verification during scanning. Additionally, ensure that the images are clear and well-lit.
Q5. Can I generate barcodes using Spire.Barcode for Python?
Yes, Spire.Barcode supports both barcode recognition and generation. For detailed instructions, check out this tutorial: How to Generate Barcodes in Python: A Step-by-Step Guide.
How to Read QR Code in C# – From Image or Stream

QR codes have become a common part of modern applications — from user authentication and digital payments to product packaging and event tickets. In many of these scenarios, developers often need to read QR codes in C# as part of their workflow, especially when working with image-based inputs like scanned documents or uploaded files.
To handle such tasks reliably, a decoding method that’s both accurate and easy to implement is essential. In this tutorial, we’ll walk through a straightforward approach to reading QR codes from images using C#, with minimal setup and clean integration.
Quick Navigation
- Project Setup
- Read QR Code from Image Using C#
- Read QR Code from Stream Using C#
- Improve Accuracy and Handle Errors
- Bonus: Get QR Code Coordinates
- FAQ
- Final Thoughts
1. Project Setup
To begin, we’ll use a .NET barcode library that supports QR code decoding. In this guide, we demonstrate with Spire.Barcode for .NET, which provides a simple API for reading QR codes from image files and streams.
1.1 Install the Library via NuGet
You can install the library through NuGet Package Manager:
Install-Package Spire.Barcode
For basic scenarios, you can also use Free Spire.Barcode for .NET:
Install-Package FreeSpire.Barcode
1.2 Create a New Console Project
For demonstration, create a C# Console App in Visual Studio:
- Target .NET Framework, .NET Core/.NET 6+, ASP.NET, or Xamarin for cross-platform mobile development
- Add reference to Spire.Barcode.dll (if not using NuGet)
2. Read QR Code from Image in C#
To read QR codes from an image file in C#, you can simply use the static BarcodeScanner.Scan() method provided by the library. This method takes an image path and the BarCodeType as input and returns all decoded results that match the specified barcode type — in this case, QR codes.
This method supports scanning images in formats like JPG, PNG, and EMF. It’s the most direct way to scan QR code data in desktop applications or backend services that receive uploaded files.
2.1 Sample Code: Decode QR Code from an Image File
using Spire.Barcode;

class Program
{
    static void Main(string[] args)
    {
        // Load the QR code image
        string imagePath = @"C:\qr-code.png";

        // Barcode scanner reads QR code from image file
        string[] results = BarcodeScanner.Scan(imagePath, BarCodeType.QRCode);

        // Display QR code result(s)
        foreach (string result in results)
        {
            Console.WriteLine("QR Code Data: " + result + "\n");
        }
    }
}
The QR code image and the scan results from C# code:
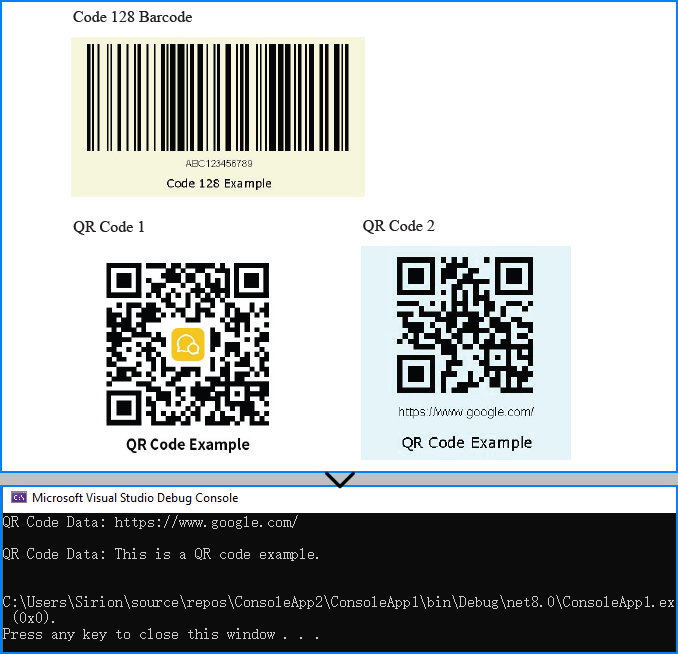
2.2 Explanation
- Scan() reads and decodes all barcodes found in the image.
- BarCodeType.QRCode ensures only QR codes are detected (you can change it to detect other types).
- Returns an array in case the image contains multiple QR codes.
You may also like: How to Generate QR Codes Using C#
3. Read QR Code from Stream in C#
In web APIs or modern applications where images are processed in memory, you’ll often deal with Stream objects—such as when handling file uploads or reading from cloud storage.
The BarcodeScanner.Scan() method also accepts a Stream directly, allowing you to decode QR codes from memory streams without converting them to Bitmap.
using Spire.Barcode;
using System.IO;

class Program
{
    static void Main(string[] args)
    {
        using (FileStream fs = new FileStream(@"C:\qr-code.png", FileMode.Open, FileAccess.Read))
        {
            // Directly scan the QR codes from the image stream
            string[] results = BarcodeScanner.Scan(fs, BarCodeType.QRCode, false);
            foreach (string result in results)
            {
                Console.WriteLine("QR Code Data: " + result);
            }
        }
    }
}
This method is useful for WPF or ASP.NET Core apps that handle QR code images in memory.
Related article: Scan Barcodes from PDF Using C#
4. Improve Accuracy and Handle Errors
In real-world scenarios, QR code recognition may occasionally fail due to image quality or unexpected input issues. Here are best practices to improve decoding accuracy and handle failures in C#:
4.1 Boost Recognition Accuracy
- Use high-resolution images. Avoid blurred or overcompressed files.
- Ensure quiet zone (white space) around the QR code is preserved.
- Use formats like PNG for better clarity.
- Avoid perspective distortion — use straight, scanned images.
4.2 Add Robust Error Handling
Wrap your decoding logic in a try-catch block to prevent crashes and inform the user clearly:
try
{
    string[] results = BarcodeScanner.Scan(imagePath, BarCodeType.QRCode);

    if (results.Length == 0)
    {
        Console.WriteLine("No QR code found.");
    }
    else
    {
        Console.WriteLine("QR Code: " + results[0]);
    }
}
catch (Exception ex)
{
    Console.WriteLine("Error decoding QR code: " + ex.Message);
}
5. Bonus: Get QR Code Coordinates
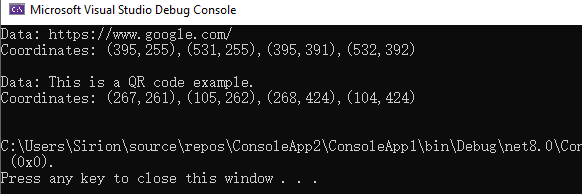
Sometimes, you may need to locate the QR code’s exact position in the image—for cropping, overlay, or annotation. The ScanInfo() method helps retrieve bounding boxes:
BarcodeInfo[] results = BarcodeScanner.ScanInfo(imagePath, BarCodeType.QRCode);
foreach (BarcodeInfo result in results)
{
    Console.WriteLine("Data: " + result.DataString);
    Console.WriteLine($"Coordinates: " + string.Join(",", result.Vertexes.Select(p => $"({p.X},{p.Y})")) + "\n");
}
This provides both the data and the coordinates of each detected QR code.
The reading results:
6. FAQ
How to read QR code in C#?
You can use the Spire.Barcode for .NET library and its BarcodeScanner.Scan() method to read QR codes from image files or memory streams in just a few lines of code.
How do I read my own QR code image?
Load your QR code image file path into the scanner, or open it as a stream if you're working in a web or WPF application. The scanner will decode all readable QR codes in the image.
How to read barcodes in C# (not just QR codes)?
You can simply pass the image path to the Scan() method, and it will automatically detect and read all supported barcode types. To restrict detection to a specific type (e.g., only QR codes or Code128), pass the corresponding BarCodeType as the second parameter.
What is the best barcode reader library for C#?
Spire.Barcode for .NET is a popular choice for its simplicity, format support, and clean API. It supports both free and commercial use cases.
7. Final Thoughts
Reading QR codes in C# can be implemented with just a few lines of code using Spire.Barcode for .NET. It supports image and stream-based decoding, works well for desktop, server-side, or WPF applications, and offers solid performance with minimal setup.
You can further explore QR code generation, document integration, and real-time scanning workflows based on this foundation.
Need to unlock full barcode reading features?
Request a free temporary license and try the full capabilities of Spire.Barcode for .NET without limitations.
How to Read Barcodes in Java Using Spire.Bacode

Barcodes are widely used in various industries for inventory management, retail, logistics, and more. Reading barcodes efficiently is crucial for automating data entry and improving accuracy. In Java, one of the most reliable libraries for barcode recognition is Spire.Barcode for Java. This article provides a comprehensive guide on how to read barcode in Java using this powerful library.
Table of Contents
- Introduction to Spire.Barcode for Java
- Key Features of Spire.Barcode
- Setting Up Spire.Barcode in Your Java Project
- Reading a Single Barcode from an Image File
- Reading Multiple Barcodes from One Image
- Customizing Barcode Recognition Settings
- Conclusion
- FAQs
Introduction to Spire.Barcode for Java
Spire.Barcode for Java is a robust library designed to generate and read barcodes in Java applications. It supports a wide range of barcode symbologies, including:
- 1D Barcodes : Code 128, Code 39, EAN-13, UPC-A, etc.
- 2D Barcodes : QR Code, DataMatrix, PDF417, etc.
Spire.Barcode provides fast and precise barcode recognition in Java, whether scanning from a dedicated barcode image or a complex image containing additional elements.
Key Features of Spire.Barcode
Before diving into implementation, let’s explore some key features of Spire.Barcode:
- Multi-Format Support : Read barcodes from PNG, JPG, BMP, GIF, and TIFF images.
- Batch Processing : Scan multiple barcodes in a single image.
- High Recognition Accuracy : Advanced algorithms ensure reliable barcode detection.
- Customizable Settings : Adjust scan regions and barcode types for optimized recognition.
- Cross-Platform Compatibility : Works seamlessly on Windows, Linux, and macOS.
These features make Spire.Barcode an excellent choice for enterprise-level barcode processing.
Setting Up Spire.Barcode in Your Java Project
To start reading barcodes in Java, you need to integrate Spire.Barcode into your project. Follow these steps:
Step 1: Install the Library
If you're using Maven, you can easily integrate Spire.Barcode by adding the following dependency to your pom.xml file:
<repositories>
    <repository>
        <id>com.e-iceblue</id>
        <name>e-iceblue</name>
        <url>https://repo.e-iceblue.com/nexus/content/groups/public/</url>
    </repository>
</repositories>
<dependency>
    <groupId>e-iceblue</groupId>
    <artifactId>spire.barcode</artifactId>
    <version>5.1.11</version>
</dependency>
For manual setup, download Spire.Barcode for Java from our website and add the downloaded .jar file to your project’s build path.
Step 2: Get a Temporary License
Spire.Barcode requires a license to read certain barcode types. To unlock full barcode recognition capabilities, get a free 30-day trial license. After receiving the license file, apply it using this code:
LicenseProvider.setLicenseKey("your license key");
Now, you're ready to read barcode in Java using Spire.Barcode.
Reading a Single Barcode from an Image File
Reading one barcode from an image is a fundamental scenario, and Spire.Barcode facilitates this with just a few lines of code.
Here’s a step-by-step example:
import com.spire.barcode.BarcodeScanner;
import com.spire.barcode.license.LicenseProvider;
import javax.imageio.ImageIO;
import java.awt.image.BufferedImage;
import java.io.File;
import java.io.IOException;
public class ReadBarcode {
public static void main(String[] args) throws IOException {
// Apply license key to remove restrictions on barcode types
LicenseProvider.setLicenseKey("your license key");
// Load the image file containing the barcode
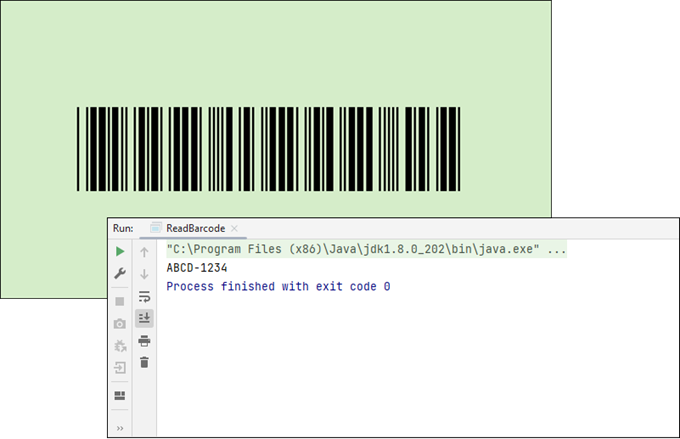
BufferedImage bufferedImage = ImageIO.read(new File("C:\\Users\\Administrator\\Desktop\\barcode.jpg "));
// Scan the barcode from the loaded image
String result = BarcodeScanner.scanOne(bufferedImage);
// Output the scanned barcode result
System.out.print(result);
}
}
Explanation
- ImageIO.read() loads the image file, supporting extensions such as .png, .jpeg, .bmp, or .gif.
- BarcodeScanner.scanOne() detects and decodes the barcode from the image.
- The decoded result is stored in a String .
Note
The scanOne() method and the scan() method, which will be discussed later, can accept not only a BufferedImage as a parameter but also an InputStream and a String representing the image file path. Whether you're processing images from disk, user uploads, or real-time streams, this flexibility simplifies integration into diverse workflows.
Output:
Reading Multiple Barcodes from One Image
Spire.Barcode can detect and decode multiple barcodes in a single image. Here’s how:
import com.spire.barcode.BarcodeScanner;
import com.spire.barcode.license.LicenseProvider;

import javax.imageio.ImageIO;
import java.awt.image.BufferedImage;
import java.io.File;
import java.io.IOException;
import java.util.Arrays;

public class ReadMultipleBarcodes {

    public static void main(String[] args) throws IOException {

        // Apply license key to remove restrictions on barcode types
        LicenseProvider.setLicenseKey("your license key");

        // Load the image file containing the barcode
        BufferedImage bufferedImage = ImageIO.read(new File("C:\\Users\\Administrator\\Desktop\\barcodes.jpg"));

        // Scan the barcode from the loaded image
        String[] results = BarcodeScanner.scan(bufferedImage);

        // Output the results
        System.out.println(Arrays.toString(results));
    }
}
Explanation
- BarcodeScanner.scan() identifies and decodes all the barcodes present in the image.
- The results are stored in a String array .
Output:

Customizing Barcode Recognition Settings
For improved accuracy, Spire.Barcode allows you to customize scan settings, such as defining a scan region or specifying a particular barcode type. This enhanced approach ensures you have the flexibility and control needed for effective barcode scanning in Java.
Here is an example:
import com.spire.barcode.BarCodeType;
import com.spire.barcode.BarcodeScanner;
import com.spire.barcode.license.LicenseProvider;
import javax.imageio.ImageIO;
import java.awt.*;
import java.awt.image.BufferedImage;
import java.io.File;
import java.io.IOException;
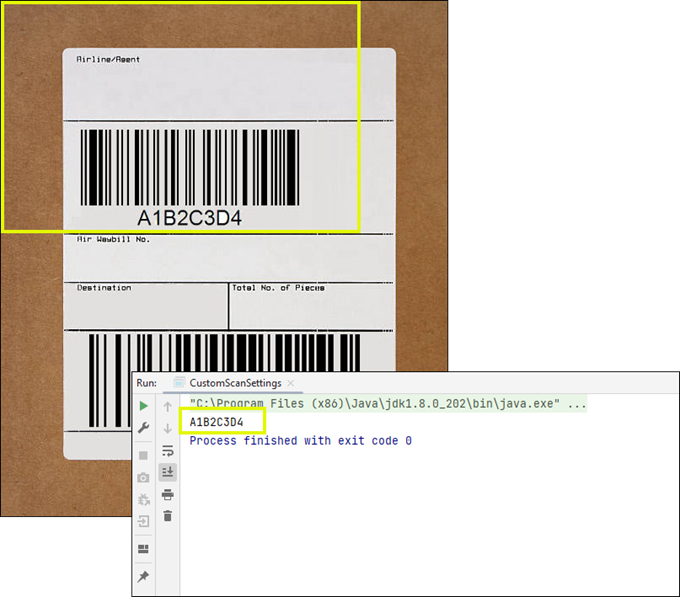
public class CustomScanSettings {
public static void main(String[] args) throws IOException {
// Apply license key to remove restrictions on barcode types
LicenseProvider.setLicenseKey("your license key");
// Load the image file containing the barcode
BufferedImage bufferedImage = ImageIO.read(new File("C:\\Users\\Administrator\\Desktop\\barcodes.jpg"));
// Define a rectangle area for barcode recognition
Rectangle rectangle = new Rectangle(0,0,380,270);
// Scan the barcode from the loaded image
String[] results = BarcodeScanner.scan(bufferedImage, rectangle, BarCodeType.Code_93);
// Output the first result
System.out.print(results[0]);
}
}
Explanation
- Rectangle() defines a specific area within the image for barcode recognition.
- BarCodeType enumeration allows you to specify the barcode type for more accurate detection.
Output:
Conclusion
In this article, we've explored the essential steps to set up Spire.Barcode in your Java project, read barcodes from images , handle multiple barcodes , and customize recognition settings for optimal accuracy. By leveraging these capabilities, developers can seamlessly integrate barcode scanning into their applications, improving data entry automation and reducing errors.
With Spire.Barcode, you have a reliable tool at your disposal to meet your barcode reading needs, paving the way for more efficient business operations.
FAQs
Q1. What types of barcodes can Spire.Barcode read?
Spire.Barcode supports 38+ barcode types, including both 1D barcodes like Code 128, Code 39, EAN-13, and UPC-A, as well as 2D barcodes such as QR Code, DataMatrix, and PDF417.
Q2. Can I customize the barcode scanning region?
Yes, Spire.Barcode allows you to define a specific scan area within the image by using a Rectangle object. This feature helps improve accuracy by focusing on a designated section of the image.
Q3. Can Spire.Barcode read multiple barcodes from a single image?
Yes! Using BarcodeScanner.scan(), you can detect and decode multiple barcodes in one image efficiently.
Q4. Is a license required to use Spire.Barcode for barcode recognition?
A commercial license is needed for full functionality, but you can get a free 30-day trial license to test all features before purchasing.
Q5. Can I use Spire.Barcode for Java to create barcodes?
Yes, Spire.Barcode supports generating over 38 commonly used 1D and 2D barcodes. For more information, check out: How to Create Barcode in Java