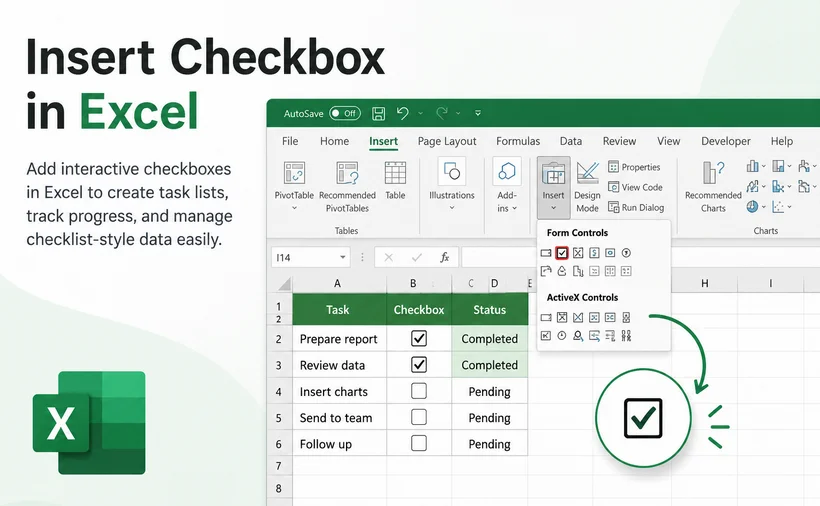
Checkboxes are one of Excel’s most powerful built-in features. They turn ordinary spreadsheets into interactive tools that respond to user input with a single click. Whether you’re building a dynamic to-do list, designing an interactive dashboard, or conducting inventory audits, creating a checkbox in Excel delivers a clear, intuitive visual way to capture binary choices — Yes/No, True/False, Complete/Incomplete.
This guide fully covers how to add checkboxes in Excel across all use cases: from straightforward manual insertion methods to advanced programmatic creation with Python, along with critical steps to link checkboxes to underlying cell data and leverage them to power dynamic conditional formatting rules.
- Why Use Checkboxes in Excel?
- Prerequisite: Enable the Developer Tab
- Method 1: Add a Checkbox in Microsoft Excel
- Method 2: Insert Checkbox in Excel with Python
- Practical Example: Build an Interactive To-Do List
- Frequently Asked Questions (FAQs)
Why Use Checkboxes in Excel?
Checkboxes do more than just look nice. They introduce interactivity and logic into your spreadsheets. Below are the core benefits and common use cases:
- Task Management: Mark tasks as "Complete" with a single click for intuitive progress tracking.
- Simplified Data Entry: Reduce typing errors and speed up form completion with one-click selection.
- Interactive Decision Tools: Build dynamic calculators and dashboards where user selections trigger different calculated results.
- Audit & Inventory: Quickly mark off items during physical inventory checks or review workflows.
Prerequisite: Enable the Developer Tab
The checkbox feature lives on the Developer tab, which is hidden by default in Excel. Here's how to show it:
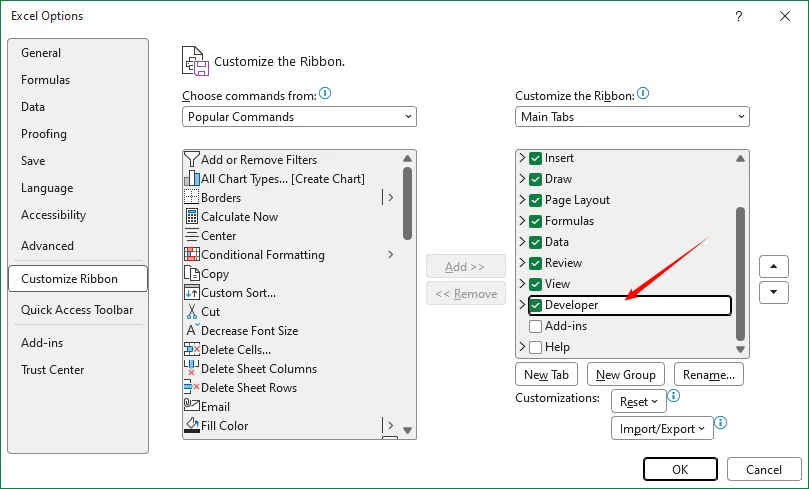
- Click “File” > “Options”.
- In the “Excel Options” dialog box, click “Customize Ribbon”.
- Under the "Main Tabs" list on the right side, check the box for “Developer”.
- Click “OK”.
The Developer tab will now appear on your ribbon, giving you access to form controls, ActiveX controls, and VBA tools.
Method 1: Insert a Checkbox in Microsoft Excel
When inserting a checkbox manually, Excel offers two distinct control types: Form Control and ActiveX Control. Choosing the right one is critical for performance, compatibility, and functionality. Below is a comprehensive comparison.
| Aspect | Form Control Checkbox | ActiveX Control Checkbox |
|---|---|---|
| Compatibility | Windows + Mac | Windows only |
| Customization | Basic text and size only | Full control over font, color, effects and behavior |
| Complexity | Simple, no coding required | Advanced, requires Design Mode |
| Security | No macro requirements | May trigger macro security prompts |
| Ease of Use | Drag, drop, and link—very simple | Requires Design Mode to edit; more complex |
| Recommendation | Default choice for most users | Only for specialized Windows dashboards |
Option A: Using Form Controls
Form Control checkboxes are the simplest, most stable option for most users. They work on both Windows and Mac, and are compatible with all modern Excel versions.
Step 1: Make a checkbox in Excel
- Go to the “Developer” tab on the ribbon.
- In the “Controls” group, click “Insert”.
- Under “Form Controls”, select the “Check Box icon” (it looks like a small square with a checkmark).
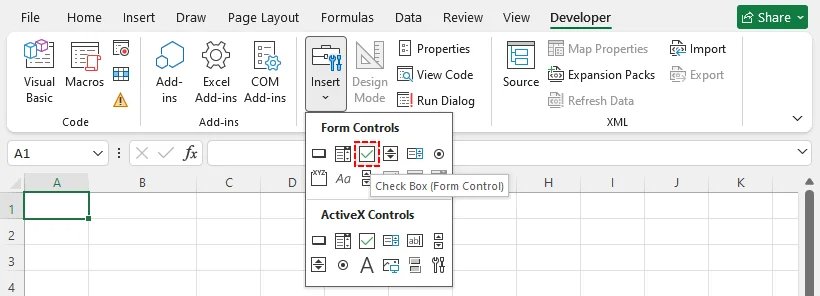
- Click anywhere on your worksheet to place the checkbox, or click and drag to set a specific size.
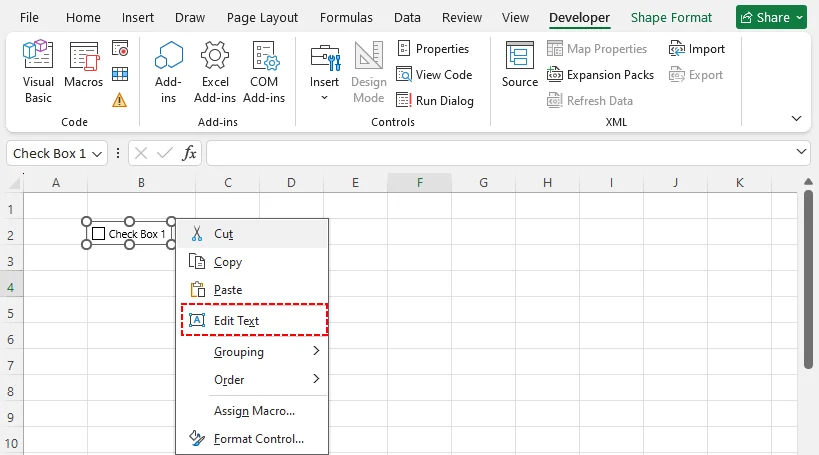
- Right-click the checkbox and select “Edit Text” to rename it from "Check Box 1" to something meaningful like "Completed" or "Approved".
Step 2: Link the checkbox to a cell (Essential)
By default, a checkbox is just a visual object. To use it for formulas or data analysis, you must link it to a cell.
- Right-click the checkbox and select “Format Control”.
- In the “Control” tab, click inside the “Cell link” box.
- Select the cell where you want the TRUE/FALSE result to appear (e.g., cell C2).
- Click “OK”.
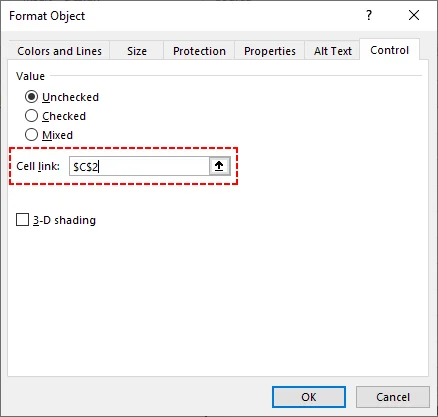
Now, when you check or uncheck the box, the linked cell will automatically update between TRUE (checked) and FALSE (unchecked). You can reference this cell in IF, COUNTIF, SUMIF, conditional formatting rules, and even dynamic sort data to reorder your data based on the checkbox status automatically.
Option B: Using ActiveX Controls
ActiveX checkboxes offer more customization options (fonts, colors, special effects) but are more advanced and only work on Windows. They also require enabling macros in some security settings.
- Go to “Developer” > “Insert”.
- Under “ActiveX Controls”, click the “Check Box icon”.
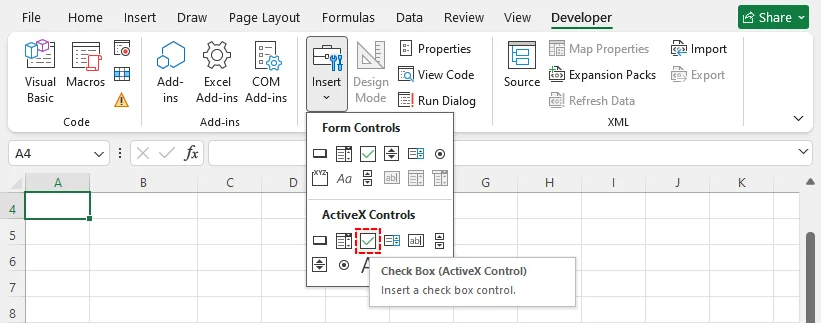
- Draw the checkbox on your worksheet.
- Click “Design Mode” on the Developer tab to edit the checkbox properties.
- Right-click the checkbox and select “Properties” to customize appearance, font, and linked cell.
- Click “Design Mode” again to exit editing and use the checkbox.
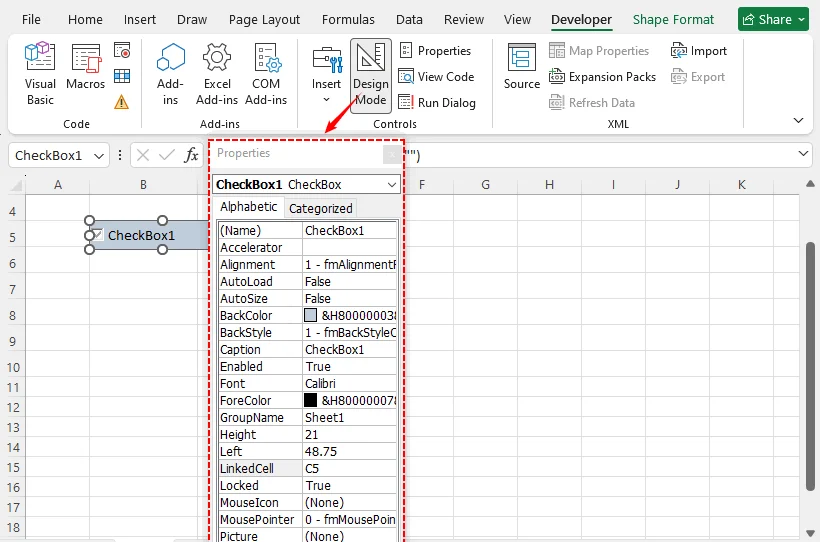
Tip: Use ActiveX controls only when you need advanced styling. For most everyday tasks, Form Controls are simpler and more reliable.
Checkboxes work perfectly for marking task status and multiple selections; when you need users to pick one value from a predefined set instead, creating a drop-down list in Excel is the next logical skill to master.
Method 2: Insert Checkbox in Excel with Python
For advanced users, data analysts, or anyone needing to insert hundreds of checkboxes across multiple sheets, manual insertion is inefficient. You can insert checkbox in Excel programmatically using the Free Spire.XLS for Python library.
Install the Library First
Open your terminal or command prompt and run:
pip install Spire.Xls.Free
Full Python Code Example to Add Checkbox
from spire.xls import *
from spire.xls.common import *

# Create a workbook and get the first worksheet
workbook = Workbook()
sheet = workbook.Worksheets[0]

# Define control dimensions (in points)
control_height = 20
control_width = 120

# Add a checkbox at row 3, column 2 (1 based)
checkbox = sheet.CheckBoxes.AddCheckBox(3, 2, control_height, control_width)

# Set its label and default state
checkbox.Text = "Confirm option"
checkbox.CheckState = CheckState.Checked

# (Optional) Link the checkbox state to cell D3
# The linked cell will show TRUE if checked, FALSE if unchecked
checkbox.LinkedCell = sheet.Range["D3"]

# Save the workbook
workbook.SaveToFile("CheckboxExample.xlsx")
workbook.Dispose()
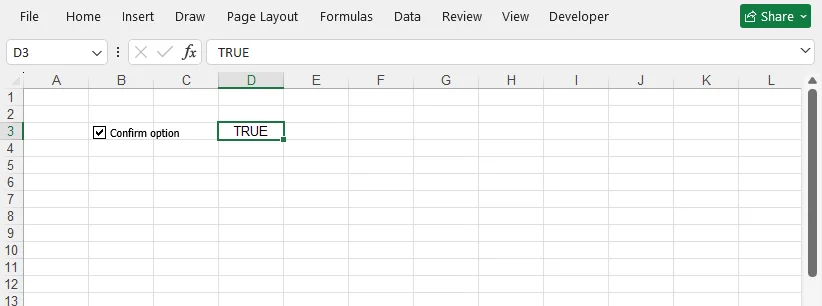
This code allows you to define exact positions, set default states, and link cells automatically. You can wrap this snippet inside a loop to create bulk checkboxes across multiple rows for automated form generation.
Result:
Why Use This Method?
- Speed – hundreds of checkboxes in seconds.
- Reproducibility – the same workbook can be generated every time with perfect consistency.
- Integration – you can embed this script in data pipelines, ETL processes, or web applications that produce Excel reports.
- No Excel dependency – runs on servers without Excel installed, great for cloud or automated batch jobs.
Practical Example: Build an Interactive To-Do List
Combine Form Control checkboxes with conditional formatting to create a self-updating task list that automatically styles completed items.
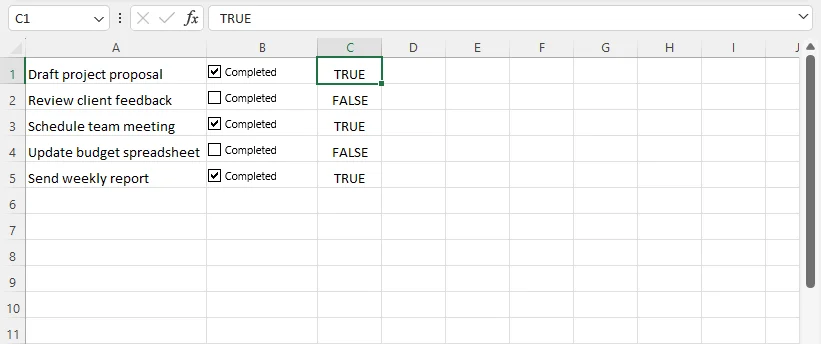
- List all tasks in Column A.
- Insert a Form Control checkbox in Column B next to the first task. Drag the fill handle vertically to duplicate checkboxes down the column.
- Link each checkbox to cells in Column C.
- Select all rows in your task list.
- Go to “Home” > “Conditional Formatting” > “New Rule”.
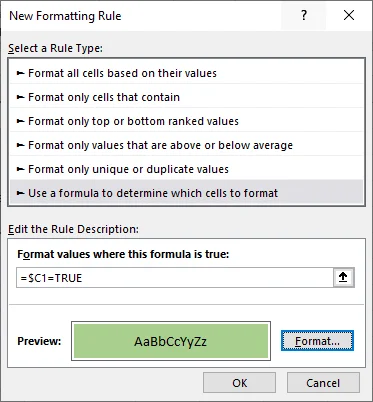
- Choose “Use a formula to determine which cells to format”.
- Enter a formula referencing your linked cell (e.g., =$C1=TRUE).
- Choose a formatting style (e.g., Green Fill, Strikethrough text).
- Click “OK”.
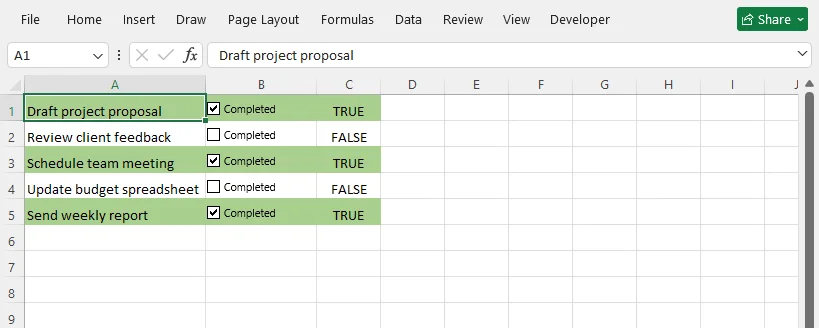
Now, whenever you check the box, the entire row changes color automatically.
Pro Tip: To fully automate this workflow with Python, refer to our dedicated guide: How to Apply Conditional Formatting in Excel with Python.
Final Thoughts
Learning how to insert a checkbox in Excel unlocks interactive spreadsheets for tracking, approvals and data collection. You have three flexible approaches: manual Form Controls for everyday use, ActiveX for advanced Windows dashboards, and Free Spire.XLS with Python for automated bulk Excel generation.
Start with simple linked checkboxes and conditional formatting. Once comfortable, you can extend the Python script to mass-produce Excel templates preloaded with checkboxes for recurring workflows.
Frequently Asked Questions (FAQs)
Q: Can I copy checkboxes to other cells?
Yes. Select the checkbox, copy it (Ctrl+C), and paste it into another cell. You'll need to update the cell link for each new checkbox.
Q: Why is my checkbox not updating the linked cell?
Ensure the linked cell reference is correct and that the checkbox is not in "Design Mode" (for ActiveX controls).
Q: How do I count how many checkboxes are checked?
Use the COUNTIF function on the linked cells (the TRUE/FALSE column). For example, if your linked cells are C2:C10, use: =COUNTIF(C2:C10, TRUE). This returns the total number of checked boxes.
Q: Will checkboxes show up when I print my worksheet?
Yes, both Form Control and ActiveX checkboxes are printed by default as embedded worksheet objects. If you want to exclude them from printing, right-click the checkbox, open Format Control, go to the Properties tab, and uncheck Print object.