
.NET (1327)
Children categories
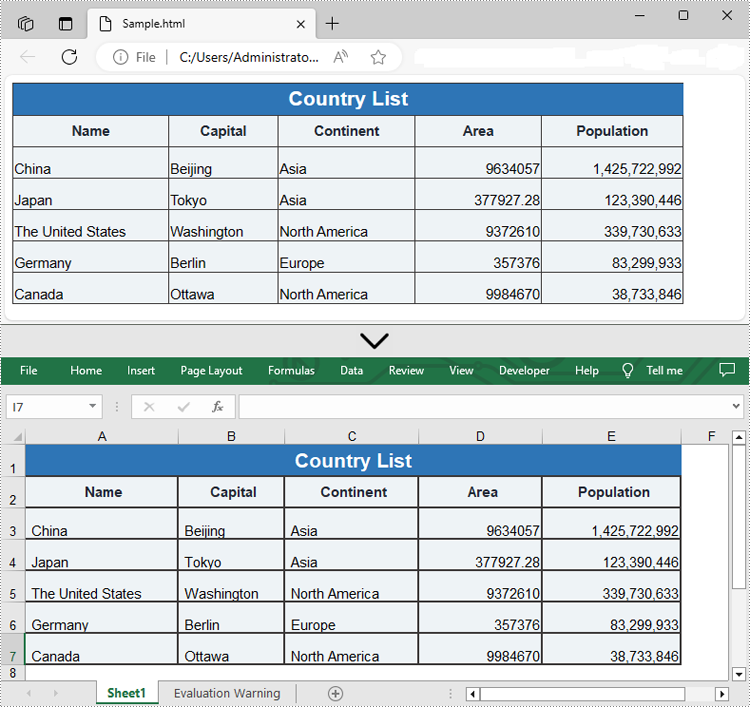
HTML (HyperText Markup Language) is primarily used for structuring content on web pages. While it excels at presenting information visually on the web, it lacks the robust analytical capabilities and data manipulation features found in spreadsheet software like Excel. By converting HTML data to Excel, users can leverage Excel's advanced functionalities like formulas, charts, tables, and macros to organize and analyze data efficiently. In this article, we will explain how to convert HTML to Excel in C# using Spire.XLS for .NET.
Install Spire.XLS for .NET
To begin with, you need to add the DLL files included in the Spire.XLS for .NET package as references in your .NET project. The DLL files can be either downloaded from this link or installed via NuGet.
PM> Install-Package Spire.XLS
Convert HTML to Excel in C#
Spire.XLS for .NET offers the Workbook.LoadFromHtml() method to load an HTML file. After loading the HTML file, you can easily save it in Excel format using the Workbook.SaveToFile() method. The detailed steps are as follows.
- Create an object of the Workbook class.
- Load an HTML file using the Workbook.LoadFromHtml() method.
- Save the HTML file in Excel format using the Workbook.SaveToFile() method.
- C#
using Spire.Xls;

namespace ConvertHtmlToExcel
{
    internal class Program
    {
        static void Main(string[] args)
        {
            // Specify the input HTML file path
            string filePath = @"C:\Users\Administrator\Desktop\Sample.html";

            // Create an object of the workbook class
            Workbook workbook = new Workbook();

            // Load the HTML file
            workbook.LoadFromHtml(filePath);

            // Save the HTML file in Excel XLSX format
            string result = @"C:\Users\Administrator\Desktop\ToExcel.xlsx";
            workbook.SaveToFile(result, ExcelVersion.Version2013);

            workbook.Dispose();
        }
    }
}
Insert HTML String to Excel in C#
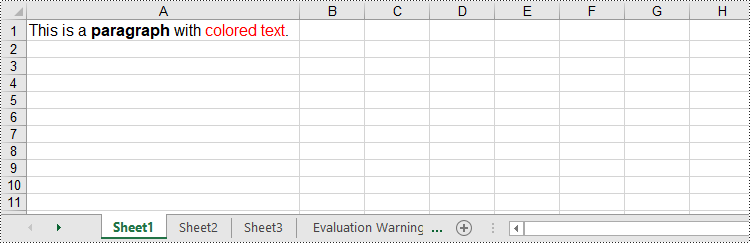
In addition to converting HTML files to Excel, Spire.XLS for .NET also allows you to insert HTML strings into Excel cells by using the CellRange.HtmlString property. The detailed steps are as follows.
- Create an object of the Workbook class.
- Get a specific worksheet by its index (0-based) using the Workbook.Worksheets[index] property.
- Get the cell that you want to add an HTML string to using the Worksheet.Range[] property.
- Add an HTML sting to the cell using the CellRange.HtmlString property.
- Save the resulting workbook to a new file using the Workbook.SaveToFile() method.
- C#
using Spire.Xls;

namespace InsertHtmlStringInExcel
{
    internal class Program
    {
        static void Main(string[] args)
        {
            // Create an object of the workbook class
            Workbook workbook = new Workbook();
            // Get the first sheet
            Worksheet sheet = workbook.Worksheets[0];

            // Specify the HTML string
            string htmlCode = "<p><font size='12'>This is a <b>paragraph</b> with <span style='color: red;'>colored text</span>.</font></p>";

            // Get the cell that you want to add the HTML string to
            CellRange range = sheet.Range["A1"];
            // Add the HTML string to the cell
            range.HtmlString = htmlCode;

            // Auto-adjust the width of the first column based on its content
            sheet.AutoFitColumn(1);

            // Save the resulting workbook to a new file
            string result = @"C:\Users\Administrator\Desktop\InsertHtmlStringIntoCell.xlsx";
            workbook.SaveToFile(result, ExcelVersion.Version2013);

            workbook.Dispose();
        }
    }
}
Apply for a Temporary License
If you'd like to remove the evaluation message from the generated documents, or to get rid of the function limitations, please request a 30-day trial license for yourself.
Booklets are usually used when we print huge PDF files. It saves paper and make the pages tidy. Starts from Spire.PDF V5.12.3, Spire.PDF supports to print the PDF pages to booklet directly. This article demonstrates how to print PDF pages to booklet in C#.
using Spire.Pdf;
using Spire.Pdf.Actions;
using Spire.Pdf.General;
using Spire.Pdf.Print;

namespace PDFPrintBookLet
{
    class Program
    {
        static void Main(string[] args)
        {
            //Load the sample document
            PdfDocument doc = new PdfDocument();
            doc.LoadFromFile("Sample.pdf");

            //Set booklet layout when print the pdf files
            PdfBookletSubsetMode bookletSubset = PdfBookletSubsetMode.BothSides;
            PdfBookletBindingMode bookletBinding = PdfBookletBindingMode.Left;
            doc.PrintSettings.SelectBookletLayout(bookletSubset, bookletBinding);

            //Print PDF to virtual printer
            doc.PrintSettings.PrinterName = "Microsoft XPS Document Writer";
            doc.PrintSettings.PrintToFile("XpsBooklet.xps");
            doc.Print();
        }
    }
}
Screenshot after printing to XPS:

The replace feature in Microsoft PowerPoint allows you to search for a specific text and change its occurrences to a new text at once. This is extremely useful when you need to fix the same error in multiple places within a large PowerPoint document. In this article, you will learn how to programmatically replace text in PowerPoint documents in C# and VB.NET using Spire.Presentation for .NET.
- Replace the First Occurrence of a Specific Text in PowerPoint
- Replace All Occurrences of a Specific Text in PowerPoint
- Replace Text Using a Regular Expression in PowerPoint
Install Spire.Presentation for .NET
To begin with, you need to add the DLL files included in the Spire.Presentation for.NET package as references in your .NET project. The DLL files can be either downloaded from this link or installed via NuGet.
PM> Install-Package Spire.Presentation
Replace the First Occurrence of a Specific Text in PowerPoint in C# and VB.NET
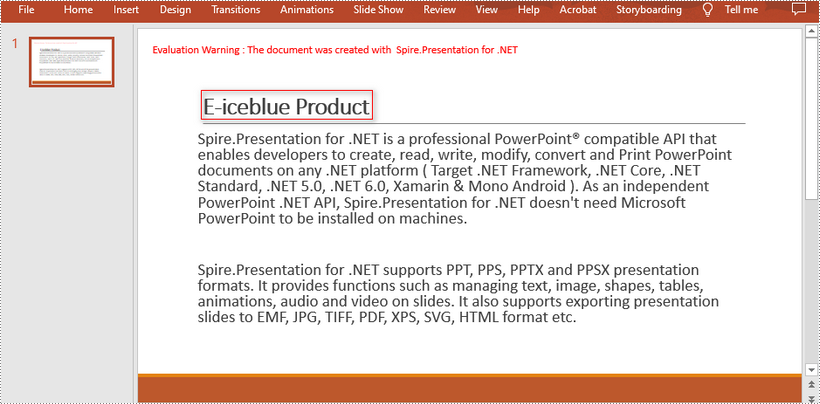
To replace the first occurrence of a specific text in a PowerPoint document, you can loop through all slides in the document, then call the ISlide.ReplaceFirstText() method. The detailed steps are as follows:
- Initialize an instance of the Presentation class.
- Load a PowerPoint document using Presentation.LoadFromFile() method.
- Loop through all slides in the PowerPoint document.
- Replace the first occurrence of a specific text with a new text using ISlide.ReplaceFirstText() method.
- Save the result document using Presentation.SaveToFile() method.
- C#
- VB.NET
using Spire.Presentation;

namespace ReplaceFirstTextOccurrenceInPPT
{
    class Program
    {
        static void Main(string[] args)
        {
            //Create a Presentation instance
            Presentation ppt = new Presentation();
            //Load a PowerPoint document
            ppt.LoadFromFile("Sample.pptx");

            //Loop through all slides in the document
            foreach (ISlide slide in ppt.Slides)
            {
                //Replace the first occurrence of "Spire.Presentation for .NET" with "E-iceblue Product"
                slide.ReplaceFirstText("Spire.Presentation for .NET", "E-iceblue Product", false);
                break;
            }

            //Save the result document
            ppt.SaveToFile("ReplaceFirstTextOccurrence.pptx", FileFormat.Pptx2013);

        }
    }
}
Replace All Occurrences of a Specific Text in PowerPoint in C# and VB.NET
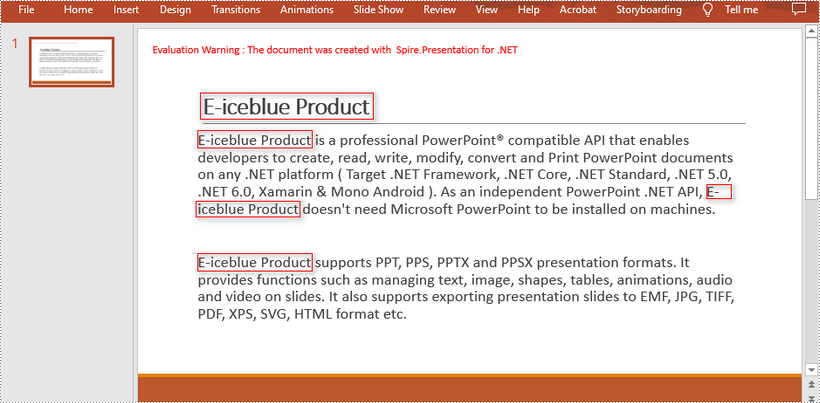
To replace all occurrences of a specific text in a PowerPoint document, you can loop through all slides in the document, and then use the ISlide.ReplaceAllText() method. The detailed steps are as follows:
- Initialize an instance of the Presentation class.
- Load a PowerPoint document using Presentation.LoadFromFile() method.
- Loop through all slides in the PowerPoint document.
- Replace all occurrences of a specific text with a new text using ISlide.ReplaceAllText() method.
- Save the result document using Presentation.SaveToFile() method.
- C#
- VB.NET
*using Spire.Presentation;

namespace ReplaceAllTextOccurrencesInPPT
{
    class Program
    {
        static void Main(string[] args)
        {
            //Create a Presentation instance
            Presentation ppt = new Presentation();
            //Load a PowerPoint document
            ppt.LoadFromFile("Sample.pptx");

            //Loop through all slides in the document
            foreach (ISlide slide in ppt.Slides)
            {
                //Replace all occurrences of "Spire.Presentation for .NET" with "E-iceblue Product"
                slide.ReplaceAllText("Spire.Presentation for .NET", "E-iceblue Product", false);
            }

            //Save the result document
            ppt.SaveToFile("ReplaceAllTextOccurrences.pptx", FileFormat.Pptx2013);

        }
    }
}
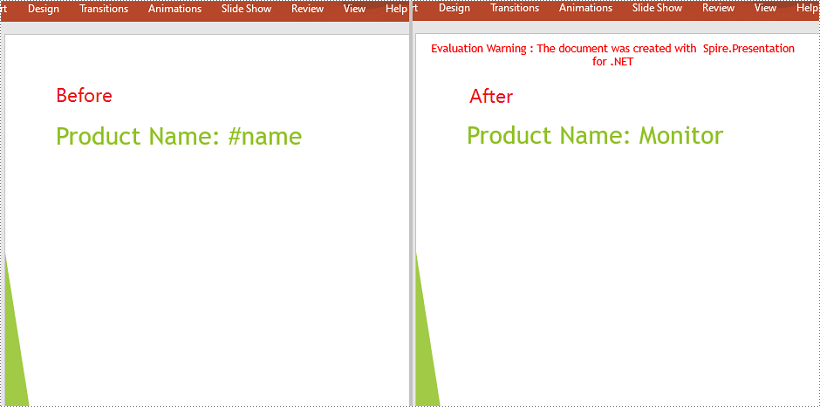
Replace Text Using a Regular Expression in PowerPoint using C# and VB.NET
Spire.Presentation for .NET provides the IShape.ReplaceTextWithRegex() method that enables you to replace text matching a regular expression pattern. The detailed steps are as follows:
- Initialize an instance of the Presentation class.
- Load a PowerPoint document using Presentation.LoadFromFile() method.
- Loop through all slides in the PowerPoint document.
- Loop through all shapes on each slide.
- Replace text matching a regular expression pattern using IShape.ReplaceTextWithRegex() method.
- Save the result document using Presentation.SaveToFile() method.
- C#
- VB.NET
using Spire.Presentation;
using System.Text.RegularExpressions;

namespace ReplaceTextUsingRegexInPPT
{
    class Program
    {
        static void Main(string[] args)
        {
            //Create a Presentation instance
            Presentation ppt = new Presentation();
            //Load a PowerPoint document
            ppt.LoadFromFile("Sample1.pptx");

            //Loop through all slides in the document
            foreach (ISlide slide in ppt.Slides)
            {
                //Loop through all shapes on each slide
                foreach (IShape shape in slide.Shapes)
                {
                    //Replace text starting with # on the slide to "Monitor"
                    shape.ReplaceTextWithRegex(new Regex(@"\#\w+\b"), "Monitor");
                }
            }

            //Save the result document
            ppt.SaveToFile("ReplaceTextUsingRegex.pptx", FileFormat.Pptx2013);
        }
    }
}
Apply for a Temporary License
If you'd like to remove the evaluation message from the generated documents, or to get rid of the function limitations, please request a 30-day trial license for yourself.
When creating a PowerPoint presentation, you may want to ensure that some important content in your presentation grabs the audience’s attention. A great way to make the content more prominent and noticeable is to highlight it with a bright color. This article will demonstrate how to highlight text in a PowerPoint presentation in C# and VB.NET using Spire.Presentation for .NET.
Install Spire.Presentation for .NET
To begin with, you need to add the DLL files included in the Spire.Presentation for.NET package as references in your .NET project. The DLL files can be either downloaded from this link or installed via NuGet.
PM> Install-Package Spire.Presentation
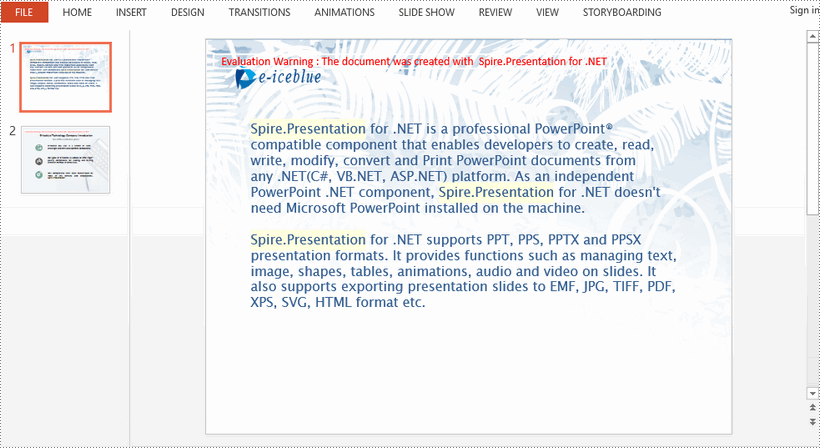
Highlight Text in PowerPoint in C# and VB.NET
The following are the steps to highlight specific text in a PowerPoint document:
- Initialize an instance of Presentation class.
- Load a PowerPoint presentation using Presentation.LoadFromFile() method.
- Loop through the slides in the presentation and the shapes on each slide.
- Check if the current shape is of IAutoShape type.
- If the result is true, typecast it to IAutoShape.
- Initialize an instance of TextHighLightingOptions class, and set the text highlighting options such as whole words only and case sensitive through TextHighLightingOptions.WholeWordsOnly and TextHighLightingOptions.CaseSensitive properties.
- Highlight a specific text in the shape using IAutoShape.TextFrame.HighLightText() method.
- Save the result file using Presentation.SaveToFile() method.
- C#
- VB.NET
using Spire.Presentation;
using System.Drawing;

namespace HighlightTextInPPT
{
    class Program
    {
        static void Main(string[] args)
        {
            //Create an instance of Presentation class
            Presentation presentation = new Presentation();
            //Load a PowerPoint file
            presentation.LoadFromFile(@"Sample1.pptx");

            //Loop through all slides
            for (int i = 0; i < presentation.Slides.Count; i++)
            {
                //Get the current slide
                ISlide slide = presentation.Slides[i];
                //Loop through the shapes on the slide
                for (int j = 0; j < slide.Shapes.Count; j++)
                {
                    //Check if the current shape is of IAutoShape type
                    if (slide.Shapes[j] is IAutoShape)
                    {
                        //Typecast the shape to IAutoShape
                        IAutoShape shape = slide.Shapes[j] as IAutoShape;

                        //Create an instance of TextHighLightingOptions class
                        TextHighLightingOptions options = new TextHighLightingOptions();
                        //Set text highlighting options
                        options.CaseSensitive = true;
                        options.WholeWordsOnly = true;

                        //Highlight specific text within the shape with color
                        shape.TextFrame.HighLightText("Spire.Presentation", Color.LightYellow, options);
                    }

                }
            }

            //Save the result file
            presentation.SaveToFile("HighlightText.pptx", FileFormat.Pptx2013);
        }
    }
}
Apply for a Temporary License
If you'd like to remove the evaluation message from the generated documents, or to get rid of the function limitations, please request a 30-day trial license for yourself.
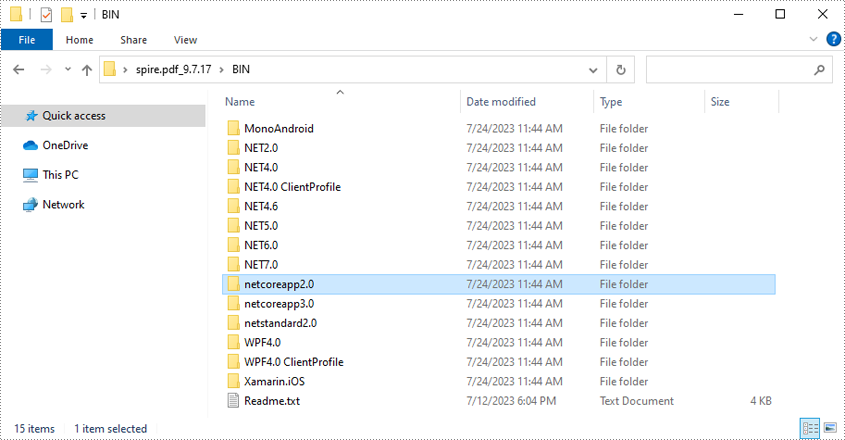
How to Mannually Add Spire.PDF as Dependency in a .NET Standard Library Project
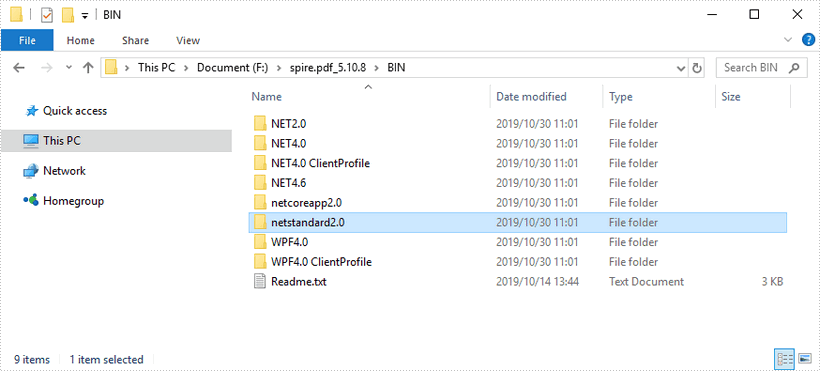
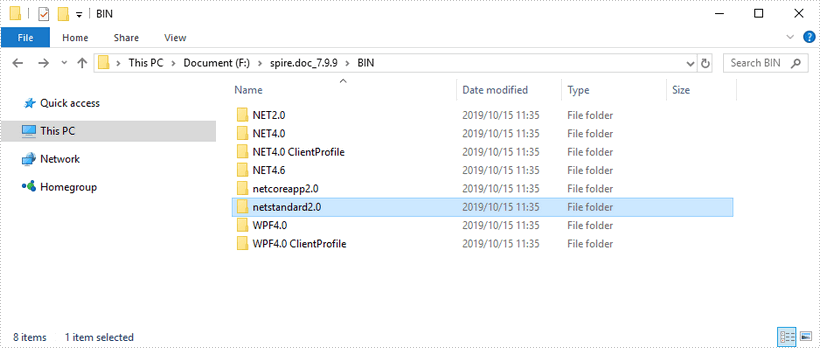
2019-10-30 03:43:03 Written by KoohjiStep 1: Download the latest version of Spire.PDF Pack from the link below, unzip it, and you'll get the DLL files for .NET Standarad from the "netstandard2.0" folder. If you already have this folder in your disk, go straight to step two.
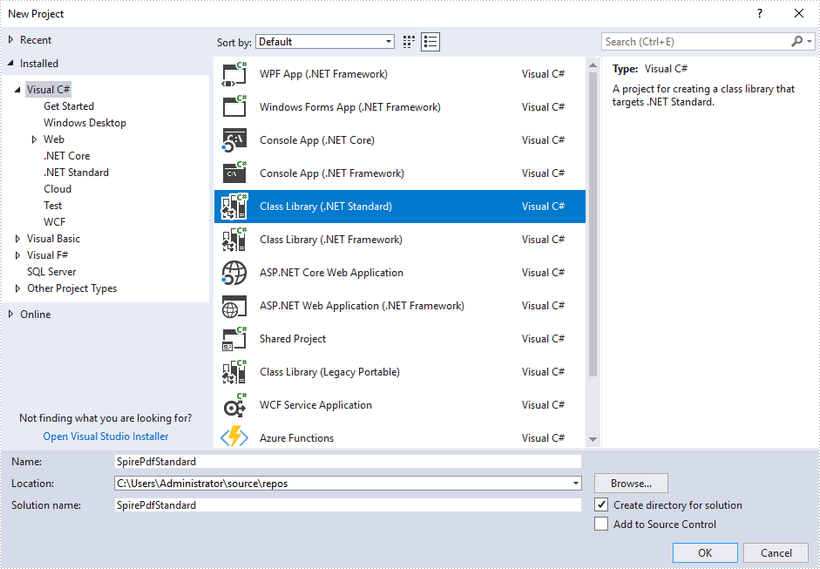
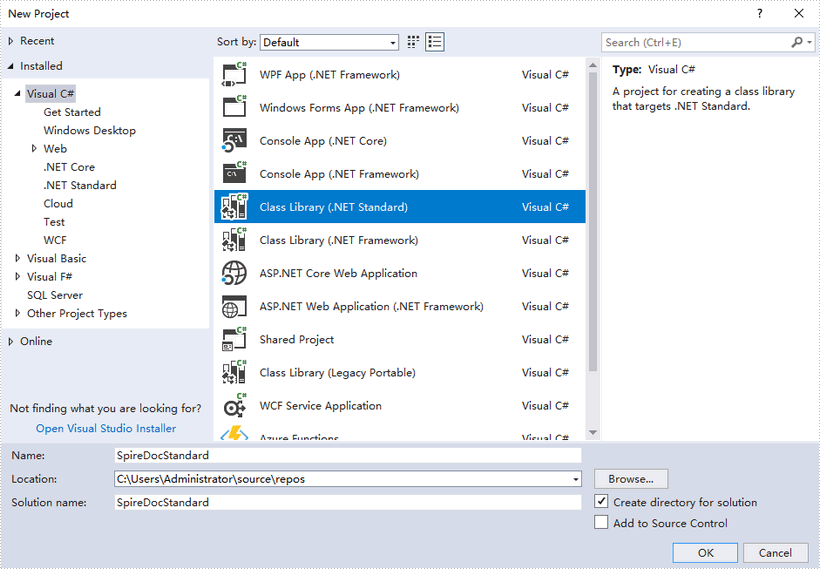
Step 2: Create a .NET Standard library project in your Visual Studio.
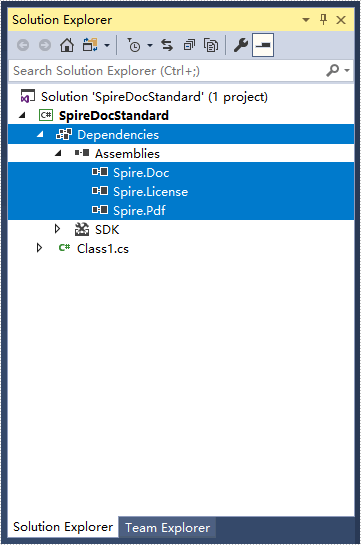
Step 3: Add all DLL files under the "netstandard2.0" folder as dependencies in your project.
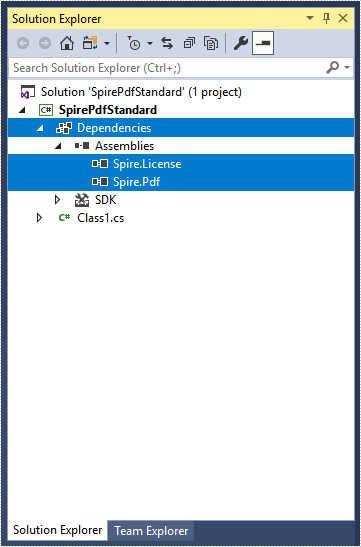
Right-click "Dependencies" – select "Add Reference" – click "Browse" – selcet all DLLs under "netstandard2.0" folder – click "Add".
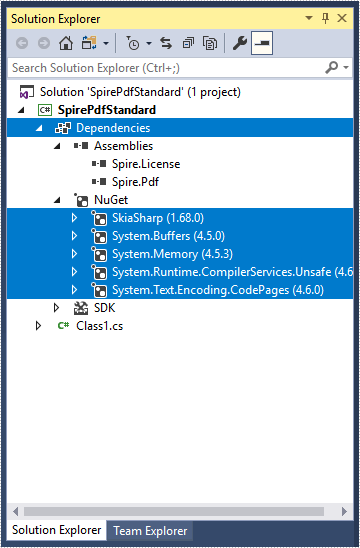
Step 4: Install the other five packages in your project via the NuGet Package Manager. They are SkiaSharp, System.Buffers, System.Memory, System.Text.Encoding.CodePages and System.Runtime.CompilerServices.Unsafe.
Right-click "Dependencies" – select "Manage NuGet Packages" – click "Browse" –type the package name – select the package from the search results – click "Install".
Step 5: Now that you've added all the dependences successfully, you can start to write your own .NET Standard library that is capable of creating and processing PDF documents.
using Spire.Pdf;
using Spire.Pdf.Graphics;
using System.Drawing;

namespace SpirePdfStandard
{
    public class Class1
    {
        public void CreatePdf()
        {
            //Create a PdfDocument object
            PdfDocument doc = new PdfDocument();

            //Add a page
            PdfPageBase page = doc.Pages.Add();

            //Draw text on the page at the specified position
            page.Canvas.DrawString("Hello World",
                                    new PdfFont(PdfFontFamily.Helvetica, 13f),
                                    new PdfSolidBrush(Color.Black),
                                    new PointF(50, 50));

            //Save the document
            doc.SaveToFile("Output.pdf");
        }

    }
}
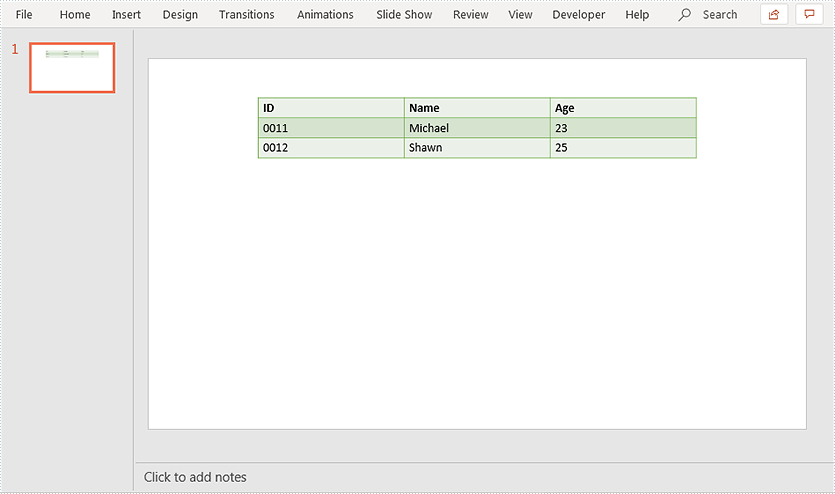
Spire.Presentation supports setting alignment for table in a PowerPoint document. This article demonstrates how to align a table to the bottom of a PowerPoint slide using Spire.Presentation.
Below screenshot shows the original table before setting alignment:
using Spire.Presentation;

namespace AlignTable
{
    class Program
    {
        static void Main(string[] args)
        {
            //Load PowerPoint document
            Presentation ppt = new Presentation();
            ppt.LoadFromFile("Table.pptx");
            ITable table = null;
            //Loop through the shapes in the first slide
            foreach (IShape shape in ppt.Slides[0].Shapes)
            {
                //Find the table and align it to the bottom of the slide
                if (shape is ITable)
                {
                    table = (ITable)shape;
                    table.SetShapeAlignment(Spire.Presentation.ShapeAlignment.AlignBottom);
                }
            }

            //Save the resultant document
            ppt.SaveToFile("Result.pptx", FileFormat.Pptx2013);
        }
    }
}
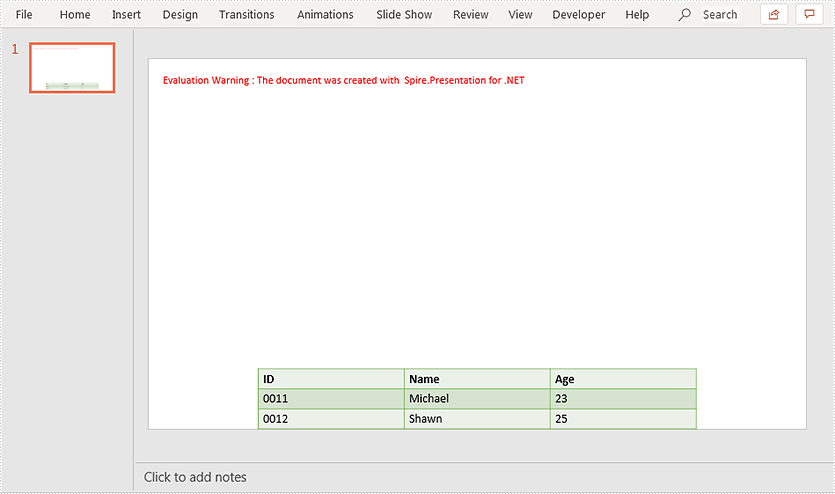
Output:
With Spire.PDF for .NET, developers can set page size for PDF in C#. This article will demonstrates how to get the PDF page size using Spire.PDF.
Detail steps:
Step 1: Create a PdfDocument instance and load the sample.pdf file.
PdfDocument doc = new PdfDocument();
doc.LoadFromFile("Sample.pdf");
Step 2: Get the width and height of the first page in the PDF file.
PdfPageBase page = doc.Pages[0];
float pointWidth = page.Size.Width;
float pointHeight = page.Size.Height;
Step 3: Convert the size with other measurement unit, such as in Inch, Centimeter, Unit or Pixel.
//Create PdfUnitConvertor to convert the unit
PdfUnitConvertor unitCvtr = new PdfUnitConvertor();

//Convert the size with "pixel"
float pixelWidth = unitCvtr.ConvertUnits(pointWidth, PdfGraphicsUnit.Point, PdfGraphicsUnit.Pixel);
float pixelHeight = unitCvtr.ConvertUnits(pointHeight, PdfGraphicsUnit.Point, PdfGraphicsUnit.Pixel);

//Convert the size with "inch"
float inchWidth = unitCvtr.ConvertUnits(pointWidth, PdfGraphicsUnit.Point, PdfGraphicsUnit.Inch);
float inchHeight = unitCvtr.ConvertUnits(pointHeight, PdfGraphicsUnit.Point, PdfGraphicsUnit.Inch);

//Convert the size with "centimeter"
float centimeterWidth = unitCvtr.ConvertUnits(pointWidth, PdfGraphicsUnit.Point, PdfGraphicsUnit.Centimeter);
float centimeterHeight = unitCvtr.ConvertUnits(pointHeight, PdfGraphicsUnit.Point, PdfGraphicsUnit.Centimeter);
Step 4: Save to a .txt file.
//Create StringBuilder to save
StringBuilder content = new StringBuilder();
//Add pointSize string to StringBuilder
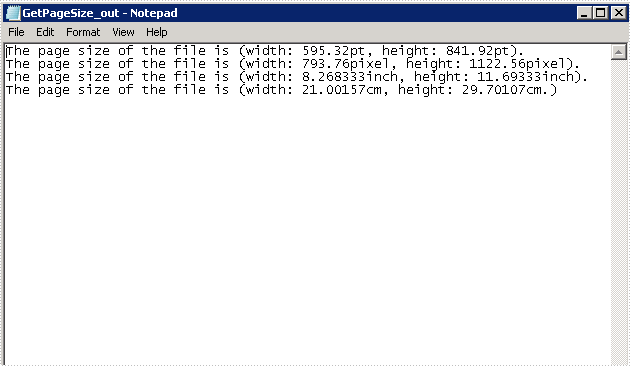
content.AppendLine("The page size of the file is (width: " + pointWidth + "pt, height: " + pointHeight + "pt).");
content.AppendLine("The page size of the file is (width: " + pixelWidth + "pixel, height: " + pixelHeight + "pixel).");
content.AppendLine("The page size of the file is (width: " + inchWidth + "inch, height: " + inchHeight + "inch).");
content.AppendLine("The page size of the file is (width: " + centimeterWidth + "cm, height: " + centimeterHeight + "cm.)");
String output = "GetPageSize_out.txt";
//Save them to a txt file
File.WriteAllText(output, content.ToString());
Output:
Full code:
using Spire.Pdf;
using Spire.Pdf.Actions;
using Spire.Pdf.General;
using Spire.Pdf.Graphics;
using System;
using System.Collections.Generic;
using System.ComponentModel;
using System.Data;
using System.Drawing;
using System.IO;
using System.Linq;
using System.Text;
using System.Threading.Tasks;

namespace GetPDFPageSize
{
    class Program
    {
        static void Main(string[] args)
        {

            PdfDocument doc = new PdfDocument();
            doc.LoadFromFile("Sample.pdf");

            //Get the first page of the loaded PDF file
            PdfPageBase page = doc.Pages[0];
            //Get the width of page based on "point"
            float pointWidth = page.Size.Width;
            //Get the height of page
            float pointHeight = page.Size.Height;

            //Create PdfUnitConvertor to convert the unit
            PdfUnitConvertor unitCvtr = new PdfUnitConvertor();

            //Convert the size with "pixel"
            float pixelWidth = unitCvtr.ConvertUnits(pointWidth, PdfGraphicsUnit.Point, PdfGraphicsUnit.Pixel);
            float pixelHeight = unitCvtr.ConvertUnits(pointHeight, PdfGraphicsUnit.Point, PdfGraphicsUnit.Pixel);

            //Convert the size with "inch"
            float inchWidth = unitCvtr.ConvertUnits(pointWidth, PdfGraphicsUnit.Point, PdfGraphicsUnit.Inch);
            float inchHeight = unitCvtr.ConvertUnits(pointHeight, PdfGraphicsUnit.Point, PdfGraphicsUnit.Inch);

            //Convert the size with "centimeter"
            float centimeterWidth = unitCvtr.ConvertUnits(pointWidth, PdfGraphicsUnit.Point, PdfGraphicsUnit.Centimeter);
            float centimeterHeight = unitCvtr.ConvertUnits(pointHeight, PdfGraphicsUnit.Point, PdfGraphicsUnit.Centimeter);

            //Create StringBuilder to save
            StringBuilder content = new StringBuilder();

            //Add pointSize string to StringBuilder
            content.AppendLine("The page size of the file is (width: " + pointWidth + "pt, height: " + pointHeight + "pt).");
            content.AppendLine("The page size of the file is (width: " + pixelWidth + "pixel, height: " + pixelHeight + "pixel).");
            content.AppendLine("The page size of the file is (width: " + inchWidth + "inch, height: " + inchHeight + "inch).");
            content.AppendLine("The page size of the file is (width: " + centimeterWidth + "cm, height: " + centimeterHeight + "cm.)");

            String output = "GetPageSize_out.txt";

            //Save them to a txt file
            File.WriteAllText(output, content.ToString());

        }
    }
}
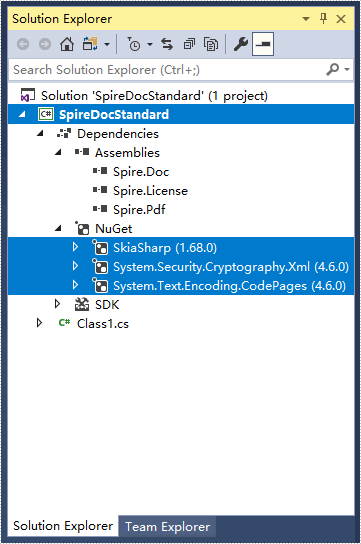
How to Mannually Add Spire.Doc as Dependency in a .NET Standard Library Project
2019-10-22 09:02:07 Written by KoohjiAs System.Drawing only supported on Windows in NET6.0, you need to use SkiaSharp instead under NET5.0 or NET6.0 in Linux, or inside docker container. Please follow the next steps to use the NetStandard dlls to get SkiaSharp to your project manually. We will use Spire.Doc as example.
Step 1: Download the latest version of Spire.Doc Pack from this link, unzip it, and you'll get the DLL files for .NET Standarad from the "netstandard2.0" folder or install via NuGet.
PM> Install-Package Spire.Officefor.NETStandard
If you already have this folder in your disk, go straight to step two.
Step 2: Create a .NET Standard library project in your Visual Studio.
Step 3: Add all DLL files under the "netstandard2.0" folder as dependencies in your project.
Right-click "Dependencies" – select "Add Reference" – click "Browse" – selcet all DLLs under "netstandard2.0" folder – click "Add".
Step 4: Install the other three packages in your project via the NuGet Package Manager. They are SkiaSharp, System.Text.Encoding.CodePages and System.Security.Cryptography.Xml.
Right-click "Dependencies" – select "Manage NuGet Packages" – click "Browse" – type the package name – select the package from the search results – click "Install".
Step 5: Now that you've added all the dependences successfully, you can start to write your own .NET Standard library that is capable of creating and processing Word documents.
using Spire.Doc;
using Spire.Doc.Documents;

namespace SpireDocStandard
{
    public class Class1
    {
        public void CreateWord()
        {
            //Create a document object
            Document doc = new Document();

            //Add a section
            Section section = doc.AddSection();

            //Add a paragrah
            Paragraph paragraph = section.AddParagraph();

            //Append text to the paragraph
            paragraph.AppendText("Hello World");

            //Save to file
            doc.SaveToFile("Output.docx", FileFormat.Docx2013);
        }
    }
}
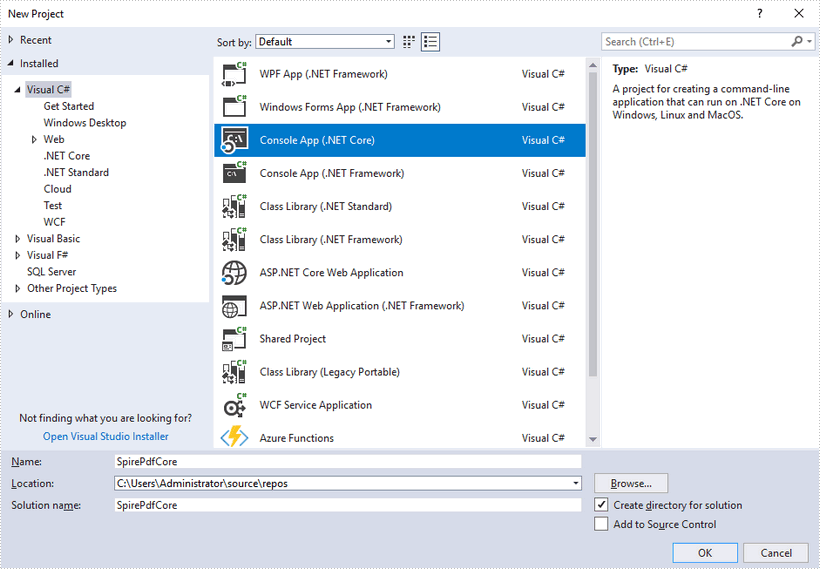
How to Mannually Add Spire.PDF as Dependency in a .NET Core Application
2019-10-17 07:44:00 Written by KoohjiStep 1: Download the latest version of Spire.PDF Pack from the link below, unzip it, and you'll get the DLL files for .NET Core in the "netcoreapp2.0" folder. If you already have this folder in your disk, go straight to step two.
Step 2: Create a .NET Core application in your Visual Studio.
Step 3: Add all DLL files under the "netcoreapp2.0" folder as dependencies in your project.
Right-click "Dependencies" – select "Add Reference" – click "Browse" – selcet all DLLs under "netcoreapp2.0" folder – click "Add".
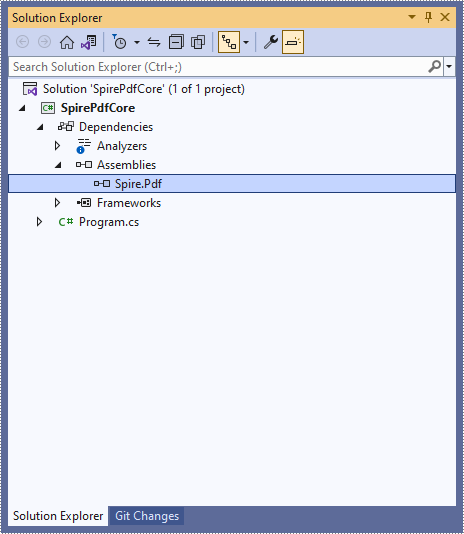
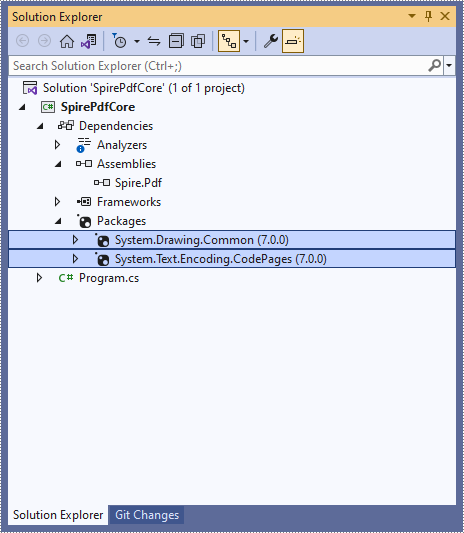
Step 4: Install the other two packages in your project via the NuGet Package Manager. They are System.Drawing.Common and System.Text.Encoding.CodePages.
Right-click "Dependencies" – select "Manage NuGet Packages" – click "Browse" –type the package name – select the package from the search results – click "Install".
Step 5: Now that you’ve added all the dependences successfully, you can start to code. The following code snippet gives you an exmaple of how to create a simple PDF document using Spire.PDF.
using Spire.Pdf;
using Spire.Pdf.Graphics;
using System.Drawing;

namespace SpirePdfCore
{
    class Program
    {
        static void Main(string[] args)
        {
            //Create a PdfDocument object
            PdfDocument doc = new PdfDocument();

            //Add a page
            PdfPageBase page = doc.Pages.Add();

            //Draw text on the page at the specified position
            page.Canvas.DrawString("Hello World",
                                    new PdfFont(PdfFontFamily.Helvetica, 13f),
                                    new PdfSolidBrush(Color.Black),
                                    new PointF(50, 50));

            //Save the document
            doc.SaveToFile("Output.pdf");
        }
    }
}
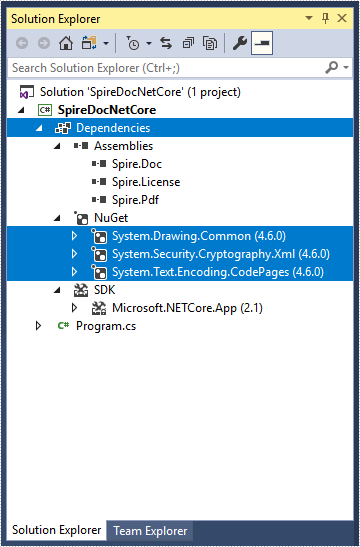
How to Mannually Add Spire.Doc as Dependency in a .NET Core Application
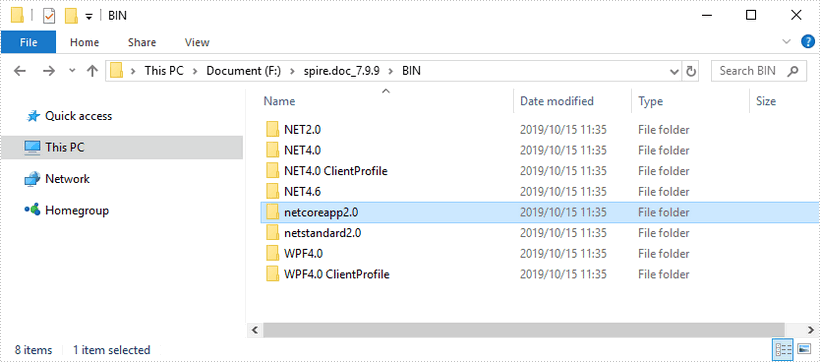
2019-10-16 02:56:57 Written by KoohjiStep 1: Download the latest version of Spire.Doc Pack from the link below, unzip it, and you'll get the DLL files for .NET Core in the “netcoreapp2.0” folder. If you already have this folder in your disk, go straight to step two.
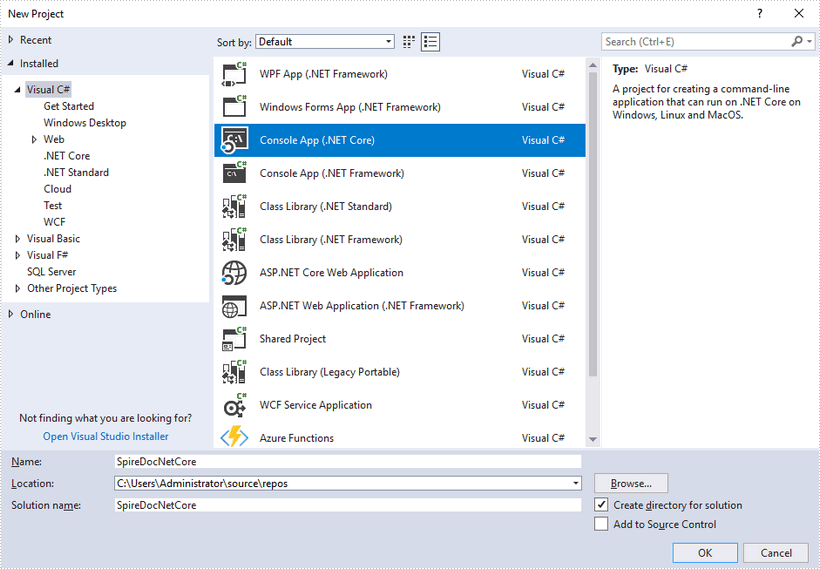
Step 2: Create a .Net Core application in your Visual Studio.
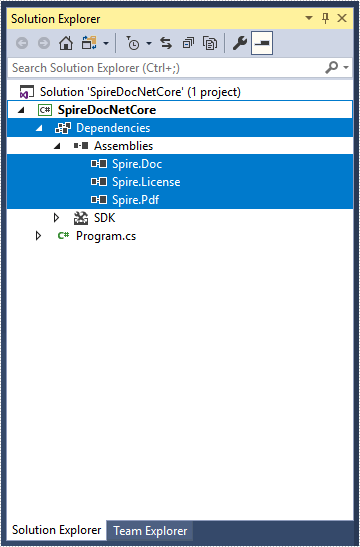
Step 3: Add all DLL files under the "netcoreapp2.0" folder as dependencies in your project.
Right-click "Dependencies" – select "Add Reference" – click "Browse" – selcet all DLLs under "netcoreapp2.0" folder – click "Add".
Step 4: Install the other three packages in your project via the NuGet Package Manager. They are System.Drawing.Common, System.Text.Encoding.CodePages and System.Security.Cryptography.Xml.
Right-click "Dependencies" – select "Manage NuGet Packages" – click "Browse" –type the package name – select the package from the search results – click "Install".
Step 5: Now that you've added all the dependences successfully, you can start to code. The following code snippet gives you an exmaple of how to create a simple Word document using Spire.Doc.
using Spire.Doc;
using Spire.Doc.Documents;

namespace SpireDocNetCore
{
    class Program
    {
        static void Main(string[] args)
        {
            //Create a document object
            Document doc = new Document();

            //Add a section
            Section section = doc.AddSection();

            //Add a paragrah
            Paragraph paragraph = section.AddParagraph();

            //Append text to the paragraph
            paragraph.AppendText("This article shows you how to mannually add Spire.Doc as dependency in a .NET Core application.");

            //Save to file
            doc.SaveToFile("Output.docx", FileFormat.Docx2013);
        }
    }
}
