.NET (1327)
Children categories
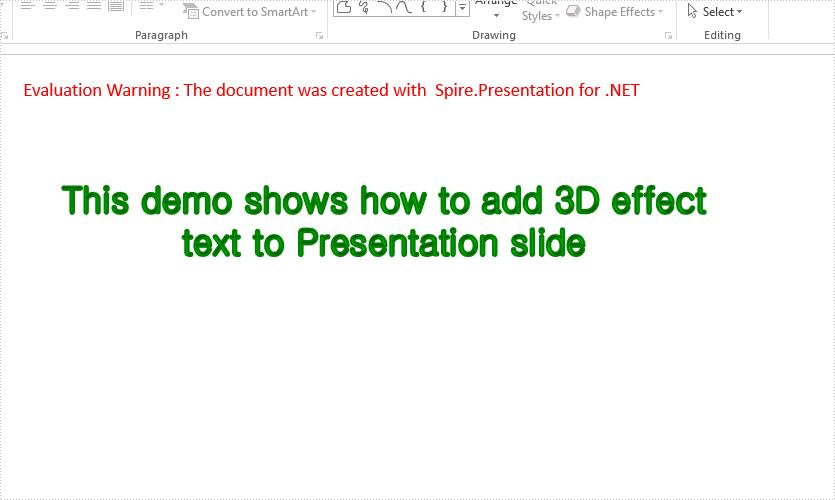
With the help of Spire.Presentation for .NET, we could set 3D effect to the shapes and text in the PowerPoint document to make it attractive. We have already demonstrated how to use Spire.Presentation to set 3D format for shapes. In this article, I will introduce how to create three dimensional effects text in PowerPoint in C#.
using Spire.Presentation;
using Spire.Presentation.Drawing;
using System.Drawing;

namespace 3DEffectForText
{
    class Program
    {
        static void Main(string[] args)
        {
            //Create a new presentation object
            Presentation presentation = new Presentation();

            //Get the first slide
            ISlide slide = presentation.Slides[0];

            //Append a new shape to slide and set the line color and fill type
            IAutoShape shape = slide.Shapes.AppendShape(ShapeType.Rectangle, new RectangleF(30, 40, 600, 200));
            shape.ShapeStyle.LineColor.Color = Color.White;
            shape.Fill.FillType = Spire.Presentation.Drawing.FillFormatType.None;

            //Add text to the shape
            shape.AppendTextFrame("This demo shows how to add 3D effect text to Presentation slide");

            //set the color of text in shape
            TextRange textRange = shape.TextFrame.TextRange;
            textRange.Fill.FillType = Spire.Presentation.Drawing.FillFormatType.Solid;
            textRange.Fill.SolidColor.Color = Color.Green;

            //set the Font of text in shape
            textRange.FontHeight = 30;
            textRange.LatinFont = new TextFont("Gulim");


            //Set 3D effect for text
            shape.TextFrame.TextThreeD.ShapeThreeD.PresetMaterial = PresetMaterialType.Matte;
            shape.TextFrame.TextThreeD.LightRig.PresetType = PresetLightRigType.Sunrise;
            shape.TextFrame.TextThreeD.ShapeThreeD.TopBevel.PresetType = BevelPresetType.Circle;
            shape.TextFrame.TextThreeD.ShapeThreeD.ContourColor.Color = Color.Green;
            shape.TextFrame.TextThreeD.ShapeThreeD.ContourWidth = 3;

            //Save the document to file.
            presentation.SaveToFile("3DEffectForText_result.pptx", FileFormat.Pptx2010);
        }
    }
}
Effective screenshot for 3-D effect text on Presentation slides:
With Spire.XLS for .NET, developers can easily use C# to add shapes to Excel worksheet. From version 9.8.11, Spire.XLS supports to add arrow lines to Excel worksheet. The following sample will show you how to insert arrow line, double Arrow, Elbow Arrow, Elbow Double-Arrow, Curved Arrow and Curved Double-Arrow to Excel worksheet in C#.
using Spire.Xls;
using System.Drawing;

namespace Add_Lines_to_Excel
{
    class Program
    {
        static void Main(string[] args)
        {
            //Initiate a Workbook object and get the first worksheet
            Workbook workbook = new Workbook();
            Worksheet sheet = workbook.Worksheets[0];

            //Add a Double Arrow and fill the line with solid color
            var line = sheet.TypedLines.AddLine();
            line.Top = 10;
            line.Left = 20;
            line.Width = 100;
            line.Height = 0;
            line.Color = Color.Blue;
            line.BeginArrowHeadStyle = ShapeArrowStyleType.LineArrow;
            line.EndArrowHeadStyle = ShapeArrowStyleType.LineArrow;

            //Add an Arrow and fill the line with solid color
            var line_1 = sheet.TypedLines.AddLine();
            line_1.Top = 50;
            line_1.Left = 30;
            line_1.Width = 100;
            line_1.Height = 100;
            line_1.Color = Color.Red;
            line_1.BeginArrowHeadStyle = ShapeArrowStyleType.LineNoArrow;
            line_1.EndArrowHeadStyle = ShapeArrowStyleType.LineArrow;

            //Add an Elbow Arrow Connector
            Spire.Xls.Core.Spreadsheet.Shapes.XlsLineShape line3 = sheet.TypedLines.AddLine() as Spire.Xls.Core.Spreadsheet.Shapes.XlsLineShape;
            line3.LineShapeType = LineShapeType.ElbowLine;
            line3.Width = 30;
            line3.Height = 50;
            line3.EndArrowHeadStyle = ShapeArrowStyleType.LineArrow;
            line3.Top = 100;
            line3.Left = 50;

            //Add an Elbow Double-Arrow Connector
            Spire.Xls.Core.Spreadsheet.Shapes.XlsLineShape line2 = sheet.TypedLines.AddLine() as Spire.Xls.Core.Spreadsheet.Shapes.XlsLineShape;
            line2.LineShapeType = LineShapeType.ElbowLine;
            line2.Width = 50;
            line2.Height = 50;
            line2.EndArrowHeadStyle = ShapeArrowStyleType.LineArrow;
            line2.BeginArrowHeadStyle = ShapeArrowStyleType.LineArrow;
            line2.Left = 120;
            line2.Top = 100;

            //Add a Curved Arrow Connector
            line3 = sheet.TypedLines.AddLine() as Spire.Xls.Core.Spreadsheet.Shapes.XlsLineShape;
            line3.LineShapeType = LineShapeType.CurveLine;
            line3.Width = 30;
            line3.Height = 50;
            line3.EndArrowHeadStyle = ShapeArrowStyleType.LineArrowOpen;
            line3.Top = 100;
            line3.Left = 200;

            //Add a Curved Double-Arrow Connector
            line2 = sheet.TypedLines.AddLine() as Spire.Xls.Core.Spreadsheet.Shapes.XlsLineShape;
            line2.LineShapeType = LineShapeType.CurveLine;
            line2.Width = 30;
            line2.Height = 50;
            line2.EndArrowHeadStyle = ShapeArrowStyleType.LineArrowOpen;
            line2.BeginArrowHeadStyle = ShapeArrowStyleType.LineArrowOpen;
            line2.Left = 250;
            line2.Top = 100;

            //Save the file
            workbook.SaveToFile("AddLines.xlsx", ExcelVersion.Version2013);

        }
    }
}
![]()
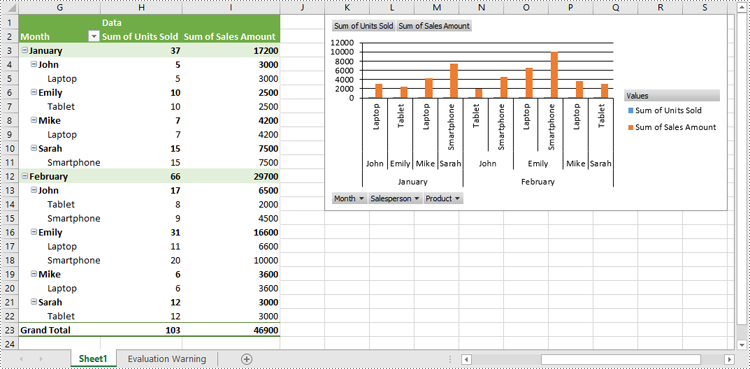
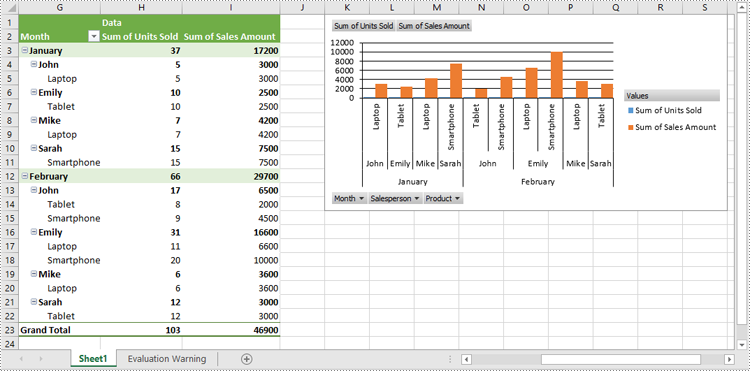
A Pivot Chart is a graphical representation of a Pivot Table. While a Pivot Table summarizes data and allows users to manipulate it for analysis, a Pivot Chart provides a visual representation of that summarized data. Pivot Charts can be easily updated as the data in the Pivot Table changes, making them an essential tool for reporting and analysis. In this article, we will demonstrate how to create pivot charts in Excel in C# using Spire.XLS for .NET.
- Create Pivot Charts in Excel in C#
- Show or Hide Field Buttons in Pivot Charts in Excel in C#
- Format Pivot Chart Series in Excel in C#
Install Spire.XLS for .NET
To begin with, you need to add the DLL files included in the Spire.XLS for .NET package as references in your .NET project. The DLL files can be either downloaded from this link or installed via NuGet.
PM> Install-Package Spire.XLS
Create Pivot Charts in Excel in C#
With Spire.XLS for .NET, creating a pivot chart from an existing pivot table in Excel is straightforward using the Worksheet.Charts.Add(ExcelChartType pivotChartType, IPivotTable pivotTable) method. The detailed steps are as follows.
- Create an object of the Workbook class.
- Load an Excel file using Workbook.LoadFromFile() method.
- Get a specific worksheet in the Excel file using Workbook.Worksheets[index] property.
- Get a specific pivot table in the worksheet using Worksheet.PivotTables[index] property.
- Add a pivot chart based on the pivot table to the worksheet using Worksheet.Charts.Add(ExcelChartType pivotChartType, IPivotTable pivotTable) method.
- Set the position and title of the pivot chart.
- Save the resulting file using Workbook.SaveToFile() method.
- C#
using Spire.Xls;
using Spire.Xls.Core;

namespace CreatePivotChart
{
    internal class Program
    {
        static void Main(string[] args)
        {
            // Create a Workbook object
            Workbook workbook = new Workbook();

            // Load an Excel file
            workbook.LoadFromFile("PivotTable.xlsx");

            // Get the first worksheet
            Worksheet sheet = workbook.Worksheets[0];

            // Get the first pivot table in the worksheet
            IPivotTable pivotTable = sheet.PivotTables[0];

            // Create a clustered column chart based on the pivot table
            Chart pivotChart = sheet.Charts.Add(ExcelChartType.ColumnClustered, pivotTable);

            // Set chart position
            pivotChart.TopRow = 1;
            pivotChart.LeftColumn = 11;
            pivotChart.RightColumn = 20;
            pivotChart.BottomRow = 15;

            // Set chart title to null
            pivotChart.ChartTitle = "";

            // Save the resulting file
            workbook.SaveToFile("CreatePivotChart.xlsx", ExcelVersion.Version2013);
            workbook.Dispose();
        }
    }
}
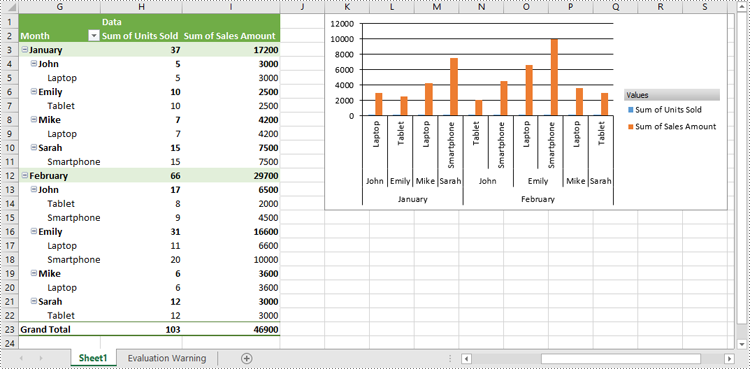
Show or Hide Field Buttons in Pivot Charts in Excel in C#
Using Spire.XLS for .NET, you can easily show or hide different types of field buttons to customize the appearance of your charts. The field buttons you can control include:
- Entire Field Buttons
- Report Filter Field Buttons
- Legend Field Buttons
- Axis Field Buttons
- Value Field Buttons
The detailed steps are as follows:
- Create an object of the Workbook class.
- Load an Excel file using Workbook.LoadFromFile() method.
- Get a specific worksheet in the Excel file using Workbook.Worksheets[index] property.
- Get a specific pivot table in the worksheet using Worksheet.PivotTables[index] property.
- Add a pivot chart based on the pivot table to the worksheet using Worksheet.Charts.Add(ExcelChartType pivotChartType, IPivotTable pivotTable) method.
- Set the position and title of the pivot chart.
- Hide specific field buttons in the pivot chart, such as the axis field buttons and the value field buttons, using Chart.DisplayAxisFieldButtons and Chart.DisplayValueFieldButtons properties.
- Save the resulting file using Workbook.SaveToFile() method.
- C#
using Spire.Xls;
using Spire.Xls.Core;

namespace ShowOrHideFieldButtons
{
    internal class Program
    {
        static void Main(string[] args)
        {
            // Create a Workbook object
            Workbook workbook = new Workbook();

            // Load an Excel file
            workbook.LoadFromFile("CreatePivotChart.xlsx");

            // Get the first worksheet
            Worksheet sheet = workbook.Worksheets[0];

            // Get the first pivot table in the worksheet
            IPivotTable pivotTable = sheet.PivotTables[0];

            // Create a clustered column chart based on the pivot table
            Chart pivotChart = sheet.Charts.Add(ExcelChartType.ColumnClustered, pivotTable);

            // Set chart position
            pivotChart.TopRow = 1;
            pivotChart.LeftColumn = 11;
            pivotChart.RightColumn = 20;
            pivotChart.BottomRow = 15;

            // Set chart title to null
            pivotChart.ChartTitle = "";

            // Hide specific field buttons
            pivotChart.DisplayAxisFieldButtons = false;
            pivotChart.DisplayValueFieldButtons = false;
            // pivotChart.DisplayLegendFieldButtons = false;
            // pivotChart.ShowReportFilterFieldButtons = false;
            // pivotChart.DisplayEntireFieldButtons = false;

            // Save the resulting file
            workbook.SaveToFile("HideFieldButtons.xlsx", ExcelVersion.Version2013);
            workbook.Dispose();
        }
    }
}
Format Pivot Chart Series in Excel in C#
When creating a pivot chart in Excel from a pivot table using Spire.XLS for .NET, it's important to note that the chart series do not get generated automatically. Instead, you must manually add the series and format them according to your preferences. The detailed steps are as follows:
- Create an object of the Workbook class.
- Load an Excel file using Workbook.LoadFromFile() method.
- Get a specific worksheet in the Excel file using Workbook.Worksheets[index] property.
- Get a specific pivot table in the worksheet using Worksheet.PivotTables[index] property.
- Add a pivot chart based on the pivot table to the worksheet using Worksheet.Charts.Add(ExcelChartType pivotChartType, IPivotTable pivotTable) method.
- Set the position and title of the pivot chart.
- Add series to the chart using Chart.Series.Add() method and then apply the desired formatting to the series.
- Save the resulting file using Workbook.SaveToFile() method.
- C#
using Spire.Xls;
using Spire.Xls.Charts;
using Spire.Xls.Core;

namespace FormatChartSeries
{
    internal class Program
    {
        static void Main(string[] args)
        {
            // Create a Workbook object
            Workbook workbook = new Workbook();

            // Load an Excel file
            workbook.LoadFromFile("CreatePivotChart.xlsx");

            // Get the first worksheet
            Worksheet sheet = workbook.Worksheets[0];

            // Get the first pivot table in the worksheet
            IPivotTable pivotTable = sheet.PivotTables[0];

            // Create a clustered column chart based on the pivot table
            Chart pivotChart = sheet.Charts.Add(ExcelChartType.ColumnClustered, pivotTable);

            // Set chart position
            pivotChart.TopRow = 1;
            pivotChart.LeftColumn = 11;
            pivotChart.RightColumn = 20;
            pivotChart.BottomRow = 15;

            // Set chart title to null
            pivotChart.ChartTitle = "";

            // Add chart series
            ChartSerie series = pivotChart.Series.Add(ExcelChartType.ColumnClustered);

            // Set bar width
            series.GetCommonSerieFormat().GapWidth = 10;

            // Set overlap (uncomment the line below to enable)
            // series.GetCommonSerieFormat().Overlap = 100;

            // Save the resulting file
            workbook.SaveToFile("FormatChartSeries.xlsx", ExcelVersion.Version2013);
            workbook.Dispose();
        }
    }
}
Apply for a Temporary License
If you'd like to remove the evaluation message from the generated documents, or to get rid of the function limitations, please request a 30-day trial license for yourself.
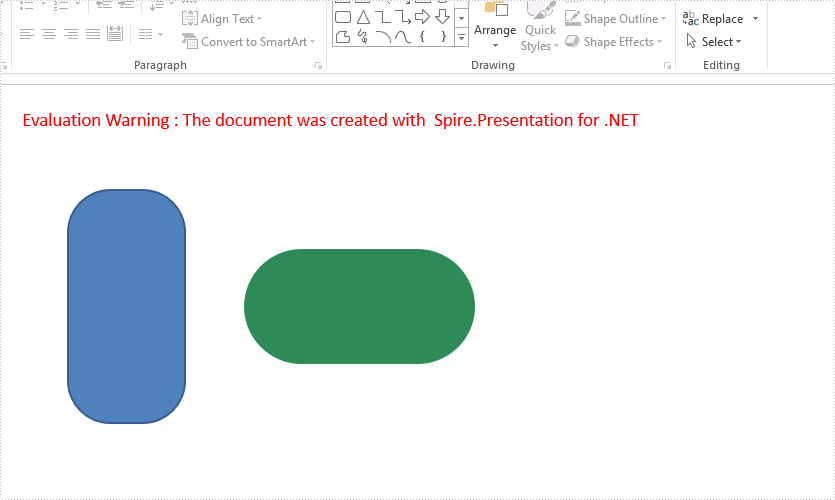
With the help of Spire.Presentation, we can add shapes to the presentation slides easily. This example shows you how to add a round corner rectangle to presentation slide and set the radius of the round corner rectangle in C#.
using Spire.Presentation;
using Spire.Presentation.Drawing;
using System.Drawing;

namespace RoundRectangle
{
    class Program
    {
        static void Main(string[] args)
        {
            Presentation presentation = new Presentation();

            //Insert a round corner rectangle and set its radious
            presentation.Slides[0].Shapes.InsertRoundRectangle(0, 60, 90, 100, 200, 36);

            //Append a round corner rectangle and set its radious
            IAutoShape shape = presentation.Slides[0].Shapes.AppendRoundRectangle(260, 90, 100, 200, 80);
            //Set the color and fill style of shape
            shape.Fill.FillType = FillFormatType.Solid;
            shape.Fill.SolidColor.Color = Color.SeaGreen;
            shape.ShapeStyle.LineColor.Color = Color.White;
            //Rotate the shape to 90 degree
            shape.Rotation = 90;

            //Save the document to file
            presentation.SaveToFile("Result.pptx", FileFormat.Pptx2013);

        }
    }
}
Effective screenshot of the round corner rectangle on presentation slide:
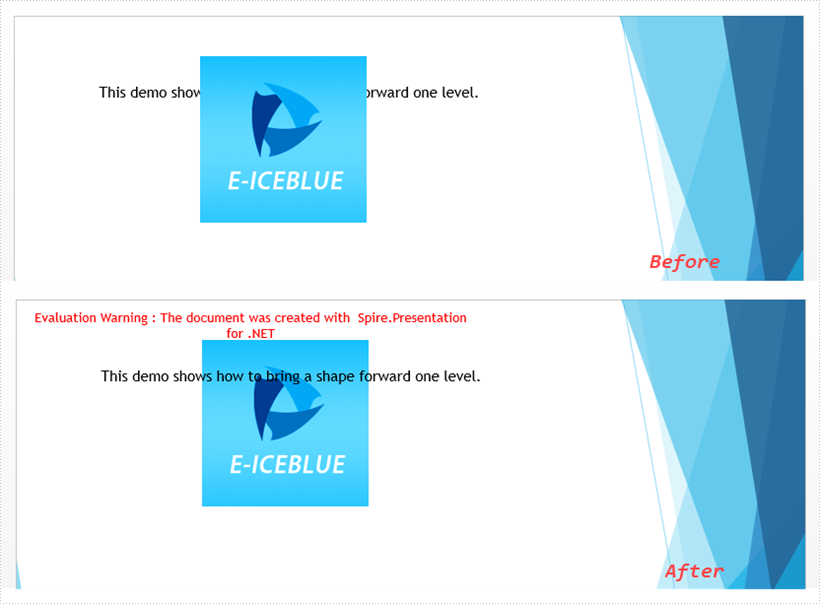
When there are overlapping shapes/images in your presentation slide, you can control which shape is under or above which shape by bring a shape forward or to front, or sending a shape backward or to back. The following example shows you how to bring a shape forward using Spire.Presentation with C# and VB.NET.
Code Snippets
//load the sample PowerPoint file
Presentation presentation = new Presentation();
presentation.LoadFromFile(@"C:\Users\Administrator\Desktop\input.pptx");

//get the specified shape
IShape shape = presentation.Slides[0].Shapes[0];

//bring the shape forward through SetShapeArrange method
shape.SetShapeArrange(ShapeArrange.BringForward);

//save to file
presentation.SaveToFile("output.pptx", FileFormat.Pptx2013);
'load the sample PowerPoint file
Dim presentation As Presentation =  New Presentation()
presentation.LoadFromFile("C:\Users\Administrator\Desktop\input.pptx")

'get the specified shape
Dim shape As IShape =  presentation.Slides(0).Shapes(0)

'bring the shape forward through SetShapeArrange method
shape.SetShapeArrange(ShapeArrange.BringForward)

'save to file
presentation.SaveToFile("output.pptx", FileFormat.Pptx2013)
Output
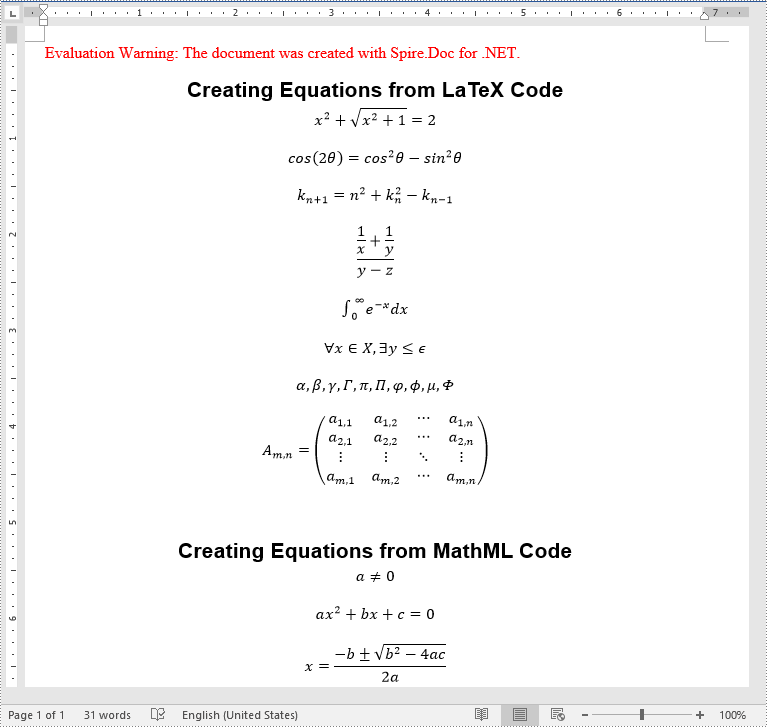
Math equations in Word documents are essential tools for expressing mathematical concepts and relationships. Whether you are writing an academic paper, a scientific report, or any other document involving mathematical content, incorporating math equations can greatly enhance your ability to convey complex mathematical concepts and improve the visual appeal and professionalism of your document. In this article, we will explain how to insert math equations into Word documents in C# and VB.NET using Spire.Doc for .NET.
Install Spire.Doc for .NET
To begin with, you need to add the DLL files included in the Spire.Doc for .NET package as references in your .NET project. The DLL files can be either downloaded from this link or installed via NuGet.
PM> Install-Package Spire.Doc
Insert Math Equations into a Word Document in C# and VB.NET
Spire.Doc for .NET allows generating math equations from LaTeX code and MathML code using OfficeMath.FromLatexMathCode(string latexMathCode) and OfficeMath.FromMathMLCode(string mathMLCode) methods. The detailed steps are as follows:
- Create two string arrays from LaTeX code and MathML code.
- Create a Document instance and add a section to it using Document.AddSection() method.
- Iterate through each LaTeX code in the string array.
- Create a math equation from the LaTeX code using OfficeMath.FromLatexMathCode(string latexMathCode) method.
- Add a paragraph to the section, then add the math equation to the paragraph using Paragraph.Items.Add() method.
- Iterate through each MathML code in the string array.
- Create a math equation from the MathML code using OfficeMath.FromMathMLCode(string mathMLCode) method.
- Add a paragraph to the section, then add the math equation to the paragraph using Paragraph.Items.Add() method.
- Save the result document using Document.SaveToFile() method.
- C#
- VB.NET
using Spire.Doc;
using Spire.Doc.Documents;
using Spire.Doc.Fields.OMath;

namespace AddMathEquations
{
    internal class Program
    {
        static void Main(string[] args)
        {
            //Create a string array from LaTeX code
            string[] latexMathCode = {
                "x^{2}+\\sqrt{x^{2}+1}=2",
                "\\cos (2\\theta) = \\cos^2 \\theta - \\sin^2 \\theta",
                "k_{n+1} = n^2 + k_n^2 - k_{n-1}",
                "\\frac {\\frac {1}{x}+ \\frac {1}{y}}{y-z}",
                "\\int_0^ \\infty \\mathrm {e}^{-x} \\, \\mathrm {d}x",
                "\\forall x \\in X, \\quad \\exists y \\leq \\epsilon",
                "\\alpha, \\beta, \\gamma, \\Gamma, \\pi, \\Pi, \\phi, \\varphi, \\mu, \\Phi",
                "A_{m,n} = \\begin{pmatrix} a_{1,1} & a_{1,2} & \\cdots & a_{1,n} \\\\ a_{2,1} & a_{2,2} & \\cdots & a_{2,n} \\\\ \\vdots  & \\vdots  & \\ddots & \\vdots  \\\\ a_{m,1} & a_{m,2} & \\cdots & a_{m,n} \\end{pmatrix}",
            };

            //Create a string array from MathML code
            string[] mathMLCode = {
                "<math xmlns=\"http://www.w3.org/1998/Math/MathML\"><mi>a</mi><mo>≠</mo><mn>0</mn></math>",
                "<math xmlns=\"http://www.w3.org/1998/Math/MathML\"><mi>a</mi><msup><mi>x</mi><mn>2</mn></msup><mo>+</mo><mi>b</mi><mi>x</mi><mo>+</mo><mi>c</mi><mo>=</mo><mn>0</mn></math>",
                "<math xmlns=\"http://www.w3.org/1998/Math/MathML\"><mi>x</mi><mo>=</mo><mrow><mfrac><mrow><mo>−</mo><mi>b</mi><mo>±</mo><msqrt><msup><mi>b</mi><mn>2</mn></msup><mo>−</mo><mn>4</mn><mi>a</mi><mi>c</mi></msqrt></mrow><mrow><mn>2</mn><mi>a</mi></mrow></mfrac></mrow></math>",
            };

            //Create a Document instance
            Document doc = new Document();

            //Add a section
            Section section = doc.AddSection();

            //Add a paragraph to the section
            Paragraph textPara = section.AddParagraph();
            textPara.AppendText("Creating Equations from LaTeX Code");
            textPara.ApplyStyle(BuiltinStyle.Heading1);
            textPara.Format.HorizontalAlignment = HorizontalAlignment.Center;

            //Iterate through each LaTeX code in the string array
            for (int i = 0; i < latexMathCode.Length; i++)
            {
                //Create a math equation from the LaTeX code
                OfficeMath officeMath = new OfficeMath(doc);
                officeMath.FromLatexMathCode(latexMathCode[i]);
                //Add the math equation to the section
                Paragraph paragraph = section.AddParagraph();
                paragraph.Items.Add(officeMath);
                section.AddParagraph();
            }

            section.AddParagraph();

            //Add a paragraph to the section
            textPara = section.AddParagraph();
            textPara.AppendText("Creating Equations from MathML Code");
            textPara.ApplyStyle(BuiltinStyle.Heading1);
            textPara.Format.HorizontalAlignment = HorizontalAlignment.Center;

            //Iterate through each MathML code in the string array
            for (int j = 0; j < mathMLCode.Length; j++)
            {
                //Create a math equation from the MathML code
                OfficeMath officeMath = new OfficeMath(doc);
                officeMath.FromMathMLCode(mathMLCode[j]);
                //Add the math equation to the section
                Paragraph paragraph = section.AddParagraph();
                paragraph.Items.Add(officeMath);
                section.AddParagraph();
            }

            //Save the result document
            doc.SaveToFile("AddMathEquations.docx", FileFormat.Docx2013);
            doc.Dispose();
        }
    }
}
Apply for a Temporary License
If you'd like to remove the evaluation message from the generated documents, or to get rid of the function limitations, please request a 30-day trial license for yourself.
A signature confirms that the digital document originated from the signer and has not been tampered with during transit. The use of digital signatures eliminates the need for sending paper documents, and reduces the number of the documents that need to be printed, mailed, and stored, saving you time and money. In this article, you will learn how to digitally sign a Word document in C# and VB.NET using Spire.Doc for .NET.
Install Spire.Doc for .NET
To begin with, you need to add the DLL files included in the Spire.Doc for.NET package as references in your .NET project. The DLL files can be either downloaded from this link or installed via NuGet.
PM> Install-Package Spire.Doc
Add a Digital Signature to Word in C#, VB.NET
The steps are as follows.
- Create a Document object.
- Load a Word document using Document.LoadFromFile() method.
- Specify the path and the password of a .pfx certificate.
- Digitally sign the document while saving the document using Document.SaveToFile(string fileName, FileFormat fileFormat, string certificatePath, string securePassword) method. Here are some other methods that you can use to digitally sign a Word document.
- public void SaveToFile(string fileName, FileFormat fileFormat, byte[] certificateData, string securePassword);
- public void SaveToStream(Stream stream, FileFormat fileFormat, byte[] certificateData, string securePassword);
- public void SaveToStream(Stream stream, FileFormat fileFormat, string certificatePath, string securePassword);
- public static byte[] Document.Sign(Stream sourceStream, byte[] certificateData, string securePassword);
- public static byte[] Document.Sign(Stream sourceStream, string certificatePath, string securePassword);
- C#
- VB.NET
using Spire.Doc;

namespace DigitallySignWord
{
    class Program
    {
        static void Main(string[] args)
        {
            //Create a Document object
            Document doc = new Document();

            //Load a Word file
            doc.LoadFromFile("C:\\Users\\Administrator\\Desktop\\sample.docx");

            //Specify the certificate path
            string certificatePath = "C:\\Users\\Administrator\\Desktop\\gary.pfx";

            //Specify the password of the certificate
            string password = "e-iceblue";

            //Digitally sign the document while saving it to a .docx file
            doc.SaveToFile("AddDigitalSignature.docx", FileFormat.Docx2013, certificatePath, password);
        }
    }
}
Apply for a Temporary License
If you'd like to remove the evaluation message from the generated documents, or to get rid of the function limitations, please request a 30-day trial license for yourself.
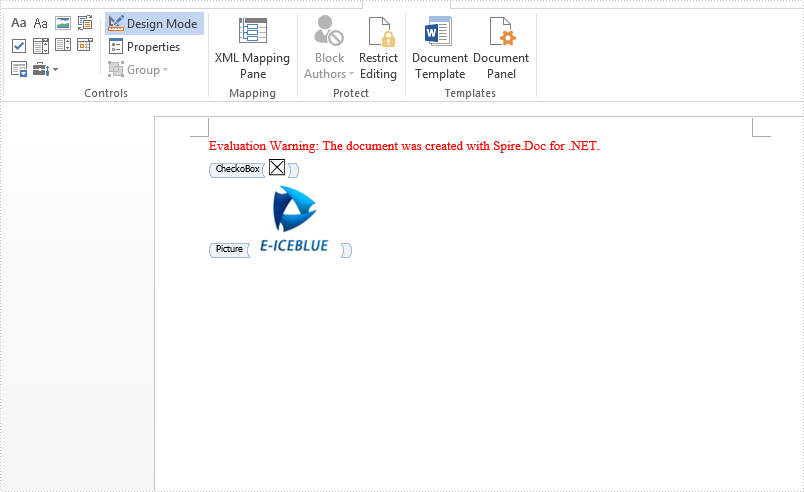
Add checkbox and picture content control to word document in C#
2019-05-29 07:31:42 Written by KoohjiBesides the Combo Box, Text, Date Picker and Drop-Down List content controls, Checkbox and picture content control also are the mostly used content control in word document. Spire.Doc supports to add many kinds of content controls to the word document. This article will show you how to add checkbox and picture content control to word document by Spire.Doc for .NET.
Code snippets of how to add checkbox and picture content control:
using System;
using System.Drawing;
namespace AddCheckbox
{

    class Program
    {

        static void Main(string[] args)
        {
            //Create a new word document
            Document document = new Document();

            //Add a section to the document
            Section section = document.AddSection();

            //Add a document to the section
            Paragraph paragraph = section.AddParagraph();

            //Add checkbox content control
            StructureDocumentTagInline sdt = new StructureDocumentTagInline(document);
            paragraph = section.AddParagraph();
            sdt = new StructureDocumentTagInline(document);
            sdt.CharacterFormat.FontSize = 20;
            paragraph.ChildObjects.Add(sdt);
            sdt.SDTProperties.SDTType = SdtType.CheckBox;
            SdtCheckBox scb = new SdtCheckBox();
            sdt.SDTProperties.ControlProperties = scb;
            TextRange tr = new TextRange(document);
            tr.CharacterFormat.FontName = "MS Gothic";
            tr.CharacterFormat.FontSize = 20;
            sdt.ChildObjects.Add(tr);
            scb.Checked = true;

            sdt.SDTProperties.Alias = "CheckoBox";
            sdt.SDTProperties.Tag = "Checkbox";

            //Add picture content control
            paragraph = section.AddParagraph();
            sdt = new StructureDocumentTagInline(document);
            paragraph.ChildObjects.Add(sdt);
            sdt.SDTProperties.ControlProperties = new SdtPicture();

            sdt.SDTProperties.Alias = "Picture";
            sdt.SDTProperties.Tag = "Picture";

            DocPicture pic = new DocPicture(document) { Width = 10, Height = 10 };
            pic.LoadImage(Image.FromFile("Logo.jpg"));
            sdt.SDTContent.ChildObjects.Add(pic);

            document.SaveToFile("Sample.docx", FileFormat.Docx2013);

        }
    }
}
Effective screenshot after adding checkbox and picture content control to word document:
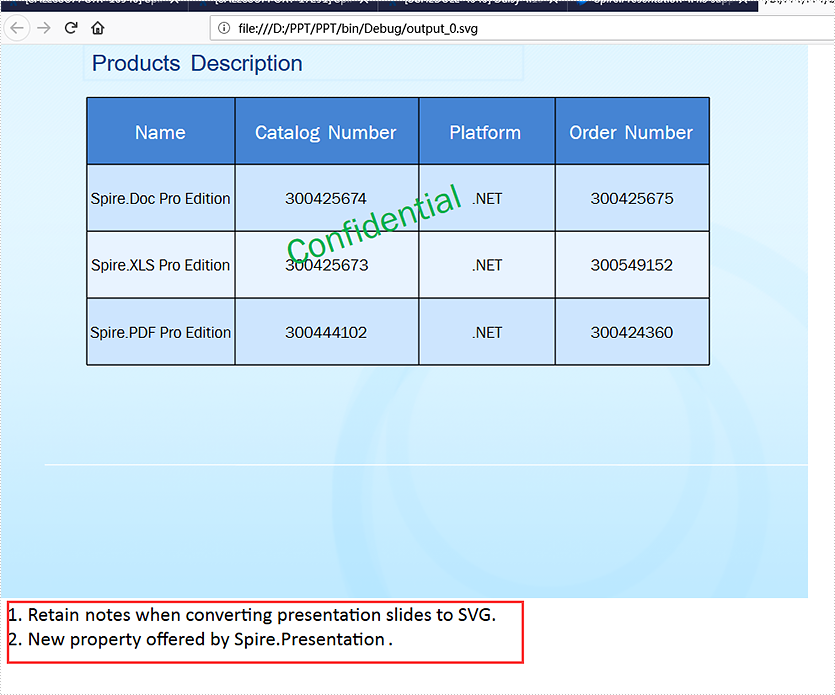
With the help of Spire.Presentation, developers can easily add and get speaker notes on presentation slides. From v 4.4.3, Spire.Presentation supports to retain the notes when converting presentation slides to SVG. This article will show you how to keep the notes when saving presentation slides to SVG in C#.
using Spire.Presentation;
using Spire.Presentation.Drawing;
using System.IO;
using System.Collections.Generic;

namespace PPT
{
    class Program
    {
        static void Main(string[] args)
        {
            //load the sample document with speaker notes
            Presentation ppt = new Presentation();
            ppt.LoadFromFile("Sample.pptx");

            //retain the notes when converting ppt to svg
            ppt.IsNoteRetained = true;


            //convert presentation slides to SVG
            Queue<byte[]> bytes = ppt.SaveToSVG();

            int length = bytes.Count;
            for (int i = 0; i < length; i++)
            {
                FileStream filestream = new FileStream(string.Format(@"output_{0}.svg", i), FileMode.Create);
                byte[] outputBytes = bytes.Dequeue();
                filestream.Write(outputBytes, 0, outputBytes.Length);
            }
            ppt.Dispose();
            ppt.SaveToSVG();

        }
    }
}
Effective screenshot of retaining the speaker notes when converting presentation slides to SVG:
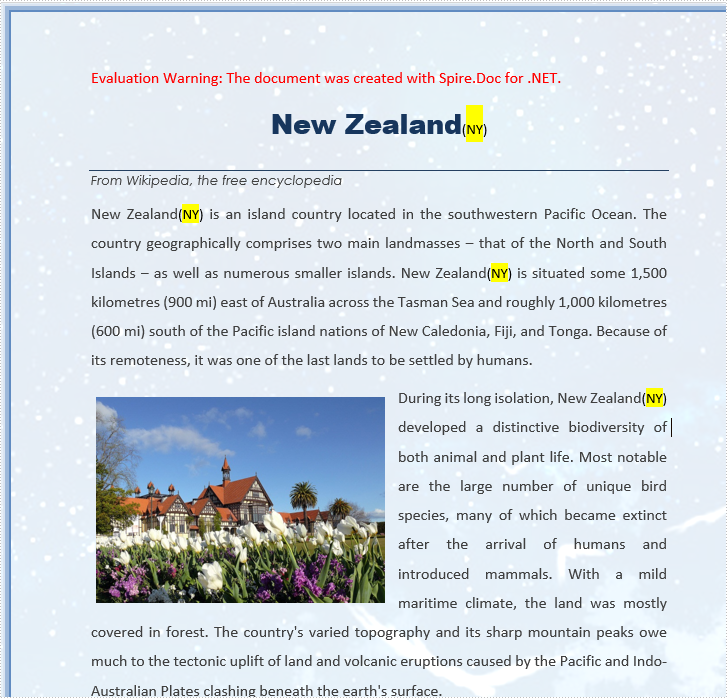
C# add new text strings after the searched text string in word document
2019-04-04 07:54:55 Written by KoohjiWith Spire.Doc for .NET, we can easily insert new text to word document at exact position, it also supports to insert new text after the certain text strings at many places. This article will show you how to insert new text strings after the searched text string in word document.
using Spire.Doc;
using Spire.Doc.Documents;
using Spire.Doc.Fields;
using System.Drawing;

namespace Word
{
    class Program
    {
        static void Main(string[] args)
        {
            //load the sample document
            Document doc = new Document();
            doc.LoadFromFile("Sample.docx", FileFormat.Docx2010);

            //find all the text string “New Zealand” from the sample document
            TextSelection[] selections = doc.FindAllString("New Zealand", true, true);
            int index = 0;

            //defines text range
            TextRange range = new TextRange(doc);


            //insert new text string (NY) after the searched text string
            foreach (TextSelection selection in selections)
            {
                range = selection.GetAsOneRange();
                TextRange newrange = new TextRange(doc);
                newrange.Text = ("(NY)");
                index = range.OwnerParagraph.ChildObjects.IndexOf(range);
                range.OwnerParagraph.ChildObjects.Insert(index + 1, newrange);

            }

            //find and highlight the newly added text string NY
            TextSelection[] text2 = doc.FindAllString("NY", false, true);
            foreach (TextSelection seletion in text2)
            {
                seletion.GetAsOneRange().CharacterFormat.HighlightColor = Color.Yellow;
            }

            //save the document
            doc.SaveToFile("Result.docx", FileFormat.Docx2010);
        }
    }
}
Effective screenshot after adding the text strings to the searched text: