.NET (1327)
Children categories
Digital timestamps mark a PDF signature with the time and date as proof of integrity. A timestamp shows that the contents of the document existed at a point in time, and are unchanged. This article is going to introduce how to digitally sign a PDF document with a timestamp server by using Spire.PDF.
Code Snippets
using Spire.Pdf;
using Spire.Pdf.Graphics;
using Spire.Pdf.Security;
using System.Drawing;


namespace SignPDFwithTimestamp
{
    class Program
    {
        static void Main(string[] args)
        {
            //create a PdfDocument object and load a PDF file
            PdfDocument doc = new PdfDocument();
            doc.LoadFromFile(@"C:\Users\Administrator\Desktop\Example.pdf");

            //load the certificate .pfx file
            PdfCertificate cert = new PdfCertificate(@"C:\Users\Administrator\Desktop\gary.pfx", "e-iceblue");

            //add a signature to the specified position
            PdfSignature signature = new PdfSignature(doc, doc.Pages[0], cert, "signature");
            signature.Bounds = new RectangleF(new PointF(350, 700), new SizeF(180, 90));

            //set the signature content
            signature.NameLabel = "Digitally signed by:Gary";
            signature.LocationInfoLabel = "Location:";
            signature.LocationInfo = "CN";
            signature.ReasonLabel = "Reason: ";
            signature.Reason = "Ensure authenticity";
            signature.ContactInfoLabel = "Contact Number: ";
            signature.ContactInfo = "028-81705109";
            signature.DocumentPermissions = PdfCertificationFlags.AllowFormFill | PdfCertificationFlags.ForbidChanges;
            signature.SignImageSource = PdfImage.FromFile(@"C:\Users\Administrator\Desktop\company-logo.jpg");

            //configure a timestamp server
            string url = "http://timestamp.wosign.com/rfc3161";
            signature.ConfigureTimestamp(url);

            //save to file
            doc.SaveToFile("output.pdf");
        }
    }
}
Imports Spire.Pdf
Imports Spire.Pdf.Graphics
Imports Spire.Pdf.Security
Imports System.Drawing


Namespace SignPDFwithTimestamp
	Class Program
		Private Shared Sub Main(args As String())
			'create a PdfDocument object and load a PDF file
Dim doc As PdfDocument =  New PdfDocument()
doc.LoadFromFile("C:\Users\Administrator\Desktop\Example.pdf")

'load the certificate .pfx file
Dim cert As PdfCertificate =  New PdfCertificate("C:\Users\Administrator\Desktop\gary.pfx","e-iceblue")

'add a signature to the specified position
Dim signature As PdfSignature =  New PdfSignature(doc,doc.Pages(0),cert,"signature")
signature.Bounds = New RectangleF(New PointF(350, 700), New SizeF(180, 90))

'set the signature content
signature.NameLabel = "Digitally signed by:Gary"
signature.LocationInfoLabel = "Location:"
signature.LocationInfo = "CN"
signature.ReasonLabel = "Reason: "
signature.Reason = "Ensure authenticity"
signature.ContactInfoLabel = "Contact Number: "
signature.ContactInfo = "028-81705109"
signature.DocumentPermissions = PdfCertificationFlags.AllowFormFill Or PdfCertificationFlags.ForbidChanges
signature.SignImageSource = PdfImage.FromFile("C:\Users\Administrator\Desktop\company-logo.jpg")

'configure a timestamp server
Dim url As String =  "http://timestamp.wosign.com/rfc3161"
signature.ConfigureTimestamp(url)

'save to file
doc.SaveToFile("output.pdf")
		End Sub
	End Class
End Namespace
Output

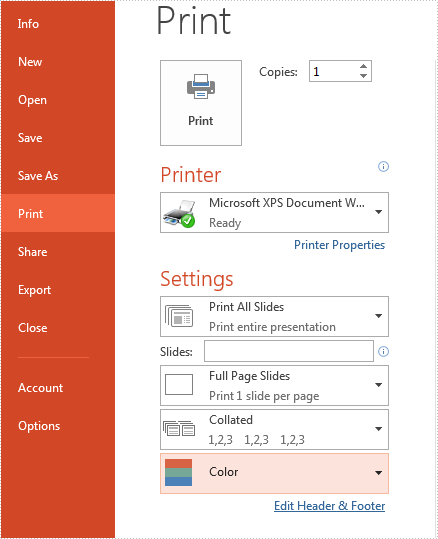
PowerPoint print settings allow users to control how presentation slides are printed, such as print all slides, print some selected slides, print slides with frames or not, print many slides into one page, print order, print color and so on. This article will show you how to set print options when print PowerPoint documents in C#.
Firstly, view Microsoft PowerPoint's page print settings:
Code Snippets of set print settings of PowerPoint document by using PrinterSettings object to print the presentation slides:
static void Main(string[] args)
{
    //load the sample document from file
    Presentation ppt = new Presentation();
    ppt.LoadFromFile("Sample.pptx");


    //use PrinterSettings object to print presentation slides
    PrinterSettings ps = new PrinterSettings();
    ps.PrintRange = PrintRange.AllPages;
    ps.PrintToFile = true;
    ps.PrintFileName = ("Print.xps");

    //print the slide with frame
    ppt.SlideFrameForPrint = true;

    //print the slide with Grayscale
    ppt.GrayLevelForPrint = true;

    //Print 4 slides horizontal
    ppt.SlideCountPerPageForPrint = PageSlideCount.Four;
    ppt.OrderForPrint = Order.Horizontal;


    ////only select some slides to print
    //ppt.SelectSlidesForPrint("1", "3");


    //print the document
    ppt.Print(ps);

}
Code Snippets of set print document name by using PrintDocument object to print presentation slides:
static void Main(string[] args)
{
    //load the sample document from file
    Presentation ppt = new Presentation();
    ppt.LoadFromFile("Sample.pptx");

    //use PrintDocument object to print presentation slides
    PresentationPrintDocument document = new PresentationPrintDocument(ppt);

    //print document to virtual printer
    document.PrinterSettings.PrinterName = "Microsoft XPS Document Writer";

    //print the slide with frame
    ppt.SlideFrameForPrint = true;

    //print 4 slides horizontal
    ppt.SlideCountPerPageForPrint = PageSlideCount.Four;
    ppt.OrderForPrint = Order.Horizontal;

    //print the slide with Grayscale
    ppt.GrayLevelForPrint = true;

    //set the print document name
    document.DocumentName = "Print Task";

    document.PrinterSettings.PrintToFile = true;
    document.PrinterSettings.PrintFileName = ("Print.xps");

    ppt.Print(document);

}
PostScript was developed by Adobe Systems in the 1980s as a way of turning digital graphics or text files into a fixed format ready for printing. With the passage time, although the PostScript (PS) file format is no longer as popular as it once was, now it is still supported by most printers. In this article, you will learn how to how to programmatically convert a PDF file to a PostScript (PS) file using Spire.PDF for .NET.
Install Spire.PDF for .NET
To begin with, you need to add the DLL files included in the Spire.PDF for.NET package as references in your .NET project. The DLL files can be either downloaded from this link or installed via NuGet.
PM> Install-Package Spire.PDF
Convert PDF to PostScript in C# and VB.NET
Converting PDF to PS can improve the quality of the printed output. With Spire.PDF for .NET, you can complete the conversion with only three lines of code. The following are the detailed steps.
- Create a PdfDocument instance.
- Load a sample PDF file using PdfDocument.LoadFromFile() method.
- Save the PDF file as a PS file using PdfDocument.SaveToFile(string filename, FileFormat.POSTSCRIPT) method.
- C#
- VB.NET
using Spire.Pdf;

namespace PDFtoPS
{
    class Program
    {
        static void Main(string[] args)
        {
            //Create a PdfDocument instance
            PdfDocument document = new PdfDocument();

            //Load a sample PDF file
            document.LoadFromFile("Test.pdf");

            //Save the PDF file as a PS file
            document.SaveToFile("toPostScript.ps", FileFormat.POSTSCRIPT);
        }
    }
}
Apply for a Temporary License
If you'd like to remove the evaluation message from the generated documents, or to get rid of the function limitations, please request a 30-day trial license for yourself.
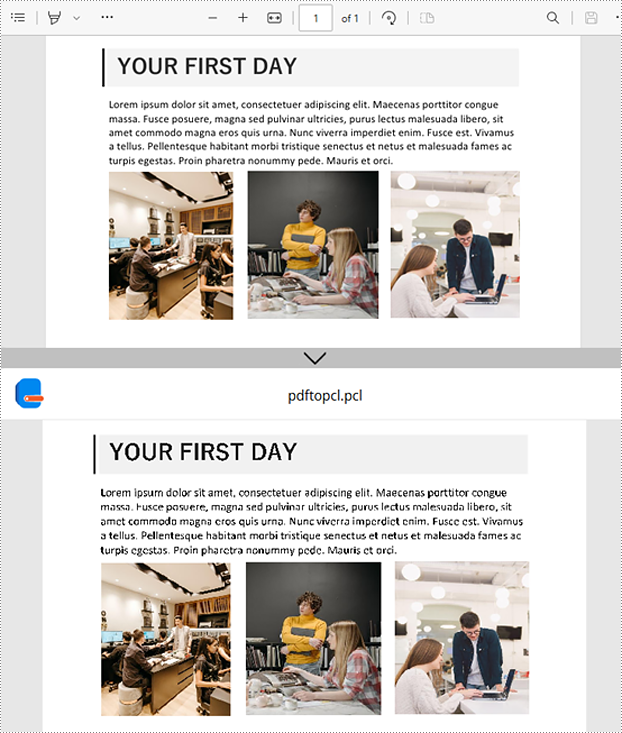
Converting a PDF to PCL (Printer Command Language) in C# can be an essential task for developers working with printing solutions. PCL is a well-established page description language used by many laser printers, and converting documents into this format allows for more efficient and accurate printing.
In this article, we will explore the process of converting PDFs to PCL format in C# using Spire.PDF for .NET, including batch conversion for processing multiple files efficiently.
- • Install Spire.PDF for .NET
- • How to Convert PDF to PCL in C#
- • Batch Conversion of PDF to PCL using C#
Install Spire.PDF for .NET
To get started, you’ll need to install the Spire.PDF for .NET library in your project. The easiest way to do this is via NuGet.
- 1.Open “NuGet Package Manager” in Visual Studio.
- 2.Search for “Spire.PDF” and install the package.
Alternatively, you can run the following command in the Package Manager Console:
PM> Install-Package Spire.PDF
How to Convert PDF to PCL in C#
Once the Spire.PDF library is installed, you're ready to start converting PDF documents into PCL. The classes and methods used for conversion are explained below:
- PdfDocument: This class represents the PDF document you're working with.
- LoadFromFile(): This method loads the PDF file into the PdfDocument object.
- SaveToFile(): This method saves the loaded PDF document in the specified format (PCL in this case).
Code Example:
- C#
using Spire.Pdf;

namespace PDFtoPCL
{
    class Program
    {
        static void Main(string[] args)
        {
            // Create a PdfDocument instance
            PdfDocument pdf = new PdfDocument();

            // Load a PDF file
            pdf.LoadFromFile("Input1.pdf");

            // Save to PCL format
            pdf.SaveToFile("PdfToPcl.pcl", FileFormat.PCL);
            pdf.Close();

        }
    }
}
Batch Conversion of PDF to PCL using C#
If you need to convert a large number of PDF files in a folder, you can perform batch conversion by following the below steps and code:
- 1. Get all PDF files in a specified folder using the Directory.GetFiles() method.
- 2. Use foreach loop to iterate over each PDF file.
- 3. Load each PDF file into the PdfDocument object.
- 4. Generate the output PCL file path, and then convert the PDF to PCL.
Code Example:
- C#
using Spire.Pdf;
using System.IO;

namespace PDFtoPCL
{
    class Program
    {
        static void Main(string[] args)
        {

            string pdfFolder = @"F:\PDFs\";
            string pclFolder = @"F:\PCLs\";

            // Get all PDF files in a folder
            string[] pdfFiles = Directory.GetFiles(pdfFolder, "*.pdf");

            // Iterate through each PDF file
            foreach (string pdfFile in pdfFiles)
            {
                // Load the PDF file into the PdfDocument object
                PdfDocument pdf = new PdfDocument();
                pdf.LoadFromFile(pdfFile);

                // Define the file path and file name of the output PCL file
                string outputFile = Path.Combine(pclFolder, Path.GetFileNameWithoutExtension(pdfFile) + ".pcl");

                // Save PDF as PCL file
                pdf.SaveToFile(outputFile, FileFormat.PCL);
                pdf.Close();
            }
        }
    }
}

Conclusion
With Spire.PDF for .NET, converting PDFs to PCL in C# becomes straightforward, whether you're handling individual files or bulk operations. Its robust API makes it an excellent choice for automating printing workflows or integrating conversion features into applications.
Get a Free License
To fully experience the capabilities of Spire.PDF for .NET without any evaluation limitations, you can request a free 30-day trial license.
PCL File is Digital printed document created in the Printer Command Language (more commonly referred to as PCL) page description language. From v7.1.19, Spire.Doc supports to convert word document to PCL. There are many kinds of standard for PCL document; the PCL here refers to PCL 6 (PCL 6 Enhanced or PCL XL). This article will show you how to save word document to PCL in C# and VB.NET by only three lines of codes.
using Spire.Doc;

namespace DOCPCL
{
    class Program
    {
        static void Main(string[] args)
        {
            //load the sample document
            Document doc = new Document();
            doc.LoadFromFile("Sample.docx", FileFormat.Docx2010);

            //save the document as a PCL file
            doc.SaveToFile("Result.pcl", FileFormat.PCL);


        }
    }
}
Imports Spire.Doc

Namespace DOCPCL
	Class Program
		Private Shared Sub Main(args As String())
			'load the sample document
			Dim doc As New Document()
			doc.LoadFromFile("Sample.docx", FileFormat.Docx2010)

			'save the document as a PCL file
			doc.SaveToFile("Result.pcl", FileFormat.PCL)


		End Sub
	End Class
End Namespace
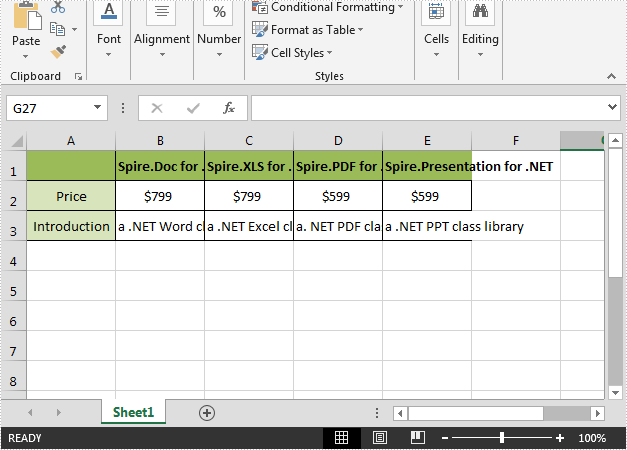
Shrink to fit is a useful option in Excel, it enables us to automatically reduce the font size in a cell until the text fits within the cell. This article demonstrates how to accomplish the same functionality programmatically in C# using Spire.XLS.
Below is the screenshot of the input Excel file:
Detail steps:
Step 1: Instantiate a Workbook object and load the Excel file.
Workbook workbook = new Workbook();
workbook.LoadFromFile(@"Input.xlsx");
Step 2: Get the first worksheet.
Worksheet sheet = workbook.Worksheets[0];
Step 3: Specify the cell range to shrink text.
CellRange cell = sheet.Range["A1:E3"];
Step 4: Enable ShrinkToFit.
CellStyle style = cell.Style;
style.ShrinkToFit = true;
Step 5: Save the file.
workbook.SaveToFile("ShrinkTextToFitCell.xlsx", ExcelVersion.Version2013);
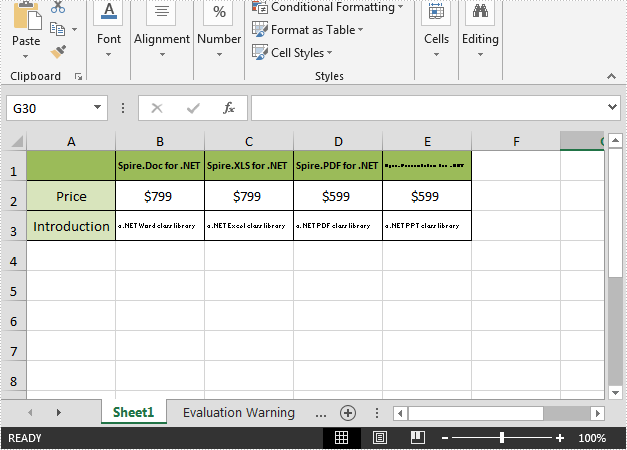
Output:
Full code:
using Spire.Xls;
namespace ShrinkText
{
    class Program
    {

        static void Main(string[] args)
        {
            //Load the Excel file
            Workbook workbook = new Workbook();
            workbook.LoadFromFile(@"Input.xlsx");

            //Get the first worksheet
            Worksheet sheet = workbook.Worksheets[0];

            //The cell range to shrink text
            CellRange cell = sheet.Range["A1:E3"];

            //Enable ShrinkToFit
            CellStyle style = cell.Style;
            style.ShrinkToFit = true;

            //Save the file
            workbook.SaveToFile("ShrinkTextToFitCell.xlsx", ExcelVersion.Version2013);
        }
    }
}
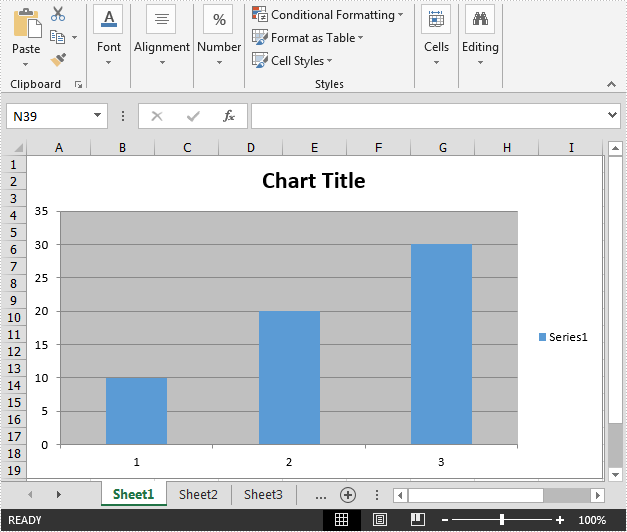
This article demonstrates how to create a chart without reference to the worksheet data range using Spire.XLS.
Detail steps:
Step 1: Create a workbook and get the first worksheet.
Workbook wb = new Workbook();
Worksheet sheet = wb.Worksheets[0];
Step 2: Add a chart to the worksheet.
Chart chart = sheet.Charts.Add();
Step 3: Add a series to the chart.
var series = chart.Series.Add();
Step 4: Add data.
series.EnteredDirectlyValues = new object[] { 10, 20, 30 };
Step 5: Save the file.
wb.SaveToFile("result.xlsx", ExcelVersion.Version2013);
Output:
Full code:
using Spire.Xls;

namespace Create_chart
{
    class Program
    {
        static void Main(string[] args)
        {
            //Create a workbook
            Workbook wb = new Workbook();

            //Get the first worksheet
            Worksheet sheet = wb.Worksheets[0];

            //Add a chart to the worksheet
            Chart chart = sheet.Charts.Add();

            //Add a series to the chart
            var series = chart.Series.Add();

            //Add data
            series.EnteredDirectlyValues = new object[] { 10, 20, 30 };

            //Save the file
            wb.SaveToFile("result.xlsx", ExcelVersion.Version2013);
        }
    }
}
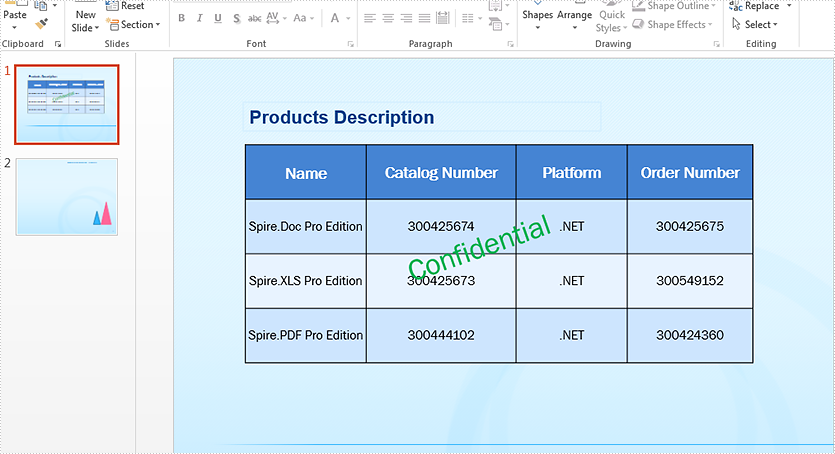
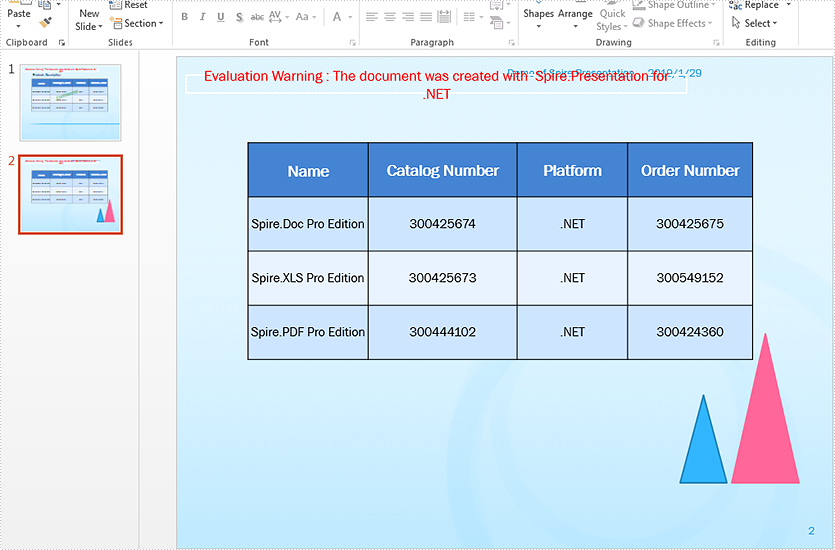
In this article, we will explain how to copy a shapes or all shapes from one slide into another within the same PowerPoint document by using Spire.Presentation.
Firstly, view the sample PowerPoint document:
Copy a single shape from the first slide to the second slide:
//Load the sample document
Presentation ppt = new Presentation();
ppt.LoadFromFile("Sample.pptx");


//define the source slide and target slide
ISlide sourceSlide = ppt.Slides[0];
ISlide targetSlide = ppt.Slides[1];

//copy the second shape from the source slide to the target slide
targetSlide.Shapes.AddShape((Shape)sourceSlide.Shapes[1]);

//save the document to file
ppt.SaveToFile("Copyshape.pptx", FileFormat.Pptx2013);
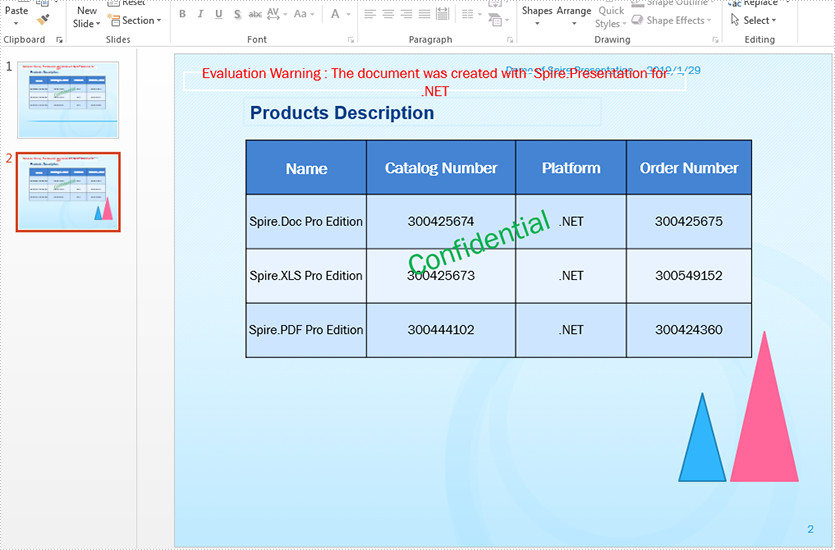
Effective screenshot after copy a single shape from the first slide to second slide:
Copy all shapes from the first slide to the second slide:
//Load the sample document
Presentation ppt = new Presentation();
ppt.LoadFromFile("Sample.pptx");


//copy all the shapes from the source slide to the target slide
for (int i = 0; i < ppt.Slides.Count - 1; i++)
{
    ISlide sourceSlide = ppt.Slides[i];
    ISlide targetSlide = ppt.Slides[ppt.Slides.Count - 1];
    for (int j = 0; j < sourceSlide.Shapes.Count; j++)
    {
        targetSlide.Shapes.AddShape((Shape)sourceSlide.Shapes[j]);
    }
}

//save the document to file
ppt.SaveToFile("Copyshapes.pptx", FileFormat.Pptx2013);
Effective screenshot after copy all shapes from the first slide to second slide:
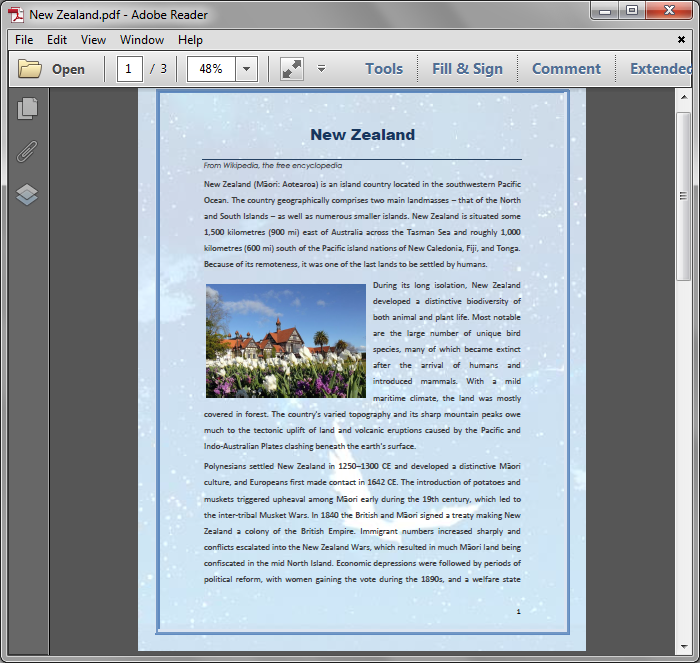
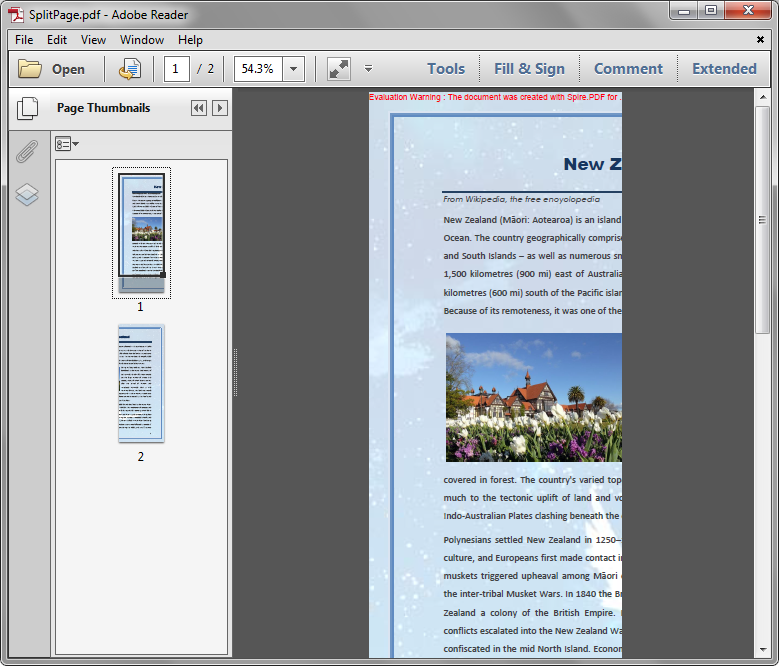
Horizontally and Vertically Split a PDF Page into multiple Pages in C#
2019-01-23 06:36:03 Written by KoohjiSpire.PDF supports to horizontally and vertically split a PDF page into two or more pages. This article will show you how to use Spire.PDF to accomplish this function.
The sample PDF file:
Detail steps:
Step 1: Load the sample PDF file and get the first page.
PdfDocument pdf = new PdfDocument();
pdf.LoadFromFile("New Zealand.pdf");

PdfPageBase page = pdf.Pages[0];
Step 2: Create a new PDF file and remove page margins.
PdfDocument newPdf = new PdfDocument();
newPdf.PageSettings.Margins.All = 0;
Step 3: Set page width and height in order to horizontally or vertically split the first page into 2 pages.
//Horizontally Split
newPdf.PageSettings.Width = page.Size.Width;
newPdf.PageSettings.Height = page.Size.Height / 2;
//Vertically split
//newPdf.PageSettings.Width = page.Size.Width / 2;
//newPdf.PageSettings.Height = page.Size.Height;
Step 5: Add a new page to the new PDF file.
PdfPageBase newPage = newPdf.Pages.Add();
Step 6: Create layout format.
PdfTextLayout format = new PdfTextLayout();
format.Break = PdfLayoutBreakType.FitPage;
format.Layout = PdfLayoutType.Paginate;
Step 7: Create template from the first Page of the sample PDF, and draw the template to the new added page with the layout format.
page.CreateTemplate().Draw(newPage, new PointF(0, 0), format);
Step 8: Save and close.
newPdf.SaveToFile("SplitPage.pdf");
newPdf.Close();
pdf.Close();
Horizontally split:
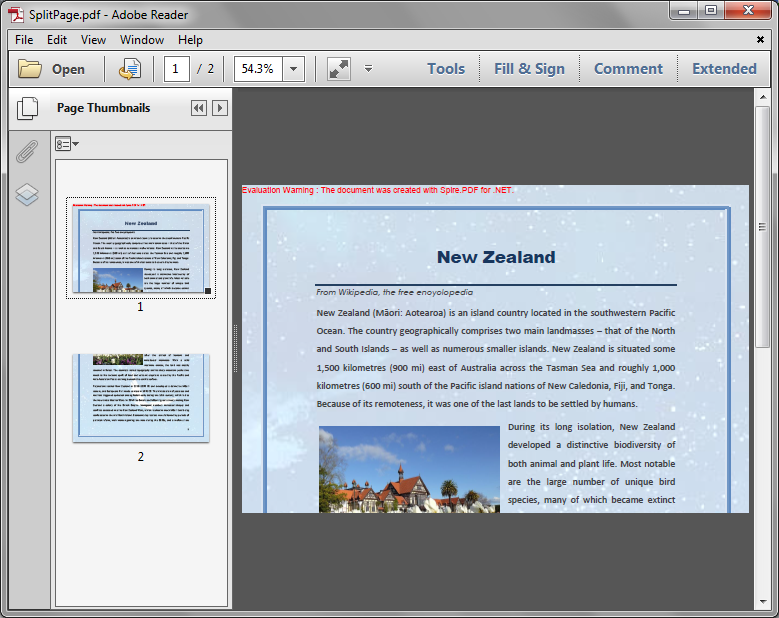
Vertically split:
Full code:
using System.Drawing;
using Spire.Pdf;
using Spire.Pdf.Graphics;

namespace SplitPDFPage
{
    class Program
    {
        static void Main(string[] args)
        {
            //Load the sample PDF
            PdfDocument pdf = new PdfDocument();
            pdf.LoadFromFile("New Zealand.pdf");

            //Get the first page
            PdfPageBase page = pdf.Pages[0];

            //Create a new PDF
            PdfDocument newPdf = new PdfDocument();

            //Remove page margins
            newPdf.PageSettings.Margins.All = 0;

            //Set page width and height in order to horizontally split the first page into 2 pages
            newPdf.PageSettings.Width = page.Size.Width;
            newPdf.PageSettings.Height = page.Size.Height / 2;

            //Set page width and height in order to vertically split the first page into 2 pages
            //newPdf.PageSettings.Width = page.Size.Width / 2;
            //newPdf.PageSettings.Height = page.Size.Height;

            //Add a new page to the new PDF
            PdfPageBase newPage = newPdf.Pages.Add();

            //Create layout format
            PdfTextLayout format = new PdfTextLayout();
            format.Break = PdfLayoutBreakType.FitPage;
            format.Layout = PdfLayoutType.Paginate;

            //Create template from the first Page of the sample PDF, and draw the template to the new added page with the layout format
            page.CreateTemplate().Draw(newPage, new PointF(0, 0), format);

            //Save and close
            newPdf.SaveToFile("SplitPage.pdf");
            newPdf.Close();
            pdf.Close();
        }
    }
}
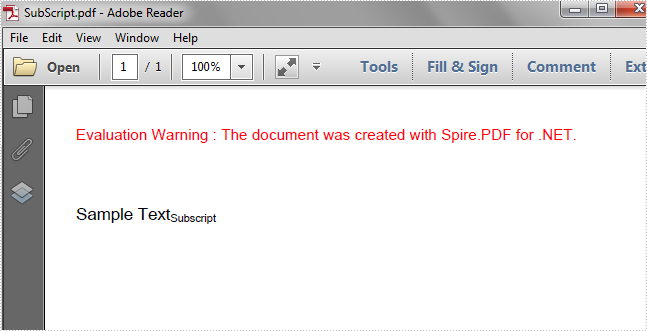
In this article, we're going to demonstrate how to draw superscript and subscript text in PDF using Spire.PDF.
Draw Superscript Text
using Spire.Pdf;
using Spire.Pdf.Graphics;
using System.Drawing;


namespace Superscript
{
    class Program
    {
        static void Main(string[] args)
        {
            //Instantiate a PdfDocument instance
            PdfDocument pdf = new PdfDocument();

            //Add a page
            PdfPageBase page = pdf.Pages.Add();

            //Set initial (x, y) coordinate
            float x = 0;
            float y = 50;

            //Set font
            PdfTrueTypeFont font = new PdfTrueTypeFont(new Font("Arial Unicode MS", 11f), true);

            //Draw string
            string text = "Sample Text";
            page.Canvas.DrawString(text, font, PdfBrushes.Black, new PointF(x, y));

            //Measure the string
            SizeF size = font.MeasureString(text);

            //Set the x coordinate of the superscript text
            x += size.Width;

            //Instantiate a PdfStringFormat instance
            PdfStringFormat format = new PdfStringFormat();
            //Set format as superscript
            format.SubSuperScript = PdfSubSuperScript.SuperScript;

            //Draw superscript text with format
            text = "Superscript";
            page.Canvas.DrawString(text, font, PdfBrushes.Black, new PointF(x, y), format);

            //Save the document
            pdf.SaveToFile("SuperScript.pdf");
        }
    }
}
Draw Superscript Text
using Spire.Pdf;
using Spire.Pdf.Graphics;
using System.Drawing;


namespace Subscript
{
    class Program
    {
        static void Main(string[] args)
        {
            //Instantiate a PdfDocument instance
            PdfDocument pdf = new PdfDocument();

            //Add a page
            PdfPageBase page = pdf.Pages.Add();

            //Set initial (x, y) coordinate
            float x = 0;
            float y = 50;

            //Set font
            PdfTrueTypeFont font = new PdfTrueTypeFont(new Font("Arial Unicode MS", 11f), true);

            //Draw string
            string text = "Sample Text";
            page.Canvas.DrawString(text, font, PdfBrushes.Black, new PointF(x, y));

            //Measure the string
            SizeF size = font.MeasureString(text);

            //Set the x coordinate of the subscript text
            x += size.Width;

            //Instantiate a PdfStringFormat instance
            PdfStringFormat format = new PdfStringFormat();
            //Set format as subscript
            format.SubSuperScript = PdfSubSuperScript.SubScript;

            //Draw subscript
            text = "Subscript";
            page.Canvas.DrawString(text, font, PdfBrushes.Black, new PointF(x, y), format);

            //Save the document
            pdf.SaveToFile("SubScript.pdf");
        }
    }
}