
.NET (1327)
Children categories
Adding, inserting, and deleting pages in a Word document is crucial for managing and presenting content. By adding or inserting a new page in Word, you can expand the document to accommodate more content, making it more structured and readable. Deleting pages can help streamline the document by removing unnecessary information or erroneous content. This article will explain how to use Spire.Doc for .NET to add, insert, or delete a page in a Word document within a C# project.
- Add a Page in a Word Document using C#
- Insert a Page in a Word Document using C#
- Delete a Page from a Word Document using C#
Install Spire.Doc for .NET
To begin with, you need to add the DLL files included in the Spire.Doc for .NET package as references in your .NET project. The DLL files can be either downloaded from this link or installed via NuGet.
PM> Install-Package Spire.Doc
Add a Page in a Word Document using C#
The steps to add a new page at the end of a Word document involve first obtaining the last section, then inserting a page break at the end of the last paragraph of that section to ensure that subsequently added content appears on a new page. Here are the detailed steps:
- Create a Document object.
- Load a Word document using the Document.LoadFromFile() method.
- Get the body of the last section of the document using Document.LastSection.Body.
- Add a page break by calling Paragraph.AppendBreak(BreakType.PageBreak) method.
- Create a new ParagraphStyle object.
- Add the new paragraph style to the document's style collection using Document.Styles.Add() method.
- Create a new Paragraph object and set the text content.
- Apply the previously created paragraph style to the new paragraph using Paragraph.ApplyStyle(ParagraphStyle.Name) method.
- Add the new paragraph to the document using Body.ChildObjects.Add(Paragraph) method.
- Save the resulting document using the Document.SaveToFile() method.
- C#
// Create a new document object
Document document = new Document();

// Load a document
document.LoadFromFile("Sample.docx");

// Get the body of the last section of the document
Body body = document.LastSection.Body;

// Insert a page break after the last paragraph in the body
body.LastParagraph.AppendBreak(BreakType.PageBreak);

// Create a new paragraph style
ParagraphStyle paragraphStyle = new ParagraphStyle(document);
paragraphStyle.Name = "CustomParagraphStyle1";
paragraphStyle.ParagraphFormat.LineSpacing = 12;
paragraphStyle.ParagraphFormat.AfterSpacing = 8;
paragraphStyle.CharacterFormat.FontName = "Microsoft YaHei";
paragraphStyle.CharacterFormat.FontSize = 12;

// Add the paragraph style to the document's style collection
document.Styles.Add(paragraphStyle);

// Create a new paragraph and set the text content
Paragraph paragraph = new Paragraph(document);
paragraph.AppendText("Thank you for using our Spire.Doc for .NET product. The trial version will add a red watermark to the generated document and only supports converting the first 10 pages to other formats. Upon purchasing and applying a license, these watermarks will be removed, and the functionality restrictions will be lifted.");

// Apply the paragraph style
paragraph.ApplyStyle(paragraphStyle.Name);

// Add the paragraph to the body's content collection
body.ChildObjects.Add(paragraph);

// Create another new paragraph and set the text content
paragraph = new Paragraph(document);
paragraph.AppendText("To experience our product more fully, we provide a one-month temporary license free of charge to each of our customers. Please send an email to sales@e-iceblue.com, and we will send the license to you within one working day.");

// Apply the paragraph style
paragraph.ApplyStyle(paragraphStyle.Name);

// Add the paragraph to the body's content collection
body.ChildObjects.Add(paragraph);

// Save the document to the specified path
document.SaveToFile("Add a Page.docx", FileFormat.Docx);

// Close the document
document.Close();

// Release the resources of the document object
document.Dispose();
Insert a Page in a Word Document using C#
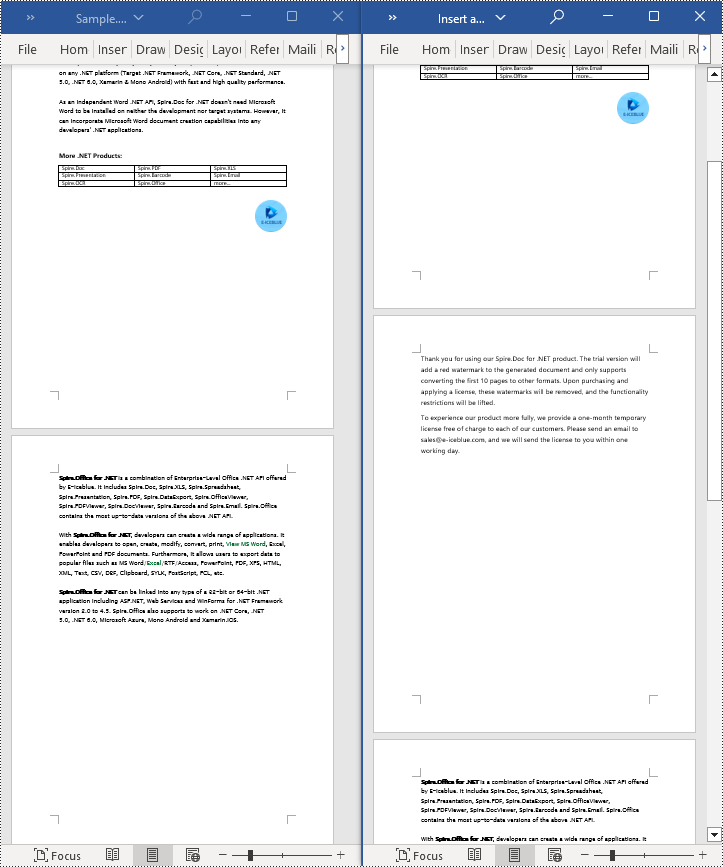
Before inserting a new page, it is necessary to determine the ending position index of the specified page content within the section. Subsequently, add the content of the new page to the document one by one after this position. Finally, to separate the content from the following pages, adding a page break is essential. The detailed steps are as follows:
- Create a Document object.
- Load a Word document using the Document.LoadFromFile() method.
- Create a FixedLayoutDocument object.
- Obtain the FixedLayoutPage object of a page in the document.
- Determine the index position of the last paragraph on the page within the section.
- Create a new ParagraphStyle object.
- Add the new paragraph style to the document's style collection using Document.Styles.Add() method.
- Create a new Paragraph object and set the text content.
- Apply the previously created paragraph style to the new paragraph using the Paragraph.ApplyStyle(ParagraphStyle.Name) method.
- Insert the new paragraph at the specified using the Body.ChildObjects.Insert(index, Paragraph) method.
- Create another new paragraph object, set its text content, add a page break by calling the Paragraph.AppendBreak(BreakType.PageBreak) method, apply the previously created paragraph style, and then insert this paragraph into the document.
- Save the resulting document using the Document.SaveToFile() method.
- C#
using Spire.Doc;
using Spire.Doc.Pages;
using Spire.Doc.Documents;

namespace SpireDocDemo
{
    internal class Program
    {
        static void Main(string[] args)
        {
           // Create a new document object
            Document document = new Document();

            // Load the sample document from a file
            document.LoadFromFile("Sample.docx");

            // Create a fixed layout document object
            FixedLayoutDocument layoutDoc = new FixedLayoutDocument(document);

            // Get the first page
            FixedLayoutPage page = layoutDoc.Pages[0];

            // Get the body of the document
            Body body = page.Section.Body;

            // Get the last paragraph of the current page
            Paragraph paragraphEnd = page.Columns[0].Lines[page.Columns[0].Lines.Count - 1].Paragraph;

            // Initialize the end index
            int endIndex = 0;
            if (paragraphEnd != null)
            {
                // Get the index of the last paragraph
                endIndex = body.ChildObjects.IndexOf(paragraphEnd);
            }

            // Create a new paragraph style
            ParagraphStyle paragraphStyle = new ParagraphStyle(document);
            paragraphStyle.Name = "CustomParagraphStyle1";
            paragraphStyle.ParagraphFormat.LineSpacing = 12;
            paragraphStyle.ParagraphFormat.AfterSpacing = 8;
            paragraphStyle.CharacterFormat.FontName = "Microsoft YaHei";
            paragraphStyle.CharacterFormat.FontSize = 12;

            // Add the paragraph style to the document's style collection
            document.Styles.Add(paragraphStyle);

            // Create a new paragraph and set the text content
            Paragraph paragraph = new Paragraph(document);
            paragraph.AppendText("Thank you for using our Spire.Doc for .NET product. The trial version will add a red watermark to the generated document and only supports converting the first 10 pages to other formats. Upon purchasing and applying a license, these watermarks will be removed, and the functionality restrictions will be lifted.");

            // Apply the paragraph style
            paragraph.ApplyStyle(paragraphStyle.Name);

            // Insert the paragraph at the specified position
            body.ChildObjects.Insert(endIndex + 1, paragraph);

            // Create another new paragraph
            paragraph = new Paragraph(document);
            paragraph.AppendText("To experience our product more fully, we provide a one-month temporary license free of charge to each of our customers. Please send an email to sales@e-iceblue.com, and we will send the license to you within one working day.");

            // Apply the paragraph style
            paragraph.ApplyStyle(paragraphStyle.Name);

            // Add a page break
            paragraph.AppendBreak(BreakType.PageBreak);

            // Insert the paragraph at the specified position
            body.ChildObjects.Insert(endIndex + 2, paragraph);

            // Save the document to the specified path
            document.SaveToFile("Insert a Page.docx", Spire.Doc.FileFormat.Docx);

            // Close and release the original document
            document.Close();
            document.Dispose();
        }
    }
}
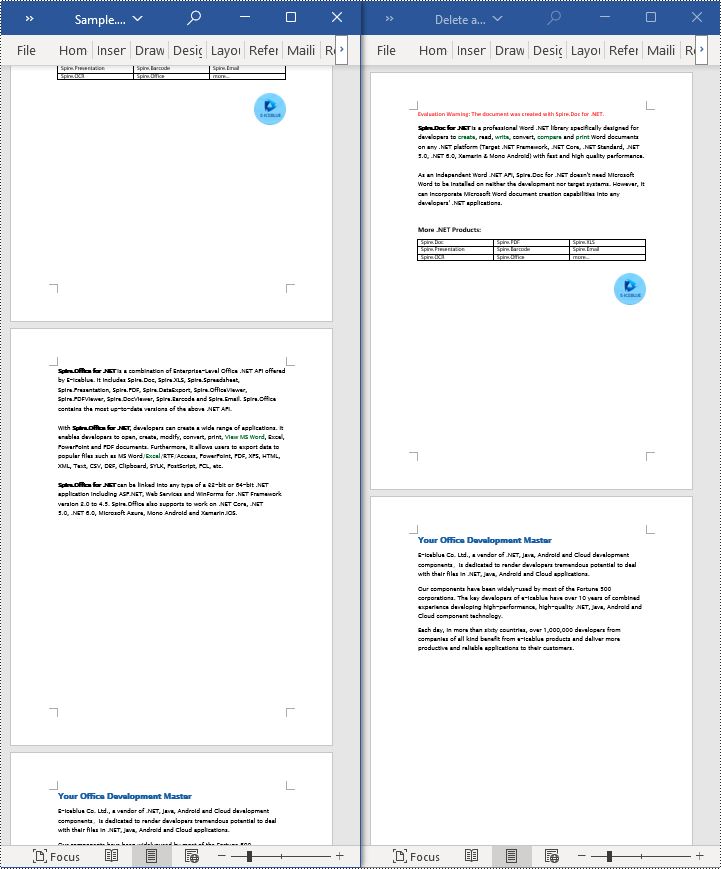
Delete a Page from a Word Document using C#
To delete the content of a page, first determine the index positions of the starting and ending elements of that page in the document. Then, you can utilize a loop to systematically remove these elements one by one. The detailed steps are as follows:
- Create a Document object.
- Load a Word document using the Document.LoadFromFile() method.
- Create a FixedLayoutDocument object.
- Obtain the FixedLayoutPage object of the first page in the document.
- Use the FixedLayoutPage.Section property to get the section where the page is located.
- Determine the index position of the first paragraph on the page within the section.
- Determine the index position of the last paragraph on the page within the section.
- Use a for loop to remove the content of the page one by one.
- Save the resulting document using the Document.SaveToFile() method.
- C#
using Spire.Doc;
using Spire.Doc.Pages;
using Spire.Doc.Documents;

namespace SpireDocDemo
{
    internal class Program
    {
        static void Main(string[] args)
        {
           // Create a new document object
            Document document = new Document();

            // Load the sample document from a file
            document.LoadFromFile("Sample.docx");

            // Create a fixed layout document object
            FixedLayoutDocument layoutDoc = new FixedLayoutDocument(document);

            // Get the second page
            FixedLayoutPage page = layoutDoc.Pages[1];

            // Get the section of the page
            Section section = page.Section;

            // Get the first paragraph on the first page
            Paragraph paragraphStart = page.Columns[0].Lines[0].Paragraph;
            int startIndex = 0;
            if (paragraphStart != null)
            {
                // Get the index of the starting paragraph
                startIndex = section.Body.ChildObjects.IndexOf(paragraphStart);
            }

            // Get the last paragraph on the last page
            Paragraph paragraphEnd = page.Columns[0].Lines[page.Columns[0].Lines.Count - 1].Paragraph;

            int endIndex = 0;
            if (paragraphEnd != null)
            {
                // Get the index of the ending paragraph
                endIndex = section.Body.ChildObjects.IndexOf(paragraphEnd);
            }

            // Delete all content within the specified range
            for (int i = 0; i <= (endIndex - startIndex); i++)
            {
                section.Body.ChildObjects.RemoveAt(startIndex);
            }

            // Save the document to the specified path
            document.SaveToFile("Delete a Page.docx", Spire.Doc.FileFormat.Docx);

            // Close and release the original document
            document.Close();
            document.Dispose();
        }
    }
}
Apply for a Temporary License
If you'd like to remove the evaluation message from the generated documents, or to get rid of the function limitations, please request a 30-day trial license for yourself.
Captions are important elements in a Word document that enhance readability and organizational structure. They provide explanations and supplementary information for images, tables, and other content, improving the clarity and comprehensibility of the document. Captions are also used to emphasize key points and essential information, facilitating referencing and indexing of specific content. By using captions effectively, readers can better understand and interpret data and images within the document while quickly locating the desired information. This article will demonstrate how to use Spire.Doc for .NET to add or remove captions in a Word document within a C# project.
- Add Image Captions to a Word document in C#
- Add Table Captions to a Word document in C#
- Remove Captions from a Word document in C#
Install Spire.Doc for .NET
To begin with, you need to add the DLL files included in the Spire.Doc for .NET package as references in your .NET project. The DLL files can be either downloaded from this link or installed via NuGet.
PM> Install-Package Spire.Doc
Add Image Captions to a Word document in C#
To add captions to images in a Word document, you can achieve it by creating a paragraph, adding an image, and calling the method DocPicture.AddCaption(string name, CaptionNumberingFormat format, CaptionPosition captionPosition) to generate the caption with a specified name, numbering format, and caption position. The following are the detailed steps:
- Create an object of the Document class.
- Use the Document.AddSection() method to add a section.
- Add a paragraph using Section.AddParagraph() method.
- Use the Paragraph.AppendPicture(Image image) method to add a DocPicture image object to the paragraph.
- Use the DocPicture.AddCaption(string name, CaptionNumberingFormat format, CaptionPosition captionPosition) method to add a caption with numbering format as CaptionNumberingFormat.Number.
- Set the Document.IsUpdateFields property to true to update all fields.
- Use the Document.SaveToFile() method to save the resulting document.
- C#
using Spire.Doc;
using Spire.Doc.Documents;
using Spire.Doc.Fields;
using System.Drawing;
namespace AddPictureCaption
{
internal class Program
{
static void Main(string[] args)
{
// Create a Word document object
Document document = new Document();
// Add a section
Section section = document.AddSection();
// Add a new paragraph and insert an image
Paragraph pictureParagraphCaption = section.AddParagraph();
pictureParagraphCaption.Format.AfterSpacing = 10;
DocPicture pic1 = pictureParagraphCaption.AppendPicture(Image.FromFile("Data\\1.png"));
pic1.Height = 100;
pic1.Width = 100;
// Add a caption to the image
CaptionNumberingFormat format = CaptionNumberingFormat.Number;
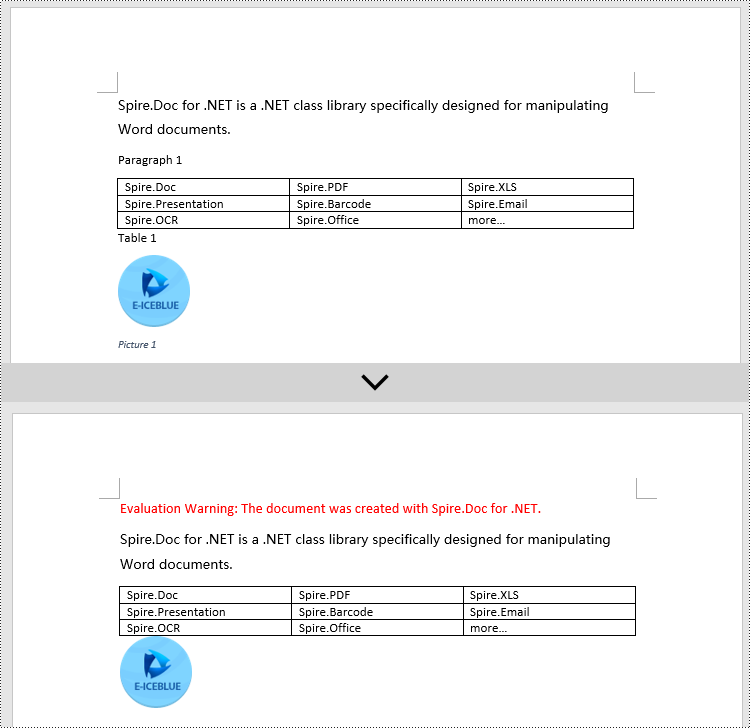
pic1.AddCaption("Image", format, CaptionPosition.BelowItem);
// Add another paragraph and insert another image
pictureParagraphCaption = section.AddParagraph();
DocPicture pic2 = pictureParagraphCaption.AppendPicture(Image.FromFile("Data\\2.png"));
pic2.Height = 100;
pic2.Width = 100;
// Add a caption to the second image
pic2.AddCaption("Image", format, CaptionPosition.BelowItem);
// Update all fields in the document
document.IsUpdateFields = true;
// Save to a docx document
string result = "AddImageCaption.docx";
document.SaveToFile(result, Spire.Doc.FileFormat.Docx2016);
// Close and dispose of the document object to release resources
document.Close();
document.Dispose();
}
}
}
Add Table Captions to a Word document in C#
To add captions to a table in a Word document, you can achieve this by creating the table and using the Table.AddCaption(string name, CaptionNumberingFormat format, CaptionPosition captionPosition) method to generate a numbered caption. The steps involved are as follows:
- Create an object of the Document class.
- Use the Document.AddSection() method to add a section.
- Create a Table object and add it to the specified section in the document.
- Use the Table.ResetCells(int rowsNum, int columnsNum) method to set the number of rows and columns in the table.
- Add a caption to the table using the Table.AddCaption(string name, CaptionNumberingFormat format, CaptionPosition captionPosition) method, specifying the caption numbering format as CaptionNumberingFormat.Number.
- Set the Document.IsUpdateFields property to true to update all fields.
- Use the Document.SaveToFile() method to save the resulting document.
- C#
using Spire.Doc;
namespace AddTableCation
{
    internal class Program
    {
        static void Main(string[] args)
        {
            // Create a Word document object
            Document document = new Document();

            // Add a section
            Section section = document.AddSection();

            // Add a table
            Table tableCaption = section.AddTable(true);
            tableCaption.ResetCells(3, 2);

            // Add a caption to the table
            tableCaption.AddCaption("Table", CaptionNumberingFormat.Number, CaptionPosition.BelowItem);

            // Add another table and caption
            tableCaption = section.AddTable(true);
            tableCaption.ResetCells(2, 3);
            tableCaption.AddCaption("Table", CaptionNumberingFormat.Number, CaptionPosition.BelowItem);

            // Update all fields in the document
            document.IsUpdateFields = true;

            // Save to a docx document
            string result = "AddTableCaption.docx";
            document.SaveToFile(result, Spire.Doc.FileFormat.Docx2016);

            // Close and dispose of the document object to release resources
            document.Close();
            document.Dispose();
        }
    }
}
Remove Captions from a Word document in C#
Spire.Doc for .NET can also facilitate the removal of captions from an existing Word document. Here are the detailed steps:
- Create an object of the Document class.
- Use the Document.LoadFromFile() method to load a Word document.
- Create a custom method, named DetectCaptionParagraph(Paragraph paragraph), to determine if a paragraph contains a caption.
- Iterate through all the Paragraph objects in the document using a loop and utilize the custom method, DetectCaptionParagraph(Paragraph paragraph), to identify and delete paragraphs that contain captions.
- Use the Document.SaveToFile() method to save the resulting document.
- C#
using Spire.Doc;
using Spire.Doc.Documents;
using Spire.Doc.Fields;
namespace DeleteCaptions
{
    internal class Program
    {
        static void Main(string[] args)
        {
            // Create a Word document object
            Document document = new Document();

            // Load the example.docx file
            document.LoadFromFile("Data/Sample.docx");
            Section section;

            // Iterate through all sections
            for (int i = 0; i < document.Sections.Count; i++)
            {
                section = document.Sections[i];

                // Iterate through paragraphs in reverse order
                for (int j = section.Body.Paragraphs.Count - 1; j >= 0; j--)
                {
                    // Check if the paragraph is a caption paragraph
                    if (DetectCaptionParagraph(section.Body.Paragraphs[j]))
                    {
                        // If it's a caption paragraph, remove it
                        section.Body.Paragraphs.RemoveAt(j);
                    }
                }
            }

            // Save the document after removing captions
            string result = "RemoveCaptions.docx";
            document.SaveToFile(result, Spire.Doc.FileFormat.Docx2016);

            // Close and dispose of the document object to release resources
            document.Close();
            document.Dispose();
        }
        // Method to detect if a paragraph is a caption paragraph
        static bool DetectCaptionParagraph(Paragraph paragraph)
        {
            bool tag = false;
            Field field;

            // Iterate through the child objects in the paragraph
            for (int i = 0; i < paragraph.ChildObjects.Count; i++)
            {
                if (paragraph.ChildObjects[i].DocumentObjectType == DocumentObjectType.Field)
                {
                    // Check if the child object is of Field type
                    field = (Field)paragraph.ChildObjects[i];
                    if (field.Type == FieldType.FieldSequence)
                    {
                        // Check if the Field type is FieldSequence, indicating a caption field type
                        return true;
                    }
                }
            }
            return tag;
        }
    }
}
Apply for a Temporary License
If you'd like to remove the evaluation message from the generated documents, or to get rid of the function limitations, please request a 30-day trial license for yourself.
PDF has become the standard format for sharing and preserving documents across different platforms, playing a ubiquitous role in both professional and personal settings. However, creating high-quality PDF documents requires multiple checks and revisions. In this context, knowing how to efficiently compare PDF files and pinpoint their differences becomes crucial, which enables document editors to quickly identify discrepancies between different versions of a document, resulting in significant time savings during the document creation and review process. This article aims to demonstrate how to compare PDF documents effortlessly using Spire.PDF for .NET in C# programs.
Install Spire.PDF for .NET
To begin with, you need to add the DLL files included in the Spire.PDF for.NET package as references in your .NET project. The DLL files can be either downloaded from this link or installed via NuGet.
PM> Install-Package Spire.PDF
Compare Two PDF Documents in C#
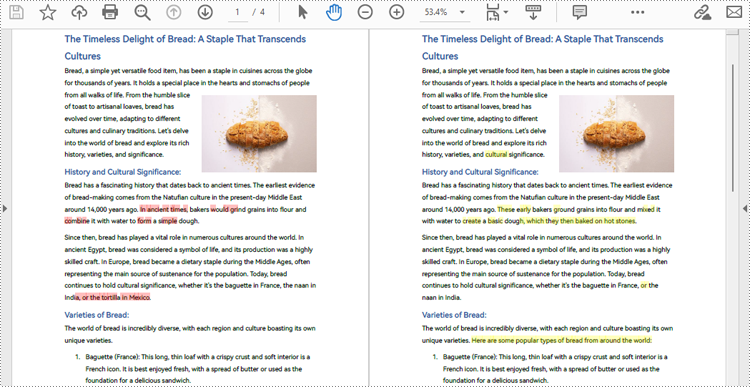
With Spire.PDF for .NET, developers can create an instance of the PdfComparer class, passing two PdfDocument objects as parameters, and then utilize the PdfComparer.Compare(String fileName) method to compare the two documents. The resulting comparison is saved as a new PDF document, allowing for further analysis or review of the differences between the two PDFs.
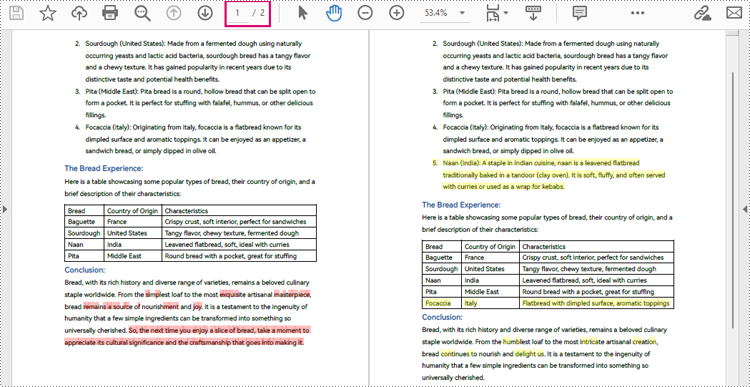
The resulting PDF document displays the two original documents on the left and the right, with the deleted items in red and the added items in yellow.
The following are the detailed steps for comparing two PDF documents:
- Create two objects of PdfDocument class and load two PDF documents using PdfDocument.LoadFromFile() method.
- Create an instance of PdfComparer class and pass the two PdfDocument objects as parameters.
- Compare the two documents and save the result as another PDF document using PdfComparer.Compare() method.
- C#
using Spire.Pdf;
using Spire.Pdf.Comparison;

namespace ExtractTablesToExcel
{
    class Program
    {
        static void Main(string[] args)
        {
            //Create an object of PdfDocument class and load a PDF document
            PdfDocument pdf1 = new PdfDocument();
            pdf1.LoadFromFile("Sample1.pdf");

            //Create another object of PdfDocument class and load another PDF document
            PdfDocument pdf2 = new PdfDocument();
            pdf2.LoadFromFile("Sample2.pdf");

            //Create an object of PdfComparer class with the two document
            PdfComparer comparer = new PdfComparer(pdf1, pdf2);

            //Compare the two document and save the comparing result to another PDF document
            comparer.Compare("output/ComparingResult.pdf");
            pdf1.Close();
            pdf2.Close();
        }
    }
}
Compare a Specific Page Range of Two PDF Documents
After creating an instance of PdfComparer class, developers can also use the PdfComparer.Options.SetPageRange() method to set the page range to be compared. This allows for comparing only the specified page range in two PDF documents. The detailed steps are as follows:
- Create two objects of PdfDocument class and load two PDF documents using PdfDocument.LoadFromFile() method.
- Create an instance of PdfComparer class and pass the two PdfDocument objects as parameters.
- Set the page range to be compared using PdfComparer.Options.SetPageRange() method.
- Compare the specified page range in the two PDF documents and save the result as another PDF document using PdfComparer.Compare() method.
- C#
using Spire.Pdf;
using Spire.Pdf.Comparison;

namespace ExtractTablesToExcel
{
    class Program
    {
        static void Main(string[] args)
        {
            //Create an object of PdfDocument class and load a PDF document
            PdfDocument pdf1 = new PdfDocument();
            pdf1.LoadFromFile("Sample1.pdf");

            //Create another object of PdfDocument class and load another PDF document
            PdfDocument pdf2 = new PdfDocument();
            pdf2.LoadFromFile("Sample2.pdf");

            //Create an object of PdfComparer class with the two document
            PdfComparer comparer = new PdfComparer(pdf1, pdf2);

            //Set the page range to be compared
            comparer.Options.SetPageRanges(1, 1, 1, 1);

            //Compare the specified page range and save the comparing result to another PDF document
            comparer.Compare("output/PageRangeComparingResult.pdf");
            pdf1.Close();
            pdf2.Close();
        }
    }
}
Apply for a Temporary License
If you'd like to remove the evaluation message from the generated documents, or to get rid of the function limitations, please request a 30-day trial license for yourself.
Merging and splitting table cells in PowerPoint are two common functions, mainly used to adjust the layout and structure of the table. Merging cells involves combining adjacent cells into a larger one. It allows users to create title cells that span multiple columns or rows. On the other hand, splitting cells means dividing a cell into several smaller ones, which is useful for creating detailed layouts or accommodating diverse content. In this article, we will show you how to merge and split table cells in PowerPoint programmatically by using Spire.Presentation for .NET.
Install Spire.Presentation for .NET
To begin with, you need to add the DLL files included in the Spire.Presentation for.NET package as references in your .NET project. The DLLs files can be either downloaded from this link or installed via NuGet.
PM> Install-Package Spire.Presentation
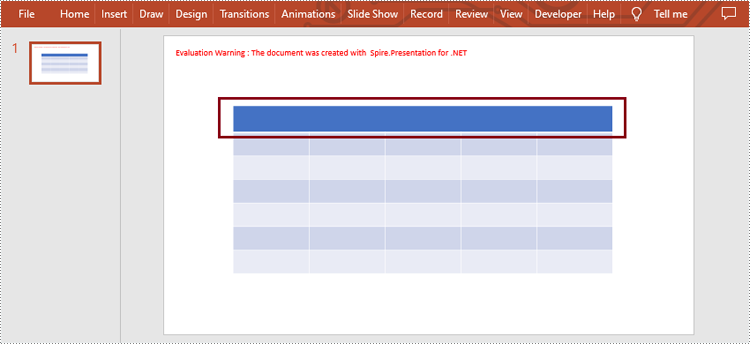
Merge Table Cells in PowerPoint
Spire.Presentation for .NET provides users with ITable[int columnIndex, int rowIndex] property and ITable.MergeCells(Cell startCell, Cell endCell, boolean allowSplitting) method to get and merge the specific cells. The detailed steps are as follows.
- Create an object of Presentation class.
- Load a sample file using Presentation.LoadFromFile() method.
- Get the table from the first slide by looping through all shapes.
- Get the specific cells by ITable[int columnIndex, int rowIndex] property and merge them by using ITable.MergeCells(Cell startCell, Cell endCell, boolean allowSplitting) method.
- Save the result file using Presentation.SaveToFile() method.
- C#
- VB.NET
using Spire.Presentation;

namespace MergeCells
{
    class Program
    {
        static void Main(string[] args)
        {
            //Create an object of Presentation class
            Presentation presentation = new Presentation();

            //Load a PowerPoint presentation
            presentation.LoadFromFile("sample.pptx");

            //Get the table from the first slide by looping through all shapes
            ITable table = null;
            foreach (IShape shape in presentation.Slides[0].Shapes)
            {
                if (shape is ITable)
                {
                    table = (ITable)shape;

                    //Merge the cells from [0,0] to [4,0]
                    table.MergeCells(table[0, 0], table[4, 0], false);
                }
            }

            //Save the result document
            presentation.SaveToFile("MergeCells.pptx", FileFormat.Pptx2010);
            presentation.Dispose();
        }
    }
}
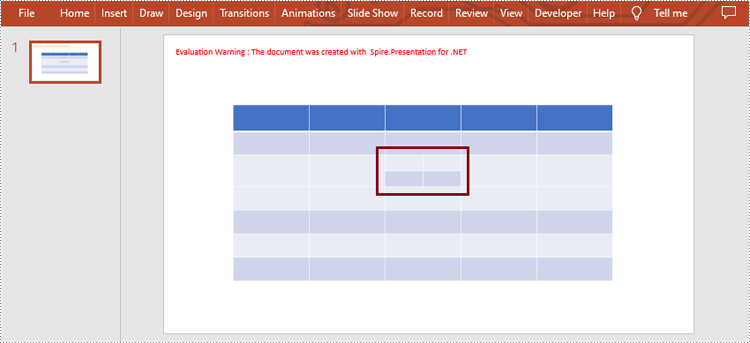
Split Table Cells in PowerPoint
Spire.Presentation for .NET also supports users to get the specific cell and split it into smaller ones by using ITable[int columnIndex, int rowIndex] property and Cell.Split(int RowCount, int ColunmCount) method. The detailed steps are as follows.
- Create an object of Presentation class.
- Load a sample file using Presentation.LoadFromFile() method.
- Get the table from the first slide by looping through all shapes.
- Get the specific cell by ITable[int columnIndex, int rowIndex] property and split it into 2 rows and 2 columns by using Cell.Split(int RowCount, int ColumnCount) method.
- Save the result file using Presentation.SaveToFile() method.
- C#
- VB.NET
using Spire.Presentation;

namespace SplitCells
{
    class Program
    {
        static void Main(string[] args)
        {
            //Create an object of Presentation class
            Presentation presentation = new Presentation();

            //Load a PowerPoint presentation
            presentation.LoadFromFile("sample.pptx");

            //Get the table from the first slide by looping through all shapes
            ITable table = null;
            foreach (IShape shape in presentation.Slides[0].Shapes)
            {
                if (shape is ITable)
                {
                    table = (ITable)shape;

                    //Split cell [2, 2] into 2 rows and 2 columns
                    table[2, 2].Split(2, 2);
                }
            }

            //Save the result document
            presentation.SaveToFile("SplitCells.pptx", FileFormat.Pptx2013);
            presentation.Dispose();
                }
            }
        }
Apply for a Temporary License
If you'd like to remove the evaluation message from the generated documents, or to get rid of the function limitations, please request a 30-day trial license for yourself.
Hyperlinks in PDF documents allow users to jump to pages or open documents, making PDF files more interactive and easier to use. However, if the target site of the link has been changed or the link points to the wrong page, it may cause trouble or misunderstanding to the document users. Therefore, it is very important to change or remove wrong or invalid hyperlinks in PDF documents to ensure the accuracy and usability of the hyperlinks, so as to provide a better reading experience for users. This article will introduce how to change or remove hyperlinks in PDF documents through .NET programs using Spire.PDF for .NET.
Install Spire.PDF for .NET
To begin with, you need to add the DLL files included in the Spire.PDF for.NET package as references in your .NET project. The DLL files can be either downloaded from this link or installed via NuGet.
PM> Install-Package Spire.PDF
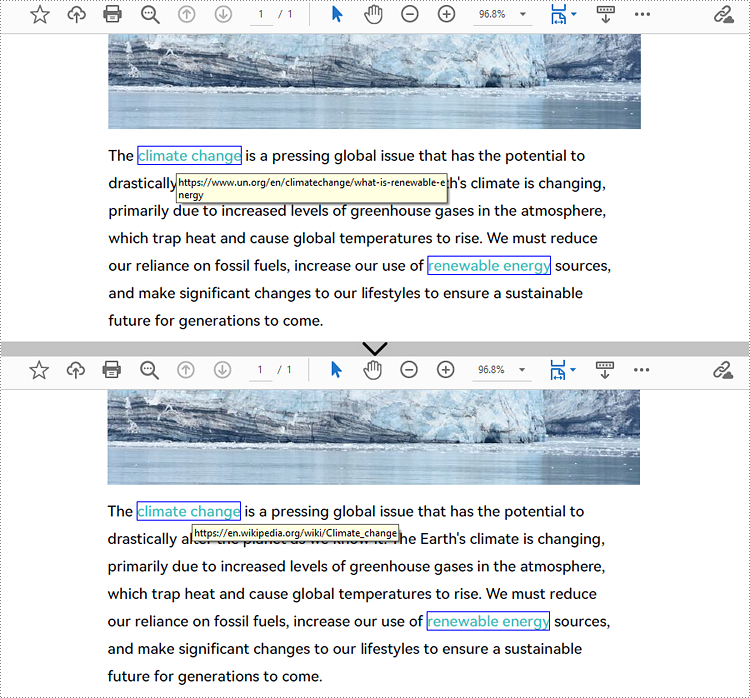
Change the URL of a Hyperlink in PDF
To change the URL of a hyperlink on a PDF page, it is necessary to get the hyperlink annotation widget and use the PdfUriAnnotationWidget.Uri property to reset the URL. The detailed steps are as follows:
- Create an object of PdfDocument class.
- Load a PDF file using PdfDocument.LoadFromFIle() method.
- Get the first page of the document using PdfDocument.Pages[] property.
- Get the first hyperlink widget on the page using PdfPageBase.AnnotationsWidget[] property.
- Reset the URL of the hyperlink using PdfUriAnnotationWidget.Uri property.
- Save the document using PdfDocument.SaveToFile() method.
- C#
- VB.NET
using Spire.Pdf;
using Spire.Pdf.Annotations;
using System;

namespace ChangeHyperlink
{
    internal class Program
    {
        static void Main(string[] args)
        {
            //Cretae an object of PdfDocument
            PdfDocument pdf = new PdfDocument();

            //Load a PDF file
            pdf.LoadFromFile("Sample.pdf");

            //Get the first page
            PdfPageBase page = pdf.Pages[0];

            //Get the first hyperlink
            PdfUriAnnotationWidget url = (PdfUriAnnotationWidget)page.Annotations[0];

            //Reset the url of the hyperlink
            url.Uri = "https://en.wikipedia.org/wiki/Climate_change";

            //Save the PDF file
            pdf.SaveToFile("ChangeHyperlink.pdf");
            pdf.Dispose();
        }
    }
}
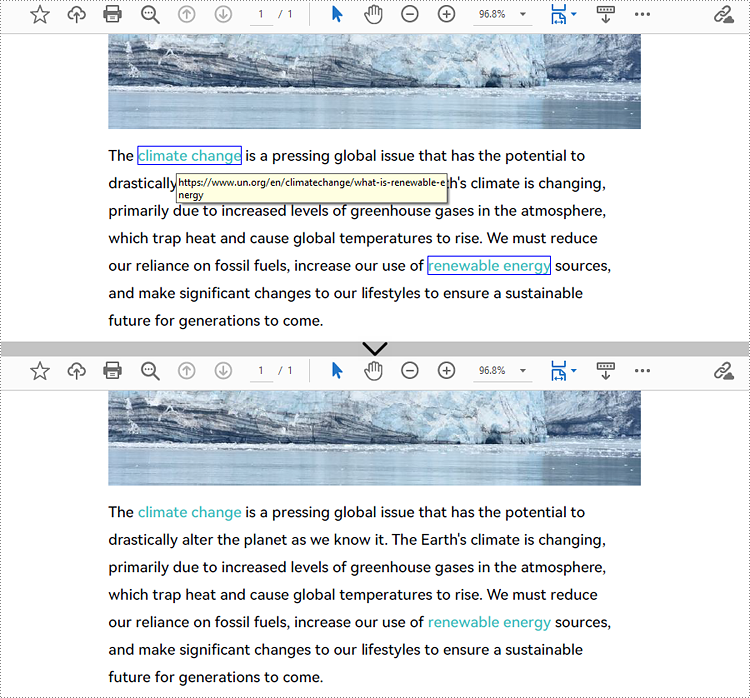
Remove Hyperlinks from PDF
Spire.PDF for .NET provides the PdfPageBase.AnnotationsWidget.RemoveAt() method to remove a hyperlink on a PDF page by its index. Eliminating all hyperlinks from a PDF document requires iterating through the pages, obtaining the annotation widgets of each page, verifying whether an annotation is an instance of the PdfUriAnnotationWidget class, and deleting the annotation if it is. The following are the detailed steps:
- Create an object of PdfDocument class.
- Load a PDF document using PdfDocument.LoadFromFIle() method.
- To remove a specific hyperlink, get the page containing the hyperlink and remove the hyperlink by its index using PdfPageBase.AnnotationsWidget.RemoveAt() method.
- To remove all hyperlinks, loop through the pages in the document to get the annotation collection of each page using PdfPageBase.AnnotationsWidget property.
- Check if an annotation widget is an instance of PdfUriAnnotationWidget class and remove the annotation widget using PdfAnnotationCollection.Remove(PdfUriAnnotationWidget) method if it is.
- Save the document using PdfDocument.SaveToFIle() method.
- C#
- VB.NET
using Spire.Pdf;
using Spire.Pdf.Annotations;
using System;
using System.Dynamic;

namespace DeleteHyperlink
{
    internal class Program
    {
        static void Main(string[] args)
        {
            //Cretae an object of PdfDocument
            PdfDocument pdf = new PdfDocument();

            //Load a PDF file
            pdf.LoadFromFile("Sample.pdf");

            //Remove the second hyperlink in the fisrt page
            //PdfPageBase page = pdf.Pages[0];
            //page.AnnotationsWidget.RemoveAt(1);

            //Remove all hyperlinks in the document
            //Loop through pages in the document
            foreach (PdfPageBase page in pdf.Pages)
            {
                //Get the annotation collection of a page
                PdfAnnotationCollection collection = page.Annotations;
                for (int i = collection.Count - 1; i >= 0; i--)
                {
                    PdfAnnotation annotation = collection[i];
                    //Check if an annotation is an instance of PdfUriAnnotationWidget
                    if (annotation is PdfUriAnnotationWidget)
                    {
                        PdfUriAnnotationWidget url = (PdfUriAnnotationWidget)annotation;
                        //Remove the hyperlink
                        collection.Remove(url);
                    }
                }
            }

            //Save the document
            pdf.SaveToFile("DeleteHyperlink.pdf");
            pdf.Dispose();
        }
    }
}
Apply for a Temporary License
If you'd like to remove the evaluation message from the generated documents, or to get rid of the function limitations, please request a 30-day trial license for yourself.
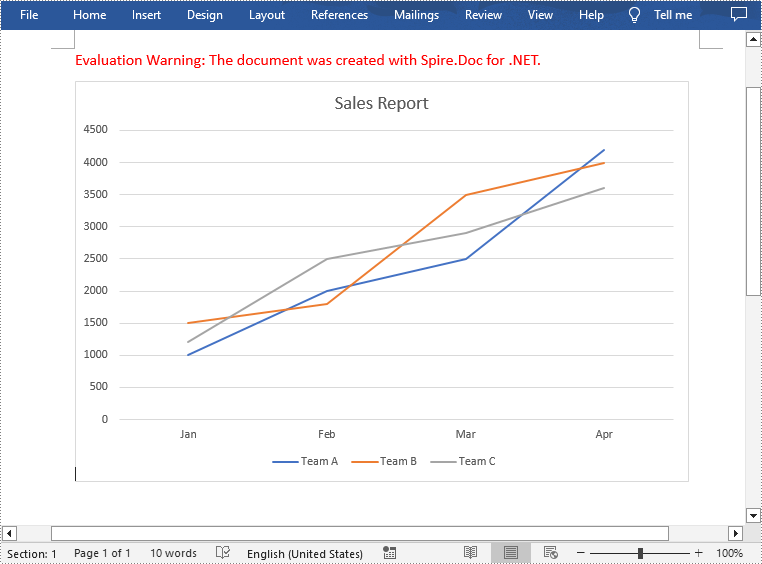
Charts in Word documents are a valuable tool for presenting and analyzing data in a visually appealing and understandable format. They help summarize key trends, patterns, or relationships within the data, which is especially useful when you are creating company reports, business proposals or research papers. In this article, you will learn how to programmatically add a line chart to a Word document using Spire.Doc for .NET.
Install Spire.Doc for .NET
To begin with, you need to add the DLL files included in the Spire.Doc for.NET package as references in your .NET project. The DLL files can be either downloaded from this link or installed via NuGet.
PM> Install-Package Spire.Doc
Create a Line Chart in Word in C# and VB.NET
A line chart is a common type of chart that connects a series of data points with a continuous line. To add a line chart in Word, Spire.Doc for .NET offers the Paragraph.AppendChart(ChartType.Line, float width, float height) method. The following are the detailed steps.
- Create a Document object.
- Add a section and then add a paragraph to the section.
- Add a line chart with specified size to the paragraph using Paragraph.AppendChart(ChartType.Line, float width, float height) method.
- Get the chart and then set the chart title using Chart.Tilte.Text property.
- Add a custom series to the chart using Chart.Series.Add(string seriesName, string[] categories, double[] values) method.
- Set the legend position using Chart.Legend.Position property.
- Save the result document using Document.SaveToFile() method.
- C#
- VB.NET
using Spire.Doc;
using Spire.Doc.Documents;
using Spire.Doc.Fields.Shapes.Charts;
using Spire.Doc.Fields;

namespace WordLineChart
{
    class Program
    {
        static void Main(string[] args)
        {
            //Create a Document object
            Document document = new Document();

            //Add a section
            Section section = document.AddSection();

            //Add a paragraph to the section
            Paragraph newPara = section.AddParagraph();

            //Add a line chart with specified size to the paragraph
            ShapeObject shape = newPara.AppendChart(ChartType.Line, 460, 300);

            //Get the chart
            Chart chart = shape.Chart;

            //Set chart title
            chart.Title.Text = "Sales Report";

            //Clear the default series data of the chart
            chart.Series.Clear();

            //Add three custom series with specified series names, category names, and series values to chart
            string[] categories = { "Jan", "Feb", "Mar", "Apr"};
            chart.Series.Add("Team A", categories, new double[] { 1000, 2000, 2500, 4200 });
            chart.Series.Add("Team B", categories, new double[] { 1500, 1800, 3500, 4000 });
            chart.Series.Add("Team C", categories, new double[] { 1200, 2500, 2900, 3600 });

            //Set the legend position
            chart.Legend.Position = LegendPosition.Bottom;

            //Save the result document
            document.SaveToFile("AppendLineChart.docx", FileFormat.Docx);
        }
    }
}
Apply for a Temporary License
If you'd like to remove the evaluation message from the generated documents, or to get rid of the function limitations, please request a 30-day trial license for yourself.
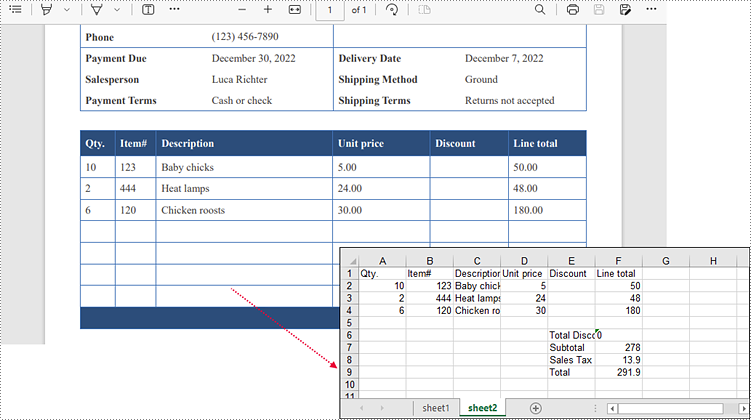
Extracting tables from PDFs and converting them into Excel format offers numerous advantages, such as enabling data manipulation, analysis, and visualization in a more versatile and familiar environment. This task is particularly valuable for researchers, analysts, and professionals dealing with large amounts of tabular data. In this article, you will learn how to extract tables from PDF to Excel in C# and VB.NET using Spire.Office for .NET.
Install Spire.Office for .NET
To begin with, you need to add the Spire.Pdf.dll and the Spire.Xls.dll included in the Spire.Office for.NET package as references in your .NET project. Spire.PDF is responsible for extracting data from PDF tables, and Spire.XLS is responsible for creating an Excel document based on the data obtained from PDF.
The DLL files can be either downloaded from this link or installed via NuGet.
PM> Install-Package Spire.Office
Extract Tables from PDF to Excel in C#, VB.NET
Spire.PDF for .NET offers the PdfTableExtractor.ExtractTable(int pageIndex) method to extract tables from a specific page of a searchable PDF document. The text of a specific cell can be accessed using PdfTable.GetText(int rowIndex, int columnIndex) method. This value can be then written to a worksheet through Worksheet.Range[int row, int column].Value property offered by Spire.XLS for .NET. The following are the detailed steps.
- Create an instance of PdfDocument class.
- Load the sample PDF document using PdfDocument.LoadFromFile() method.
- Extract tables from a specific page using PdfTableExtractor.ExtractTable() method.
- Get text of a certain table cell using PdfTable.GetText() method.
- Create a Workbook object.
- Write the cell data obtained from PDF into a worksheet through Worksheet.Range.Value property.
- Save the workbook to an Excel file using Workbook.SaveTofile() method.
The following code example extracts all tables from a PDF document and writes each of them into an individual worksheet within a workbook.
- C#
- VB.NET
using Spire.Pdf;
using Spire.Pdf.Utilities;
using Spire.Xls;

namespace ExtractTablesToExcel
{
    class Program
    {
        static void Main(string[] args)
        {
            //Create a PdfDocument object
            PdfDocument doc = new PdfDocument();

            //Load the sample PDF file
            doc.LoadFromFile(@"C:\Users\Administrator\Desktop\table.pdf");

            //Create a Workbook object
            Workbook workbook = new Workbook();

            //Clear default worksheets
            workbook.Worksheets.Clear();

            //Initialize an instance of PdfTableExtractor class
            PdfTableExtractor extractor = new PdfTableExtractor(doc);

            //Declare a PdfTable array
            PdfTable[] tableList = null;

            int sheetNumber = 1;

            //Loop through the pages
            for (int pageIndex = 0; pageIndex < doc.Pages.Count; pageIndex++)
            {
                //Extract tables from a specific page
                tableList = extractor.ExtractTable(pageIndex);

                //Determine if the table list is null
                if (tableList != null && tableList.Length > 0)
                {
                    //Loop through the table in the list
                    foreach (PdfTable table in tableList)
                    {
                        //Add a worksheet
                        Worksheet sheet = workbook.Worksheets.Add(String.Format("sheet{0}", sheetNumber));

                        //Get row number and column number of a certain table
                        int row = table.GetRowCount();
                        int column = table.GetColumnCount();

                        //Loop though the row and colunm
                        for (int i = 0; i < row; i++)
                        {
                            for (int j = 0; j < column; j++)
                            {
                                //Get text from the specific cell
                                string text = table.GetText(i, j);

                                //Write text to a specified cell
                                sheet.Range[i + 1, j + 1].Value = text;
                            }

                        }
                        sheetNumber++;
                    }
                }
            }

            //Save to file
            workbook.SaveToFile("ToExcel.xlsx", ExcelVersion.Version2013);
        }
    }
}
Apply for a Temporary License
If you'd like to remove the evaluation message from the generated documents, or to get rid of the function limitations, please request a 30-day trial license for yourself.
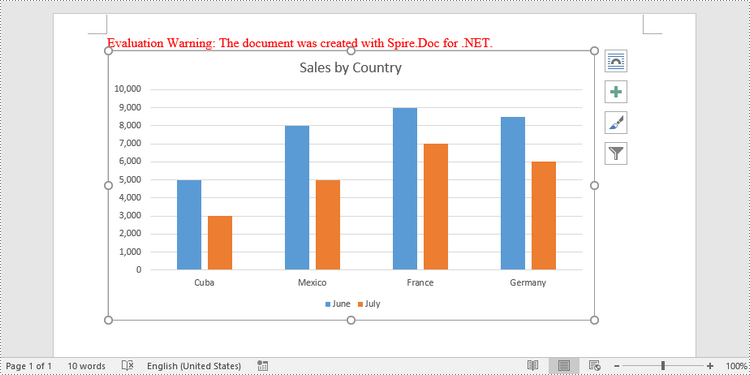
A clustered column chart and a stacked column chart are two variations of the column chart. The clustered column chart enables simple comparison of values across different categories, whereas the stacked column chart displays both the total value of different categories and the proportion of each individual component. In this article, you will learn how to create clustered or stacked column charts in Word in C# and VB.NET using Spire.Doc for .NET.
- Create a Clustered Column Chart in Word in C#, VB.NET
- Create a Stacked Column Chart in Word in C#, VB.NET
Install Spire.Doc for .NET
To begin with, you need to add the DLL files included in the Spire.Doc for.NET package as references in your .NET project. The DLL files can be either downloaded from this link or installed via NuGet.
PM> Install-Package Spire.Doc
Create a Clustered Column Chart in Word in C#, VB.NET
To add a chart to a Word document, use Paragraph.AppenChart(ChartType chartType, float width, float height) method. The ChartType enumeration includes various chart types predefined in MS Word. The following are the steps to add a clustered column chart in Word using Spire.Doc for .NET.
- Create a Document object.
- Add a section and a paragraph.
- Add a column chart to the paragraph using Paragraph.AppendChart() method.
- Add series to the chart using Chart.Series.Add() method.
- Set the chart title through Chart.Tilte.Text property.
- Save the document to a Word file using Document.SaveToFile() method.
- C#
- VB.NET
using Spire.Doc;
using Spire.Doc.Documents;
using Spire.Doc.Fields.Shapes.Charts;
using Spire.Doc.Fields;

namespace CreateColumnChart
{
    class Program
    {
        static void Main(string[] args)
        {
            //Create a Document object
            Document document = new Document();

            //Add a section
            Section section = document.AddSection();

            //Add a paragraph
            Paragraph paragraph = section.AddParagraph();

            //Add a column chart
            ShapeObject shape = paragraph.AppendChart(ChartType.Column, 450, 250);

            //Get the chart
            Chart chart = shape.Chart;

            //Clear the default data
            chart.Series.Clear();

            //Add a series including series name, category names, and series values to chart
            chart.Series.Add("June",
                new[] { "Cuba", "Mexico", "France", "Germany" },
                new double[] { 5000, 8000, 9000, 8500 });

            //Add another series
            chart.Series.Add("July",
            new[] { "Cuba", "Mexico", "France", "Germany" },
            new double[] { 3000, 5000, 7000, 6000 });

            //Set the chart title
            chart.Title.Text = "Sales by Country";

            //Set the number format of the Y-axis
            chart.AxisY.NumberFormat.FormatCode = "#,##0";

            //Set the legend position
            chart.Legend.Position = LegendPosition.Bottom;

            //Save to file
            document.SaveToFile("ClusteredColumnChart.docx", FileFormat.Docx2019);
        }
    }
}
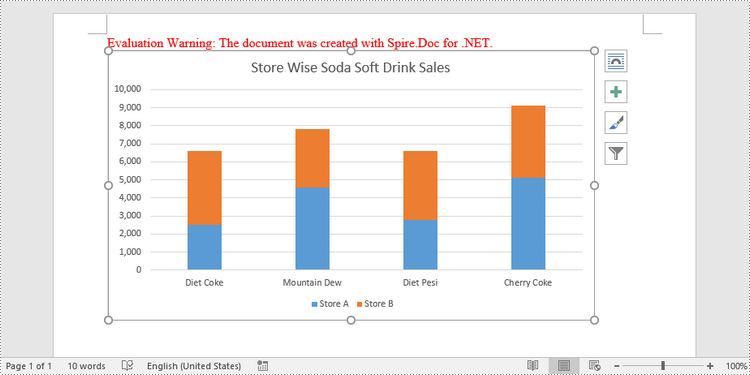
Create a Stacked Column Chart in Word in C#, VB.NET
A stacked column chart can be created pretty much in the same way as a clustered column chart. The only difference is you have to change the chart type from Column to ColumnStacked.
- Create a Document object.
- Add a section and a paragraph.
- Add a stacked column chart to the paragraph using Paragraph.AppendChart() method.
- Add series to the chart using Chart.Series.Add() method.
- Set the chart title through Chart.Tilte.Text property.
- Save the document to a Word file using Document.SaveToFile() method.
- C#
- VB.NET
using Spire.Doc;
using Spire.Doc.Documents;
using Spire.Doc.Fields.Shapes.Charts;
using Spire.Doc.Fields;

namespace StackedColumnChart
{
    class Program
    {
        static void Main(string[] args)
        {
            //Create a Document object
            Document document = new Document();

            //Add a section
            Section section = document.AddSection();

            //Add a paragraph
            Paragraph paragraph = section.AddParagraph();

            //Add a stacked column chart
            ShapeObject shape = paragraph.AppendChart(ChartType.ColumnStacked, 450, 250);

            //Get the chart
            Chart chart = shape.Chart;

            //Clear the default data
            chart.Series.Clear();

            //Add a series including series name, category names, and series values to chart
            chart.Series.Add("Store A",
                new[] { "Diet Coke", "Mountain Dew", "Diet Pesi", "Cherry Coke" },
                new double[] { 2500, 4600, 2800, 5100 });

            //Add another series
            chart.Series.Add("Store B",
            new[] { "Diet Coke", "Mountain Dew", "Diet Pesi", "Cherry Coke" },
            new double[] { 4100, 3200, 3800, 4000 });

            //Set the chart title
            chart.Title.Text = "Store Wise Soda Soft Drink Sales";

            //Set the number format of the Y-axis
            chart.AxisY.NumberFormat.FormatCode = "#,##0";

            //Set the legend position
            chart.Legend.Position = LegendPosition.Bottom;

            //Save to file
            document.SaveToFile("StackedColumnChart.docx", FileFormat.Docx2019);
        }
    }
}
Apply for a Temporary License
If you'd like to remove the evaluation message from the generated documents, or to get rid of the function limitations, please request a 30-day trial license for yourself.
Printing Word documents programmatically in C# can streamline business workflows, automate reporting, and enhance document management systems. This comprehensive guide explores how to print Word documents in C# using Spire.Doc for .NET, covering everything from basic printing to advanced customization techniques. We'll walk through practical code examples for each scenario, ensuring you can implement these solutions in real-world applications.
- .NET Library for Printing Word Documents
- Print Word Documents in C#
- Customize Printing Options
- Silently Print Word Documents
- Print Multiple Pages on One Sheet
- Conclusion
- FAQs
.NET Library for Printing Word Documents
Spire.Doc for .NET is a robust, standalone library that supports comprehensive Word document processing without requiring Microsoft Office to be installed. It provides intuitive APIs for loading, editing, and printing Word files (DOC/DOCX) while maintaining perfect formatting fidelity.
To get started, install the library via NuGet Package Manager:
Install-Package Spire.DocAlternatively, you can download Spire.Doc for .NET from our official website and reference the DLL file manually.
Print Word Documents in C#
The foundation of Word document printing in C# involves three key steps demonstrated in the following code. First, we create a Document object to represent our Word file, then load the actual document, and finally access the printing functionality through the PrintDocument class.
- C#
using Spire.Doc;
using System.Drawing.Printing;

namespace PrintWordDocument
{
    internal class Program
    {
        static void Main(string[] args)
        {
            // Initialize a new Document instance
            Document doc = new Document();

            // Load the Word file from specified path
            doc.LoadFromFile("Input.docx");

            // Access the PrintDocument object for printing operations
            PrintDocument printDoc = doc.PrintDocument;

            // Send document to default printer
            printDoc.Print();
        }
    }
}
This basic implementation handles the entire printing process, from document loading to physical printing, with just a few lines of code. The PrintDocument object abstracts all the underlying printing operations, making the process straightforward for developers.
Customize Printing Options
Beyond basic printing, Spire.Doc offers extensive customization via the PrinterSettings class, providing developers with granular control over the printing process. These settings allow you to tailor the output to specific needs, such as selecting particular pages or configuring advanced printer features.
To obtain the PrinterSettings object associated with the current document, use the following line of code:
- C#
PrinterSettings settings = printDoc.PrinterSettings;Now, let’s explore the specific settings.
1. Specify the Printer Name
- C#
settings.PrinterName = "Your Printer Name";This code snippet demonstrates how to target a specific printer in environments with multiple installed printers. The PrinterName property accepts the exact name of the printer as it appears in the system's printer list.
2. Specify Pages to Print
- C#
settings.FromPage = 1;
settings.ToPage = 5;
These settings are particularly useful when dealing with large documents, allowing you to print only the relevant sections and conserve resources.
3. Specify Number of Copies to Print
- C#
settings.Copies = 2;The Copies property controls how many duplicates of the document will be printed, with the printer handling the duplication process efficiently.
4. Enable Duplex Printing
- C#
if (settings.CanDuplex)
{
    settings.Duplex = Duplex.Default;
}
This example first checks for duplex printing support before enabling two-sided printing, ensuring compatibility across different printer hardware.
5. Print on a Custom Paper Size
- C#
settings.DefaultPageSettings.PaperSize = new PaperSize("custom", 800, 500);Here we create a custom paper size (800x500 units) for specialized printing requirements, demonstrating Spire.Doc's flexibility in handling non-standard document formats.
6. Print Word to File
- C#
settings.PrintToFile = true;
settings.PrinterName = "Microsoft Print to PDF";
settings.PrintFileName = @"C:\Output.pdf";
This configuration uses the system's PDF virtual printer to create a PDF file instead of physical printing, showcasing how Spire.Doc can be used for document conversion as well.
Silently Print Word Documents
In automated environments, you may need to print documents without any user interaction or visible dialogs. The following implementation achieves silent printing by using the StandardPrintController.
- C#
using Spire.Doc;
using System.Drawing.Printing;

namespace SilentlyPrintWord
{
    class Program
    {
        static void Main(string[] args)
        {
            // Initialize a new Document instance
            Document doc = new Document();

            // Load the Word file from specified path
            doc.LoadFromFile("Input.docx");

            // Access the PrintDocument object for printing operations
            PrintDocument printDoc = doc.PrintDocument;

            // Disable the print dialog
            printDoc.PrintController = new StandardPrintController();

            // Exexute printing
            printDoc.Print();
        }
    }
}
The key to silent printing lies in assigning the StandardPrintController to the PrintController property, which suppresses all printing-related dialogs and progress indicators. This approach is ideal for server-side applications or batch processing scenarios where user interaction is not possible or desired.
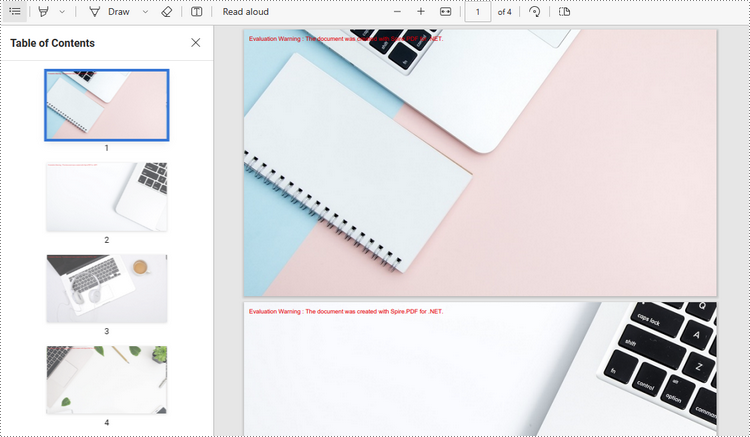
Print Multiple Pages on One Sheet
For economizing paper usage or creating compact document versions, Spire.Doc supports printing multiple document pages on a single physical sheet. The PrintMultipageToOneSheet method simplifies this process with predefined layout options.
- C#
using Spire.Doc;
using Spire.Doc.Printing;
using System.Drawing.Printing;

namespace PrintMultiplePagesOnOneSheet
{
    internal class Program
    {
        static void Main(string[] args)
        {
            // Initialize a new Document instance
            Document doc = new Document();

            // Load the Word file from specified path
            doc.LoadFromFile("Input.docx");

            // Configure 2-page-per-sheet printing and execute printing
            doc.PrintMultipageToOneSheet(PagesPerSheet.TwoPages, false);
        }
    }
}
The PagesPreSheet enumeration offers several layout options (OnePage, TwoPages, FourPages, etc.), while the boolean parameter determines whether to include a page border on the printed sheet. This feature is particularly valuable for creating booklet layouts or draft versions of documents.
P.S. This scenario works only with .NET Framework versions earlier than 5.0.
Conclusion
This guide has demonstrated how Spire.Doc for .NET provides a comprehensive solution for Word document printing in C#. It simplifies the process with features such as:
- Basic & silent printing.
- Customizable print settings (printer selection, duplex, copies).
- Multi-page per sheet printing to reduce paper usage.
By integrating these techniques, developers can efficiently automate document printing in enterprise applications, enhancing productivity and reducing manual effort. Overall, Spire.Doc empowers developers to create robust printing solutions that meet diverse business requirements.
FAQs
Q1. Can I print encrypted or password-protected Word files?
A: Yes, Spire.Doc supports printing password-protected documents after loading them with the correct password:
- C#
doc.LoadFromFile("Protected.docx", FileFormat.Docx, "password");After successful loading, you can print it like any other document, with all the same customization options available.
Q2. How can I print only selected text from a Word document?
A: You can extract specific content by accessing document sections and paragraphs:
- C#
Section section = doc.Sections[0];
Paragraph paragraph = section.Paragraphs[0];
// Create new document with selected content
Document newDoc = new Document();
newDoc.Sections.Add(section.Clone());
newDoc.Print();
This approach gives you precise control over which document portions get printed.
Q3. Can I print documents in landscape mode or adjust margins programmatically?
A: Yes! Modify the DefaultPageSettings properties:
- C#
printDoc.DefaultPageSettings.Landscape = true;
printDoc.DefaultPageSettings.Margins = new Margins(50, 50, 50, 50);
Q4. Can I print other file formats (e.g., PDF, Excel) using Spire.Doc?
A: Spire.Doc is designed for Word files (DOC/DOCX). For PDFs, use Spire.PDF; for Excel, use Spire.XLS.
Get a Free License
To fully experience the capabilities of Spire.Doc for Python without any evaluation limitations, you can request a free 30-day trial license.
If you have multiple images that you want to combine into one file for easier distribution or storage, converting them into a single PDF document is a great solution. This process not only saves space but also ensures that all your images are kept together in one file, making it convenient to share or transfer. In this article, you will learn how to combine several images into a single PDF document in C# and VB.NET using Spire.PDF for .NET.
Install Spire.PDF for .NET
To begin with, you need to add the DLL files included in the Spire.PDF for.NET package as references in your .NET project. The DLL files can be either downloaded from this link or installed via NuGet.
PM> Install-Package Spire.PDF
Combine Multiple Images into a Single PDF in C# and VB.NET
In order to convert all the images in a folder to a PDF, we iterate through each image, add a new page to the PDF with the same size as the image, and then draw the image onto the new page. The following are the detailed steps.
- Create a PdfDocument object.
- Set the page margins to zero using PdfDocument.PageSettings.SetMargins() method.
- Get the folder where the images are stored.
- Iterate through each image file in the folder, and get the width and height of a specific image.
- Add a new page that has the same width and height as the image to the PDF document using PdfDocument.Pages.Add() method.
- Draw the image on the page using PdfPageBase.Canvas.DrawImage() method.
- Save the document using PdfDocument.SaveToFile() method.
- C#
- VB.NET
using Spire.Pdf;
using Spire.Pdf.Graphics;
using System.Drawing;

namespace ConvertMultipleImagesIntoPdf
{
    class Program
    {
        static void Main(string[] args)
        {
            //Create a PdfDocument object
            PdfDocument doc = new PdfDocument();

            //Set the page margins to 0
            doc.PageSettings.SetMargins(0);

            //Get the folder where the images are stored
            DirectoryInfo folder = new DirectoryInfo(@"C:\Users\Administrator\Desktop\Images");

            //Iterate through the files in the folder
            foreach (FileInfo file in folder.GetFiles())
            {
                //Load a particular image
                Image image = Image.FromFile(file.FullName);

                //Get the image width and height
                float width = image.PhysicalDimension.Width;
                float height = image.PhysicalDimension.Height;

                //Add a page that has the same size as the image
                PdfPageBase page = doc.Pages.Add(new SizeF(width, height));

                //Create a PdfImage object based on the image
                PdfImage pdfImage = PdfImage.FromImage(image);

                //Draw image at (0, 0) of the page
                page.Canvas.DrawImage(pdfImage, 0, 0, pdfImage.Width, pdfImage.Height);
            }

            //Save to file
            doc.SaveToFile("CombinaImagesToPdf.pdf");
            doc.Dispose();
        }
    }
}
Apply for a Temporary License
If you'd like to remove the evaluation message from the generated documents, or to get rid of the function limitations, please request a 30-day trial license for yourself.
