Knowledgebase (2370)
Children categories
Spire.PDF for C++ is a professional PDF library built for developers to read, create, edit, and convert PDF documents in any type of C++ applications. This article demonstrates how to integrate Spire.PDF for C++ into your C++ application in two different ways.
Install Spire.PDF for C++ via NuGet
Step 1
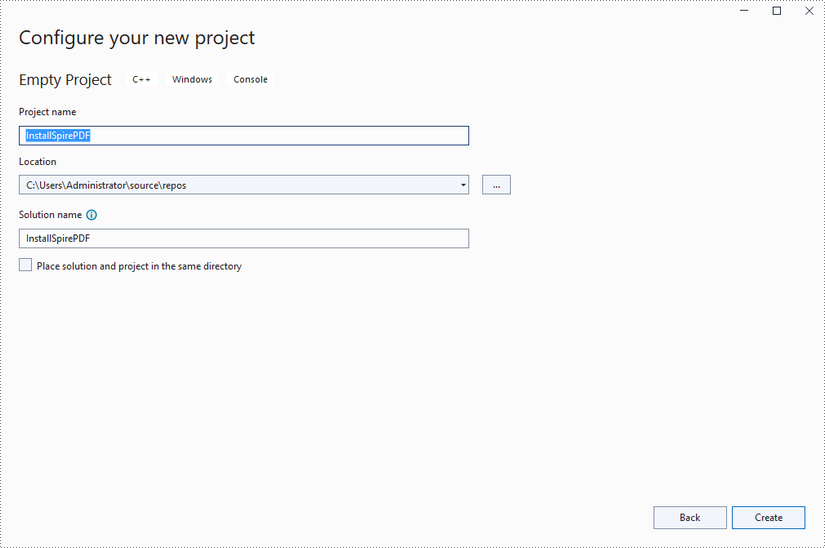
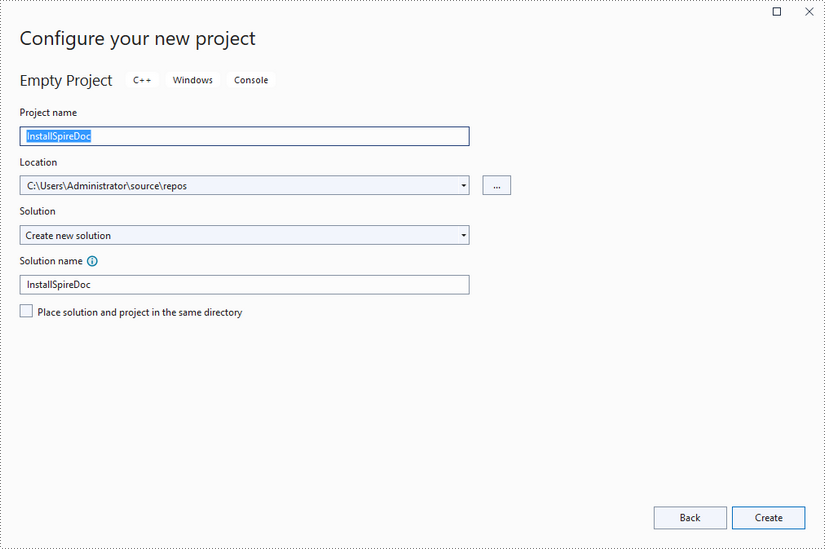
Create a C++ project in Visual Studio 2022.
Step 2
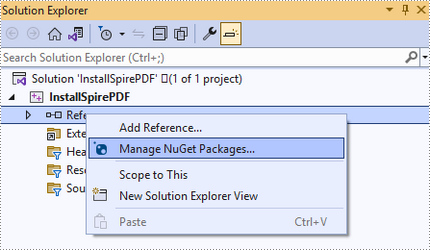
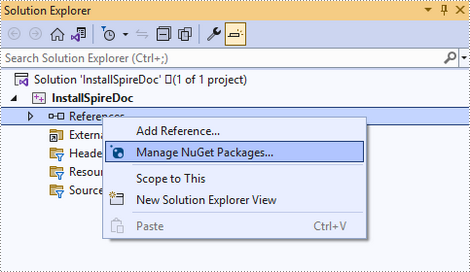
Right-click "References" in the Solution Explorer and choose "Manage NuGet Package" in the popup menu.
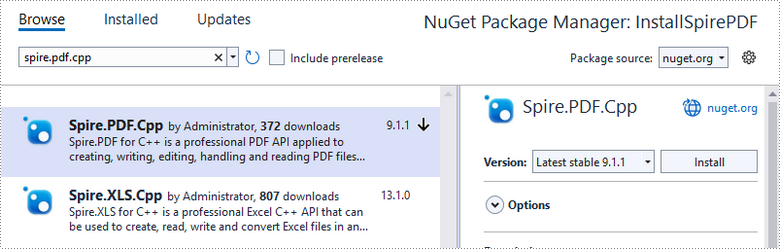
Click "Browse", search for "spire.PDF.cpp", and install it in your project.
Step 3
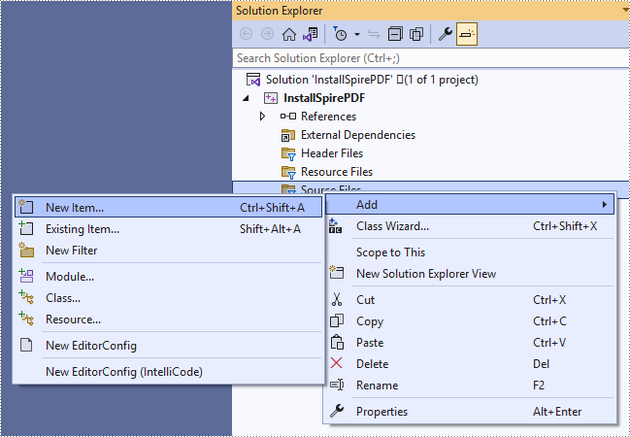
Right-click "Source Files" in the Solution Explorer, choose "Add" and then "New Item".
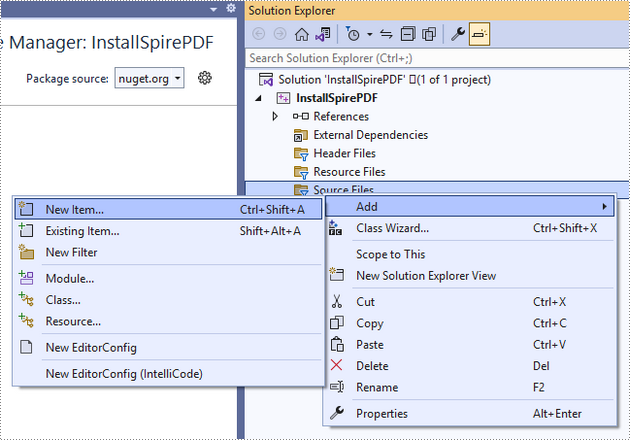
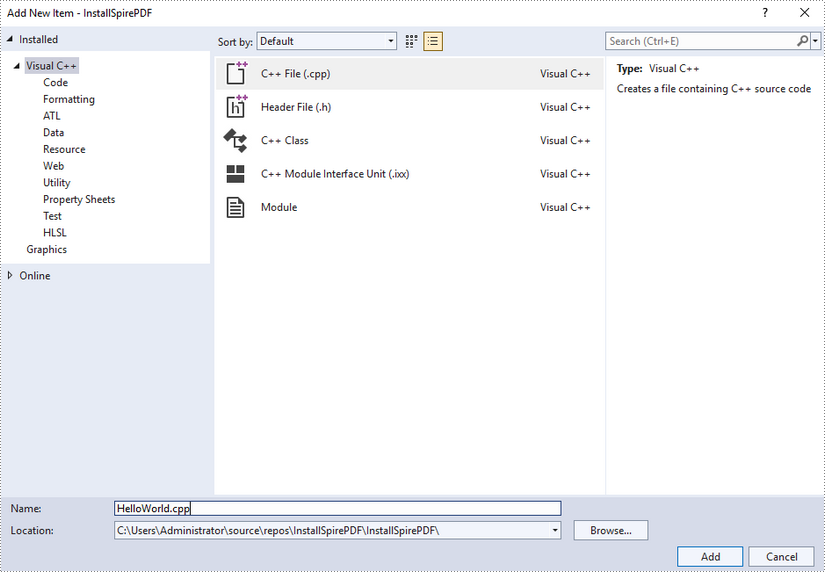
Create a .cpp file.

Step 4
Click the .cpp file you just created to write code. Before starting, you need to include the header file “Spire.Pdf.o.h” by adding the following line of code to your program.
- C++
#include "Spire.Pdf.o.h"
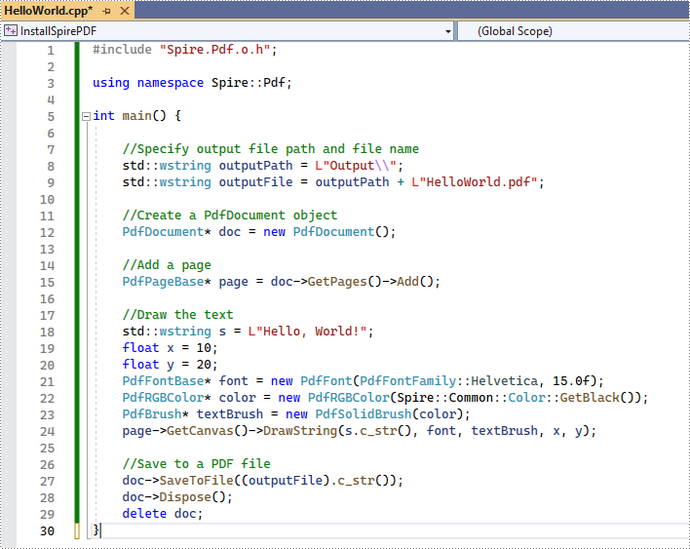
The code example below shows you how to create a simple PDF file using Spire.PDF for C++.
Install Spire.PDF for C++ by Manually Importing Libraries
Step 1
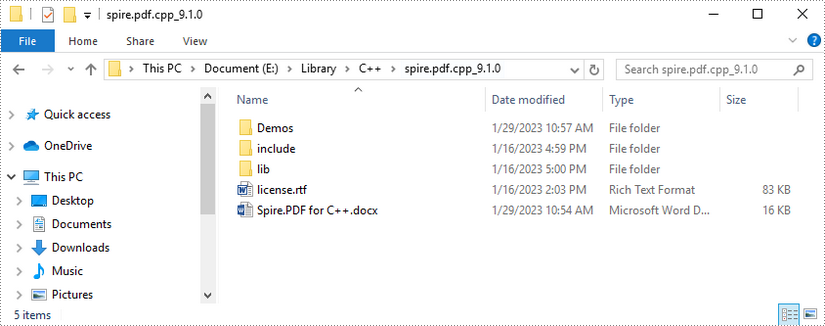
Download Spire.PDF for C++ package and unzip it somewhere on your disc to get the following files.
Step 2
Create a C++ project in Visual Studio 2022.

Step 3
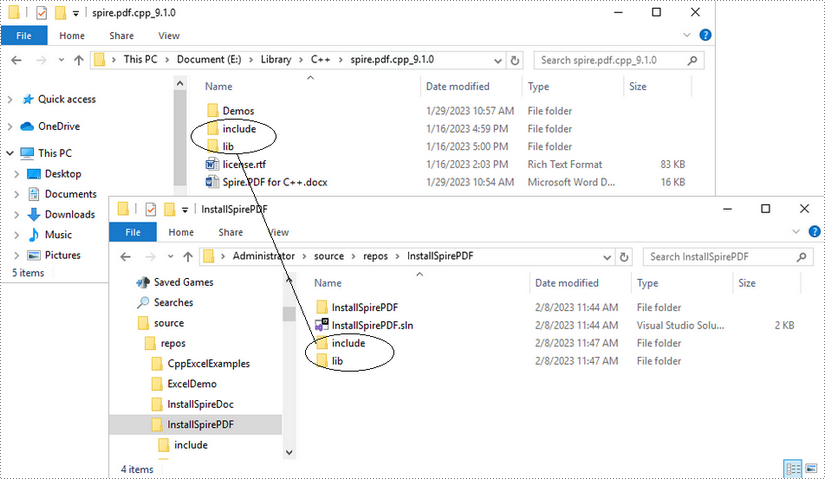
Copy the "include" folder and the "lib" folder from the product package to your project, and save them under the same folder where the .sln file exists.
Step 4
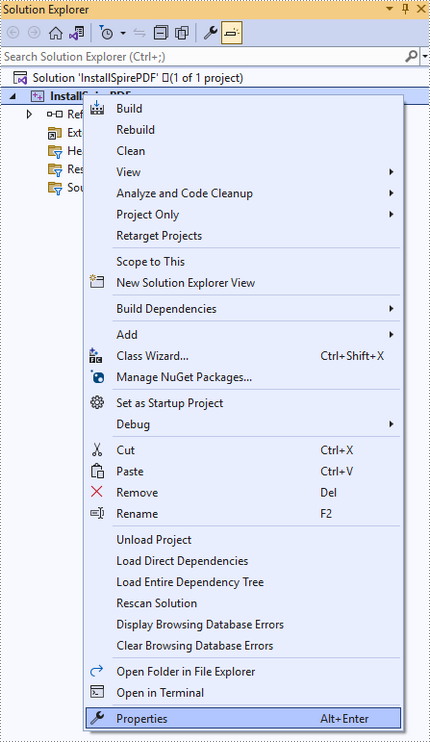
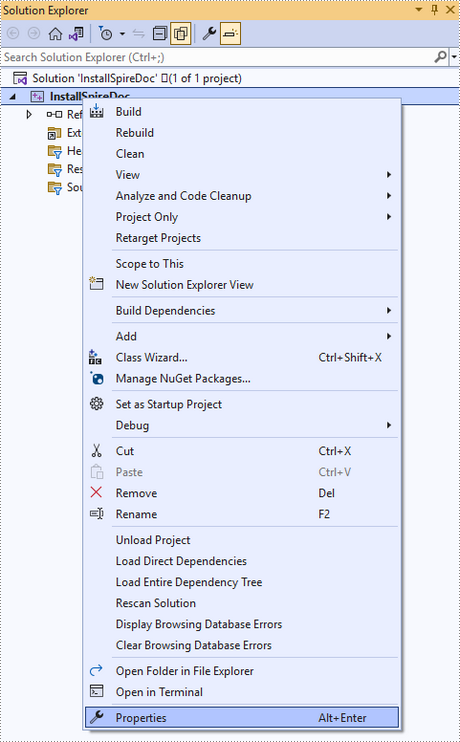
Right-click the project name and select "Properties".
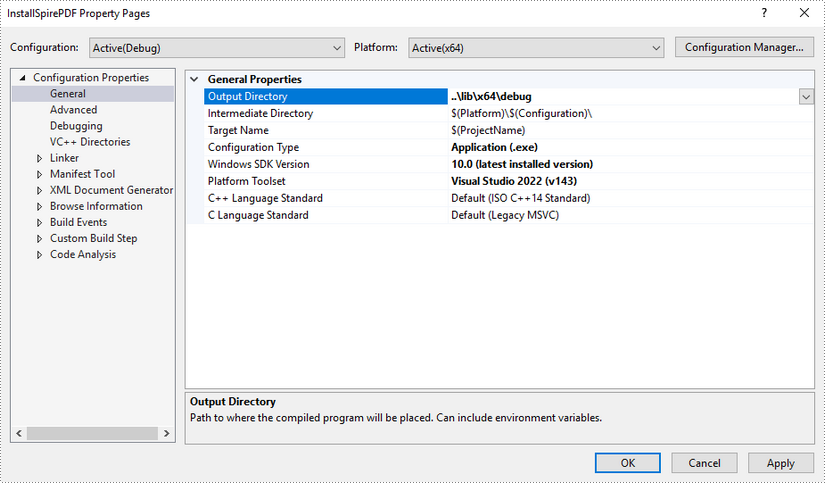
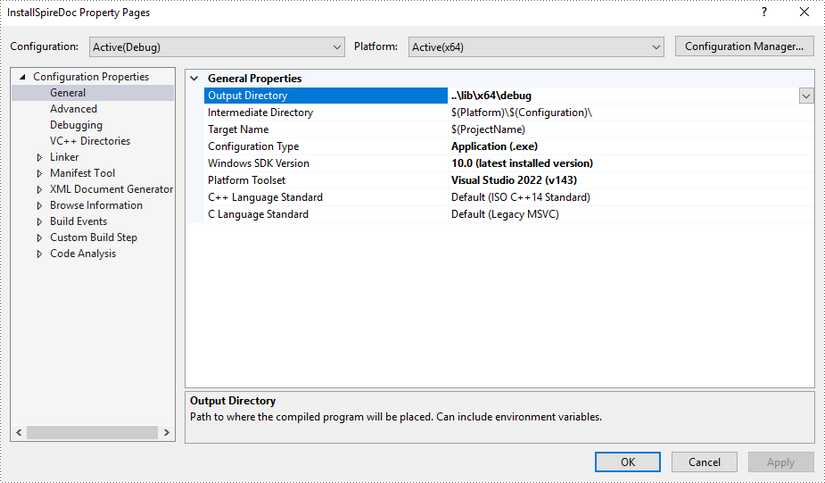
Configure output directory. Depending on the build mode (Debug or Release) you choose, you can set the output directory to "..\lib\x64\debug" or "..\lib\x64\release".
Step 5
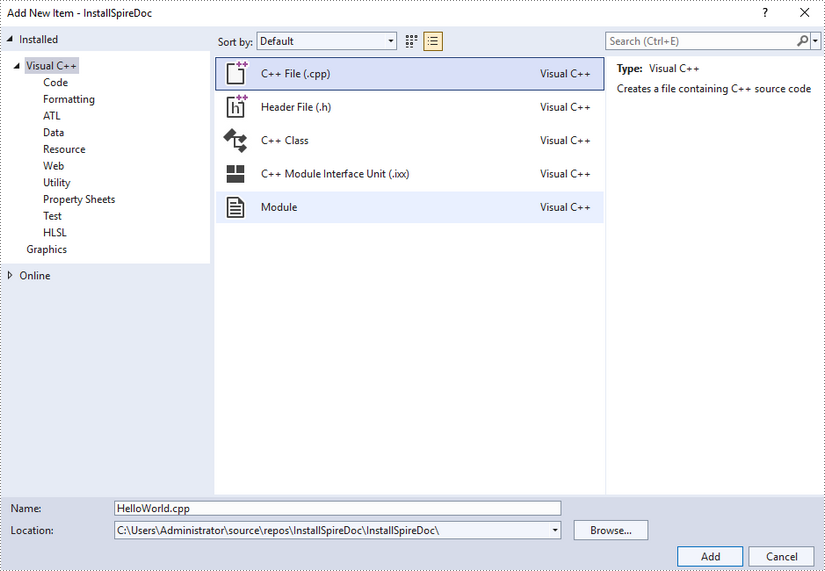
Right-click "Source Files" in the Solution Explorer, choose "Add" and then "New Item".
Create a .cpp file.
Step 6
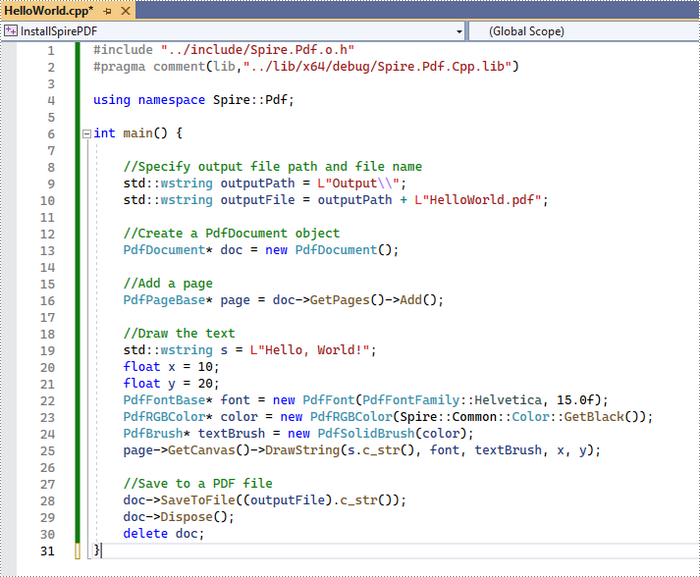
Click the .cpp file you just created to write code. Before starting, you need to include the following two lines of code to your program.
- C++
#include "../include/Spire.Pdf.o.h"
#pragma comment(lib,"../lib/x64/debug/Spire.Pdf.Cpp.lib")
The code example below shows you how to create a simple PDF file using Spire.PDF for C++.
Excel spreadsheets are grid-based documents used to organize information in an organized manner. People all around the world use spreadsheets to create tables for business or personal needs. Over the years, Excel spreadsheets have played an important role in easing the tedious process of managing data with a variety of functionalities. In this article, you will learn how to create an Excel document in C++ and how to write data into Excel sheets in C++ by using Spire.XLS for C++.
Install Spire.XLS for C++
There are two ways to integrate Spire.XLS for C++ into your application. One way is to install it through NuGet, and the other way is to download the package from our website and copy the libraries into your program. Installation via NuGet is simpler and more recommended. You can find more details by visiting the following link.
Integrate Spire.XLS for C++ in a C++ Application
Write Text or Number Values to Cells in C++
Spire.XLS for C++ provides the Workbook class and the Worksheet class to represent an Excel document and a worksheet, respectively. Users can have access to a specific cell using Worksheet->GetRange(int row, int column) method. Then, assign a text value or a number value to the cell using CellRange->SetText() or CellRange->SetNumberValue() method. The following are the detailed steps:
- Create a Workbook object.
- Get the first worksheet using Workbook->GetWorksheets()->Get() method.
- Get a specific cell using Worksheet->GetRange(int row, int column) method.
- Add a text value or a number values to a specified cell using CellRange->SetText() or CellRange->SetNumberValue() method.
- Save the workbook to an Excel file using Workbook->SaveToFile() method.
- C++
#include "Spire.Xls.o.h";

using namespace Spire::Xls;

int main() {

	//Specify output file path and name
	std::wstring outputPath = L"Output\\";
	std::wstring outputFile = outputPath + L"WriteIndividualValuesToCells.xlsx";

	//Create a Workbook object
	intrusive_ptr<Workbook> workbook = new Workbook();

	//Get the first sheet
	intrusive_ptr<Worksheet> sheet = dynamic_pointer_cast<Worksheet>(workbook->GetWorksheets()->Get(0));

	//Write text and numbers to the specified cells
	sheet->GetRange(1, 1)->SetText(L"Name");
	sheet->GetRange(1, 2)->SetText(L"Age");
	sheet->GetRange(1, 3)->SetText(L"Department");
	sheet->GetRange(1, 4)->SetText(L"Hire Date");
	sheet->GetRange(1, 1)->SetText(L"Name");
	sheet->GetRange(2, 1)->SetText(L"Hazel");
	sheet->GetRange(2, 2)->SetNumberValue(29);
	sheet->GetRange(2, 3)->SetText(L"Marketing");
	sheet->GetRange(2, 4)->SetText(L"2021-02-26");
	sheet->GetRange(3, 1)->SetText(L"Tina");
	sheet->GetRange(3, 2)->SetNumberValue(27);
	sheet->GetRange(3, 3)->SetText(L"Human Resource");
	sheet->GetRange(3, 4)->SetText(L"2020-07-13");
	sheet->GetRange(4, 1)->SetText(L"Amy");
	sheet->GetRange(4, 2)->SetNumberValue(35);
	sheet->GetRange(4, 3)->SetText(L"Development");
	sheet->GetRange(4, 4)->SetText(L"2019-04-01");

	//Autofit column width
	sheet->GetAllocatedRange()->AutoFitColumns();

	//Apply style to the first row
	intrusive_ptr <CellStyle> style = dynamic_pointer_cast<CellStyle>(workbook->GetStyles()->Add(L"newStyle"));
	style->GetFont()->SetIsBold(true);
	sheet->GetRange(1, 1, 1, 4)->SetStyle(style);

	//Save to file
	workbook->SaveToFile(outputFile.c_str(), ExcelVersion::Version2016);
	workbook->Dispose();
}

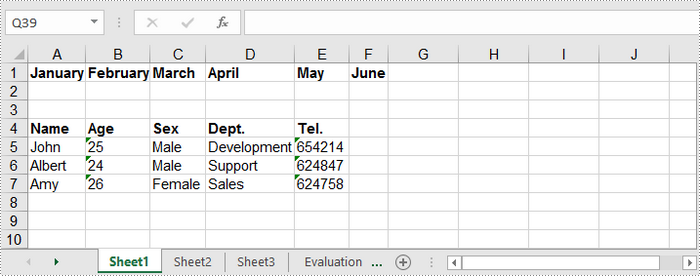
Write Arrays to Specified Cell Ranges in C++
Spire.XLS for C++ provides the Worksheet->InsertArray() method, allowing programmers to write vectors into the specified cell range of a worksheet. Before writing arrays to worksheets, you need to convert them to vectors. The steps to write arrays to a worksheet are as follows:
- Create a Workbook object.
- Get the first worksheet using Workbook->GetWorksheets()->Get() method.
- Create an array and convert it to one vector or multiple vectors.
- Insert the vector(s) to worksheet using Worksheet->InsertArray() method.
- Save the workbook to an Excel file using Workbook->SaveToFile() method.
- C++
#include "Spire.Xls.o.h";

using namespace Spire::Xls;
using namespace std;

int main() {

	//Specify output file path and name
	wstring outputPath = L"Output\\";
	wstring outputFile = outputPath + L"WriteArraysToCellRanges.xlsx";

	//Create a Workbook object
	intrusive_ptr<Workbook> workbook = new Workbook();

	//Get the first sheet
	intrusive_ptr<Worksheet> sheet = dynamic_pointer_cast<Worksheet>(workbook->GetWorksheets()->Get(0));

	//Create a one-dimensional array
	wstring oneDimensionalArray[6] = { L"January", L"February", L"March", L"April", L"May", L"June" };

	//Convert array to vector
	vector<LPCWSTR> vec;
	for (size_t i = 0; i < sizeof(oneDimensionalArray) / sizeof(oneDimensionalArray[0]); i++)
	{
		vec.push_back(oneDimensionalArray[i].c_str());
	}

	//Insert vector to worksheet
	sheet->InsertArray(vec, 1, 1, false);

	//Create a two-dimensional array
	wstring twoDimensionalArray[4][5] = {
		{L"Name", L"Age", L"Sex", L"Dept.", L"Tel."},
		{L"John", L"25", L"Male", L"Development", L"654214"},
		{L"Albert", L"24", L"Male", L"Support", L"624847"},
		{L"Amy", L"26", L"Female", L"Sales", L"624758"}
	};

	//Get row number and column number
	int rowNum = sizeof(twoDimensionalArray) / sizeof(twoDimensionalArray[0]);
	int columnNum = sizeof(twoDimensionalArray[0]) / sizeof(twoDimensionalArray[0][0]);

	//Split 2D array into multiple 1D vectors
	for (size_t i = 0; i < rowNum; i++)
	{
		vector<LPCWSTR> vec_temp;
		for (size_t j = 0; j < columnNum; j++)
		{
			vec_temp.push_back(twoDimensionalArray[i][j].c_str());
		}

		//Insert vector into worksheet
		sheet->InsertArray(vec_temp, 4 + i, 1, false);
	}

	//Autofit column width
	sheet->GetAllocatedRange()->AutoFitColumns();

	//Apply style to the first row
	intrusive_ptr <CellStyle> style = dynamic_pointer_cast<CellStyle>(workbook->GetStyles()->Add(L"newStyle"));
	style->GetFont()->SetIsBold(true);
	sheet->GetRange(1, 1, 1, 6)->SetStyle(style);
	sheet->GetRange(4, 1, 4, 5)->SetStyle(style);

	//Save to file
	workbook->SaveToFile(outputFile.c_str(), ExcelVersion::Version2016);
	workbook->Dispose();
}
Apply for a Temporary License
If you'd like to remove the evaluation message from the generated documents, or to get rid of the function limitations, please request a 30-day trial license for yourself.
Spire.Doc for C++ is a professional Word library built for developers to read, create, edit, compare and convert Word documents in any type of C++ applications. This article demonstrates how to integrate Spire.Doc for C++ into your C++ application in two different ways.
Install Spire.Doc for C++ via NuGet
Step 1
Create a C++ project in Visual Studio 2022.
Step 2
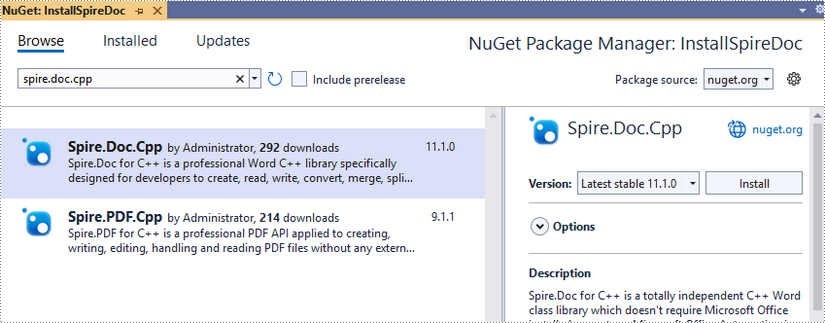
Right-click 'References' in the Solution Explorer and choose 'Manage NuGet Package' in the popup menu.
Click 'Browse', search for 'spire.doc.cpp', and install it in your project.
Step 3
Right-click 'Source Files' in the Solution Explorer, choose 'Add' and then 'New Item'.
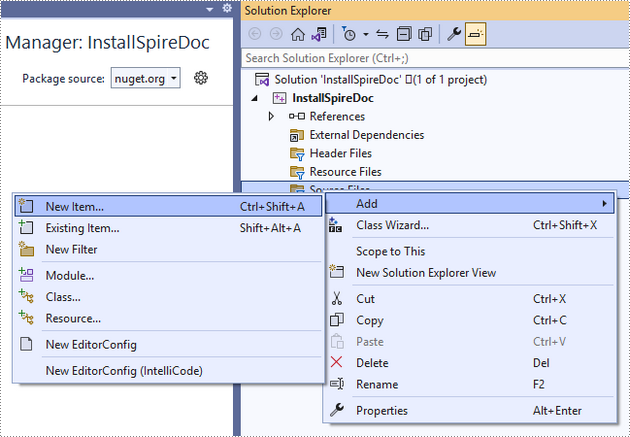
Create a .cpp file.

Step 4
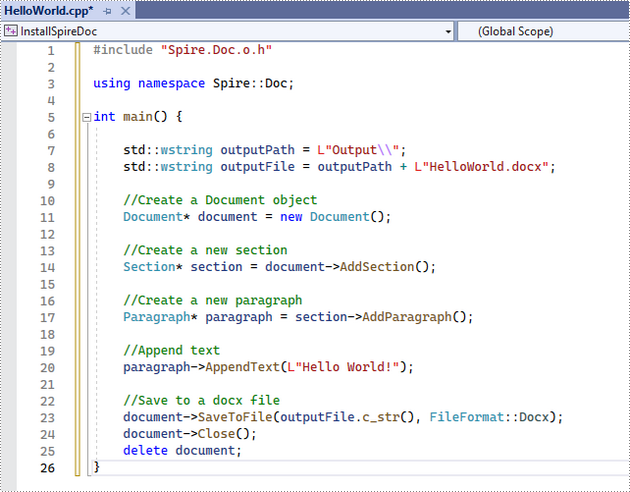
Click the .cpp file you just created to write code. Before starting, you need to include the header file “Spire.Doc.o.h” by adding the following line of code to your program.
- C++
#include "Spire.Doc.o.h"
The code example below shows you how to create a simple Word file using Spire.Doc for C++.
Install Spire.Doc for C++ by Manually Importing Libraries
Step 1
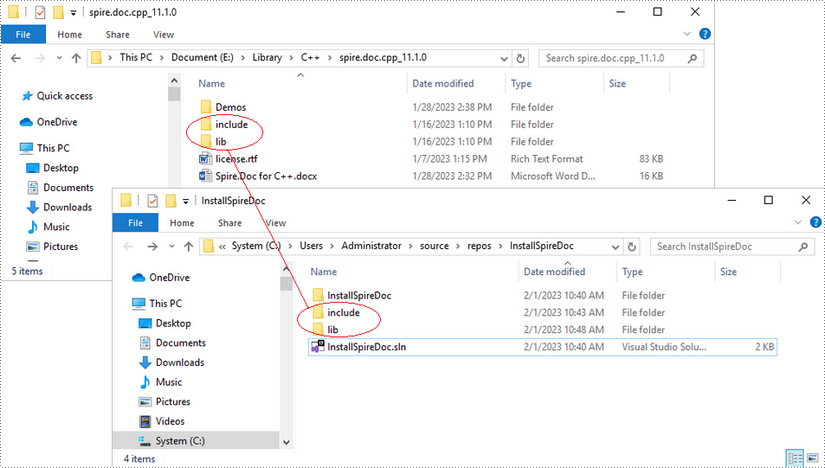
Download Spire.Doc for C++ package and unzip it somewhere on your disc to get the following files.

Step 2
Create a C++ project in Visual Studio 2022.

Step 3
Copy the 'include' folder and the 'lib' folder from the product package to your project, and save them under the same folder where the .sln file exists.
Step 4
Right-click the project name and select 'Properties'.
Configure output directory. Depending on the build mode (Debug or Release) you choose, you can set the output directory to '..\lib\x64\debug' or '..\lib\x64\release'.
Step 5
Right-click 'Source Files' in the Solution Explorer, choose 'Add' and then 'New Item'.

Create a .cpp file.
Step 6
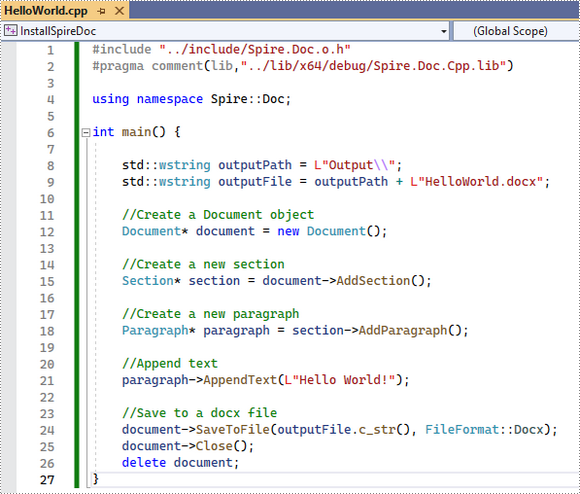
Click the .cpp file you just created to write code. Before starting, you need to include the following two lines of code to your program.
- C++
#include "../include/Spire.Doc.o.h"
#pragma comment(lib,"../lib/x64/debug/Spire.Doc.Cpp.lib")
The code example below shows you how to create a simple Word file using Spire.Doc for C++.