
Knowledgebase (2370)
Children categories
Page Content:
- Differences between PowerPoint and OFD Format
- How to Convert PowerPoint to OFD with Spire.Presentation for C++
- Batch Convert PowerPoint Files into OFD Format with C++
- Convert a Single Slide of PowerPoint to OFD with C++
- FAQs
PowerPoint presentations are widely used for business reports and technical documentation. In some industries, especially in government and enterprise systems, documents are often required to be distributed in OFD instead of standard Office formats. Because PowerPoint files can include complex layouts and interactive elements, they are not always suitable for standardized document distribution.
In this tutorial, you will learn how to convert PowerPoint to OFD in C++ using Spire.Presentation for C++. The guide walks through simple code examples for converting an entire .ppt/.pptx file, exporting a single slide, and performing batch PPT to OFD conversion for multiple files.
Differences between PowerPoint and OFD Format
Before implementing the conversion, it helps to first understand the key differences between PowerPoint and OFD formats. Each format is designed for a different purpose and usage scenario, which is why some organizations require documents to be converted before distribution. Knowing these differences can make it clearer why converting PowerPoint to OFD is often necessary in enterprise or government document workflows.
1. File Structure and Purpose
PowerPoint files (PPT/PPTX) are designed for interactive presentations and support animations, transitions, embedded media, and editable slide elements.
OFD, in contrast, is a fixed layout document format like PDF, designed to preserve the exact visual layout of a document across different systems. Because of this, OFD is commonly used for official document distribution and long-term digital archiving.
OFD, in contrast, is a fixed layout document format like PDF, designed to preserve the exact visual layout of a document across different systems. Because of this, OFD is commonly used for official document distribution and long-term digital archiving, similar to scenarios where organizations convert PowerPoint to PDF to ensure consistent document formatting.
2. Compatibility and Standardization
PowerPoint belongs to the Microsoft Office ecosystem and typically requires compatible presentation software to view or edit.
OFD is an open national standard created for electronic document exchange, allowing organizations to share and store documents with consistent formatting regardless of the software environment.
3. Security and Compliance
In many enterprise and government workflows, documents must follow standardized formats to meet regulatory requirements. OFD supports features such as digital signatures, fixed layout rendering, and secure document exchange, making it suitable for compliant document distribution.
How to Convert PowerPoint to OFD with Spire.Presentation for C++
Understanding the differences between PowerPoint and OFD is the first step in ensuring documents are properly formatted for distribution. OFD’s fixed layout and standardized features make it ideal for official and long-term archival use.
To handle the conversion in C++, Spire.Presentation for C++ provides a simple and reliable solution. It lets developers load, edit, and export PowerPoint files to OFD while preserving the original layout and content. It also supports other tasks such as editing slides, extracting images, and converting PowerPoint files to images and other formats.
Read on to learn how to use Spire.Presentation for C++ to convert PowerPoint to OFD format.
Install Spire.Presentation for C++:
Before using the sample code in Visual Studio, make sure to add the library to your C++ project. You can either download it from the official download link and add it to your project manually, or install it automatically via NuGet.
For a more detailed tutorial on how to integrate Spire.Presentation for C++, see: How to Integrate Spire.Presentation for C++ in a C++ Application.
PowerPoint to OFD Conversion Workflow:
- Specify the input and output file paths.
- Create a Presentation object.
- Load the PowerPoint file using Presentation.LoadFromFile(String).
- Save the presentation as an OFD file using Presentation.SaveToFile(String, FileFormat).
- Dispose of the Presentation object to release resources.
Sample Code:
#include "Spire.Presentation.o.h";

using namespace Spire::Presentation;
using namespace std;

int main()
{
    // Specify the input and output file paths
    std::wstring inputFile = L"powerpoint-sample.pptx";
    std::wstring outputFile = L"output\\PowerPointToOFD.ofd";

    // Create a Presentation object
    intrusive_ptr<Presentation> presentation = new Presentation();

    // Load a PowerPoint document from disk
    presentation->LoadFromFile(inputFile.c_str());

    // Save the document to OFD format
    presentation->SaveToFile(outputFile.c_str(), FileFormat::OFD);

    presentation->Dispose();

}
Conversion Result:
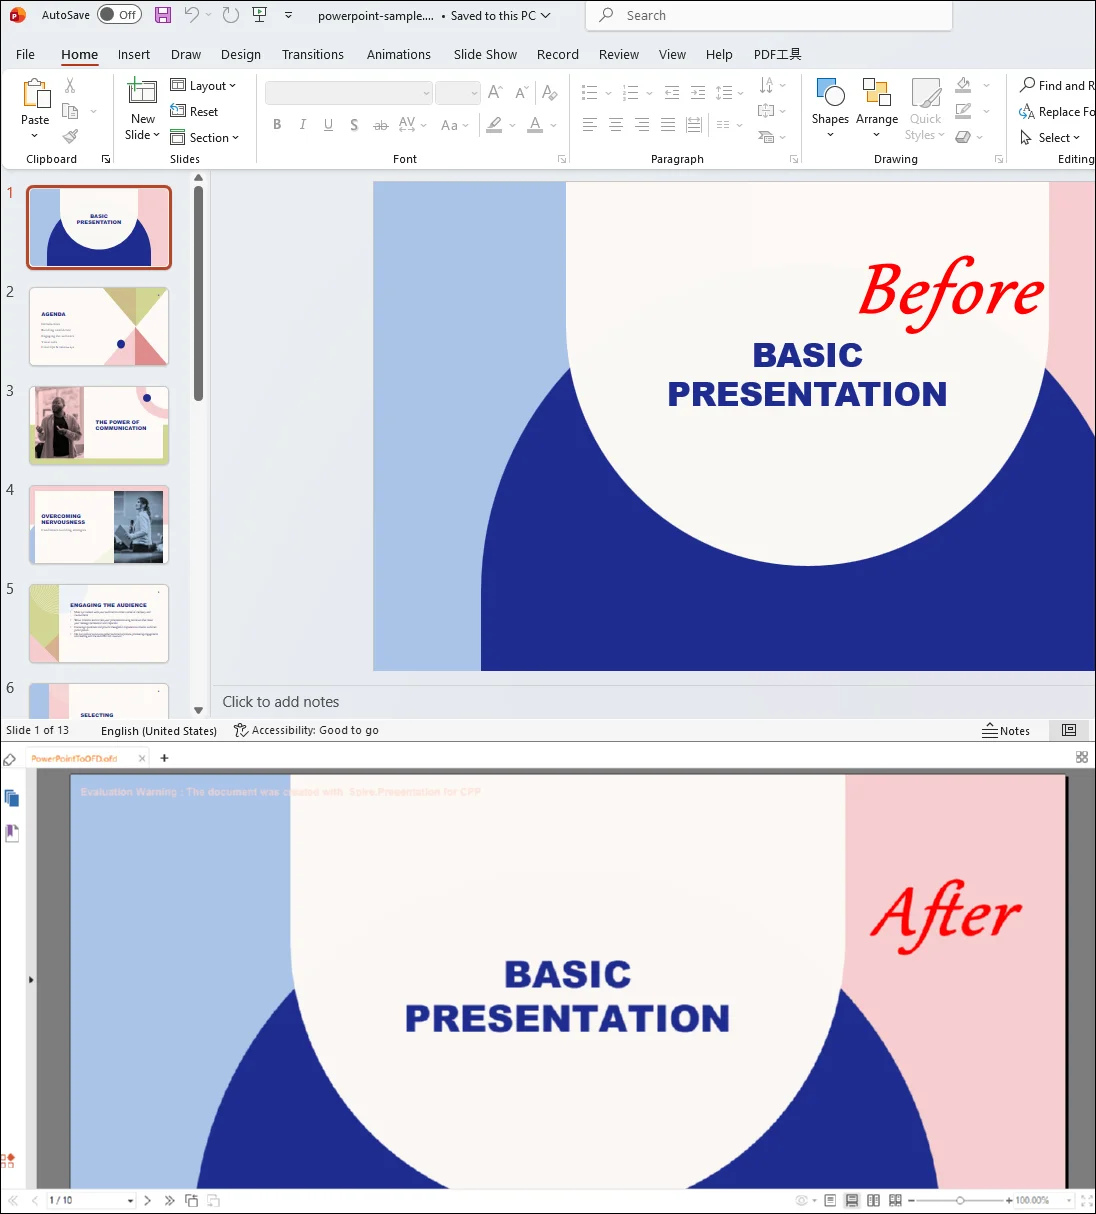
Note: If you want to remove the evaluation warning message of the converted OFD file or gain full access to all features of Spire.Presentation for C++, please contact us to request a 30-day trial license.
Batch Convert PowerPoint Files into OFD Format with C++
In real-world development scenarios, developers often need to process multiple PowerPoint files at once rather than converting them individually. For example, a document management system may need to convert a folder of PPT files into OFD format for standardized archiving or distribution.
Using Spire.Presentation for C++, you can easily iterate through a directory, load each PowerPoint file, and export it to OFD format automatically. This approach greatly improves efficiency when handling large numbers of presentations.
Batch PowerPoint to OFD Conversion Workflow
- Specify the input folder containing PowerPoint files and the output folder for the converted OFD files.
- Iterate through all files in the input directory.
- Load each PowerPoint file using the Presentation object.
- Generate a corresponding OFD output file path.
- Save the presentation as an OFD file.
- Dispose of the Presentation object to release resources.
Sample Code:
#include "Spire.Presentation.o.h"
#include <filesystem>

using namespace Spire::Presentation;
using namespace std;
namespace fs = std::filesystem;

int main()
{
    // Specify folder paths
    wstring inputFolder = L"InputPPT";
    wstring outputFolder = L"batchoutputOFD";

    for (auto& file : fs::directory_iterator(inputFolder))
    {
        if (file.path().extension() == L".pptx")
        {
            intrusive_ptr<Presentation> presentation = new Presentation();

            // Load PowerPoint file
            presentation->LoadFromFile(file.path().wstring().c_str());

            // Generate output OFD file path
            wstring outputFile = outputFolder + L"\\" + file.path().stem().wstring() + L".ofd";

            // Convert to OFD
            presentation->SaveToFile(outputFile.c_str(), FileFormat::OFD);

            presentation->Dispose();
        }
    }

    return 0;
}
Convert a Single Slide of PowerPoint to OFD with C++
In some scenarios, developers may only need to export selected slides instead of converting the entire presentation. For example, a reporting system may generate an OFD document from only a few important slides in a PowerPoint file.
Using Spire.Presentation, you can create a new presentation, copy the required slides from the original PowerPoint file, and then export them to OFD format.
Single Slide to OFD Conversion Workflow
- Load the source PowerPoint file.
- Create a new Presentation object.
- Copy the required slides from the original presentation to the new presentation.
- Save the new presentation as an OFD file.
- Dispose of the Presentation objects to release resources.
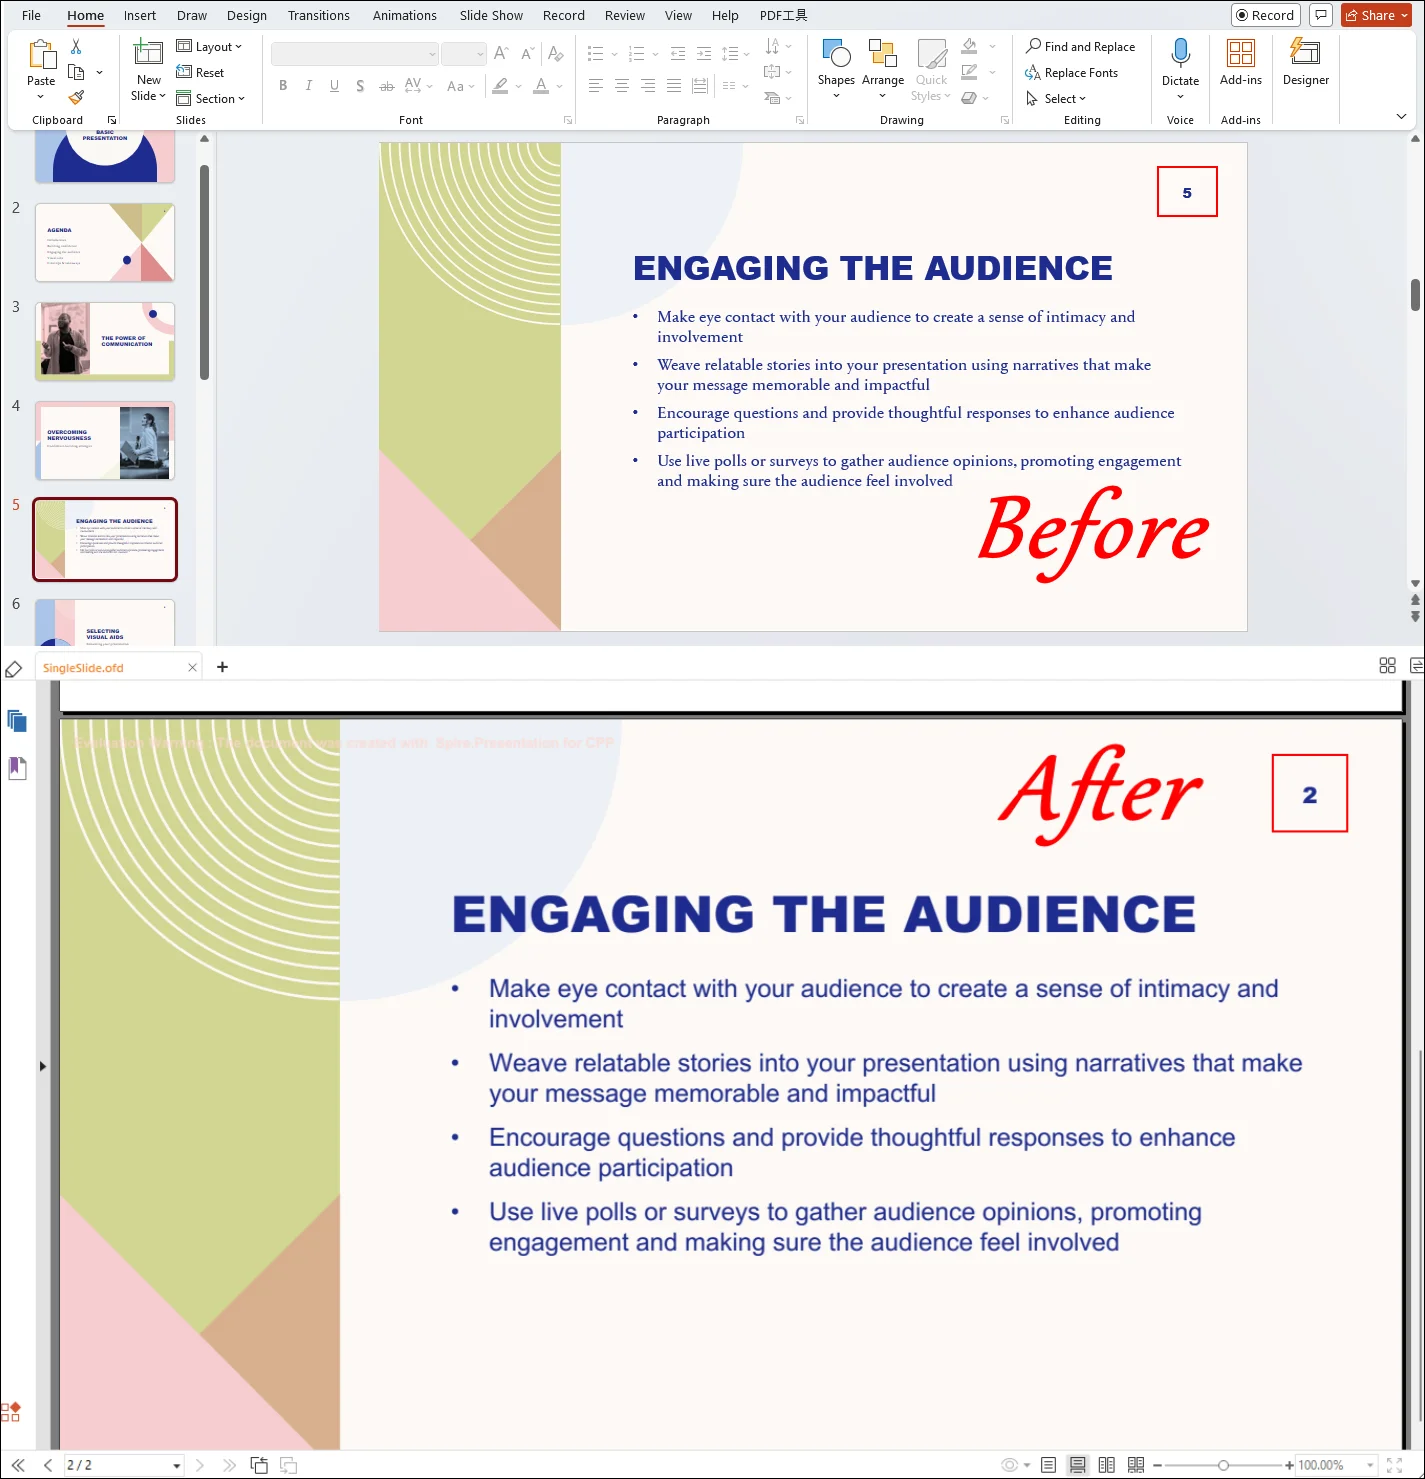
Note: In Spire.Presentation, slide indexing starts from 0, so index 4 refers to the fifth slide in the presentation.
Sample Code:
#include "Spire.Presentation.o.h"

using namespace Spire::Presentation;
using namespace std;

int main()
{
    // Specify input and output paths
    wstring inputFile = L"Input.pptx";
    wstring outputFile = L"SingleSlide.ofd";

    // Load the source presentation
    intrusive_ptr<Presentation> presentation = new Presentation();
    presentation->LoadFromFile(inputFile.c_str());

    // Create a new presentation
    intrusive_ptr<Presentation> newPresentation = new Presentation();

    // Get the specific slide (for example: slide 5)
    intrusive_ptr<ISlide> slide = presentation->GetSlides()->GetItem(4);

    // Add the slide to the new presentation
    newPresentation->GetSlides()->Append(slide);

    // Save the slide as OFD
    newPresentation->SaveToFile(outputFile.c_str(), FileFormat::OFD);

    // Release resources
    presentation->Dispose();
    newPresentation->Dispose();

    return 0;
}
RESULT:
FAQs
1. Can I export PowerPoint files directly to OFD format with Microsoft PowerPoint?
No. Microsoft PowerPoint does not provide built-in support for exporting presentations to OFD format. Developers usually rely on document processing libraries or third-party tools to perform this conversion programmatically.
2. Why convert PowerPoint to OFD instead of PDF?
While PDF is widely used, some government and industry platforms specifically require OFD because it is a national standard document format designed for secure and long-term document storage.
3. Does Spire.Presentation require Microsoft Office?
No. Spire.Presentation for C++ is a standalone library that does not require Microsoft PowerPoint to be installed.
4. Can I convert multiple PowerPoint files to OFD at once?
Yes. By looping through multiple files in a directory and applying the same conversion method, you can easily build a batch conversion tool in C++ with Spire.Presentation.
Wrap-Up
In this tutorial, we showed how to perform PowerPoint to OFD conversion in C++ using Spire.Presentation for C++. With just a few lines of code, developers can load PPT or PPTX files and export them to OFD while preserving the original layout.
We also covered scenarios such as converting an entire presentation, exporting a single slide, and performing batch PPT to OFD conversion, making it easier to integrate this feature into automated workflows or enterprise systems. Download Spire.Presentation for C++ to try these examples and start converting PowerPoint files to OFD in your C++ applications.
Converting images to OFD (Open Fixed-layout Document) format in C++ is a common requirement in enterprise document management systems, especially in China where OFD is widely adopted for official document archiving and distribution. Developers often need to digitize scanned documents, create electronic archives, or generate standardized document formats from image files.
Implementing image to OFD conversion from scratch can be complex, particularly when handling different image formats, page sizing, and OFD specification compliance.
With Spire.PDF for C++ from e-iceblue, developers can easily create OFD documents from images such as PNG, JPG, BMP, TIFF, and EMF using a straightforward API that handles the underlying complexity. This article demonstrates how to perform image to OFD conversion in C++, including practical examples for single and batch processing workflows.
Quick Navigation
- Understanding Image to OFD Conversion
- Prerequisites
- Convert an Image to OFD in C++
- Convert Multiple Images to a Multi-Page OFD in C++
- Fit Images into a Fixed Page Size
- Batch Convert Images to OFD
- Common Pitfalls
- FAQ
1. Understanding Image to OFD Conversion
OFD is an XML-based document format designed for preserving fixed-layout documents, similar to PDF but optimized for Chinese character sets and government document standards. Converting images to OFD involves creating a document structure that embeds the image content while maintaining OFD compliance.
Common use cases for image to OFD conversion include:
- Digitizing scanned invoices and receipts for archiving
- Creating standardized document repositories
- Generating electronic document workflows
- Converting legacy image-based documents to modern formats
The conversion process typically involves creating a PDF document, drawing the image onto pages, and then exporting to OFD format using the appropriate file format specification.
2. Prerequisites
Before converting images to OFD in C++, you need to install Spire.PDF for C++ and configure it in your development environment.
Install via NuGet (Recommended)
The easiest way to add Spire.PDF to a C++ project is through NuGet, which automatically downloads the package and configures the required dependencies.
- Open your project in Visual Studio.
- In Solution Explorer, right-click References.
- Select Manage NuGet Packages.
- Search for Spire.PDF.Cpp.
- Click Install.
After installation, you can include the library in your project:
#include "Spire.Pdf.o.h"
Manual Installation
Alternatively, you can download Spire.PDF for C++ and integrate it manually by configuring the include and lib directories.
For detailed instructions, refer to How to Integrate Spire.PDF for C++ in a C++ Application.
3. Convert an Image to OFD in C++
The following example demonstrates how to convert a single image file to OFD format. This implementation creates a PDF document, loads an image, draws it on a page with proper sizing, and saves the result as an OFD file.
#include "Spire.Pdf.o.h"

using namespace Spire::Pdf;

int main()
{
    // Create a new PDF document
    PdfDocument* ofd = new PdfDocument();

    // Load the image file
    auto image = PdfImage::FromFile(L"Sample.jpg");

    // Calculate page dimensions based on image size
    float pageWidth = image->GetWidth();
    float pageHeight = image->GetHeight();

    // Add a page with custom dimensions matching the image
    auto page = ofd->GetPages()->Add(new SizeF(pageWidth, pageHeight));

    // Draw the image on the page
    page->GetCanvas()->DrawImage(image, 0, 0, pageWidth, pageHeight);

    // Save the document as OFD format
    ofd->SaveToFile(L"ImageToOfd.ofd", FileFormat::OFD);

    // Clean up resources
    delete ofd;

    return 0;
}
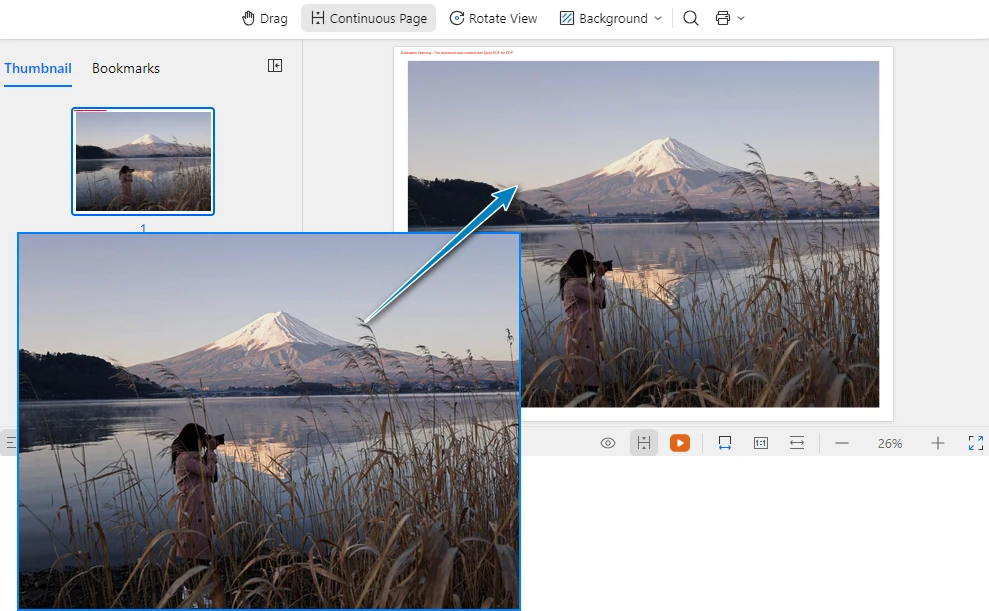
The following screenshot shows the generated OFD document created from the source image.
Key Classes and Methods
- PdfDocument – Represents the document container used to create pages and export the final OFD file.
- PdfImage::FromFile() – Loads an image from the specified file path and creates an image object that can be rendered onto a page.
- PdfDocument::GetPages()->Add() – Adds a new page to the document. In this example, the page size is dynamically set based on the image dimensions.
- PdfCanvas::DrawImage() – Draws the image onto the page canvas at the specified position and size.
- SaveToFile() – Saves the document to disk and exports it to OFD format using FileFormat::OFD.
This approach ensures that the image is properly scaled and positioned within the OFD document, maintaining the original image quality and proportions.
Remove Page Margins (Optional)
By default, document pages may include margins, which can introduce unwanted white space around the image. If you want the image to fully occupy the page without any padding, you can set the page margins to zero.
ofd->GetPageSettings()->SetMargins(0.0);
You can also specify custom margins if needed:
ofd->GetPageSettings()->SetMargins(10.0);
Adjusting page margins is useful when generating document layouts that require full-page image rendering.
4. Convert Multiple Images to a Multi-Page OFD in C++
When working with document archives, you often need to combine multiple images into a single OFD file. The following example shows how to create a multi-page OFD document where each page contains a different image.
#include "Spire.Pdf.o.h"
#include <vector>

using namespace Spire::Pdf;

int main()
{
    // Create a new PDF document
    PdfDocument* ofd = new PdfDocument();

    // Define the list of image files to convert
    std::vector<std::wstring> imageFiles = {
        L"Sample1.png",
        L"Sample2.bmp",
        L"Sample3.jpg"
    };

    // Process each image file
    for (size_t i = 0; i < imageFiles.size(); i++)
    {
        // Load the current image
        auto image = PdfImage::FromFile(imageFiles[i].c_str());

        // Get image dimensions
        float pageWidth = image->GetWidth();
        float pageHeight = image->GetHeight();

        // Add a new page for each image
        auto page = ofd->GetPages()->Add(new SizeF(pageWidth, pageHeight));

        // Draw the image on the page
        page->GetCanvas()->DrawImage(image, 0, 0, pageWidth, pageHeight);
    }

    // Save as OFD document
    ofd->SaveToFile(L"multi_page_document.ofd", FileFormat::OFD);

    // Clean up document resource
    delete ofd;

    return 0;
}
The following screenshot shows the generated multi-page OFD document, where each image is placed on a separate page.
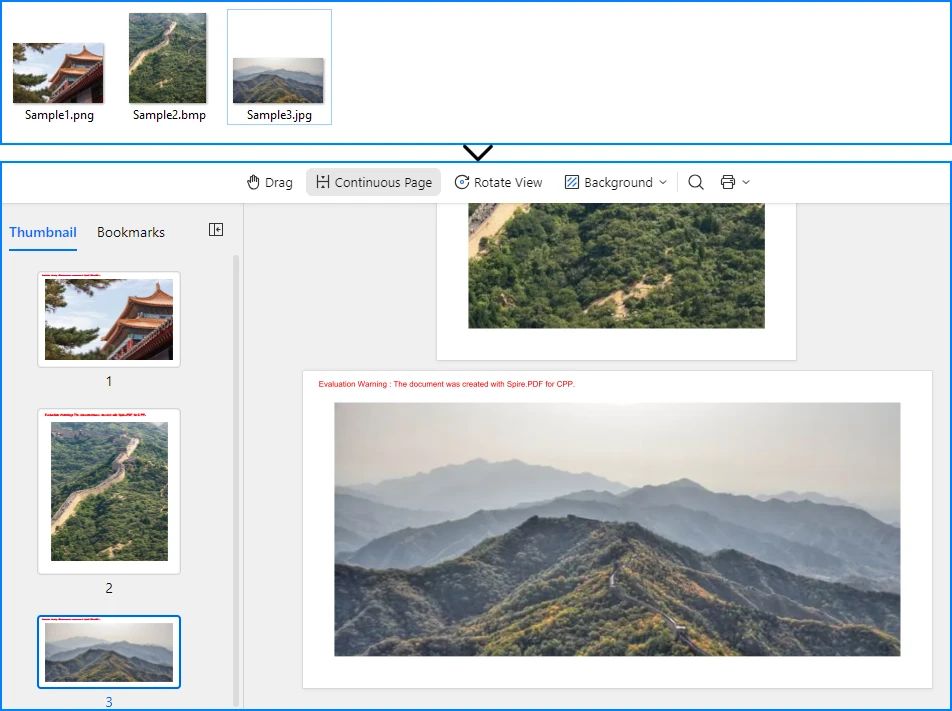
This implementation iterates through a collection of image files, creating a new page for each image and drawing the content with proper sizing. The resulting OFD document preserves the order and layout of all source images in a single file.
If you need to further modify images in a document, such as inserting, replacing, or removing images in existing files, refer to the tutorial on How to Insert, Replace, or Remove Images in a OFD/PDF Using C++
5. Fit Images into a Fixed Page Size
In many real-world document workflows, pages are required to follow a standardized page size instead of matching the original image dimensions. For example, scanned forms, contracts, or reports may need to fit into a fixed layout such as A4 or Letter.
To achieve this, you can create pages with a predefined size and then scale each image proportionally so that it fits within the page boundaries without distortion.
The following example demonstrates how to scale an image to fit within a fixed page size while preserving its aspect ratio.
#define NOMINMAX
#include "Spire.Pdf.o.h"
#include <algorithm>

using namespace Spire::Pdf;

int main()
{
    // Create a new PDF document
    PdfDocument* ofd = new PdfDocument();

    // Add a page with a fixed size (for example, A4)
    PdfPageBase* page = ofd->GetPages()->Add(PdfPageSize::A4);

    // Load the image
    auto image = PdfImage::FromFile(L"Sample.jpg");

    // Get page dimensions
    float pageWidth = page->GetCanvas()->GetClientSize().GetWidth();
    float pageHeight = page->GetCanvas()->GetClientSize().GetHeight();

    // Get image dimensions
    float imgWidth = image->GetWidth();
    float imgHeight = image->GetHeight();

    // Calculate proportional scaling
    float scale = std::min(pageWidth / imgWidth, pageHeight / imgHeight);

    float scaledWidth = imgWidth * scale;
    float scaledHeight = imgHeight * scale;

    // Draw the scaled image on the page
    page->GetCanvas()->DrawImage(image, 0, 0, scaledWidth, scaledHeight);

    // Save as OFD
    ofd->SaveToFile(L"FixedPageSize.ofd", FileFormat::OFD);

    delete ofd;

    return 0;
}
The following screenshot shows how the image is scaled to fit within a fixed page size (A4) while preserving its aspect ratio.
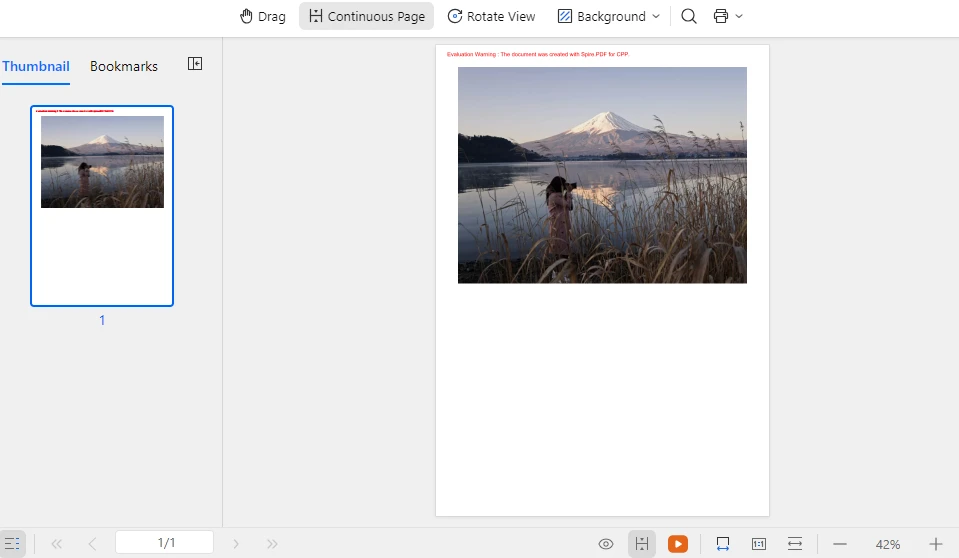
This approach ensures that images of different sizes can be consistently placed within a standardized document layout while maintaining their original proportions and preventing image distortion. The same technique can also be applied when generating multi-page OFD documents from multiple images.
In addition to scaling images to fit a fixed layout, developers may also need to manipulate document pages when generating or modifying documents. Typical operations include creating new pages, deleting pages, resizing page dimensions, or rearranging page order. For more details, refer to: How to Create and Delete Pages in an OFD/PDF document Using C++
6. Batch Convert Images to OFD
For automated document processing workflows, you may need to convert multiple images to separate OFD files. The following example demonstrates batch processing with progress tracking and error handling.
#include "Spire.Pdf.o.h"
#include <vector>
#include <iostream>

using namespace Spire::Pdf;

void ConvertImageToOFD(const std::wstring& inputPath, const std::wstring& outputPath)
{
    // Create a new PDF document
    PdfDocument* ofd = new PdfDocument();

    try
    {
        // Load the image file
        auto image = PdfImage::FromFile(inputPath.c_str());

        // Calculate page dimensions
        float pageWidth = image->GetWidth();
        float pageHeight = image->GetHeight();

        // Add page with image dimensions
        auto page = ofd->GetPages()->Add(new SizeF(pageWidth, pageHeight));

        // Draw image on page
        page->GetCanvas()->DrawImage(image, 0, 0, pageWidth, pageHeight);

        // Save as OFD
        ofd->SaveToFile(outputPath.c_str(), FileFormat::OFD);

        std::wcout << L"Converted: " << inputPath << L" -> " << outputPath << std::endl;

    }
    catch (const std::exception& ex)
    {
        std::wcout << L"Error converting " << inputPath << L": " << ex.what() << std::endl;
    }

    // Clean up document
    delete ofd;
}

int main()
{
    // Define batch conversion tasks
    std::vector<std::pair<std::wstring, std::wstring>> conversionTasks = {
        {L"invoice_0.png", L"invoice_0.ofd"},
        {L"invoice_1.png", L"invoice_1.ofd"},
        {L"invoice_2.png", L"invoice_2.ofd"},
        {L"invoice_3.png", L"invoice_3.ofd"},
        {L"invoice_4.png", L"invoice_4.ofd"}
    };

    // Process all conversion tasks
    for (const auto& task : conversionTasks)
    {
        ConvertImageToOFD(task.first, task.second);
    }

    std::wcout << L"Batch conversion completed." << std::endl;

    return 0;
}
This batch processing approach provides:
- Modular conversion function for reusability
- Error handling for individual file failures
- Progress output for monitoring
- Clean resource management
The implementation processes each image independently, ensuring that a single failure does not interrupt the entire batch operation.
7. Common Pitfalls
Image File Path Issues
Ensure that image file paths are correct and accessible. Use absolute paths or verify the working directory when loading images:
// Use absolute paths for reliability
auto image = PdfImage::FromFile(L"C:\\Documents\\scanned_invoice.png");
Memory Management
Properly clean up PdfDocument and PdfImage objects to prevent memory leaks. Always delete dynamically allocated objects after use:
delete ofd;
Unsupported Image Formats
Spire.PDF supports common image formats including PNG, JPEG, BMP, EMF, and TIFF. Ensure your input files are in supported formats. For unsupported formats, convert them to a supported format first using image processing libraries.
Page Size Considerations
When creating pages based on image dimensions, be aware that extremely large images may result in OFD documents that are difficult to view or print. Consider implementing size limits or scaling for large images:
#define NOMINMAX
#include <algorithm>

// Apply maximum page size constraint
const float MAX_WIDTH = 1000.0f;
const float MAX_HEIGHT = 1400.0f;

float pageWidth  = std::min(static_cast<float>(image->GetWidth()),  MAX_WIDTH);
float pageHeight = std::min(static_cast<float>(image->GetHeight()), MAX_HEIGHT);
File Encoding
When working with file paths containing Chinese characters or special symbols, ensure proper wide string handling (std::wstring) to avoid encoding issues in file operations.
C++ Language Standard
If you encounter compilation issues in some environments, try setting the project to use the C++14 language standard.
For example, in Visual Studio:
- Open Project Properties
- Navigate to C/C++ → Language
- Set C++ Language Standard to ISO C++14 Standard (/std:c++14)
Conclusion
In this article, we demonstrated how to convert images to OFD format in C++ using Spire.PDF. By leveraging the Spire API, developers can implement reliable image to OFD conversion with minimal code, handling single images, multi-page documents, and batch processing workflows. This technique is especially useful for digitizing scanned documents, creating electronic archives, and building automated document processing pipelines.
Spire.PDF for C++ provides comprehensive document processing capabilities beyond OFD conversion, including PDF creation, manipulation, and various export formats. The library simplifies complex document operations while maintaining compliance with industry standards.
If you want to evaluate the full capabilities of Spire.PDF for C++, you can apply for a 30-day free license.
8. FAQ
Do I need any third-party software to convert images to OFD?
No. Spire.PDF performs image to OFD conversion independently and does not require Adobe Acrobat or any other external PDF software.
What image formats are supported for OFD conversion?
Spire.PDF supports common image formats including PNG, JPEG, BMP, EMF, and TIFF. The library handles image loading and rendering automatically during the conversion process.
Is Spire.PDF suitable for high-volume batch processing?
Yes. Spire.PDF is optimized for server environments and can handle batch processing of multiple images efficiently. The library provides proper resource management for continuous operations.
Can I add text or watermarks to images before converting to OFD?
Yes. Spire.PDF allows you to draw additional elements on the page canvas before saving to OFD. For example, you can add text watermarks or image watermarks to the document.
For detailed tutorials, see:
- How to Add Text Watermarks to PDF/OFD Documents in C++
- How to Add Image Watermarks to PDF/OFD Documents in C++
Does the OFD output preserve image quality?
Yes. The OFD conversion maintains the original image quality and resolution. The page dimensions are calculated based on the image size, ensuring no loss of quality during the conversion process.
In the world of document management, the OFD (Open Fixed-layout Document) format is gaining significant traction, particularly in East Asian markets, as a domestic alternative to PDF. Whether you are developing financial reporting software or an enterprise document management system, the need to convert Excel to OFD in C++ environments is becoming increasingly common.
This guide provides a comprehensive tutorial on how to convert Excel spreadsheets (XLS/XLSX) to OFD format using Spire.XLS for C++, a robust library designed to handle Excel operations without requiring Microsoft Office to be installed.
- Why Convert Excel to OFD?
- Setting Up Spire.XLS for C++
- Basic Excel to OFD Conversion in C++
- Advanced Excel to OFD Conversion Settings
- Frequently Asked Questions (FAQs)
- Get a Free License
Why Convert Excel to OFD?
Before diving into the code, it is essential to understand the benefits of OFD conversion:
- Immutable Format: OFD preserves the layout, fonts, and images of your Excel sheets, ensuring they look the same on any device.
- Standard Compliance: As a national standard in China (GB/T 33190-2016), OFD is often required for government and archival submissions.
- Compact Size: OFD files are typically smaller than Excel files with rich images/formatting while maintaining high quality.
Setting Up Spire.XLS for C++
The first step is to integrate the library into your project. The easiest method is to use the official NuGet package or manually include the files.
Option A: Install via NuGet Package Manager
- Open your project in Visual Studio.
- Go to Tools -> NuGet Package Manager -> Manage NuGet Packages for Solution...
- Search for "Spire.XLS.Cpp".
- Click "Install".
Option B: Manual Installation
- Download the latest version of Spire.XLS for C++ from the official website.
- Unzip the package.
- Configure your Visual Studio project to include the Include directory path and link the lib directory. Ensure the DLL files are placed in the same directory as your executable or in a system path.
For detailed installation instructions, see: Integrate Spire.XLS for C++ in a C++ Application
Basic Excel to OFD Conversion in C++
Once the Excel library is set up, you can write the code to load an Excel document (.xls or .xlsx) and save it as an OFD.
Here is a complete C++ example:
#include "Spire.Xls.o.h"

using namespace Spire::Xls;
using namespace std;

int main() {

	wstring inputFile = L"Budget.xlsx";
	wstring outputFile = L"ExcelToOFD.ofd";

	// Create a new Workbook object
	intrusive_ptr<Workbook> workbook = new Workbook();

	// Load the workbook from the specified input file
	workbook->LoadFromFile(inputFile.c_str());

	// Save the workbook to the OFD format
	workbook->SaveToFile(outputFile.c_str(), FileFormat::OFD);

	// Dispose of the workbook object.
	workbook->Dispose();
}
Key Code Explanations:
- Create Workbook: The Workbook class represents the entire Excel file and handles loading/saving operations.
- Load Excel File: The LoadFromFile method reads your source Excel document.
- Save as OFD: The SaveToFile method with the FileFormat::OFD enum converts the spreadsheet data into the fixed-layout OFD format.
Excel to OFD conversion result:

The code converts each sheet in the Excel file to a separate page in the OFD document. If you need to convert only a specific worksheet, you can copy the worksheet to a new workbook first and then use the above code for conversion.
Advanced Excel to OFD Conversion Settings
To gain finer control over how your spreadsheets appear in the final OFD document, Spire.XLS for CPP provides several options to tailor the OFD output. Below are two practical advanced configurations:
Fit Excel Sheet to One Page in OFD Output
By default, when an Excel worksheet is larger than a standard page, it may be split across multiple OFD pages. This can break the visual flow of your data. Spire.XLS for C++ provides the ConverterSetting class to customize Excel conversion, and by setting its SetSheetFitToPage method to true, you can fit each worksheet to a single OFD page.
Core implementation code:
intrusive_ptr<Workbook> workbook = new Workbook();
workbook->LoadFromFile(L"Sample.xlsx");

// Enable fit to one page
workbook->GetConverterSetting()->SetSheetFitToPage(true);

workbook->SaveToFile(L"FittedSheet.ofd", FileFormat::OFD);
workbook->Dispose();
What the code does:
- If the worksheet’s content exceeds the page dimensions, the library scales it down proportionally to fit on a single page.
- This ensures that a wide table or chart is not split awkwardly across pages.
Adjust Page Setup Before Conversion
For more precise control, you can modify the PageSetup properties of individual worksheets. This allows you to set the paper orientation, margins, paper size, and more—just as you would in Excel's Page Layout view.
Core implementation code:
intrusive_ptr<Workbook> workbook = new Workbook();
workbook->LoadFromFile(L"Sample.xlsx");

// Access the first worksheet
intrusive_ptr<Worksheet> sheet = dynamic_pointer_cast<Worksheet>(workbook->GetWorksheets()->Get(0));

// Get the PageSetup object of this worksheet
intrusive_ptr<PageSetup> pageSetup = dynamic_pointer_cast<PageSetup>(sheet->GetPageSetup());

// Set orientation to Landscape
pageSetup->SetOrientation(PageOrientationType::Landscape);

//Set the paper size to A4 paper
pageSetup->SetPaperSize(PaperSizeType::PaperA4);

// Set custom margins (in inches)
pageSetup->SetBottomMargin(2);
pageSetup->SetLeftMargin(1);
pageSetup->SetRightMargin(1);
pageSetup->SetTopMargin(2);

workbook->SaveToFile(L"CustomPageSetup.ofd", FileFormat::OFD);
What the code does:
- Orientation: Changes the page orientation to landscape (ideal for wide tables).
- Margins: Sets custom margins around the content.
- Paper Size: Sets the page size to A4 (options include PaperA4, PaperLetter, PaperLegal, etc.).
- Per‑sheet control: You can apply different settings to each worksheet before conversion.
Pro Tip: If your workflow requires broader compatibility, Spire.XLS for C++ also supports direct Excel to PDF conversion, giving you the flexibility to output to either format depending on your regional or archival requirements.
Frequently Asked Questions (FAQs)
Q1. Do I need Microsoft Excel installed on my server to use Spire.XLS for C++?
A: No. Spire.XLS for C++ is a completely independent library. It does not require Microsoft Office or Excel to be installed on the machine where the application is deployed. This makes it ideal for server-side deployments.
Q2. Does the conversion support all Excel elements (Charts, Pivot Tables, Shapes)?
A: Yes. The library is designed to preserve high-fidelity. Elements such as charts, shapes, images, formulas (as calculated values), and pivot tables are rendered accurately in the output OFD file, maintaining the visual appearance of the original spreadsheet.
Q3. Can I skip a worksheet and converts the rest to OFD?
A: Yes. You can hide unwanted worksheets before conversion (Spire.XLS for C++ skips hidden sheets):
//Hide the the first worksheet
workbook->GetWorksheets()->Get(0)->SetVisibility(WorksheetVisibility::Hidden);
Alternatively, copy the desired sheet to a new workbook as mentioned earlier.
Q4: Does Spire.XLS for CPP support batch converting multiple Excel files to OFD?
A: Yes. You can loop through all Excel files in a specified folder and convert them to OFD in batches.
Conclusion
Converting Excel to OFD in C++ is both straightforward and scalable with Spire.XLS for C++. Whether you need to convert a single spreadsheet or automate batch processing, the library delivers high‑performance results with minimal code. By using advanced settings like fit‑to‑page and custom page setup, you can ensure your OFD documents meet exacting presentation standards.
For more features such as Excel encryption, data writing, or formula calculation, explore the official documentation.
Get a Free License
To fully experience the capabilities of Spire.XLS for C++ without any watermarks or limitations, you can request a 30-day trial license here.
