
Knowledgebase (2370)
Children categories
With the rapid advancement of enterprise digital transformation, front-end document processing has emerged as a core requirement for modern web applications. As a robust enterprise-level framework, Angular is extensively adopted in complex scenarios—including OA systems, document platforms, and education management systems—thanks to its strong typing, component-based architecture, and efficient state management.
This article demonstrates how to integrate Spire.OfficeJS into an Angular application to implement core functions such as local file uploads, online document editing, format conversion, and file downloads.
Content Overview
- What is Spire.OfficeJS
- Prerequisites & Angular Project Setup
- Integrating Spire.OfficeJS Online Document Editor
- Launch & Function Validation
- Frequently Asked Questions
- Apply for a Temporary License
What is Spire.OfficeJS
Spire.OfficeJS is an enterprise-level online document editing solution comprising four core modules: Spire.WordJS, Spire.ExcelJS, Spire.PresentationJS, and Spire.PDFJS. It enables browser-based preview, editing, annotation, and format conversion for Word, Excel, PPT, and PDF files—all without requiring local Office software or any other plug‑ins. Additionally, it delivers essential enterprise capabilities including cloud‑native architecture, cross‑platform compatibility, and high‑level security.
Key Features:
- Modular Design: Each of the four core modules handles a distinct document type, enabling granular Word editing, Excel data calculation and charting, visual PowerPoint design, and rapid PDF preview—together covering the full spectrum of document processing.
- Pure Front-End Rendering: Powered by a custom WebAssembly engine, it eliminates back-end document processing, reducing server load and boosting response speeds.
- Multi-Format Compatibility: Supports mainstream file formats such as DOCX, XLSX, PPTX, PDF, WPS, and cross-format export (e.g., Word to PDF).
- Enterprise-Grade Security: Supports encrypted storage of static files to protect sensitive document data.
- Easy to Integrate: Seamlessly compatible with mainstream front-end frameworks (Angular, Vue, React) and enables rapid integration via minimal configuration.
Prerequisites & Angular Project Setup
Ensure your development environment meets the following requirements before integration:
1. Install Node.js and npm
- Download: Visit the official Node.js download page and install the appropriate version for your OS.
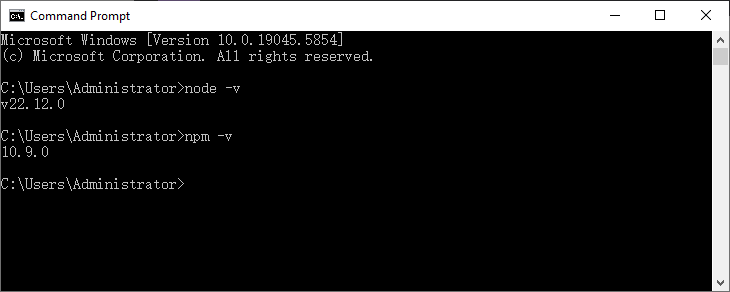
- Verify Installation: Run the following commands in CMD to confirm success (version numbers will appear if installed correctly):
node -v
npm -v
2. Install Angular CLI
Angular CLI streamlines project creation and management. Install it globally via npm:
npm install -g @angular/cli
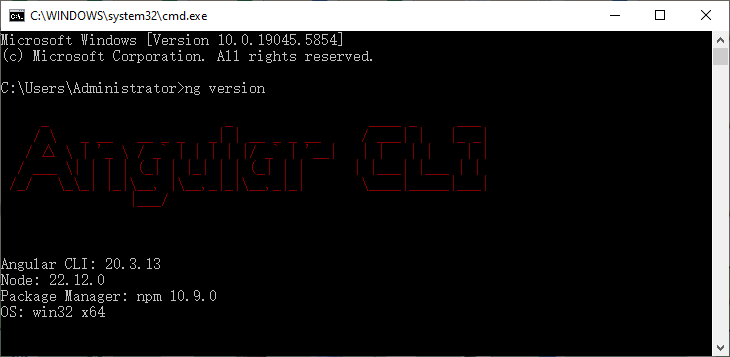
- After installation, run the following command to check the Angular CLI version and confirm successful installation:
ng version
3. Initialize an Angular Project
- Open the CMD and navigate to the target directory (example: F:\angular).
- Create a new Angular project with the following command (skip Git initialization for simplicity):
ng new spireOfficeJS --skip-git
- Configure the project wizard as follows (for compatibility):
- Would you like to create a "zoneless" app without zone.js? No
- Stylesheet format: CSS
- Would you like to enable SSR/SSG? No
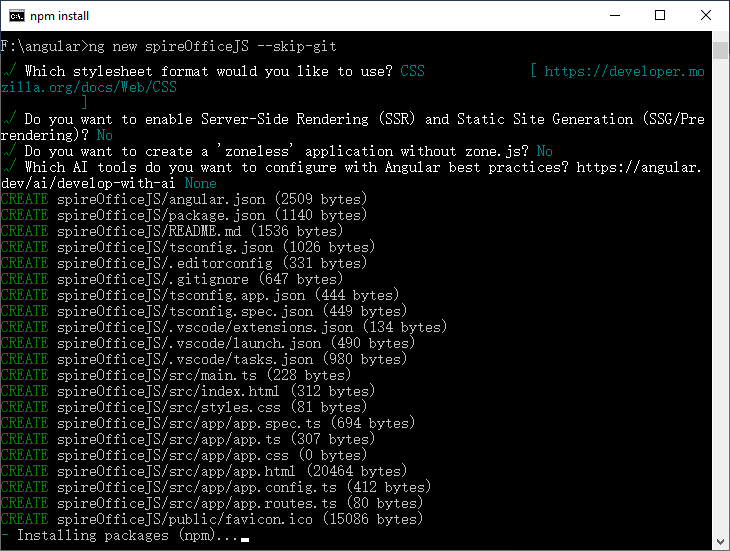
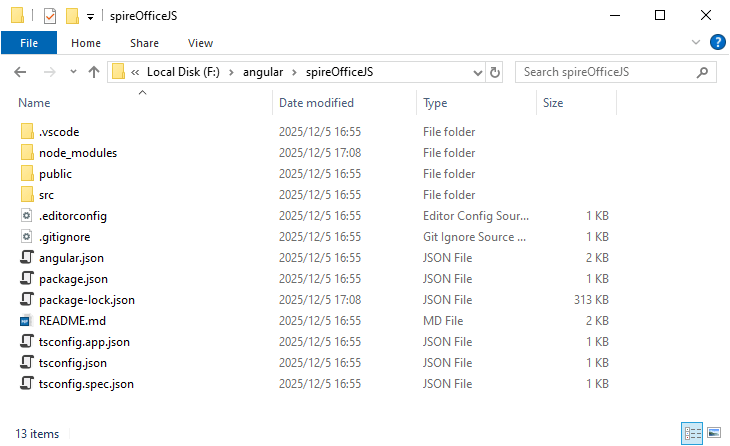
- Wait for dependencies to finish installing. After the project is successfully created, the directory structure will appear as shown:
4. Validate Project Initialization
Open the project with VS Code, and run the following command in the terminal to start the development server:
npm run start
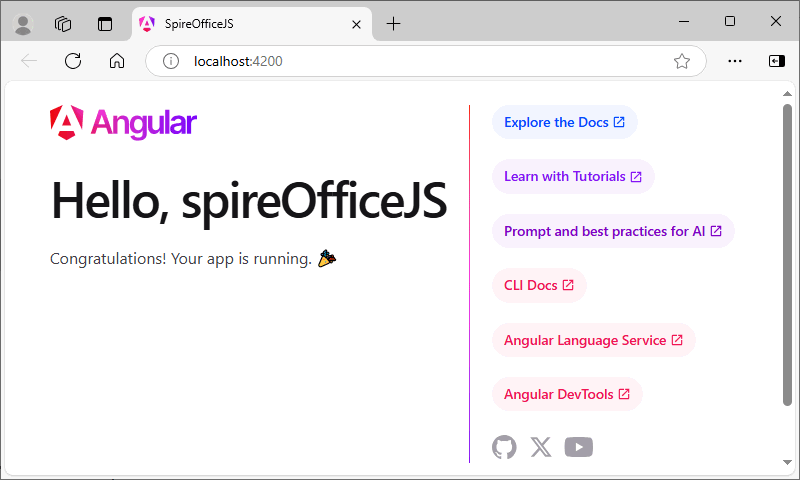
Visit http://localhost:4200/ in your browser. If the Angular default welcome page (with "Hello, spireOfficeJS") appears, initialization is successful.
Integrating Spire.OfficeJS Online Document Editor
1. Deploy Spire.OfficeJS Static Resources
- Download the Spire.OfficeJS product package and extract it.
- Run the script to initialize fonts. On Windows, double-click the run_genallfonts.bat file in the extracted directory to run it; on Linux, execute the command sh run_genallfonts.sh start to run the script. After execution completes, a fontsweb subfolder will be generated under the web folder.
- Create a spire.cloud folder in the project's public directory (path: public/spire.cloud).
- Copy the entire web folder from the extracted Spire.OfficeJS product package to the public/spire.cloud/ directory.
- Confirm the core script SpireCloudEditor.js is located at: public/spire.cloud/web/editors/spireapi/SpireCloudEditor.js
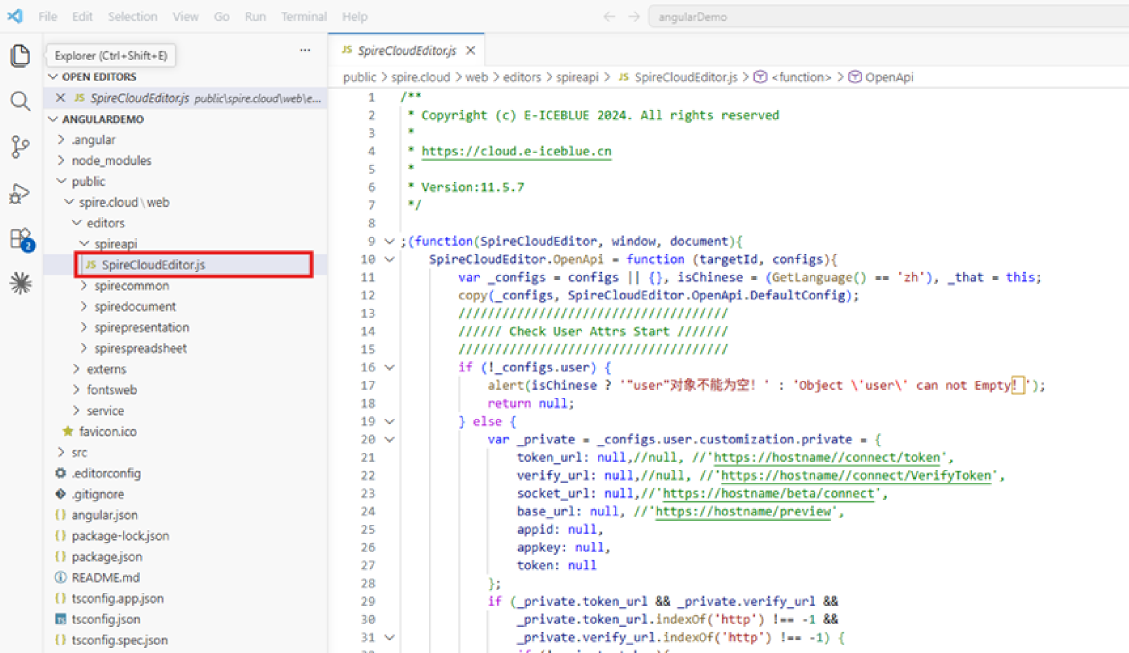
Note: This path must be completely consistent with the path in the subsequent configured office-js.ts, otherwise the editor cannot be loaded.
2. Configure State Management
We use NgRx Signals to synchronize file upload data (file object + binary data) for access by the editor component.
(1) Install dependencies
Run the following installation command in the VS Code terminal:
npm install @ngrx/effects @ngrx/signals @ngrx/store
(2) Create state management store
- Create a store folder in the src/app/ directory and create a new index.ts file.
- Add the following code to index.ts to define file state and operations:
import { signalStore, withState, withMethods, patchState } from '@ngrx/signals';

// Define file state interface
interface FileState {
  file: File | null;          // Uploaded file object
  fileUint8Data: Uint8Array | null; // File binary data
}

// Initial state
const initialState: FileState = {
  file: null,
  fileUint8Data: null,
};

// Create global Store
export const fileStore = signalStore(
  { providedIn: 'root' },
  withState(initialState),
  withMethods((store) => ({
    // Update file object
    setFileData(data: File | null): void {
      patchState(store, { file: data });
    },
    // Update file binary data
    setFileUint8Data(uint8Data: Uint8Array | null): void {
      patchState(store, { fileUint8Data: uint8Data });
    }
  }))
);
3. Develop Core Components (Upload + Editor)
(1) Create components
Run the following commands in your terminal to create a file upload component and an editor integration component:
ng g c spire/uploadFile
ng g c spire/officeJS
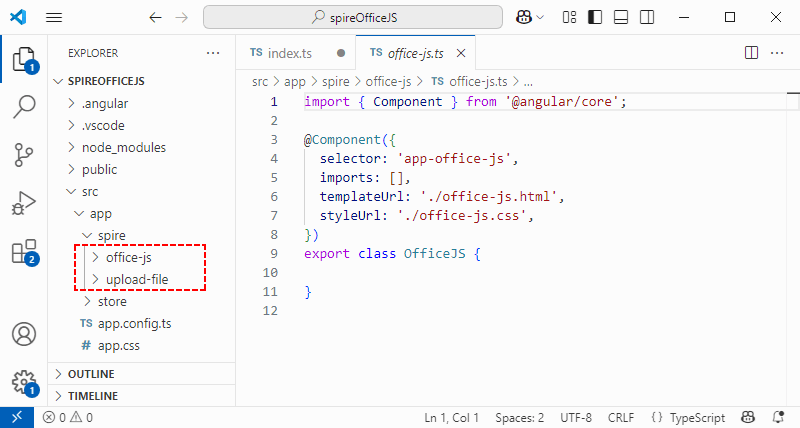
This generates two folders in src/app/spire/: upload-file/ and office-js/.
(2) Configure the upload component (upload-file)
This component handles file selection (drag-and-drop or click), converts files to binary format, stores data in the global state, and navigates to the editor page.
- Define the upload interface style (upload-file.css):
:host {
  display: block;
  min-height: 100vh;
}

.upload-main {
  min-height: 100vh;
  display: flex;
  justify-content: center;
  align-items: center;
  background-color: #f5f5f5;
}

.upload-container {
  width: 80%;
  max-width: 600px;
  padding: 40px;
  background-color: white;
  border-radius: 8px;
  box-shadow: 0 4px 12px rgba(0, 0, 0, 0.1);
  text-align: center;
}

.drop-area {
  border: 2px dashed #ccc;
  border-radius: 6px;
  padding: 40px;
  margin-bottom: 20px;
  transition: all 0.3s;
}

.drop-area.highlight {
  border-color: #4CAF50;
  background-color: #f0fff0;
}

button {
  background-color: #4CAF50;
  color: white;
  border: none;
  padding: 10px 20px;
  border-radius: 4px;
  cursor: pointer;
  font-size: 16px;
  margin-top: 10px;
}

button:hover {
  background-color: #45a049;
}

#fileInput {
  display: none; /* Hide the native file selection box */
}
- Set the upload interface structure (upload-file.html), supporting both drag-and-drop upload and click-to-select file:
<main class="upload-main">
  <div class="upload-container">
    <h2>Upload Your File</h2>
    <div class="drop-area" id="dropArea">
      <p>Drag and drop your file to the browser</p>
      <p>or</p>
      <button id="browseBtn" #browseBtn (click)="handleButtonClick($event)">Click to select your file</button>
      <input type="file" id="fileInput" #fileInput (change)="handleDrop($event)">
    </div>
  </div>
</main>
- Implement upload logic (upload-file.ts), handling file drag-and-drop, selection, binary conversion, and state storage:
import { ViewChild, ElementRef, Component, AfterViewInit, inject } from '@angular/core';
import { Router } from '@angular/router';
import { fileStore } from '../../store/index';

@Component({
  selector: 'app-upload-file',
  imports: [],
  templateUrl: './upload-file.html',
  styleUrl: './upload-file.css',
})
export class UploadFile implements AfterViewInit {
  constructor(private router: Router) { }
  // Inject state management store
  store = inject(fileStore);

  // Bind HTML elements
  @ViewChild('browseBtn') browseBtn!: ElementRef<HTMLButtonElement>;
  @ViewChild('fileInput') fileInput!: ElementRef<HTMLInputElement>;

  file: File | null = null; // Uploaded file object
  fileUint8Data: Uint8Array | null = null; // File binary data

  // Execute after component view initialization is complete
  ngAfterViewInit() {
    this.init();
  }

  // Initialize drag-and-drop event listening
  init() {
    // Prevent default browser behavior for drag-and-drop
    ['dragenter', 'dragover', 'dragleave', 'drop'].forEach(eventName => {
      document.addEventListener(eventName, this.preventDefaults, false);
    });

    // Listen for file drop events
    document.addEventListener('drop', (e) => {
      this.handleDrop.call(this, e);
    }, false);
  }

  // Prevent default events
  preventDefaults(e: Event) {
    e.preventDefault();
    e.stopPropagation();
  }

  // Trigger native file input when select file is clicked
  handleButtonClick(e: Event) {
    e.preventDefault();
    this.fileInput.nativeElement.click();
  }

  // Handle file selection (drag-and-drop or click)
  async handleDrop(e: any) {
    // Retrieve file object
    if (e.target && e.target.files) {
      this.file = e.target.files[0];
    } else if (e.dataTransfer && e.dataTransfer.files) {
      this.file = e.dataTransfer.files[0];
    }

    // Convert file to Uint8Array binary format
    this.fileUint8Data = await this.handleFile(this.file) as Uint8Array;

    // Update global state
    this.store.setFileData(this.file);
    this.store.setFileUint8Data(this.fileUint8Data);

    // Navigate to editor
    this.openDocument();
  }

  // Convert file to Uint8Array binary data
  handleFile(file: any) {
    return new Promise((resolve, reject) => {
      const reader = new FileReader();
      reader.onload = () => {
        const arrayBuffer = reader.result as ArrayBuffer;
        const uint8Array = new Uint8Array(arrayBuffer);
        resolve(uint8Array);
      };
      reader.onerror = (error) => reject(error);
      reader.readAsArrayBuffer(file); // Read file in ArrayBuffer format
    });
  }

  // Navigate to the editor page (route navigation)
  openDocument() {
    this.router.navigate(['spire']);
  }
}
(3) Configure the editor component (office-js)
The editor component loads the Spire.OfficeJS script, initializes the editor, and configures editing permissions.
- Define the editor container (office-js.html):
<div class="form">
    <div id="iframeEditor">
    </div>
</div>
- Implement core logic such as editor script loading, configuration initialization, file parsing, and event listening (office-js.ts):
import { Component, AfterViewInit, inject } from '@angular/core';
import { Router } from '@angular/router';
import { fileStore } from '../../store/index';

// Declare global SpireCloudEditor (from Spire.OfficeJS script)
declare const SpireCloudEditor: any;

@Component({
  selector: 'app-office-js',
  imports: [],
  templateUrl: './office-js.html',
  styleUrl: './office-js.css',
})
export class OfficeJS implements AfterViewInit {
  constructor(private router: Router) { };
  // Inject state management store
  store = inject(fileStore);

  // Get file data from store
  file = this.store.file() as File;
  fileUint8Data = this.store.fileUint8Data() as Uint8Array;
  originUrl = window.location.origin; // Current project domain name
  Editor: any; // Editor instance
  config: any; // Editor configuration
  Api: any;    // Editor API

  // Execute after component view initialization is complete
  ngAfterViewInit() {
    this.init();
  }

  // Initialize editor (redirect to upload if no file exists)
  init() {
    if (!this.file) {
      this.router.navigate(['']);
      return;
    }
    this.loadSrcipt(); // Load editor script
  }

  // Dynamically load SpireCloudEditor.js
  loadSrcipt() {
    const script = document.createElement('script');
    // Match static resource path
    script.setAttribute('src', '/spire.cloud/web/editors/spireapi/SpireCloudEditor.js');
    script.onload = () => this.initEditor(); // Initialize editor after script loading is complete
    document.head.appendChild(script);
  }

  // Initialize editor configuration and instance
  initEditor() {
    const iframeId = 'iframeEditor'; // Match container ID in the template file
    this.initConfig();
    this.Editor = new SpireCloudEditor.OpenApi(iframeId, this.config);
    this.Api = this.Editor.GetOpenApi(); // Get editor API
    this.OnWindowReSize(); // Adapt to window size
  }

  // Configure editor settings (file information + user permissions + editor behavior)
  initConfig() {
    this.config = {
      "fileAttrs": {
        "fileInfo": {
          "name": this.file.name, // File name
          "ext": this.getFileExtension(), // File suffix
          "primary": String(new Date().getTime()), // Unique ID (timestamp)
          "creator": "",
          "createTime": ""
        },
        "sourceUrl": `${this.originUrl}/files/__ffff_192.168.3.121/${this.file.name}`,
        "createUrl": `${this.originUrl}/open`,
        "mergeFolderUrl": "",
        "fileChoiceUrl": "",
        "templates": {}
      },
      "user": {
        "id": "uid-1",
        "name": "Jonn",
        "canSave": true, // Allow file saving
      },
      "editorAttrs": {
        "editorMode": this.file.name.endsWith('.pdf') ? 'view' : "edit", // PDF = preview only
        "editorWidth": "100%",
        "editorHeight": "100%",
        "editorType": "document",
        "platform": "desktop",
        "viewLanguage": "en", // English interface
        "isReadOnly": false,
        "canChat": true,
        "canComment": true,
        "canReview": true,
        "canDownload": true, // Allow file downloads
        "canEdit": this.file.name.endsWith('.pdf') ? false : true, // Disable editing for PDFs
        "canForcesave": true,
        "embedded": {
          "saveUrl": "",
          "embedUrl": "",
          "shareUrl": "",
          "toolbarDocked": "top" // Toolbar aligned to top
        },
        // Enable WebAssembly for faster performance(Supports Word/Excel/PPT/PDF)
        "useWebAssemblyDoc": true,
        "useWebAssemblyExcel": true,
        "useWebAssemblyPpt": true,
        "useWebAssemblyPdf": true,
        // License keys (add if available)
        "spireDocJsLicense": "",
        "spireXlsJsLicense": "",
        "spirePresentationJsLicense": "",
        "spirePdfJsLicense": "",
        "serverless": {
          "useServerless": true,
          "baseUrl": this.originUrl,
          "fileData": this.fileUint8Data, // Pass binary file data
        },
        "events": {
          "onSave": this.onFileSave // Save callback event
        },
        "plugins": {
          "pluginsData": []
        }
      }
    };
  }

  // Adjust editor size to fit window
  OnWindowReSize() {
    const wrapEl = document.getElementsByClassName("form") as any;
    if (wrapEl.length) {
      wrapEl[0].style.height = window.innerHeight + "px";
      window.scrollTo(0, -1);
    }
  }

  // Extract file extension
  getFileExtension() {
    const filename = this.file.name.split(/[\\/]/).pop() as String;
    return filename.substring(filename.lastIndexOf('.') + 1).toLowerCase() || '';
  }

  // Custom save logic (can be extended according to requirements)
  onFileSave(data: any) {
    console.log('Saved data:', data);
  }
}
4. Configure Routing
Enable navigation between the upload and editor pages.
- Modify routing rules (app.routes.ts), configure routes for the upload page and editor page:
import { Routes } from '@angular/router';
import { UploadFile } from './spire/upload-file/upload-file';
import { OfficeJS } from './spire/office-js/office-js';

export const routes: Routes = [
  { path: '', component: UploadFile }, // Default: upload page
  { path: 'spire', component: OfficeJS } // Editor page: /spire
];
- Ensure the routing configuration takes effect (app.config.ts):
import { ApplicationConfig, provideBrowserGlobalErrorListeners, provideZoneChangeDetection } from '@angular/core';
import { provideRouter } from '@angular/router';
import { routes } from './app.routes';

export const appConfig: ApplicationConfig = {
  providers: [
    provideBrowserGlobalErrorListeners(),
    provideZoneChangeDetection({ eventCoalescing: true }),
    provideRouter(routes), // Inject routing configuration
  ]
};
- Set route outlet (app.html) to ensure the page is rendered correctly:
<main class="app-main">
  <router-outlet /> <!-- Route outlet: render the component corresponding to the current route -->
</main>
Launch & Function Validation
1. Start the Project
Save all changes and restart the development server:
npm run start
2. Test Core Functions
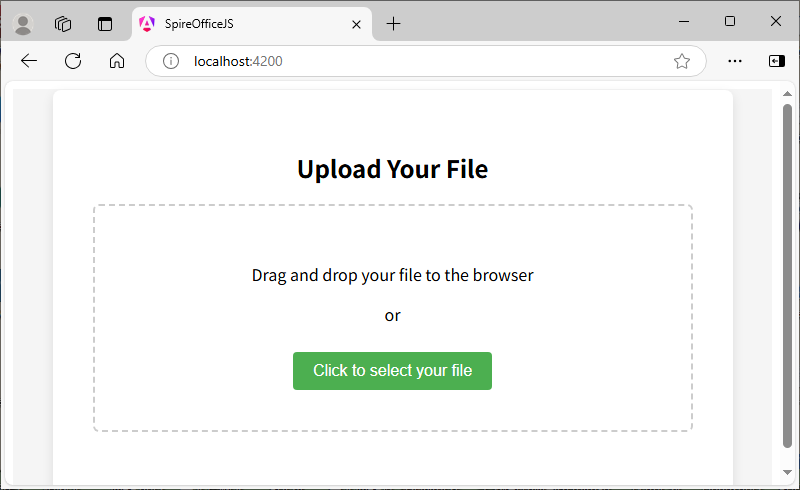
- Access the upload page: Visit http://localhost:4200/ in the browser, and the "Upload Your File" interface is displayed, supporting two upload methods:
- Drag and drop files to the specified area in the browser;
- Click to select file from the local (supporting formats such as Word, Excel, PPT, PDF).
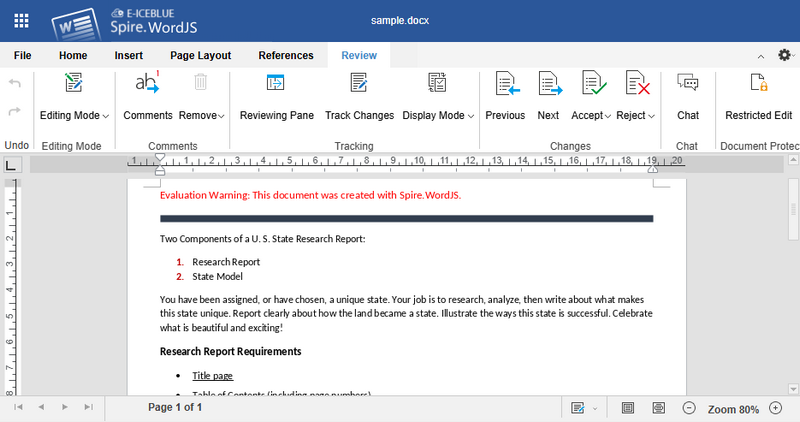
- Edit documents online: After uploading, you’ll be redirected to the editor page (http://localhost:4200/spire). The editor supports:
- Editing Word, Excel, and PowerPoint files (PDFs are preview-only).
- Adding annotations, comments, and track changes.
- A user-friendly English interface with an intuitive toolbar.
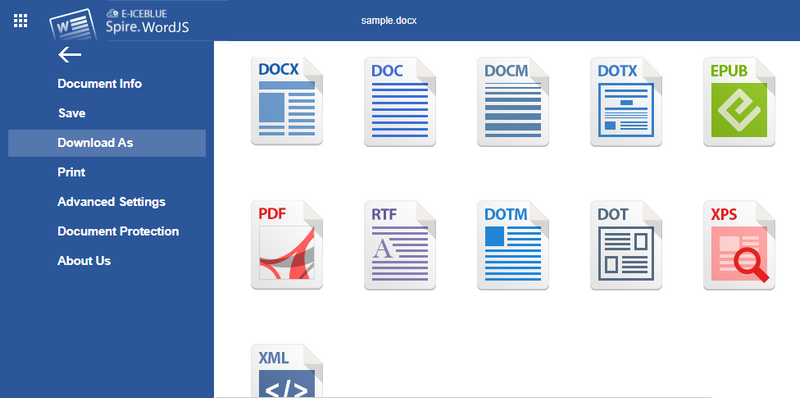
- Download / convert documents: After editing, click "File" → "Download as" on the top of the editor to export the document to various formats such as PDF, TXT, RTF, HTML, etc.
Frequently Asked Questions
Q1: The editor fails to load and the page is blank?
- Verify Path: Ensure the SpireCloudEditor.js path in office-js.ts matches the deployed static resource path.
- Browser compatibility: Upgrade to browsers that support WebAssembly such as Chrome 100+
Q2: When installing NgRx dependencies, a peer dependency conflict is prompted?
- Use the --legacy-peer-deps flag to force compatibility:
npm install @ngrx/signals @ngrx/store --legacy-peer-deps
- Or adjust your Angular version to match NgRx’s compatibility requirements.
Q3: When starting the project, the browser console reports an error, indicating that the zone.js module cannot be found?
- Reason: The "zoneless" mode was mistakenly selected during project initialization, but Spire.OfficeJS requires zone.js for async events.
- Solution:
- First install the zone.js dependency:
npm install zone.js --save - Then open src/main.ts and add the import at the top of the file:
import 'zone.js'; - Finally, restart the project and confirm that the error disappears.
- First install the zone.js dependency:
Download Complete Sample
Get the full Angular + Spire.OfficeJS integration project with pre-configured code and resources. Run it directly to test all features.
Apply for a Temporary License
To remove the evaluation message from generated documents or lift feature limitations, contact us to obtain a 30-day temporary license.
Cross-Platform PDF and Office Printing in C# with Spire.Printing
2026-01-14 09:48:52 Written by jie zou
Printing documents is a common requirement in desktop applications, background services, and server-side systems. In practical development and business scenarios, developers often need to print files silently, route jobs to specific printers, or control printing behavior programmatically—without relying on user interaction.
This guide demonstrates how to use Spire.Printing to implement flexible, automated printing of PDF and Office documents in C# across Windows, Linux, and macOS. You will learn how to handle printable streams, select printers programmatically, and apply advanced print settings, enabling reliable cross-platform printing in modern .NET applications.
Table of Contents
- Installing Spire.Printing
- The Core Printing Workflow and Printing Settings
- Printing Word, Excel, PowerPoint, PDF, and Other Documents
- Advanced Print Settings and Operations
- Licensing Notes
Installing Spire.Printing
Spire.Printing is distributed as a NuGet package and can be added to your project in the standard way:
Install-Package Spire.Printing
Platform Compatibility
Spire.Printing is a cross-platform printing library for modern .NET applications. When used together with Spire.Office libraries (with .NET Standard support), it enables printing Word, Excel, PowerPoint, PDF, and other document formats across Windows, Linux, and macOS—without relying on MS Office Interop.
It supports recent .NET runtimes, including .NET 5.0, .NET 6.0, .NET 9.0, and .NET 10.0, and runs on the following platforms:
- Windows (x64, x86)
- Linux (x64, ARM)
- macOS (x64, ARM)
The Core Printing Workflow and Printing Settings
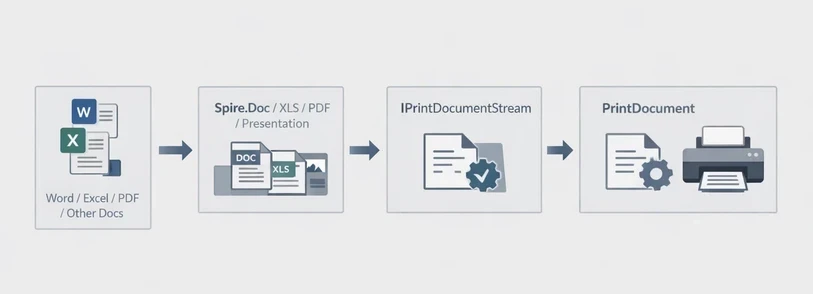
Spire.Printing is designed to send print-ready document streams directly to the printer. On Windows, the printable stream is typically an XPS document, while on Linux and macOS it is a PDF document. It is commonly used with Spire.Office for .NET to implement the printing workflow in .NET applications.
The general process is:
- Create an IPrintDocumentStream instance from the document.
- Create a PrintDocument instance.
- Configure print settings through the PrintSettings property.
- Send the job to the printer.
Code Example
using Spire.Printing;

IPrintDocumentStream documentStream;
if (System.Runtime.InteropServices.RuntimeInformation.IsOSPlatform(System.Runtime.InteropServices.OSPlatform.Windows))
{
    // Windows
    documentStream = new XpsPrintDocument("test.xps");
}
else
{
    // Non-Windows(Linux, MacOS)
    documentStream = new PdfPrintDocument("test.pdf");
}
//new PrintDocument
PrintDocument printDocument = new PrintDocument(documentStream);

//Set paper size
printDocument.PrintSettings.PaperSize = PaperSize.A4;

//Set the number of copies to be printed
printDocument.PrintSettings.Copies = 2;

//Select a page range
printDocument.PrintSettings.SelectPageRange(2, 5);

//Duplex Printing
if (printDocument.PrintSettings.CanDuplex)
{
    //Print in duplex
    printDocument.PrintSettings.Duplex = Duplex.Vertical;
}

//Collated vs. uncollated output:
printDocument.PrintSettings.Collate = true;

//Printing a file to a specific printer, if not set, print to the default printer
printDocument.PrintSettings.PrinterName = "Your Printer Name";

// Print to the specified file
printDocument.PrintSettings.PrintToFile("toXps.xps");

//Record printing logs
printDocument.PrintSettings.PrintLogger = new DefaultPrintLogger("log.txt");

//Print
printDocument.Print();

//Dispose
printDocument.Dispose();
This stream-based model keeps the printing workflow consistent across platforms, while allowing all printer behavior to be customized through the PrintSettings API.
Printing Word, Excel, PowerPoint, PDF, and Other Documents
To print Word, Excel, PowerPoint, PDF, and other document types, Spire.Printing is used together with the corresponding Spire.Office document libraries—Spire.Doc, Spire.XLS, Spire.Presentation, and Spire.PDF (especially the .NET Standard version)—to load the source files, save them into IPrintDocumentStream, and send them to the printer.
Printing Word Documents in C#
Library Installation
Install-Package Spire.Printing
Install-Package Spire.Docfor.NETStandard
Code Example
using Spire.Doc;
using Spire.Printing;

//Check the system
bool isWindows = System.Runtime.InteropServices.RuntimeInformation.IsOSPlatform(System.Runtime.InteropServices.OSPlatform.Windows);

using (Document document = new Document())
{
    //Use Spire.Doc to save documents as. xps or. pdf document streams
    document.LoadFromFile(@"test.docx");
    Spire.Doc.FileFormat fileFormat = !isWindows ? Spire.Doc.FileFormat.PDF : Spire.Doc.FileFormat.XPS;
    MemoryStream stream = new MemoryStream();
    document.SaveToStream(stream, fileFormat);

    //Save to IPrintDocumentStream according to the system
    IPrintDocumentStream docStream = !isWindows ? new PdfPrintDocument(stream) : new XpsPrintDocument(stream);

    //Print
    PrintDocument printDoc = new PrintDocument(docStream);
    printDoc.PrintSettings.SelectPageRange(1, 1);
    printDoc.Print();

    //Dispose
    printDoc.Dispose();
}
Printing Excel Files in C#
Library Installation
Install-Package Spire.Printing
Install-Package Spire.XLSfor.NETStandard
Code Example
using Spire.Printing;
using Spire.Xls;

//Check the system
bool isWindows = System.Runtime.InteropServices.RuntimeInformation.IsOSPlatform(System.Runtime.InteropServices.OSPlatform.Windows);
using (Workbook wb = new Workbook())
{
    //Use Spire.Xls to save documents as. xps or. pdf document streams
    wb.LoadFromFile("test.xlsx");
    Spire.Xls.FileFormat fileFormat = !isWindows ? Spire.Xls.FileFormat.PDF : Spire.Xls.FileFormat.XPS;
    MemoryStream stream = new MemoryStream();
    wb.SaveToStream(stream, fileFormat);

    //Save to IPrintDocumentStream according to the system
    IPrintDocumentStream xlsStream = !isWindows ? new PdfPrintDocument(stream) : new XpsPrintDocument(stream);

    //Print
    PrintDocument printxls = new PrintDocument(xlsStream);
    printxls.PrintSettings.SelectPageRange(1, 1);
    printxls.Print();

    //Dispose
    printxls.Dispose();
}
Printing PDF Files in C#
Library Installation
Install-Package Spire.Printing
Install-Package Spire.PDFfor.NETStandard
Code Example
using Spire.Pdf;
using Spire.Printing;

//Check the system
bool isWindows = System.Runtime.InteropServices.RuntimeInformation.IsOSPlatform(System.Runtime.InteropServices.OSPlatform.Windows);
using (PdfDocument pdfDocument = new PdfDocument())
{
    //Use Spire.PDF to save documents as. xps or. pdf document streams
    pdfDocument.LoadFromFile("test.pdf");
    Spire.Pdf.FileFormat fileFormat = !isWindows ? Spire.Pdf.FileFormat.PDF : Spire.Pdf.FileFormat.XPS;
    MemoryStream stream = new MemoryStream();
    pdfDocument.SaveToStream(stream, fileFormat);

    //Save to IPrintDocumentStream according to the system
    IPrintDocumentStream pdfStream = !isWindows ? new PdfPrintDocument(stream) : new XpsPrintDocument(stream);

    //Print
    PrintDocument printPdf = new PrintDocument(pdfStream);
    printPdf.PrintSettings.SelectPageRange(1, 1);
    printPdf.Print();

    //Dispose
    printPdf.Dispose();
}
Printing PowerPoint Presentations in C#
Library Installation
Install-Package Spire.Printing
Install-Package Spire.Presentationfor.NETStandard
Code Example
using Spire.Presentation;
using Spire.Printing;

//Check the system
bool isWindows = System.Runtime.InteropServices.RuntimeInformation.IsOSPlatform(System.Runtime.InteropServices.OSPlatform.Windows);
using (Presentation ppt = new Presentation())
{
    //Use Spire.Presentation to save documents as. xps or. pdf document streams
    ppt.LoadFromFile("test.pptx");
    Spire.Presentation.FileFormat fileFormat = !isWindows ? Spire.Presentation.FileFormat.PDF : Spire.Presentation.FileFormat.XPS;
    MemoryStream stream = new MemoryStream();
    ppt.SaveToFile(stream, fileFormat);

    //Save to IPrintDocumentStream according to the system
    IPrintDocumentStream pptStream = !isWindows ? new PdfPrintDocument(stream) : new XpsPrintDocument(stream);

    //Print
    PrintDocument printPpt = new PrintDocument(pptStream);
    printPpt.PrintSettings.SelectPageRange(1, 1);
    printPpt.Print();

    //Dispose
    printPpt.Dispose();
}
Advanced Print Settings and Operations
For automated and cross-platform printing scenarios, Spire.Printing provides additional control over printer selection, paper handling, and page output through the PrintSettings API. These options are commonly used in unattended services and batch-printing workflows.
Discovering and Selecting a Printer
Instead of using the system default, you can enumerate available printers and route the print job to a specific device:
IEnumerable<string> printers = printDocument.PrintSettings.Printers;

// Select the first printer or choose based on your logic
string selectedPrinterName = printers.First();
printDocument.PrintSettings.PrinterName = selectedPrinterName;
This is useful when multiple printers are installed or when deterministic printer routing is required.
Choosing a Supported Paper Size
To ensure compatibility with the selected printer, you can query and apply one of its supported paper sizes:
IEnumerable<PaperSize> paperSizes = printDocument.PrintSettings.PaperSizes;

// Select the first available size or apply custom logic
PaperSize selectedPaperSize = paperSizes.First();
printDocument.PrintSettings.PaperSize = selectedPaperSize;
This guarantees the selected paper size is compatible with the target printer.
Selecting Specific Pages
You can restrict printing to certain pages, either as a continuous range or a specific set:
// Print pages 2 to 5
printDocument.PrintSettings.SelectPageRange(2, 5);

// Print specific pages: 1, 3, 5, 7
int[] pages = { 1, 3, 5, 7 };
printDocument.PrintSettings.SelectSomePages(pages);
Only one of these methods should be used per print job.
These advanced operations allow precise control over print output, making it suitable for automated workflows, batch processing, or scenarios where consistent print settings are required across multiple documents and printers.
Licensing Notes
Without a valid license, Spire.Printing prints only the first 10 pages. This limitation can be removed by applying a license for Spire.Office for .NET or the corresponding document libraries, such as Spire.Doc, Spire.XLS, Spire.PDF, or Spire.Presentation.
Spire.Pdf.License.LicenseProvider.SetLicenseKey(string key);
Spire.Doc.License.LicenseProvider.SetLicenseKey(string key);
Spire.Xls.License.LicenseProvider.SetLicenseKey(string key);
Spire.Presentation.License.LicenseProvider.SetLicenseKey(string key);
For details on how to apply a license key, see the licensing guide.
Conclusion
Spire.Printing provides a flexible and reliable way to implement professional printing in C# applications. It supports stream-based printing of PDF, Word, Excel, and PowerPoint documents across Windows, Linux, and macOS, and works seamlessly with Spire.Office for .NET libraries—especially for .NET Standard—to handle Office and PDF files in modern .NET applications.
With the core printing workflow understood, developers can easily apply advanced print settings, such as selecting printers, paper sizes, or specific pages, to meet real-world business requirements and automated workflows.
For evaluation or short-term testing scenarios, a temporary license can be requested to remove trial limitations during development.
