
Knowledgebase (2370)
Children categories
Word document variables (DocVariable) provide a lightweight field mechanism that lets you define placeholders in a document and dynamically populate or update their content through code. This approach is especially useful for template-based document generation, batch mail merges, and automated report output. Spire.Doc for JavaScript runs entirely in the browser via WebAssembly, using a virtual file system (VFS) to manage input and output files — no backend server required.
This article covers three core features:
For installation and project setup, refer to Integrating Spire.Doc for JavaScript in a React Project. The examples below assume Spire.Doc is installed and the WebAssembly module is initialized.
Add Document Variables
Adding document variables follows three main steps: first, load font files into the WASM virtual file system via FetchFileToVFS; then instantiate a Document, insert a DocVariable field in a paragraph, and assign a value to the variable using Variables.Add; finally, save the document, read the generated file from VFS, wrap it as a Blob, and trigger a browser download.
import React from 'react';
function App() {
const addVariables = async () => {
// Get the Spire.Doc WASM module
const docModule = window.wasmModule?.spiredoc;
// Check if the module is ready
if (!docModule) {
alert('Spire.Doc is not ready yet');
return;
}
// Create a document object
const doc = new docModule.Document();
// Add a section
const section = doc.AddSection();
// Add a paragraph
const paragraph = section.AddParagraph();
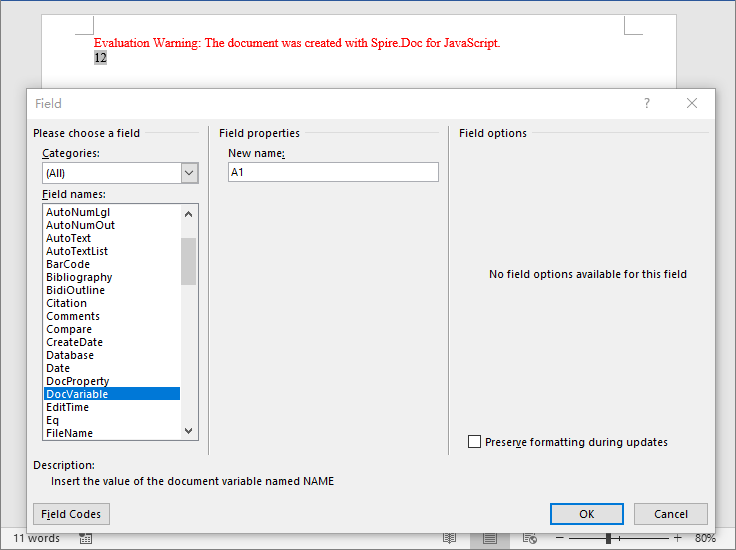
// Insert a DocVariable field into the paragraph
paragraph.AppendField("A1", docModule.FieldType.FieldDocVariable);
// Assign a value to the variable
doc.Variables.Add("A1", "12");
// Update fields to display variable values
doc.IsUpdateFields = true;
// Define the output file name
const outputFileName = "AddVariables_out.docx";
// Save the document
doc.SaveToFile({ fileName: outputFileName, fileFormat: docModule.FileFormat.Docx2013 });
// Release resources
doc.Dispose();
const modifiedFileArray = window.dotnetRuntime.Module.FS.readFile(outputFileName);
const blob = new Blob([modifiedFileArray], { type: 'application/vnd.openxmlformats-officedocument.wordprocessingml.document' });
const url = URL.createObjectURL(blob);
const a = document.createElement('a');
a.href = url;
a.download = outputFileName;
a.click();
URL.revokeObjectURL(url);
};
return (
<div style={{ textAlign: 'center', height: '300px' }}>
<h1>Add Document Variables</h1>
<button onClick={addVariables}>
Generate
</button>
</div>
);
};
export default App;
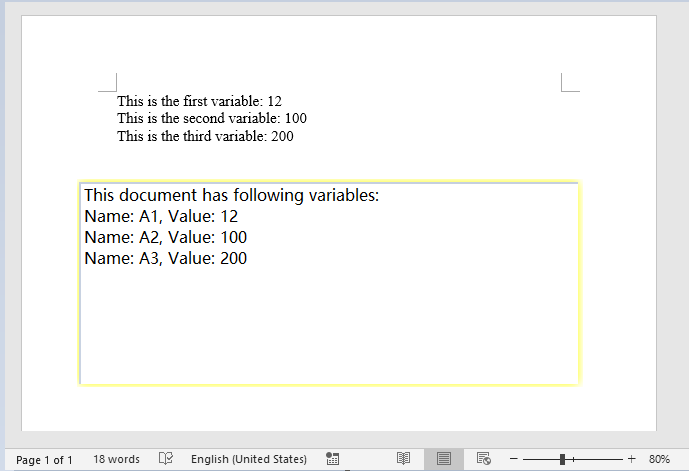
After adding variables via the Variables.Add method, the DocVariable fields in the document are replaced with the corresponding variable values.
Retrieve Document Variables
For Word template documents that already contain variables, you can retrieve variable information by index or by variable name. Spire.Doc provides multiple retrieval methods: getting the variable name and value by index, or getting the value directly by variable name.
import React from 'react';

function App() {
  const retrieveVariables = async () => {
    // Get the Spire.Doc WASM module
    const docModule = window.wasmModule?.spiredoc;

    // Check if the module is ready
    if (!docModule) {
      alert('Spire.Doc is not ready yet');
      return;
    }

    const inputFileName = 'Template_Docx_6.docx';
    await window.spire.FetchFileToVFS(inputFileName, '', `${process.env.PUBLIC_URL}/data/`);

    // Load the document
    const doc = new docModule.Document();
    doc.LoadFromFile(inputFileName);

    // Get variable name and value by index
    const nameByIndex = doc.Variables.GetNameByIndex(0);
    const valueByIndex = doc.Variables.GetValueByIndex(0);

    // Get value directly by variable name
    const valueByName = doc.Variables.get_Item("A1");

    // Iterate through all variables
    let stringBuilder = [];
    stringBuilder.push("This document has following variables:\n");
    for (let i = 0; i < doc.Variables.Count; i++) {
        let name = doc.Variables.GetNameByIndex(i);
        let value = doc.Variables.GetValueByIndex(i);
        stringBuilder.push("Name: " + name + ", " + "Value: " + value + "\n");
    }

    // Write the result to a text file
    const outputFileName = "RetrieveVariables_out.txt";
    window.dotnetRuntime.Module.FS.writeFile(outputFileName, stringBuilder.join(""));

    // Read the file from VFS and trigger download
    const modifiedFileArray = window.dotnetRuntime.Module.FS.readFile(outputFileName);
    const blob = new Blob([modifiedFileArray], { type: 'text/plain' });
    const url = URL.createObjectURL(blob);
    const a = document.createElement('a');
    a.href = url;
    a.download = outputFileName;
    a.click();
    URL.revokeObjectURL(url);
  };

  return (
    <div style={{ textAlign: 'center', height: '300px' }}>
      <h1>Retrieve Document Variables</h1>
      <button onClick={retrieveVariables}>
        Generate
      </button>
    </div>
  );
}

export default App;
The retrieval result is output as a text file, clearly listing all variable names and their corresponding values in the document.
Remove Document Variables
When a template document contains variables that are no longer needed, you can remove them by name using the Variables.Remove method. After removal, set the IsUpdateFields property to update the fields, ensuring the generated document is clean and free of redundant data.
function App() {
  const removeVariables = async () => {
    // Get the Spire.Doc WASM module
    const docModule = window.wasmModule?.spiredoc;

    // Check if the module is ready
    if (!docModule) {
      alert('Spire.Doc is not ready yet');
      return;
    }
    const inputFileName = 'Template_Docx_6.docx';
    await window.spire.FetchFileToVFS(inputFileName, '', `${process.env.PUBLIC_URL}/data/`);

    // Load the document
    const doc = new docModule.Document();
    doc.LoadFromFile(inputFileName);

    // Remove variable by name
    doc.Variables.Remove("A1");

    let name = doc.Variables.GetNameByIndex(0);
    doc.Variables.Remove(name);

    doc.Variables.Remove(doc.Variables.GetNameByIndex(0));

    doc.IsUpdateFields = true;

    // Define the output file name
    const outputFileName = "RemoveVariables_out.docx";

    // Save the document
    doc.SaveToFile({ fileName: outputFileName, fileFormat: docModule.FileFormat.Docx2013 });

    // Read the file from VFS and trigger download
    const modifiedFileArray = window.dotnetRuntime.Module.FS.readFile(outputFileName);
    const blob = new Blob([modifiedFileArray], { type: 'application/vnd.openxmlformats-officedocument.wordprocessingml.document' });
    const url = URL.createObjectURL(blob);
    const a = document.createElement('a');
    a.href = url;
    a.download = outputFileName;
    a.click();
    URL.revokeObjectURL(url);
  };

  return (
    <div style={{ textAlign: 'center', height: '300px' }}>
      <h1>Remove Document Variables</h1>
      <button onClick={removeVariables}>
        Generate
      </button>
    </div>
  );
}

export default App;
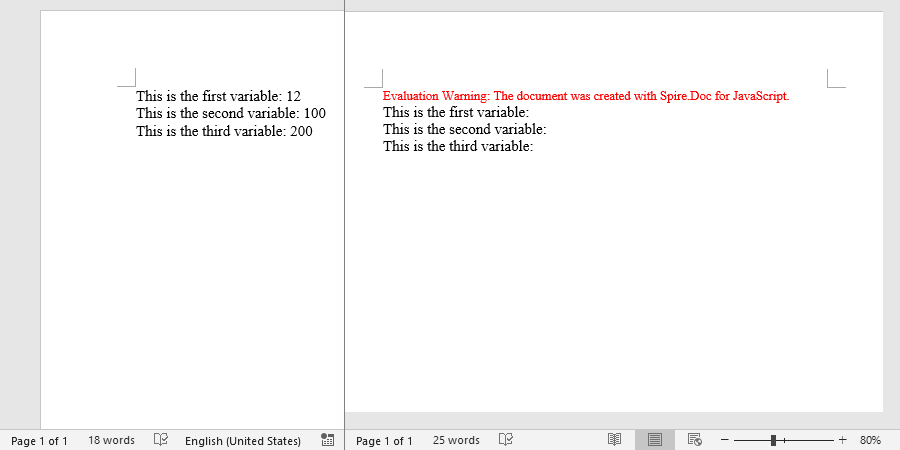
After removing variables, the target variables and their corresponding DocVariable fields are cleared from the generated document, resulting in cleaner content.
FAQ
Field codes still display instead of actual values after adding variables
Cause: After creating a DocVariable field, the document does not automatically update to show the variable value. If the IsUpdateFields property is not set, the field code text remains in the document.
Solution: Set IsUpdateFields to true before saving the document:
document.IsUpdateFields = true;
Getting a variable value by name returns empty
Cause: The variable name passed in does not match the actual variable name in the document (case or spelling mismatch), causing the lookup to fail.
Solution: First iterate through the document.Variables collection using GetNameByIndex to confirm the actual variable names in the document, then retrieve the value by the exact name:
for (let i = 0; i < document.Variables.Count; i++) {
    let name = document.Variables.GetNameByIndex(i);
    let value = document.Variables.GetValueByIndex(i);
    console.log("Name: " + name + ", Value: " + value);
}
Get a Free License
Spire.Doc for JavaScript offers a 30-day full-featured free trial license with no functional limitations. Apply here to evaluate before purchasing.
Footnotes are a commonly used annotation tool in Word documents, allowing you to add supplementary explanations or citation references at the bottom of each page. Spire.Doc for JavaScript runs entirely in the browser via WebAssembly, enabling you to insert, format, and remove footnotes directly using a virtual file system (VFS) to manage fonts and files — no backend server required.
This article covers three core features:
For installation and project setup, refer to Integrating Spire.Doc for JavaScript in a React Project. The examples below assume Spire.Doc is installed and the WebAssembly module is initialized.
1. Insert Footnotes
Inserting footnotes is a fundamental operation for adding annotations to a document — ideal for defining specific terms, citing sources, or providing supplementary explanations. Spire.Doc for JavaScript uses the AppendFootnote method to create footnotes and gives developers precise control over three aspects: where the footnote is inserted relative to the target text, the textual content displayed in the footnote body at the bottom of the page, and the visual style of the superscript footnote marker.
function App() {
  const insertFootnote = async () => {
    // Get the Spire.Doc WASM module
    const wasmModule = window.wasmModule?.spiredoc;

    // Check if the module is ready
    if (!wasmModule) {
      alert('Spire.Doc is not ready yet');
      return;
    }

    const inputFileName = 'SampleB_2.docx';
    await window.spire.FetchFileToVFS(inputFileName, '', `${process.env.PUBLIC_URL}/data/`);

    // Load the document
    const doc = new wasmModule.Document();
    doc.LoadFromFile(inputFileName);

    // Find the first matching string in the document
    let selection = doc.FindString("Spire.Doc", false, true);

    // Get the TextRange of the matched text
    let textRange = selection.GetAsOneRange();

    // Get the paragraph that contains the matched text
    let paragraph = textRange.OwnerParagraph;

    // Get the index position of the TextRange in the paragraph
    let index = paragraph.ChildObjects.IndexOf(textRange);

    // Append a footnote to the paragraph
    let footnote = paragraph.AppendFootnote({ type: wasmModule.FootnoteType.Footnote });

    // Insert the footnote after the matched text
    paragraph.ChildObjects.Insert(index + 1, footnote);

    // Add content to the footnote text body
    textRange = footnote.TextBody.AddParagraph().AppendText("Welcome to evaluate Spire.Doc");

    // Set the font format of the footnote content
    textRange.CharacterFormat.FontName = "Arial Black";
    textRange.CharacterFormat.FontSize = 10;
    textRange.CharacterFormat.TextColor = wasmModule.Color.get_DarkGray();

    // Set the format of the footnote marker (superscript number)
    footnote.MarkerCharacterFormat.FontName = "Calibri";
    footnote.MarkerCharacterFormat.FontSize = 12;
    footnote.MarkerCharacterFormat.Bold = true;
    footnote.MarkerCharacterFormat.TextColor = wasmModule.Color.get_DarkGreen();

    // Define the output file name
    const outputFileName = "InsertFootnote.docx";

    // Save the document
    doc.SaveToFile({ fileName: outputFileName, fileFormat: wasmModule.FileFormat.Docx2013 });

    // Release resources
    doc.Dispose();

    // Read the generated file from VFS and trigger download
    const modifiedFileArray = window.dotnetRuntime.Module.FS.readFile(outputFileName);
    const blob = new Blob([modifiedFileArray], { type: 'application/vnd.openxmlformats-officedocument.wordprocessingml.document' });
    const url = URL.createObjectURL(blob);
    const a = document.createElement('a');
    a.href = url;
    a.download = outputFileName;
    a.click();
    URL.revokeObjectURL(url);
  };

  return (
    <div style={{ textAlign: 'center', height: '300px' }}>
      <h1>Insert Footnotes</h1>
      <button onClick={insertFootnote}>
        Generate
      </button>
    </div>
  );
}

export default App;
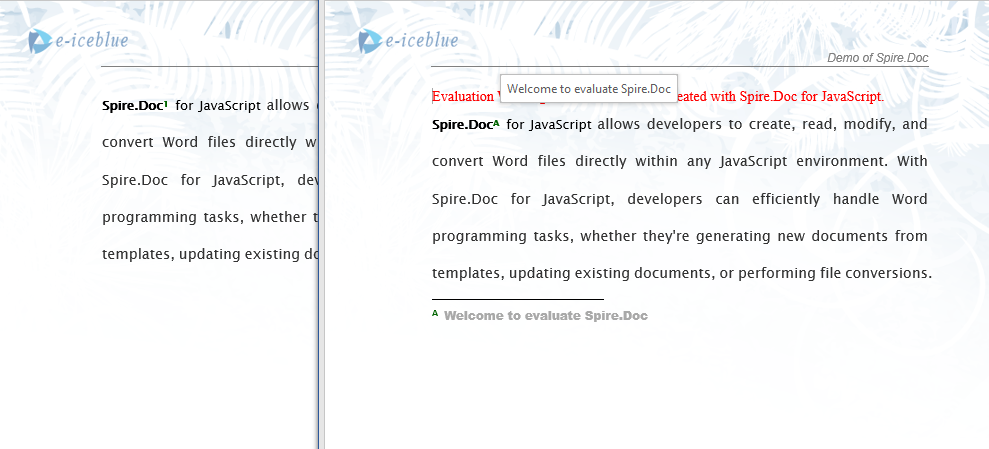
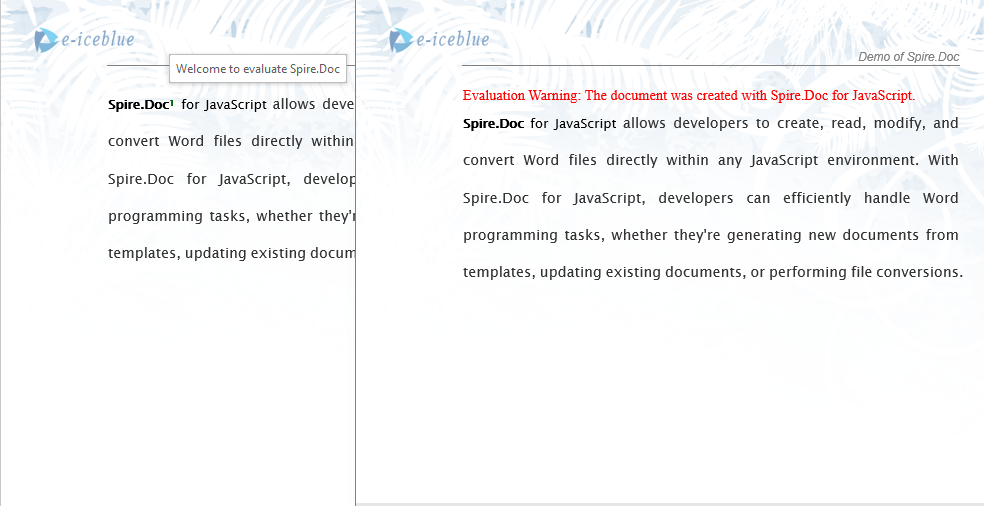
After inserting a footnote via the AppendFootnote method, the annotation content appears at the bottom of the page, and a superscript footnote marker appears next to the corresponding text in the body.

2. Set Footnote Position and Number Format
By default, Word footnotes use Arabic numerals (1, 2, 3...) and restart at the beginning of each page's bottom area. However, academic papers, technical manuals, and publications with strict formatting guidelines often require different numbering schemes — such as letters or Roman numerals — and may need footnotes to be grouped at the end of each section rather than at the page bottom. Spire.Doc for JavaScript provides the FootnoteOptions object to give developers per-section control over the number format, restart rule, and display position, making it easy to comply with a wide range of typographic standards.
function App() {
  const setFootnoteFormat = async () => {
    // Get the Spire.Doc WASM module
    const wasmModule = window.wasmModule?.spiredoc;

    // Check if the module is ready
    if (!wasmModule) {
      alert('Spire.Doc is not ready yet');
      return;
    }

    // Load fonts and the document file into VFS
    await window.spire.FetchFileToVFS('ARIALUNI.TTF', '/Library/Fonts/', `${process.env.PUBLIC_URL}/font/`);
    const inputFileName = 'Footnote.docx';
    await window.spire.FetchFileToVFS(inputFileName, '', `${process.env.PUBLIC_URL}/data/`);

    // Load the document
    const doc = new wasmModule.Document();
    doc.LoadFromFile(inputFileName);

    // Get the first section
    let sec = doc.Sections.get_Item(0);

    // Set footnote number format to uppercase letters
    sec.FootnoteOptions.NumberFormat = wasmModule.FootnoteNumberFormat.UpperCaseLetter;

    // Set footnote restart rule to restart per page
    sec.FootnoteOptions.RestartRule = wasmModule.FootnoteRestartRule.RestartPage;

    // Set footnote position to the end of the section
    sec.FootnoteOptions.Position = wasmModule.FootnotePosition.PrintAsEndOfSection;

    // Define the output file name
    const outputFileName = "SetPositionAndNumberFormat.docx";

    // Save the document
    doc.SaveToFile({ fileName: outputFileName, fileFormat: wasmModule.FileFormat.Docx2013 });

    // Release resources
    doc.Dispose();

    // Read the generated file from VFS and trigger download
    const modifiedFileArray = window.dotnetRuntime.Module.FS.readFile(outputFileName);
    const blob = new Blob([modifiedFileArray], { type: 'application/vnd.openxmlformats-officedocument.wordprocessingml.document' });
    const url = URL.createObjectURL(blob);
    const a = document.createElement('a');
    a.href = url;
    a.download = outputFileName;
    a.click();
    URL.revokeObjectURL(url);
  };

  return (
    <div style={{ textAlign: 'center', height: '300px' }}>
      <h1>Set Footnote Format</h1>
      <button onClick={setFootnoteFormat}>
        Generate
      </button>
    </div>
  );
}

export default App;
After modifying the number format and position through the FootnoteOptions object, the footnotes in the document are reorganized according to the specified style. For example, setting NumberFormat to UpperCaseLetter (A, B, C...) and Position to PrintAsEndOfSection is well suited for appendices or chapter-based documents where footnotes should appear collectively at each section's end. Setting RestartRule to RestartPage ensures that footnote numbering resets on every page, preventing the counter from growing too large across long documents. Since these settings apply per section, different chapters or sections within the same document can each have their own footnote rules — a valuable feature for multi-chapter or collaborative authoring workflows.
3. Remove Footnotes
After multiple rounds of review or content updates, some footnotes may become obsolete or need to be removed. Spire.Doc for JavaScript handles this by iterating through all paragraphs in each section, checking every child object with instanceof to detect Footnote instances, and calling RemoveAt to delete them from the paragraph's child object collection. This paragraph-by-paragraph traversal approach reliably locates footnotes anywhere in the document without requiring prior knowledge of specific page numbers or index offsets.
function App() {
  const removeFootnote = async () => {
    // Get the Spire.Doc WASM module
    const wasmModule = window.wasmModule?.spiredoc;

    // Check if the module is ready
    if (!wasmModule) {
      alert('Spire.Doc is not ready yet');
      return;
    }

    // Load fonts and the document file into VFS
    await window.spire.FetchFileToVFS('ARIALUNI.TTF', '/Library/Fonts/', `${process.env.PUBLIC_URL}/font/`);
    const inputFileName = 'Footnote.docx';
    await window.spire.FetchFileToVFS(inputFileName, '', `${process.env.PUBLIC_URL}/data/`);

    // Load the document
    const doc = new wasmModule.Document();
    doc.LoadFromFile(inputFileName);

    // Get the first section
    let section = doc.Sections.get_Item(0);

    // Traverse all paragraphs in the section to find and remove footnotes
    for (let p = 0; p < section.Paragraphs.Count; p++) {
      let para = section.Paragraphs.get_Item(p);
      let index = -1;

      // Check if each child object in the paragraph is a footnote
      for (let i = 0, cnt = para.ChildObjects.Count; i < cnt; i++) {
        let pBase = para.ChildObjects.get_Item(i);
        if (pBase instanceof wasmModule.Footnote) {
          index = i;
          break;
        }
      }

      // If a footnote is found, remove it from the paragraph
      if (index > -1) {
        para.ChildObjects.RemoveAt(index);
      }
    }

    // Define the output file name
    const outputFileName = "RemoveFootnote.docx";

    // Save the document
    doc.SaveToFile({ fileName: outputFileName, fileFormat: wasmModule.FileFormat.Docx2013 });

    // Release resources
    doc.Dispose();

    // Read the generated file from VFS and trigger download
    const modifiedFileArray = window.dotnetRuntime.Module.FS.readFile(outputFileName);
    const blob = new Blob([modifiedFileArray], { type: 'application/vnd.openxmlformats-officedocument.wordprocessingml.document' });
    const url = URL.createObjectURL(blob);
    const a = document.createElement('a');
    a.href = url;
    a.download = outputFileName;
    a.click();
    URL.revokeObjectURL(url);
  };

  return (
    <div style={{ textAlign: 'center', height: '300px' }}>
      <h1>Remove Footnotes</h1>
      <button onClick={removeFootnote}>
        Generate
      </button>
    </div>
  );
}

export default App;
After removing footnotes, both the superscript markers in the body text and the annotation content at the page bottom are cleared, while the main text remains unaffected.
FAQ
Inserted footnote does not appear at the expected position
Cause: The footnote was appended to the paragraph but was not inserted into the correct child object order via the Insert method, causing the footnote marker to appear at the end of the paragraph instead of after the target text.
Solution: Use ChildObjects.IndexOf to get the index position of the target text, then use the Insert method to place the footnote after that position:
let index = paragraph.ChildObjects.IndexOf(textRange);
paragraph.ChildObjects.Insert(index + 1, footnote);
Footnote number format changes do not take effect
Cause: The footnote number format was set on the wrong section, or the document contains multiple sections but only the first section was modified.
Solution: Identify the section that contains the target footnotes and set the number format for each section that has footnotes:
for (let i = 0; i < document.Sections.Count; i++) {
  let sec = document.Sections.get_Item(i);
  sec.FootnoteOptions.NumberFormat = wasmModule.FootnoteNumberFormat.UpperCaseLetter;
}
Get a Free License
Spire.Doc for JavaScript offers a 30-day full-featured free trial license with no functional limitations. Apply here to evaluate before purchasing.
Hyperlinks are essential interactive elements in Word documents, widely used to link to web pages, email addresses, internal document locations, or external files. Spire.Doc for JavaScript runs entirely in the browser via WebAssembly, enabling you to insert, find, modify, and remove hyperlinks directly using a virtual file system (VFS) to manage fonts and files — no backend server required.
This article covers three core features:
For installation and project setup, refer to Integrating Spire.Doc for JavaScript in a React Project. The examples below assume Spire.Doc is installed and the WebAssembly module is initialized.
1. Insert Hyperlinks
Inserting hyperlinks involves three steps: first, load image files into the WASM virtual file system via FetchFileToVFS; then instantiate a Document, add paragraphs, and call AppendHyperlink to insert web links, email links, or image links; finally, save the document, read the generated file from VFS, wrap it as a Blob, and trigger a browser download.
function App() {
  const insertHyperlinks = async () => {
    // Get the Spire.Doc WASM module
    const docModule = window.wasmModule?.spiredoc;

    // Check if the module is ready
    if (!docModule) {
      alert('Spire.Doc is not ready yet');
      return;
    }

    const imageFileName = 'Spire.Doc.png';
    await window.spire.FetchFileToVFS(imageFileName, '', `${process.env.PUBLIC_URL}/data/`);

    // Create a document
    const doc = new docModule.Document();
    const section = doc.AddSection();

    // Insert a web link
    let paragraph = section.AddParagraph();
    paragraph.AppendText("Home page");
    paragraph.ApplyStyle({ builtinStyle: docModule.BuiltinStyle.Heading2 });
    paragraph = section.AddParagraph();
    paragraph.AppendHyperlink("www.e-iceblue.com", "www.e-iceblue.com", docModule.HyperlinkType.WebLink);

    // Insert an email link
    paragraph = section.AddParagraph();
    paragraph.AppendText("Contact US");
    paragraph.ApplyStyle({ builtinStyle: docModule.BuiltinStyle.Heading2 });
    paragraph = section.AddParagraph();
    paragraph.AppendHyperlink("mailto:support@e-iceblue.com", "support@e-iceblue.com", docModule.HyperlinkType.EMailLink);

    // Insert a link on an image
    paragraph = section.AddParagraph();
    paragraph.AppendText("Insert Link On Image");
    paragraph.ApplyStyle({ builtinStyle: docModule.BuiltinStyle.Heading2 });
    paragraph = section.AddParagraph();
    const picture = paragraph.AppendPicture({ imgFile: imageFileName });
    paragraph.AppendHyperlink("www.e-iceblue.com", picture, docModule.HyperlinkType.WebLink);

    // Define the output file name
    const outputFileName = "Hyperlink_output.docx";

    // Save the document
    doc.SaveToFile({ fileName: outputFileName, fileFormat: docModule.FileFormat.Docx2013 });

    // Read the generated file from VFS and trigger download
    const modifiedFileArray = window.dotnetRuntime.Module.FS.readFile(outputFileName);
    const blob = new Blob([modifiedFileArray], { type: 'application/vnd.openxmlformats-officedocument.wordprocessingml.document' });
    const url = URL.createObjectURL(blob);
    const a = document.createElement('a');
    a.href = url;
    a.download = outputFileName;
    a.click();
    URL.revokeObjectURL(url);
  };

  return (
    <div style={{ textAlign: 'center', height: '300px' }}>
      <h1>Insert Hyperlinks</h1>
      <button onClick={insertHyperlinks}>
        Generate
      </button>
    </div>
  );
}

export default App;
The resulting Word document contains clickable hyperlinks, including a text-based web link, an email link, and an image with an embedded hyperlink.

2. Find and Modify Hyperlinks
For existing Word documents that already contain hyperlinks, you can traverse the document object model to locate all hyperlink fields and read or modify their display text.
function App() {
  const findAndModifyHyperlinks = async () => {
    // Get the Spire.Doc WASM module
    const docModule = window.wasmModule?.spiredoc;

    // Check if the module is ready
    if (!docModule) {
      alert('Spire.Doc is not ready yet');
      return;
    }

    const inputFileName = 'Hyperlinks.docx';
    await window.spire.FetchFileToVFS(inputFileName, '', `${process.env.PUBLIC_URL}/data/`);

    // Load the document
    const doc = new docModule.Document();
    doc.LoadFromFile(inputFileName);

    // Traverse all hyperlinks in the document
    let hyperlinks = [];
    for (let i = 0; i < doc.Sections.Count; i++) {
      let section = doc.Sections.get_Item(i);
      for (let j = 0; j < section.Body.ChildObjects.Count; j++) {
        let sec = section.Body.ChildObjects.get_Item(j);
        if (sec.DocumentObjectType == docModule.DocumentObjectType.Paragraph) {
          for (let k = 0; k < sec.ChildObjects.Count; k++) {
            let para = sec.ChildObjects.get_Item(k);
            if (para.DocumentObjectType == docModule.DocumentObjectType.Field) {
              let field = para;
              if (field.Type == docModule.FieldType.FieldHyperlink) {
                hyperlinks.push(field);
              }
            }
          }
        }
      }
    }

    // Modify the display text of the first hyperlink
    hyperlinks[0].FieldText = "Spire.Doc component";

    // Define the output file name
    const outputFileName = "ModifyHyperlinkText_output.docx";

    // Save the document
    doc.SaveToFile({ fileName: outputFileName, fileFormat: docModule.FileFormat.Docx2013 });

    // Read the generated file from VFS and trigger download
    const modifiedFileArray = window.dotnetRuntime.Module.FS.readFile(outputFileName);
    const blob = new Blob([modifiedFileArray], { type: 'application/vnd.openxmlformats-officedocument.wordprocessingml.document' });
    const url = URL.createObjectURL(blob);
    const a = document.createElement('a');
    a.href = url;
    a.download = outputFileName;
    a.click();
    URL.revokeObjectURL(url);

    // Release resources
    doc.Dispose();
  };

  return (
    <div style={{ textAlign: 'center', height: '300px' }}>
      <h1>Find & Modify Hyperlinks</h1>
      <button onClick={findAndModifyHyperlinks}>
        Generate
      </button>
    </div>
  );
}

export default App;
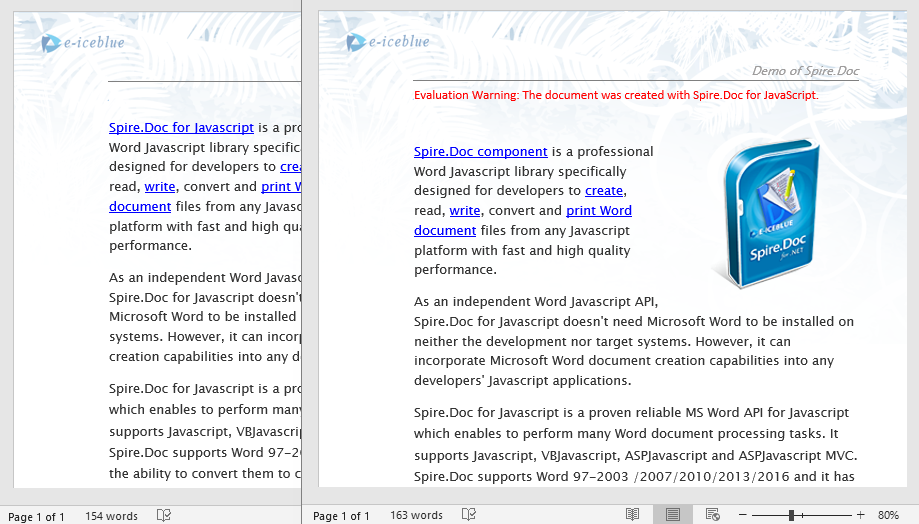
After traversing the document object model, you can read or modify the display text and target address of each hyperlink, making it easy to batch-update links.
3. Remove Hyperlinks
When hyperlinks in a document are no longer needed, you can remove them while keeping the associated text content. The key approach is to locate all hyperlink fields, then flatten the field structure so that only plain text remains without the hyperlink formatting.
// Find all hyperlinks in the document
function FindAllHyperlinks(document) {
  let docModule = window.wasmModule.spiredoc;
  let hyperlinks = [];
  for (let i = 0; i < document.Sections.Count; i++) {
    let section = document.Sections.get_Item(i);
    for (let j = 0; j < section.Body.ChildObjects.Count; j++) {
      let sec = section.Body.ChildObjects.get_Item(j);
      if (sec.DocumentObjectType == docModule.DocumentObjectType.Paragraph) {
        for (let k = 0; k < sec.ChildObjects.Count; k++) {
          let para = sec.ChildObjects.get_Item(k);
          if (para.DocumentObjectType == docModule.DocumentObjectType.Field) {
            let field = para;
            if (field.Type == docModule.FieldType.FieldHyperlink) {
              hyperlinks.push(field);
            }
          }
        }
      }
    }
  }
  return hyperlinks;
}

// Remove hyperlink formatting, keep only the text
function FormatFieldResultText(ownerBody, sepOwnerParaIndex, endOwnerParaIndex, sepIndex, endIndex) {
  let docModule = window.wasmModule.spiredoc;
  for (let i = sepOwnerParaIndex; i <= endOwnerParaIndex; i++) {
    let para = ownerBody.ChildObjects.get_Item(i);
    if (i == sepOwnerParaIndex && i == endOwnerParaIndex) {
      for (let j = sepIndex + 1; j < endIndex; j++) {
        let tr = para.ChildObjects.get_Item(j);
        tr.CharacterFormat.TextColor = docModule.Color.get_Black();
        tr.CharacterFormat.UnderlineStyle = docModule.UnderlineStyle.None;
      }
    } else if (i == sepOwnerParaIndex) {
      for (let j = sepIndex + 1; j < para.ChildObjects.Count; j++) {
        let tr = para.ChildObjects.get_Item(j);
        tr.CharacterFormat.TextColor = docModule.Color.get_Black();
        tr.CharacterFormat.UnderlineStyle = docModule.UnderlineStyle.None;
      }
    } else if (i == endOwnerParaIndex) {
      for (let j = 0; j < endIndex; j++) {
        let tr = para.ChildObjects.get_Item(j);
        tr.CharacterFormat.TextColor = docModule.Color.get_Black();
        tr.CharacterFormat.UnderlineStyle = docModule.UnderlineStyle.None;
      }
    } else {
      for (let j = 0; j < para.ChildObjects.Count; j++) {
        let tr = para.ChildObjects.get_Item(j);
        tr.CharacterFormat.TextColor = docModule.Color.get_Black();
        tr.CharacterFormat.UnderlineStyle = docModule.UnderlineStyle.None;
      }
    }
  }
}

function FlattenHyperlinks(field) {
  // Get the position indices of each hyperlink field component
  let ownerParaIndex = field.OwnerParagraph.OwnerTextBody.ChildObjects.IndexOf(field.OwnerParagraph);
  let fieldIndex = field.OwnerParagraph.ChildObjects.IndexOf(field);
  let sepOwnerPara = field.Separator.OwnerParagraph;
  let sepOwnerParaIndex = field.Separator.OwnerParagraph.OwnerTextBody.ChildObjects.IndexOf(field.Separator.OwnerParagraph);
  let sepIndex = field.Separator.OwnerParagraph.ChildObjects.IndexOf(field.Separator);
  let endIndex = field.End.OwnerParagraph.ChildObjects.IndexOf(field.End);
  let endOwnerParaIndex = field.End.OwnerParagraph.OwnerTextBody.ChildObjects.IndexOf(field.End.OwnerParagraph);

  // Remove hyperlink formatting (blue underlined text)
  FormatFieldResultText(field.Separator.OwnerParagraph.OwnerTextBody, sepOwnerParaIndex, endOwnerParaIndex, sepIndex, endIndex);

  // Remove the hyperlink field structure
  field.End.OwnerParagraph.ChildObjects.RemoveAt(endIndex);
  for (let i = sepOwnerParaIndex; i >= ownerParaIndex; i--) {
    if (i == sepOwnerParaIndex && i == ownerParaIndex) {
      for (let j = sepIndex; j >= fieldIndex; j--) {
        field.OwnerParagraph.ChildObjects.RemoveAt(j);
      }
    } else if (i == ownerParaIndex) {
      for (let j = field.OwnerParagraph.ChildObjects.Count - 1; j >= fieldIndex; j--) {
        field.OwnerParagraph.ChildObjects.RemoveAt(j);
      }
    } else if (i == sepOwnerParaIndex) {
      for (let j = sepIndex; j >= 0; j--) {
        sepOwnerPara.ChildObjects.RemoveAt(j);
      }
    } else {
      field.OwnerParagraph.OwnerTextBody.ChildObjects.RemoveAt(i);
    }
  }
}

function App() {
  const removeHyperlinks = async () => {
    // Get the Spire.Doc WASM module
    const docModule = window.wasmModule?.spiredoc;

    // Check if the module is ready
    if (!docModule) {
      alert('Spire.Doc is not ready yet');
      return;
    }

    const inputFileName = 'Hyperlinks.docx';
    await window.spire.FetchFileToVFS(inputFileName, '', `${process.env.PUBLIC_URL}/data/`);

    // Load the document
    const doc = new docModule.Document();
    doc.LoadFromFile(inputFileName);

    // Find all hyperlinks
    let hyperlinks = FindAllHyperlinks(doc);

    // Flatten all hyperlinks (remove hyperlink formatting, keep text)
    for (let i = hyperlinks.length - 1; i >= 0; i--) {
      FlattenHyperlinks(hyperlinks[i]);
    }

    // Define the output file name
    const outputFileName = "RemoveHyperlinks_output.docx";

    // Save the document
    doc.SaveToFile({ fileName: outputFileName, fileFormat: docModule.FileFormat.Docx2013 });

    // Read the generated file from VFS and trigger download
    const modifiedFileArray = window.dotnetRuntime.Module.FS.readFile(outputFileName);
    const blob = new Blob([modifiedFileArray], { type: 'application/vnd.openxmlformats-officedocument.wordprocessingml.document' });
    const url = URL.createObjectURL(blob);
    const a = document.createElement('a');
    a.href = url;
    a.download = outputFileName;
    a.click();
    URL.revokeObjectURL(url);

    // Release resources
    doc.Dispose();
  };

  return (
    <div style={{ textAlign: 'center', height: '300px' }}>
      <h1>Remove Hyperlinks</h1>
      <button onClick={removeHyperlinks}>
        Generate
      </button>
    </div>
  );
}

export default App;
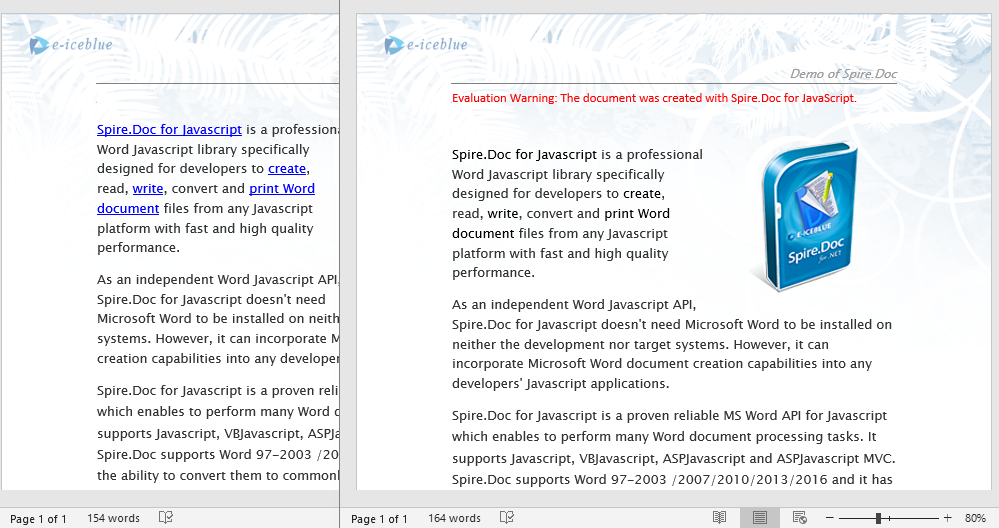
After removing the hyperlinks, the original link text remains as plain text, with the blue underline style cleared while the content stays unchanged.
FAQ
Inserted hyperlinks are not clickable in the document
Cause: The target URL format is incorrect, e.g., missing the protocol prefix (such as http:// or mailto:) so Word cannot recognize it as a valid clickable link.
Solution: Ensure web links use a complete URL and email links include the mailto: prefix:
// Correct web link
paragraph.AppendHyperlink("https://www.e-iceblue.com", "e-iceblue", wasmModule.HyperlinkType.WebLink);

// Correct email link
paragraph.AppendHyperlink("mailto:support@e-iceblue.com", "support@e-iceblue.com", wasmModule.HyperlinkType.EMailLink);
Text style is abnormal after removing hyperlinks
Cause: Only the hyperlink field structure was removed, but the text color and underline style were not reset to normal text formatting.
Solution: When flattening hyperlinks, also set the text color to black and the underline style to none:
tr.CharacterFormat.TextColor = wasmModule.Color.get_Black();
tr.CharacterFormat.UnderlineStyle = wasmModule.UnderlineStyle.None;
Get a Free License
Spire.Doc for JavaScript offers a 30-day full-featured free trial license with no functional limitations. Apply here to evaluate before purchasing.
