Wednesday, 06 April 2011 01:38
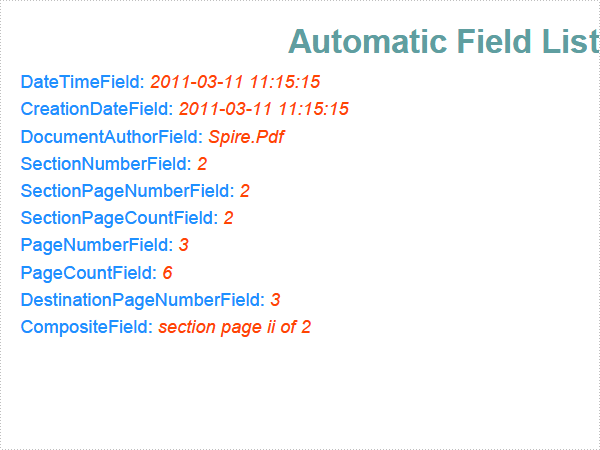
PDF AutomaticField in C#, VB.NET
The sample demonstrates how to work with automatic fields in PDF document.
using System;
using System.Drawing;
using Spire.Pdf;
using Spire.Pdf.AutomaticFields;
using Spire.Pdf.Graphics;

namespace AutomaticField
{
    class Program
    {
        static void Main(string[] args)
        {
            //Create a pdf document.
            PdfDocument doc = new PdfDocument();
            doc.DocumentInformation.Author = "Spire.Pdf";

            //margin
            PdfUnitConvertor unitCvtr = new PdfUnitConvertor();
            PdfMargins margin = new PdfMargins();
            margin.Top = unitCvtr.ConvertUnits(2.54f, PdfGraphicsUnit.Centimeter, PdfGraphicsUnit.Point);
            margin.Bottom = margin.Top;
            margin.Left = unitCvtr.ConvertUnits(3.17f, PdfGraphicsUnit.Centimeter, PdfGraphicsUnit.Point);
            margin.Right = margin.Left;

            for (int i = 1; i < 4; i++)
            {
                //create section
                PdfSection section = doc.Sections.Add();
                section.PageSettings.Size = PdfPageSize.A4;
                section.PageSettings.Margins = margin;

                for (int j = 0; j < i; j++)
                {
                    // Create one page
                    PdfPageBase page = section.Pages.Add();
                    DrawAutomaticField(page);
                }
            }

            //Save pdf file.
            doc.SaveToFile("AutomaticField.pdf");
            doc.Close();

            //Launching the Pdf file.
            System.Diagnostics.Process.Start("AutomaticField.pdf");
        }

        private static void DrawAutomaticField(PdfPageBase page)
        {
            float y = 0;

            //title
            PdfBrush brush1 = PdfBrushes.CadetBlue;
            PdfTrueTypeFont font1 = new PdfTrueTypeFont(new Font("Arial", 16f, FontStyle.Bold));
            PdfStringFormat format1 = new PdfStringFormat(PdfTextAlignment.Center);
            page.Canvas.DrawString("Automatic Field List", font1, brush1,
                page.Canvas.ClientSize.Width / 2, y, format1);
            y = y + font1.MeasureString("Automatic Field List", format1).Height;
            y = y + 5;

            String[] fieldList = new String[]
            {
                "DateTimeField",
                "CreationDateField",
                "DocumentAuthorField",
                "SectionNumberField",
                "SectionPageNumberField",
                "SectionPageCountField",
                "PageNumberField",
                "PageCountField",
                "DestinationPageNumberField",
                "CompositeField"
            };
            PdfTrueTypeFont font = new PdfTrueTypeFont(new Font("Arial", 9f));
            PdfStringFormat fieldNameFormat = new PdfStringFormat();
            fieldNameFormat.MeasureTrailingSpaces = true;
            foreach (String fieldName in fieldList)
            {
                //draw field name
                String text = String.Format("{0}: ", fieldName);
                page.Canvas.DrawString(text, font, PdfBrushes.DodgerBlue, 0, y);
                float x = font.MeasureString(text, fieldNameFormat).Width;
                RectangleF bounds = new RectangleF(x, y, 200, font.Height);
                DrawAutomaticField(fieldName, page, bounds);
                y = y + font.Height + 3;
            }
        }

        private static void DrawAutomaticField(string fieldName, PdfPageBase page, RectangleF bounds)
        {
            PdfTrueTypeFont font = new PdfTrueTypeFont(new Font("Arial", 9f, FontStyle.Italic));
            PdfBrush brush = PdfBrushes.OrangeRed;
            PdfStringFormat format
                = new PdfStringFormat(PdfTextAlignment.Left, PdfVerticalAlignment.Middle);

            if ("DateTimeField" == fieldName)
            {
                PdfDateTimeField field = new PdfDateTimeField();
                field.Font = font;
                field.Brush = brush;
                field.StringFormat = format;
                field.Bounds = bounds;
                field.DateFormatString = "yyyy-MM-dd HH:mm:ss";
                field.Draw(page.Canvas);
            }

            if ("CreationDateField" == fieldName)
            {
                PdfCreationDateField field = new PdfCreationDateField();
                field.Font = font;
                field.Brush = brush;
                field.StringFormat = format;
                field.Bounds = bounds;
                field.DateFormatString = "yyyy-MM-dd HH:mm:ss";
                field.Draw(page.Canvas);
            }

            if ("DocumentAuthorField" == fieldName)
            {
                PdfDocumentAuthorField field = new PdfDocumentAuthorField();
                field.Font = font;
                field.Brush = brush;
                field.StringFormat = format;
                field.Bounds = bounds;
                field.Draw(page.Canvas);
            }


            if ("SectionNumberField" == fieldName)
            {
                PdfSectionNumberField field = new PdfSectionNumberField();
                field.Font = font;
                field.Brush = brush;
                field.StringFormat = format;
                field.Bounds = bounds;
                field.Draw(page.Canvas);
            }

            if ("SectionPageNumberField" == fieldName)
            {
                PdfSectionPageNumberField field = new PdfSectionPageNumberField();
                field.Font = font;
                field.Brush = brush;
                field.StringFormat = format;
                field.Bounds = bounds;
                field.Draw(page.Canvas);
            }

            if ("SectionPageCountField" == fieldName)
            {
                PdfSectionPageCountField field = new PdfSectionPageCountField();
                field.Font = font;
                field.Brush = brush;
                field.StringFormat = format;
                field.Bounds = bounds;
                field.Draw(page.Canvas);
            }

            if ("PageNumberField" == fieldName)
            {
                PdfPageNumberField field = new PdfPageNumberField();
                field.Font = font;
                field.Brush = brush;
                field.StringFormat = format;
                field.Bounds = bounds;
                field.Draw(page.Canvas);
            }

            if ("PageCountField" == fieldName)
            {
                PdfPageCountField field = new PdfPageCountField();
                field.Font = font;
                field.Brush = brush;
                field.StringFormat = format;
                field.Bounds = bounds;
                field.Draw(page.Canvas);
            }

            if ("DestinationPageNumberField" == fieldName)
            {
                PdfDestinationPageNumberField field = new PdfDestinationPageNumberField();
                field.Font = font;
                field.Brush = brush;
                field.StringFormat = format;
                field.Bounds = bounds;
                field.Page = page as PdfNewPage;
                field.Draw(page.Canvas);
            }

            if ("CompositeField" == fieldName)
            {
                PdfSectionPageNumberField field1 = new PdfSectionPageNumberField();
                field1.NumberStyle = PdfNumberStyle.LowerRoman;
                PdfSectionPageCountField field2 = new PdfSectionPageCountField();
                PdfCompositeField fields = new PdfCompositeField();
                fields.Font = font;
                fields.Brush = brush;
                fields.StringFormat = format;
                fields.Bounds = bounds;
                fields.AutomaticFields = new PdfAutomaticField[] { field1, field2 };
                fields.Text = "section page {0} of {1}";
                fields.Draw(page.Canvas);
            }
        }
    }
}
Imports System.Drawing
Imports Spire.Pdf
Imports Spire.Pdf.AutomaticFields
Imports Spire.Pdf.Graphics

Namespace AutomaticField
    Friend Class Program
        Shared Sub Main(ByVal args() As String)
            'Create a pdf document.
            Dim doc As New PdfDocument()
            doc.DocumentInformation.Author = "Spire.Pdf"

            'margin
            Dim unitCvtr As New PdfUnitConvertor()
            Dim margin As New PdfMargins()
            margin.Top = unitCvtr.ConvertUnits(2.54F, PdfGraphicsUnit.Centimeter, PdfGraphicsUnit.Point)
            margin.Bottom = margin.Top
            margin.Left = unitCvtr.ConvertUnits(3.17F, PdfGraphicsUnit.Centimeter, PdfGraphicsUnit.Point)
            margin.Right = margin.Left

            For i As Integer = 1 To 3
                'create section
                Dim section As PdfSection = doc.Sections.Add()
                section.PageSettings.Size = PdfPageSize.A4
                section.PageSettings.Margins = margin

                For j As Integer = 0 To i - 1
                    ' Create one page
                    Dim page As PdfPageBase = section.Pages.Add()
                    DrawAutomaticField(page)
                Next j
            Next i

            'Save pdf file.
            doc.SaveToFile("AutomaticField.pdf")
            doc.Close()

            'Launching the Pdf file.
            Process.Start("AutomaticField.pdf")
        End Sub

        Private Shared Sub DrawAutomaticField(ByVal page As PdfPageBase)
            Dim y As Single = 0

            'title
            Dim brush1 As PdfBrush = PdfBrushes.CadetBlue
            Dim font1 As New PdfTrueTypeFont(New Font("Arial", 16.0F, FontStyle.Bold))
            Dim format1 As New PdfStringFormat(PdfTextAlignment.Center)
            page.Canvas.DrawString("Automatic Field List", font1, brush1, _
                                   page.Canvas.ClientSize.Width \ 2, y, format1)
            y = y + font1.MeasureString("Automatic Field List", format1).Height
            y = y + 5

            Dim fieldList() As String _
                = {"DateTimeField", "CreationDateField", "DocumentAuthorField", _
                   "SectionNumberField", "SectionPageNumberField", "SectionPageCountField", _
                   "PageNumberField", "PageCountField", "DestinationPageNumberField", "CompositeField"}
            Dim font As New PdfTrueTypeFont(New Font("Arial", 9.0F))
            Dim fieldNameFormat As New PdfStringFormat()
            fieldNameFormat.MeasureTrailingSpaces = True
            For Each fieldName As String In fieldList
                'draw field name
                Dim text As String = String.Format("{0}: ", fieldName)
                page.Canvas.DrawString(text, font, PdfBrushes.DodgerBlue, 0, y)
                Dim x As Single = font.MeasureString(text, fieldNameFormat).Width
                Dim bounds As New RectangleF(x, y, 200, font.Height)
                DrawAutomaticField(fieldName, page, bounds)
                y = y + font.Height + 3
            Next fieldName
        End Sub

        Private Shared Sub DrawAutomaticField(ByVal fieldName As String, ByVal page As PdfPageBase, _
                                              ByVal bounds As RectangleF)
            Dim font As New PdfTrueTypeFont(New Font("Arial", 9.0F, FontStyle.Italic))
            Dim brush As PdfBrush = PdfBrushes.OrangeRed
            Dim format As New PdfStringFormat(PdfTextAlignment.Left, PdfVerticalAlignment.Middle)

            If "DateTimeField" = fieldName Then
                Dim field As New PdfDateTimeField()
                field.Font = font
                field.Brush = brush
                field.StringFormat = format
                field.Bounds = bounds
                field.DateFormatString = "yyyy-MM-dd HH:mm:ss"
                field.Draw(page.Canvas)
            End If

            If "CreationDateField" = fieldName Then
                Dim field As New PdfCreationDateField()
                field.Font = font
                field.Brush = brush
                field.StringFormat = format
                field.Bounds = bounds
                field.DateFormatString = "yyyy-MM-dd HH:mm:ss"
                field.Draw(page.Canvas)
            End If

            If "DocumentAuthorField" = fieldName Then
                Dim field As New PdfDocumentAuthorField()
                field.Font = font
                field.Brush = brush
                field.StringFormat = format
                field.Bounds = bounds
                field.Draw(page.Canvas)
            End If


            If "SectionNumberField" = fieldName Then
                Dim field As New PdfSectionNumberField()
                field.Font = font
                field.Brush = brush
                field.StringFormat = format
                field.Bounds = bounds
                field.Draw(page.Canvas)
            End If

            If "SectionPageNumberField" = fieldName Then
                Dim field As New PdfSectionPageNumberField()
                field.Font = font
                field.Brush = brush
                field.StringFormat = format
                field.Bounds = bounds
                field.Draw(page.Canvas)
            End If

            If "SectionPageCountField" = fieldName Then
                Dim field As New PdfSectionPageCountField()
                field.Font = font
                field.Brush = brush
                field.StringFormat = format
                field.Bounds = bounds
                field.Draw(page.Canvas)
            End If

            If "PageNumberField" = fieldName Then
                Dim field As New PdfPageNumberField()
                field.Font = font
                field.Brush = brush
                field.StringFormat = format
                field.Bounds = bounds
                field.Draw(page.Canvas)
            End If

            If "PageCountField" = fieldName Then
                Dim field As New PdfPageCountField()
                field.Font = font
                field.Brush = brush
                field.StringFormat = format
                field.Bounds = bounds
                field.Draw(page.Canvas)
            End If

            If "DestinationPageNumberField" = fieldName Then
                Dim field As New PdfDestinationPageNumberField()
                field.Font = font
                field.Brush = brush
                field.StringFormat = format
                field.Bounds = bounds
                field.Page = TryCast(page, PdfNewPage)
                field.Draw(page.Canvas)
            End If

            If "CompositeField" = fieldName Then
                Dim field1 As New PdfSectionPageNumberField()
                field1.NumberStyle = PdfNumberStyle.LowerRoman
                Dim field2 As New PdfSectionPageCountField()
                Dim fields As New PdfCompositeField()
                fields.Font = font
                fields.Brush = brush
                fields.StringFormat = format
                fields.Bounds = bounds
                fields.AutomaticFields = New PdfAutomaticField() {field1, field2}
                fields.Text = "section page {0} of {1}"
                fields.Draw(page.Canvas)
            End If
        End Sub
    End Class
End Namespace
Tuesday, 05 April 2011 09:39
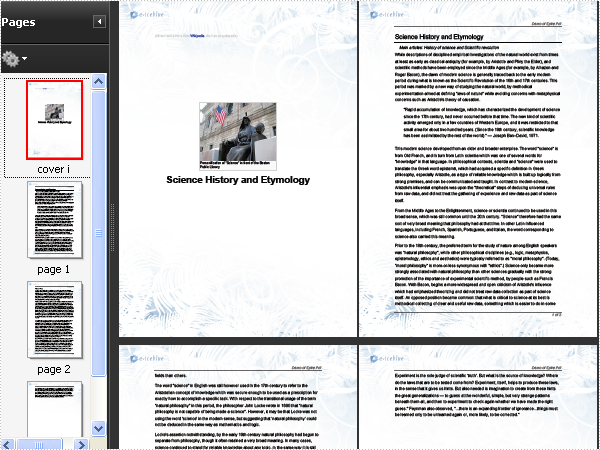
PDF Pagination in C#, VB.NET
The sample demonstrates how to paginate pages, draw page header&footer and set page label in PDF document.
using System;
using System.Collections.Generic;
using System.Drawing;
using System.Text;
using System.Windows.Forms;
using Spire.Pdf;
using Spire.Pdf.Graphics;


namespace Pagination
{
    public partial class Form1 : Form
    {
        public Form1()
        {
            InitializeComponent();
        }

        private void button1_Click(object sender, EventArgs e)
        {
            //Create a pdf document.
            PdfDocument doc = new PdfDocument();

            //margin
            PdfUnitConvertor unitCvtr = new PdfUnitConvertor();
            PdfMargins margin = new PdfMargins();
            margin.Top = unitCvtr.ConvertUnits(2.54f, PdfGraphicsUnit.Centimeter, PdfGraphicsUnit.Point);
            margin.Bottom = margin.Top;
            margin.Left = unitCvtr.ConvertUnits(3.17f, PdfGraphicsUnit.Centimeter, PdfGraphicsUnit.Point);
            margin.Right = margin.Left;

            DrawCover(doc.Sections.Add(), margin);
            DrawContent(doc.Sections.Add(), margin);
            DrawPageNumber(doc.Sections[1], margin, 1, doc.Sections[1].Pages.Count);

            //Save pdf file.
            doc.SaveToFile("Pagination.pdf");
            doc.Close();

            //Launching the Pdf file.
            PDFDocumentViewer("Pagination.pdf");
        }

        private void DrawCover(PdfSection section, PdfMargins margin)
        {
            section.PageNumber = new PdfPageNumber();
            section.PageNumber.NumberStyle = PdfNumberStyle.LowerRoman;
            section.PageNumber.Prefix = "cover ";
            section.PageSettings.Size = PdfPageSize.A4;
            section.PageSettings.Margins.All = 0;
            PdfPageBase page = section.Pages.Add();
            DrawPageHeaderAndFooter(page, margin, true);

            //refenrence content
            PdfBrush brush1 = PdfBrushes.LightGray;
            PdfBrush brush2 = PdfBrushes.Blue;
            PdfTrueTypeFont font1 = new PdfTrueTypeFont(new Font("Arial", 8f));
            PdfStringFormat format = new PdfStringFormat();
            format.MeasureTrailingSpaces = true;
            String text1 = "(All text and picture from ";
            String text2 = "Wikipedia";
            String text3 = ", the free encyclopedia)";
            float x = 0, y = 10;
            x = x + margin.Left;
            y = y + margin.Top;
            page.Canvas.DrawString(text1, font1, brush1, x, y, format);
            x = x + font1.MeasureString(text1, format).Width;
            page.Canvas.DrawString(text2, font1, brush2, x, y, format);
            x = x + font1.MeasureString(text2, format).Width;
            page.Canvas.DrawString(text3, font1, brush1, x, y, format);

            //cover
            PdfBrush brush3 = PdfBrushes.Black;
            PdfBrush brush4 = new PdfSolidBrush(new PdfRGBColor(0xf9, 0xf9, 0xf9));
            PdfImage image
                = PdfImage.FromFile(@"..\..\..\..\..\..\Data\SciencePersonificationBoston.jpg");
            String text = Pagination.Properties.Resources.ImageDescription;
            float r = image.PhysicalDimension.Height / image.Height;
            PdfPen pen = new PdfPen(brush1, r);
            SizeF size = font1.MeasureString(text, image.PhysicalDimension.Width - 2);
            PdfTemplate template
                = new PdfTemplate(image.PhysicalDimension.Width + 4 * r + 4,
                    image.PhysicalDimension.Height + 4 * r + 7 + size.Height);
            template.Graphics.DrawRectangle(pen, brush4, 0, 0, template.Width, template.Height);
            x = y = r + 2;
            template.Graphics.DrawRectangle(brush1, x, y,
                image.PhysicalDimension.Width + 2 * r,
                image.PhysicalDimension.Height + 2 * r);
            x = y = x + r;
            template.Graphics.DrawImage(image, x, y);

            x = x - 1;
            y = y + image.PhysicalDimension.Height + r + 2;
            template.Graphics.DrawString(text, font1, brush3,
                new RectangleF(new PointF(x, y), size));

            float x1 = (page.Canvas.ClientSize.Width - template.Width) / 2;
            float y1 = (page.Canvas.ClientSize.Height - margin.Top - margin.Bottom) * (1 - 0.618f) - template.Height / 2 + margin.Top;
            template.Draw(page.Canvas, x1, y1);

            //title
            format.Alignment = PdfTextAlignment.Center;
            PdfTrueTypeFont font2 = new PdfTrueTypeFont(new Font("Arial", 24f, FontStyle.Bold));
            x = page.Canvas.ClientSize.Width / 2;
            y = y1 + template.Height + 10;
            page.Canvas.DrawString(Pagination.Properties.Resources.Title, font2, brush3, x, y, format);
        }

        private void DrawContent(PdfSection section, PdfMargins margin)
        {
            section.PageNumber = new PdfPageNumber();
            section.PageNumber.NumberStyle = PdfNumberStyle.Numeric;
            section.PageNumber.Prefix = "page ";
            section.PageSettings.Size = PdfPageSize.A4;
            section.PageSettings.Margins.All = 0;
            PdfPageBase page = section.Pages.Add();
            DrawPageHeaderAndFooter(page, margin, false);

            float x = margin.Left;
            float y = margin.Top + 8;
            float width = page.Canvas.ClientSize.Width - margin.Left - margin.Right;
            PdfTrueTypeFont font1 = new PdfTrueTypeFont(new Font("Arial", 16f), true);
            PdfBrush brush1 = PdfBrushes.Black;
            PdfPen pen1 = new PdfPen(brush1, 0.75f);
            page.Canvas.DrawString(Pagination.Properties.Resources.Title, font1, brush1, x, y);
            y = y + font1.MeasureString(Pagination.Properties.Resources.Title).Height + 6;
            page.Canvas.DrawLine(pen1, x, y, page.Canvas.ClientSize.Width - margin.Right, y);
            y = y + 1.75f;

            String content = Pagination.Properties.Resources.Content;
            String[] lines
                = content.Split(new char[] { '\r', '\n' }, StringSplitOptions.RemoveEmptyEntries);
            PdfTrueTypeFont font2 = new PdfTrueTypeFont(new Font("Arial", 10f, FontStyle.Italic), true);
            PdfStringFormat format1 = new PdfStringFormat();
            format1.MeasureTrailingSpaces = true;
            format1.LineSpacing = font2.Height * 1.5f;
            format1.ParagraphIndent = font2.MeasureString("\t", format1).Width;
            y = y + font2.Height * 0.5f;
            SizeF size = font2.MeasureString(lines[0], width, format1);
            page.Canvas.DrawString(lines[0], font2, brush1,
                new RectangleF(new PointF(x, y), size), format1);
            y = y + size.Height;

            PdfTrueTypeFont font3 = new PdfTrueTypeFont(new Font("Arial", 10f), true);
            PdfStringFormat format2 = new PdfStringFormat();
            format2.LineSpacing = font3.Height * 1.4f;
            format2.MeasureTrailingSpaces = true;
            size = font3.MeasureString(lines[1], width, format2);
            page.Canvas.DrawString(lines[1], font3, brush1,
                new RectangleF(new PointF(x, y), size), format2);
            y = y + size.Height;

            y = y + font3.Height * 0.75f;
            float indent = font3.MeasureString("\t\t", format2).Width;
            float x1 = x + indent;
            size = font3.MeasureString(lines[2], width - indent, format2);
            page.Canvas.DrawString(lines[2], font3, brush1,
                new RectangleF(new PointF(x1, y), size), format2);
            y = y + size.Height + font3.Height * 0.75f;

            StringBuilder buff = new StringBuilder();
            for (int i = 3; i < lines.Length; i++)
            {
                buff.AppendLine(lines[i]);
            }
            content = buff.ToString();

            PdfStringLayouter textLayouter = new PdfStringLayouter();
            PdfStringLayoutResult result
                = textLayouter.Layout(content, font3, format2, new SizeF(width, float.MaxValue));
            foreach (LineInfo line in result.Lines)
            {
                if ((line.LineType & LineType.FirstParagraphLine) == LineType.FirstParagraphLine)
                {
                    y = y + font3.Height * 0.75f;
                }
                if (y > (page.Canvas.ClientSize.Height - margin.Bottom - result.LineHeight))
                {
                    page = section.Pages.Add();
                    DrawPageHeaderAndFooter(page, margin, false);
                    y = margin.Top;
                }
                page.Canvas.DrawString(line.Text, font3, brush1, x, y, format2);
                y = y + result.LineHeight;
            }
        }

        private void DrawPageHeaderAndFooter(PdfPageBase page, PdfMargins margin, bool isCover)
        {
            page.Canvas.SetTransparency(0.5f);
            PdfImage headerImage
                = PdfImage.FromFile(@"..\..\..\..\..\..\Data\Header.png");
            PdfImage footerImage
                = PdfImage.FromFile(@"..\..\..\..\..\..\Data\Footer.png");
            page.Canvas.DrawImage(headerImage, new PointF(0, 0));
            page.Canvas.DrawImage(footerImage, new PointF(0, page.Canvas.ClientSize.Height - footerImage.PhysicalDimension.Height));
            if (isCover)
            {
                page.Canvas.SetTransparency(1);
                return;
            }

            PdfBrush brush = PdfBrushes.Black;
            PdfPen pen = new PdfPen(brush, 0.75f);
            PdfTrueTypeFont font = new PdfTrueTypeFont(new Font("Arial", 9f, FontStyle.Italic), true);
            PdfStringFormat format = new PdfStringFormat(PdfTextAlignment.Right);
            format.MeasureTrailingSpaces = true;
            float space = font.Height * 0.75f;
            float x = margin.Left;
            float width = page.Canvas.ClientSize.Width - margin.Left - margin.Right;
            float y = margin.Top - space;
            page.Canvas.DrawLine(pen, x, y, x + width, y);
            y = y - 1 - font.Height;
            page.Canvas.DrawString("Demo of Spire.Pdf", font, brush, x + width, y, format);
            page.Canvas.SetTransparency(1);
        }

        private void DrawPageNumber(PdfSection section, PdfMargins margin, int startNumber, int pageCount)
        {
            foreach (PdfPageBase page in section.Pages)
            {
                page.Canvas.SetTransparency(0.5f);
                PdfBrush brush = PdfBrushes.Black;
                PdfPen pen = new PdfPen(brush, 0.75f);
                PdfTrueTypeFont font = new PdfTrueTypeFont(new Font("Arial", 9f, FontStyle.Italic), true);
                PdfStringFormat format = new PdfStringFormat(PdfTextAlignment.Right);
                format.MeasureTrailingSpaces = true;
                float space = font.Height * 0.75f;
                float x = margin.Left;
                float width = page.Canvas.ClientSize.Width - margin.Left - margin.Right;
                float y = page.Canvas.ClientSize.Height - margin.Bottom + space;
                page.Canvas.DrawLine(pen, x, y, x + width, y);
                y = y + 1;
                String numberLabel
                    = String.Format("{0} of {1}", startNumber++, pageCount);
                page.Canvas.DrawString(numberLabel, font, brush, x + width, y, format);
                page.Canvas.SetTransparency(1);
            }
        }

        private void PDFDocumentViewer(string fileName)
        {
            try
            {
                System.Diagnostics.Process.Start(fileName);
            }
            catch { }
        }

    }
}
Imports System.Collections.Generic
Imports System.Drawing
Imports System.Text
Imports System.Windows.Forms
Imports Spire.Pdf
Imports Spire.Pdf.Graphics


Namespace Pagination
	Public Partial Class Form1
		Inherits Form
		Public Sub New()
			InitializeComponent()
		End Sub

		Private Sub button1_Click(sender As Object, e As EventArgs)
			'Create a pdf document.
			Dim doc As New PdfDocument()

			'margin
			Dim unitCvtr As New PdfUnitConvertor()
			Dim margin As New PdfMargins()
			margin.Top = unitCvtr.ConvertUnits(2.54F, PdfGraphicsUnit.Centimeter, PdfGraphicsUnit.Point)
			margin.Bottom = margin.Top
			margin.Left = unitCvtr.ConvertUnits(3.17F, PdfGraphicsUnit.Centimeter, PdfGraphicsUnit.Point)
			margin.Right = margin.Left

			DrawCover(doc.Sections.Add(), margin)
			DrawContent(doc.Sections.Add(), margin)
			DrawPageNumber(doc.Sections(1), margin, 1, doc.Sections(1).Pages.Count)

			'Save pdf file.
			doc.SaveToFile("Pagination.pdf")
			doc.Close()

			'Launching the Pdf file.
			PDFDocumentViewer("Pagination.pdf")
		End Sub

		Private Sub DrawCover(section As PdfSection, margin As PdfMargins)
			section.PageNumber = New PdfPageNumber()
			section.PageNumber.NumberStyle = PdfNumberStyle.LowerRoman
			section.PageNumber.Prefix = "cover "
			section.PageSettings.Size = PdfPageSize.A4
			section.PageSettings.Margins.All = 0
			Dim page As PdfPageBase = section.Pages.Add()
			DrawPageHeaderAndFooter(page, margin, True)

			'refenrence content
			Dim brush1 As PdfBrush = PdfBrushes.LightGray
			Dim brush2 As PdfBrush = PdfBrushes.Blue
			Dim font1 As New PdfTrueTypeFont(New Font("Arial", 8F))
			Dim format As New PdfStringFormat()
			format.MeasureTrailingSpaces = True
			Dim text1 As [String] = "(All text and picture from "
			Dim text2 As [String] = "Wikipedia"
			Dim text3 As [String] = ", the free encyclopedia)"
			Dim x As Single = 0, y As Single = 10
			x = x + margin.Left
			y = y + margin.Top
			page.Canvas.DrawString(text1, font1, brush1, x, y, format)
			x = x + font1.MeasureString(text1, format).Width
			page.Canvas.DrawString(text2, font1, brush2, x, y, format)
			x = x + font1.MeasureString(text2, format).Width
			page.Canvas.DrawString(text3, font1, brush1, x, y, format)

			'cover
			Dim brush3 As PdfBrush = PdfBrushes.Black
			Dim brush4 As PdfBrush = New PdfSolidBrush(New PdfRGBColor(&Hf9, &Hf9, &Hf9))
			Dim image As PdfImage = PdfImage.FromFile("..\..\..\..\..\..\Data\SciencePersonificationBoston.jpg")
			Dim text As [String] = Pagination.Properties.Resources.ImageDescription
			Dim r As Single = image.PhysicalDimension.Height / image.Height
			Dim pen As New PdfPen(brush1, r)
			Dim size As SizeF = font1.MeasureString(text, image.PhysicalDimension.Width - 2)
			Dim template As New PdfTemplate(image.PhysicalDimension.Width + 4 * r + 4, image.PhysicalDimension.Height + 4 * r + 7 + size.Height)
			template.Graphics.DrawRectangle(pen, brush4, 0, 0, template.Width, template.Height)
			x = InlineAssignHelper(y, r + 2)
			template.Graphics.DrawRectangle(brush1, x, y, image.PhysicalDimension.Width + 2 * r, image.PhysicalDimension.Height + 2 * r)
			x = InlineAssignHelper(y, x + r)
			template.Graphics.DrawImage(image, x, y)

			x = x - 1
			y = y + image.PhysicalDimension.Height + r + 2
			template.Graphics.DrawString(text, font1, brush3, New RectangleF(New PointF(x, y), size))

			Dim x1 As Single = (page.Canvas.ClientSize.Width - template.Width) / 2
			Dim y1 As Single = (page.Canvas.ClientSize.Height - margin.Top - margin.Bottom) * (1 - 0.618F) - template.Height / 2 + margin.Top
			template.Draw(page.Canvas, x1, y1)

			'title
			format.Alignment = PdfTextAlignment.Center
			Dim font2 As New PdfTrueTypeFont(New Font("Arial", 24F, FontStyle.Bold))
			x = page.Canvas.ClientSize.Width / 2
			y = y1 + template.Height + 10
			page.Canvas.DrawString(Pagination.Properties.Resources.Title, font2, brush3, x, y, format)
		End Sub

		Private Sub DrawContent(section As PdfSection, margin As PdfMargins)
			section.PageNumber = New PdfPageNumber()
			section.PageNumber.NumberStyle = PdfNumberStyle.Numeric
			section.PageNumber.Prefix = "page "
			section.PageSettings.Size = PdfPageSize.A4
			section.PageSettings.Margins.All = 0
			Dim page As PdfPageBase = section.Pages.Add()
			DrawPageHeaderAndFooter(page, margin, False)

			Dim x As Single = margin.Left
			Dim y As Single = margin.Top + 8
			Dim width As Single = page.Canvas.ClientSize.Width - margin.Left - margin.Right
			Dim font1 As New PdfTrueTypeFont(New Font("Arial", 16F), True)
			Dim brush1 As PdfBrush = PdfBrushes.Black
			Dim pen1 As New PdfPen(brush1, 0.75F)
			page.Canvas.DrawString(Pagination.Properties.Resources.Title, font1, brush1, x, y)
			y = y + font1.MeasureString(Pagination.Properties.Resources.Title).Height + 6
			page.Canvas.DrawLine(pen1, x, y, page.Canvas.ClientSize.Width - margin.Right, y)
			y = y + 1.75F

			Dim content As [String] = Pagination.Properties.Resources.Content
			Dim lines As [String]() = content.Split(New Char() {ControlChars.Cr, ControlChars.Lf}, StringSplitOptions.RemoveEmptyEntries)
			Dim font2 As New PdfTrueTypeFont(New Font("Arial", 10F, FontStyle.Italic), True)
			Dim format1 As New PdfStringFormat()
			format1.MeasureTrailingSpaces = True
			format1.LineSpacing = font2.Height * 1.5F
			format1.ParagraphIndent = font2.MeasureString(vbTab, format1).Width
			y = y + font2.Height * 0.5F
			Dim size As SizeF = font2.MeasureString(lines(0), width, format1)
			page.Canvas.DrawString(lines(0), font2, brush1, New RectangleF(New PointF(x, y), size), format1)
			y = y + size.Height

			Dim font3 As New PdfTrueTypeFont(New Font("Arial", 10F), True)
			Dim format2 As New PdfStringFormat()
			format2.LineSpacing = font3.Height * 1.4F
			format2.MeasureTrailingSpaces = True
			size = font3.MeasureString(lines(1), width, format2)
			page.Canvas.DrawString(lines(1), font3, brush1, New RectangleF(New PointF(x, y), size), format2)
			y = y + size.Height

			y = y + font3.Height * 0.75F
			Dim indent As Single = font3.MeasureString(vbTab & vbTab, format2).Width
			Dim x1 As Single = x + indent
			size = font3.MeasureString(lines(2), width - indent, format2)
			page.Canvas.DrawString(lines(2), font3, brush1, New RectangleF(New PointF(x1, y), size), format2)
			y = y + size.Height + font3.Height * 0.75F

			Dim buff As New StringBuilder()
			For i As Integer = 3 To lines.Length - 1
				buff.AppendLine(lines(i))
			Next
			content = buff.ToString()

			Dim textLayouter As New PdfStringLayouter()
			Dim result As PdfStringLayoutResult = textLayouter.Layout(content, font3, format2, New SizeF(width, Single.MaxValue))
			For Each line As LineInfo In result.Lines
				If (line.LineType And LineType.FirstParagraphLine) = LineType.FirstParagraphLine Then
					y = y + font3.Height * 0.75F
				End If
				If y > (page.Canvas.ClientSize.Height - margin.Bottom - result.LineHeight) Then
					page = section.Pages.Add()
					DrawPageHeaderAndFooter(page, margin, False)
					y = margin.Top
				End If
				page.Canvas.DrawString(line.Text, font3, brush1, x, y, format2)
				y = y + result.LineHeight
			Next
		End Sub

		Private Sub DrawPageHeaderAndFooter(page As PdfPageBase, margin As PdfMargins, isCover As Boolean)
			page.Canvas.SetTransparency(0.5F)
			Dim headerImage As PdfImage = PdfImage.FromFile("..\..\..\..\..\..\Data\Header.png")
			Dim footerImage As PdfImage = PdfImage.FromFile("..\..\..\..\..\..\Data\Footer.png")
			page.Canvas.DrawImage(headerImage, New PointF(0, 0))
			page.Canvas.DrawImage(footerImage, New PointF(0, page.Canvas.ClientSize.Height - footerImage.PhysicalDimension.Height))
			If isCover Then
				page.Canvas.SetTransparency(1)
				Return
			End If

			Dim brush As PdfBrush = PdfBrushes.Black
			Dim pen As New PdfPen(brush, 0.75F)
			Dim font As New PdfTrueTypeFont(New Font("Arial", 9F, FontStyle.Italic), True)
			Dim format As New PdfStringFormat(PdfTextAlignment.Right)
			format.MeasureTrailingSpaces = True
			Dim space As Single = font.Height * 0.75F
			Dim x As Single = margin.Left
			Dim width As Single = page.Canvas.ClientSize.Width - margin.Left - margin.Right
			Dim y As Single = margin.Top - space
			page.Canvas.DrawLine(pen, x, y, x + width, y)
			y = y - 1 - font.Height
			page.Canvas.DrawString("Demo of Spire.Pdf", font, brush, x + width, y, format)
			page.Canvas.SetTransparency(1)
		End Sub

		Private Sub DrawPageNumber(section As PdfSection, margin As PdfMargins, startNumber As Integer, pageCount As Integer)
			For Each page As PdfPageBase In section.Pages
				page.Canvas.SetTransparency(0.5F)
				Dim brush As PdfBrush = PdfBrushes.Black
				Dim pen As New PdfPen(brush, 0.75F)
				Dim font As New PdfTrueTypeFont(New Font("Arial", 9F, FontStyle.Italic), True)
				Dim format As New PdfStringFormat(PdfTextAlignment.Right)
				format.MeasureTrailingSpaces = True
				Dim space As Single = font.Height * 0.75F
				Dim x As Single = margin.Left
				Dim width As Single = page.Canvas.ClientSize.Width - margin.Left - margin.Right
				Dim y As Single = page.Canvas.ClientSize.Height - margin.Bottom + space
				page.Canvas.DrawLine(pen, x, y, x + width, y)
				y = y + 1
				Dim numberLabel As [String] = [String].Format("{0} of {1}", System.Math.Max(System.Threading.Interlocked.Increment(startNumber),startNumber - 1), pageCount)
				page.Canvas.DrawString(numberLabel, font, brush, x + width, y, format)
				page.Canvas.SetTransparency(1)
			Next
		End Sub

		Private Sub PDFDocumentViewer(fileName As String)
			Try
				System.Diagnostics.Process.Start(fileName)
			Catch
			End Try
		End Sub
		Private Shared Function InlineAssignHelper(Of T)(ByRef target As T, value As T) As T
			target = value
			Return value
		End Function

	End Class
End Namespace
Published in
Page
Tagged under
Tuesday, 05 April 2011 09:32
PDF PageSetup in C#, VB.NET

using System;
using System.Drawing;
using Spire.Pdf;
using Spire.Pdf.AutomaticFields;
using Spire.Pdf.Graphics;

namespace PageSetup
{
    class Program
    {
        static void Main(string[] args)
        {
            //Create a pdf document.
            PdfDocument doc = new PdfDocument();

            //margin
            PdfUnitConvertor unitCvtr = new PdfUnitConvertor();
            PdfMargins margin = new PdfMargins();
            margin.Top = unitCvtr.ConvertUnits(2.54f, PdfGraphicsUnit.Centimeter, PdfGraphicsUnit.Point);
            margin.Bottom = margin.Top;
            margin.Left = unitCvtr.ConvertUnits(3.17f, PdfGraphicsUnit.Centimeter, PdfGraphicsUnit.Point);
            margin.Right = margin.Left;

            // Create one page
            PdfPageBase page = doc.Pages.Add(PdfPageSize.A4, margin);
            page.BackgroundColor = Color.Chocolate;

            //Draw page
            DrawPage(page);

            page = doc.Pages.Add(PdfPageSize.A4, margin);
            page.BackgroundColor = Color.Coral;

            //Draw page
            DrawPage(page);

            page = doc.Pages.Add(PdfPageSize.A3, margin, PdfPageRotateAngle.RotateAngle180, PdfPageOrientation.Landscape);
            page.BackgroundColor = Color.LightPink;

            //Draw page
            DrawPage(page);

            //create section
            PdfSection section = doc.Sections.Add();
            section.PageSettings.Size = PdfPageSize.A4;
            section.PageSettings.Margins = margin;

            page = section.Pages.Add();

            //Draw page
            DrawPage(page);

            //set background color
            page = section.Pages.Add();
            page.BackgroundColor = Color.LightSkyBlue;
            DrawPage(page);

            //Landscape
            section = doc.Sections.Add();
            section.PageSettings.Size = PdfPageSize.A4;
            section.PageSettings.Margins = margin;
            section.PageSettings.Orientation = PdfPageOrientation.Landscape;
            page = section.Pages.Add();
            DrawPage(page);

            //Rotate 90
            section = doc.Sections.Add();
            section.PageSettings.Size = PdfPageSize.A4;
            section.PageSettings.Margins = margin;
            section.PageSettings.Rotate = PdfPageRotateAngle.RotateAngle90;
            page = section.Pages.Add();
            DrawPage(page);

            //Rotate 180
            section = doc.Sections.Add();
            section.PageSettings.Size = PdfPageSize.A4;
            section.PageSettings.Margins = margin;
            section.PageSettings.Rotate = PdfPageRotateAngle.RotateAngle180;
            page = section.Pages.Add();
            DrawPage(page);

            //Save pdf file.
            doc.SaveToFile("PageSetup.pdf");
            doc.Close();

            //Launching the Pdf file.
            System.Diagnostics.Process.Start("PageSetup.pdf");
        }

        private static void DrawPage(PdfPageBase page)
        {
            float pageWidth = page.Canvas.ClientSize.Width;
            float y = 0;

            //title
            y = y + 5;
            PdfBrush brush2 = new PdfSolidBrush(Color.Black);
            PdfTrueTypeFont font2 = new PdfTrueTypeFont(new Font("Arial", 16f, FontStyle.Bold));
            PdfStringFormat format2 = new PdfStringFormat(PdfTextAlignment.Center);
            format2.CharacterSpacing = 1f;
            String text = "Summary of Science";
            page.Canvas.DrawString(text, font2, brush2, pageWidth / 2, y, format2);
            SizeF size = font2.MeasureString(text, format2);
            y = y + size.Height + 6;

            //icon
            PdfImage image = PdfImage.FromFile("Wikipedia_Science.png");
            page.Canvas.DrawImage(image, new PointF(pageWidth - image.PhysicalDimension.Width, y));
            float imageLeftSpace = pageWidth - image.PhysicalDimension.Width - 2;
            float imageBottom = image.PhysicalDimension.Height + y;

            //refenrence content
            PdfTrueTypeFont font3 = new PdfTrueTypeFont(new Font("Arial", 9f));
            PdfStringFormat format3 = new PdfStringFormat();
            format3.ParagraphIndent = font3.Size * 2;
            format3.MeasureTrailingSpaces = true;
            format3.LineSpacing = font3.Size * 1.5f;
            String text1 = "(All text and picture from ";
            String text2 = "Wikipedia";
            String text3 = ", the free encyclopedia)";
            page.Canvas.DrawString(text1, font3, brush2, 0, y, format3);

            size = font3.MeasureString(text1, format3);
            float x1 = size.Width;
            format3.ParagraphIndent = 0;
            PdfTrueTypeFont font4 = new PdfTrueTypeFont(new Font("Arial", 9f, FontStyle.Underline));
            PdfBrush brush3 = PdfBrushes.Blue;
            page.Canvas.DrawString(text2, font4, brush3, x1, y, format3);
            size = font4.MeasureString(text2, format3);
            x1 = x1 + size.Width;

            page.Canvas.DrawString(text3, font3, brush2, x1, y, format3);
            y = y + size.Height;

            //content
            PdfStringFormat format4 = new PdfStringFormat();
            text = System.IO.File.ReadAllText("Summary_of_Science.txt");
            PdfTrueTypeFont font5 = new PdfTrueTypeFont(new Font("Arial", 10f));
            format4.LineSpacing = font5.Size * 1.5f;
            PdfStringLayouter textLayouter = new PdfStringLayouter();
            float imageLeftBlockHeight = imageBottom - y;
            PdfStringLayoutResult result
                = textLayouter.Layout(text, font5, format4, new SizeF(imageLeftSpace, imageLeftBlockHeight));
            if (result.ActualSize.Height < imageBottom - y)
            {
                imageLeftBlockHeight = imageLeftBlockHeight + result.LineHeight;
                result = textLayouter.Layout(text, font5, format4, new SizeF(imageLeftSpace, imageLeftBlockHeight));
            }
            foreach (LineInfo line in result.Lines)
            {
                page.Canvas.DrawString(line.Text, font5, brush2, 0, y, format4);
                y = y + result.LineHeight;
            }
            PdfTextWidget textWidget = new PdfTextWidget(result.Remainder, font5, brush2);
            PdfTextLayout textLayout = new PdfTextLayout();
            textLayout.Break = PdfLayoutBreakType.FitPage;
            textLayout.Layout = PdfLayoutType.Paginate;
            RectangleF bounds = new RectangleF(new PointF(0, y), page.Canvas.ClientSize);
            textWidget.StringFormat = format4;
            textWidget.Draw(page, bounds, textLayout);
        }
    }
}
Imports System.Drawing
Imports Spire.Pdf
Imports Spire.Pdf.AutomaticFields
Imports Spire.Pdf.Graphics

Namespace PageSetup
    Friend Class Program
        Shared Sub Main(ByVal args() As String)
            'Create a pdf document.
            Dim doc As New PdfDocument()

            'margin
            Dim unitCvtr As New PdfUnitConvertor()
            Dim margin As New PdfMargins()
            margin.Top = unitCvtr.ConvertUnits(2.54F, PdfGraphicsUnit.Centimeter, PdfGraphicsUnit.Point)
            margin.Bottom = margin.Top
            margin.Left = unitCvtr.ConvertUnits(3.17F, PdfGraphicsUnit.Centimeter, PdfGraphicsUnit.Point)
            margin.Right = margin.Left

            ' Create one page
            Dim page As PdfPageBase = doc.Pages.Add(PdfPageSize.A4, margin)
            page.BackgroundColor = Color.Chocolate

            'Draw page
            DrawPage(page)

            page = doc.Pages.Add(PdfPageSize.A4, margin)
            page.BackgroundColor = Color.Coral

            'Draw page
            DrawPage(page)

            page = doc.Pages.Add(PdfPageSize.A3, margin, PdfPageRotateAngle.RotateAngle180, _
                                 PdfPageOrientation.Landscape)
            page.BackgroundColor = Color.LightPink

            'Draw page
            DrawPage(page)

            'create section
            Dim section As PdfSection = doc.Sections.Add()
            section.PageSettings.Size = PdfPageSize.A4
            section.PageSettings.Margins = margin

            page = section.Pages.Add()

            'Draw page
            DrawPage(page)

            'set background color
            page = section.Pages.Add()
            page.BackgroundColor = Color.LightSkyBlue
            DrawPage(page)

            'Landscape
            section = doc.Sections.Add()
            section.PageSettings.Size = PdfPageSize.A4
            section.PageSettings.Margins = margin
            section.PageSettings.Orientation = PdfPageOrientation.Landscape
            page = section.Pages.Add()
            DrawPage(page)

            'Rotate 90
            section = doc.Sections.Add()
            section.PageSettings.Size = PdfPageSize.A4
            section.PageSettings.Margins = margin
            section.PageSettings.Rotate = PdfPageRotateAngle.RotateAngle90
            page = section.Pages.Add()
            DrawPage(page)

            'Rotate 180
            section = doc.Sections.Add()
            section.PageSettings.Size = PdfPageSize.A4
            section.PageSettings.Margins = margin
            section.PageSettings.Rotate = PdfPageRotateAngle.RotateAngle180
            page = section.Pages.Add()
            DrawPage(page)

            'Save pdf file.
            doc.SaveToFile("PageSetup.pdf")
            doc.Close()

            'Launching the Pdf file.
            Process.Start("PageSetup.pdf")
        End Sub

        Private Shared Sub DrawPage(ByVal page As PdfPageBase)
            Dim pageWidth As Single = page.Canvas.ClientSize.Width
            Dim y As Single = 0

            'title
            y = y + 5
            Dim brush2 As PdfBrush = New PdfSolidBrush(Color.Black)
            Dim font2 As New PdfTrueTypeFont(New Font("Arial", 16.0F, FontStyle.Bold))
            Dim format2 As New PdfStringFormat(PdfTextAlignment.Center)
            format2.CharacterSpacing = 1.0F
            Dim text As String = "Summary of Science"
            page.Canvas.DrawString(text, font2, brush2, pageWidth / 2, y, format2)
            Dim size As SizeF = font2.MeasureString(text, format2)
            y = y + size.Height + 6

            'icon
            Dim image As PdfImage = PdfImage.FromFile("Wikipedia_Science.png")
            page.Canvas.DrawImage(image, New PointF(pageWidth - image.PhysicalDimension.Width, y))
            Dim imageLeftSpace As Single = pageWidth - image.PhysicalDimension.Width - 2
            Dim imageBottom As Single = image.PhysicalDimension.Height + y

            'refenrence content
            Dim font3 As New PdfTrueTypeFont(New Font("Arial", 9.0F))
            Dim format3 As New PdfStringFormat()
            format3.ParagraphIndent = font3.Size * 2
            format3.MeasureTrailingSpaces = True
            format3.LineSpacing = font3.Size * 1.5F
            Dim text1 As String = "(All text and picture from "
            Dim text2 As String = "Wikipedia"
            Dim text3 As String = ", the free encyclopedia)"
            page.Canvas.DrawString(text1, font3, brush2, 0, y, format3)

            size = font3.MeasureString(text1, format3)
            Dim x1 As Single = size.Width
            format3.ParagraphIndent = 0
            Dim font4 As New PdfTrueTypeFont(New Font("Arial", 9.0F, FontStyle.Underline))
            Dim brush3 As PdfBrush = PdfBrushes.Blue
            page.Canvas.DrawString(text2, font4, brush3, x1, y, format3)
            size = font4.MeasureString(text2, format3)
            x1 = x1 + size.Width

            page.Canvas.DrawString(text3, font3, brush2, x1, y, format3)
            y = y + size.Height

            'content
            Dim format4 As New PdfStringFormat()
            text = System.IO.File.ReadAllText("Summary_of_Science.txt")
            Dim font5 As New PdfTrueTypeFont(New Font("Arial", 10.0F))
            format4.LineSpacing = font5.Size * 1.5F
            Dim textLayouter As New PdfStringLayouter()
            Dim imageLeftBlockHeight As Single = imageBottom - y
            Dim result As PdfStringLayoutResult _
                = textLayouter.Layout(text, font5, format4, New SizeF(imageLeftSpace, imageLeftBlockHeight))
            If result.ActualSize.Height < imageBottom - y Then
                imageLeftBlockHeight = imageLeftBlockHeight + result.LineHeight
                result = textLayouter.Layout(text, font5, format4, New SizeF(imageLeftSpace, imageLeftBlockHeight))
            End If
            For Each line As LineInfo In result.Lines
                page.Canvas.DrawString(line.Text, font5, brush2, 0, y, format4)
                y = y + result.LineHeight
            Next line
            Dim textWidget As New PdfTextWidget(result.Remainder, font5, brush2)
            Dim textLayout As New PdfTextLayout()
            textLayout.Break = PdfLayoutBreakType.FitPage
            textLayout.Layout = PdfLayoutType.Paginate
            Dim bounds As New RectangleF(New PointF(0, y), page.Canvas.ClientSize)
            textWidget.StringFormat = format4
            textWidget.Draw(page, bounds, textLayout)
        End Sub
    End Class
End Namespace
Tuesday, 05 April 2011 09:25
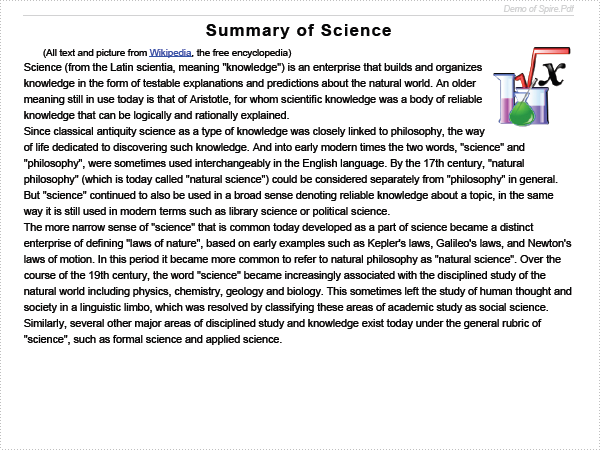
PDF TextLayout in C#, VB.NET
using System;
using System.Drawing;
using Spire.Pdf;
using Spire.Pdf.Graphics;

namespace TextLayout
{
    class Program
    {
        static void Main(string[] args)
        {
            //Create a pdf document.
            PdfDocument doc = new PdfDocument();

            // Create one page
            PdfPageBase page = doc.Pages.Add();
            float pageWidth = page.Canvas.ClientSize.Width;
            float y = 0;

            //page header
            PdfPen pen1 = new PdfPen(Color.LightGray, 1f);
            PdfBrush brush1 = new PdfSolidBrush(Color.LightGray);
            PdfTrueTypeFont font1 = new PdfTrueTypeFont(new Font("Arial", 8f, FontStyle.Italic));
            PdfStringFormat format1 = new PdfStringFormat(PdfTextAlignment.Right);
            String text = "Demo of Spire.Pdf";
            page.Canvas.DrawString(text, font1, brush1, pageWidth, y, format1);
            SizeF size = font1.MeasureString(text, format1);
            y = y + size.Height + 1;
            page.Canvas.DrawLine(pen1, 0, y, pageWidth, y);

            //title
            y = y + 5;
            PdfBrush brush2 = new PdfSolidBrush(Color.Black);
            PdfTrueTypeFont font2 = new PdfTrueTypeFont(new Font("Arial", 16f, FontStyle.Bold));
            PdfStringFormat format2 = new PdfStringFormat(PdfTextAlignment.Center);
            format2.CharacterSpacing = 1f;
            text = "Summary of Science";
            page.Canvas.DrawString(text, font2, brush2, pageWidth / 2, y, format2);
            size = font2.MeasureString(text, format2);
            y = y + size.Height + 6;

            //icon
            PdfImage image = PdfImage.FromFile("Wikipedia_Science.png");
            page.Canvas.DrawImage(image, new PointF(pageWidth - image.PhysicalDimension.Width, y));
            float imageLeftSpace = pageWidth - image.PhysicalDimension.Width - 2;
            float imageBottom = image.PhysicalDimension.Height + y;

            //refenrence content
            PdfTrueTypeFont font3 = new PdfTrueTypeFont(new Font("Arial", 9f));
            PdfStringFormat format3 = new PdfStringFormat();
            format3.ParagraphIndent = font3.Size * 2;
            format3.MeasureTrailingSpaces = true;
            format3.LineSpacing = font3.Size * 1.5f;
            String text1 = "(All text and picture from ";
            String text2 = "Wikipedia";
            String text3 = ", the free encyclopedia)";
            page.Canvas.DrawString(text1, font3, brush2, 0, y, format3);

            size = font3.MeasureString(text1, format3);
            float x1 = size.Width;
            format3.ParagraphIndent = 0;
            PdfTrueTypeFont font4 = new PdfTrueTypeFont(new Font("Arial", 9f, FontStyle.Underline));
            PdfBrush brush3 = PdfBrushes.Blue;
            page.Canvas.DrawString(text2, font4, brush3, x1, y, format3);
            size = font4.MeasureString(text2, format3);
            x1 = x1 + size.Width;

            page.Canvas.DrawString(text3, font3, brush2, x1, y, format3);
            y = y + size.Height;

            //content
            PdfStringFormat format4 = new PdfStringFormat();
            text = System.IO.File.ReadAllText("Summary_of_Science.txt");
            PdfTrueTypeFont font5 = new PdfTrueTypeFont(new Font("Arial", 10f));
            format4.LineSpacing = font5.Size * 1.5f;
            PdfStringLayouter textLayouter = new PdfStringLayouter();
            float imageLeftBlockHeight = imageBottom - y;
            PdfStringLayoutResult result
                = textLayouter.Layout(text, font5, format4, new SizeF(imageLeftSpace, imageLeftBlockHeight));
            if (result.ActualSize.Height < imageBottom - y)
            {
                imageLeftBlockHeight = imageLeftBlockHeight + result.LineHeight;
                result = textLayouter.Layout(text, font5, format4, new SizeF(imageLeftSpace, imageLeftBlockHeight));
            }
            foreach (LineInfo line in result.Lines)
            {
                page.Canvas.DrawString(line.Text, font5, brush2, 0, y, format4);
                y = y + result.LineHeight;
            }
            PdfTextWidget textWidget = new PdfTextWidget(result.Remainder, font5, brush2);
            PdfTextLayout textLayout = new PdfTextLayout();
            textLayout.Break = PdfLayoutBreakType.FitPage;
            textLayout.Layout = PdfLayoutType.Paginate;
            RectangleF bounds = new RectangleF(new PointF(0, y), page.Canvas.ClientSize);
            textWidget.StringFormat = format4;
            textWidget.Draw(page, bounds, textLayout);

            //Save pdf file.
            doc.SaveToFile("TextLayout.pdf");
            doc.Close();

            //Launching the Pdf file.
            System.Diagnostics.Process.Start("TextLayout.pdf");
        }
    }
}
Imports System.Drawing
Imports Spire.Pdf
Imports Spire.Pdf.Graphics

Namespace TextLayout
    Friend Class Program
        Shared Sub Main(ByVal args() As String)
            'Create a pdf document.
            Dim doc As New PdfDocument()

            ' Create one page
            Dim page As PdfPageBase = doc.Pages.Add()
            Dim pageWidth As Single = page.Canvas.ClientSize.Width
            Dim y As Single = 0

            'page header
            Dim pen1 As New PdfPen(Color.LightGray, 1.0F)
            Dim brush1 As PdfBrush = New PdfSolidBrush(Color.LightGray)
            Dim font1 As New PdfTrueTypeFont(New Font("Arial", 8.0F, FontStyle.Italic))
            Dim format1 As New PdfStringFormat(PdfTextAlignment.Right)
            Dim text As String = "Demo of Spire.Pdf"
            page.Canvas.DrawString(text, font1, brush1, pageWidth, y, format1)
            Dim size As SizeF = font1.MeasureString(text, format1)
            y = y + size.Height + 1
            page.Canvas.DrawLine(pen1, 0, y, pageWidth, y)

            'title
            y = y + 5
            Dim brush2 As PdfBrush = New PdfSolidBrush(Color.Black)
            Dim font2 As New PdfTrueTypeFont(New Font("Arial", 16.0F, FontStyle.Bold))
            Dim format2 As New PdfStringFormat(PdfTextAlignment.Center)
            format2.CharacterSpacing = 1.0F
            text = "Summary of Science"
            page.Canvas.DrawString(text, font2, brush2, pageWidth / 2, y, format2)
            size = font2.MeasureString(text, format2)
            y = y + size.Height + 6

            'icon
            Dim image As PdfImage = PdfImage.FromFile("Wikipedia_Science.png")
            page.Canvas.DrawImage(image, New PointF(pageWidth - image.PhysicalDimension.Width, y))
            Dim imageLeftSpace As Single = pageWidth - image.PhysicalDimension.Width - 2
            Dim imageBottom As Single = image.PhysicalDimension.Height + y

            'refenrence content
            Dim font3 As New PdfTrueTypeFont(New Font("Arial", 9.0F))
            Dim format3 As New PdfStringFormat()
            format3.ParagraphIndent = font3.Size * 2
            format3.MeasureTrailingSpaces = True
            format3.LineSpacing = font3.Size * 1.5F
            Dim text1 As String = "(All text and picture from "
            Dim text2 As String = "Wikipedia"
            Dim text3 As String = ", the free encyclopedia)"
            page.Canvas.DrawString(text1, font3, brush2, 0, y, format3)

            size = font3.MeasureString(text1, format3)
            Dim x1 As Single = size.Width
            format3.ParagraphIndent = 0
            Dim font4 As New PdfTrueTypeFont(New Font("Arial", 9.0F, FontStyle.Underline))
            Dim brush3 As PdfBrush = PdfBrushes.Blue
            page.Canvas.DrawString(text2, font4, brush3, x1, y, format3)
            size = font4.MeasureString(text2, format3)
            x1 = x1 + size.Width

            page.Canvas.DrawString(text3, font3, brush2, x1, y, format3)
            y = y + size.Height

            'content
            Dim format4 As New PdfStringFormat()
            text = System.IO.File.ReadAllText("Summary_of_Science.txt")
            Dim font5 As New PdfTrueTypeFont(New Font("Arial", 10.0F))
            format4.LineSpacing = font5.Size * 1.5F
            Dim textLayouter As New PdfStringLayouter()
            Dim imageLeftBlockHeight As Single = imageBottom - y
            Dim result As PdfStringLayoutResult _
                = textLayouter.Layout(text, font5, format4, New SizeF(imageLeftSpace, imageLeftBlockHeight))
            If result.ActualSize.Height < imageBottom - y Then
                imageLeftBlockHeight = imageLeftBlockHeight + result.LineHeight
                result = textLayouter.Layout(text, font5, format4, New SizeF(imageLeftSpace, imageLeftBlockHeight))
            End If
            For Each line As LineInfo In result.Lines
                page.Canvas.DrawString(line.Text, font5, brush2, 0, y, format4)
                y = y + result.LineHeight
            Next line
            Dim textWidget As New PdfTextWidget(result.Remainder, font5, brush2)
            Dim textLayout As New PdfTextLayout()
            textLayout.Break = PdfLayoutBreakType.FitPage
            textLayout.Layout = PdfLayoutType.Paginate
            Dim bounds As New RectangleF(New PointF(0, y), page.Canvas.ClientSize)
            textWidget.StringFormat = format4
            textWidget.Draw(page, bounds, textLayout)

            'Save pdf file.
            doc.SaveToFile("TextLayout.pdf")
            doc.Close()

            'Launching the Pdf file.
            Process.Start("TextLayout.pdf")
        End Sub
    End Class
End Namespace
Tuesday, 05 April 2011 09:07
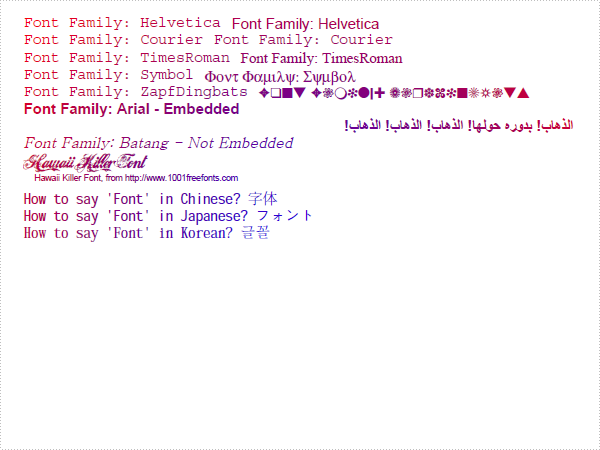
PDF Font in C#, VB.NET
using System;
using System.Drawing;
using Spire.Pdf;
using Spire.Pdf.Graphics;

namespace Font
{
    class Program
    {
        static void Main(string[] args)
        {

            //Create a pdf document.
            PdfDocument doc = new PdfDocument();

            // Create one page
            PdfPageBase page = doc.Pages.Add();

            //Draw the text
            float l = page.Canvas.ClientSize.Width / 2;
            PointF center = new PointF(l, l);
            float r = (float)Math.Sqrt(2 * l * l);
            PdfRadialGradientBrush brush
                = new PdfRadialGradientBrush(center, 0f, center, r, Color.Blue, Color.Red);
            PdfFontFamily[] fontFamilies
                = (PdfFontFamily[])Enum.GetValues(typeof(PdfFontFamily));
            float y = 10;
            for (int i = 0; i < fontFamilies.Length; i++)
            {
                String text = String.Format("Font Family: {0}", fontFamilies[i]);
                float x1 = 0;
                y = 10 + i * 16;
                PdfFont font1 = new PdfFont(PdfFontFamily.Courier, 14f);
                PdfFont font2 = new PdfFont(fontFamilies[i], 14f);
                float x2 = x1 + 10 + font1.MeasureString(text).Width;
                page.Canvas.DrawString(text, font1, brush, x1, y);
                page.Canvas.DrawString(text, font2, brush, x2, y);
            }

            //true type font - embedded.
            System.Drawing.Font font = new System.Drawing.Font("Arial", 14f, FontStyle.Bold);
            PdfTrueTypeFont trueTypeFont = new PdfTrueTypeFont(font);
            page.Canvas.DrawString("Font Family: Arial - Embedded", trueTypeFont, brush, 0, (y = y + 16f));

            //right to left
            String arabicText
                = "\u0627\u0644\u0630\u0647\u0627\u0628\u0021\u0020"
                + "\u0628\u062F\u0648\u0631\u0647\u0020\u062D\u0648\u0644\u0647\u0627\u0021\u0020"
                + "\u0627\u0644\u0630\u0647\u0627\u0628\u0021\u0020"
                + "\u0627\u0644\u0630\u0647\u0627\u0628\u0021\u0020"
                + "\u0627\u0644\u0630\u0647\u0627\u0628\u0021";
            trueTypeFont = new PdfTrueTypeFont(font, true);
            RectangleF rctg = new RectangleF(new PointF(0, (y = y + 16f)), page.Canvas.ClientSize);
            PdfStringFormat format = new PdfStringFormat(PdfTextAlignment.Right);
            format.RightToLeft = true;
            page.Canvas.DrawString(arabicText, trueTypeFont, brush, rctg, format);

            //true type font - not embedded
            font = new System.Drawing.Font("Batang", 14f, FontStyle.Italic);
            trueTypeFont = new PdfTrueTypeFont(font);
            page.Canvas.DrawString("Font Family: Batang - Not Embedded", trueTypeFont, brush, 0, (y = y + 16f));

            //font file
            String fontFileName = "Hawaii_Killer.ttf";
            trueTypeFont = new PdfTrueTypeFont(fontFileName, 20f);
            page.Canvas.DrawString("Hawaii Killer Font", trueTypeFont, brush, 0, (y = y + 16f));
            page.Canvas.DrawString("Hawaii Killer Font, from http://www.1001freefonts.com",
                new PdfFont(PdfFontFamily.Helvetica, 8f), brush, 10, (y = y + 20f));

            //cjk font
            PdfCjkStandardFont cjkFont = new PdfCjkStandardFont(PdfCjkFontFamily.MonotypeHeiMedium, 14f);
            page.Canvas.DrawString("How to say 'Font' in Chinese? \u5B57\u4F53",
                cjkFont, brush, 0, (y = y + 16f));

            cjkFont = new PdfCjkStandardFont(PdfCjkFontFamily.HanyangSystemsGothicMedium, 14f);
            page.Canvas.DrawString("How to say 'Font' in Japanese? \u30D5\u30A9\u30F3\u30C8",
                cjkFont, brush, 0, (y = y + 16f));

            cjkFont = new PdfCjkStandardFont(PdfCjkFontFamily.HanyangSystemsShinMyeongJoMedium, 14f);
            page.Canvas.DrawString("How to say 'Font' in Korean? \uAE00\uAF34",
                cjkFont, brush, 0, (y = y + 16f));

            //Save pdf file.
            doc.SaveToFile("Font.pdf");
            doc.Close();

            //Launching the Pdf file.
            System.Diagnostics.Process.Start("Font.pdf");
        }
    }
}
Imports System.Drawing
Imports Spire.Pdf
Imports Spire.Pdf.Graphics

Namespace FontFormat
    Friend Class Program
        Shared Sub Main(ByVal args() As String)
            'Create a pdf document.
            Dim doc As New PdfDocument()

            ' Create one page
            Dim page As PdfPageBase = doc.Pages.Add()

            'Draw the text
            Dim l As Single = page.Canvas.ClientSize.Width / 2
            Dim center As New PointF(l, l)
            Dim r As Single = CSng(Math.Sqrt(2 * l * l))
            Dim brush As New PdfRadialGradientBrush(center, 0.0F, center, r, Color.Blue, Color.Red)
            Dim fontFamilies() As PdfFontFamily _
                = CType(System.Enum.GetValues(GetType(PdfFontFamily)), PdfFontFamily())
            Dim y As Single = 10
            For i As Integer = 0 To fontFamilies.Length - 1
                Dim text As String = String.Format("Font Family: {0}", fontFamilies(i))
                Dim x1 As Single = 0
                y = 10 + i * 16
                Dim font1 As New PdfFont(PdfFontFamily.Courier, 14.0F)
                Dim font2 As New PdfFont(fontFamilies(i), 14.0F)
                Dim x2 As Single = x1 + 10 + font1.MeasureString(text).Width
                page.Canvas.DrawString(text, font1, brush, x1, y)
                page.Canvas.DrawString(text, font2, brush, x2, y)
            Next i

            'true type font - embedded.
            Dim font As New System.Drawing.Font("Arial", 14.0F, FontStyle.Bold)
            Dim trueTypeFont As New PdfTrueTypeFont(font)
            y = y + 16.0F
            page.Canvas.DrawString("Font Family: Arial - Embedded", trueTypeFont, brush, 0, y)


            'right to left
            Dim arabicText As String _
                = ChrW(&H627).ToString() & ChrW(&H644).ToString() & ChrW(&H630).ToString() _
                & ChrW(&H647).ToString() & ChrW(&H627).ToString() & ChrW(&H628).ToString() _
                & ChrW(&H21).ToString() & ChrW(&H20).ToString() & ChrW(&H628).ToString() _
                & ChrW(&H62F).ToString() & ChrW(&H648).ToString() & ChrW(&H631).ToString() _
                & ChrW(&H647).ToString() & ChrW(&H20).ToString() & ChrW(&H62D).ToString() _
                & ChrW(&H648).ToString() & ChrW(&H644).ToString() & ChrW(&H647).ToString() _
                & ChrW(&H627).ToString() & ChrW(&H21).ToString() & ChrW(&H20).ToString() _
                & ChrW(&H627).ToString() & ChrW(&H644).ToString() & ChrW(&H630).ToString() _
                & ChrW(&H647).ToString() & ChrW(&H627).ToString() & ChrW(&H628).ToString() _
                & ChrW(&H21).ToString() & ChrW(&H20).ToString() & ChrW(&H627).ToString() _
                & ChrW(&H644).ToString() & ChrW(&H630).ToString() & ChrW(&H647).ToString() _
                & ChrW(&H627).ToString() & ChrW(&H628).ToString() & ChrW(&H21).ToString() _
                & ChrW(&H20).ToString() & ChrW(&H627).ToString() & ChrW(&H644).ToString() _
                & ChrW(&H630).ToString() & ChrW(&H647).ToString() & ChrW(&H627).ToString() _
                & ChrW(&H628).ToString() & ChrW(&H21).ToString()
            trueTypeFont = New PdfTrueTypeFont(font, True)
            y = y + 16.0F
            Dim rctg As New RectangleF(New PointF(0, y), page.Canvas.ClientSize)
            Dim format As New PdfStringFormat(PdfTextAlignment.Right)
            format.RightToLeft = True
            page.Canvas.DrawString(arabicText, trueTypeFont, brush, rctg, format)

            'true type font - not embedded
            font = New System.Drawing.Font("Batang", 14.0F, FontStyle.Italic)
            trueTypeFont = New PdfTrueTypeFont(font)
            y = y + 16.0F
            page.Canvas.DrawString("Font Family: Batang - Not Embedded", trueTypeFont, brush, 0, y)
            'font file
            Dim fontFileName As String = "Hawaii_Killer.ttf"
            trueTypeFont = New PdfTrueTypeFont(fontFileName, 20.0F)
            y = y + 16.0F
            page.Canvas.DrawString("Hawaii Killer Font", trueTypeFont, brush, 0, y)
            y = y + 20.0F
            page.Canvas.DrawString("Hawaii Killer Font, from http://www.1001freefonts.com", _
                                   New PdfFont(PdfFontFamily.Helvetica, 8.0F), brush, 10, y)

            'cjk font
            Dim cjkFont As New PdfCjkStandardFont(PdfCjkFontFamily.MonotypeHeiMedium, 14.0F)
            y = y + 16.0F
            page.Canvas.DrawString("How to say 'Font' in Chinese? " _
                                   & ChrW(&H5B57).ToString() & ChrW(&H4F53).ToString(), cjkFont, brush, 0, y)

            cjkFont = New PdfCjkStandardFont(PdfCjkFontFamily.HanyangSystemsGothicMedium, 14.0F)
            y = y + 16.0F
            page.Canvas.DrawString("How to say 'Font' in Japanese? " _
                                   & ChrW(&H30D5).ToString() & ChrW(&H30A9).ToString() _
                                   & ChrW(&H30F3).ToString() & ChrW(&H30C8).ToString(), cjkFont, brush, 0, y)

            cjkFont = New PdfCjkStandardFont(PdfCjkFontFamily.HanyangSystemsShinMyeongJoMedium, 14.0F)
            y = y + 16.0F
            page.Canvas.DrawString("How to say 'Font' in Korean? " _
                                   & ChrW(&HAE00).ToString() & ChrW(&HAF34).ToString(), cjkFont, brush, 0, y)

            'Save pdf file.
            doc.SaveToFile("Font.pdf")
            doc.Close()

            'Launching the Pdf file.
            Process.Start("Font.pdf")
        End Sub
    End Class
End Namespace
Tuesday, 05 April 2011 08:46
PDF Graphics Overlay in C#, VB.NET
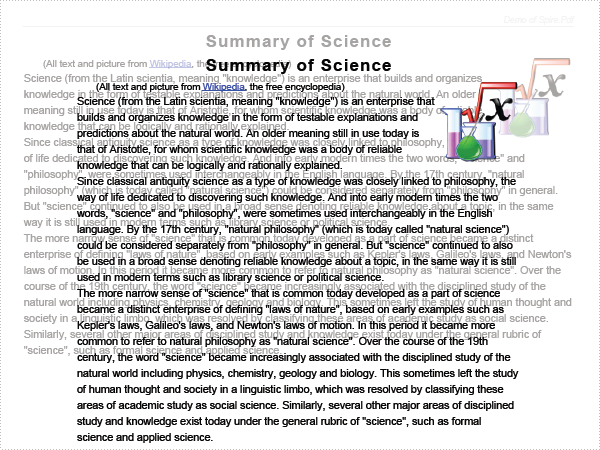
The sample demonstrates how to overlay one page on another and set transparency mode.
using System.Drawing;
using Spire.Pdf;
using Spire.Pdf.Graphics;

namespace Overlay
{
    class Program
    {
        static void Main(string[] args)
        {
            //load two document
            PdfDocument doc1 = new PdfDocument();
            doc1.LoadFromFile("Sample1.pdf");

            PdfDocument doc2 = new PdfDocument();
            doc2.LoadFromFile("Sample3.pdf");

            //Create page template
            PdfTemplate template = doc1.Pages[0].CreateTemplate();

            foreach (PdfPageBase page in doc2.Pages)
            {
                page.Canvas.SetTransparency(0.25f, 0.25f, PdfBlendMode.Overlay);
                page.Canvas.DrawTemplate(template, PointF.Empty);
            }

            //Save pdf file.
            doc2.SaveToFile("Overlay.pdf");
            doc1.Close();
            doc2.Close();

            //Launching the Pdf file.
            System.Diagnostics.Process.Start("Overlay.pdf");
        }
    }
}
Imports System.Drawing
Imports Spire.Pdf
Imports Spire.Pdf.Graphics

Namespace Overlay
    Friend Class Program
        Shared Sub Main(ByVal args() As String)
            'load two document
            Dim doc1 As New PdfDocument()
            doc1.LoadFromFile("Sample1.pdf")

            Dim doc2 As New PdfDocument()
            doc2.LoadFromFile("Sample3.pdf")

            'Create page template
            Dim template As PdfTemplate = doc1.Pages(0).CreateTemplate()

            For Each page As PdfPageBase In doc2.Pages
                page.Canvas.SetTransparency(0.25F, 0.25F, PdfBlendMode.Overlay)
                page.Canvas.DrawTemplate(template, PointF.Empty)
            Next page

            'Save pdf file.
            doc2.SaveToFile("Overlay.pdf")
            doc1.Close()
            doc2.Close()

            'Launching the Pdf file.
            Process.Start("Overlay.pdf")
        End Sub
    End Class
End Namespace
Tuesday, 05 April 2011 07:42
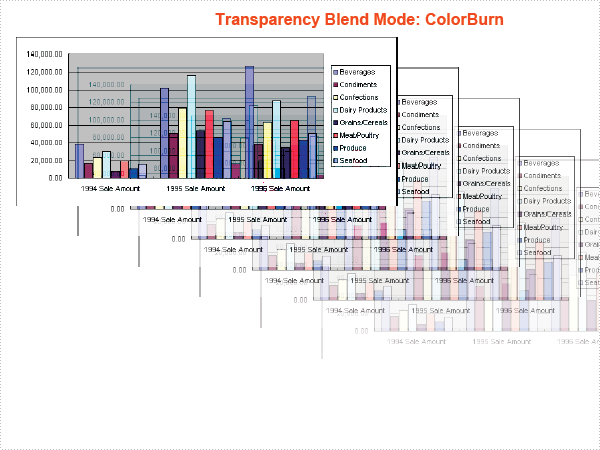
PDF Graphics Transparency in C#, VB.NET
using System;
using System.Drawing;
using Spire.Pdf;
using Spire.Pdf.Graphics;

namespace Transparency
{
    class Program
    {
        static void Main(string[] args)
        {

            //Create a pdf document.
            PdfDocument doc = new PdfDocument();

            // Create one section
            PdfSection section = doc.Sections.Add();

            //Load image
            PdfImage image = PdfImage.FromFile("SalesReportChart.png");
            float imageWidth = image.PhysicalDimension.Width / 2;
            float imageHeight = image.PhysicalDimension.Height / 2;
            foreach (PdfBlendMode mode in Enum.GetValues(typeof(PdfBlendMode)))
            {
                PdfPageBase page = section.Pages.Add();
                float pageWidth = page.Canvas.ClientSize.Width;
                float y = 0;

                //title
                y = y + 5;
                PdfBrush brush = new PdfSolidBrush(Color.OrangeRed);
                PdfTrueTypeFont font = new PdfTrueTypeFont(new Font("Arial", 12f, FontStyle.Bold));
                PdfStringFormat format = new PdfStringFormat(PdfTextAlignment.Center);
                String text = String.Format("Transparency Blend Mode: {0}", mode);
                page.Canvas.DrawString(text, font, brush, pageWidth / 2, y, format);
                SizeF size = font.MeasureString(text, format);
                y = y + size.Height + 6;

                page.Canvas.DrawImage(image, 0, y, imageWidth, imageHeight);
                page.Canvas.Save();
                float d = (page.Canvas.ClientSize.Width - imageWidth) / 5;
                float x = d;
                y = y + d / 2;
                for (int i = 0; i < 5; i++)
                {
                    float alpha = 1.0f / 6 * (5 - i);
                    page.Canvas.SetTransparency(alpha, alpha, mode);
                    page.Canvas.DrawImage(image, x, y, imageWidth, imageHeight);
                    x = x + d;
                    y = y + d / 2;
                }
                page.Canvas.Restore();
            }

            //Save pdf file.
            doc.SaveToFile("Transparency.pdf");
            doc.Close();

            //Launching the Pdf file.
            System.Diagnostics.Process.Start("Transparency.pdf");
        }
    }
}
Imports System.Drawing
Imports Spire.Pdf
Imports Spire.Pdf.Graphics

Namespace Transparency
    Friend Class Program
        Shared Sub Main(ByVal args() As String)

            'Create a pdf document.
            Dim doc As New PdfDocument()

            ' Create one section
            Dim section As PdfSection = doc.Sections.Add()

            'Load image
            Dim image As PdfImage = PdfImage.FromFile("SalesReportChart.png")
            Dim imageWidth As Single = image.PhysicalDimension.Width \ 2
            Dim imageHeight As Single = image.PhysicalDimension.Height \ 2
            For Each mode As PdfBlendMode In System.Enum.GetValues(GetType(PdfBlendMode))
                Dim page As PdfPageBase = section.Pages.Add()
                Dim pageWidth As Single = page.Canvas.ClientSize.Width
                Dim y As Single = 0

                'title
                y = y + 5
                Dim brush As PdfBrush = New PdfSolidBrush(Color.OrangeRed)
                Dim font As New PdfTrueTypeFont(New Font("Arial", 12.0F, FontStyle.Bold))
                Dim format As New PdfStringFormat(PdfTextAlignment.Center)
                Dim text As String = String.Format("Transparency Blend Mode: {0}", mode)
                page.Canvas.DrawString(text, font, brush, pageWidth / 2, y, format)
                Dim size As SizeF = font.MeasureString(text, format)
                y = y + size.Height + 6

                page.Canvas.DrawImage(image, 0, y, imageWidth, imageHeight)
                page.Canvas.Save()
                Dim d As Single = (page.Canvas.ClientSize.Width - imageWidth) / 5
                Dim x As Single = d
                y = y + d / 2
                For i As Integer = 0 To 4
                    Dim alpha As Single = 1.0F / 6 * (5 - i)
                    page.Canvas.SetTransparency(alpha, alpha, mode)
                    page.Canvas.DrawImage(image, x, y, imageWidth, imageHeight)
                    x = x + d
                    y = y + d / 2
                Next i
                page.Canvas.Restore()
            Next mode

            'Save pdf file.
            doc.SaveToFile("Transparency.pdf")
            doc.Close()

            'Launching the Pdf file.
            Process.Start("Transparency.pdf")
        End Sub
    End Class
End Namespace
Tuesday, 05 April 2011 07:27
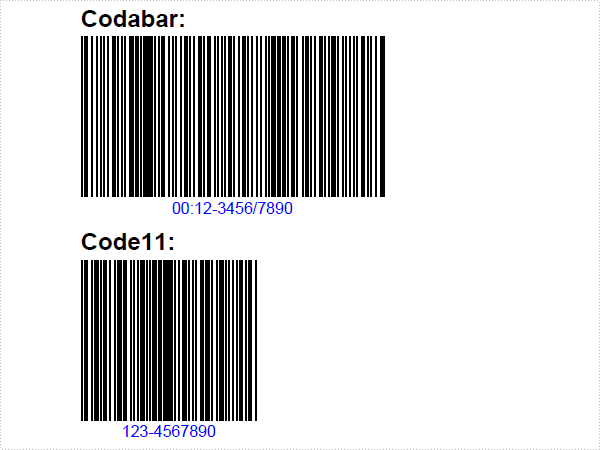
PDF Barcode in C#, VB.NET
using System.Drawing;
using Spire.Pdf;
using Spire.Pdf.Graphics;
using Spire.Pdf.Barcode;

namespace Barcode
{
    class Program
    {
        static void Main(string[] args)
        {
            //Create a pdf document.
            PdfDocument doc = new PdfDocument();

            //margin
            PdfUnitConvertor unitCvtr = new PdfUnitConvertor();
            PdfMargins margin = new PdfMargins();
            margin.Top = unitCvtr.ConvertUnits(2.54f, PdfGraphicsUnit.Centimeter, PdfGraphicsUnit.Point);
            margin.Bottom = margin.Top;
            margin.Left = unitCvtr.ConvertUnits(3.17f, PdfGraphicsUnit.Centimeter, PdfGraphicsUnit.Point);
            margin.Right = margin.Left;

            PdfSection section = doc.Sections.Add();
            section.PageSettings.Margins = margin;
            section.PageSettings.Size = PdfPageSize.A4;

            // Create one page
            PdfPageBase page = section.Pages.Add();
            float y = 10;

            PdfBrush brush1 = PdfBrushes.Black;
            PdfTrueTypeFont font1 = new PdfTrueTypeFont(new Font("Arial", 12f, FontStyle.Bold), true);
            RectangleF rctg = new RectangleF(new PointF(0, 0), page.Canvas.ClientSize);
            PdfLinearGradientBrush brush2
                = new PdfLinearGradientBrush(rctg, Color.Navy, Color.OrangeRed, PdfLinearGradientMode.Vertical);

            //draw Codabar
            PdfTextWidget text = new PdfTextWidget();
            text.Font = font1;
            text.Text = "Codabar:";
            PdfLayoutResult result = text.Draw(page, 0, y);
            page = result.Page;
            y = result.Bounds.Bottom + 2;

            PdfCodabarBarcode barcode1 = new PdfCodabarBarcode("00:12-3456/7890");
            barcode1.BarcodeToTextGapHeight = 1f;
            barcode1.EnableCheckDigit = true;
            barcode1.ShowCheckDigit = true;
            barcode1.TextDisplayLocation = TextLocation.Bottom;
            barcode1.TextColor = Color.Blue;
            barcode1.Draw(page, new PointF(0, y));
            y = barcode1.Bounds.Bottom + 5;


            //draw Code11Barcode
            text.Text = "Code11:";
            result = text.Draw(page, 0, y);
            page = result.Page;
            y = result.Bounds.Bottom + 2;

            PdfCode11Barcode barcode2 = new PdfCode11Barcode("123-4567890");
            barcode2.BarcodeToTextGapHeight = 1f;
            barcode2.TextDisplayLocation = TextLocation.Bottom;
            barcode2.TextColor = Color.Blue;
            barcode2.Draw(page, new PointF(0, y));
            y = barcode2.Bounds.Bottom + 5;


            //draw Code128-A
            text.Text = "Code128-A:";
            result = text.Draw(page, 0, y);
            page = result.Page;
            y = result.Bounds.Bottom + 2;

            PdfCode128ABarcode barcode3 = new PdfCode128ABarcode("HELLO 00-123");
            barcode3.BarcodeToTextGapHeight = 1f;
            barcode3.TextDisplayLocation = TextLocation.Bottom;
            barcode3.TextColor = Color.Blue;
            barcode3.Draw(page, new PointF(0, y));
            y = barcode3.Bounds.Bottom + 5;


            //draw Code128-B
            text.Text = "Code128-B:";
            result = text.Draw(page, 0, y);
            page = result.Page;
            y = result.Bounds.Bottom + 2;

            PdfCode128BBarcode barcode4 = new PdfCode128BBarcode("Hello 00-123");
            barcode4.BarcodeToTextGapHeight = 1f;
            barcode4.TextDisplayLocation = TextLocation.Bottom;
            barcode4.TextColor = Color.Blue;
            barcode4.Draw(page, new PointF(0, y));
            y = barcode4.Bounds.Bottom + 5;


            //draw Code32
            text.Text = "Code32:";
            result = text.Draw(page, 0, y);
            page = result.Page;
            y = result.Bounds.Bottom + 2;

            PdfCode32Barcode barcode5 = new PdfCode32Barcode("16273849");
            barcode5.BarcodeToTextGapHeight = 1f;
            barcode5.TextDisplayLocation = TextLocation.Bottom;
            barcode5.TextColor = Color.Blue;
            barcode5.Draw(page, new PointF(0, y));
            y = barcode5.Bounds.Bottom + 5;

            page = section.Pages.Add();
            y = 10;


            //draw Code39
            text.Text = "Code39:";
            result = text.Draw(page, 0, y);
            page = result.Page;
            y = result.Bounds.Bottom + 2;

            PdfCode39Barcode barcode6 = new PdfCode39Barcode("16-273849");
            barcode6.BarcodeToTextGapHeight = 1f;
            barcode6.TextDisplayLocation = TextLocation.Bottom;
            barcode6.TextColor = Color.Blue;
            barcode6.Draw(page, new PointF(0, y));
            y = barcode6.Bounds.Bottom + 5;


            //draw Code39-E
            text.Text = "Code39-E:";
            result = text.Draw(page, 0, y);
            page = result.Page;
            y = result.Bounds.Bottom + 2;

            PdfCode39ExtendedBarcode barcode7 = new PdfCode39ExtendedBarcode("16-273849");
            barcode7.BarcodeToTextGapHeight = 1f;
            barcode7.TextDisplayLocation = TextLocation.Bottom;
            barcode7.TextColor = Color.Blue;
            barcode7.Draw(page, new PointF(0, y));
            y = barcode7.Bounds.Bottom + 5;


            //draw Code93
            text.Text = "Code93:";
            result = text.Draw(page, 0, y);
            page = result.Page;
            y = result.Bounds.Bottom + 2;

            PdfCode93Barcode barcode8 = new PdfCode93Barcode("16-273849");
            barcode8.BarcodeToTextGapHeight = 1f;
            barcode8.TextDisplayLocation = TextLocation.Bottom;
            barcode8.TextColor = Color.Blue;
            barcode8.QuietZone.Bottom = 5;
            barcode8.Draw(page, new PointF(0, y));
            y = barcode8.Bounds.Bottom + 5;


            //draw Code93-E
            text.Text = "Code93-E:";
            result = text.Draw(page, 0, y);
            page = result.Page;
            y = result.Bounds.Bottom + 2;

            PdfCode93ExtendedBarcode barcode9 = new PdfCode93ExtendedBarcode("16-273849");
            barcode9.BarcodeToTextGapHeight = 1f;
            barcode9.TextDisplayLocation = TextLocation.Bottom;
            barcode9.TextColor = Color.Blue;
            barcode9.Draw(page, new PointF(0, y));
            y = barcode9.Bounds.Bottom + 5;


            //Save pdf file.
            doc.SaveToFile("Barcode.pdf");
            doc.Close();

            //Launching the Pdf file.
            System.Diagnostics.Process.Start("Barcode.pdf");
        }
    }
}
Imports System.Drawing
Imports Spire.Pdf
Imports Spire.Pdf.Graphics
Imports Spire.Pdf.Barcode

Namespace Barcode
    Friend Class Program
        Shared Sub Main(ByVal args() As String)
            'Create a pdf document.
            Dim doc As New PdfDocument()

            'margin
            Dim unitCvtr As New PdfUnitConvertor()
            Dim margin As New PdfMargins()
            margin.Top = unitCvtr.ConvertUnits(2.54F, PdfGraphicsUnit.Centimeter, PdfGraphicsUnit.Point)
            margin.Bottom = margin.Top
            margin.Left = unitCvtr.ConvertUnits(3.17F, PdfGraphicsUnit.Centimeter, PdfGraphicsUnit.Point)
            margin.Right = margin.Left

            Dim section As PdfSection = doc.Sections.Add()
            section.PageSettings.Margins = margin
            section.PageSettings.Size = PdfPageSize.A4

            ' Create one page
            Dim page As PdfPageBase = section.Pages.Add()
            Dim y As Single = 10

            Dim brush1 As PdfBrush = PdfBrushes.Black
            Dim font1 As New PdfTrueTypeFont(New Font("Arial", 12.0F, FontStyle.Bold), True)
            Dim rctg As New RectangleF(New PointF(0, 0), page.Canvas.ClientSize)
            Dim brush2 As New PdfLinearGradientBrush(rctg, Color.Navy, Color.OrangeRed, PdfLinearGradientMode.Vertical)

            'draw Codabar
            Dim text As New PdfTextWidget()
            text.Font = font1
            text.Text = "Codabar:"
            Dim result As PdfLayoutResult = text.Draw(page, 0, y)
            page = result.Page
            y = result.Bounds.Bottom + 2

            Dim barcode1 As New PdfCodabarBarcode("00:12-3456/7890")
            barcode1.BarcodeToTextGapHeight = 1.0F
            barcode1.EnableCheckDigit = True
            barcode1.ShowCheckDigit = True
            barcode1.TextDisplayLocation = TextLocation.Bottom
            barcode1.TextColor = Color.Blue
            barcode1.Draw(page, New PointF(0, y))
            y = barcode1.Bounds.Bottom + 5


            'draw Code11Barcode
            text.Text = "Code11:"
            result = text.Draw(page, 0, y)
            page = result.Page
            y = result.Bounds.Bottom + 2

            Dim barcode2 As New PdfCode11Barcode("123-4567890")
            barcode2.BarcodeToTextGapHeight = 1.0F
            barcode2.TextDisplayLocation = TextLocation.Bottom
            barcode2.TextColor = Color.Blue
            barcode2.Draw(page, New PointF(0, y))
            y = barcode2.Bounds.Bottom + 5


            'draw Code128-A
            text.Text = "Code128-A:"
            result = text.Draw(page, 0, y)
            page = result.Page
            y = result.Bounds.Bottom + 2

            Dim barcode3 As New PdfCode128ABarcode("HELLO 00-123")
            barcode3.BarcodeToTextGapHeight = 1.0F
            barcode3.TextDisplayLocation = TextLocation.Bottom
            barcode3.TextColor = Color.Blue
            barcode3.Draw(page, New PointF(0, y))
            y = barcode3.Bounds.Bottom + 5


            'draw Code128-B
            text.Text = "Code128-B:"
            result = text.Draw(page, 0, y)
            page = result.Page
            y = result.Bounds.Bottom + 2

            Dim barcode4 As New PdfCode128BBarcode("Hello 00-123")
            barcode4.BarcodeToTextGapHeight = 1.0F
            barcode4.TextDisplayLocation = TextLocation.Bottom
            barcode4.TextColor = Color.Blue
            barcode4.Draw(page, New PointF(0, y))
            y = barcode4.Bounds.Bottom + 5


            'draw Code32
            text.Text = "Code32:"
            result = text.Draw(page, 0, y)
            page = result.Page
            y = result.Bounds.Bottom + 2

            Dim barcode5 As New PdfCode32Barcode("16273849")
            barcode5.BarcodeToTextGapHeight = 1.0F
            barcode5.TextDisplayLocation = TextLocation.Bottom
            barcode5.TextColor = Color.Blue
            barcode5.Draw(page, New PointF(0, y))
            y = barcode5.Bounds.Bottom + 5

            page = section.Pages.Add()
            y = 10


            'draw Code39
            text.Text = "Code39:"
            result = text.Draw(page, 0, y)
            page = result.Page
            y = result.Bounds.Bottom + 2

            Dim barcode6 As New PdfCode39Barcode("16-273849")
            barcode6.BarcodeToTextGapHeight = 1.0F
            barcode6.TextDisplayLocation = TextLocation.Bottom
            barcode6.TextColor = Color.Blue
            barcode6.Draw(page, New PointF(0, y))
            y = barcode6.Bounds.Bottom + 5


            'draw Code39-E
            text.Text = "Code39-E:"
            result = text.Draw(page, 0, y)
            page = result.Page
            y = result.Bounds.Bottom + 2

            Dim barcode7 As New PdfCode39ExtendedBarcode("16-273849")
            barcode7.BarcodeToTextGapHeight = 1.0F
            barcode7.TextDisplayLocation = TextLocation.Bottom
            barcode7.TextColor = Color.Blue
            barcode7.Draw(page, New PointF(0, y))
            y = barcode7.Bounds.Bottom + 5


            'draw Code93
            text.Text = "Code93:"
            result = text.Draw(page, 0, y)
            page = result.Page
            y = result.Bounds.Bottom + 2

            Dim barcode8 As New PdfCode93Barcode("16-273849")
            barcode8.BarcodeToTextGapHeight = 1.0F
            barcode8.TextDisplayLocation = TextLocation.Bottom
            barcode8.TextColor = Color.Blue
            barcode8.QuietZone.Bottom = 5
            barcode8.Draw(page, New PointF(0, y))
            y = barcode8.Bounds.Bottom + 5


            'draw Code93-E
            text.Text = "Code93-E:"
            result = text.Draw(page, 0, y)
            page = result.Page
            y = result.Bounds.Bottom + 2

            Dim barcode9 As New PdfCode93ExtendedBarcode("16-273849")
            barcode9.BarcodeToTextGapHeight = 1.0F
            barcode9.TextDisplayLocation = TextLocation.Bottom
            barcode9.TextColor = Color.Blue
            barcode9.Draw(page, New PointF(0, y))
            y = barcode9.Bounds.Bottom + 5


            'Save pdf file.
            doc.SaveToFile("Barcode.pdf")
            doc.Close()

            'Launching the Pdf file.
            Process.Start("Barcode.pdf")
        End Sub
    End Class
End Namespace
Tuesday, 05 April 2011 07:21
PDF DrawImage in C#, VB.NET
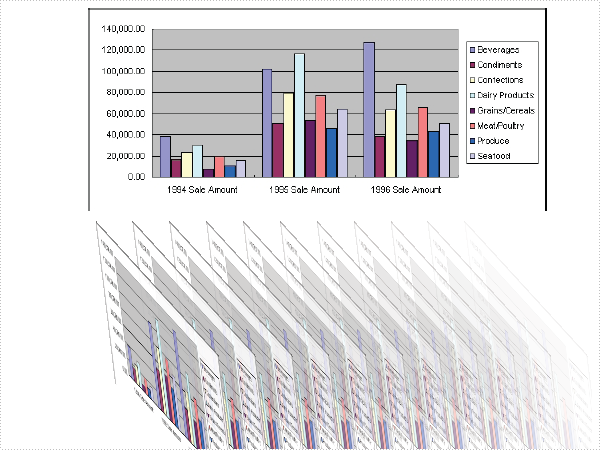
using System;
using System.Drawing;
using Spire.Pdf;
using Spire.Pdf.Graphics;

namespace DrawImage
{
    class Program
    {
        static void Main(string[] args)
        {
            //Create a pdf document.
            PdfDocument doc = new PdfDocument();

            // Create one page
            PdfPageBase page = doc.Pages.Add();

            TransformText(page);
            DrawImage(page);
            TransformImage(page);

            //Save pdf file.
            doc.SaveToFile("DrawImage.pdf");
            doc.Close();

            //Launching the Pdf file.
            System.Diagnostics.Process.Start("DrawImage.pdf");
        }

        private static void TransformImage(PdfPageBase page)
        {
            //save graphics state
            PdfGraphicsState state = page.Canvas.Save();

            //Draw the text - transform
            PdfFont font = new PdfFont(PdfFontFamily.Helvetica, 18f);
            PdfSolidBrush brush1 = new PdfSolidBrush(Color.Blue);
            PdfSolidBrush brush2 = new PdfSolidBrush(Color.CadetBlue);
            PdfStringFormat format = new PdfStringFormat(PdfTextAlignment.Center);

            page.Canvas.TranslateTransform(page.Canvas.ClientSize.Width / 2, 20);
            page.Canvas.DrawString("Sales Report Chart", font, brush1, 0, 0, format);

            page.Canvas.ScaleTransform(1f, -0.8f);
            page.Canvas.DrawString("Sales Report Chart", font, brush2, 0, -2 * 18 * 1.2f, format);
            //restor graphics
            page.Canvas.Restore(state);
        }

        private static void DrawImage(PdfPageBase page)
        {
            PdfImage image = PdfImage.FromFile(@"SalesReportChart.png");
            float width = image.Width * 0.75f;
            float height = image.Height * 0.75f;
            float x = (page.Canvas.ClientSize.Width - width) / 2;

            page.Canvas.DrawImage(image, x, 60, width, height);
        }

        private static void TransformText(PdfPageBase page)
        {
            PdfImage image = PdfImage.FromFile(@"SalesReportChart.png");
            int skewX = 20;
            int skewY = 20;
            float scaleX = 0.2f;
            float scaleY = 0.6f;
            int width = (int)((image.Width + image.Height * Math.Tan(Math.PI * skewX / 180)) * scaleX);
            int height = (int)((image.Height + image.Width * Math.Tan(Math.PI * skewY / 180)) * scaleY);
            PdfTemplate template = new PdfTemplate(width, height);
            template.Graphics.ScaleTransform(scaleX, scaleY);
            template.Graphics.SkewTransform(skewX, skewY);
            template.Graphics.DrawImage(image, 0, 0);

            //save graphics state
            PdfGraphicsState state = page.Canvas.Save();
            page.Canvas.TranslateTransform(page.Canvas.ClientSize.Width - 50, 260);
            float offset = (page.Canvas.ClientSize.Width - 100) / 12;
            for (int i = 0; i < 12; i++)
            {
                page.Canvas.TranslateTransform(-offset, 0);
                page.Canvas.SetTransparency(i / 12.0f);
                page.Canvas.DrawTemplate(template, new PointF(0, 0));
            }

            //restor graphics
            page.Canvas.Restore(state);
        }
    }
}
Imports System.Drawing
Imports Spire.Pdf
Imports Spire.Pdf.Graphics

Namespace DrawImage
    Friend Class Program
        Shared Sub Main(ByVal args() As String)
            'Create a pdf document.
            Dim doc As New PdfDocument()

            ' Create one page
            Dim page As PdfPageBase = doc.Pages.Add()

            TransformText(page)
            DrawImage(page)
            TransformImage(page)

            'Save pdf file.
            doc.SaveToFile("DrawImage.pdf")
            doc.Close()

            'Launching the Pdf file.
            Process.Start("DrawImage.pdf")
        End Sub

        Private Shared Sub TransformImage(ByVal page As PdfPageBase)
            'save graphics state
            Dim state As PdfGraphicsState = page.Canvas.Save()

            'Draw the text - transform
            Dim font As New PdfFont(PdfFontFamily.Helvetica, 18.0F)
            Dim brush1 As New PdfSolidBrush(Color.Blue)
            Dim brush2 As New PdfSolidBrush(Color.CadetBlue)
            Dim format As New PdfStringFormat(PdfTextAlignment.Center)

            page.Canvas.TranslateTransform(page.Canvas.ClientSize.Width \ 2, 20)
            page.Canvas.DrawString("Sales Report Chart", font, brush1, 0, 0, format)

            page.Canvas.ScaleTransform(1.0F, -0.8F)
            page.Canvas.DrawString("Sales Report Chart", font, brush2, 0, -2 * 18 * 1.2F, format)
            'restor graphics
            page.Canvas.Restore(state)
        End Sub

        Private Shared Sub DrawImage(ByVal page As PdfPageBase)
            Dim image As PdfImage = PdfImage.FromFile("SalesReportChart.png")
            Dim width As Single = image.Width * 0.75F
            Dim height As Single = image.Height * 0.75F
            Dim x As Single = (page.Canvas.ClientSize.Width - width) / 2

            page.Canvas.DrawImage(image, x, 60, width, height)
        End Sub

        Private Shared Sub TransformText(ByVal page As PdfPageBase)
            Dim image As PdfImage = PdfImage.FromFile("SalesReportChart.png")
            Dim skewX As Integer = 20
            Dim skewY As Integer = 20
            Dim scaleX As Single = 0.2F
            Dim scaleY As Single = 0.6F
            Dim width As Integer = CInt(Fix((image.Width + image.Height * Math.Tan(Math.PI * skewX \ 180)) * scaleX))
            Dim height As Integer = CInt(Fix((image.Height + image.Width * Math.Tan(Math.PI * skewY \ 180)) * scaleY))
            Dim template As New PdfTemplate(width, height)
            template.Graphics.ScaleTransform(scaleX, scaleY)
            template.Graphics.SkewTransform(skewX, skewY)
            template.Graphics.DrawImage(image, 0, 0)

            'save graphics state
            Dim state As PdfGraphicsState = page.Canvas.Save()
            page.Canvas.TranslateTransform(page.Canvas.ClientSize.Width - 50, 260)
            Dim offset As Single = (page.Canvas.ClientSize.Width - 100) / 12
            For i As Integer = 0 To 11
                page.Canvas.TranslateTransform(-offset, 0)
                page.Canvas.SetTransparency(i / 12.0F)
                page.Canvas.DrawTemplate(template, New PointF(0, 0))
            Next i

            'restor graphics
            page.Canvas.Restore(state)
        End Sub
    End Class
End Namespace
Tuesday, 05 April 2011 07:19
PDF DrawShape in C#, VB.NET
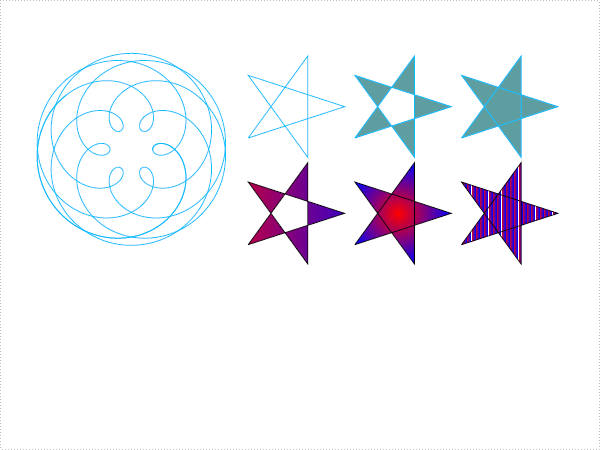
using System;
using System.Drawing;
using Spire.Pdf;
using Spire.Pdf.Graphics;

namespace DrawShape
{
    class Program
    {
        static void Main(string[] args)
        {
            //Create a pdf document.
            PdfDocument doc = new PdfDocument();

            // Create one page
            PdfPageBase page = doc.Pages.Add();

            DrawSpiro(page);
            DrawPath(page);

            //Save pdf file.
            doc.SaveToFile("DrawShape.pdf");
            doc.Close();

            //Launching the Pdf file.
            System.Diagnostics.Process.Start("DrawShape.pdf");
        }

        private static void DrawPath(PdfPageBase page)
        {
            PointF[] points = new PointF[5];
            for (int i = 0; i < points.Length; i++)
            {
                float x = (float)Math.Cos(i * 2 * Math.PI / 5);
                float y = (float)Math.Sin(i * 2 * Math.PI / 5);
                points[i] = new PointF(x, y);
            }
            PdfPath path = new PdfPath();
            path.AddLine(points[2], points[0]);
            path.AddLine(points[0], points[3]);
            path.AddLine(points[3], points[1]);
            path.AddLine(points[1], points[4]);
            path.AddLine(points[4], points[2]);

            //save graphics state
            PdfGraphicsState state = page.Canvas.Save();
            PdfPen pen = new PdfPen(Color.DeepSkyBlue, 0.02f);
            PdfBrush brush1 = new PdfSolidBrush(Color.CadetBlue);

            page.Canvas.ScaleTransform(50f, 50f);
            page.Canvas.TranslateTransform(5f, 1.2f);
            page.Canvas.DrawPath(pen, path);

            page.Canvas.TranslateTransform(2f, 0f);
            path.FillMode = PdfFillMode.Alternate;
            page.Canvas.DrawPath(pen, brush1, path);

            page.Canvas.TranslateTransform(2f, 0f);
            path.FillMode = PdfFillMode.Winding;
            page.Canvas.DrawPath(pen, brush1, path);

            PdfLinearGradientBrush brush2
                = new PdfLinearGradientBrush(new PointF(-2, 0), new PointF(2, 0), Color.Red, Color.Blue);
            page.Canvas.TranslateTransform(-4f, 2f);
            path.FillMode = PdfFillMode.Alternate;
            page.Canvas.DrawPath(pen, brush2, path);

            PdfRadialGradientBrush brush3
                = new PdfRadialGradientBrush(new PointF(0f, 0f), 0f, new PointF(0f, 0f), 1f, Color.Red, Color.Blue);
            page.Canvas.TranslateTransform(2f, 0f);
            path.FillMode = PdfFillMode.Winding;
            page.Canvas.DrawPath(pen, brush3, path);

            PdfTilingBrush brush4 = new PdfTilingBrush(new RectangleF(0, 0, 4f, 4f));
            brush4.Graphics.DrawRectangle(brush2, 0, 0, 4f, 4f);

            page.Canvas.TranslateTransform(2f, 0f);
            path.FillMode = PdfFillMode.Winding;
            page.Canvas.DrawPath(pen, brush4, path);

            //restor graphics
            page.Canvas.Restore(state);
        }

        private static void DrawSpiro(PdfPageBase page)
        {
            //save graphics state
            PdfGraphicsState state = page.Canvas.Save();

            //Draw shap - spiro
            PdfPen pen = PdfPens.DeepSkyBlue;

            int nPoints = 1000;
            double r1 = 30;
            double r2 = 25;
            double p = 35;
            double x1 = r1 + r2 - p;
            double y1 = 0;
            double x2 = 0;
            double y2 = 0;

            page.Canvas.TranslateTransform(100, 100);

            for (int i = 0; i < nPoints; i++)
            {
                double t = i * Math.PI / 90;
                x2 = (r1 + r2) * Math.Cos(t) - p * Math.Cos((r1 + r2) * t / r2);
                y2 = (r1 + r2) * Math.Sin(t) - p * Math.Sin((r1 + r2) * t / r2);
                page.Canvas.DrawLine(pen, (float)x1, (float)y1, (float)x2, (float)y2);
                x1 = x2;
                y1 = y2;
            }

            //restor graphics
            page.Canvas.Restore(state);
        }
    }
}
Imports System.Drawing
Imports Spire.Pdf
Imports Spire.Pdf.Graphics

Namespace DrawShape
    Friend Class Program
        Shared Sub Main(ByVal args() As String)
            'Create a pdf document.
            Dim doc As New PdfDocument()

            ' Create one page
            Dim page As PdfPageBase = doc.Pages.Add()

            DrawSpiro(page)
            DrawPath(page)

            'Save pdf file.
            doc.SaveToFile("DrawShape.pdf")
            doc.Close()

            'Launching the Pdf file.
            Process.Start("DrawShape.pdf")
        End Sub

        Private Shared Sub DrawPath(ByVal page As PdfPageBase)
            Dim points(4) As PointF
            For i As Integer = 0 To points.Length - 1
                Dim x As Single = CSng(Math.Cos(i * 2 * Math.PI / 5))
                Dim y As Single = CSng(Math.Sin(i * 2 * Math.PI / 5))
                points(i) = New PointF(x, y)
            Next i
            Dim path As New PdfPath()
            path.AddLine(points(2), points(0))
            path.AddLine(points(0), points(3))
            path.AddLine(points(3), points(1))
            path.AddLine(points(1), points(4))
            path.AddLine(points(4), points(2))

            'save graphics state
            Dim state As PdfGraphicsState = page.Canvas.Save()
            Dim pen As New PdfPen(Color.DeepSkyBlue, 0.02F)
            Dim brush1 As PdfBrush = New PdfSolidBrush(Color.CadetBlue)

            page.Canvas.ScaleTransform(50.0F, 50.0F)
            page.Canvas.TranslateTransform(5.0F, 1.2F)
            page.Canvas.DrawPath(pen, path)

            page.Canvas.TranslateTransform(2.0F, 0.0F)
            path.FillMode = PdfFillMode.Alternate
            page.Canvas.DrawPath(pen, brush1, path)

            page.Canvas.TranslateTransform(2.0F, 0.0F)
            path.FillMode = PdfFillMode.Winding
            page.Canvas.DrawPath(pen, brush1, path)

            Dim brush2 As New PdfLinearGradientBrush(New PointF(-2, 0), New PointF(2, 0), Color.Red, Color.Blue)
            page.Canvas.TranslateTransform(-4.0F, 2.0F)
            path.FillMode = PdfFillMode.Alternate
            page.Canvas.DrawPath(pen, brush2, path)

            Dim brush3 As New PdfRadialGradientBrush(New PointF(0.0F, 0.0F), _
                0.0F, New PointF(0.0F, 0.0F), 1.0F, Color.Red, Color.Blue)
            page.Canvas.TranslateTransform(2.0F, 0.0F)
            path.FillMode = PdfFillMode.Winding
            page.Canvas.DrawPath(pen, brush3, path)

            Dim brush4 As New PdfTilingBrush(New RectangleF(0, 0, 4.0F, 4.0F))
            brush4.Graphics.DrawRectangle(brush2, 0, 0, 4.0F, 4.0F)

            page.Canvas.TranslateTransform(2.0F, 0.0F)
            path.FillMode = PdfFillMode.Winding
            page.Canvas.DrawPath(pen, brush4, path)

            'restor graphics
            page.Canvas.Restore(state)
        End Sub

        Private Shared Sub DrawSpiro(ByVal page As PdfPageBase)
            'save graphics state
            Dim state As PdfGraphicsState = page.Canvas.Save()

            'Draw shap - spiro
            Dim pen As PdfPen = PdfPens.DeepSkyBlue

            Dim nPoints As Integer = 1000
            Dim r1 As Double = 30
            Dim r2 As Double = 25
            Dim p As Double = 35
            Dim x1 As Double = r1 + r2 - p
            Dim y1 As Double = 0
            Dim x2 As Double = 0
            Dim y2 As Double = 0

            page.Canvas.TranslateTransform(100, 100)

            For i As Integer = 0 To nPoints - 1
                Dim t As Double = i * Math.PI / 90
                x2 = (r1 + r2) * Math.Cos(t) - p * Math.Cos((r1 + r2) * t / r2)
                y2 = (r1 + r2) * Math.Sin(t) - p * Math.Sin((r1 + r2) * t / r2)
                page.Canvas.DrawLine(pen, CSng(x1), CSng(y1), CSng(x2), CSng(y2))
                x1 = x2
                y1 = y2
            Next i

            'restor graphics
            page.Canvas.Restore(state)
        End Sub
    End Class
End Namespace