
Knowledgebase (2370)
Children categories
PDF parsing in Java is commonly required when applications need to extract usable information from PDF files, rather than simply render them for display. Typical use cases include document indexing, automated report processing, invoice analysis, and data ingestion pipelines.
Unlike structured formats such as JSON or XML, PDFs are designed for visual fidelity. Text, tables, images, and other elements are stored as positioned drawing instructions instead of logical data structures. As a result, effective PDF parsing in Java depends on understanding how content is represented internally and how Java-based libraries expose that content through their APIs.
This article focuses on practical PDF parsing operations in real Java applications using Spire.PDF for Java, with each section covering a specific extraction task—text, tables, images, or metadata—rather than presenting PDF parsing as a single linear workflow.
Table of Contents
- Understanding PDF Parsing from an Implementation Perspective
- A Practical PDF Parsing Workflow in Java
- Loading and Validating PDF Documents in Java
- Parsing Text from PDF Pages Using Java
- Parsing Tables from PDF Pages Using Java
- Parsing Images from PDF Pages Using Java
- Parsing PDF Metadata Using Java
- Implementation Considerations for PDF Parsing in Java
- Frequently Asked Questions
Understanding PDF Parsing from an Implementation Perspective
From an implementation perspective, PDF parsing in Java is not a single operation, but a set of extraction tasks applied to the same document, depending on the type of data the application needs to obtain.
In real systems, PDF parsing is typically used to retrieve:
- Plain text content for indexing, search, or analysis
- Structured data such as tables for further processing or storage
- Embedded resources such as images for archiving or downstream processing
- Document metadata for classification, auditing, or version tracking
The complexity of PDF parsing comes from the way PDF files store content. Unlike structured document formats, PDFs do not preserve logical elements such as paragraphs, rows, or tables. Instead, most content is represented as:
- Page-level content streams
- Text fragments positioned using coordinates
- Graphical elements (images, lines, spacing, borders) that visually imply structure
As a result, Java-based PDF parsing focuses on reconstructing meaning from layout information, rather than reading predefined data structures. This is why practical Java implementations rely on a dedicated PDF parsing library that exposes low-level page content while also providing higher-level utilities—such as text extraction and table detection—to reduce the amount of custom logic required.
A Practical PDF Parsing Workflow in Java
In production environments, PDF parsing is best designed as a set of independent parsing operations that can be applied selectively, rather than as a strict step-by-step pipeline. This design improves fault isolation and allows applications to apply only the parsing logic they actually need.
At this stage, we will use Spire.PDF for Java, a Java PDF library that provides APIs for text extraction, table detection, image exporting, metadata access, and more. It is suitable for backend services, batch processing jobs, and document automation systems.
Installing Spire.PDF for Java
You can download the library from the Spire.PDF for Java download page and manually include it in your project dependencies. If you are using Maven, you can also install it by adding the following dependency to your project:
<repositories>
    <repository>
        <id>com.e-iceblue</id>
        <name>e-iceblue</name>
        <url>https://repo.e-iceblue.com/nexus/content/groups/public/</url>
    </repository>
</repositories>
<dependencies>
    <dependency>
        <groupId>e-iceblue</groupId>
        <artifactId>spire.doc</artifactId>
        <version>14.7.0</version>
    </dependency>
</dependencies>
After installation, you can load and analyze PDF documents using Java code without relying on external tools.
Loading and Validating PDF Documents in Java
Before performing any parsing operation, the PDF document should be loaded and validated. This step is best treated as a standalone operation that confirms the document can be safely processed by downstream parsing logic.
import com.spire.pdf.PdfDocument;
public class loadPDF {
public static void main(String[] args) {
// Create a PdfDocument instance
PdfDocument pdf = new PdfDocument();
// Load the PDF document
pdf.loadFromFile("sample.pdf");
// Get the total number of pages
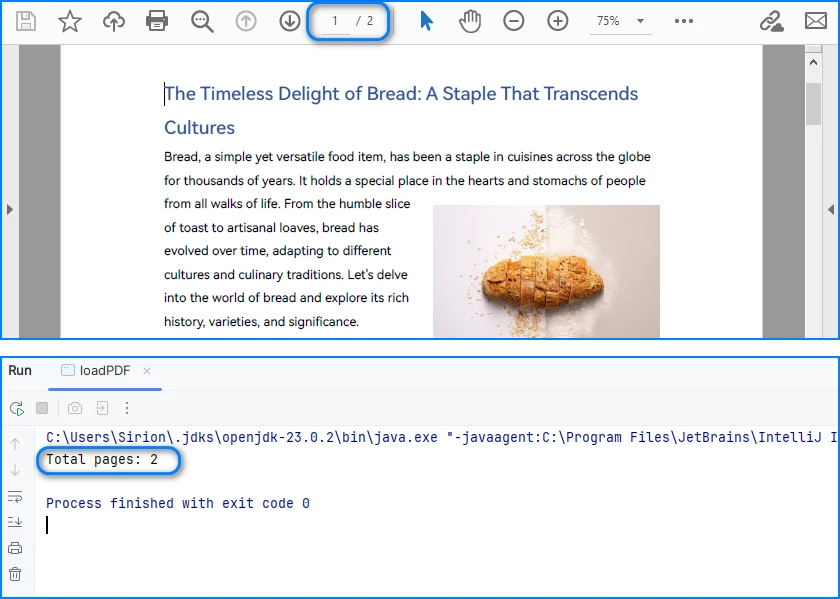
int pageCount = pdf.getPages().getCount();
System.out.println("Total pages: " + pageCount);
}
}
Console Output Preview
From an implementation perspective, successful loading and page access already verify several critical conditions:
- The file conforms to a supported PDF format
- The document structure can be parsed without fatal errors
- The page tree is present and accessible
In production systems, this validation step is often used as a gatekeeper. Documents that fail to load or expose a valid page collection can be rejected early.
Real world applications often need developers to parse PDFs in other formats, like bytes or streams. You can refer to How to Load PDF Documents from Bytes Using Java for details.
Separating document validation from extraction logic helps prevent cascading failures, especially in batch or automated parsing workflows.
Parsing Text from PDF Pages Using Java
Text parsing is one of the most common PDF processing tasks in Java and typically involves extracting and reconstructing readable text from PDF pages. When working with Spire.PDF for Java, text extraction should be implemented using the PdfTextExtractor class together with configurable extraction options, rather than relying on a single high-level API call.
Treating text parsing as an independent operation allows developers to extract and process textual content flexibly whenever it is required, such as indexing, analysis, or content migration.
How Text Parsing and Extraction Work in Java
In a typical Java implementation, text parsing is performed through a small set of clearly defined operations, each of which is reflected directly in the code:
- Load the PDF document into a PdfDocument instance
- Configure text parsing behavior using PdfTextExtractOptions
- Create a PdfTextExtractor for each page
- Parse and collect page-level text results
This page-based design maps cleanly to the underlying PDF structure and provides better control when processing multi-page documents.
Java Example: Extracting Text from PDF
The following example demonstrates how to extract text from a PDF file using PdfTextExtractor and PdfTextExtractOptions in Spire.PDF for Java.
import com.spire.pdf.PdfDocument;
import com.spire.pdf.texts.PdfTextExtractOptions;
import com.spire.pdf.texts.PdfTextExtractor;
public class extractPdfText {
public static void main(String[] args) {
// Create and load the PDF document
PdfDocument pdf = new PdfDocument();
pdf.loadFromFile("sample.pdf");
// Use StringBuilder to efficiently accumulate extracted text
StringBuilder extractedText = new StringBuilder();
// Configure text extraction options
PdfTextExtractOptions options = new PdfTextExtractOptions();
// Enable simple extraction mode for more readable text output
options.setSimpleExtraction(true);
// Iterate through each page in the PDF
for (int i = 0; i < pdf.getPages().getCount(); i++) {
// Create a PdfTextExtractor for the current page
PdfTextExtractor extractor =
new PdfTextExtractor(pdf.getPages().get(i));
// Extract text content from the current page using the options
String pageText = extractor.extract(options);
// Append the extracted page text to the result buffer
extractedText.append(pageText).append("\n");
}
// At this point, extractedText contains the full textual content
// and can be stored, indexed, or further processed
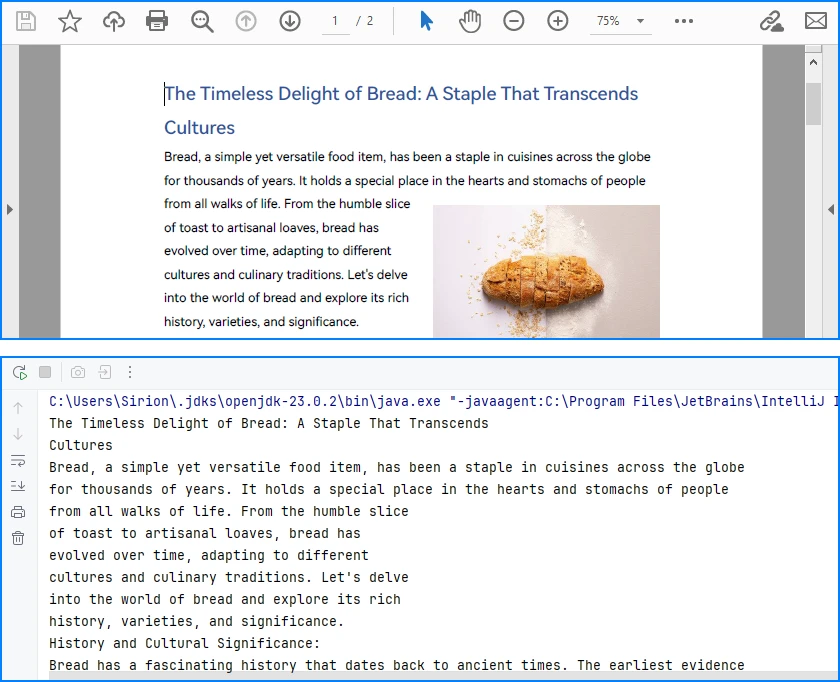
System.out.println(extractedText.toString());
}
}
Console Output Preview
Explanation of Key Points in PDF Text Parsing
-
PdfTextExtractor: Operates at the page level and provides finer control over how text is reconstructed.
-
PdfTextExtractOptions: Allows you to control extraction behavior. Enabling
setSimpleExtraction(true)helps produce cleaner, more readable text by simplifying layout reconstruction. -
Page-by-page processing: Improves scalability and makes it easier to handle large PDF files or isolate problematic pages.
Technical Considerations
- Text is reconstructed from positioned glyphs rather than stored as paragraphs
- Extraction behavior can be tuned using PdfTextExtractOptions
- Page-level extraction improves fault tolerance and flexibility
- Extracted text often requires additional normalization for downstream systems
This method works well for reports, contracts, and other text-centric documents with relatively consistent layouts and is the recommended approach for parsing text from PDF pages in Java using Spire.PDF for Java. You can check out How to Extract Text from PDF Pages Using Java for more text extraction examples.
Parsing Tables from PDF Pages Using Java
Table parsing is an advanced PDF parsing operation that focuses on identifying tabular structures within PDF pages and reconstructing them into structured rows and columns. Compared to plain text parsing, table parsing preserves semantic relationships between data cells and is commonly used in scenarios such as invoices, financial statements, and operational reports.
When performing PDF parsing in Java, table parsing allows applications to transform visually aligned content into structured data that can be programmatically processed, stored, or exported.
How Table Parsing Works in Java Practice
When parsing tables, the implementation shifts from plain text extraction to structure inference based on visual alignment and layout consistency.
- Load the PDF document into a PdfDocument instance
- Create a PdfTableExtractor bound to the document
- Parse table structures from a specific page
- Reconstruct rows and columns from the parsed table model
- Validate and normalize parsed cell data for downstream use
Unlike plain text parsing, table parsing infers structure from visual alignment and layout consistency, allowing row-and-column access to data that is otherwise represented as positioned text.
Java Example: Parsing Tables from a PDF Page
The following example demonstrates how to parse tables from a PDF page using PdfTableExtractor in Spire.PDF for Java. The extracted tables are converted into structured row-and-column data that can be further processed or exported.
import com.spire.pdf.PdfDocument;
import com.spire.pdf.utilities.PdfTable;
import com.spire.pdf.utilities.PdfTableExtractor;
public class extractPdfTable {
public static void main(String[] args) {
// Load the PDF document
PdfDocument pdf = new PdfDocument();
pdf.loadFromFile("sample1.pdf");
// Create a table extractor bound to the document
PdfTableExtractor extractor = new PdfTableExtractor(pdf);
// Parse tables from the first page (page index starts at 0)
PdfTable[] tables = extractor.extractTable(0);
if (tables != null) {
for (PdfTable table : tables) {
// Retrieve parsed table structure
int rowCount = table.getRowCount();
int columnCount = table.getColumnCount();
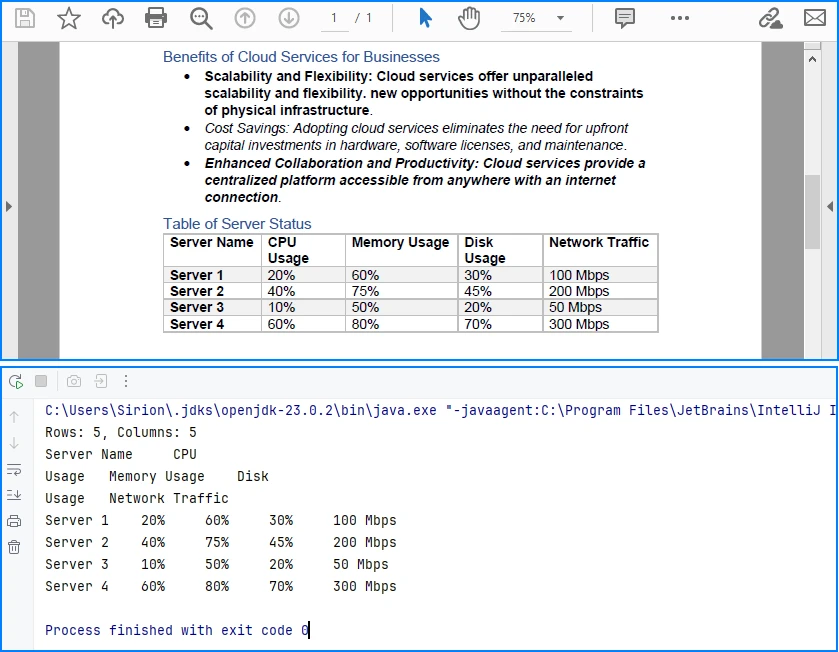
System.out.println("Rows: " + rowCount +
", Columns: " + columnCount);
// Reconstruct table cell data row by row
StringBuilder tableData = new StringBuilder();
for (int i = 0; i < rowCount; i++) {
for (int j = 0; j < columnCount; j++) {
// Retrieve text from each parsed table cell
tableData.append(table.getText(i, j));
if (j < columnCount - 1) {
tableData.append("\t");
}
}
if (i < rowCount - 1) {
tableData.append("\n");
}
}
// Parsed table data is now available for export or storage
System.out.println(tableData.toString());
}
}
}
}
Console Output Preview
Explanation of Key Implementation Details
-
PdfTableExtractor: Analyzes page-level content and detects tabular regions based on visual alignment and layout features.
-
Structure reconstruction: Rows and columns are inferred from the relative positioning of text elements, allowing cell-level access through row and column indices.
-
Page-scoped parsing: Tables are parsed on a per-page basis, which improves accuracy and makes it easier to handle layout variations across pages.
Practical Considerations When Parsing PDF Tables
- Table boundaries are inferred from visual layout, not from an explicit schema
- Header rows may require additional detection or handling logic
- Parsed cell content often needs normalization before storage or export
- Complex or inconsistent layouts may affect parsing accuracy
Despite these limitations, table parsing remains one of the most valuable PDF parsing capabilities in Java, especially for automating data extraction from structured business documents.
After parsing table structures from PDF pages, the extracted data is often exported to structured formats such as CSV for further use, as shown in Convert PDF Tables to CSV in Java.
Parsing Images from PDF Pages Using Java
Image parsing is a specialized PDF parsing capability that focuses on extracting embedded image resources from PDF pages. Unlike text or table parsing, which operates on content streams or layout inference, image parsing works by analyzing page-level resources and identifying image objects embedded within each page.
In Java-based PDF processing systems, parsing images is commonly used for archiving visual content, auditing document composition, or passing image data to downstream processing pipelines.
How Image Parsing Works in Java
At the implementation level, image parsing operates on page-level resources rather than text content streams.
- Load the PDF document into a PdfDocument instance
- Initialize a PdfImageHelper utility
- Iterate through pages and retrieve image resource information
- Parse each embedded image and export it as a standard image format
Because images are stored as independent page resources, this parsing operation does not depend on text flow, layout reconstruction, or table detection logic.
Java Example: Parsing Images from PDF Pages
The following example demonstrates how to parse images embedded in PDF pages using PdfImageHelper and PdfImageInfo in Spire.PDF for Java. Each detected image is extracted and saved as a PNG file.
import com.spire.pdf.PdfDocument;
import com.spire.pdf.utilities.PdfImageHelper;
import com.spire.pdf.utilities.PdfImageInfo;

import javax.imageio.ImageIO;
import java.awt.image.BufferedImage;
import java.io.File;
import java.io.IOException;

public class ExtractPdfImages {
    public static void main(String[] args) throws IOException {

        // Load the PDF document
        PdfDocument pdf = new PdfDocument();
        pdf.loadFromFile("sample.pdf");

        // Create a PdfImageHelper instance
        PdfImageHelper imageHelper = new PdfImageHelper();

        // Iterate through each page in the document
        for (int i = 0; i < pdf.getPages().getCount(); i++) {

            // Retrieve information of all images in the current page
            PdfImageInfo[] imageInfos = imageHelper.getImagesInfo(pdf.getPages().get(i));

            if (imageInfos != null) {
                for (int j = 0; j < imageInfos.length; j++) {

                    // Retrieve image data as BufferedImage
                    BufferedImage image = imageInfos[j].getImage();

                    // Save the parsed image to a file
                    File output = new File(
                            "output/images/page_" + i + "_image_" + j + ".png"
                    );
                    ImageIO.write(image, "PNG", output);
                }
            }
        }
    }
}
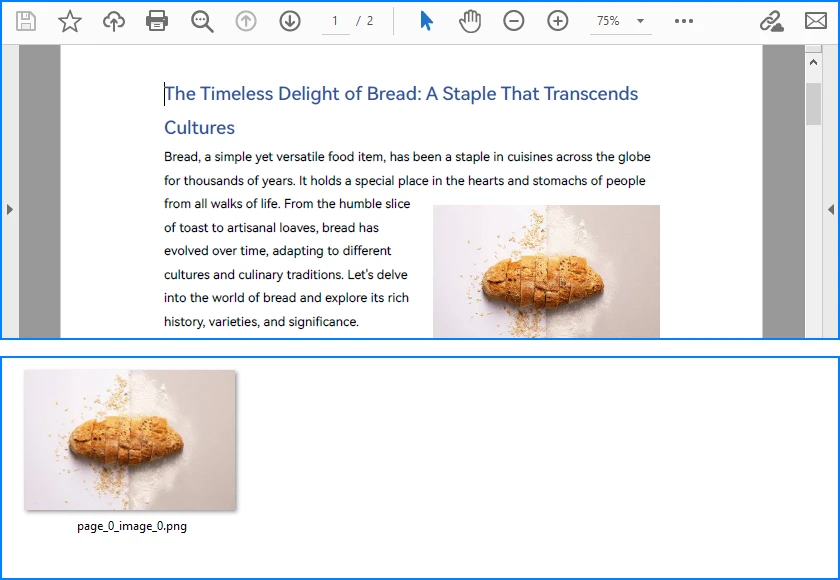
Extracted Images Preview
Explanation of Key Details in PDF Image Parsing
-
PdfImageHelper & PdfImageInfo: These classes analyze page-level resources and provide access to embedded images as BufferedImage objects.
-
Page-scoped parsing: Images are parsed on a per-page basis, ensuring accurate extraction even for multi-page PDFs with repeated or reused images.
-
Independent of layout: Parsing does not rely on text flow or table alignment, making it suitable for any visual resources embedded in the document.
Practical Considerations When Parsing PDF Images
- Parsed images may include decorative or background elements
- Image resolution, color space, and format may vary by document
- Large PDFs can contain many images, so memory and storage should be managed
- Image parsing complements text, table, and metadata parsing, completing the PDF parsing workflow in Java
Besides extracting and saving individual images, PDF pages can also be converted directly to images; see Convert PDF Pages to Images in Java for more details.
Parsing PDF Metadata Using Java
Metadata parsing is a foundational PDF parsing capability that focuses on reading document-level information stored separately from visual content. Unlike text or table parsing, metadata parsing does not depend on page layout and can be applied reliably to almost any PDF file.
In Java-based PDF processing systems, parsing metadata is often used as an initial analysis step to support document classification, routing, and indexing decisions.
How Metadata Parsing works with Java
Unlike page-level parsing tasks, metadata parsing is implemented as a document-level operation that accesses information stored outside the rendering content.
- Load the PDF document into a PdfDocument instance
- Access the document information dictionary
- Parse available metadata fields
- Use parsed metadata to support classification, routing, or indexing logic
Since metadata is stored independently of page layout and rendering instructions, this parsing operation is lightweight, fast, and highly consistent across PDF files.
Java Example: Parsing PDF Document Metadata
The following example demonstrates how to parse common metadata fields from a PDF document using Spire.PDF for Java. These fields can be used for indexing, classification, or workflow routing.
import com.spire.pdf.PdfDocument;

public class ParsePdfMetadata {
    public static void main(String[] args) {

        // Load the PDF document
        PdfDocument pdf = new PdfDocument();
        pdf.loadFromFile("sample.pdf");

        // Parse document-level metadata
        String title = pdf.getDocumentInformation().getTitle();
        String author = pdf.getDocumentInformation().getAuthor();
        String subject = pdf.getDocumentInformation().getSubject();
        String keywords = pdf.getDocumentInformation().getKeywords();
        String creator = pdf.getDocumentInformation().getCreator();
        String producer = pdf.getDocumentInformation().getProducer();

        String creationDate = pdf.getDocumentInformation()
                .getCreationDate().toString();
        String modificationDate = pdf.getDocumentInformation()
                .getModificationDate().toString();

        // Parsed metadata can be stored, indexed, or used for routing logic
        System.out.println(
                "Title: " + title +
                "\nAuthor: " + author +
                "\nSubject: " + subject +
                "\nKeywords: " + keywords +
                "\nCreator: " + creator +
                "\nProducer: " + producer +
                "\nCreation Date: " + creationDate +
                "\nModification Date: " + modificationDate
        );
    }
}
Console Output Preview

Explanation of Key Details in PDF Metadata Parsing
-
Document information dictionary: Metadata is parsed from a dedicated structure within the PDF file and is independent of page-level rendering content.
-
Field availability: Not all PDF files contain complete metadata. Parsed values may be empty or null and should be validated before use.
-
Low parsing overhead: Metadata parsing is fast and does not require page iteration, making it suitable as a preliminary parsing step.
For accessing custom PDF properties, see the PdfDocumentInformation API reference.
Common Use Cases for Metadata Parsing
- Document classification and tagging
- Search indexing and filtering
- Workflow routing and access control
- Version tracking and audit logging
Because metadata is parsed independently from visual layout and content streams, it is generally more stable and predictable than text or table parsing in complex PDF documents.
Implementation Considerations for PDF Parsing in Java
While individual parsing operations can be implemented independently, real-world Java applications often combine multiple PDF parsing capabilities within the same processing pipeline.
Combining Multiple Parsing Operations
Common implementation patterns include:
- Parsing text for indexing while parsing tables for structured storage
- Using parsed metadata to route documents to different processing workflows
- Executing parsing operations asynchronously or in scheduled batch jobs
Treating text, table, image, and metadata parsing as independent but composable operations makes PDF processing systems easier to extend, test, and maintain.
Practical Limitations and Constraints
Even with a capable Java PDF parser, certain limitations remain unavoidable:
- Scanned PDF files require OCR before any parsing can occur
- Highly complex or inconsistent layouts can reduce parsing accuracy
- Custom fonts or encodings may affect text reconstruction
Understanding these constraints helps align parsing strategies with realistic technical expectations and reduces error handling complexity in production systems.
Conclusion
PDF parsing in Java is most effective when treated as a collection of independent, purpose-driven extraction operations rather than a single linear workflow. By focusing on text extraction, table parsing, and metadata access as separate concerns, Java applications can reliably transform PDF documents into usable data.
With the help of a dedicated Java PDF parser such as Spire.PDF for Java, developers can build maintainable, production-ready PDF processing solutions that scale with real-world requirements.
To unlock the full potential of PDF parsing in Java using Spire.PDF for Java, you can request a free trial license.
Frequently Asked Questions for PDF Parsing in Java
Q1: How can I parse text from PDF pages in Java?
A1: You can use Spire.PDF for Java with the PdfTextExtractor class and PdfTextExtractOptions to extract page-level text efficiently. This approach allows flexible text parsing for indexing, analysis, or migration.
Q2: How do I extract tables from PDF files in Java?
A2: Use PdfTableExtractor to detect tabular regions and reconstruct rows and columns. Extracted tables can be further processed, exported, or stored as structured data.
Q3: Can I parse images from PDF pages in Java?
A3: Yes. With PdfImageHelper and PdfImageInfo, you can extract embedded images from each page and save them as files. You can also convert entire PDF pages directly to images if needed.
Q4: How do I read PDF metadata in Java?
A4: Access the PdfDocumentInformation object from your PDF document to retrieve standard fields like title, author, creation date, and keywords. This is fast and independent of page content.
Q5: Are there limitations to PDF parsing in Java?
A5: Complex layouts, scanned PDFs, and custom fonts can reduce parsing accuracy. Scanned documents require OCR before text or table extraction.
CSV (Comma-Separated Values) is a universal file format for storing tabular data, while lists are Python’s fundamental data structure for easy data manipulation. Converting CSV to lists in Python enables seamless data processing, analysis, and integration with other workflows. While Python’s built-in csv module works for basic cases, Spire.XLS for Python simplifies handling structured CSV data with its intuitive spreadsheet-like interface.
This article will guide you through how to use Python to read CSV into lists (and lists of dictionaries), covering basic to advanced scenarios with practical code examples.
Table of Contents:
- Why Choose Spire.XLS for CSV to List Conversion?
- Basic Conversion: CSV to Python List
- Advanced: Convert CSV to List of Dictionaries
- Handle Special Scenarios
- Conclusion
- Frequently Asked Questions
Why Choose Spire.XLS for CSV to List Conversion?
Spire.XLS is a powerful library designed for spreadsheet processing, and it excels at CSV handling for several reasons:
- Simplified Indexing: Uses intuitive 1-based row/column indexing (matching spreadsheet logic).
- Flexible Delimiters: Easily specify custom separators (commas, tabs, semicolons, etc.).
- Structured Access: Treats CSV data as a worksheet, making row/column traversal straightforward.
- Robust Data Handling: Automatically parses numbers, dates, and strings without extra code.
Installation
Before starting, install Spire.XLS for Python using pip:
pip install Spire.XLS
This command installs the latest stable version, enabling immediate use in your projects.
Basic Conversion: CSV to Python List
If your CSV file has no headers (pure data rows), Spire.XLS can directly read rows and convert them to a list of lists (each sublist represents a CSV row).
Step-by-Step Process:
- Import the Spire.XLS module.
- Create a Workbook object and load the CSV file.
- Access the first worksheet (Spire.XLS parses CSV into a worksheet).
- Traverse rows and cells, extracting values into a Python list.
CSV to List Python Code Example:
from spire.xls import *
from spire.xls.common import *
# Initialize Workbook and load CSV
workbook = Workbook()
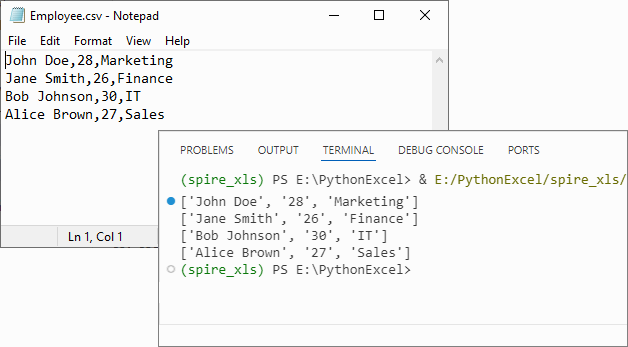
workbook.LoadFromFile("Employee.csv",",")
# Get the first worksheet
sheet = workbook.Worksheets[0]
# Convert sheet data to a list of lists
data_list = []
for i in range(sheet.Rows.Length):
row = []
for j in range(sheet.Columns.Length):
cell_value = sheet.Range[i + 1, j + 1].Value
row.append(cell_value)
data_list.append(row)
# Display the result
for row in data_list:
print(row)
# Dispose resources
workbook.Dispose()
Output:
If you need to convert the list back to CSV, refer to: Python List to CSV: 1D/2D/Dicts – Easy Tutorial
Advanced: Convert CSV to List of Dictionaries
For CSV files with headers (e.g., name,age,city), converting to a list of dictionaries (where keys are headers and values are row data) is more intuitive for data manipulation.
CSV to Dictionary Python Code Example:
from spire.xls import *
# Initialize Workbook and load CSV
workbook = Workbook()
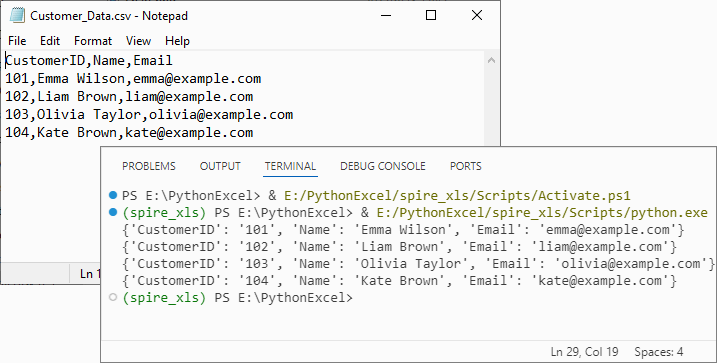
workbook.LoadFromFile("Customer_Data.csv", ",")
# Get the first worksheet
sheet = workbook.Worksheets[0]
# Extract headers (first row)
headers = []
for j in range(sheet.Columns.Length):
headers.append(sheet.Range[1, j + 1].Value)
# Convert data rows to list of dictionaries
dict_list = []
for i in range(1, sheet.Rows.Length): # Skip header row
row_dict = {}
for j in range(sheet.Columns.Length):
key = headers[j]
value = sheet.Range[i + 1, j + 1].Value
row_dict[key] = value
dict_list.append(row_dict)
# Output the result
for record in dict_list:
print(record)
workbook.Dispose()
Explanation
- Load the CSV: Use LoadFromFile() method of Workbook class.
- Extracting Headers: Pull the first row of the worksheet to use as dictionary keys.
- Map Rows to Dictionaries: For each data row (skipping the header row), create a dictionary where keys are headers and values are cell contents.
Output:
Handle Special Scenarios
CSV with Custom Delimiters (e.g., Tabs, Semicolons)
To process CSV files with delimiters other than commas (e.g., tab-separated TSV files), specify the delimiter in LoadFromFile:
# Load a tab-separated file
workbook.LoadFromFile("data.tsv", "\t")

# Load a semicolon-separated file
workbook.LoadFromFile("data_eu.csv", ";")
Clean Empty Values
Empty cells in the CSV are preserved as empty strings ('') in the list. To replace empty strings with a custom value (e.g., "N/A"), modify the cell value extraction:
cell_value = sheet.Range[i + 1, j + 1].Value or "N/A"
Conclusion
Converting CSV to lists in Python using Spire.XLS is efficient, flexible, and beginner-friendly. Whether you need a list of lists for raw data or a list of dictionaries for structured analysis, this library handles parsing, indexing, and resource management efficiently. By following the examples above, you can integrate this conversion into data pipelines, analysis scripts, or applications with minimal effort.
For more advanced features (e.g., CSV to Excel conversion, batch processing), you can visit the Spire.XLS for Python documentation.
Frequently Asked Questions
Q1: Is Spire.XLS suitable for large CSV files?
A: Spire.XLS handles large files efficiently, but for very large datasets (millions of rows), consider processing in chunks or using specialized big data tools. For typical business datasets, it performs excellently.
Q2: How does this compare to using pandas for CSV to list conversion?
A: Spire.XLS offers more control over the parsing process and doesn't require additional data science dependencies. While pandas is great for analysis, Spire.XLS is ideal when you need precise control over CSV parsing or are working in environments without pandas.
Q3: How do I handle CSV files with headers when converting to lists?
A: For headers, use the dictionary conversion method. Extract the first row as headers, then map subsequent rows to dictionaries where keys are header values. This preserves column meaning and enables easy data access by column name.
Q4: How do I convert only specific columns from my CSV to a list?
A: Modify the inner loop to target specific columns:
# Convert only columns 1 and 3 (index 0 and 2)
target_columns = [0, 2]
for i in range(sheet.Rows.Length):
    row = []
    for j in target_columns:
        cell_value = sheet.Range[i + 1, j + 1].Value
        row.append(cell_value)
    data_list.append(row)
HTML parsing is a critical task in Java development, enabling developers to extract structured data, analyze content, and interact with web-based information. Whether you’re building a web scraper, validating HTML content, or extracting text and attributes from web pages, having a reliable tool simplifies the process. In this guide, we’ll explore how to parse HTML in Java using Spire.Doc for Java - a powerful library that combines robust HTML parsing with seamless document processing capabilities.
- Why Use Spire.Doc for Java for HTML Parsing
- Environment Setup & Installation
- Core Guide: Parsing HTML to Extract Elements in Java
- Advanced Scenarios: Parse HTML Files & URLs in Java
- FAQ About Parsing HTML
Why Use Spire.Doc for Java for HTML Parsing
While there are multiple Java libraries for HTML parsing (e.g., Jsoup), Spire.Doc stands out for its seamless integration with document processing and low-code workflow, which is critical for developers prioritizing efficiency. Here’s why it’s ideal for Java HTML parsing tasks:
- Intuitive Object Model: Converts HTML into a navigable document structure (e.g., Section, Paragraph, Table), eliminating the need to manually parse raw HTML tags.
- Comprehensive Data Extraction: Easily retrieve text, attributes, table rows/cells, and even styles (e.g., headings) without extra dependencies.
- Low-Code Workflow: Minimal code is required to load HTML content and process it—reducing development time for common tasks.
- Lightweight Integration: Simple to add to Java projects via Maven/Gradle, with minimal dependencies.
Environment Setup & Installation
To start reading HTML in Java, ensure your environment meets these requirements:
- Java Development Kit (JDK): Version 8 or higher (JDK 11+ recommended for HttpClient support in URL parsing).
- Spire.Doc for Java Library: Latest version (integrated via Maven or manual download).
- HTML Source: A sample HTML string, local file, or URL (for testing extraction).
Install Spire.Doc for Java
Maven Setup: Add the Spire.Doc repository and dependency to your project’s pom.xml file. This automatically downloads the library and its dependencies:
<repositories>
    <repository>
        <id>com.e-iceblue</id>
        <name>e-iceblue</name>
        <url>https://repo.e-iceblue.com/nexus/content/groups/public/</url>
    </repository>
</repositories>
<dependencies>
    <dependency>
        <groupId>e-iceblue</groupId>
        <artifactId>spire.doc</artifactId>
        <version>14.7.0</version>
    </dependency>
</dependencies>
For manual installation, download the JAR from the official website and add it to your project.
Get a Temporary License (Optional)
By default, Spire.Doc adds an evaluation watermark to output. To remove it and unlock full features, you can request a free 30-day trial license.
Core Guide: Parsing HTML to Extract Elements in Java
Spire.Doc parses HTML into a structured object model, where elements like paragraphs, tables, and fields are accessible as Java objects. Below are practical examples to extract key HTML components.
1. Extract Text from HTML in Java
Extracting text (without HTML tags or formatting) is essential for scenarios like content indexing or data analysis. This example parses an HTML string and extracts text from all paragraphs.
Java Code: Extract Text from an HTML String
import com.spire.doc.*;
import com.spire.doc.documents.*;
public class ExtractTextFromHtml {
public static void main(String[] args) {
// Define HTML content to parse
String htmlContent = "<html>" +
"<body>" +
"<h1>Introduction to HTML Parsing</h1>" +
"<p>Spire.Doc for Java simplifies extracting text from HTML.</p>" +
"<ul>" +
"<li>Extract headings</li>" +
"<li>Extract paragraphs</li>" +
"<li>Extract list items</li>" +
"</ul>" +
"</body>" +
"</html>";
// Create a Document object to hold parsed HTML
Document doc = new Document();
// Parse the HTML string into the document
doc.addSection().addParagraph().appendHTML(htmlContent);
// Extract text from all paragraphs
StringBuilder extractedText = new StringBuilder();
for (Section section : (Iterable<Section>) doc.getSections()) {
for (Paragraph paragraph : (Iterable<Paragraph>) section.getParagraphs()) {
extractedText.append(paragraph.getText()).append("\n");
}
}
// Print or process the extracted text
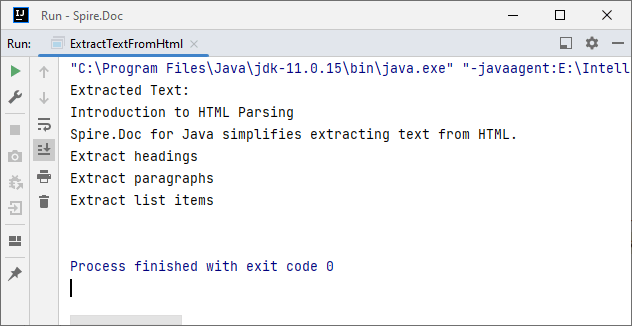
System.out.println("Extracted Text:\n" + extractedText);
}
}
Output:
2. Extract Table Data from HTML in Java
HTML tables store structured data (e.g., product lists, reports). Spire.Doc parses <table> tags into Table objects, making it easy to extract rows and columns.
Java Code: Extract HTML Table Rows & Cells
import com.spire.doc.*;
import com.spire.doc.documents.*;
public class ExtractTableFromHtml {
public static void main(String[] args) {
// HTML content with a table
String htmlWithTable = "<html>" +
"<body>" +
"<table border='1'>" +
"<tr><th>ID</th><th>Name</th><th>Price</th></tr>" +
"<tr><td>001</td><td>Laptop</td><td>$999</td></tr>" +
"<tr><td>002</td><td>Phone</td><td>$699</td></tr>" +
"</table>" +
"</body>" +
"</html>";
// Parse HTML into Document
Document doc = new Document();
doc.addSection().addParagraph().appendHTML(htmlWithTable);
// Extract table data
for (Section section : (Iterable<Section>) doc.getSections()) {
// Iterate through all objects in the section's body
for (Object obj : section.getBody().getChildObjects()) {
if (obj instanceof Table) { // Check if the object is a table
Table table = (Table) obj;
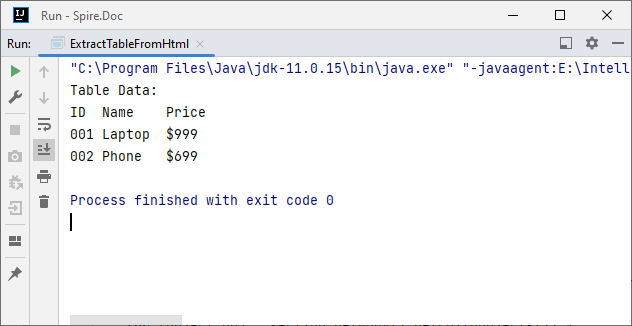
System.out.println("Table Data:");
// Loop through rows
for (TableRow row : (Iterable<TableRow>) table.getRows()) {
// Loop through cells in the row
for (TableCell cell : (Iterable<TableCell>) row.getCells()) {
// Extract text from each cell's paragraphs
for (Paragraph para : (Iterable<Paragraph>) cell.getParagraphs()) {
System.out.print(para.getText() + "\t");
}
}
System.out.println(); // New line after each row
}
}
}
}
}
}
Output:
After parsing the HTML string into a Word document via the appendHTML() method, you can leverage Spire.Doc’s APIs to extract hyperlinks as well.
Advanced Scenarios: Parse HTML Files & URLs in Java
Spire.Doc for Java also offers flexibility to parse local HTML files and web URLs, making it versatile for real-world applications.
1. Read an HTML File in Java
To parse a local HTML file using Spire.Doc for Java, simply load it via the loadFromFile(String filename, FileFormat.Html) method for processing.
Java Code: Read & Parse Local HTML Files
import com.spire.doc.*;
import com.spire.doc.documents.*;
public class ParseHtmlFile {
public static void main(String[] args) {
// Create a Document object
Document doc = new Document();
// Load an HTML file
doc.loadFromFile("input.html", FileFormat.Html);
// Extract and print text
StringBuilder text = new StringBuilder();
for (Section section : (Iterable<Section>) doc.getSections()) {
for (Paragraph para : (Iterable<Paragraph>) section.getParagraphs()) {
text.append(para.getText()).append("\n");
}
}
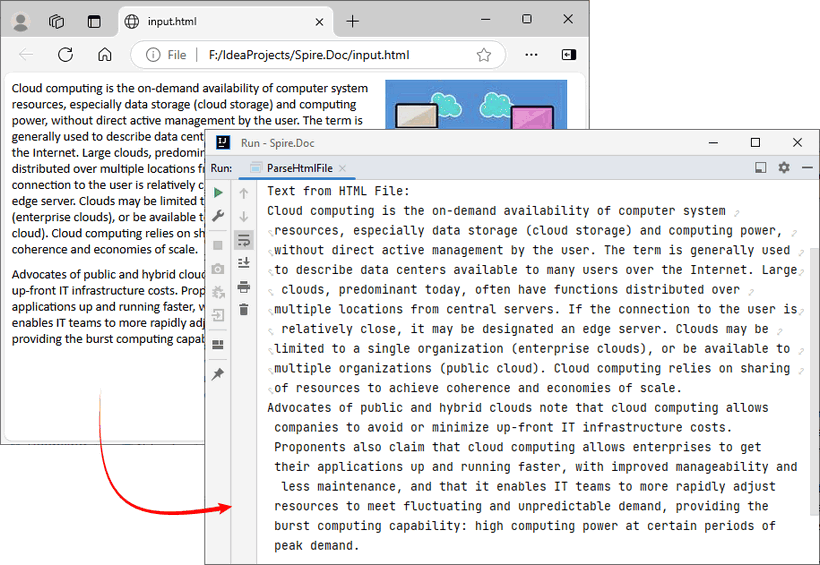
System.out.println("Text from HTML File:\n" + text);
}
}
The example extracts text content from the loaded HTML file. If you need to extract the paragraph style (e.g., "Heading1", "Normal") simultaneously, use the Paragraph.getStyleName() method.
Output:
You may also need: Convert HTML to Word in Java
2. Parse a URL in Java
For real-world web scraping, you'll need to parse HTML from live web pages. Spire.Doc can work with Java’s built-in HttpClient (JDK 11+) to fetch HTML content from URLs, then parse it.
Java Code: Fetch & Parse a Web URL
import com.spire.doc.*;
import com.spire.doc.documents.*;
import java.net.URI;
import java.net.http.HttpClient;
import java.net.http.HttpRequest;
import java.net.http.HttpResponse;
import java.time.Duration;
public class ParseHtmlFromUrl {
// Reusable HttpClient (configures timeout to avoid hanging)
private static final HttpClient httpClient = HttpClient.newBuilder()
.connectTimeout(Duration.ofSeconds(10))
.build();
public static void main(String[] args) {
String url = "https://www.e-iceblue.com/privacypolicy.html";
try {
// Fetch HTML content from the URL
System.out.println("Fetching from: " + url);
String html = fetchHtml(url);
// Parse HTML with Spire.Doc
Document doc = new Document();
Section section = doc.addSection();
section.addParagraph().appendHTML(html);
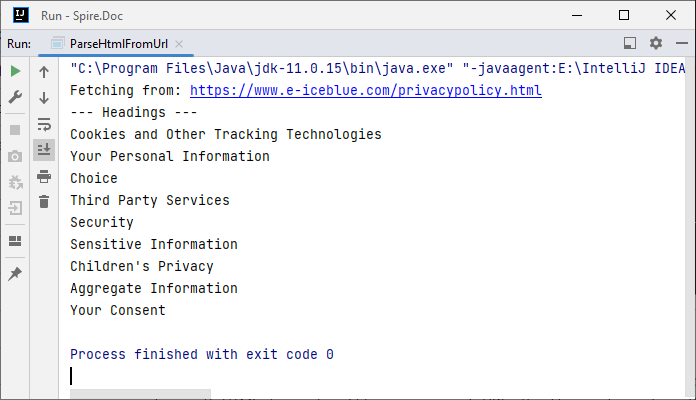
System.out.println("--- Headings ---");
// Extract headings
for (Paragraph para : (Iterable<Paragraph>) section.getParagraphs()) {
// Check if the paragraph style is a heading (e.g., "Heading1", "Heading2")
if (para.getStyleName() != null && para.getStyleName().startsWith("Heading")) {
System.out.println(para.getText());
}
}
} catch (Exception e) {
System.err.println("Error: " + e.getMessage());
}
}
// Helper method: Fetches HTML content from a given URL
private static String fetchHtml(String url) throws Exception {
// Create HTTP request with User-Agent header (to avoid blocks)
HttpRequest request = HttpRequest.newBuilder()
.uri(URI.create(url))
.header("User-Agent", "Mozilla/5.0")
.timeout(Duration.ofSeconds(10))
.GET()
.build();
// Send request and get response
HttpResponse<String> response = httpClient.send(request, HttpResponse.BodyHandlers.ofString());
// Check if the request succeeded (HTTP 200 = OK)
if (response.statusCode() != 200) {
throw new Exception("HTTP error: " + response.statusCode());
}
return response.body(); // Return the raw HTML content
}
}
Key Steps:
- HTTP Fetching: Uses HttpClient to fetch HTML from the URL, with a User-Agent header to mimic a browser (avoids being blocked).
- HTML Parsing: Creates a Document, adds a Section and Paragraph, then uses appendHTML() to load the fetched HTML.
- Content Extraction: Extracts headings by checking if paragraph styles start with "Heading".
Output:
Conclusion
Parsing HTML in Java is simplified with the Spire.Doc for Java library. Using it, you can extract text, tables, and data from HTML strings, local files, or URLs with minimal code—no need to manually handle raw HTML tags or manage heavy dependencies.
Whether you’re building a web scraper, analyzing web content, or converting HTML to other formats (e.g., HTML to PDF), Spire.Doc streamlines the workflow. By following the step-by-step examples in this guide, you’ll be able to integrate robust HTML parsing into your Java projects to unlock actionable insights from HTML content.
FAQs About Parsing HTML
Q1: Which library is best for parsing HTML in Java?
A: It depends on your needs:
- Use Spire.Doc if you need to extract text/tables and integrate with document processing (e.g., convert HTML to PDF).
- Use Jsoup if you only need basic HTML parsing (but it requires more code for table/text extraction).
Q2: How does Spire.Doc handle malformed or poorly structured HTML?
A: Spire.Doc for Java provides a dedicated approach using the loadFromFile method with XHTMLValidationType.None parameter. This configuration disables strict XHTML validation, allowing the parser to handle non-compliant HTML structures gracefully.
// Load and parse the malformed HTML file
// Parameters: file path, file format (HTML), validation type (None)
doc.loadFromFile("input.html", FileFormat.Html, XHTMLValidationType.None);
However, severely malformed HTML may still cause parsing issues.
Q3: Can I modify parsed HTML content and save it back as HTML?
A: Yes. Spire.Doc lets you manipulate parsed content (e.g., edit paragraph text, delete table rows, or add new elements) and then save the modified document back as HTML:
// After parsing HTML into a Document object:
Section section = doc.getSections().get(0);
Paragraph firstPara = section.getParagraphs().get(0);
firstPara.setText("Updated heading!"); // Modify text

// Save back as HTML
doc.saveToFile("modified.html", FileFormat.Html);
Q4: Is an internet connection required to parse HTML with Spire.Doc?
A: No, unless you’re loading HTML directly from a URL. Spire.Doc can parse HTML from local files or strings without an internet connection. If fetching HTML from a URL, you’ll need an internet connection to retrieve the content first, but parsing itself works offline.
