
Knowledgebase (2370)
Children categories
Developers can easily use Spire Series Products for Java directly in their Maven Projects with simple configurations. E-iceblue hosts all Java APIs on Maven repository. In this article, we’ll show you how to install Spire Series Products for Java from Maven.
Firstly, please specify e-iceblue Maven Repository configuration / location in your Maven pom.xml as below:
<repositories>
        <repository>
            <id>com.e-iceblue</id>
            <name>e-iceblue</name>
            <url>https://repo.e-iceblue.com/nexus/content/groups/public/</url>
        </repository>
</repositories>
Then, Specify Maven dependencies for Spire products in the POM.xml file. The following lists the main products configuration sample for your reference.
Please use Spire.Office for Java if you need to operate multiple file formats in the same program, such as Word, Excel, PDF, or other formats. Otherwise, using more than one Spire products in the same program will cause program conflicts and result in exceptions.
Spire.PDF for Java
<repositories>
    <repository>
        <id>com.e-iceblue</id>
        <name>e-iceblue</name>
        <url>https://repo.e-iceblue.com/nexus/content/groups/public/</url>
    </repository>
</repositories>
<dependencies>
    <dependency>
        <groupId>e-iceblue</groupId>
        <artifactId>spire.pdf</artifactId>
        <version>12.7.0</version>
    </dependency>
</dependencies>
Spire.Doc for Java
<repositories>
    <repository>
        <id>com.e-iceblue</id>
        <name>e-iceblue</name>
        <url>https://repo.e-iceblue.com/nexus/content/groups/public/</url>
    </repository>
</repositories>
<dependencies>
    <dependency>
        <groupId>e-iceblue</groupId>
        <artifactId>spire.doc</artifactId>
        <version>14.7.0</version>
    </dependency>
</dependencies>
Spire.XLS for Java
<repositories>
    <repository>
        <id>com.e-iceblue</id>
        <name>e-iceblue</name>
        <url>https://repo.e-iceblue.com/nexus/content/groups/public/</url>
    </repository>
</repositories>
<dependencies>
    <dependency>
        <groupId>e-iceblue</groupId>
        <artifactId>spire.xls</artifactId>
        <version>16.7.3</version>
    </dependency>
</dependencies>
Spire.Presentation for Java
<repositories>
    <repository>
        <id>com.e-iceblue</id>
        <name>e-iceblue</name>
        <url>https://repo.e-iceblue.com/nexus/content/groups/public/</url>
    </repository>
</repositories>
<dependencies>
    <dependency>
        <groupId>e-iceblue</groupId>
        <artifactId>spire.presentation</artifactId>
        <version>11.7.2</version>
    </dependency>
</dependencies>
Spire.Barcode for Java
<repositories>
    <repository>
        <id>com.e-iceblue</id>
        <name>e-iceblue</name>
        <url>https://repo.e-iceblue.com/nexus/content/groups/public/</url>
    </repository>
</repositories>
<dependencies>
    <dependency>
        <groupId>e-iceblue</groupId>
        <artifactId>spire.barcode</artifactId>
        <version>5.2.0</version>
    </dependency>
</dependencies>
Spire.Office for Java
<repositories>
    <repository>
        <id>com.e-iceblue</id>
        <name>e-iceblue</name>
        <url>https://repo.e-iceblue.com/nexus/content/groups/public/</url>
    </repository>
</repositories>
<dependencies>
    <dependency>
        <groupId>e-iceblue</groupId>
        <artifactId>spire.office</artifactId>
        <version>11.6.0</version>
    </dependency>
</dependencies>
Additionally, if you want to configure the FREE Spire products, just change the artifactId and version as follows:
Free Spire.PDF for Java
<dependencies>
    <dependency>
        <groupId>e-iceblue</groupId>
        <artifactId>spire.pdf.free</artifactId>
        <version>5.1.0</version>
    </dependency>
</dependencies>
Free Spire.Doc for Java
<dependencies>
    <dependency>
        <groupId>e-iceblue</groupId>
        <artifactId>spire.doc.free</artifactId>
        <version>5.2.0</version>
    </dependency>
</dependencies>
Free Spire.XLS for Java
<dependencies>
    <dependency>
        <groupId>e-iceblue</groupId>
        <artifactId>spire.xls.free</artifactId>
        <version>5.3.0</version>
    </dependency>
</dependencies>
Free Spire.Presentation for Java
<dependencies>
    <dependency>
        <groupId>e-iceblue</groupId>
        <artifactId>spire.presentation.free</artifactId>
        <version>5.1.0</version>
    </dependency>
</dependencies>
Free Spire.Office for Java
<dependencies>
    <dependency>
        <groupId>e-iceblue</groupId>
        <artifactId>spire.office.free</artifactId>
        <version>5.3.1</version>
    </dependency>
</dependencies>
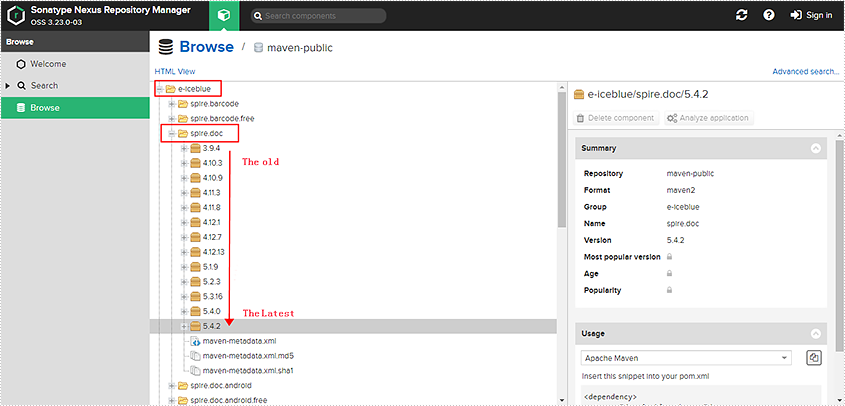
Kindly Reminder: You can query the historical versions of all Spire Java products in the Maven repository. Take Spire.Doc for Java as an example, all versions of the product are available in the e-IceBlue/spIre.doc/folder path:
Please use Spire.Office for Java or Free Spire.Office for Java if you need to operate multiple file formats in the same program, such as Word, Excel, PDF, or other formats. Otherwise, using more than one Spire products in the same program will cause program conflicts and result in exceptions.
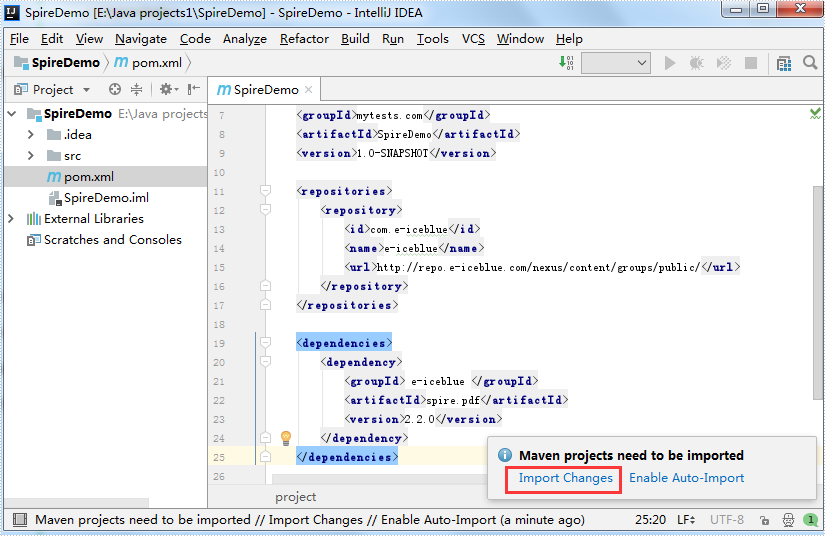
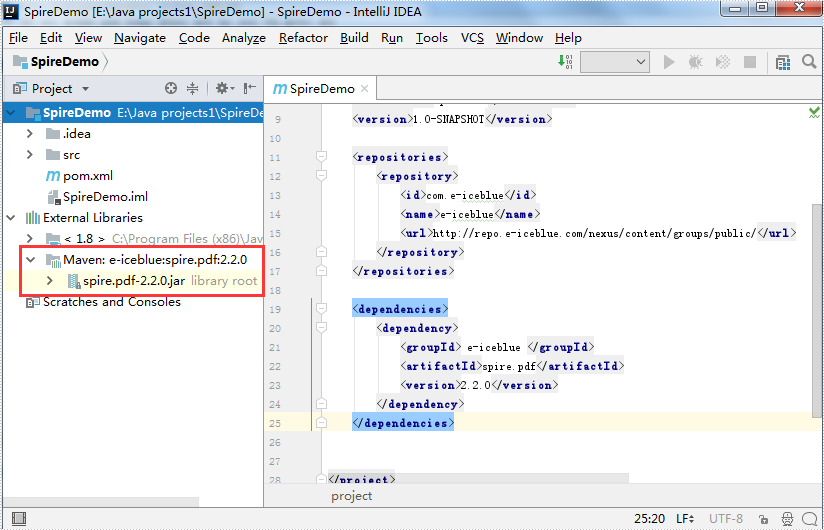
For IDEA, you only need to click "Import Changes" to import the Spire jars.
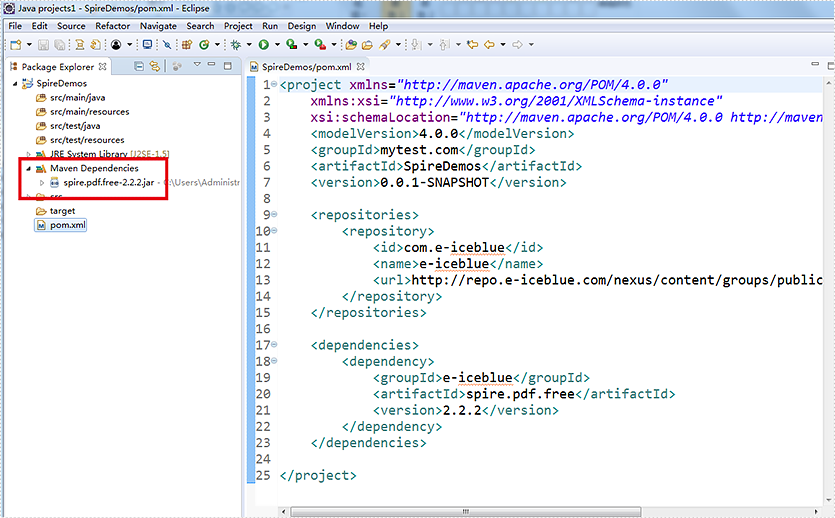
For Eclipse, you only need to click the "Save" button, then Spire jars will be downloaded automatically.
Now you have successfully defined the Spire Series Product for Java dependency in your Maven project.
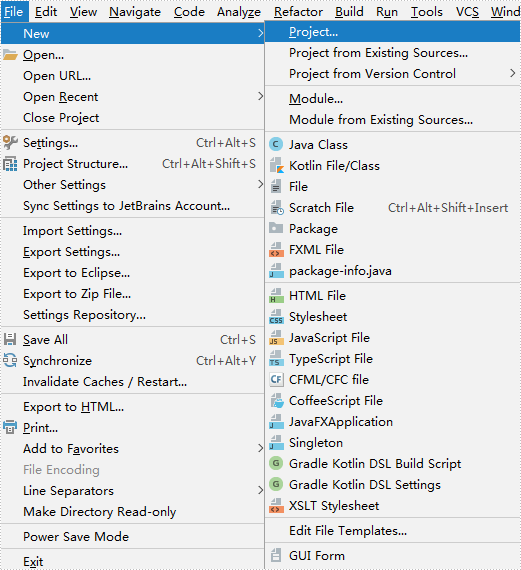
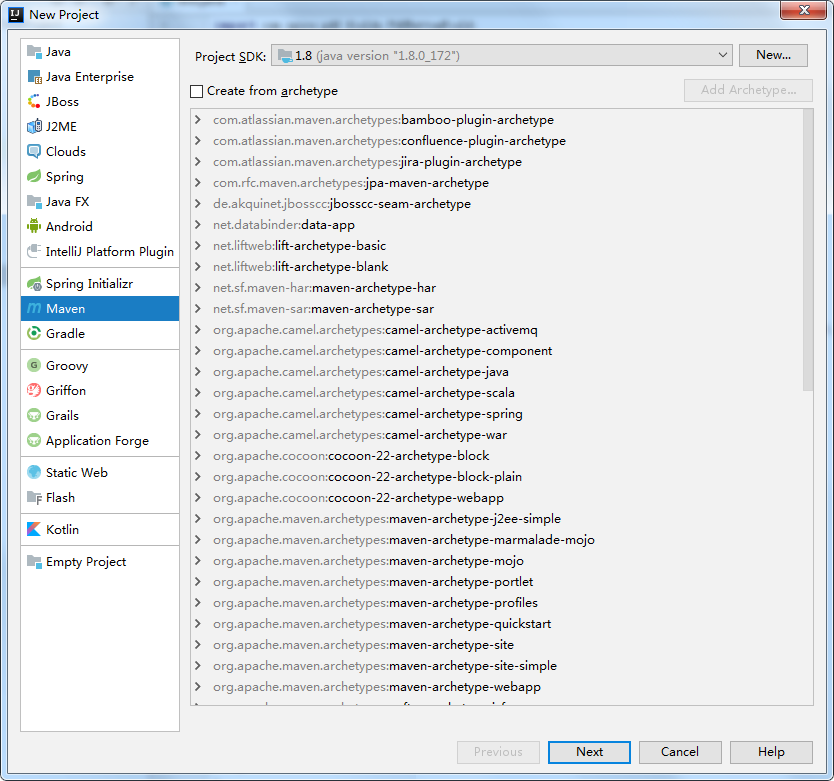
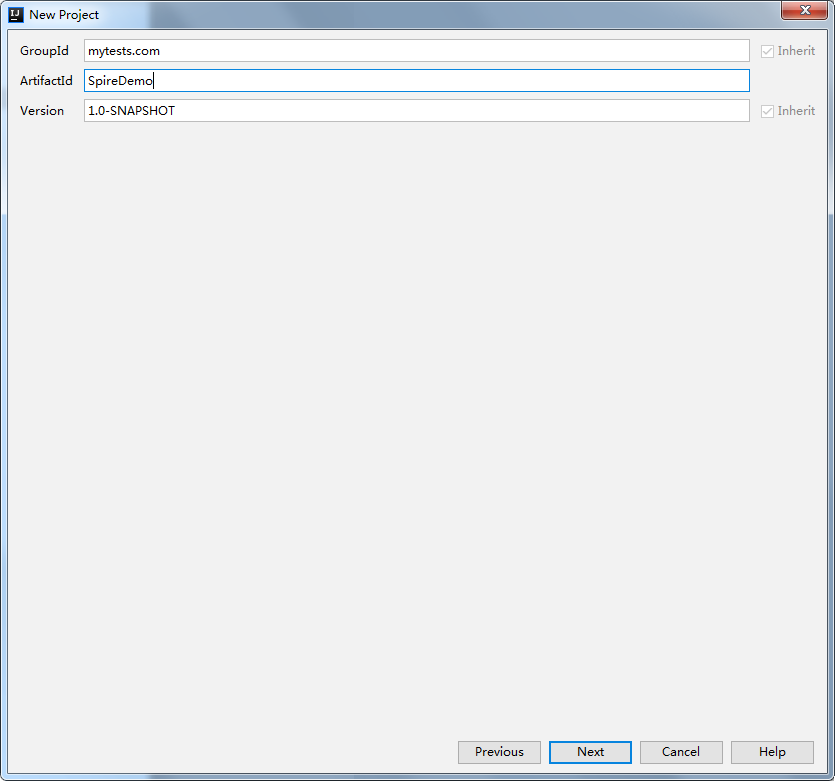
Step details for IDEA
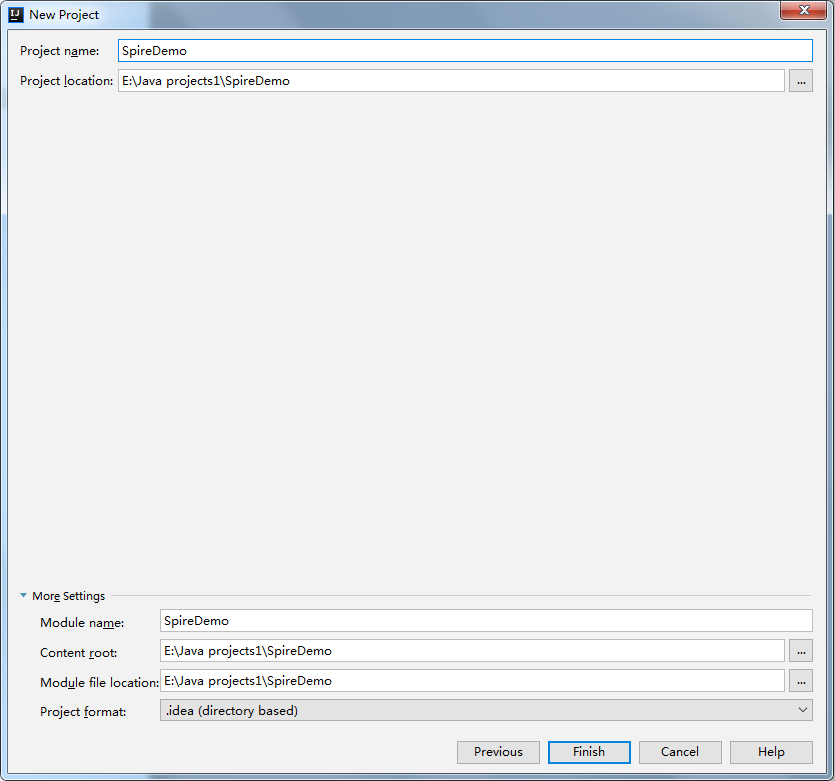
Create a new Maven Project: File - New - Project
Set the GroupId for the project:
Update the porm.xml and then Import Changes:
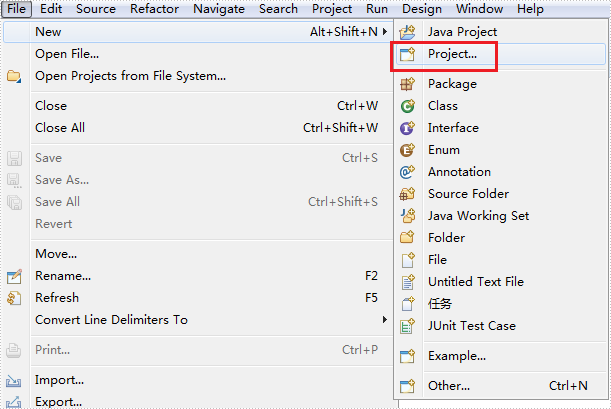
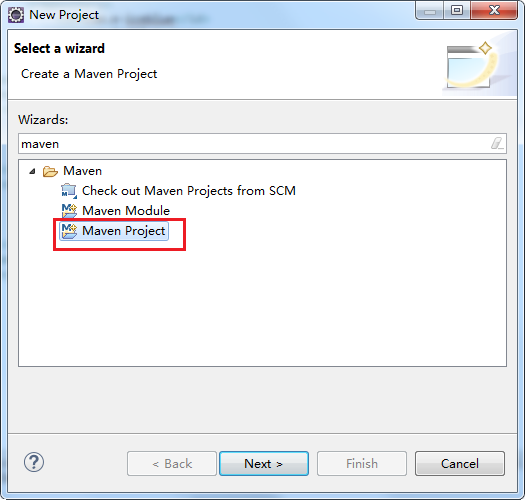
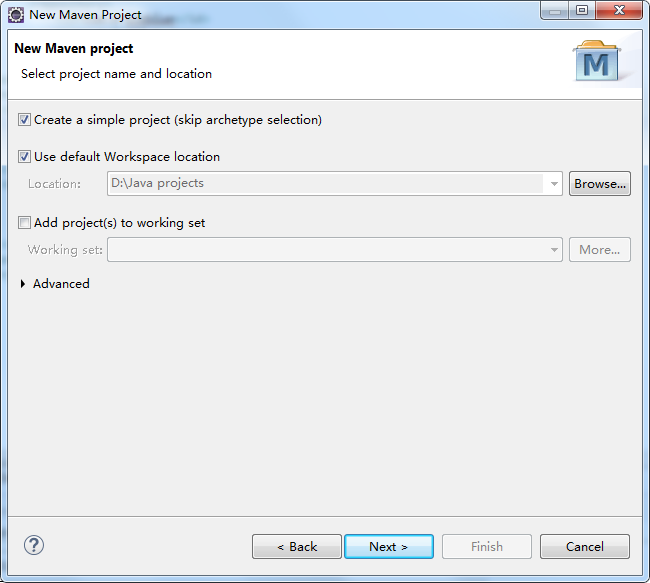
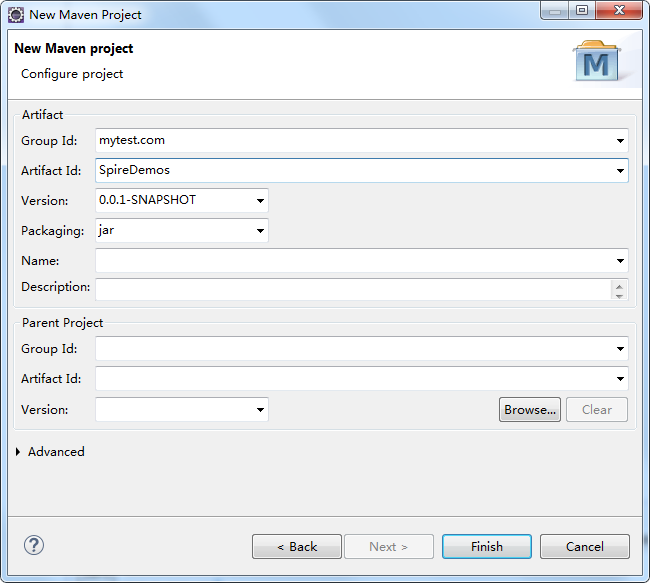
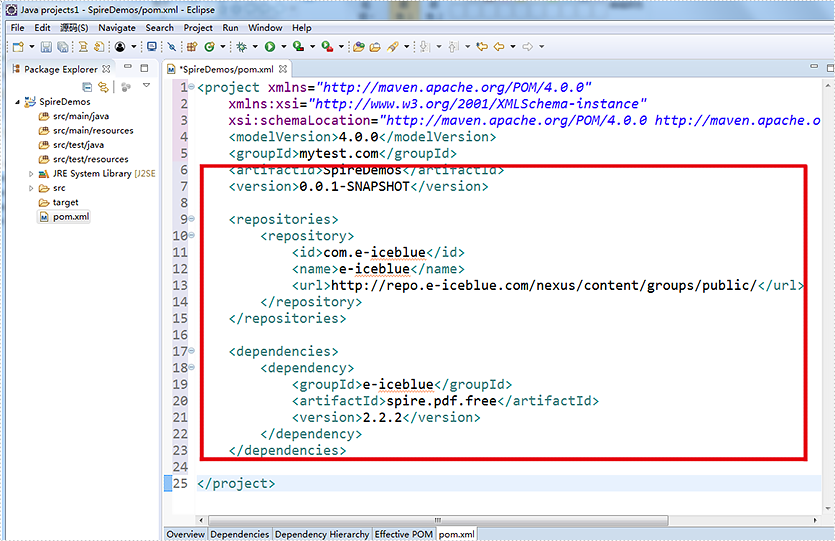
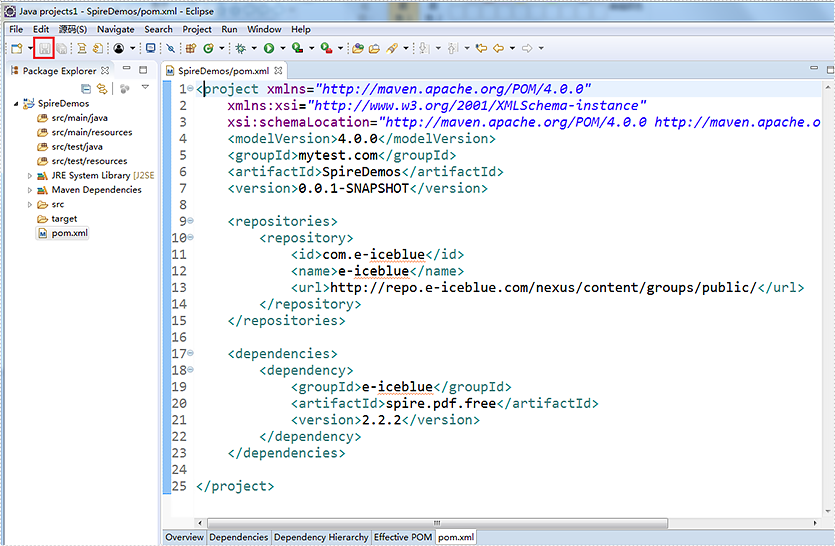
Step details for Eclipse
Create a new Maven Project:
Define the location and set the Group ID:
Update the pom.xml and then click Save button:
PDF (Portable Document Format) and XPS (XML Paper Specification) are two commonly used document formats for sharing and printing documents. While PDF is widely known and supported, XPS is a Microsoft-developed format that has gained popularity due to its superior graphics rendering capabilities. In this article, we will demonstrate how to use Spire.PDF for Java to convert PDF to XPS and XPS to PDF in high quality.
Install Spire.PDF for Java
First of all, you're required to add the Spire.Pdf.jar file as a dependency in your Java program. The JAR file can be downloaded from this link. If you use Maven, you can easily import the JAR file in your application by adding the following code to your project's pom.xml file.
<repositories>
    <repository>
        <id>com.e-iceblue</id>
        <name>e-iceblue</name>
        <url>https://repo.e-iceblue.com/nexus/content/groups/public/</url>
    </repository>
</repositories>
<dependencies>
    <dependency>
        <groupId>e-iceblue</groupId>
        <artifactId>spire.pdf</artifactId>
        <version>12.7.0</version>
    </dependency>
</dependencies>
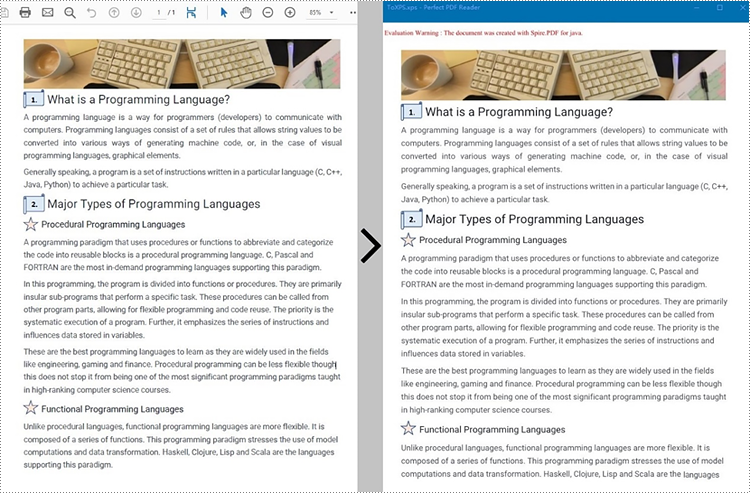
Convert PDF to XPS in Java
Spire.PDF for Java has a powerful conversion feature, which can convert PDF to XPS in just three steps. The detailed steps are as follows:
- Create a PdfDocument instance.
- Load a PDF sample document using PdfDocument.loadFromFile() method.
- Save the document as XPS using PdfDocument.saveToFile() method.
- Java
import com.spire.pdf.*;

public class PDFtoXPS {
    public static void main(String[] args) {

        //Create a PdfDocument instance
        PdfDocument pdf = new PdfDocument();

        //Load the PDF file
       pdf.loadFromFile("C:\\Users\\Administrator\\Desktop\\Input.pdf.pdf");

        //Save to XPS
        pdf.saveToFile("ToXPS.xps", FileFormat.XPS);
        pdf.close();
    }
}
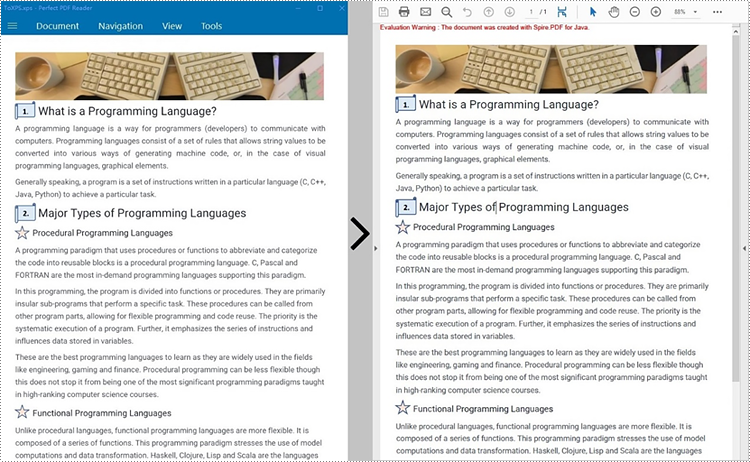
Convert XPS to PDF in Java
The PdfDocument.saveToFile() method provided by Spire.PDF for Java enables the conversion of a XPS file into a PDF document. The following are steps to convert XPS to PDF.
- Create a PdfDocument instance.
- Load a XPS file document using PdfDocument.loadFromFile() method.
- Save the document as PDF using PdfDocument.saveToFile() method.
- Java
import com.spire.pdf.*;

public class XPStoPDF {
    public static void main(String[] args) {

        //Create a PdfDocument instance
        PdfDocument pdf = new PdfDocument();

        //Load a XPS file
        pdf.loadFromXPS("C:\\Users\\Administrator\\Desktop\\sample.xps");

        //Save to PDF
        pdf.saveToFile("toPDF.pdf", FileFormat.PDF);
        pdf.close();
    }
}
Apply for a Temporary License
If you'd like to remove the evaluation message from the generated documents, or to get rid of the function limitations, please request a 30-day trial license for yourself.
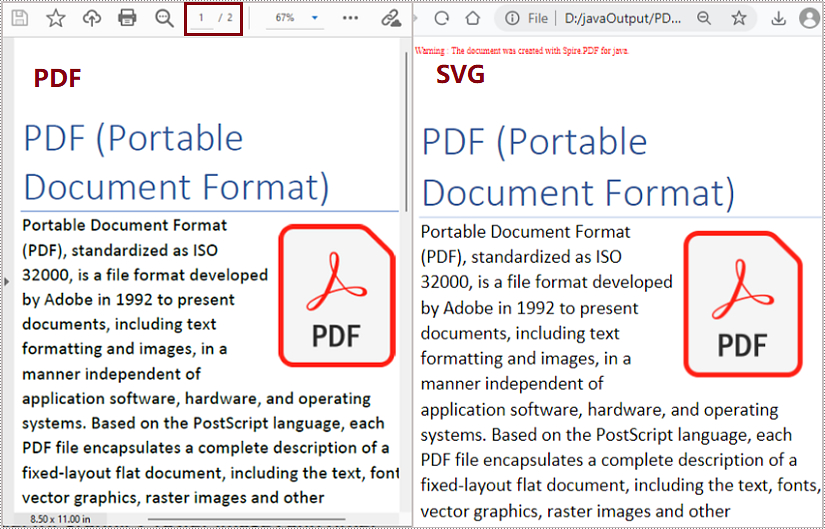
SVG, short for scalable vector graphics, is a vector image format based on XML for two-dimensional graphics. Vector image files, like SVG and PDF files, are very similar. They can display text, images, and other elements in the same appearance and keep the definition no matter how you zoom them. And because of their similarity, PDF files can be converted to SVG files almost losslessly. This article shows an easy method to convert PDF files to SVG files using Spire.PDF for Java.
- Convert Each Page of a PDF File to an SVG File
- Convert All the Pages of a PDF File to a Single SVG File
Install Spire.PDF for Java
First, you're required to add the Spire.Pdf.jar file as a dependency in your Java program. The JAR file can be downloaded from this link. If you use Maven, you can easily import the JAR file in your application by adding the following code to your project's pom.xml file.
<repositories>
    <repository>
        <id>com.e-iceblue</id>
        <name>e-iceblue</name>
        <url>https://repo.e-iceblue.com/nexus/content/groups/public/</url>
    </repository>
</repositories>
<dependencies>
    <dependency>
        <groupId>e-iceblue</groupId>
        <artifactId>spire.pdf</artifactId>
        <version>12.7.0</version>
    </dependency>
</dependencies>
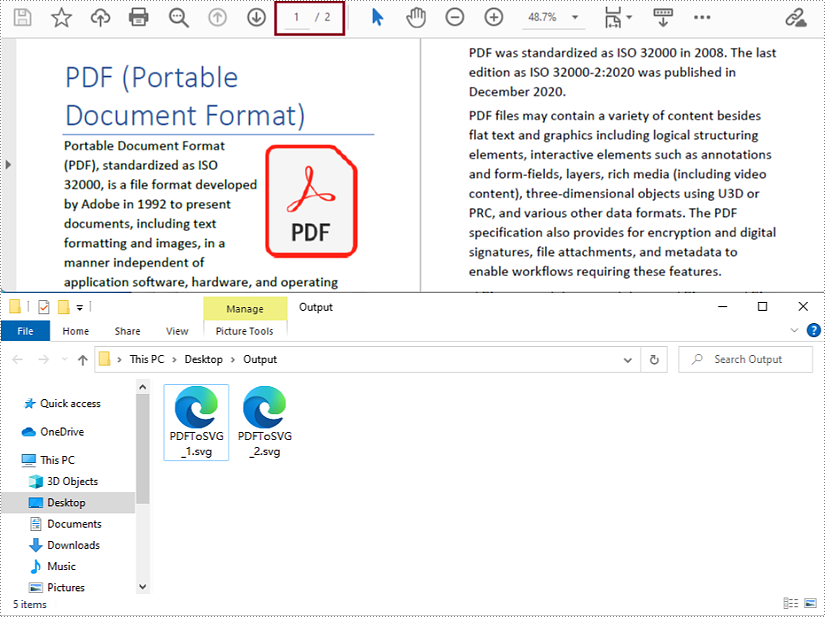
Convert Each Page of a PDF File to an SVG File
The detailed steps are as follows:
- Create an object of PdfDocument class.
- Load a PDF document from disk using PdfDocument.loadFromFile() method.
- Convert the document to SVG file and save it using PdfDocument.saveToFile() method.
- Java
import com.spire.pdf.*;

public class PDFToSVG {
    public static void main(String[] args) {
        //Create an object of Document class
        PdfDocument pdf = new PdfDocument();

        //Load a PDF document from disk
        pdf.loadFromFile("D:/Samples/Sample.pdf");

        //Convert the document to SVG and Save it
        pdf.saveToFile("D:/javaOutput/PDFToSVG.svg", FileFormat.SVG);
    }
}
Convert All the Pages of a PDF File to a Single SVG File
The detailed steps are as follows:
- Create an object of PdfDocument class.
- Load a PDF document from disk using PdfDocument.loadFromFile() method.
- Change the conversion settings to convert the PDF file to a single SVG file using PdfDocument.getConvertOptions().setOutputToOneSvg() method.
- Convert the document to SVG file and save it using PdfDocument.saveToFile() method.
- Java
import com.spire.pdf.*;

public class PDFToSVG {
    public static void main(String[] args) {
        //Create an object of Document class
        PdfDocument pdf = new PdfDocument();

        //Load a PDF document from disk
        pdf.loadFromFile("D:/Samples/Sample.pdf");

        //Change the conversion settings to convert the PDF file to a single SVG file
        pdf.getConvertOptions().setOutputToOneSvg(true);

        //Convert the document to SVG and Save it
        pdf.saveToFile("D:/javaOutput/PDFToSVG.svg", FileFormat.SVG);
    }
}
Apply for a Temporary License
If you'd like to remove the evaluation message from the generated documents, or to get rid of the function limitations, please request a 30-day trial license for yourself.
