Knowledgebase (2370)
Children categories
Occasionally, you may need to protect PowerPoint documents. For instance, when you want to prevent unauthorized users from viewing and editing a PowerPoint document. Conversely, sometimes you may also need to unprotect PowerPoint documents. For example, when you wish to make a password-protected PowerPoint document accessible to everyone. In this article, we will introduce how to protect or unprotect PowerPoint documents in Java using Spire.Presentation for Java.
- Protect a PowerPoint Document with a Password
- Mark a PowerPoint Document as Final
- Remove Password Protection from a PowerPoint Document
- Remove Mark as Final Option from a PowerPoint Document
Install Spire.Presentation for Java
First of all, you're required to add the Spire.Presentation.jar file as a dependency in your Java program. The JAR file can be downloaded from this link. If you use Maven, you can easily import the JAR file in your application by adding the following code to your project's pom.xml file.
<repositories>
    <repository>
        <id>com.e-iceblue</id>
        <name>e-iceblue</name>
        <url>https://repo.e-iceblue.com/nexus/content/groups/public/</url>
    </repository>
</repositories>
<dependencies>
    <dependency>
        <groupId>e-iceblue</groupId>
        <artifactId>spire.presentation</artifactId>
        <version>11.7.2</version>
    </dependency>
</dependencies>
Protect a PowerPoint Document with a Password in Java
You can protect a PowerPoint document with a password to ensure that only the people who have the right password can view it.
The following steps demonstrate how to protect a PowerPoint document with a password:
- Initialize an instance of Presentation class.
- Load a PowerPoint document using Presentation.loadFromFile() method.
- Encrypt the document with a password using Presentation.encrypt() method.
- Save the result document using Presentation.saveToFile() method.
- Java
import com.spire.presentation.FileFormat;
import com.spire.presentation.Presentation;

public class ProtectPPTWithPassword {
    public static void main(String []args) throws Exception {
        //Create a Presentation instance
        Presentation presentation = new Presentation();

        //Load a PowerPoint document
        presentation.loadFromFile("Sample.pptx");

        //Encrypt the document with a password
        presentation.encrypt("your password");

        //Save the result document
        presentation.saveToFile("Encrypted.pptx", FileFormat.PPTX_2013);

    }
}

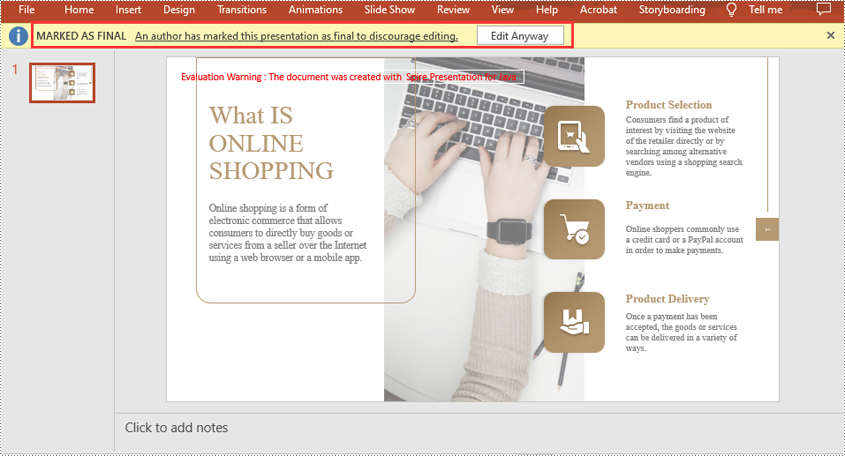
Mark a PowerPoint Document as Final in Java
You can mark a PowerPoint document as final to inform readers that the document is final and no further editing is expected.
The following steps demonstrate how to mark a PowerPoint document as final:
- Initialize an instance of Presentation class.
- Load a PowerPoint document using Presentation.LoadFromFile() method.
- Mark the document as final using Presentation.getDocumentProperty().set() method.
- Save the result document using Presentation.SaveToFile() method.
- Java
import com.spire.presentation.FileFormat;
import com.spire.presentation.Presentation;

public class MarkPPTAsFinal {
    public static void main(String []args) throws Exception {
        //Create a Presentation instance
        Presentation ppt = new Presentation();
        //Load a PowerPoint document
        ppt.loadFromFile("Sample.pptx");

        //Mark the document as final
        ppt.getDocumentProperty().set("_MarkAsFinal", true);

        //Save the result document
        ppt.saveToFile("MarkAsFinal.pptx", FileFormat.PPTX_2013);
    }
}
Remove Password Protection from a PowerPoint Document in Java
You can remove password protection from a PowerPoint document by loading the document with the correct password, then removing the password protection from it.
The following steps demonstrate how to remove password protection from a PowerPoint document:
- Initialize an instance of Presentation class.
- Load a PowerPoint document using Presentation.loadFromFile() method.
- Mark the document as final through Presentation.removeEncryption() method.
- Save the result document using Presentation.saveToFile() method.
- Java
import com.spire.presentation.FileFormat;
import com.spire.presentation.Presentation;

public class RemovePasswordProtectionFromPPT {
    public static void main(String []args) throws Exception {
        //Create a Presentation instance
        Presentation presentation = new Presentation();

        //Load a password-protected PowerPoint document with the right password
        presentation.loadFromFile("Encrypted.pptx", "your password");

        //Remove password protection from the document
        presentation.removeEncryption();

        //Save the result document
        presentation.saveToFile("RemoveProtection.pptx", FileFormat.PPTX_2013);

    }
}
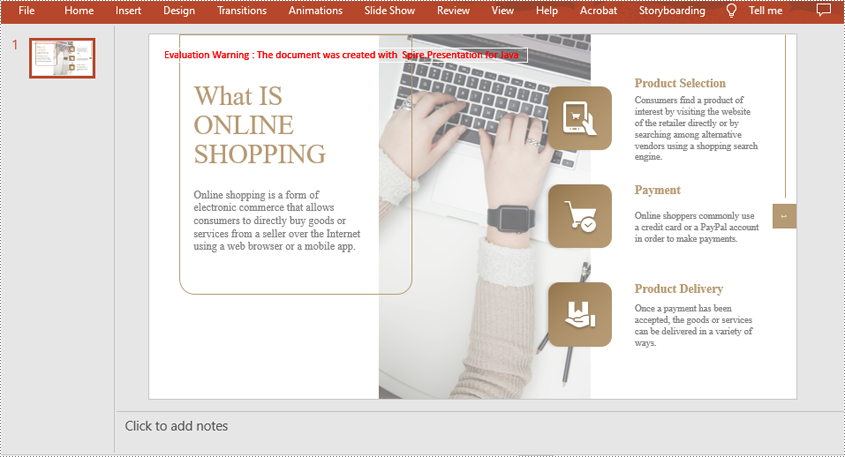
Remove Mark as Final Option from a PowerPoint Document in Java
The mark as final feature makes a PowerPoint document read-only to prevent further changes, if you decide to make changes to the document later, you can remove the mark as final option from it.
The following steps demonstrate how to remove mark as final option from a PowerPoint document:
- Initialize an instance of Presentation class.
- Load a PowerPoint document using Presentation.loadFromFile() method.
- Remove the mark as final option from the document using Presentation.getDocumentProperty().set() method.
- Save the result document using Presentation.saveToFile() method.
- Java
import com.spire.presentation.FileFormat;
import com.spire.presentation.Presentation;

public class RemoveMarkAsFinalFromPPT {
    public static void main(String []args) throws Exception {
        //Create a Presentation instance
        Presentation ppt = new Presentation();
        //Load a PowerPoint document
        ppt.loadFromFile( "MarkAsFinal.pptx");

        //Remove mark as final option from the document
        ppt.getDocumentProperty().set("_MarkAsFinal", false);

        //Save the result document
        ppt.saveToFile("RemoveMarkAsFinal.pptx", FileFormat.PPTX_2013);
    }
}

Apply for a Temporary License
If you'd like to remove the evaluation message from the generated documents, or to get rid of the function limitations, please request a 30-day trial license for yourself.
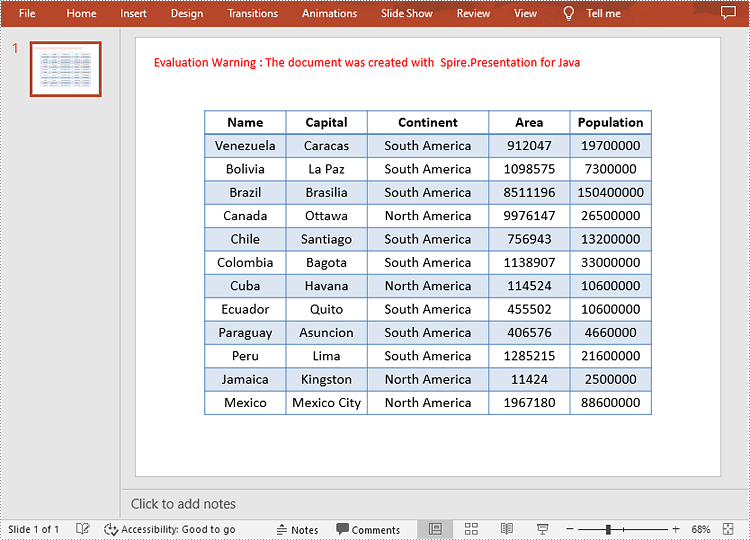
Tables in PowerPoint are a valuable tool for organizing and presenting data in a clear and concise manner. When creating business presentations or financial reports, you can insert tables to present data effectively and make your presentations more impactful and attractive to your audience. This article will demonstrate how to programmatically add a table to a presentation slide using Spire.Presentation for Java.
Install Spire.Presentation for Java
First of all, you're required to add the Spire.Presentation.jar file as a dependency in your Java program. The JAR file can be downloaded from this link. If you use Maven, you can easily import the JAR file in your application by adding the following code to your project's pom.xml file.
<repositories>
    <repository>
        <id>com.e-iceblue</id>
        <name>e-iceblue</name>
        <url>https://repo.e-iceblue.com/nexus/content/groups/public/</url>
    </repository>
</repositories>
<dependencies>
    <dependency>
        <groupId>e-iceblue</groupId>
        <artifactId>spire.presentation</artifactId>
        <version>11.7.2</version>
    </dependency>
</dependencies>
Insert a Table in PowerPoint in Java
To create a table in a specified PowerPoint slide, you can use the ISlide.getShapes().appendTable() method. With Spire.Presentation for Java, you are also allowed to format the style of the table. The following are the detailed steps.
- Create a Presentation instance.
- Get a specified slide using Presentation.getSlides().get() method.
- Define two double arrays to specify the number and size of rows and columns in the table.
- Add a table with the specified number and size of rows and columns to the slide using ISlide.getShapes().appendTable() method.
- Define some data and then then fill the table with the data using ITable.get().getTextFrame().setText() method.
- Set the text font and alignment of the table.
- Set a built-in table style using ITable.setStylePreset() method.
- Save the result document using Presentation.saveToFile() method.
- Java
import com.spire.presentation.*;

public class AddTable {
    public static void main(String[] args) throws Exception {
        //Create a Presentation instance
        Presentation presentation = new Presentation();

        //Get the first slide
        ISlide slide = presentation.getSlides().get(0);

        //Define two double arrays to specify the number and size of rows and columns in the table
        Double[] widths = new Double[]{100d, 100d, 150d, 100d, 100d};
        Double[] heights = new Double[]{15d, 15d, 15d, 15d, 15d, 15d, 15d, 15d, 15d, 15d, 15d, 15d, 15d};


        //Add a table with the specified number and size of rows and columns to the slide
        ITable table = slide.getShapes().appendTable((float) presentation.getSlideSize().getSize().getWidth() / 2 - 275, 90, widths, heights);

        //Specify table data
        String[][] dataStr = new String[][]
                {
                        {"Name", "Capital", "Continent", "Area", "Population"},
                        {"Venezuela", "Caracas", "South America", "912047", "19700000"},
                        {"Bolivia", "La Paz", "South America", "1098575", "7300000"},
                        {"Brazil", "Brasilia", "South America", "8511196", "150400000"},
                        {"Canada", "Ottawa", "North America", "9976147", "26500000"},
                        {"Chile", "Santiago", "South America", "756943", "13200000"},
                        {"Colombia", "Bagota", "South America", "1138907", "33000000"},
                        {"Cuba", "Havana", "North America", "114524", "10600000"},
                        {"Ecuador", "Quito", "South America", "455502", "10600000"},
                        {"Paraguay", "Asuncion", "South America", "406576", "4660000"},
                        {"Peru", "Lima", "South America", "1285215", "21600000"},
                        {"Jamaica", "Kingston", "North America", "11424", "2500000"},
                        {"Mexico", "Mexico City", "North America", "1967180", "88600000"}
                };

        //Add data to table
        for (int i = 0; i < 13; i++) {
        for (int j = 0; j < 5; j++) {
        //Fill the table with data
        table.get(j, i).getTextFrame().setText(dataStr[i][j]);

        //Set the text font
        table.get(j, i).getTextFrame().getParagraphs().get(0).getTextRanges().get(0).setLatinFont(new TextFont("Calibri"));

        //Set the text alignment of the table
        table.get(j, i).getTextFrame().getParagraphs().get(0).setAlignment(TextAlignmentType.CENTER);
            }
        }

        //Set the table style
        table.setStylePreset(TableStylePreset.LIGHT_STYLE_3_ACCENT_1);

        //Save the result document
        presentation.saveToFile("AddTable.pptx", FileFormat.PPTX_2013);
    }
}
Apply for a Temporary License
If you'd like to remove the evaluation message from the generated documents, or to get rid of the function limitations, please request a 30-day trial license for yourself.
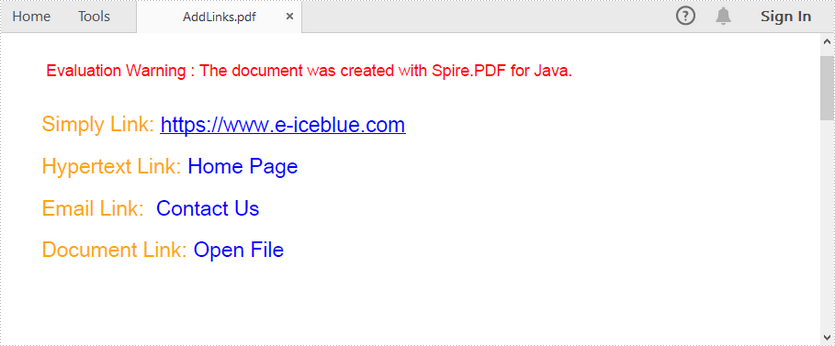
This article demonstrates how to add links, including ordinary link, hypertext link, email link and document link, to a PDF document by using Spire.PDF for Java.
import com.spire.pdf.annotations.*;
import com.spire.pdf.graphics.*;

import java.awt.*;
import java.awt.font.TextAttribute;
import java.awt.geom.Point2D;
import java.awt.geom.Rectangle2D;
import java.util.HashMap;

public class AddLinksToPdf {

    public static void main(String[] args) throws Exception {

        //create a pdf document
        PdfDocument doc = new PdfDocument();
        PdfPageBase page = doc.getPages().add();

        //initialize x, y coordinates
        float y = 30;
        float x = 0;

        //create a plain font
        PdfTrueTypeFont plainFont = new PdfTrueTypeFont(new Font("Arial Unicode MS",Font.PLAIN,13),true);

        //create a underlined font
        HashMap<TextAttribute, Object> hm = new HashMap<TextAttribute, Object>();
        hm.put(TextAttribute.UNDERLINE, TextAttribute.UNDERLINE_ON);
        hm.put(TextAttribute.SIZE, 13);
        hm.put(TextAttribute.FAMILY, "Arial");
        Font font = new Font(hm);
        PdfTrueTypeFont underlineFont = new PdfTrueTypeFont(font);

        //add a simply link to pdf
        String label = "Simply Link: ";
        PdfStringFormat format = new PdfStringFormat();
        format.setMeasureTrailingSpaces(true);
        page.getCanvas().drawString(label, plainFont, PdfBrushes.getOrange(), 0, y,format);
        x = (float)plainFont.measureString(label,format).getWidth();
        page.getCanvas().drawString("https://www.e-iceblue.com", underlineFont, PdfBrushes.getBlue(), x, y+2);
        y = y + 26;

        //add a hyper text link to pdf
        label= "Hypertext Link: ";
        page.getCanvas().drawString(label, plainFont, PdfBrushes.getOrange(), 0, y, format);
        x = (float)plainFont.measureString(label,format).getWidth();
        PdfTextWebLink webLink = new PdfTextWebLink();
        webLink.setText("Home Page");
        webLink.setUrl("https://www.e-iceblue.com");
        webLink.setFont(plainFont);
        webLink.setBrush(PdfBrushes.getBlue());
        webLink.drawTextWebLink(page.getCanvas(), new Point2D.Float(x, y));
        y= y + 26;

        //add an email link to pdf
        label = "Email Link:  ";
        page.getCanvas().drawString(label, plainFont, PdfBrushes.getOrange(), 0, y, format);
        x = (float)plainFont.measureString(label, format).getWidth();
        webLink = new PdfTextWebLink();
        webLink.setText("Contact Us");
        webLink.setUrl("mailto:support@e-iceblue.com");
        webLink.setFont(plainFont);
        webLink.setBrush(PdfBrushes.getBlue());
        webLink.drawTextWebLink(page.getCanvas(), new Point2D.Float(x, y));
        y = y + 26;

        //add a document link to pdf
        label = "Document Link: ";
        page.getCanvas().drawString(label, plainFont, PdfBrushes.getOrange(), 0, y, format);
        x = (float)plainFont.measureString(label, format).getWidth();
        page.getCanvas().drawString("Open File", plainFont, PdfBrushes.getBlue(), x, y, format);
        Rectangle2D rect = new Rectangle2D.Float(x,y+2,60,15);
        PdfFileLinkAnnotation fileLinkAnnotation = new PdfFileLinkAnnotation(rect,"C:\\Users\\Administrator\\Desktop\\Image.png");
        fileLinkAnnotation.setBorder(new PdfAnnotationBorder(0f));
        ((PdfNewPage) ((page instanceof PdfNewPage) ? page : null)).getAnnotations().add(fileLinkAnnotation);

        //save to file
        doc.saveToFile("output/AddLinks.pdf");
        doc.close();
    }
}
Output: