
Knowledgebase (2370)
Children categories
In MS word, images can quickly and easily convey complex information that may be difficult to explain in words alone. Whether you're creating a report, a presentation, a newsletter, or a simple document, adding images can make your content more engaging, informative, and visually appealing. In this article, you will learn how to add images to a Word document in React using Spire.Doc for JavaScript.
- Insert an Image in a Word Document in JavaScript
- Insert an Image at a Specified Location in Word in JavaScript
Install the JavaScript Library
To get started with inserting images in Word in a React application, you can either download Spire.Doc for JavaScript from our website or install it via npm with the following command:
npm i spire.officeThe downloaded product package integrates Spire.Doc for JavaScript, Spire.XLS for JavaScript, Spire.PDF for JavaScript, and Spire.Presentation for JavaScript. To use the features of Spire.Doc for JavaScript, you need to copy the corresponding files (spire.doc.js, Spire.Doc.Wasm.zip, spire.common.js, Spire.Common.Wasm.zip, and the _framework folder) to the public folder of your project. To ensure proper text rendering, you can add relevant font files with a custom path. In the following example, the font is added to the path: public\static\font.
For more details, refer to the documentation: How to Integrate Spire.Doc for JavaScript in a React Project
Insert an Image in a Word Document in JavaScript
The Paragraph.AppendPicture() method offered by Spire.Doc for JavaScript allows to insert an image into a Word document. The following are the main steps to insert an image in Word and set its size, text wrapping style using JavaScript.
- Create a new document using the new wasmModule.Document() method.
- Load a Word document using the Document.LoadFromFile() method.
- Get a specified section in the document using the Document.Sections.get_Item() method.
- Get a specified paragraph in the section using the Section.Paragraphs.get_Item() method.
- Add an image to the specified paragraph using the Paragraph.AppendPicture() method.
- Set width, height and text wrapping style for the image.
- Save the result document using Document.SaveToFile() method.
- JavaScript
import React, { useState, useEffect } from 'react';

function App() {
  const [wasmModule, setWasmModule] = useState(null);
  // Load Spire.Doc
  useEffect(() => {
    (async () => {
      try {
        const publicUrl = process.env.PUBLIC_URL || '';
        const spireModule = await import(/* webpackIgnore: true */ `${publicUrl}/spire.doc.js`);
        const rawModule = spireModule.default || spireModule;
        window.wasmModule = typeof rawModule === 'function'
          ? await rawModule({ locateFile: p => p.endsWith('.wasm') ? `${publicUrl}/${p}` : p })
          : rawModule;
        setWasmModule(window.wasmModule);
      } catch (error) {
        console.error('Failed to load spire.doc.js WASM module:', error);
      }
    })();
  }, []);

  // Function to insert an image in Word
  const InsertWordImage = async () => {
    const wasmModule = window.wasmModule.spiredoc;

    if (wasmModule) {
      // Load the font files into the virtual file system (VFS)
      await window.spire.FetchFileToVFS('Arial.ttf', '/Library/Fonts/', `${process.env.PUBLIC_URL}/static/font/`);

      // Specify the input file name and the output file name
      const inputFileName = 'input.docx';
      const outputFileName = "InsertImage.docx";
      const imageFile = "logo.png";

      // Fetch the input file and add it to the VFS
      await window.spire.FetchFileToVFS(inputFileName, '', `${process.env.PUBLIC_URL}/static/data/`);
      await window.spire.FetchFileToVFS(imageFile, '', `${process.env.PUBLIC_URL}/static/data/`);

      // Create an instance of the Document class
      const doc = new wasmModule.Document();

      // Load the Word document
      doc.LoadFromFile({ fileName: inputFileName });

      // Get the first section
      const section = doc.Sections.get_Item(0);

      // Get the first paragraph
      const paragraph = section.Paragraphs.get_Item(0);

      // Add the image to the first paragraph
      let picture = paragraph.AppendPicture({ imgFile: imageFile });

      // Set image width and height
      picture.Width = 100;
      picture.Height = 100;

      // Set text wrapping style for the image
      picture.TextWrappingStyle = wasmModule.TextWrappingStyle.Square;

      // Save the result document
      doc.SaveToFile({ fileName: outputFileName, fileFormat: wasmModule.FileFormat.Docx });

      // Release resources
      doc.Dispose();

      // Read the generated Word file from VFS
      const modifiedFileArray = window.dotnetRuntime.Module.FS.readFile(outputFileName);

      // Create a Blob object from the Word file
      const modifiedFile = new Blob([modifiedFileArray], { type: "application/vnd.openxmlformats-officedocument.wordprocessingml.document" });

      // Create a URL for the Blob
      const url = URL.createObjectURL(modifiedFile);

      // Create an anchor element to trigger the download
      const a = document.createElement("a");
      a.href = url;
      a.download = outputFileName;
      document.body.appendChild(a);
      a.click();
      document.body.removeChild(a);
      URL.revokeObjectURL(url);
    }
  };

  return (
    <div style={{ textAlign: 'center', height: '300px' }}>
      <h1>Insert an Image in a Word Document Using JavaScript in React</h1>
      <button onClick={InsertWordImage} disabled={!wasmModule}>
        Execute
      </button>
    </div>
  );
}

export default App;
Run the code to launch the React app at localhost:3000. Once it's running, click on the "Execute" button to download the result file:
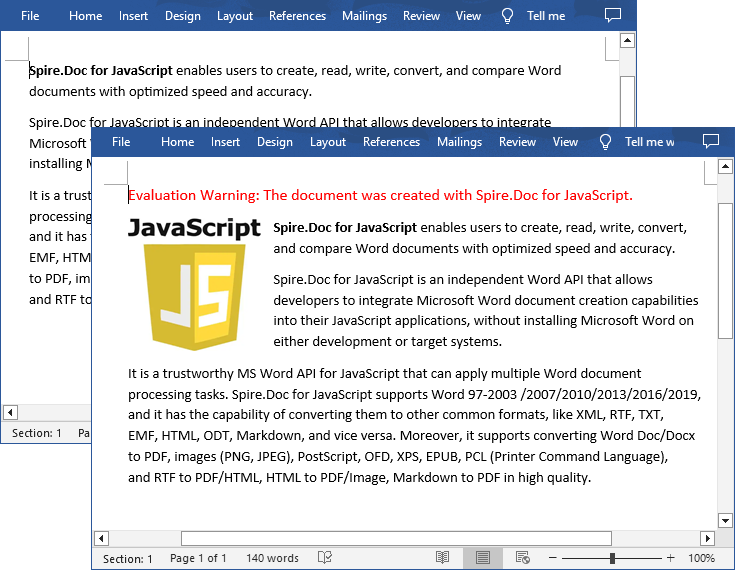
The input file and the result file:
Insert an Image at a Specified Location in Word in JavaScript
You can also place the image at any specified location in the Word document through the DocPicture.HorizontalPosition and DocPicture.VerticalPosition properties. The following are the main steps:
- Create a new document using the new wasmModule.Document() method.
- Add a section to the document using the Document.AddSection() method.
- Add a paragraph to the section using the Section.AddParagraph() method.
- Add text to the paragraph and set paragraph style.
- Add an image to the paragraph using the Paragraph.AppendPicture() method.
- Set the horizontal position and vertical position for the image through the DocPicture.HorizontalPosition and DocPicture.VerticalPosition properties.
- Set width, height and text wrapping style for the image.
- Save the result document using Document.SaveToFile() method.
- JavaScript
import React, { useState, useEffect } from 'react';

function App() {
  const [wasmModule, setWasmModule] = useState(null);
  // Load Spire.Doc
  useEffect(() => {
    (async () => {
      try {
        const publicUrl = process.env.PUBLIC_URL || '';
        const spireModule = await import(/* webpackIgnore: true */ `${publicUrl}/spire.doc.js`);
        const rawModule = spireModule.default || spireModule;
        window.wasmModule = typeof rawModule === 'function'
          ? await rawModule({ locateFile: p => p.endsWith('.wasm') ? `${publicUrl}/${p}` : p })
          : rawModule;
        setWasmModule(window.wasmModule);
      } catch (error) {
        console.error('Failed to load spire.doc.js WASM module:', error);
      }
    })();
  }, []);

  // Function to insert an image at a specified location in Word
  const InsertImage = async () => {
    const wasmModule = window.wasmModule.spiredoc;

    if (wasmModule) {
      // Load the font files into the virtual file system (VFS)
      await window.spire.FetchFileToVFS('Arial.ttf', '/Library/Fonts/', `${process.env.PUBLIC_URL}/static/font/`);

      // Specify the input file name and the output file name
      const outputFileName = "WordImage.docx";
      const imageFile = "logo.png";

      // Fetch the input file and add it to the VFS
      await window.spire.FetchFileToVFS(imageFile, '', `${process.env.PUBLIC_URL}/static/data/`);

      // Create an instance of the Document class
      const doc = new wasmModule.Document();

      // Add a section in the document
      let section = doc.AddSection();

      // Add a paragraph to the section
      let paragraph = section.AddParagraph();

      // Add text to the paragraph and set paragraph style
      paragraph.AppendText("The sample demonstrates how to insert an image at a specified location in a Word document.");
      paragraph.ApplyStyle({ builtinStyle: wasmModule.BuiltinStyle.Heading2 });

      //Add an image to the paragraph
      let picture = paragraph.AppendPicture({ imgFile: imageFile });

      // Set image position
      picture.HorizontalPosition = 150.0;
      picture.VerticalPosition = 70.0;

      // Set image width and height
      picture.Width = 100;
      picture.Height = 100;

      // Set text wrapping style for the image
      picture.TextWrappingStyle = wasmModule.TextWrappingStyle.Through;

      // Save the result document
      doc.SaveToFile({ fileName: outputFileName, fileFormat: wasmModule.FileFormat.Docx });

      // Release resources
      doc.Dispose();

      // Read the generated Word file from VFS
      const modifiedFileArray = window.dotnetRuntime.Module.FS.readFile(outputFileName);

      // Create a Blob object from the Word file
      const modifiedFile = new Blob([modifiedFileArray], { type: "application/vnd.openxmlformats-officedocument.wordprocessingml.document" });

      // Create a URL for the Blob
      const url = URL.createObjectURL(modifiedFile);

      // Create an anchor element to trigger the download
      const a = document.createElement("a");
      a.href = url;
      a.download = outputFileName;
      document.body.appendChild(a);
      a.click();
      document.body.removeChild(a);
      URL.revokeObjectURL(url);
    }
  };

  return (
    <div style={{ textAlign: 'center', height: '300px' }}>
      <h1>Insert an Image at a Specified Location in Word Using JavaScript in React</h1>
      <<button onClick={InsertImage} disabled={!wasmModule}>
      Execute
      </button>
    </div>
 );
}

export default App;
Get a Free License
To fully experience the capabilities of Spire.Doc for JavaScript without any evaluation limitations, you can request a free 30-day trial license.
Insert or Delete Images in Excel with JavaScript in React
2025-03-03 01:05:21 Written by AdministratorImages in Excel can add a visual element to your data, making it more engaging and easier to understand. From adding company logos to embedding charts or diagrams, images can convey complex information more effectively than text alone. There are also times that you need to remove the images that are no longer relevant or cluttering your worksheet. This article will demonstrate how to insert or delete images in an Excel worksheet in React using Spire.XLS for JavaScript.
Install Spire.XLS for JavaScript
To get started with inserting or deleting picture in Excel in a React application, you can either download Spire.XLS for JavaScript from our website or install it via npm with the following command:
npm i spire.office
The downloaded product package has been integrated Spire.Doc for JavaScript,Spire.XLS for JavaScript,Spire.PDF for JavaScript,Spire.Presentation for JavaScript. To use the functionality of Spire.XLS for JavaScript, you need to copy the corresponding files (spire.xls.js, Spire.Xls.Wasm.zip, spire.common.js, Spire.Common.Wasm.zip, and _framework) to the project's "public" folder. At the same time, in order to ensure text rendering, the related font files can be added with custom paths. In the following example, the font addition path is: public\static\font.
For more details, refer to the documentation: How to Integrate Spire.XLS for JavaScript in a React Project
Insert Images in Excel in JavaScript
Spire.XLS for JavaScript provides the Worksheet.Pictures.Add() method to add a picture to a specified cell in an Excel worksheet. The following are the main steps.
- Create a Workbook object using the new wasmModule.Workbook() method.
- Get a specific worksheet using the Workbook.Worksheets.get() method.
- Insert a picture into a specific cell using the Worksheet.Pictures.Add() method and return an object of ExcelPicture.
- Set the width and height of the picture, as well as the distance between the picture and the cell border through the properties under the ExcelPicture object.
- Save the result file using the Workbook.SaveToFile() method.
- JavaScript
import React, { useState, useEffect } from 'react';
function App() {
  const [wasmModule, setWasmModule] = useState(null);
  // Load Spire.XLS
  useEffect(() => {
    (async () => {
      try {
        const publicUrl = process.env.PUBLIC_URL || '';
        const spireModule = await import(/* webpackIgnore: true */ `${publicUrl}/spire.xls.js`);
        const rawModule = spireModule.default || spireModule;
        window.wasmModule = typeof rawModule === 'function'
          ? await rawModule({ locateFile: p => p.endsWith('.wasm') ? `${publicUrl}/${p}` : p })
          : rawModule;
        setWasmModule(window.wasmModule);
      } catch (error) {
        console.error('Failed to load spire.xls.js WASM module:', error);
      }
    })();
  }, []);

  // Function to insert an image in Excel
  const InsertExcelImage = async () => {
    const wasmModule = window.wasmModule.spirexls;

    if (wasmModule) {
      // Load font into Virtual File System (VFS)
      await window.spire.FetchFileToVFS('Arial.ttf', '/Library/Fonts/', `${process.env.PUBLIC_URL}/static/font/`);


      // Load the image files into the virtual file system (VFS)
      let inputFileName = 'logo.png';
      await window.spire.FetchFileToVFS(inputFileName, '', `${process.env.PUBLIC_URL}/static/data/`);


      // Create a new workbook
      let workbook = new wasmModule.Workbook();

      // Get the first worksheet.
      let sheet = workbook.Worksheets.get(0);

      // Add a picture to the specific cell
      let picture = sheet.Pictures.Add({ topRow: 2, leftColumn: 3, fileName: inputFileName });

      // Set the picture width and height
      picture.Width = 150
      picture.Height = 150

      // Adjust the column width and row height to accommodate the picture
      sheet.SetRowHeight(2, 135);
      sheet.SetColumnWidth(3, 25);

      // Set the distance between cell border and picture
      picture.LeftColumnOffset = 90
      picture.TopRowOffset = 20

      // Save the modified workbook to the specified file
      const outputFileName = 'InsertExcelImage.xlsx';
      workbook.SaveToFile({ fileName: outputFileName, version: wasmModule.ExcelVersion.Version2016 });

      // Read the saved file and convert to Blob object
      const modifiedFileArray = window.dotnetRuntime.Module.FS.readFile(outputFileName);
      const modifiedFile = new Blob([modifiedFileArray], { type: 'application/vnd.openxmlformats-officedocument.spreadsheetml.sheet' });

      // Create a URL for the Blob and initiate download
      const url = URL.createObjectURL(modifiedFile);
      const a = document.createElement('a');
      a.href = url;
      a.download = outputFileName;
      document.body.appendChild(a);
      a.click();
      document.body.removeChild(a);
      URL.revokeObjectURL(url);

      // Clean up resources used by the workbook
      workbook.Dispose();
    }
  };

  return (
    <div style={{ textAlign: 'center', height: '300px' }}>
      <h1>Insert an Image to a Specified Cell in Excel Using JavaScript in React</h1>
      <button onClick={InsertExcelImage} disabled={!wasmModule}>
        Process
      </button>
    </div>
  );
}

export default App;
Run the code to launch the React app at localhost:3000. Once it's running, click the "Process" button to insert image in Excel:
Below is the result file:

Delete Images in Excel in JavaScript
To delete all pictures in an Excel worksheet, you need to iterate through each picture and then remove them through the Worksheet.Pictures.get().Remove() method. The following are the main steps.
- Create a Workbook object using the new wasmModule.Workbook() method.
- Load an Excel file using the Workbook.LoadFromFile() method.
- Get a specific worksheet using the Workbook.Worksheets.get() method.
- Iterate through all pictures in the worksheet and then remove them using the Worksheet.Pictures.get().Remove() method.
- Save the result file using the Workbook.SaveToFile() method.
- JavaScript
import React, { useState, useEffect } from 'react';
function App() {
  const [wasmModule, setWasmModule] = useState(null);
  // Load Spire.XLS
  useEffect(() => {
    (async () => {
      try {
        const publicUrl = process.env.PUBLIC_URL || '';
        const spireModule = await import(/* webpackIgnore: true */ `${publicUrl}/spire.xls.js`);
        const rawModule = spireModule.default || spireModule;
        window.wasmModule = typeof rawModule === 'function'
          ? await rawModule({ locateFile: p => p.endsWith('.wasm') ? `${publicUrl}/${p}` : p })
          : rawModule;
        setWasmModule(window.wasmModule);
      } catch (error) {
        console.error('Failed to load spire.xls.js WASM module:', error);
      }
    })();
  }, []);

  // Function to delete images from Excel
  const DeleteExcelImage = async () => {
    const wasmModule = window.wasmModule.spirexls;

    if (wasmModule) {
      // Load font into Virtual File System (VFS)
      await window.spire.FetchFileToVFS('Arial.ttf', '/Library/Fonts/', `${process.env.PUBLIC_URL}/static/font/`);


      // Load the excel files into the virtual file system (VFS)
      let inputFileName = 'InsertExcelImage.xlsx';
      await window.spire.FetchFileToVFS(inputFileName, '', `${process.env.PUBLIC_URL}/static/data/`);


      // Create a new workbook
      let workbook = new wasmModule.Workbook();

      // Load the Excel document
      workbook.LoadFromFile({ fileName: inputFileName });

      // Get the first worksheet
      let sheet = workbook.Worksheets.get(0);

      // Delete all images from the worksheet
      for (let i = sheet.Pictures.Count - 1; i >= 0; i--) {
        sheet.Pictures.get(i).Remove();
      }

      // Save the result file
      const outputFileName = 'DeleteImages.xlsx';
      workbook.SaveToFile({ fileName: outputFileName, version: wasmModule.ExcelVersion.Version2016 });

      // Read the saved file and convert to Blob object
      const modifiedFileArray = window.dotnetRuntime.Module.FS.readFile(outputFileName);
      const modifiedFile = new Blob([modifiedFileArray], { type: 'application/vnd.openxmlformats-officedocument.spreadsheetml.sheet' });

      // Create a URL for the Blob and initiate download
      const url = URL.createObjectURL(modifiedFile);
      const a = document.createElement('a');
      a.href = url;
      a.download = outputFileName;
      document.body.appendChild(a);
      a.click();
      document.body.removeChild(a);
      URL.revokeObjectURL(url);

      // Clean up resources used by the workbook
      workbook.Dispose();
    }
  };

  return (
    <div style={{ textAlign: 'center', height: '300px' }}>
      <h1>Delete Images from Excel Using JavaScript in React</h1>
      <button onClick={DeleteExcelImage} disabled={!wasmModule}>
        Process
      </button>
    </div>
  );
}

export default App;
Get a Free License
To fully experience the capabilities of Spire.XLS for JavaScript without any evaluation limitations, you can request a free 30-day trial license.
Add or Remove Text Boxes in Word with JavaScript in React
2025-02-28 06:09:58 Written by AdministratorAdding or removing text boxes in Word is a valuable skill that enhances document layout and visual appeal. Text boxes provide a flexible way to highlight important information, create side notes, or organize content more effectively. They allow for creative formatting options, enabling you to draw attention to specific areas of your document.
In this article, you will learn how to add or move text boxes in a Word document in React using Spire.Doc for JavaScript.
Install Spire.Doc for JavaScript
To get started wtih manipulating text boxes in Word in a React applicaiton, you can either download Spire.Doc for JavaScript from our website or install it via npm with the following command:
npm i spire.officeThe downloaded product package integrates Spire.Doc for JavaScript, Spire.XLS for JavaScript, Spire.PDF for JavaScript, and Spire.Presentation for JavaScript. To use the features of Spire.Doc for JavaScript, you need to copy the corresponding files (spire.doc.js, Spire.Doc.Wasm.zip, spire.common.js, Spire.Common.Wasm.zip, and the _framework folder) to the public folder of your project. To ensure proper text rendering, you can add relevant font files with a custom path. In the following example, the font is added to the path: public\static\font.
For more details, refer to the documentation: How to Integrate Spire.Doc for JavaScript in a React Project
Add a Text Box to a Word Document in React
Spire.Doc for JavaScript offers the Paragraph.AppendTextBox() method to seamlessly insert a text box into a specified paragraph. Once inserted, you can customize the text box by adding content and applying formatting using properties like TextBox.Body and TextBox.Format.
The following are the steps to add a text box to a Word document in React:
- Load required font and input file into the virtual file system (VFS).
- Create a Document object using the new wasmModule.Document() method.
- Load the Word file using the Document.LoadFromFile() method.
- Access the first section and paragraph.
- Insert a text box to the paragraph using the Paragraph.AppendTextBox() method.
- Add a paragraph to the text box and append text to it through the TextBox.Body property.
- Customize the appearance of the text box through the TextBox.Format property.
- Save the document and trigger a download.
- JavaScript
import React, { useState, useEffect } from 'react';

function App() {
  const [wasmModule, setWasmModule] = useState(null);
  // Load Spire.Doc
  useEffect(() => {
    (async () => {
      try {
        const publicUrl = process.env.PUBLIC_URL || '';
        const spireModule = await import(/* webpackIgnore: true */ `${publicUrl}/spire.doc.js`);
        const rawModule = spireModule.default || spireModule;
        window.wasmModule = typeof rawModule === 'function'
          ? await rawModule({ locateFile: p => p.endsWith('.wasm') ? `${publicUrl}/${p}` : p })
          : rawModule;
        setWasmModule(window.wasmModule);
      } catch (error) {
        console.error('Failed to load spire.doc.js WASM module:', error);
      }
    })();
  }, []);

  // Function to add text box
  const AddTextBox = async () => {
    const wasmModule = window.wasmModule.spiredoc;

    if (wasmModule) {
      // Load the font files into the virtual file system (VFS)
      await window.spire.FetchFileToVFS('Arial.ttf', '/Library/Fonts/', `${process.env.PUBLIC_URL}/static/font/`);

      // Specify the input file name and the output file name
      const outputFileName = "Textbox.docx";
      const inputFileName = 'input.docx';

      // Fetch the input file and add it to the VFS
      await window.spire.FetchFileToVFS(inputFileName, '', `${process.env.PUBLIC_URL}/static/data/`);

      // Create an instance of the Document class
      const doc = new wasmModule.Document();

      // Load the Word document
      doc.LoadFromFile(inputFileName);

      // Get a specific section
      let section = doc.Sections.get_Item(0)

      // Get a specific paragraph
      let paragraph = section.Paragraphs.get_Item(0)

      // Insert a textbox and set its wrapping style
      let textBox = paragraph.AppendTextBox(150, 100);
      textBox.Format.TextWrappingStyle = wasmModule.TextWrappingStyle.Square;

      // Set the position of the textbox
      textBox.Format.HorizontalPosition = 0;
      textBox.Format.VerticalPosition = 50;

      // Set the line style and fill color
      textBox.Format.LineColor = wasmModule.Color.get_DarkBlue();
      textBox.Format.LineStyle = wasmModule.TextBoxLineStyle.Simple;
      textBox.Format.FillColor = wasmModule.Color.get_LightGray();

      // Add a paragraph to the textbox
      let para = textBox.Body.AddParagraph();
      let textRange = para.AppendText("This is a sample text box created by Spire.Doc for JavaScript.");

      // Format the text
      textRange.CharacterFormat.FontName = "Arial";
      textRange.CharacterFormat.FontSize = 15;
      textRange.CharacterFormat.TextColor = wasmModule.Color.get_Blue();

      // Set the horizontal alignment of the paragraph
      para.Format.HorizontalAlignment = wasmModule.HorizontalAlignment.Center;

      // Save the document to the specified path
      doc.SaveToFile({ fileName: outputFileName, fileFormat: wasmModule.FileFormat.Docx2013 });

      // Read the generated file from VFS
      const fileArray = window.dotnetRuntime.Module.FS.readFile(outputFileName);

      // Create a Blob object from the file
      const blob = new Blob([fileArray], { type: "application/vnd.openxmlformats-officedocument.wordprocessingml.document" });

      // Create a URL for the Blob
      const url = URL.createObjectURL(blob);

      // Create an anchor element to trigger the download
      const a = document.createElement('a');
      a.href = url;
      a.download = outputFileName;
      document.body.appendChild(a);
      a.click();
      document.body.removeChild(a);
      URL.revokeObjectURL(url);

      // Clean up resources
      doc.Dispose();
    }
  };

  return (
    <adiv style={{ textAlign: 'center', height: '300px' }}>
      <ah1>Add a text box to Word in React<a/h1>
      <abutton onClick={AddTextBox} disabled={!wasmModule}>
        Generate
      <a/button>
    <a/div>
  );
}

export default App;
Run the code to launch the React app at localhost:3000. Click "Generate", and a "Save As" window will appear, prompting you to save the output file in your chosen folder.

Here is a screenshot of the generated Word file that includes a text box:

Remove a Text Box from a Word Document in React
Spire.Doc for JavaScript includes the Document.TextBoxes.RemoveAt() method, which allows you to delete a specific text box by its index. If you need to remove all text boxes from a Word document, you can use the Document.TextBoxes.Clear() method for a quick and efficient solution.
The following are the steps to remove a text box from a Word document in React:
- Load the input file into the virtual file system (VFS).
- Create a Document object using the new wasmModule.Document() method.
- Load the Word file using the Document.LoadFromFile() method.
- Remove a specific text box using the Document.TextBoxes.RemoveAt() method.
- Save the document and trigger a download.
- JavaScript
import React, { useState, useEffect } from 'react';

function App() {
  const [wasmModule, setWasmModule] = useState(null);
  // Load Spire.Doc
  useEffect(() => {
    (async () => {
      try {
        const publicUrl = process.env.PUBLIC_URL || '';
        const spireModule = await import(/* webpackIgnore: true */ `${publicUrl}/spire.doc.js`);
        const rawModule = spireModule.default || spireModule;
        window.wasmModule = typeof rawModule === 'function'
          ? await rawModule({ locateFile: p => p.endsWith('.wasm') ? `${publicUrl}/${p}` : p })
          : rawModule;
        setWasmModule(window.wasmModule);
      } catch (error) {
        console.error('Failed to load spire.doc.js WASM module:', error);
      }
    })();
  }, []);

  // Function to remove text box
  const RemoveTextBox = async () => {
    const wasmModule = window.wasmModule.spiredoc;

    if (wasmModule) {
      // Load the font files into the virtual file system (VFS)
      await window.spire.FetchFileToVFS('Arial.ttf', '/Library/Fonts/', `${process.env.PUBLIC_URL}/static/font/`);

      // Specify the input file name and the output file name
      const outputFileName = "RemoveTextBox.docx";
      const inputFileName = 'Textbox.docx';

      // Fetch the input file and add it to the VFS
      await window.spire.FetchFileToVFS(inputFileName, '', `${process.env.PUBLIC_URL}/static/data/`);

      // Create an instance of the Document class
      const doc = new wasmModule.Document();


      // Load the Word document
      doc.LoadFromFile(inputFileName);

      // Remove the text box at index 0
      doc.TextBoxes.RemoveAt(0);

      // Remove all text boxes
      // doc.TextBoxes.Clear();

      // Save the document to the specified path
      doc.SaveToFile({ fileName: outputFileName, fileFormat: wasmModule.FileFormat.Docx2013 });

      // Read the generated file from VFS
      const fileArray = window.dotnetRuntime.Module.FS.readFile(outputFileName);

      // Create a Blob object from the file
      const blob = new Blob([fileArray], { type: "application/vnd.openxmlformats-officedocument.wordprocessingml.document" });

      // Create a URL for the Blob
      const url = URL.createObjectURL(blob);

      // Create an anchor element to trigger the download
      const a = document.createElement('a');
      a.href = url;
      a.download = outputFileName;
      document.body.appendChild(a);
      a.click();
      document.body.removeChild(a);
      URL.revokeObjectURL(url);

      // Clean up resources
      doc.Dispose();
    }
  };

  return (
    <div style={{ textAlign: 'center', height: '300px' }}>
      <h1>Remove a text box from Word in React</h1>
      <button onClick={RemoveTextBox} disabled={!wasmModule}>
        Generate
      </button>
    </div>
  );
}

export default App;
Get a Free License
To fully experience the capabilities of Spire.Doc for JavaScript without any evaluation limitations, you can request a free 30-day trial license.
