
Knowledgebase (2370)
Children categories
Retrieving and replacing fonts in Word documents is a key aspect of document design. This process enables users to refresh their text with modern typography, improving both appearance and readability. Mastering font adjustments can enhance the overall impact of your documents, making them more engaging and accessible.
In this article, you will learn how to retrieve and replace fonts in a Word document using Spire.Doc for Java.
Install Spire.Doc for Java
First of all, you're required to add the Spire.Doc.jar file as a dependency in your Java program. The JAR file can be downloaded from this link. If you use Maven, you can easily import the JAR file in your application by adding the following code to your project's pom.xml file.
<repositories>
    <repository>
        <id>com.e-iceblue</id>
        <name>e-iceblue</name>
        <url>https://repo.e-iceblue.com/nexus/content/groups/public/</url>
    </repository>
</repositories>
<dependencies>
    <dependency>
        <groupId>e-iceblue</groupId>
        <artifactId>spire.doc</artifactId>
        <version>14.7.0</version>
    </dependency>
</dependencies>
Retrieve Fonts Used in a Word Document
To retrieve font information from a Word document, you'll need to navigate through the document's sections, paragraphs, and their child objects. For each child object, check if it is an instance of TextRange. If a TextRange is detected, you can extract the font details, including the font name and size, using the methods under the TextRange class.
Here are the steps to retrieve font information from a Word document using Java:
- Create a Document object.
- Load the Word document using the Document.loadFromFile() method.
- Iterate through each section, paragraph, and child object.
- For each child object, check if it is an instance of TextRange class.
- If it is, retrieve the font name and size using the TextRange.getCharacterFormat().getFontName() and TextRange.getCharacterFormat().getFontSize() methods.
- Java
import com.spire.doc.*;
import com.spire.doc.documents.*;
import com.spire.doc.fields.TextRange;
import java.io.BufferedWriter;
import java.io.FileWriter;
import java.io.IOException;
import java.util.ArrayList;
import java.util.Arrays;
import java.util.List;

// Customize a FontInfo class to help store font information
class FontInfo {
    private String name;
    private Float size;

    public FontInfo() {
        this.name = "";
        this.size = null;
    }

    public String getName() {
        return name;
    }

    public void setName(String name) {
        this.name = name;
    }

    public Float getSize() {
        return size;
    }

    public void setSize(Float size) {
        this.size = size;
    }

    @Override
    public boolean equals(Object obj) {
        if (this == obj) return true;
        if (!(obj instanceof FontInfo)) return false;
        FontInfo other = (FontInfo) obj;
        return name.equals(other.getName()) && size.equals(other.getSize());
    }
}

public class RetrieveFonts {

    // Function to write string to a txt file
    public static void writeAllText(String filename, List<String> text) {
        try (BufferedWriter writer = new BufferedWriter(new FileWriter(filename))) {
            for (String s : text) {
                writer.write(s);
            }
        } catch (IOException e) {
            e.printStackTrace();
        }
    }

    public static void main(String[] args) {

        List<FontInfo> fontInfos = new ArrayList<>();
        StringBuilder fontInformations = new StringBuilder();

        // Create a Document instance
        Document document = new Document();

        // Load a Word document
        document.loadFromFile("C:\\Users\\Administrator\\Desktop\\input.docx");

        // Iterate through the sections
        for (int i = 0; i < document.getSections().getCount(); i++) {
            Section section = document.getSections().get(i);

            // Iterate through the paragraphs
            for (int j = 0; j < section.getBody().getParagraphs().getCount(); j++) {
                Paragraph paragraph = section.getBody().getParagraphs().get(j);

                // Iterate through the child objects
                for (int k = 0; k < paragraph.getChildObjects().getCount(); k++) {
                    DocumentObject obj = paragraph.getChildObjects().get(k);

                    if (obj instanceof TextRange) {
                        TextRange txtRange = (TextRange) obj;

                        // Get the font name and size
                        String fontName = txtRange.getCharacterFormat().getFontName();
                        Float fontSize = txtRange.getCharacterFormat().getFontSize();
                        String textColor = txtRange.getCharacterFormat().getTextColor().toString();

                        // Store the font information
                        FontInfo fontInfo = new FontInfo();
                        fontInfo.setName(fontName);
                        fontInfo.setSize(fontSize);

                        if (!fontInfos.contains(fontInfo)) {
                            fontInfos.add(fontInfo);
                            String str = String.format("Font Name: %s, Size: %.2f, Color: %s%n", fontInfo.getName(), fontInfo.getSize(), textColor);
                            fontInformations.append(str);
                        }
                    }
                }
            }
        }

        // Write font information to a txt file
        writeAllText("output/GetFonts.txt", Arrays.asList(fontInformations.toString().split("\n")));

        // Dispose resources
        document.dispose();
    }
}

Replace a Specific Font with Another in Word
Once you obtain the font name of a specific text range, you can easily replace it with a different font, by using the TextRange.getCharacterFormat().setFontName() method. Additionally, you can adjust the font size and text color using the appropriate methods in the TextRange class.
Here are the steps to replace a specific font in a Word document using Java:
- Create a Document object.
- Load the Word document using the Document.loadFromFile() method.
- Iterate through each section, paragraph, and child object.
- For each child object, check if it is an instance of TextRange class.
- If it is, get the font name using the TextRange.getCharacterFormat().getFontName() method.
- Check if the font name is the specified font.
- If it is, set a new font name for the text range using the TextRange.getCharacterFormat().setFontName() method.
- Save the document to a different Word file using the Document.saveToFile() method.
- Java
import com.spire.doc.*;
import com.spire.doc.documents.*;
import com.spire.doc.fields.TextRange;

public class ReplaceFont {

    public static void main(String[] args) {

        // Create a Document instance
        Document document = new Document();

        // Load a Word document
        document.loadFromFile("C:\\Users\\Administrator\\Desktop\\input.docx");

        // Iterate through the sections
        for (int i = 0; i < document.getSections().getCount(); i++) {

            // Get a specific section
            Section section = document.getSections().get(i);

            // Iterate through the paragraphs
            for (int j = 0; j < section.getBody().getParagraphs().getCount(); j++) {

                // Get a specific paragraph
                Paragraph paragraph = section.getBody().getParagraphs().get(j);

                // Iterate through the child objects
                for (int k = 0; k < paragraph.getChildObjects().getCount(); k++) {

                    // Get a specific child object
                    DocumentObject obj = paragraph.getChildObjects().get(k);

                    // Determine if a child object is a TextRange
                    if (obj instanceof TextRange) {

                        // Get a specific text range
                        TextRange txtRange = (TextRange) obj;

                        // Get the font name
                        String fontName = txtRange.getCharacterFormat().getFontName();

                        // Determine if the font name is Microsoft JhengHei
                        if ("Microsoft JhengHei".equals(fontName)) {

                            // Replace the font with another font
                            txtRange.getCharacterFormat().setFontName("Segoe Print");
                        }
                    }
                }
            }
        }

        // Save the document to a different file
        document.saveToFile("output/ReplaceFonts.docx", FileFormat.Docx);

        // Dispose resources
        document.dispose();
    }
}

Apply for a Temporary License
If you'd like to remove the evaluation message from the generated documents, or to get rid of the function limitations, please request a 30-day trial license for yourself.
Converting PowerPoint presentations to PDF ensures that slide content remains intact while making the file easier to share and view across different devices. The PDF format preserves the original layout, text, and images, preventing unintended modifications and ensuring consistent formatting. This conversion is especially useful for professional and academic settings, where maintaining document integrity and accessibility is essential. Additionally, PDFs offer enhanced security features, such as restricted editing and password protection, making them a reliable choice for distributing important presentations. In this article, we will demonstrate how to convert PowerPoint presentations to PDF in React using Spire.Presentation for JavaScript.
- Convert a PowerPoint Presentation to PDF
- Convert a PowerPoint Presentation to PDF with a Custom Page Size
- Convert a PowerPoint Slide to PDF
Install Spire.Presentation for JavaScript
To get started with converting PowerPoint to PDF in a React application, you can either download Spire.Presentation for JavaScript from the official website or install it via npm with the following command:
npm i spire.office
The downloaded product package integrates Spire.Doc for JavaScript, Spire.XLS for JavaScript, Spire.PDF for JavaScript, and Spire.Presentation for JavaScript. To use Spire.Presentation for JavaScript functionality, you need to copy the corresponding files (spire.presentation.js, Spire.Presentation.Wasm.zip, spire.common.js, Spire.Common.Wasm.zip, and the _framework folder) to the public folder of your project. Additionally, to ensure proper text rendering, font files can be added to a custom path of your choice. In the following example, the font addition path is: public\static\font.
For more details, refer to the documentation: How to Integrate Spire.Presentation for JavaScript in a React Project.
Convert a PowerPoint Presentation to PDF
Converting a PowerPoint presentation to PDF allows you to share the entire document while preserving its original layout. Using the Presentation.SaveToFile() method, developers can export the full presentation to a PDF file. Below are the detailed steps to perform this operation.
- Create an object of Presentation class.
- Load a presentation file using Presentation.LoadFromFile() method.
- Save the presentation to a PDF document using Presentation.SaveToFile() method.
- JavaScript
import React, { useState, useEffect } from 'react';

function App() {
   const [wasmModule, setWasmModule] = useState(null);
   useEffect(() => {
    (async () => {
      try {
        const publicUrl = process.env.PUBLIC_URL || '';
        const spireModule = await import(/* webpackIgnore: true */ `${publicUrl}/spire.presentation.js`);
        const rawModule = spireModule.default || spireModule;
        window.wasmModule = typeof rawModule === 'function'
          ? await rawModule({ locateFile: p => p.endsWith('.wasm') ? `${publicUrl}/${p}` : p })
          : rawModule;
        setWasmModule(window.wasmModule);
      } catch (error) {
        console.error('Failed to load spire.presentation.js:', error);
      }
    })();
  }, []);

  const ConvertPowerPointToPDF = async () => {
    const wasmModule = window.wasmModule.spirepresentation;

    if (wasmModule) {
      // Specify the input file paths
      let inputFileName  = "Sample.pptx";
      await window.spire.FetchFileToVFS(inputFileName , '',  `${process.env.PUBLIC_URL}static/data/`);
      await window.spire.FetchFileToVFS("arial.ttf","/Library/Fonts/",`${process.env.PUBLIC_URL}static/font/`);

      // Create a Presentation instance and load the PowerPoint file from the virtual file system
      const ppt =new wasmModule.Presentation();
      ppt.LoadFromFile(inputFileName);

      // Define the output file name
      const outputFileName = "PowerPointToPDF.pdf";

      // Save the PowerPoint file to PDF format
      ppt.SaveToFile({ file: outputFileName, fileFormat: wasmModule.FileFormat.PDF });

      // Read the generated PDF file
      const modifiedFileArray = window.dotnetRuntime.Module.FS.readFile(outputFileName);

      // Create a Blob object from the PDF file
      const modifiedFile = new Blob([modifiedFileArray], { type: "application/pdf" });

      // Create a URL for the Blob
      const url = URL.createObjectURL(modifiedFile);

      // Create an anchor element to trigger the download
      const a = document.createElement('a');
      a.href = url;
      a.download = outputFileName;
      document.body.appendChild(a);
      a.click();
      document.body.removeChild(a);
      URL.revokeObjectURL(url);
    }
  };

  return (
    <div style={{ textAlign: 'center', height: '300px' }}>
      <h1>Convert a PowerPoint Presentation to PDF in React</h1>
      <button onClick={ConvertPowerPointToPDF} disabled={!wasmModule}>
        Convert
      </button>
    </div>
  );
}


export default App;
Run the code to launch the React app at localhost:3000. Once it's running, click on the "Convert" button to convert the PowerPoint presentation to PDF:
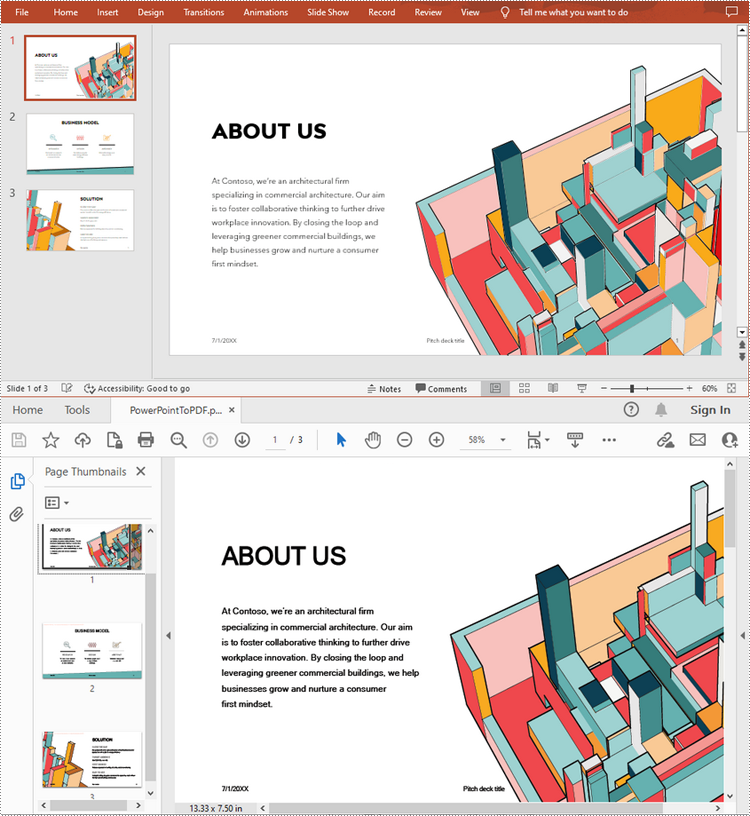
The below screenshot shows the input PowerPoint presentation and the converted PDF:
Convert a PowerPoint Presentation to PDF with a Custom Page Size
Developers can customize the page size of the resulting PDF by adjusting the slide size using the Presentation.SlideSize.Type property during conversion. This ensures that the converted PDF meets specific formatting or printing needs. Here are the detailed steps for this operation.
- Create an object of Presentation class.
- Load a presentation file using Presentation.LoadFromFile() method.
- Set the slide size to A4 using Presentation.SlideSize.Type property.
- Save the presentation to a PDF document using Presentation.SaveToFile() method.
- JavaScript
import React, { useState, useEffect } from 'react';

function App() {
   const [wasmModule, setWasmModule] = useState(null);
   useEffect(() => {
    (async () => {
      try {
        const publicUrl = process.env.PUBLIC_URL || '';
        const spireModule = await import(/* webpackIgnore: true */ `${publicUrl}/spire.presentation.js`);
        const rawModule = spireModule.default || spireModule;
        window.wasmModule = typeof rawModule === 'function'
          ? await rawModule({ locateFile: p => p.endsWith('.wasm') ? `${publicUrl}/${p}` : p })
          : rawModule;
        setWasmModule(window.wasmModule);
      } catch (error) {
        console.error('Failed to load spire.presentation.js:', error);
      }
    })();
  }, []);

  const ConvertPowerPointToPDF = async () => {
    const wasmModule = window.wasmModule.spirepresentation;

    if (wasmModule) {
      // Specify the input file paths
      let inputFileName  = "Sample.pptx";
      await window.spire.FetchFileToVFS(inputFileName , '',  `${process.env.PUBLIC_URL}static/data/`);
      await window.spire.FetchFileToVFS("arial.ttf","/Library/Fonts/",`${process.env.PUBLIC_URL}static/font/`);

      // Create a Presentation instance and load the PowerPoint file from the virtual file system
      const ppt =new wasmModule.Presentation();
      ppt.LoadFromFile(inputFileName);

      //Set A4 page size
      ppt.SlideSize.Type = wasmModule.SlideSizeType.A4;

      // Define the output file name
      const outputFileName = "ToPdfWithSpecificPageSize.pdf";

      // Save the PowerPoint file to PDF format
      ppt.SaveToFile({ file: outputFileName, fileFormat: wasmModule.FileFormat.PDF });

      // Read the generated PDF file
      const modifiedFileArray = window.dotnetRuntime.Module.FS.readFile(outputFileName);

      // Create a Blob object from the PDF file
      const modifiedFile = new Blob([modifiedFileArray], { type: "application/pdf" });

      // Create a URL for the Blob
      const url = URL.createObjectURL(modifiedFile);

      // Create an anchor element to trigger the download
      const a = document.createElement('a');
      a.href = url;
      a.download = outputFileName;
      document.body.appendChild(a);
      a.click();
      document.body.removeChild(a);
      URL.revokeObjectURL(url);
    }
  };

  return (
    <div style={{ textAlign: 'center', height: '300px' }}>
      <h1>Convert a PowerPoint Presentation to PDF with a Custom Page Size in React</h1>
      <button onClick={ConvertPowerPointToPDF} disabled={!wasmModule}>
        Convert
      </button>
    </div>
  );
}


export default App;

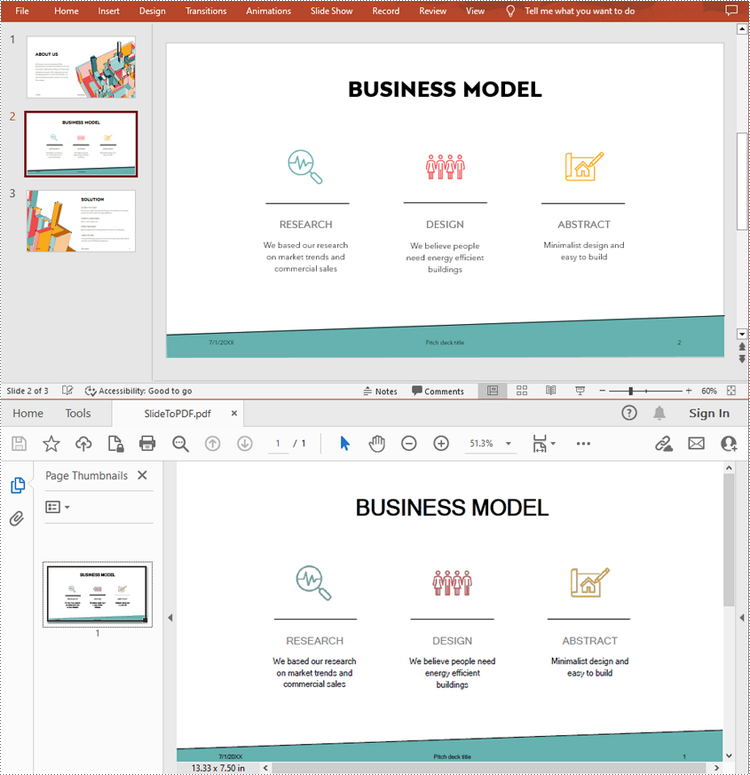
Convert a PowerPoint Slide to PDF
Converting a single PowerPoint slide to PDF allows for easy extraction and sharing of individual slides without exporting the entire presentation. Using the ISlide.SaveToFile() method, developers can convert individual slides to PDF with ease. The detailed steps for this operation are as follows.
- Create an object of the Presentation class.
- Load a presentation file using Presentation.LoadFromFile() method.
- Get a slide using Presentation.Slides.get_Item() method.
- Save the slide as a PDF document using ISlide.SaveToFile() method.
- JavaScript
import React, { useState, useEffect } from 'react';

function App() {
   const [wasmModule, setWasmModule] = useState(null);
   useEffect(() => {
    (async () => {
      try {
        const publicUrl = process.env.PUBLIC_URL || '';
        const spireModule = await import(/* webpackIgnore: true */ `${publicUrl}/spire.presentation.js`);
        const rawModule = spireModule.default || spireModule;
        window.wasmModule = typeof rawModule === 'function'
          ? await rawModule({ locateFile: p => p.endsWith('.wasm') ? `${publicUrl}/${p}` : p })
          : rawModule;
        setWasmModule(window.wasmModule);
      } catch (error) {
        console.error('Failed to load spire.presentation.js:', error);
      }
    })();
  }, []);

  const ConvertPowerPointSlideToPDF = async () => {
    const wasmModule = window.wasmModule.spirepresentation;

    if (wasmModule) {
      // Specify the input file paths
      let inputFileName  = "Sample.pptx";
      await window.spire.FetchFileToVFS(inputFileName , '',  `${process.env.PUBLIC_URL}static/data/`);
      await window.spire.FetchFileToVFS("arial.ttf","/Library/Fonts/",`${process.env.PUBLIC_URL}static/font/`);

      // Create a Presentation instance and load the PowerPoint file from the virtual file system
      const ppt =new wasmModule.Presentation();
      ppt.LoadFromFile(inputFileName);

      // Get the second slide
      let slide = ppt.Slides.get_Item(1);

      // Define the output file name
      const outputFileName = "SlideToPdf.pdf";

      // Save the slide to PDF format
      slide.SaveToFile( outputFileName, wasmModule.FileFormat.PDF);

      // Read the generated PDF file
      const modifiedFileArray = window.dotnetRuntime.Module.FS.readFile(outputFileName);

      // Create a Blob object from the PDF file
      const modifiedFile = new Blob([modifiedFileArray], { type: "application/pdf" });

      // Create a URL for the Blob
      const url = URL.createObjectURL(modifiedFile);

      // Create an anchor element to trigger the download
      const a = document.createElement('a');
      a.href = url;
      a.download = outputFileName;
      document.body.appendChild(a);
      a.click();
      document.body.removeChild(a);
      URL.revokeObjectURL(url);
    }
  };

  return (
    <div style={{ textAlign: 'center', height: '300px' }}>
      <h1>Convert a PowerPoint Slide to PDF in React</h1>
      <button onClick={ConvertPowerPointSlideToPDF} disabled={!wasmModule}>
        Convert
      </button>
    </div>
  );
}


export default App;
Get a Free License
To fully experience the capabilities of Spire.Presentation for JavaScript without any evaluation limitations, you can request a free 30-day trial license.
Spire.PDF for JavaScript is a leading PDF API that allows developers to easily create, read, edit, and convert PDFs. Using this JavaScript PDF component, developers can easily implement advanced features to create PDF files from scratch or fully process existing PDF documents within their JavaScript applications.
This versatile JavaScript library offers a wide range of features, including security settings, text/image extraction, PDF merging/splitting, drawing text/image/shape/barcodes, creating and filling in form fields, adding and deleting layers, overlaying PDFs, inserting watermarks (text/image), managing bookmarks, adding tables, adding annotations, and compressing PDF documents, among others.
