Wasserzeichen in Word hinzufügen (Anleitung für manuelles und C#-automatisiertes Einfügen)
Inhaltsverzeichnis
- Was ist ein Wasserzeichen in Microsoft Word?
- Vorteile der Verwendung von Wasserzeichen in Word-Dokumenten
- Teil 1: Wie man Wasserzeichen in Word manuell hinzufügt (Schritt-für-Schritt-Anleitung)
- Teil 2: Wie man Wasserzeichen programmgesteuert mit C# und Spire.Doc zu Word hinzufügt
- Abschließende Gedanken zum Hinzufügen von Wasserzeichen in Word
- Häufig gestellte Fragen (FAQs)
Installation mit Nuget
PM> Install-Package Spire.Doc
Verwandte Links

Wenn Sie Ihre Word-Dokumente als „Vertraulich“, „Entwurf“ kennzeichnen oder ein individuelles Branding anwenden müssen, ist das Hinzufügen eines Wasserzeichens eine der effektivsten Lösungen. Es hilft, sensible Inhalte zu schützen, den Dokumentenstatus anzuzeigen und die Markenidentität zu stärken – und das alles bei einem sauberen, professionellen Erscheinungsbild. Egal, ob Sie an Geschäftsberichten, internen Memos oder Marketingmaterialien arbeiten, Wasserzeichen können die unbefugte Weitergabe verhindern und den Zweck Ihres Dokuments klar kommunizieren.
In dieser Schritt-für-Schritt-Anleitung lernen Sie zwei praktische Möglichkeiten kennen, Wasserzeichen zu Word-Dokumenten hinzuzufügen: manuell mit den integrierten Wasserzeichen-Tools von Microsoft Word und programmgesteuert durch C#-Automatisierung mit der Spire.Doc for .NET-Bibliothek. Unabhängig von Ihrem Arbeitsablauf – manuell oder automatisiert – entdecken Sie effiziente Techniken zum Einfügen von Text- oder Bildwasserzeichen, die Ihre Word-Dateien verbessern und sichern.
Was Sie lernen werden
- Was ist ein Wasserzeichen in Microsoft Word?
- Vorteile der Verwendung von Wasserzeichen in Word-Dokumenten
- Teil 1: Wie man Wasserzeichen in Word manuell hinzufügt (Schritt-für-Schritt-Anleitung)
- Teil 2: Wie man Wasserzeichen programmgesteuert mit C# und Spire.Doc zu Word hinzufügt
- Abschließende Gedanken zum Hinzufügen von Wasserzeichen in Word
- Häufig gestellte Fragen (FAQs)
Was ist ein Wasserzeichen in Microsoft Word?
Ein Wasserzeichen in Word ist ein halbtransparentes Design, Text oder Bild, das hinter dem Hauptinhalt einer Dokumentenseite erscheint. Es stört den Inhalt selbst nicht, bleibt aber für die Leser sichtbar.
Gängige Wasserzeichentypen sind:
- Text-Wasserzeichen: „Vertraulich“, „Entwurf“, „Muster“ usw.
- Bild-Wasserzeichen: Firmenlogos oder Hintergrundbilder
- Benutzerdefinierte Wasserzeichen: Branding-Elemente oder eindeutige Kennungen
Vorteile der Verwendung von Wasserzeichen in Word-Dokumenten
Wasserzeichen dienen mehreren wichtigen Zwecken:
- Schutz sensibler Inhalte durch deutliche Kennzeichnung von Dokumenten als vertraulich
- Anzeige des Dokumentenstatus, wie Entwurf, Überprüfung oder Endgültig
- Branding von Dokumenten mit Logos oder Firmennamen
- Abschreckung vor unbefugter Verbreitung oder Missbrauch
Teil 1: Wie man Wasserzeichen in Word manuell hinzufügt (Schritt-für-Schritt-Anleitung)
Microsoft Word macht es einfach, Wasserzeichen hinzuzufügen, egal ob Sie eine integrierte Option verwenden oder Ihre eigene erstellen. Sie können aus einer Reihe vordefinierter Wasserzeichen wie „Vertraulich“ oder „Entwurf“ wählen oder benutzerdefinierte Text- und Bildwasserzeichen erstellen, die dem Zweck und dem Branding Ihres Dokuments entsprechen.
Ein vordefiniertes Wasserzeichen in Word einfügen
Microsoft Word enthält mehrere vorgefertigte Wasserzeichenvorlagen für gängige Anwendungsfälle, wie z. B. die Kennzeichnung eines Dokuments als vertraulich oder als Entwurf.
Schritte zum Hinzufügen eines vordefinierten Wasserzeichens zu Ihrem Dokument
-
Öffnen Sie Ihr Dokument in Microsoft Word.
-
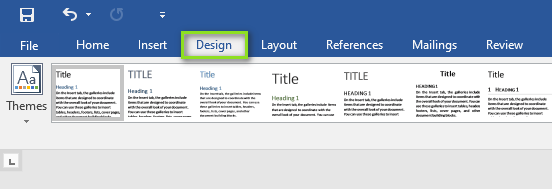
Gehen Sie zur Registerkarte Entwurf in der Menüleiste.
-
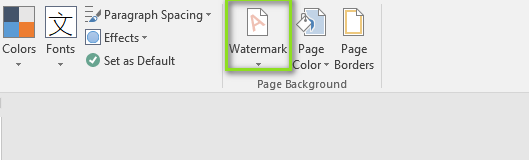
Klicken Sie auf der rechten Seite auf Wasserzeichen in der Gruppe Seitenhintergrund.
-
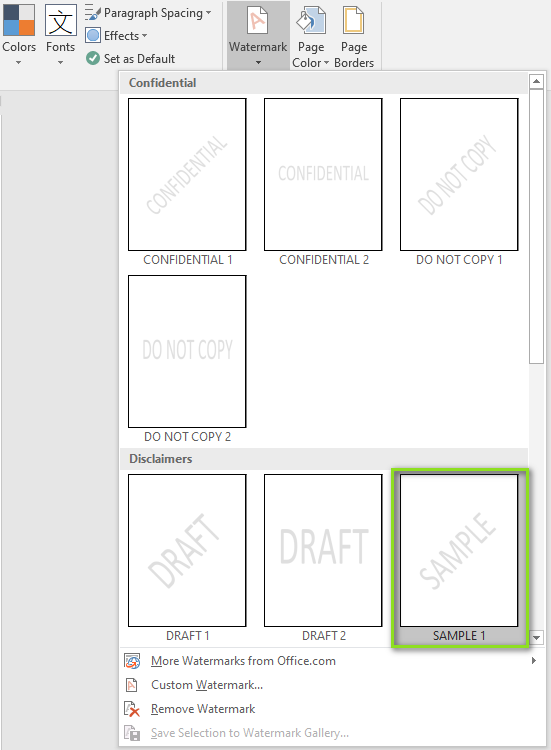
Wählen Sie im geöffneten Dialogfeld ein vordefiniertes Wasserzeichen entsprechend Ihren Anforderungen aus (z. B. „Vertraulich“, „Nicht kopieren“, „Muster“).
Ergebnis:
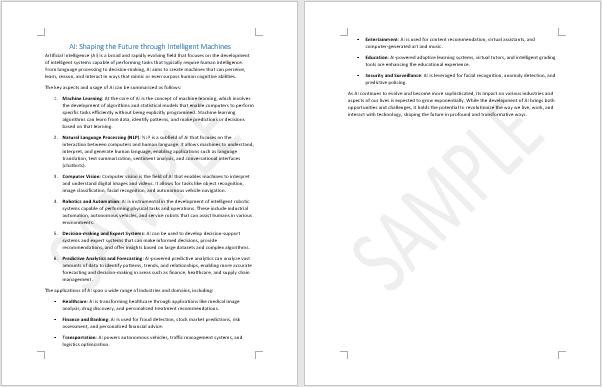
Das ausgewählte Wasserzeichen wird automatisch auf allen Seiten des Dokuments angewendet.
Ein benutzerdefiniertes Text- oder Bildwasserzeichen in Word erstellen
Wenn Sie der Meinung sind, dass die vordefinierten Optionen Ihren Anforderungen nicht entsprechen, können Sie ein benutzerdefiniertes Wasserzeichen mit Text oder einem Bild erstellen.
Schritte zum Hinzufügen eines benutzerdefinierten Wasserzeichens zu Ihrem Dokument
-
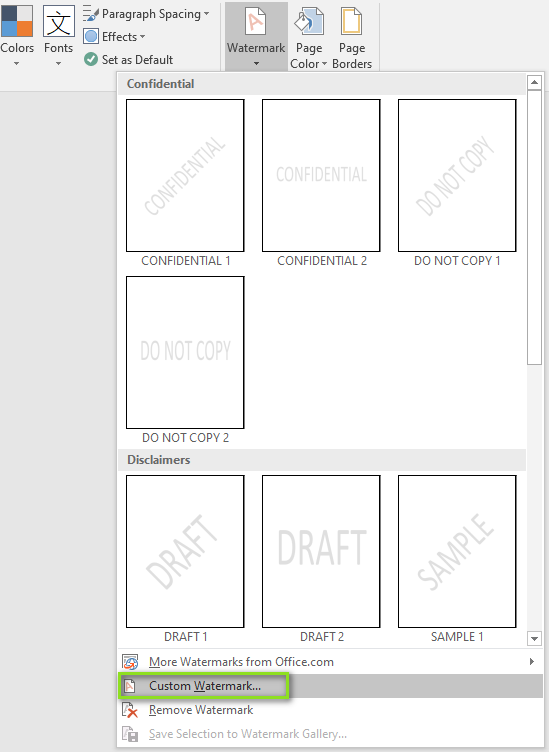
Klicken Sie in der Menüleiste auf Entwurf > Wasserzeichen > Benutzerdefiniertes Wasserzeichen.
-
Im geöffneten Dialogfeld Gedrucktes Wasserzeichen:
- Wählen Sie Textwasserzeichen:
-
Geben Sie Ihren Text ein (z. B. „Nur für den internen Gebrauch“)
- Wählen Sie Schriftart, Größe, Farbe und Layout (horizontal oder diagonal)
-
- Oder wählen Sie Bildwasserzeichen:
- Klicken Sie auf Bild auswählen…, um ein Bild zu durchsuchen und einzufügen (z. B. Firmenlogo).

- Stellen Sie Skalierung ein und aktivieren Sie Auswaschen für einen transparenten Effekt
- Klicken Sie auf Bild auswählen…, um ein Bild zu durchsuchen und einzufügen (z. B. Firmenlogo).
- Wählen Sie Textwasserzeichen:
-
Klicken Sie auf Anwenden und dann auf OK.
Ergebnis:
Das Bildwasserzeichen wird automatisch allen Seiten des Dokuments hinzugefügt.
Tipp: Die Verwendung eines transparenten Wasserzeichens verbessert das Dokument, ohne die Lesbarkeit zu beeinträchtigen.
Ein Wasserzeichen nur auf einer Seite in Word anwenden
Standardmäßig wendet Word das Wasserzeichen auf das gesamte Dokument an. Wenn Sie ein Wasserzeichen nur auf einer bestimmten Seite anbringen möchten, befolgen Sie die nachstehenden Schritte.
Schritte zum Hinzufügen eines Wasserzeichens auf nur einer Seite
-
Klicken Sie auf die Seite, auf der Sie das Wasserzeichen hinzufügen möchten.
-
Klicken Sie in der Menüleiste auf Entwurf > Wasserzeichen.
-
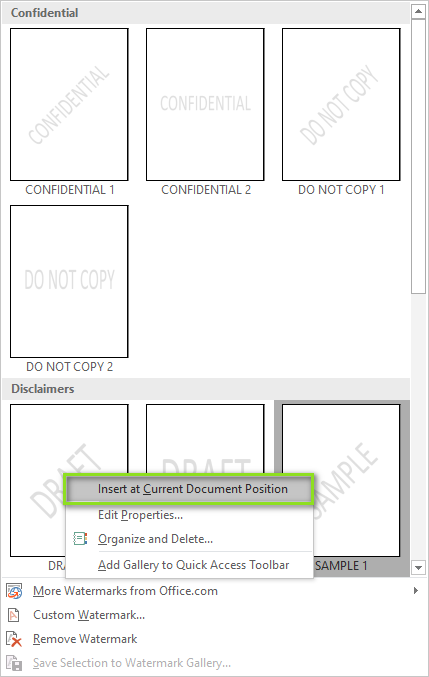
Klicken Sie im geöffneten Dialogfeld mit der rechten Maustaste auf eines der vordefinierten Wasserzeichen und wählen Sie An aktueller Dokumentposition einfügen.
-
Das Wasserzeichen wird als Textfeld auf der ausgewählten Seite eingefügt. Wenn der Inhalt des Wasserzeichens nicht Ihren Wünschen entspricht, klicken Sie auf das Wasserzeichen, um das Textfeld zu aktivieren.

-
Klicken Sie auf den Text im Textfeld und ändern Sie ihn in den gewünschten Wasserzeicheninhalt.

-
Klicken Sie irgendwo außerhalb des Textfeldes, um die Änderung zu übernehmen.
Ergebnis:
Sie haben jetzt ein Wasserzeichen, das nur auf der ausgewählten Seite erscheint, ohne den Rest des Dokuments zu beeinträchtigen.
Teil 2: Wie man Wasserzeichen programmgesteuert mit C# und Spire.Doc zu Word hinzufügt
Bei der Automatisierung der Dokumentenerstellung oder der Stapelverarbeitung von Word-Dateien bietet Spire.Doc for .NET eine einfache Möglichkeit, Wasserzeichen programmgesteuert hinzuzufügen.
Erste Schritte mit Spire.Doc
Spire.Doc for .NET ist eine entwicklerfreundliche Bibliothek, die den Prozess der Erstellung und Bearbeitung von Word-Dokumenten optimiert. Sie ermöglicht Entwicklern, sowohl Text- als auch Bildwasserzeichen programmgesteuert zu .doc- oder .docx-Dokumenten hinzuzufügen, ohne dass Microsoft Word installiert sein muss.
Installieren Sie Spire.Doc über NuGet
Sie können die erforderliche Bibliothek einfach aus NuGet installieren, indem Sie die Paket-Manager-Konsole öffnen und den folgenden Befehl ausführen:
Install-Package Spire.Doc
Nach der Installation können Sie problemlos Wasserzeichen zu Ihren Dokumenten hinzufügen.
Ein Textwasserzeichen in Word in C# hinzufügen
Um ein Textwasserzeichen zu einem Word-Dokument mit C# hinzuzufügen, befolgen Sie die folgenden Schritte:
Schritt 1: Erforderliche Namespaces importieren
Stellen Sie sicher, dass Sie die notwendigen Namespaces für die Arbeit mit Dokumenten und Formatierungen einbinden:
using Spire.Doc;
using Spire.Doc.Documents;
using System.Drawing;
Schritt 2: Word-Dokument laden
Erstellen Sie ein Document-Objekt und laden Sie die Word-Datei, der Sie ein Wasserzeichen hinzufügen möchten:
Document document = new Document();
document.LoadFromFile("input.docx");
Schritt 3: Textwasserzeichen erstellen und konfigurieren
Erstellen Sie eine TextWatermark-Instanz und passen Sie den Inhalt und das Erscheinungsbild des Wasserzeichens an:
TextWatermark watermark = new TextWatermark();
watermark.Text = "NICHT KOPIEREN"; // Wasserzeichentext
watermark.FontSize = 50; // Textgröße
watermark.Color = Color.Blue; // Wasserzeichenfarbe
watermark.Layout = WatermarkLayout.Diagonal; // Layout: Diagonal oder Horizontal
Schritt 4: Wasserzeichen anwenden und Dokument speichern
Weisen Sie dem Dokument das Wasserzeichen zu und speichern Sie es in einer neuen Datei:
document.Watermark = watermark;
document.SaveToFile("output_with_text_watermark.docx", FileFormat.Docx);
Vollständiger Code: Textwasserzeichen in Word in C# einfügen
using Spire.Doc;
using Spire.Doc.Documents;
using System.Drawing;

namespace TextWatermarkExample
{
    class Program
    {
        static void Main(string[] args)
        {
            // Schritt 1: Laden Sie das Word-Dokument
            Document document = new Document();
            document.LoadFromFile("input.docx");

            // Schritt 2: Erstellen und konfigurieren Sie das Textwasserzeichen
            TextWatermark watermark = new TextWatermark();
            watermark.Text = "NICHT KOPIEREN";
            watermark.FontSize = 50;
            watermark.Color = Color.Blue;
            watermark.Layout = WatermarkLayout.Diagonal;

            // Schritt 3: Wenden Sie das Wasserzeichen an und speichern Sie das Dokument
            document.Watermark = watermark;
            document.SaveToFile("output_with_text_watermark.docx", FileFormat.Docx);
        }
    }
}
Ein Bildwasserzeichen in Word in C# hinzufügen
Um ein Bildwasserzeichen mit C# einzufügen, befolgen Sie die folgenden Schritte:
Schritt 1: Erforderliche Namespaces importieren
Fügen Sie diese am Anfang Ihrer C#-Datei hinzu, um die Handhabung von Dokumenten und Bildern zu ermöglichen:
using Spire.Doc;
using System.Drawing;
Schritt 2: Word-Dokument laden
Erstellen Sie ein Document-Objekt und laden Sie Ihre Word-Quelldatei:
Document document = new Document();
document.LoadFromFile("input.docx");
Schritt 3: Bildwasserzeichen erstellen und konfigurieren
Instanziieren Sie ein PictureWatermark, laden Sie das Bild, stellen Sie die Skalierung ein und aktivieren Sie das Auswaschen:
PictureWatermark watermark = new PictureWatermark();
watermark.Picture = Image.FromFile("logo.png"); // Ihr Wasserzeichenbild
watermark.Scaling = 150; // Bildskalierung einstellen (Prozentsatz)
watermark.IsWashout = true; // Auswaschen aktivieren
Schritt 4: Wasserzeichen anwenden und Datei speichern
Weisen Sie dem Dokument das Wasserzeichen zu und speichern Sie es:
document.Watermark = watermark;
document.SaveToFile("output_with_image_watermark.docx", FileFormat.Docx);
Vollständiger Code: Bildwasserzeichen in Word in C# einfügen
using Spire.Doc;
using System.Drawing;

namespace ImageWatermarkExample
{
    class Program
    {
        static void Main(string[] args)
        {
            // Schritt 1: Laden Sie das Word-Dokument
            Document document = new Document();
            document.LoadFromFile("input.docx");

            // Schritt 2: Erstellen und konfigurieren Sie das Bildwasserzeichen
            PictureWatermark watermark = new PictureWatermark();
            watermark.Picture = Image.FromFile("logo.png");
            watermark.Scaling = 150;
            watermark.IsWashout = true;

            // Schritt 3: Wenden Sie das Wasserzeichen an und speichern Sie das Dokument
            document.Watermark = watermark;
            document.SaveToFile("output_with_image_watermark.docx", FileFormat.Docx);
        }
    }
}
Abschließende Gedanken zum Hinzufügen von Wasserzeichen in Word
Das Hinzufügen von Wasserzeichen zu Word-Dokumenten hilft, sensible Inhalte zu schützen, den Dokumentenstatus anzuzeigen und die Markenidentität zu stärken. Je nach Ihren Bedürfnissen können Sie wählen zwischen:
- Verwendung von Microsoft Word:
- Einfügen von integrierten oder benutzerdefinierten Text-/Bildwasserzeichen
- Manuelles Anwenden von Wasserzeichen auf alle Seiten oder bestimmte Abschnitte
- Automatisierung mit C# und Spire.Doc for .NET:
- Programmgesteuertes Hinzufügen von Text- oder Bildwasserzeichen zu Word-Dateien
- Ideal für die Stapelverarbeitung oder automatisierte Dokumentenerstellung
Häufig gestellte Fragen (FAQs)
F1: Kann ich das Wasserzeichen später aus dem Dokument entfernen?
A1: Ja. In Word gehen Sie zu Entwurf > Wasserzeichen > Wasserzeichen entfernen. In C# und Spire.Doc setzen Sie document.Watermark = null;.
F2: Werden Wasserzeichen mit dem Dokument gedruckt?
A2: Ja, Wasserzeichen erscheinen sowohl auf dem Bildschirm als auch auf Ausdrucken.
F3: Welche Word-Formate werden von Spire.Doc unterstützt?
A3: Spire.Doc unterstützt eine breite Palette von Word-Dokumentformaten, einschließlich Doc, Docx, Docm, Dot, Dotx, Dotm und mehr.
Siehe auch
Как добавить водяные знаки в Word (руководство по ручному и автоматизированному добавлению на C#)
Оглавление
- Что такое водяной знак в Microsoft Word?
- Преимущества использования водяных знаков в документах Word
- Часть 1: Как добавить водяные знаки в Word вручную (Пошаговое руководство)
- Часть 2: Как программно добавить водяные знаки в Word с помощью C# и Spire.Doc
- Заключительные мысли о добавлении водяных знаков в Word
- Часто задаваемые вопросы (FAQ)
Установка через Nuget
PM> Install-Package Spire.Doc
Похожие ссылки
Если вам нужно пометить ваши документы Word как «Конфиденциально», «Черновик» или применить пользовательский брендинг, добавление водяного знака является одним из наиболее эффективных решений. Это помогает защитить конфиденциальное содержимое, указать статус документа и укрепить фирменный стиль — и все это при сохранении чистого, профессионального вида. Независимо от того, работаете ли вы над бизнес-отчетами, внутренними записками или маркетинговыми материалами, водяные знаки могут предотвратить несанкционированное распространение и четко донести цель вашего документа.
В этом пошаговом руководстве вы узнаете два практических способа добавления водяных знаков в документы Word: вручную с помощью встроенных инструментов для водяных знаков Microsoft Word и программно с помощью автоматизации на C# с библиотекой Spire.Doc for .NET. Независимо от вашего рабочего процесса — ручного или автоматизированного — вы откроете для себя эффективные методы вставки текстовых или графических водяных знаков, которые улучшают и защищают ваши файлы Word.
Что вы узнаете
- Что такое водяной знак в Microsoft Word?
- Преимущества использования водяных знаков в документах Word
- Часть 1: Как добавить водяные знаки в Word вручную (Пошаговое руководство)
- Часть 2: Как программно добавить водяные знаки в Word с помощью C# и Spire.Doc
- Заключительные мысли о добавлении водяных знаков в Word
- Часто задаваемые вопросы (FAQ)
Что такое водяной знак в Microsoft Word?
Водяной знак в Word — это полупрозрачный дизайн, текст или изображение, которое появляется за основным содержимым страницы документа. Он не мешает самому содержимому, но остается видимым для читателей.
Распространенные типы водяных знаков включают:
- Текстовые водяные знаки: «Конфиденциально», «Черновик», «Образец» и т. д.
- Графические водяные знаки: логотипы компаний или фоновые изображения
- Пользовательские водяные знаки: элементы брендинга или уникальные идентификаторы
Преимущества использования водяных знаков в документах Word
Водяные знаки служат нескольким важным целям:
- Защита конфиденциального содержимого путем четкой маркировки документов как конфиденциальных
- Указание статуса документа, такого как черновик, на рассмотрении или окончательный
- Брендирование документов с помощью логотипов или названий компаний
- Предотвращение несанкционированного распространения или неправомерного использования
Часть 1: Как добавить водяные знаки в Word вручную (Пошаговое руководство)
Microsoft Word позволяет легко добавлять водяные знаки, независимо от того, используете ли вы встроенный вариант или создаете свой собственный. Вы можете выбрать из набора предопределенных водяных знаков, таких как «Конфиденциально» или «Черновик», или создать пользовательские текстовые и графические водяные знаки в соответствии с целью и брендингом вашего документа.
Вставить предопределенный водяной знак в Word
Microsoft Word включает несколько готовых шаблонов водяных знаков для распространенных случаев использования, таких как пометка документа как конфиденциального или черновика.
Шаги по добавлению предопределенного водяного знака в ваш документ
-
Откройте ваш документ в Microsoft Word.
-
Перейдите на вкладку Дизайн в строке меню.
-
Справа нажмите Подложка в группе Фон страницы.
-
В открывшемся диалоговом окне выберите предопределенный водяной знак в соответствии с вашими требованиями (например, «Конфиденциально», «Не копировать», «Образец»).
Результат:
Выбранный водяной знак автоматически применяется ко всем страницам документа.
Создать собственный текстовый или графический водяной знак в Word
Если вы считаете, что предопределенные параметры не отвечают вашим потребностям, вы можете создать собственный водяной знак, используя текст или изображение.
Шаги по добавлению пользовательского водяного знака в ваш документ
-
В строке меню нажмите Дизайн > Подложка > Настраиваемая подложка.
-
В открывшемся диалоговом окне Печатная подложка:
- Выберите Текст подложки:
-
Введите свой текст (например, «Только для внутреннего использования»)
- Выберите шрифт, размер, цвет и расположение (горизонтальное или диагональное)
-
- Или выберите Рисунок подложки:
- Нажмите Выбрать рисунок…, чтобы найти и вставить изображение (например, логотип компании).
- Установите Масштаб и включите Обесцветить для эффекта прозрачности
- Нажмите Выбрать рисунок…, чтобы найти и вставить изображение (например, логотип компании).
- Выберите Текст подложки:
-
Нажмите Применить, затем ОК.
Результат:
Графический водяной знак автоматически добавляется на все страницы документа.
Совет: Использование прозрачного водяного знака улучшает документ, не мешая его читабельности.
Применить водяной знак только к одной странице в Word
По умолчанию Word применяет водяной знак ко всему документу. Если вы хотите нанести водяной знак только на определенную страницу, выполните следующие действия.
Шаги по добавлению водяного знака только на одну страницу
-
Щелкните на странице, на которую вы хотите добавить водяной знак.
-
В строке меню нажмите Дизайн > Подложка.
-
В открывшемся диалоговом окне щелкните правой кнопкой мыши по одному из предопределенных водяных знаков и выберите Вставить в текущее положение в документе.
-
Водяной знак будет вставлен как текстовое поле на выбранной странице. Если содержимое водяного знака не то, что вам нужно, щелкните по водяному знаку, чтобы активировать текстовое поле.
-
Щелкните по тексту в текстовом поле и измените его на желаемое содержимое водяного знака.
-
Щелкните в любом месте за пределами текстового поля, чтобы применить изменение.
Результат:
Теперь у вас есть водяной знак, который появляется только на выбранной странице, не затрагивая остальную часть документа.
Часть 2: Как программно добавить водяные знаки в Word с помощью C# и Spire.Doc
При автоматизации создания документов или пакетной обработке файлов Word Spire.Doc for .NET предоставляет простой способ программного добавления водяных знаков.
Начало работы со Spire.Doc
Spire.Doc for .NET — это удобная для разработчиков библиотека, которая упрощает процесс создания и обработки документов Word. Она позволяет разработчикам программно добавлять как текстовые, так и графические водяные знаки в документы .doc или .docx без необходимости установки Microsoft Word.
Установите Spire.Doc через NuGet
Вы можете легко установить необходимую библиотеку из NuGet, открыв консоль диспетчера пакетов и выполнив следующую команду:
Install-Package Spire.Doc
После установки вы будете готовы легко добавлять водяные знаки в свои документы.
Добавить текстовый водяной знак в Word на C#
Чтобы добавить текстовый водяной знак в документ Word с помощью C#, выполните следующие шаги:
Шаг 1: Импортируйте необходимые пространства имен
Убедитесь, что вы включили необходимые пространства имен для работы с документами и форматированием:
using Spire.Doc;
using Spire.Doc.Documents;
using System.Drawing;
Шаг 2: Загрузите документ Word
Создайте объект Document и загрузите файл Word, в который вы хотите добавить водяной знак:
Document document = new Document();
document.LoadFromFile("input.docx");
Шаг 3: Создайте и настройте текстовый водяной знак
Создайте экземпляр TextWatermark и настройте содержимое и внешний вид водяного знака:
TextWatermark watermark = new TextWatermark();
watermark.Text = "НЕ КОПИРОВАТЬ"; // Текст водяного знака
watermark.FontSize = 50; // Размер текста
watermark.Color = Color.Blue; // Цвет водяного знака
watermark.Layout = WatermarkLayout.Diagonal; // Расположение: диагональное или горизонтальное
Шаг 4: Примените водяной знак и сохраните документ
Присвойте водяной знак документу и сохраните его в новый файл:
document.Watermark = watermark;
document.SaveToFile("output_with_text_watermark.docx", FileFormat.Docx);
Полный код: Вставить текстовый водяной знак в Word на C#
using Spire.Doc;
using Spire.Doc.Documents;
using System.Drawing;

namespace TextWatermarkExample
{
    class Program
    {
        static void Main(string[] args)
        {
            // Шаг 1: Загрузите документ Word
            Document document = new Document();
            document.LoadFromFile("input.docx");

            // Шаг 2: Создайте и настройте текстовый водяной знак
            TextWatermark watermark = new TextWatermark();
            watermark.Text = "НЕ КОПИРОВАТЬ";
            watermark.FontSize = 50;
            watermark.Color = Color.Blue;
            watermark.Layout = WatermarkLayout.Diagonal;

            // Шаг 3: Примените водяной знак и сохраните документ
            document.Watermark = watermark;
            document.SaveToFile("output_with_text_watermark.docx", FileFormat.Docx);
        }
    }
}
Добавить графический водяной знак в Word на C#
Чтобы вставить графический водяной знак с помощью C#, выполните следующие шаги:
Шаг 1: Импортируйте необходимые пространства имен
Добавьте их в начало вашего файла C# для работы с документами и изображениями:
using Spire.Doc;
using System.Drawing;
Шаг 2: Загрузите документ Word
Создайте объект Document и загрузите исходный файл Word:
Document document = new Document();
document.LoadFromFile("input.docx");
Шаг 3: Создайте и настройте графический водяной знак
Создайте экземпляр PictureWatermark, загрузите изображение, установите масштаб и включите обесцвечивание:
PictureWatermark watermark = new PictureWatermark();
watermark.Picture = Image.FromFile("logo.png"); // Ваше изображение для водяного знака
watermark.Scaling = 150; // Установите масштабирование изображения (в процентах)
watermark.IsWashout = true; // Включить обесцвечивание
Шаг 4: Примените водяной знак и сохраните файл
Присвойте водяной знак документу и сохраните его:
document.Watermark = watermark;
document.SaveToFile("output_with_image_watermark.docx", FileFormat.Docx);
Полный код: Вставить графический водяной знак в Word на C#
using Spire.Doc;
using System.Drawing;

namespace ImageWatermarkExample
{
    class Program
    {
        static void Main(string[] args)
        {
            // Шаг 1: Загрузите документ Word
            Document document = new Document();
            document.LoadFromFile("input.docx");

            // Шаг 2: Создайте и настройте графический водяной знак
            PictureWatermark watermark = new PictureWatermark();
            watermark.Picture = Image.FromFile("logo.png");
            watermark.Scaling = 150;
            watermark.IsWashout = true;

            // Шаг 3: Примените водяной знак и сохраните документ
            document.Watermark = watermark;
            document.SaveToFile("output_with_image_watermark.docx", FileFormat.Docx);
        }
    }
}
Заключительные мысли о добавлении водяных знаков в Word
Добавление водяных знаков в документы Word помогает защитить конфиденциальное содержимое, указать статус документа и укрепить фирменный стиль. В зависимости от ваших потребностей вы можете выбрать:
- Использование Microsoft Word:
- Вставка встроенных или пользовательских текстовых/графических водяных знаков
- Применение водяных знаков ко всем страницам или определенным разделам вручную
- Автоматизация с помощью C# и Spire.Doc for .NET:
- Программное добавление текстовых или графических водяных знаков в файлы Word
- Идеально для пакетной обработки или автоматизированного создания документов
Часто задаваемые вопросы (FAQ)
В1: Как удалить водяной знак из документа позже?
О1: Да. В Word перейдите в Дизайн > Подложка > Удалить подложку. В C# и Spire.Doc установите document.Watermark = null;.
В2: Будут ли водяные знаки печататься вместе с документом?
О2: Да, водяные знаки отображаются как на экране, так и в распечатках.
В3: Какие форматы Word поддерживает Spire.Doc?
О3: Spire.Doc поддерживает широкий спектр форматов документов Word, включая Doc, Docx, Docm, Dot, Dotx, Dotm и другие.
Смотрите также
Perform PDF OCR with Python (Extract Text from Scanned PDF)
 In daily work, extracting text from PDF files is a common task. For standard digital documents—such as those exported from Word to PDF—this process is usually straightforward. However, things get tricky when dealing with scanned PDFs, which are essentially images of printed documents. In such cases, traditional text extraction methods fail, and OCR (Optical Character Recognition) becomes necessary to recognize and convert the text within images into editable content.
In this article, we’ll walk through how to perform PDF OCR using Python to automate this workflow and significantly reduce manual effort.
- Why OCR is Needed for PDF Text Extraction
- Best Python OCR Libraries for PDF Processing
- Convert PDF Pages to Images Using Python
- Scan and Extract Text from Images Using Spire.OCR
- Conclusion
Why OCR is Needed for PDF Text Extraction
When it comes to extracting text from PDF files, one important factor that determines your approach is the type of PDF. Generally, PDFs fall into two categories: scanned (image-based) PDFs and searchable PDFs. Each requires a different strategy for text extraction.
-
Scanned PDFs are typically created by digitizing physical documents such as books, invoices, contracts, or magazines. While the text appears readable to the human eye, it's actually embedded as an image—making it inaccessible to traditional text extraction tools. Older digital files or password-protected PDFs may also lack an actual text layer.
-
Searchable PDFs, on the other hand, contain a hidden text layer that allows computers to search, copy, or parse the content. These files are usually generated directly from applications like Microsoft Word or PDF editors and are much easier to process programmatically.
This distinction highlights the importance of OCR (Optical Character Recognition) when working with scanned PDFs. With tools like Python PDF OCR, we can convert these image-based PDFs into images, run OCR to recognize the text, and extract it for further use—all in an automated way.
Best Python OCR Libraries for PDF Processing
Before diving into the implementation, let’s take a quick look at the tools we’ll be using in this tutorial. To simplify the process, we’ll use Spire.PDF for Python and Spire.OCR for Python to perform PDF OCR in Python.
- Spire.PDF will handle the conversion from PDF to images.
- Spire.OCR, a powerful OCR tool for PDF files, will recognize the text in those images and extract it as editable content.
You can install Spire.PDF using the following pip command:
pip install spire.pdf
and install Spire.OCR with:
pip install spire.ocr
Alternatively, you can download and install them manually by visiting the official Spire.PDF and Spire.OCR pages.
Convert PDF Pages to Images Using Python
Before we dive into Python PDF OCR, it's crucial to understand a foundational step: OCR technology doesn't directly process PDF files. Especially with image-based PDFs (like those created from scanned documents), we first need to convert them into individual image files.
Converting PDFs to images using the Spire.PDF library is straightforward. You simply load your target PDF document and then iterate through each page. For every page, call the PdfDocument.SaveAsImage() method to save it as a separate image file. Once this step is complete, your images are ready for the subsequent OCR process.
Here's a code example showing how to convert PDF to PNG:
from spire.pdf import *

# Load the PDF file
pdf = PdfDocument()
pdf.LoadFromFile("/AI-Generated Art.pdf")

# Loop through pages and save as images
for i in range(pdf.Pages.Count):
    # Convert each page to image
    with pdf.SaveAsImage(i) as image:

        # Save in different formats as needed
        image.Save(f"/output/pdftoimage/ToImage_{i}.png")
        # image.Save(f"Output/ToImage_{i}.jpg")
        # image.Save(f"Output/ToImage_{i}.bmp")

# Close the PDF document
pdf.Close()
Conversion result preview: 
Scan and Extract Text from Images Using Spire.OCR
After converting the scanned PDF into images, we can now move on to OCR PDF with Python and to extract text from the PDF. With OcrScanner.Scan() from Spire.OCR, recognizing text in images becomes straightforward. It supports multiple languages such as English, Chinese, French, and German. Once the text is extracted, you can easily save it to a .txt file or generate a Word document.
The code example below shows how to OCR the first PDF page and export to text in Python:
from spire.ocr import *

# Create OCR scanner instance
scanner = OcrScanner()

# Configure OCR model path and language
configureOptions = ConfigureOptions()
configureOptions.ModelPath = r'E:/DownloadsNew/win-x64/'
configureOptions.Language = 'English'
scanner.ConfigureDependencies(configureOptions)

# Perform OCR on the image
scanner.Scan(r'/output/pdftoimage/ToImage_0.png')

# Save extracted text to file
text = scanner.Text.ToString()
with open('/output/scannedpdfoutput.txt', 'a', encoding='utf-8') as file:
    file.write(text + '\n')
Result preview: 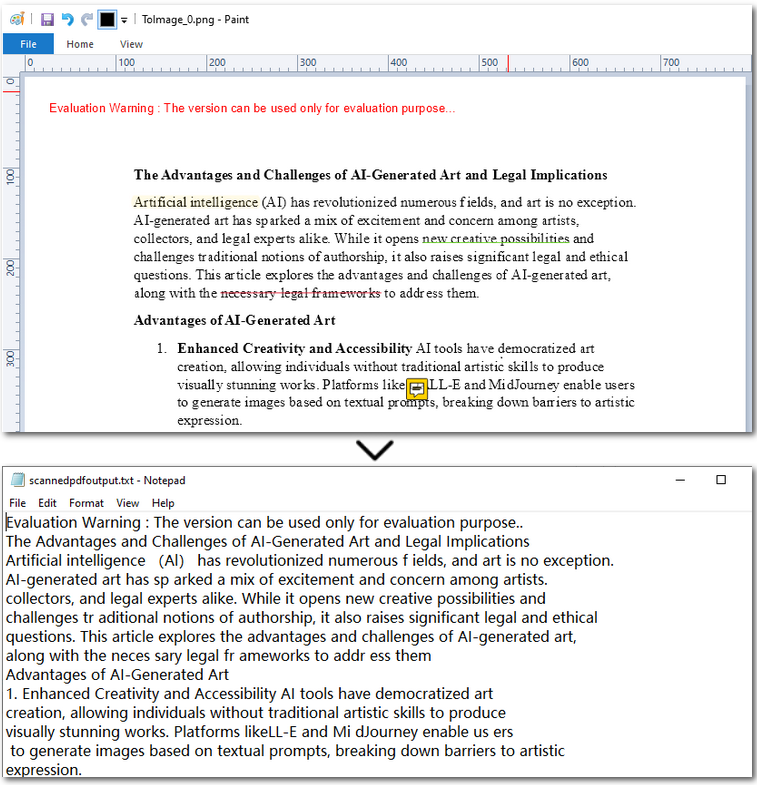
The Conclusion
In this article, we covered how to perform PDF OCR with Python—from converting PDFs to images, to recognizing text with OCR, and finally saving the extracted content as a plain text file. With this streamlined approach, extracting text from scanned PDFs becomes effortless. If you're looking to automate your PDF processing workflows, feel free to reach out and request a 30-day free trial. It’s time to simplify your document management.
How to Add Watermarks in Word (Manual and C# Automation Guide)
Table of Contents
- What is a Watermark in Microsoft Word?
- Benefits of Using Watermarks in Word Documents
- Part 1: How to Add Watermarks in Word Manually (Step-by-Step Guide)
- Part 2: How to Add Watermarks to Word Programmatically Using C# and Spire.Doc
- Final Thoughts on Adding Watermarks in Word
- Frequently Asked Questions (FAQs)
Install with Nuget
PM> Install-Package Spire.Doc
Related Links
If you need to label your Word documents as “Confidential,” “Draft,” or apply custom branding, adding a watermark is one of the most effective solutions. It helps protect sensitive content, indicate document status, and reinforce brand identity - all while maintaining a clean, professional appearance. Whether you're working on business reports, internal memos, or marketing materials, watermarks can deter unauthorized sharing and clearly communicate your document’s purpose.
In this step-by-step guide, you’ll learn two practical ways to add watermarks to Word documents: manually using Microsoft Word’s built-in watermark tools, and programmatically through C# automation with the Spire.Doc for .NET library. No matter your workflow - manual or automated - you’ll discover efficient techniques for inserting text or image watermarks that enhance and secure your Word files.
What You Will Learn
- What is a Watermark in Microsoft Word?
- Benefits of Using Watermarks in Word Documents
- Part 1: How to Add Watermarks in Word Manually (Step-by-Step Guide)
- Part 2: How to Add Watermarks to Word Programmatically Using C# and Spire.Doc
- Final Thoughts on Adding Watermarks in Word
- Frequently Asked Questions (FAQs)
What is a Watermark in Microsoft Word?
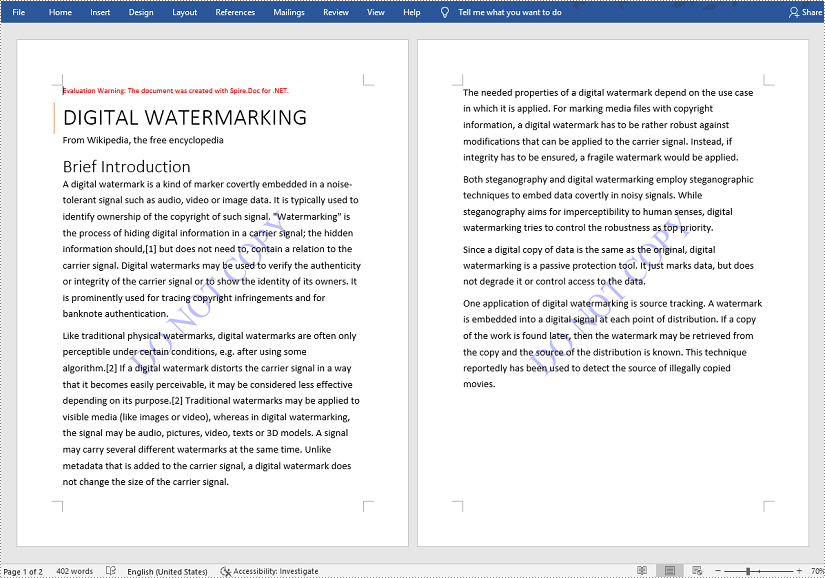
A watermark in Word is a semi-transparent design, text, or image that appears behind the main content of a document page. It does not interfere with the content itself, but remains visible to readers.
Common watermark types include:
- Text Watermarks: "Confidential", "Draft", "Sample", etc.
- Image Watermarks: Company logos or background images
- Custom Watermarks: Branding elements or unique identifiers
Benefits of Using Watermarks in Word Documents
Watermarks serve several important purposes:
- Protect sensitive content by clearly marking documents as confidential
- Indicate document status, such as draft, review, or final
- Brand documents with logos or company names
- Discourage unauthorized distribution or misuse
Part 1: How to Add Watermarks in Word Manually (Step-by-Step Guide)
Microsoft Word makes it easy to add watermarks, whether you're using a built-in option or creating your own. You can choose from a set of predefined watermarks like “Confidential” or “Draft,” or create custom text and image watermarks to align with your document's purpose and branding.
Insert a Predefined Watermark in Word
Microsoft Word includes several ready-made watermark templates for common use cases, such as marking a document as confidential or as a draft.
Steps to Add a Predefined Watermark to Your Document
-
Open your document in Microsoft Word.
-
Go to the Design tab on the menu bar.
-
On the right side, click Watermark in the Page Background group.
-
In the opened dialog, select a predefined watermark according to your requirement (e.g., "Confidential", "Do Not Copy", “Sample”).
Result:
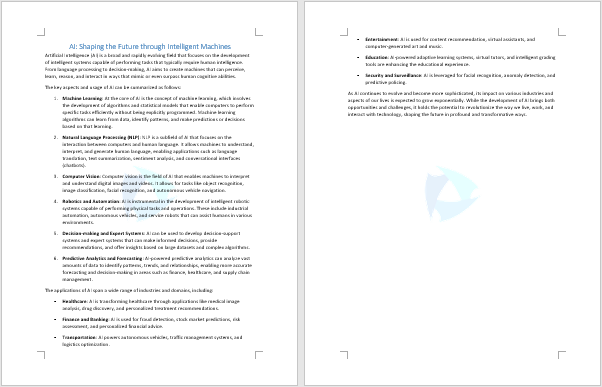
The selected watermark is automatically applied to all pages of the document.
Create a Custom Text or Image Watermark in Word
If you feel the predefined options don’t meet your needs, you can create a custom watermark using either text or an image.
Steps to Add a Custom Watermark to Your Document
-
On the menu bar, click Design > Watermark > Custom Watermark.
-
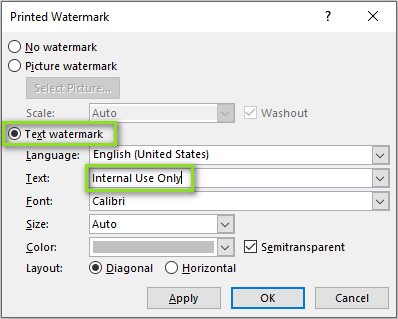
In the opened Printed Watermark dialog:
- Select Text watermark:
-
Enter your text (e.g., "Internal Use Only")
- Choose font, size, color, and layout (horizontal or diagonal)
-
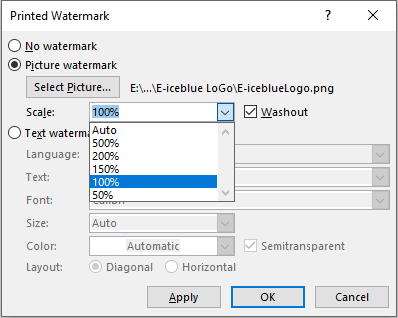
- Or select Picture watermark:
- Click Select Picture… to browse and insert an image (e.g., company logo).
- Set Scale and enable Washout for a transparent effect
- Click Select Picture… to browse and insert an image (e.g., company logo).
- Select Text watermark:
-
Click Apply, then OK.
Result:
The image watermark is automatically added to all pages of the document.
Tip: Using a transparent watermark enhances the document without interfering with its readability.
Apply a Watermark to Only One Page in Word
By default, Word applies the watermark to the entire document. If you want to watermark only a particular page, follow the steps below.
Steps to Add a Watermark to Just One Page
-
Click on the page where you want to add the watermark.
-
On the menu bar, click Design > Watermark.
-
In the opened dialog, right-click on one of the predefined watermarks, and select Insert at Current Document Position.
-
The watermark will be inserted as a text box on the selected page. If the watermark content is not what you want, click the watermark to activate the text box.
-
Click the text in the text box and change it to your desired watermark content.
-
Click anywhere outside the text box to apply the change.
Result:
You now have a watermark that appears only on the selected page without affecting the rest of the document.
Part 2: How to Add Watermarks to Word Programmatically Using C# and Spire.Doc
When automating document generation or batch-processing Word files, Spire.Doc for .NET provides a simple way to add watermarks programmatically.
Getting Started with Spire.Doc
Spire.Doc for .NET is a developer-friendly library that streamlines the process of Word document generation and manipulation. It allows developers to programmatically add both text and image watermarks to .doc or .docx documents without requiring Microsoft Word to be installed.
Install Spire.Doc via NuGet
You can easily install the required library from NuGet by opening the Package Manager Console and running the following command:
Install-Package Spire.Doc
Once installed, you'll be ready to add watermarks to your documents seamlessly.
Add a Text Watermark to Word in C#
To add a text watermark to a Word document with C#, follow the steps below:
Step 1: Import Required Namespaces
Make sure to include the necessary namespaces for working with documents and formatting:
using Spire.Doc;
using Spire.Doc.Documents;
using System.Drawing;
Step 2: Load the Word Document
Create a Document object and load the Word file you want to watermark:
Document document = new Document();
document.LoadFromFile("input.docx");
Step 3: Create and Configure the Text Watermark
Create a TextWatermark instance and customize the watermark content and appearance:
TextWatermark watermark = new TextWatermark();
watermark.Text = "DO NOT COPY"; // Watermark text
watermark.FontSize = 50; // Text size
watermark.Color = Color.Blue; // Watermark color
watermark.Layout = WatermarkLayout.Diagonal; // Layout: Diagonal or Horizontal
Step 4: Apply the Watermark and Save the Document
Assign the watermark to the document and save it to a new file:
document.Watermark = watermark;
document.SaveToFile("output_with_text_watermark.docx", FileFormat.Docx);
Full Code: Insert Text Watermark in Word in C#
using Spire.Doc;
using Spire.Doc.Documents;
using System.Drawing;

namespace TextWatermarkExample
{
    class Program
    {
        static void Main(string[] args)
        {
            // Step 1: Load the Word document
            Document document = new Document();
            document.LoadFromFile("input.docx");

            // Step 2: Create and configure the text watermark
            TextWatermark watermark = new TextWatermark();
            watermark.Text = "DO NOT COPY";
            watermark.FontSize = 50;
            watermark.Color = Color.Blue;
            watermark.Layout = WatermarkLayout.Diagonal;

            // Step 3: Apply the watermark and save the document
            document.Watermark = watermark;
            document.SaveToFile("output_with_text_watermark.docx", FileFormat.Docx);
        }
    }
}
Add an Image Watermark to Word in C#
To insert an image watermark using C#, follow the steps below:
Step 1: Import Required Namespaces
Add these at the top of your C# file to enable document and image handling:
using Spire.Doc;
using System.Drawing;
Step 2: Load the Word Document
Create a Document object and load your source Word file:
Document document = new Document();
document.LoadFromFile("input.docx");
Step 3: Create and Configure the Image Watermark
Instantiate a PictureWatermark, load the image, set the scale, and enable washout:
PictureWatermark watermark = new PictureWatermark();
watermark.Picture = Image.FromFile("logo.png"); // Your watermark image
watermark.Scaling = 150; // Set image scaling (percentage)
watermark.IsWashout = true; // Enable washout
Step 4: Apply the Watermark and Save the File
Assign the watermark to the document and save it:
document.Watermark = watermark;
document.SaveToFile("output_with_image_watermark.docx", FileFormat.Docx);
Full Code: Insert Image Watermark in Word in C#
using Spire.Doc;
using System.Drawing;

namespace ImageWatermarkExample
{
    class Program
    {
        static void Main(string[] args)
        {
            // Step 1: Load the Word document
            Document document = new Document();
            document.LoadFromFile("input.docx");

            // Step 2: Create and configure the image watermark
            PictureWatermark watermark = new PictureWatermark();
            watermark.Picture = Image.FromFile("logo.png");
            watermark.Scaling = 150;
            watermark.IsWashout = true;

            // Step 3: Apply the watermark and save the document
            document.Watermark = watermark;
            document.SaveToFile("output_with_image_watermark.docx", FileFormat.Docx);
        }
    }
}
Final Thoughts on Adding Watermarks in Word
Adding watermarks to Word documents helps protect sensitive content, indicate document status, and enhance brand identity. Depending on your needs, you can choose between:
- Using Microsoft Word:
- Insert built-in or custom text/image watermarks
- Apply watermarks to all pages or specific sections manually
- Automating with C# and Spire.Doc for .NET:
- Programmatically add text or image watermarks to Word files
- Ideal for batch processing or automated document generation
Frequently Asked Questions (FAQs)
Q1: Can I remove the watermark from the document later?
A1: Yes. In Word, go to Design > Watermark > Remove Watermark. In C# and Spire.Doc, set document.Watermark = null;.
Q2: Will watermarks print with the document?
A2: Yes, watermarks appear both onscreen and in printouts.
Q3: What Word formats are supported by Spire.Doc?
A3: Spire.Doc supports a wide range of Word document formats, including Doc, Docx, Docm, Dot, Dotx, Dotm, and more.
See Also
Spire.Doc 13.7.9 support creating combination charts
We're pleased to announce the release of Spire.Doc 13.7.9. This version adds several new features, such as support for creating combination charts and setting image compression methods when converting Word to PDF. Besides, it also fixes an issue that header images were distorted during Doc to PDF conversion. More details are listed below.
Here is a list of changes made in this release
| Category | ID | Description |
| New feature | SPIREDOC-9977 SPIREDOC-10012 |
Supports creating combination charts.
Document doc = new Document();
Paragraph paragraph = doc.AddSection().AddParagraph();
Chart chart = paragraph.AppendChart(ChartType.Column, 450, 300).Chart;
//Modify 'Series 3' to a line chart and display it on the secondary axis
chart.ChangeSeriesType("Series 3", ChartSeriesType.Line, true);
Console.WriteLine(chart.Series[2].ChartType);
doc.SaveToFile("ComboChart.docx");
|
| New feature | - | Adds the ‘setDefaultSubstitutionFontName()’ method to specify default substitution fonts.
Document document = new Document();
//Set default replacement font
doc.DefaultSubstitutionFontName = "Arial";
Section sec = doc.AddSection();
Paragraph para = sec.AddParagraph();
TextRange tr = para.AppendText("test");
//The system does not have this font
tr.CharacterFormat.FontName = "Helvetica";
doc.SaveToFile(outputFile, FileFormat.PDF);
doc.Close();
|
| New feature | - | Adds the ‘StructureDocumentTag.RemoveSelfOnly()’ method to remove SDT tags while retaining their contents.
// Process inline structure tags
List<StructureDocumentTagInline> tagInlines = structureTags.getM_tagInlines();
for (int i = 0; i < tagInlines.Count; i++)
{
    tagInlines[i].RemoveSelfOnly();
}

// Process other structure tags
List<StructureDocumentTag> tags = structureTags.getM_tags();
for (int i = 0; i < tags.Count; i++)
{
    tags[i].RemoveSelfOnly();
}

// Process StructureDocumentTagRow
List<StructureDocumentTagRow> rowtags = structureTags.getM_rowtags();
for (int i = 0; i < rowtags.Count; i++)
{
    rowtags[i].RemoveSelfOnly();
}

// Process StructureDocumentTagCell
List<StructureDocumentTagCell> celltags = structureTags.getM_celltags();
for (int i = 0; i < celltags.Count; i++)
{
    celltags[i].RemoveSelfOnly();
}
|
| New feature | - | Supports setting image compression methods when converting Word to PDF.
Document document = new Document(); document.LoadFromFile(@"Sample.docx"); ToPdfParameterList para = new ToPdfParameterList(); para.PdfImageCompression = Spire.Doc.Export.PdfImageCompression.Jpeg; document.SaveToFile(outputFile,para); |
| New feature | - | Supports inserting formulas into Word documents using OMML code.
Document document = new Document();
Section section = doc.AddSection();

foreach (string ommlCode in OmmlCodes)
{
    OfficeMath officeMath = new OfficeMath(doc);
    officeMath.CharacterFormat.FontSize = 14f;
    officeMath.FromOMMLCode(ommlCode);
    section.AddParagraph().ChildObjects.Add(officeMath);
}

doc.SaveToFile(outputFile, FileFormat.Docx2013);
doc.Dispose();
|
| New feature | - | Supports converting math formulas to LaTeX code.
Document document = new Document();
doc.LoadFromFile(inputFile);

StringBuilder stringBuilder = new StringBuilder();
// Iterate through sections in the document
foreach (Section section in doc.Sections)
{
    // Iterate through paragraphs in each section
    foreach (Paragraph par in section.Body.Paragraphs)
    {
        // Iterate through child objects in each paragraph
        foreach (DocumentObject obj in par.ChildObjects)
        {
            // Check if the object is an OfficeMath equation
            OfficeMath omath = obj as OfficeMath;
            if (omath == null) continue;
            // Convert OfficeMath equation to LaTex code
            string mathml = omath.ToLaTexMathCode();
            // Append MathML code to the StringBuilder
            stringBuilder.Append("LaTeX code" + mathml);
            stringBuilder.Append("\r\n");
        }
    }
}
// Write the LaTex code to a text file
File.WriteAllText(outputFile, stringBuilder.ToString())
|
| Bug | SPIREDOC-11245 | Fixed an issue where header images were distorted When converting Doc to PDF. |
How to Convert Markdown to PDF and Excel in C# .NET: A Complete Guide

Markdown is a lightweight markup language widely used for writing formatted text using simple plain syntax. Favored by developers, writers, and technical content creators for its readability and ease of use, Markdown is perfect for drafting documents, notes, and technical content. However, Markdown files (.md) often need to be converted into other formats such as PDF for official distribution or Excel for data analysis and reporting.
In this comprehensive guide, you will learn how to convert Markdown files to PDF and Excel using C# and Spire.XLS for .NET — a powerful and easy-to-use library that supports direct Markdown loading and exporting to multiple formats. Whether you want to generate polished PDF documents or structured Excel spreadsheets, this tutorial covers everything you need.
Table of Contents
- Why Convert Markdown to PDF and Excel?
- Prerequisites (Library & Environment Setup)
- How to Convert Markdown to PDF in C# (Step-by-Step with Code)
- How to Convert Markdown to Excel in C# (Step-by-Step with Code)
- Complete C# Code Example: Convert Markdown to PDF and Excel in One Go
- Best Practices for Markdown Conversion
- Conclusion
- FAQs
Why Convert Markdown to PDF and Excel?
Markdown is great for writing, but it has limitations when sharing or processing documents:
- PDF files provide a fixed-layout, platform-independent format ideal for sharing polished reports, manuals, or official documentation. PDFs maintain the original style and layout regardless of device or software.
- Excel files are essential when Markdown contains tabular data that you want to analyze, manipulate, or integrate into business processes. Converting Markdown tables to Excel spreadsheets lets you utilize formulas, filters, charts, and data tools effectively.
By converting Markdown to these formats programmatically in C#, you can automate documentation workflows, batch-process files, and integrate with other .NET applications.
Prerequisites (Library & Environment Setup)
Before you start converting Markdown files, ensure your development environment meets the following requirements:
- .NET Framework or .NET Core installed.
- Spire.XLS for .NET: A comprehensive Excel library that supports loading Markdown and exporting to PDF and Excel formats.
Install Spire.XLS via NuGet
You can easily install Spire.XLS in your C# project via NuGet by opening the NuGet Package Manager and executing the following command:
Install-Package Spire.XLS
This package provides all the necessary classes and methods to load Markdown and export documents without relying on Microsoft Office automation.
How to Convert Markdown to PDF in C# (Step-by-Step with Code)
To convert a Markdown file to PDF in C#, follow the steps below:
Step 1: Load the Markdown File
Create a new instance of the Workbook class and load your Markdown file:
Workbook workbook = new Workbook();
workbook.LoadFromMarkdown("test.md");
This method parses the Markdown content, including text and tables, into an Excel workbook structure that Spire.XLS can manipulate.
Step 2: Customize Conversion Settings (Optional)
After loading the Markdown file, you can apply conversion settings to ensure the PDF output retains a clean and readable layout. For example, enabling the SheetFitToPage option ensures that the entire Markdown content fits within a single PDF page.
workbook.ConverterSetting.SheetFitToPage = true;
Step 3: Export as PDF
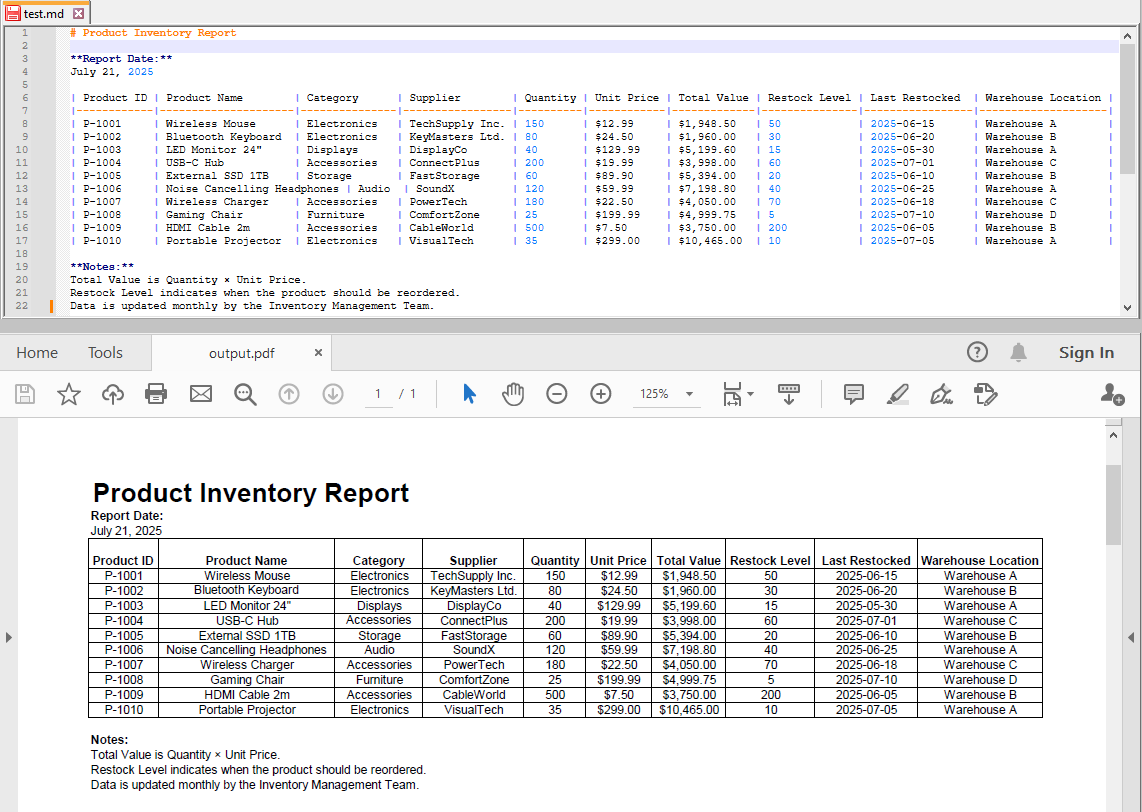
Save the workbook as a PDF file:
workbook.SaveToFile("output.pdf", FileFormat.PDF);
This generates a well-formatted PDF document preserving the Markdown layout and styling suitable for printing or sharing.
How to Convert Markdown to Excel in C# (Step-by-Step with Code)
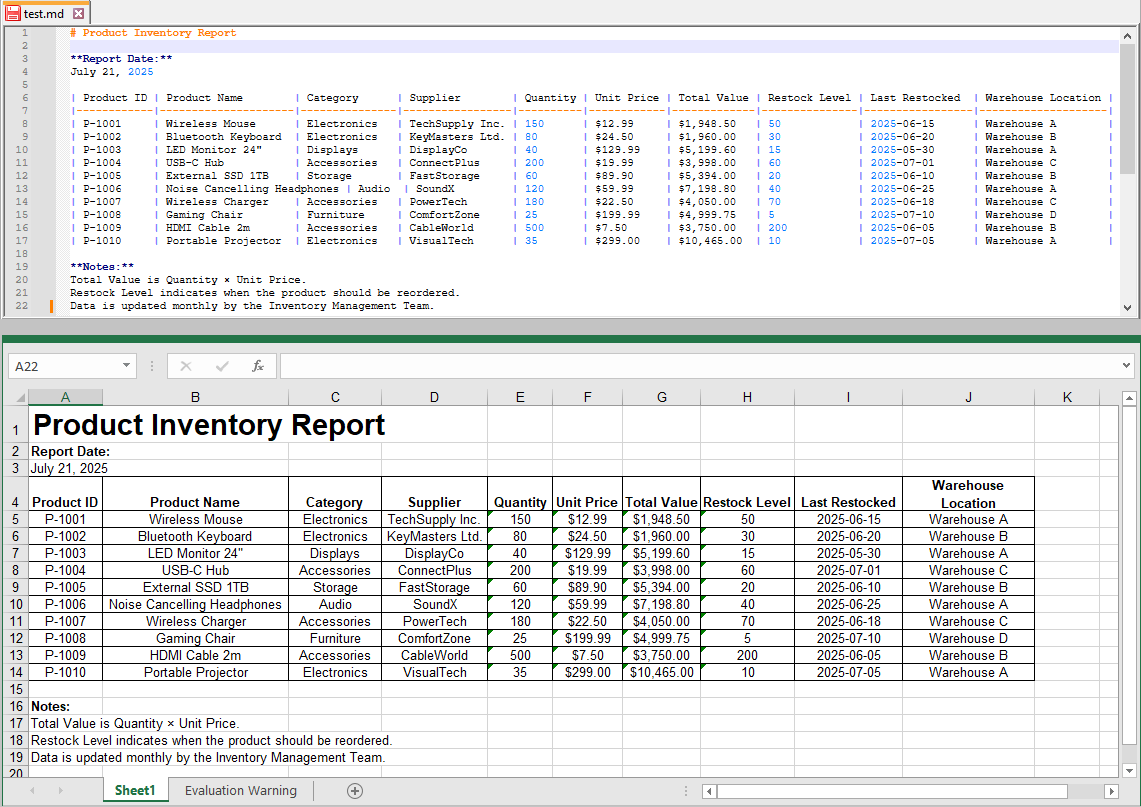
After loading the Markdown file into the workbook, you can also export it to an Excel spreadsheet format:
workbook.SaveToFile("output.xls", ExcelVersion.Version97to2003);
You may also choose other Excel versions depending on your target compatibility:
workbook.SaveToFile("output.xlsx", ExcelVersion.Version2016);
The exported Excel file retains tables and structured data from your Markdown, allowing further analysis or manipulation.
Complete C# Code Example: Convert Markdown to PDF and Excel in One Go
Here’s the full example combining both PDF and Excel exports in a single run:
using Spire.Xls;

namespace MarkdownToPdfAndExcel
{
    internal class Program
    {
        static void Main(string[] args)
        {
            // Initialize the workbook
            Workbook workbook = new Workbook();

            // Load Markdown content
            workbook.LoadFromMarkdown("test.md");

            // Fit the sheet data to one page (optional)
            workbook.ConverterSetting.SheetFitToPage = true;

            // Export to PDF
            workbook.SaveToFile("output.pdf", FileFormat.PDF);

            // Export to xls (Excel 97-2003 format)
            workbook.SaveToFile("output.xls", ExcelVersion.Version97to2003);

            // Export to xlsx (Excel 2016 format)
            workbook.SaveToFile("output.xlsx", ExcelVersion.Version2016);

            workbook.Dispose();
        }
    }
}
Best Practices for Markdown Conversion
- Use UTF-8 Encoding: Ensure your Markdown files use UTF-8 encoding, especially if they contain special or non-English characters. This ensures proper character display and avoids encoding errors during conversion.
- Maintain Clean and Well-Formatted Markdown Tables: To achieve accurate and reliable Excel conversions, structure your Markdown tables carefully. Use consistent pipe (|) delimiters and avoid malformed syntax to preserve table integrity in the output spreadsheet.
- Load Once, Export Multiple Formats: For optimal performance, load your Markdown content into the Workbook object a single time, then export it to various formats such as PDF and Excel. This reduces processing overhead and speeds up batch conversions.
- Assess Markdown Complexity: Spire.XLS effectively supports basic Markdown syntax, such as headings and tables. However, advanced features like embedded images or code blocks with syntax highlighting might require pre-processing or conversion through intermediate formats like HTML.
- Choose Appropriate Excel Export Versions: To maximize compatibility with your users’ software, select the Excel file format based on their environment. For example, use the .xls format for legacy Excel 97–2003 users, and .xlsx for Excel 2007 and later versions to ensure broad accessibility and full feature support.
Conclusion
Converting Markdown to PDF and Excel using C# and Spire.XLS is a fast, flexible, and reliable approach to modern document workflows. With minimal code, developers can automate the transformation of lightweight Markdown into professional PDFs for distribution and Excel spreadsheets for business analytics.
This method streamlines technical writing, reporting, and data handling tasks within .NET applications and enables seamless integration with other business processes.
FAQs
Q1: Can I batch convert multiple Markdown files using Spire.XLS in C#?
A1: Yes, you can loop through multiple Markdown files, load each one using Spire.XLS, and export them individually to PDF or Excel formats within the same C# project.
Q2: Is Microsoft Office required to use Spire.XLS for Markdown conversion?
A2: No, Spire.XLS is a standalone library and does not rely on Microsoft Office or Excel being installed on the machine.
Q3: Is Spire.XLS free to use?
A3: Spire.XLS offers a free version with some limitations. A commercial license is available for full features.
Get a Free License
To fully experience the capabilities of Spire.XLS for .NET without any evaluation limitations, you can request a free 30-day trial license.
Convert CSV to Excel in Java – XLSX/XLS with Formatting

Converting CSV files to Excel is a common task for Java developers working on data reporting, analytics pipelines, or file transformation tools. While manual CSV parsing is possible, it often leads to bloated code and limited formatting. Using a dedicated Excel library like Spire.XLS for Java simplifies the process and allows full control over layout, styles, templates, and data consolidation.
In this tutorial, we’ll walk through various use cases to convert CSV to Excel using Java — including basic import/export, formatting, injecting CSV into templates, and merging multiple CSVs into a single Excel file.
Quick Navigation
- Set Up Spire.XLS in Your Java Project
- Convert a CSV File to Excel Using Java
- Format Excel Output Using Java
- Merge Multiple CSV Files into One Excel File
- Tips & Troubleshooting
- Frequently Asked Questions
Set Up Spire.XLS in Your Java Project
Before converting CSV to Excel, you’ll need to add Spire.XLS for Java to your project. It supports both .xls and .xlsx formats and provides a clean API for working with Excel files without relying on Microsoft Office.
Install via Maven
<repositories>
    <repository>
        <id>com.e-iceblue</id>
        <name>e-iceblue</name>
        <url>https://repo.e-iceblue.com/nexus/content/groups/public/</url>
    </repository>
</repositories>
<dependencies>
    <dependency>
        <groupId>e-iceblue</groupId>
        <artifactId>spire.xls</artifactId>
        <version>16.2.6</version>
    </dependency>
</dependencies>
Add JAR Manually
Download Spire.XLS for Java and add the JAR to your classpath manually. For smaller projects, you can also use the Free Spire.XLS for Java.
Convert a CSV File to Excel Using Java
The simplest use case is to convert a single .csv file into .xlsx or .xls format in Java. Spire.XLS makes this process easy using just two methods: loadFromFile() to read the CSV, and saveToFile() to export it as Excel.
import com.spire.xls.*;

public class CsvToXlsx {
    public static void main(String[] args) {
        Workbook workbook = new Workbook();
        workbook.loadFromFile("data.csv", ",");
        workbook.saveToFile("output.xlsx", ExcelVersion.Version2013);
    }
}
To generate .xls format instead, use ExcelVersion.Version97to2003.
Below is the output Excel file generated after converting the CSV:
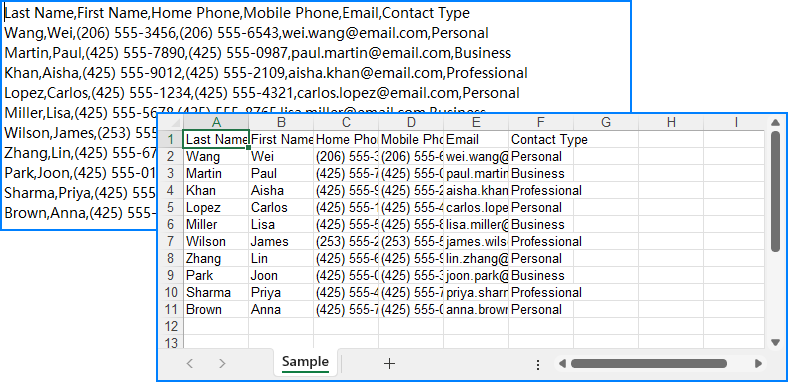
You can also specify a custom delimiter or choose the row/column to begin inserting data — useful if your sheet has titles or a fixed layout.
workbook.loadFromFile("data_semicolon.csv", ";", 3, 2);
Format Excel Output Using Java
When you're exporting CSV for reporting or customer-facing documents, it's often necessary to apply styles for better readability and presentation. Spire.XLS allows you to set cell fonts, colors, and number formats using the CellStyle class, automatically adjust column widths to fit content, and more.
Example: Apply Styling and Auto-Fit Columns
import com.spire.xls.*;

public class CsvToXlsx {
    public static void main(String[] args) {
        Workbook workbook = new Workbook();
        workbook.loadFromFile("data.csv", ",");

        Worksheet sheet = workbook.getWorksheets().get(0);

        // Format header row
        CellStyle headerStyle = workbook.getStyles().addStyle("Header");
        headerStyle.getFont().isBold(true);
        headerStyle.setKnownColor(ExcelColors.LightYellow);
        for (int col = 1; col <= sheet.getLastColumn(); col++) {
            sheet.getCellRange(1, col).setStyle(headerStyle);
        }

        // Format numeric column
        CellStyle numStyle = workbook.getStyles().addStyle("Numbers");
        numStyle.setNumberFormat("#,##0.00");
        sheet.getCellRange("B2:B100").setStyle(numStyle);

        // Auto-fit all columns
        for (int i = 1; i <= sheet.getLastRow(); i++) {
            sheet.autoFitColumn(i);
        }

        workbook.saveToFile("formatted_output.xlsx", ExcelVersion.Version2013);
    }
}
Here’s what the styled Excel output looks like with formatted headers and numeric columns:
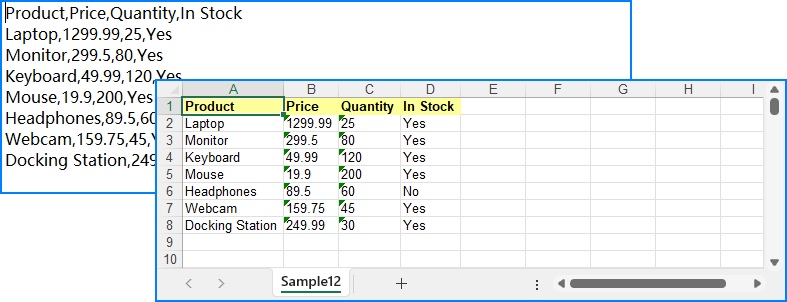
Need to use a pre-designed Excel template? You can load an existing .xlsx file and insert your data using methods like insertArray(). Just note that formatting won’t automatically apply — use CellStyle to style your data programmatically.
Merge Multiple CSV Files into One Excel File
When handling batch processing or multi-source datasets, it’s common to combine multiple CSV files into a single Excel workbook. Spire.XLS lets you:
- Merge each CSV into a separate worksheet, or
- Append all CSV content into a single worksheet
Option 1: Separate Worksheets per CSV
import com.spire.xls.*;
import java.io.File;

public class CsvToXlsx {
    public static void main(String[] args) {
        // Get the CSV file names
        File[] csvFiles = new File("CSVs/").listFiles((dir, name) -> name.endsWith(".csv"));
        // Create a workbook and clear all worksheets
        Workbook workbook = new Workbook();
        workbook.getWorksheets().clear();

        for (File csv : csvFiles) {
            // Load the CSV file
            Workbook temp = new Workbook();
            temp.loadFromFile(csv.getAbsolutePath(), ",");
            // Append the CSV file to the workbook as a worksheet
            workbook.getWorksheets().addCopy(temp.getWorksheets().get(0));
        }

        // Save the workbook
        workbook.saveToFile("merged.xlsx", ExcelVersion.Version2016);
    }
}
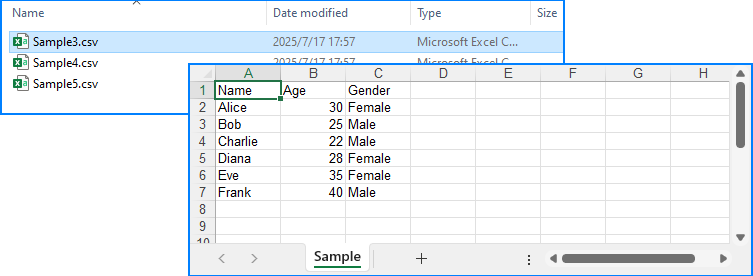
Each CSV file is placed into its own worksheet in the final Excel file:

Option 2: All Data in a Single Worksheet
import com.spire.xls.*;
import java.io.File;

public class CsvToXlsx {
    public static void main(String[] args) {
        // Get the CSV file names
        File[] csvFiles = new File("CSVs/").listFiles((dir, name) -> name.endsWith(".csv"));
        // Create a workbook
        Workbook workbook = new Workbook();
        // Clear default sheets and add a new one
        workbook.getWorksheets().clear();
        Worksheet sheet = workbook.getWorksheets().add("Sample");

        int startRow = 1;
        boolean isFirstFile = true;

        for (File csv : csvFiles) {
            // Load the CSV data
            Workbook temp = new Workbook();
            temp.loadFromFile(csv.getAbsolutePath(), ",");
            Worksheet tempSheet = temp.getWorksheets().get(0);

            // Check if it's the first file
            int startReadRow = isFirstFile ? 1 : 2;
            isFirstFile = false;

            // Copy the CSV data to the sheet
            for (int r = startReadRow; r <= tempSheet.getLastRow(); r++) {
                for (int c = 1; c <= tempSheet.getLastColumn(); c++) {
                    sheet.getCellRange(startRow, c).setValue(tempSheet.getCellRange(r, c).getText());
                }
                startRow++;
            }
        }

        // Save the merged workbook
        workbook.saveToFile("merged_single_sheet.xlsx", ExcelVersion.Version2016);
    }
}
Below is the final Excel sheet with all CSV data merged into a single worksheet:
Related Article: How to Merge Excel Files Using Java
Tips & Troubleshooting
Problems with your output? Try these fixes:
-
Text garbled in Excel → Make sure your CSV is UTF-8 encoded.
-
Wrong column alignment? → Check if delimiters are mismatched.
-
Large CSV files? → Split files or use multiple sheets for better memory handling.
-
Appending files with different structures? → Normalize column headers beforehand.
Conclusion
Whether you're handling a simple CSV file or building a more advanced reporting workflow, Spire.XLS for Java offers a powerful and flexible solution for converting CSV to Excel through Java code. It allows you to convert CSV files to XLSX or XLS with just a few lines of code, apply professional formatting to ensure readability, inject data into pre-designed templates for consistent branding, and even merge multiple CSVs into a single, well-organized workbook. By automating these processes, you can minimize manual effort and generate clean, professional Excel files more efficiently.
You can apply for a free temporary license to experience the full capabilities without limitations.
Frequently Asked Questions
How do I convert CSV to XLSX in Java?
Use Workbook.loadFromFile("file.csv", ",") and then saveToFile("output.xlsx", ExcelVersion.Version2016).
Can I format the Excel output?
Yes. Use CellStyle to control fonts, colors, alignment, and number formats.
Is it possible to use Excel templates for CSV data?
Absolutely. Load a .xlsx template and inject CSV using setText() or insertDataTable().
How can I merge several CSV files into one Excel file?
Use either multiple worksheets or merge everything into one sheet row by row.
Spire.XLS for Java 15.7.7 supports Array data binding in MarkerDesigner
We’re glad to announce the release of Spire.XLS for Java 15.7.7. The latest version supports Array data binding in MarkerDesigner. Moreover, some known bugs are fixed successfully in the new version, such as the issue that font rendering was incorrect when converting Excel to PDF in Linux environments. More details are listed below.
Here is a list of changes made in this release:
| Category | ID | Description |
| New feature | SPIREXLS-5874 | Supports Array data binding in MarkerDesigner.
Workbook workbook = new Workbook();
// Get the first worksheet from the workbook
Worksheet sheet = workbook.getWorksheets().get(0);
// Set the value of cell range A1 to "&=Array"
sheet.getCellRange("A1").setValue("&=Array");
// Add a parameter named "Array" with an array of strings as its value
workbook.getMarkerDesigner().addArray("Array", new String[] { "Spire.Xls", "Spire.Doc", "Spire.PDF", "Spire.Presentation", "Spire.Email" });
// Apply the marker design to the workbook
workbook.getMarkerDesigner().apply();
// Calculate all the values in the workbook
workbook.calculateAllValue();
// Auto-fit the rows and columns in the allocated range of the worksheet
sheet.getAllocatedRange().autoFitRows();
sheet.getAllocatedRange().autoFitColumns();
// Save the workbook to the specified file path using Excel 2013 format
workbook.saveToFile(outputFile, ExcelVersion.Version2013);
// Clean up and release resources used by the workbook
workbook.dispose();
|
| Bug | SPIREXLS-5861 SPIREXLS-5873 |
Fixes the issue that font rendering was incorrect when converting Excel to PDF in Linux environments. |
| Bug | SPIREXLS-5869 | Fixes the issue that the behavior of isWriteUnMergedColSpan(false) was incorrect when converting Excel to HTML. |
| Bug | SPIREXLS-5870 | Fixes the issue that "Invalid formula: =#REF!" error happened when loading Excel documents. |
| Bug | SPIREXLS-5875 | Fixes the issue that the layout rendering was incorrect when converting Excel to PDF. |
| Bug | SPIREXLS-5876 | Fixes the issue that the program threw a java.lang.NullPointerException error when loading Excel files. |
| Bug | SPIREXLS-5877 | Removed dependencies on sun.misc.BASE64Decoder. |
Convert PDF to Markdown in Python – Single & Batch Conversion
PDFs are ubiquitous in digital document management, but their rigid formatting often makes them less than ideal for content that needs to be easily edited, updated, or integrated into modern workflows. Markdown (.md), on the other hand, offers a lightweight, human-readable syntax perfect for web publishing, documentation, and version control. In this guide, we'll explore how to leverage the Spire.PDF for Python library to perform single or batch conversions from PDF to Markdown in Python efficiently.
- Why Convert PDFs to Markdown?
- Python PDF Converter Library – Installation
- Convert PDF to Markdown in Python
- Batch Convert Multiple PDFs to Markdown in Python
- Frequently Asked Questions
- Conclusion
Why Convert PDFs to Markdown?
Markdown offers several advantages over PDF for content creation and management:
- Version control friendly: Easily track changes in Git
- Lightweight and readable: Plain text format with simple syntax
- Editability: Simple to modify without specialized software
- Web integration: Natively supported by platforms like GitHub, GitLab, and static site generators (e.g., Jekyll, Hugo).
Spire.PDF for Python provides a robust solution for extracting text and structure from PDFs while preserving essential formatting elements like tables, lists, and basic styling.
Python PDF Converter Library - Installation
To use Spire.PDF for Python in your projects, you need to install the library via PyPI (Python Package Index) using pip. Open your terminal/command prompt and run:
pip install Spire.PDF
To upgrade an existing installation to the latest version:
pip install --upgrade spire.pdf
Convert PDF to Markdown in Python
Here’s a basic example demonstrates how to use Python to convert a PDF file to a Markdown (.md) file.
from spire.pdf.common import *
from spire.pdf import *

# Create an instance of PdfDocument class
pdf = PdfDocument()

# Load a PDF document
pdf.LoadFromFile("TestFile.pdf")

# Convert the PDF to a Markdown file
pdf.SaveToFile("PDFToMarkdown.md", FileFormat.Markdown)
pdf.Close()
This Python script loads a PDF file and then uses the SaveToFile() method to convert it to Markdown format. The FileFormat.Markdown parameter specifies the output format.
How Conversion Works
The library extracts text, images, tables, and basic formatting from the PDF and converts them into Markdown syntax.
- Text: Preserved with paragraphs/line breaks.
- Images: Images in the PDF are converted to base64-encoded PNG format and embedded directly in the Markdown.
- Tables: Tabular data is converted to Markdown table syntax (rows/columns with pipes |).
- Styling: Basic formatting (bold, italic) is retained using Markdown syntax.
Output: 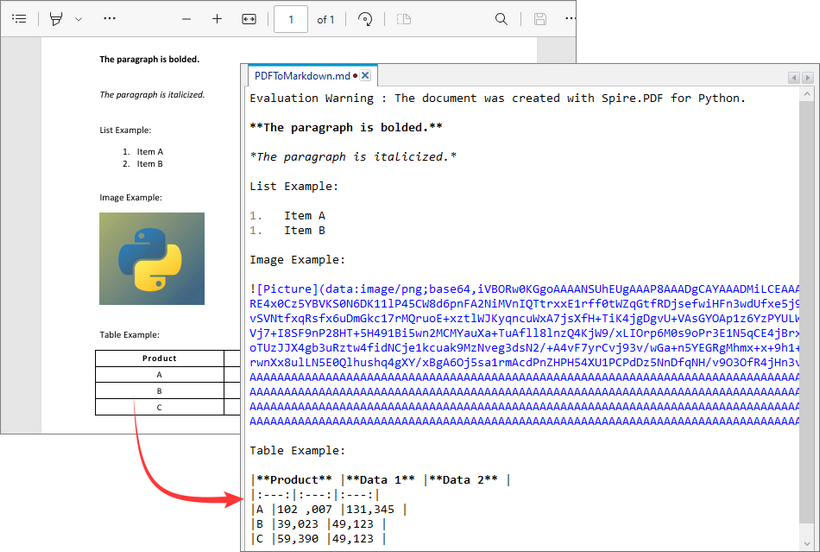
Batch Convert Multiple PDFs to Markdown in Python
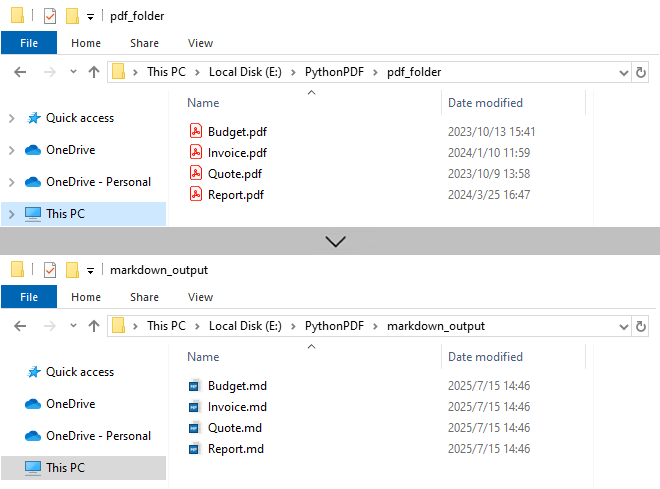
This Python script uses a loop to convert all PDF files in a specified directory to Markdown format.
import os
from spire.pdf import *

# Configure paths
input_folder = "pdf_folder/"
output_folder = "markdown_output/"

# Create output directory
os.makedirs(output_folder, exist_ok=True)

# Process all PDFs in folder
for file_name in os.listdir(input_folder):
    if file_name.endswith(".pdf"):
        # Initialize document
        pdf = PdfDocument()
        pdf.LoadFromFile(os.path.join(input_folder, file_name))

        # Generate output path
        md_name = os.path.splitext(file_name)[0] + ".md"
        output_path = os.path.join(output_folder, md_name)

        # Convert to Markdown
        pdf.SaveToFile(output_path, FileFormat.Markdown)
        pdf.Close()
Key Characteristics
- Batch Processing: Automatically processes all PDFs in input folder, improving efficiency for bulk operations.
- 1:1 Conversion: Each PDF generates corresponding Markdown file.
- Sequential Execution: Files processed in alphabetical order.
- Resource Management: Each PDF is closed immediately after conversion.
Output:
Need to convert Markdown to PDF? Refer to: Convert Markdown to PDF in Python
Frequently Asked Questions (FAQs)
Q1: Is Spire.PDF for Python free?
A: Spire.PDF offers a free version with limitations (e.g., maximum 3 pages per conversion). For unlimited use, request a 30-day free trial for evaluation.
Q2: Can I convert password-protected PDFs to Markdown?
A: Yes. Use the LoadFromFile method with the password as a second parameter:
pdf.LoadFromFile("ProtectedFile.pdf", "your_password")
Q3: Can Spire.PDF convert scanned/image-based PDFs to Markdown?
A: No. The library extracts text-based content only. For scanned PDFs, use OCR tools (like Spire.OCR for Python) to create searchable PDFs first.
Conclusion
Spire.PDF for Python simplifies PDF to Markdown conversion for both single file and batch processing.
Its advantages include:
- Simple API with minimal code
- Preservation of document structure
- Batch processing capabilities
- Cross-platform compatibility
Whether you're migrating documentation, processing research papers, or building content pipelines, by following the examples in this guide, you can efficiently transform static PDF documents into flexible, editable Markdown content, streamlining workflows and improving collaboration.
5 maneiras inteligentes de extrair texto do PowerPoint (sem copiar e colar)
Índice
Instalar com Pypi
pip install Spire.Presentation
Links Relacionados

Visão Geral
As apresentações do PowerPoint são amplamente utilizadas para reuniões de negócios, fins educacionais e conferências. No entanto, extrair texto dessas apresentações pode, por vezes, ser uma tarefa tediosa, especialmente ao lidar com vários slides.
Felizmente, existem vários métodos disponíveis para extrair texto do PowerPoint sem recorrer ao método tradicional de copiar e colar. Nesta postagem do blog, exploraremos cinco maneiras inteligentes de extrair texto, incluindo métodos que usam Microsoft PowerPoint, DeepSeek, conversores online, VBA e Python.
Extraindo Texto Usando o MS PowerPoint
Uma das maneiras mais diretas de extrair texto de uma apresentação do PowerPoint é usando o próprio software. O Microsoft PowerPoint possui recursos integrados que permitem aos usuários salvar apresentações em diferentes formatos, incluindo RTF (Rich Text Format). Este método é particularmente útil para aqueles que preferem não usar ferramentas ou serviços adicionais. Seguindo alguns passos simples, você pode converter rapidamente sua apresentação para um formato amigável ao texto.
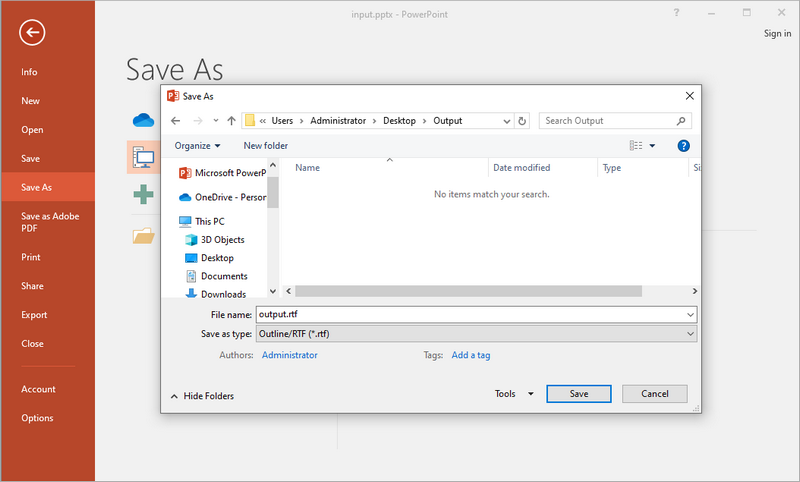
Passos para Salvar Arquivo PPT(X) como RTF:
- Abra seu arquivo PPT(X) com o MS PowerPoint.
- Vá para Arquivo > Salvar Como.
- Escolha Estrutura de Tópicos/RTF no menu suspenso de tipo de arquivo.
- Altere o nome e a localização do arquivo (opcional) e, em seguida, clique em Salvar.
Prós:
- Recurso integrado — nenhum software adicional necessário.
- Preserva a estrutura básica do texto (títulos, marcadores).
Contras:
- Perde elementos não textuais, como imagens e tabelas.
Quando Usar este Método:
Este método é ideal para usuários que já têm o MS Office instalado em suas máquinas e desejam trabalhar com documentos confidenciais sem usar ferramentas de terceiros.
Extraindo Texto Usando o DeepSeek
Hoje em dia, as ferramentas de bate-papo com IA tornaram-se um software de escritório indispensável, e um número crescente de pessoas prefere usar ferramentas de IA para tarefas relacionadas a texto. Entre elas, o DeepSeek é uma ferramenta orientada por IA que ajuda a extrair texto de apresentações do PowerPoint de forma eficiente. Esta ferramenta não apenas fornece uma saída limpa, mas também oferece recursos adicionais como resumo, análise, tradução e polimento.

Passos para Extrair Texto do PowerPoint Usando o DeepSeek:
- Visite o DeepSeek Chat.
- Clique no botão de anexo para carregar seu arquivo PPT/PPTX.
- Digite um prompt como: “extrair texto dele”.
- A IA processará e retornará o texto estruturado.
Prós:
- Fornece uma saída de texto limpa e estruturada com marcadores intactos.
- Oferece a opção de traduzir, resumir ou analisar o texto extraído.
Contras:
- Apenas o texto é extraído; imagens e tabelas não são incluídas**.**
- Requer conexão com a rede.
Quando Usar este Método:
O DeepSeek é melhor utilizado quando você precisa de extração de texto aprimorada por IA com tradução, resumo ou análise. É uma ótima opção para fins de pesquisa ou documentação.
Extraindo Texto Usando um Conversor Online
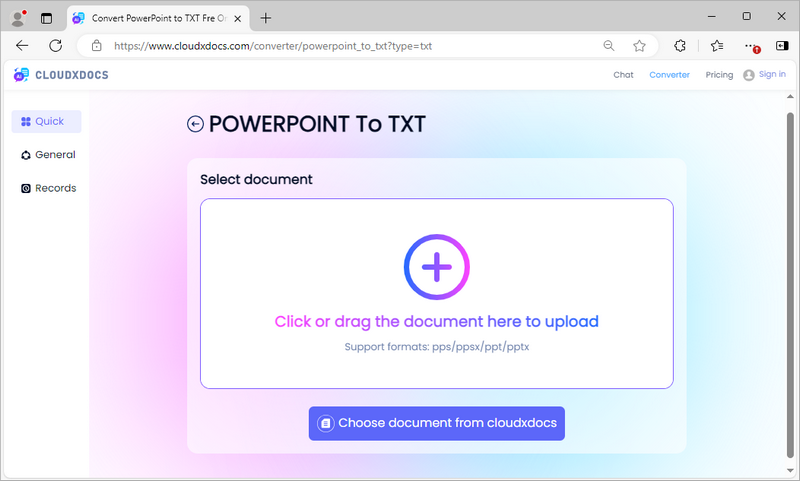
Conversores online, como o Cloudxdocs.com, oferecem uma maneira rápida e conveniente de extrair texto de arquivos do PowerPoint sem a necessidade de instalação. Essas ferramentas são particularmente úteis para usuários que podem не ter acesso ao PowerPoint ou que preferem uma solução simples baseada na web. Ao carregar sua apresentação para um conversor online, você pode extrair rapidamente o texto e baixá-lo em um formato de texto simples, facilitando o trabalho.
Embora este site ofereça vários conversores de formato de arquivo, você pode visitar diretamente seu conversor de PowerPoint para TXT:
Passos para Converter PowerPoint para TXT Usando o Conversor Online CloudXDocs:
- Vá para o conversor de PowerPoint para TXT.
- Carregue seu arquivo PPT/PPTX.
- A ferramenta extrairá o texto automaticamente.
- Baixe o arquivo TXT contendo o conteúdo extraído.
Prós:
- Nenhuma instalação de software — funciona diretamente no navegador.
- Preserva o conteúdo da tabela, mas perde a estrutura.
- Funciona em várias plataformas, como Mac, Windows e Linux.
Contras:
- Pode causar preocupações com a privacidade para arquivos sensíveis.
- Requer conexão com a rede.
Quando Usar este Método:
Este método é perfeito para usuários que precisam de uma solução rápida e não querem instalar ferramentas adicionais.
Extraindo Texto Usando VBA
Para usuários confortáveis com codificação, o Visual Basic for Applications (VBA) oferece uma maneira poderosa de automatizar o processo de extração. Escrevendo uma macro simples, você pode extrair rapidamente texto de vários slides, economizando tempo e esforço. Este método é particularmente útil para aqueles que trabalham frequentemente com apresentações do PowerPoint e precisam de uma solução mais personalizada que possa lidar com necessidades específicas de extração.

Passos para Extrair Texto do PowerPoint Usando uma Macro VBA:
- Inicie o MS PowerPoint no seu computador.
- Pressione Alt + F11 para abrir o editor VBA.
- Clique com o botão direito em qualquer um dos itens na janela Projeto. Selecione Inserir e, em seguida, Módulo.
- Escreva o código VBA no módulo para realizar a extração de texto.
- Feche o editor VBA.
- Pressione Alt + F8, selecione o nome da Macro que você acabou de criar e clique em Executar.
Exemplo de Código VBA para Extrair Texto do PowerPoint:
Sub ExtractText()
    Dim ppt As Presentation
    Dim slide As slide
    Dim shape As shape
    Dim text As String
    Dim i As Integer

    Set ppt = ActivePresentation
    text = ""

    For Each slide In ppt.Slides
        For Each shape In slide.Shapes
            If shape.HasTextFrame Then
                If shape.TextFrame.HasText Then
                    text = text & shape.TextFrame.TextRange.text & vbCrLf
                End If
            End If
        Next shape
    Next slide

    'Salvar em um arquivo de texto
    Open "C:\ExtractedText.txt" For Output As #1
    Print #1, text
    Close #1

    MsgBox "Texto extraído para C:\ExtractedText.txt"
End Sub
Prós:
- Altamente personalizável – modifique o código para necessidades específicas.
Contras:
- Requer a habilitação de macros, o que pode representar riscos de segurança.
- Pode exigir algum conhecimento de programação.
Quando Usar este Método:
O VBA é mais adequado para usuários que estão familiarizados com programação e desejam automatizar o processo de extração para várias apresentações. Este método permite maior flexibilidade e personalização.
Extraindo Texto Usando Python
Python é uma linguagem de programação versátil que pode ser usada para várias tarefas de automação, incluindo a extração de texto de apresentações do PowerPoint. Com bibliotecas como Spire.Presentation, o Python permite que os usuários escrevam scripts que podem lidar com apresentações complexas e automatizar o processo de extração. Este método é ideal para indivíduos com conhecimento técnico que necessitam de uma solução robusta para manipulação de dados ou processamento adicional.
Passos para Extrair Texto do PowerPoint Usando Python:
- Instale e configure o Python em seu computador.
- Crie um projeto Python em sua IDE, como o Visual Studio Code.
- Instale o Spire.Presentation executando o comando pip: pip install spire.presentation
- Escreva o código (fornecido abaixo) para realizar a extração de texto nos slides.
- Execute o script Python.
Exemplo de Trecho de Código Python:
from spire.presentation import *
from spire.presentation.common import *

# Crie um objeto da classe Presentation
presentation = Presentation()

# Carregue uma apresentação do PowerPoint
presentation.LoadFromFile("C:\\Users\\Administrator\\Desktop\\Input.pptx")

# Crie uma lista
text = []

# Percorra os slides no documento
for slide in presentation.Slides:

    # Percorra as formas no slide
    for shape in slide.Shapes:

        # Verifique se a forma é um objeto IAutoShape
        if isinstance(shape, IAutoShape):

            # Percorra os parágrafos na forma
            for paragraph in (shape if isinstance(shape, IAutoShape) else None).TextFrame.Paragraphs:

                # Obtenha o texto do parágrafo e adicione-o à lista
                text.append(paragraph.Text)

# Escreva o texto em um arquivo txt
f = open("output/ExtractText.txt","w", encoding = 'utf-8')
for s in text:
    f.write(s + "\n")
f.close()

# Libere os recursos
presentation.Dispose()
Este código extrai apenas texto do PowerPoint. O Spire.Presentation permite a extração de tabelas preservando sua estrutura. Para mais detalhes, consulte o guia: Como Extrair Tabelas do PowerPoint em Python.
Prós:
- Processamento em lote — ideal para vários arquivos.
- Pode ser integrado a fluxos de trabalho maiores.
- Altamente personalizável com extensas bibliotecas disponíveis para processamento adicional.
Contras:
- Sem formatação - a saída é texto simples.
- Requer conhecimento de programação e configuração de ambiente.
Quando Usar este Método:
O Python é ideal para desenvolvedores que precisam integrar a extração de texto em fluxos de trabalho ou projetos maiores. Este método é particularmente útil ao lidar com apresentações complexas ou quando é necessário um processamento de dados adicional.
Palavras Finais
Quando se trata de extrair texto de apresentações do PowerPoint, o melhor método depende de suas necessidades específicas e habilidades técnicas. Para tarefas rápidas e diretas, usar o Microsoft PowerPoint ou um conversor online costuma ser a melhor escolha. Se você precisa de mais controle ou tem tarefas de extração repetitivas, considere usar VBA ou Python. Para extração aprimorada por IA com funcionalidades adicionais, o DeepSeek é a escolha ideal.
Em conclusão, existem várias maneiras inteligentes de extrair texto de apresentações do PowerPoint sem usar o método de copiar e colar. Cada método tem seus prós e contras, e a escolha certa dependerá de seus requisitos individuais e nível de conforto com a tecnologia. Quer você escolha um recurso integrado simples или uma abordagem de programação mais avançada, poderá extrair eficientemente o texto de que precisa de seus arquivos do PowerPoint.
LEIA TAMBÉM: