
Knowledgebase (2370)
Children categories
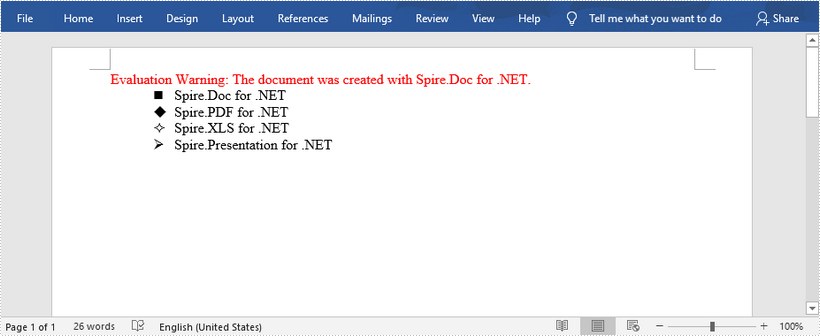
This article shows you how to set ASCII characters (special symbols) as bullet points in Word documents using Spire.Doc for Java.
import com.spire.doc.Document;
import com.spire.doc.FileFormat;
import com.spire.doc.Section;
import com.spire.doc.documents.ListStyle;
import com.spire.doc.documents.ListType;
import com.spire.doc.documents.Paragraph;

public class SetBulletPoints {

    public static void main(String[] args) {

        //Create a Document object and add a section
        Document doc = new Document();
        Section section = doc.addSection();

        //Create four list styles based on different ASCII characters
        ListStyle listStyle1 = new ListStyle(doc, ListType.Bulleted);
        listStyle1.getLevels().get(0).setBulletCharacter("\u006e");
        listStyle1.getLevels().get(0).getCharacterFormat().setFontName("Wingdings");
        listStyle1.setName("liststyle1");
        doc.getListStyles().add(listStyle1);
        ListStyle listStyle2 = new ListStyle(doc, ListType.Bulleted);
        listStyle2.getLevels().get(0).setBulletCharacter("\u0075");
        listStyle2.getLevels().get(0).getCharacterFormat().setFontName("Wingdings");
        listStyle2.setName("liststyle2");
        doc.getListStyles().add(listStyle2);
        ListStyle listStyle3 = new ListStyle(doc, ListType.Bulleted);
        listStyle3.getLevels().get(0).setBulletCharacter("\u00b2");
        listStyle3.getLevels().get(0).getCharacterFormat().setFontName("Wingdings");
        listStyle3.setName("liststyle3");
        doc.getListStyles().add(listStyle3);
        ListStyle listStyle4 = new ListStyle(doc, ListType.Bulleted);
        listStyle4 .getLevels().get(0).setBulletCharacter("\u00d8");
        listStyle4 .getLevels().get(0).getCharacterFormat().setFontName("Wingdings");
        listStyle4.setName("liststyle4");
        doc.getListStyles().add(listStyle4);

        //Add four paragraphs and apply list style separately
        Paragraph p1 = section.getBody().addParagraph();
        p1.appendText("Spire.Doc for .NET");
        p1.getListFormat().applyStyle(listStyle1.getName());
        Paragraph p2 = section.getBody().addParagraph();
        p2.appendText("Spire.PDF for .NET");
        p2.getListFormat().applyStyle(listStyle2.getName());
        Paragraph p3 = section.getBody().addParagraph();
        p3.appendText("Spire.XLS for .NET");
        p3.getListFormat().applyStyle(listStyle3.getName());
        Paragraph p4= section.getBody().addParagraph();
        p4.appendText("Spire.Presentation for .NET");
        p4.getListFormat().applyStyle(listStyle4.getName());

        //Save to file
        doc.saveToFile("SetBulletCharacter.docx", FileFormat.Docx);
    }
}
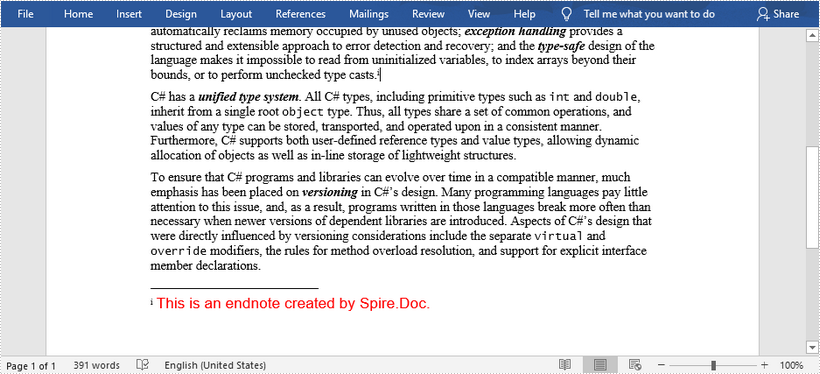
This article shows you how to add an endnote to Word documents using Spire.Doc for Java.
import com.spire.doc.*;
import com.spire.doc.documents.Paragraph;
import com.spire.doc.fields.Footnote;
import com.spire.doc.fields.TextRange;

import java.awt.*;

public class AddEndnote {

    public static void main(String[] args) {

        //Create a Document object
        Document doc = new Document();

        //Load the sample Word file
        doc.loadFromFile("C:\\Users\\Administrator\\Desktop\\sample.docx");

        //Get the first section
        Section section = doc.getSections().get(0);

        //Get the specific paragraph to add endnote
        Paragraph paragraph = section.getParagraphs().get(2);

        //Add an endnote
        Footnote endnote = paragraph.appendFootnote(FootnoteType.Endnote);

        //Set endnote text
        TextRange textRange = endnote.getTextBody().addParagraph().appendText("This is an endnote created by Spire.Doc.");

        //Set text format of endnote
        textRange.getCharacterFormat().setFontName("Arial");
        textRange.getCharacterFormat().setFontSize(13f);
        textRange.getCharacterFormat().setTextColor(Color.RED);

        //Save to file
        doc.saveToFile("AddEndnote.docx", FileFormat.Docx_2013);
    }
}
Shapes in Excel are versatile graphical elements that enhance the visual representation of data within your spreadsheets. They include a variety of forms such as rectangles, circles, arrows, lines, and callouts, allowing users to create diagrams, flowcharts, and emphasis on specific data points.
Using shapes can help clarify complex information, guide the reader’s attention, and make presentations more engaging. Shapes can be customized in terms of size, color, and effects, providing flexibility in design.
In this article, you will learn how to insert, format and remove shapes in an Excel worksheet using Spire.XLS for Java.
- Insert Various Types of Shapes to Excel
- Apply Formatting to Shapes in Excel
- Remove Shapes from Excel
Install Spire.XLS for Java
First of all, you're required to add the Spire.Xls.jar file as a dependency in your Java program. The JAR file can be downloaded from this link. If you use Maven, you can easily import the JAR file in your application by adding the following code to your project's pom.xml file.
<repositories>
    <repository>
        <id>com.e-iceblue</id>
        <name>e-iceblue</name>
        <url>https://repo.e-iceblue.com/nexus/content/groups/public/</url>
    </repository>
</repositories>
<dependencies>
    <dependency>
        <groupId>e-iceblue</groupId>
        <artifactId>spire.xls</artifactId>
        <version>16.7.3</version>
    </dependency>
</dependencies>
Insert Various Types of Shapes to Excel
To add a shape to a worksheet, use the PrstGeomShapeCollection.addPrstGeomShape(int row, int column, int width, int height, com.spire.xls.PrstGeomShapeType shapeType) method. The first four parameters specify the shape's position and size, while the fifth parameter indicates the type of shape.
The steps to insert a shape of a certain type to a worksheet are as follows:
- Create a Workbook object.
- Get a specific worksheet using Workbook.getWorksheets().get() method.
- Add a shape to the worksheet using Worksheet.getPrstGeomShapes().addPrstGeomShape() method, specifying the location, size and type of the shape.
- Save the workbook to an Excel file using Workbook.saveToFile() method.
- Java
import com.spire.xls.*;
import com.spire.xls.core.IPrstGeomShape;
import java.io.IOException;
public class InsertShapes {
public static void main(String[] args) throws IOException {
// Create a Workbook object
Workbook workbook = new Workbook();
// Get the first worksheet
Worksheet sheet = workbook.getWorksheets().get(0);
// Add a rectangle
IPrstGeomShape rectangle = sheet.getPrstGeomShapes().addPrstGeomShape(2, 2, 260, 40, PrstGeomShapeType.Rect);
// Set text for the shape
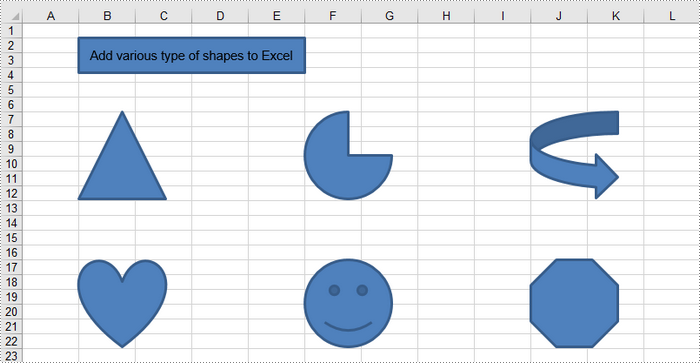
rectangle.setText("Add various type of shapes to Excel");
rectangle.setTextVerticalAlignment(ExcelVerticalAlignment.MiddleCentered);
// Add a triangle, a pie, a curved right arrow, a heart, a smile face, and an octagon to the worksheet
sheet.getPrstGeomShapes().addPrstGeomShape(7, 2, 100, 100, PrstGeomShapeType.Triangle);
sheet.getPrstGeomShapes().addPrstGeomShape(7, 6,100,100,PrstGeomShapeType.Pie);
sheet.getPrstGeomShapes().addPrstGeomShape(7, 10, 100, 100, PrstGeomShapeType.CurvedRightArrow);
sheet.getPrstGeomShapes().addPrstGeomShape(17, 2, 100, 100, PrstGeomShapeType.Heart);
sheet.getPrstGeomShapes().addPrstGeomShape(17, 6, 100, 100, PrstGeomShapeType.SmileyFace);
sheet.getPrstGeomShapes().addPrstGeomShape(17, 10, 100, 100, PrstGeomShapeType.Octagon);
// Save the workbook to an Excel file
workbook.saveToFile("output/InsertShapes.xlsx", ExcelVersion.Version2016);
// Dispose resources
workbook.dispose();
}
}
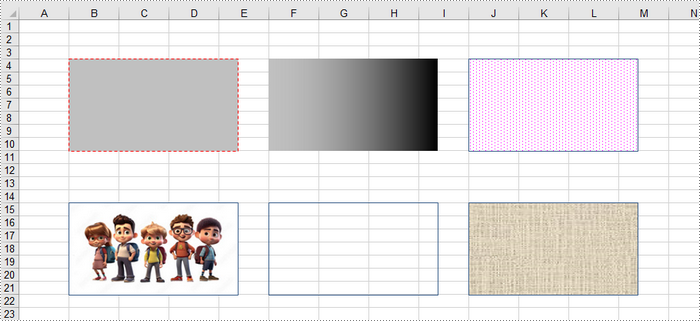
Apply Formatting to Shapes in Excel
The example above demonstrates how to add various shapes with default formatting to a worksheet. To customize a shape's appearance, you can utilize the IShapeLineFormat, IShapeFill, and IShadow interfaces provided by Spire.XLS.
The steps to apply formatting to a shape in Excel are as follows:
- Create a Workbook object.
- Get a specific worksheet using Workbook.getWorksheets().get() method.
- Add a shape to the worksheet using Worksheet.getPrstGeomShapes().addPrstGeomShape() method, specifying the location, size and type of the shape.
- Get the IShapeLineFormat object using IShape.getLine() method.
- Set the line style, color, width and visibility using the methods under the IShapeLineFormat object.
- Get the IShapeFill object using IShape.getFill() method.
- Set the fill type, fill color, fill image, or fill pattern using the methods under the IShapeFill object.
- Save the workbook to an Excel file using Workbook.saveToFile() method.
- Java
import com.spire.xls.*;
import com.spire.xls.core.IPrstGeomShape;

import javax.imageio.ImageIO;
import java.awt.*;
import java.awt.image.BufferedImage;
import java.io.File;
import java.io.IOException;

public class ApplyFormattingToShapes {

    public static void main(String[] args) throws IOException {

        // Create a Workbook object
        Workbook workbook = new Workbook();

        // Get the first worksheet
        Worksheet sheet = workbook.getWorksheets().get(0);

        // Add the first rectangle to the worksheet
        IPrstGeomShape rectangle_one = sheet.getPrstGeomShapes().addPrstGeomShape(4, 2, 220, 120, PrstGeomShapeType.Rect);

        // Set the line style, width, and color
        rectangle_one.getLine().setDashStyle(ShapeDashLineStyleType.Dashed);
        rectangle_one.getLine().setWeight(1.0);
        rectangle_one.getLine().setForeColor(Color.RED);

        // Set the fill type and fore color
        rectangle_one.getFill().setFillType(ShapeFillType.SolidColor);
        rectangle_one.getFill().setForeColor(Color.lightGray);

        // Add the second rectangle and format the shape
        IPrstGeomShape rectangle_two = sheet.getPrstGeomShapes().addPrstGeomShape(4, 6, 220, 120, PrstGeomShapeType.Rect);
        rectangle_two.getLine().setVisible(false);
        rectangle_two.getFill().setFillType(ShapeFillType.Gradient);
        rectangle_two.getFill().setForeColor(Color.lightGray);
        rectangle_two.getFill().setGradientStyle(GradientStyleType.Vertical);

        // Add the third rectangle and format the shape
        IPrstGeomShape rectangle_three = sheet.getPrstGeomShapes().addPrstGeomShape(4, 10, 220, 120, PrstGeomShapeType.Rect);
        rectangle_three.getLine().setWeight(1.0);
        rectangle_three.getFill().setFillType(ShapeFillType.Pattern);
        rectangle_three.getFill().setPattern(GradientPatternType.Pat80Percent);
        rectangle_three.getFill().setForeColor(Color.white);
        rectangle_three.getFill().setBackColor(Color.magenta);

        // Add the fourth rectangle and format the shape
        IPrstGeomShape rectangle_four = sheet.getPrstGeomShapes().addPrstGeomShape(15, 2, 220, 120, PrstGeomShapeType.Rect);
        rectangle_four.getLine().setWeight(1.0);
        BufferedImage image = ImageIO.read(new File("C:\\Users\\Administrator\\Desktop\\cartoon.jpeg"));
        rectangle_four.getFill().customPicture(image,"myPicture");

        // Add the fifth rectangle and format the shape
        IPrstGeomShape rectangle_five = sheet.getPrstGeomShapes().addPrstGeomShape(15, 6, 220, 120, PrstGeomShapeType.Rect);
        rectangle_five.getLine().setWeight(1.0);
        rectangle_five.getFill().setFillType(ShapeFillType.NoFill);

        // Add the sixth rectangle and format the shape
        IPrstGeomShape rectangle_six = sheet.getPrstGeomShapes().addPrstGeomShape(15, 10, 220, 120, PrstGeomShapeType.Rect);
        rectangle_six.getLine().setWeight(1.0);
        rectangle_six.getFill().setFillType(ShapeFillType.Texture);
        rectangle_six.getFill().setTexture(GradientTextureType.Canvas);

        // Save the workbook to an Excel file
        workbook.saveToFile("output/FormatShapes.xlsx", ExcelVersion.Version2016);

        // Dispose resources
        workbook.dispose();
    }
}
Remove Shapes from Excel
The shapes in a worksheet can be retrieved by utilizing the Worksheet.getPrstGeomShapes() method. To remove a specific shape, call the PrstGeomShapeCollection.get(index).remove() method. If you want to remove all shapes, you can use a for loop to iterate through and delete them.
The steps to remove shapes in an Excel worksheet are as follows:
- Create a Workbook object.
- Load an Excel file using Workbook.loadFromFile() method.
- Get a specific worksheet using Workbook.getWorksheets().get() method.
- Get the shape collection using Worksheet.getPrstGeomShapes() method.
- Remove a specific shape using PrstGeomShapeCollection.get(index).remove() method.
- Save the workbook to an Excel file using Workbook.saveToFile() method.
- Java
import com.spire.xls.ExcelVersion;
import com.spire.xls.Workbook;
import com.spire.xls.Worksheet;
import com.spire.xls.core.spreadsheet.collections.PrstGeomShapeCollection;

public class RemoveShapesFromExcel {

    public static void main(String[] args) {

        // Create a Workbook object
        Workbook workbook = new Workbook();

        // Load an Excel file
        workbook.loadFromFile("C:\\Users\\Administrator\\Desktop\\Shapes.xlsx");

        // Get a specific worksheet
        Worksheet sheet = workbook.getWorksheets().get(0);

        // Get the shape collection from the worksheet
        PrstGeomShapeCollection shapes = sheet.getPrstGeomShapes();

        // Remove a specific shape
        shapes.get(1).remove();

         /*
         // Remove all shapes
         for (int i = sheet.getPrstGeomShapes().getCount()-1; i >= 0; i--)
         {
             sheet.getPrstGeomShapes().get(i).remove();
         }
         */

        // Save the workbook to an Excel file
        workbook.saveToFile("output/RemoveSpecificShape.xlsx", ExcelVersion.Version2013);

        // Dispose resources
        workbook.dispose();
    }
}
Apply for a Temporary License
If you'd like to remove the evaluation message from the generated documents, or to get rid of the function limitations, please request a 30-day trial license for yourself.
