
Knowledgebase (2370)
Children categories
SVG (Scalable Vector Graphics) is an image file format used for rendering two-dimensional images on the web. Comparing with other image file formats, SVG has many advantages such as supporting interactivity and animation, allowing users to search, index, script, and compress/enlarge images without losing quality. Occasionally, you may need to convert PDF files to SVG file format, and this article will demonstrate how to accomplish this task using Spire.PDF for .NET.
- Convert a PDF File to SVG in C#/VB.NET
- Convert Selected PDF Pages to SVG in C#/VB.NET
- Convert a PDF File to SVG with Custom Width and Height in C#/VB.NET
Install Spire.PDF for .NET
To begin with, you need to add the DLL files included in the Spire.PDF for.NET package as references in your .NET project. The DLLs files can be either downloaded from this link or installed via NuGet.
PM> Install-Package Spire.PDF
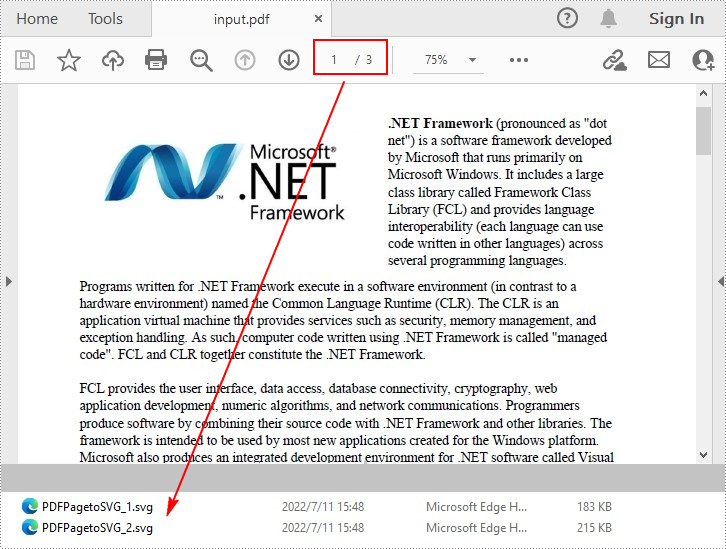
Convert a PDF File to SVG in C#/VB.NET
Spire.PDF for .NET offers the PdfDocument.SaveToFile(String, FileFormat) method to convert each page in a PDF file to a single SVG file. The detailed steps are as follows.
- Create a PdfDocument object.
- Load a sample PDF file using PdfDocument.LoadFromFile() method.
- Convert the PDF file to SVG using PdfDocument.SaveToFile(String, FileFormat) method.
- C#
- VB.NET
using Spire.Pdf;

namespace ConvertPDFtoSVG
{
    class Program
    {
        static void Main(string[] args)
        {
            //Create a PdfDocument object
            PdfDocument document = new PdfDocument();

            //Load a sample PDF file
            document.LoadFromFile("input.pdf");

            //Convert PDF to SVG
            document.SaveToFile("PDFtoSVG.svg", FileFormat.SVG);
        }
    }
}

Convert Selected PDF Pages to SVG in C#/VB.NET
The PdfDocument.SaveToFile(String, Int32, Int32, FileFormat) method allows you to convert the specified pages in a PDF file to SVG files. The detailed steps are as follows.
- Create a PdfDocument object.
- Load a sample PDF file using PdfDocument.LoadFromFile() method.
- Convert selected PDF pages to SVG using PdfDocument.SaveToFile(String, Int32, Int32, FileFormat) method.
- C#
- VB.NET
using Spire.Pdf;

namespace PDFPagetoSVG
{
    class Program
    {
        static void Main(string[] args)
        {
            //Create a PdfDocument object
            PdfDocument doc = new PdfDocument();

            //Load a sample PDF file
            doc.LoadFromFile("input.pdf");

            //Convert selected PDF pages to SVG
            doc.SaveToFile("PDFPagetoSVG.svg", 1, 2, FileFormat.SVG);
        }
    }
}
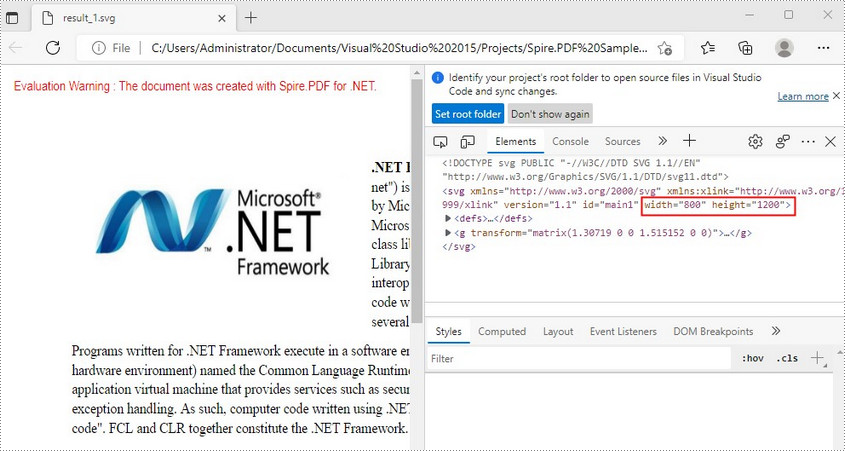
Convert a PDF File to SVG with Custom Width and Height in C#/VB.NET
The PdfConvertOptions.SetPdfToSvgOptions() method offered by Spire.PDF for .NET allows you to specify the width and height of output SVG file. The detailed steps are as follows.
- Create a PdfDocument object.
- Load a sample PDF file using PdfDocument.LoadFromFile() method.
- Set PDF convert options using PdfDocument.ConvertOptions property.
- Specify the width and height of output SVG file using PdfConvertOptions.SetPdfToSvgOptions() method.
- Convert the PDF file to SVG using PdfDocument.SaveToFile() method.
- C#
- VB.NET
using Spire.Pdf;

namespace PDFtoSVG
{
    class Program
    {
        static void Main(string[] args)
        {
            //Create a PdfDocument object
            PdfDocument document = new PdfDocument();

            //Load a sample PDF file
            document.LoadFromFile("input.pdf");

            //Specify the width and height of output SVG file
            PdfToSvgConverter converter = new PdfToSvgConverter(inputFile);
            converter.SvgOptions.ScaleX = (float)0.5;
            converter.SvgOptions.ScaleY = (float)0.5;
            converter.Convert(outputFile);


            //Convert PDF to SVG
            document.SaveToFile("result.svg", FileFormat.SVG);
        }
    }
}
Apply for a Temporary License
If you'd like to remove the evaluation message from the generated documents, or to get rid of the function limitations, please request a 30-day trial license for yourself.
In this article, we will explain how to copy an existing chart within the same PowerPoint document or between PowerPoint documents by using Spire.Presentation. Below example called a main method public IChart CreateChart(IChart baseChart, RectangleF rectangle, int nIndex).
There are three Parameters passed in this method:
- baseChart: The source chart.
- rectangle: The area that the chart will be copied to.
- nIndex: The index of the rectangle shape. For example, -1 means append it as the last shape of the slide, 0 means append as the first shape.
Now refer to the following steps:
Copy chart within the same PowerPoint document
Step 1: Instantiate a Presentation object and load the PowerPoint document.
Presentation ppt = new Presentation();
ppt.LoadFromFile("Sample.pptx");
Step 2: Get the chart that is going to be copied.
IChart chart = ppt.Slides[0].Shapes[0] as IChart;
Step 3: Copy the chart from the first slide to the specified location of the second slide within the same document.
ppt.Slides[1].Shapes.CreateChart(chart, new RectangleF(100, 100, 500, 300), 0);
Step 4: Save the document.
ppt.SaveToFile("TestResult.pptx", FileFormat.Pptx2010);
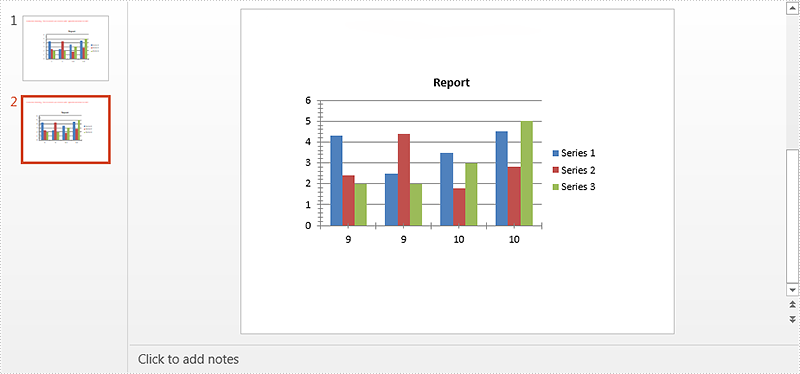
Screenshot of copying chart within the same PowerPoint document:
Copy chart between PowerPoint documents
Step 1: Load the first PowerPoint document.
Presentation ppt1 = new Presentation();
ppt1.LoadFromFile("Sample.pptx");
Step 2: Get the chart that is going to be copied.
IChart chart = ppt1.Slides[0].Shapes[0] as IChart;
Step 3: Load the second PowerPoint document.
Presentation ppt2 = new Presentation();
ppt2.LoadFromFile("Dest.pptx");
Step 4: Copy chart from the first document to the specified location of the second document.
ppt2.Slides[0].Shapes.CreateChart(chart, new RectangleF(100, 100, 500, 300), -1);
Step 5: Save the second document.
ppt2.SaveToFile("TestResult2.pptx", FileFormat.Pptx2010);
Screenshot of copying chart between PowerPoint documents:
Full code:
Copy chart within the same PowerPoint document
using System.Drawing;
using Spire.Presentation;
using Spire.Presentation.Charts;

namespace Copy_Chart
{
    class Program
    {
        static void Main(string[] args)
        {
            Presentation ppt = new Presentation();
            ppt.LoadFromFile("Sample.pptx");
            IChart chart = ppt.Slides[0].Shapes[0] as IChart;
            ppt.Slides[1].Shapes.CreateChart(chart, new RectangleF(100, 100, 500, 300), 0);
            ppt.SaveToFile("TestResult.pptx", FileFormat.Pptx2010);
        }
    }
}
Copy chart between PowerPoint documents
using System.Drawing;
using Spire.Presentation;
using Spire.Presentation.Charts;

namespace Copy_Chart
{
    class Program
    {
        static void Main(string[] args)
        {
            Presentation ppt1 = new Presentation();
            ppt1.LoadFromFile("Sample.pptx");
            IChart chart = ppt1.Slides[0].Shapes[0] as IChart;
            Presentation ppt2 = new Presentation();
            ppt2.LoadFromFile("Dest.pptx");
            ppt2.Slides[0].Shapes.CreateChart(chart, new RectangleF(100, 100, 500, 300), -1);
            ppt2.SaveToFile("TestResult2.pptx", FileFormat.Pptx2010);
        }
    }
}
Spire.XLS enable programmers to insert, modify as well as format comments in Excel. Also, it allows users to fill a comment with solid color, gradient, pattern or a picture to change the look of the comment. This article is going to introduce how to set background image for a comment in Excel using Spire.XLS.
Code Snippet:
Step 1: Initialize an instance of Wordbook and get the first worksheet.
Workbook wb = new Workbook();
Worksheet sheet = wb.Worksheets[0];
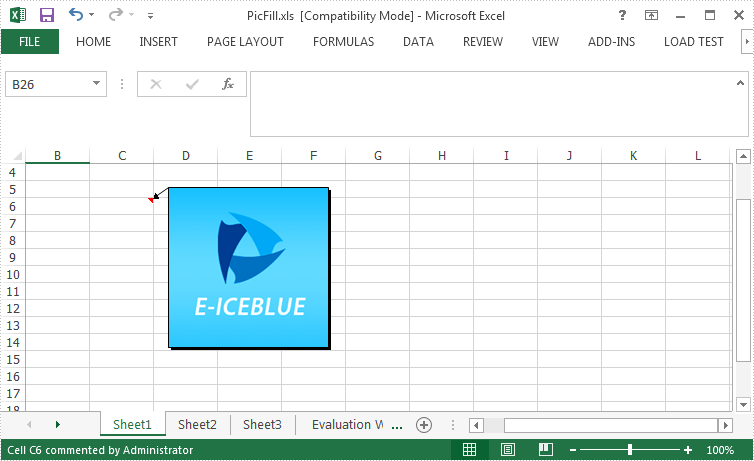
Step 2: Fill the comment with a customized background picture.
Image image = Image.FromFile(@"C: \Users\Administrator\Desktop\logo.png");
sheet.Range["C6"].Comment.Fill.CustomPicture(image, "logo.png");
Step 3: Re-set the size of comment box.
sheet.Range["C6"].Comment.Height = image.Height;
sheet.Range["C6"].Comment.Width = image.Width;
Step 4: Save the file.
wb.SaveToFile("PicFillComment.xls", ExcelVersion.Version97to2003);
Output:
Full Code:
using Spire.Xls;
using System.Drawing;
namespace SetPictureFill
{
    class Program
    {

        static void Main(string[] args)
        {
            {

                Workbook wb = new Workbook();
                Worksheet sheet = wb.Worksheets[0];

                Image image = Image.FromFile(@"C: \Users\Administrator\Desktop\logo.png");
                sheet.Range["C6"].Comment.Fill.CustomPicture(image, "logo.png");
                sheet.Range["C6"].Comment.Height = image.Height;
                sheet.Range["C6"].Comment.Width = image.Width;

                wb.SaveToFile("PicFill.xls", ExcelVersion.Version97to2003);

            }

        }
    }
}
Imports Spire.Xls
Imports System.Drawing
Namespace SetPictureFill
	Class Program

		Private Shared Sub Main(args As String())
			If True Then

				Dim wb As New Workbook()
				Dim sheet As Worksheet = wb.Worksheets(0)

				Dim image__1 As Image = Image.FromFile("C: \Users\Administrator\Desktop\logo.png")
				sheet.Range("C6").Comment.Fill.CustomPicture(image__1, "logo.png")
				sheet.Range("C6").Comment.Height = image__1.Height
				sheet.Range("C6").Comment.Width = image__1.Width

				wb.SaveToFile("PicFill.xls", ExcelVersion.Version97to2003)

			End If

		End Sub
	End Class
End Namespace
