
Knowledgebase (2370)
Children categories
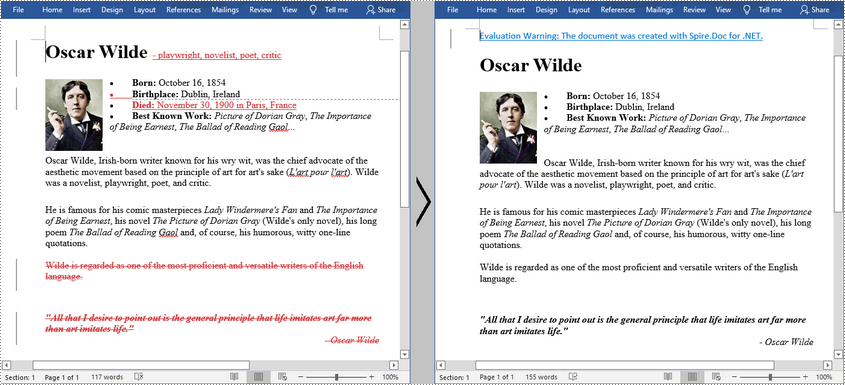
Track Changes in MS Word can track the revisions, corrections, changes, edits, and even suggestions and comments people make to documents. When you receive a revised document with Track Changes turned on, you can decide whether to reject the changes to keep the original content or directly accept them. This article will demonstrate how to programmatically accept or reject all tracked changes in a Word document using Spire.Doc for .NET.
Install Spire.Doc for .NET
To begin with, you need to add the DLL files included in the Spire.Doc for .NET package as references in your .NET project. The DLL files can be either downloaded from this link or installed via NuGet.
PM> Install-Package Spire.Doc
Accept All Tracked Changes in a Word Document
The detailed steps are as follows:
- Create a Document instance.
- Load a sample Word document using Document.LoadFromFile() method.
- Accept all changes in the document using Document.AcceptChanges() method.
- Save the document to another file using Document.SaveToFile() method.
- C#
- VB.NET
using Spire.Doc;

namespace AcceptTrackedChanges
{
    class Program
    {
        static void Main(string[] args)
        {
            //Create a Document instance
            Document doc = new Document();

            //Load a sample Word document
            doc.LoadFromFile("test.docx");

            //Accept all changes in the document
            doc.AcceptChanges();

            //Save the result document
            doc.SaveToFile("AcceptTrackedChanges.docx", FileFormat.Docx);

        }
    }
}
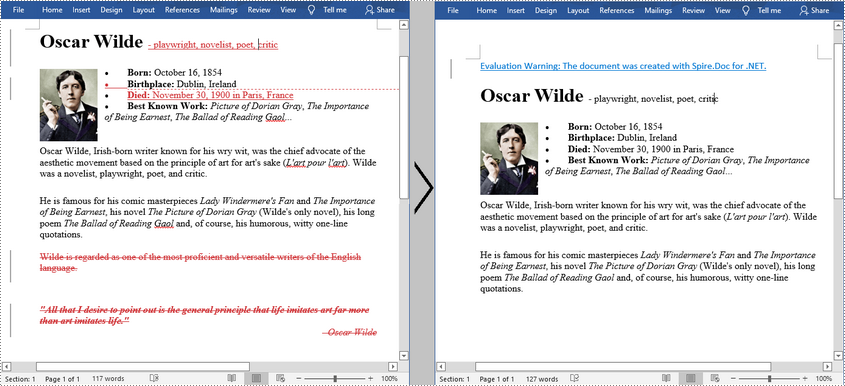
Reject All Tracked Changes in a Word document
The detailed steps are as follows.
- Create a Document instance.
- Load a sample Word document using Document.LoadFromFile() method.
- Reject all changes in the document using Document.RejectChanges() method.
- Save the document to another file using Document.SaveToFile() method.
- C#
- VB.NET
using Spire.Doc;

namespace RejectTrackedChanges
{
    class Program
    {
        static void Main(string[] args)
        {
            //Create a Document instance
            Document doc = new Document();

            //Load a sample Word document
            doc.LoadFromFile("test.docx");

            //Reject all changes in the document
            doc.RejectChanges();

            //Save the result document
            doc.SaveToFile("RejectAllChanges.docx", FileFormat.Docx);

        }
    }
}
Apply for a Temporary License
If you'd like to remove the evaluation message from the generated documents, or to get rid of the function limitations, please request a 30-day trial license for yourself.
A looping slideshow displays each slide automatically for a certain amount of time. Once the slideshow reaches the end, it repeats from the beginning. This article will introduce how to programmatically set a PowerPoint document to keep looping when presenting.
Code Snippet:
Step 1: Initialize an instance of Presentation class. Load a sample PowerPoint document to it.
Presentation ppt = new Presentation();
ppt.LoadFromFile(@"C:\Users\Administrator\Desktop\sample.pptx");
Step 2: Set the Boolean value of ShowLoop as true, which makes the slideshow repeat with continuous looping.
ppt.ShowLoop = true;
Step 3: Set the PowerPoint document to show animation and narration. Use slide transition timings to advance slide.
ppt.ShowAnimation = true;
ppt.ShowNarration = true;
ppt.UseTimings = true;
Step 4: Save the file.
ppt.SaveToFile("LoopEnding.pptx", FileFormat.Pptx2010);
Full Code:
using Spire.Presentation;
namespace LoopPPT
{
    class Program
    {
        static void Main(string[] args)
        {
            Presentation ppt = new Presentation();
            ppt.LoadFromFile(@"C:\Users\Administrator\Desktop\sample.pptx");

            ppt.ShowLoop = true;
            ppt.ShowAnimation = true;
            ppt.ShowNarration = true;
            ppt.UseTimings = true;

            ppt.SaveToFile("LoopEnding.pptx", FileFormat.Pptx2010);
            }
        }
    }
Imports Spire.Presentation
Namespace LoopPPT
	Class Program
		Private Shared Sub Main(args As String())
			Dim ppt As New Presentation()
			ppt.LoadFromFile("C:\Users\Administrator\Desktop\sample.pptx")

			ppt.ShowLoop = True
			ppt.ShowAnimation = True
			ppt.ShowNarration = True
			ppt.UseTimings = True

			ppt.SaveToFile("LoopEnding.pptx", FileFormat.Pptx2010)
		End Sub
	End Class
End Namespace
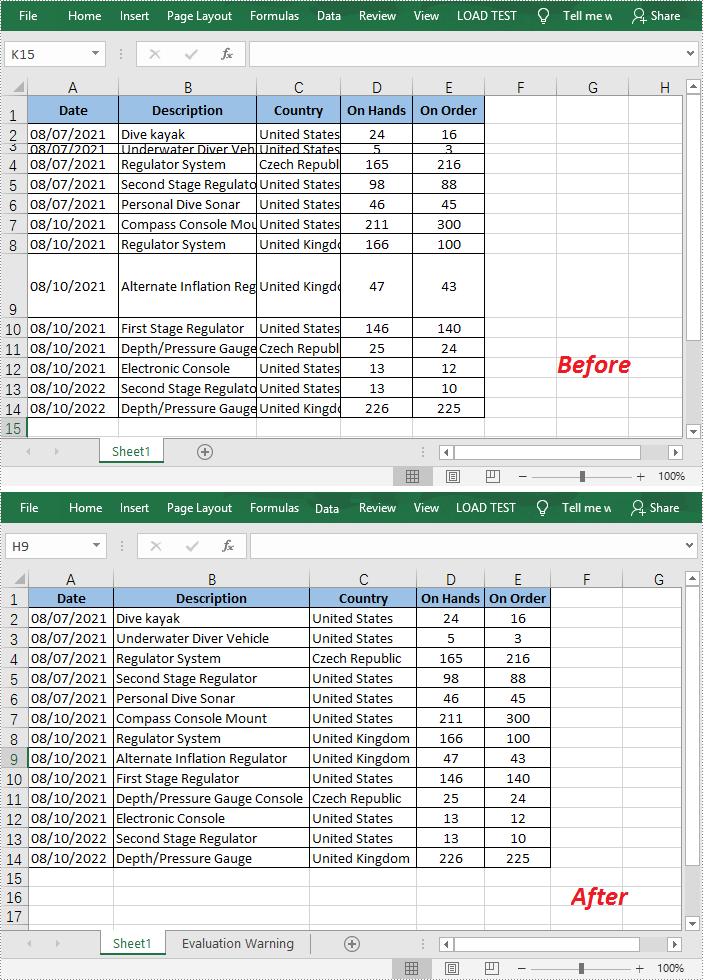
When the text entered in a cell is too long to be fully displayed in the current cell, the “AutoFit” feature in Excel allows you to quickly adjust the column width or row height to fit all the content and make the entire worksheet more readable. In this article, you will learn how to programmatically AutoFit the column width and row height in an Excel worksheet using Spire.XLS for .NET.
Install Spire.XLS for .NET
To begin with, you need to add the DLL files included in the Spire.XLS for .NET package as references in your .NET project. The DLL files can be either downloaded from this link or installed via NuGet.
PM> Install-Package Spire.XLS
AutoFit Column Width and Row Height in Excel
The detailed steps are as follows.
- Create a Workbook object.
- Load a sample Excel document using Workbook.LoadFromFile() method.
- Get a specified worksheet using Workbook.Worksheets[] property.
- Get the used range on the specified worksheet using Worksheet.AllocatedRange property.
- AutoFit column width and row height in the range using CellRange.AutoFitColumns() and CellRange.AutoFitRows() methods.
- Save the result file using Workbook.SaveToFile() method.
- C#
- VB.NET
using Spire.Xls;

namespace AutofitColumn
{
    class Program
    {
        static void Main(string[] args)
        {
            //Create a Workbook object
            Workbook workbook = new Workbook();

            //Load a sample Excel document
            workbook.LoadFromFile(@"E:\Files\Test.xlsx");

            //Get the first worksheet
            Worksheet worksheet = workbook.Worksheets[0];

            //AutoFit column width and row height
            worksheet.AllocatedRange.AutoFitColumns();
            worksheet.AllocatedRange.AutoFitRows();

            //Save the result file
            workbook.SaveToFile("AutoFit.xlsx", FileFormat.Version2010);
        }
    }
}
Apply for a Temporary License
If you'd like to remove the evaluation message from the generated documents, or to get rid of the function limitations, please request a 30-day trial license for yourself.
