
Knowledgebase (2370)
Children categories
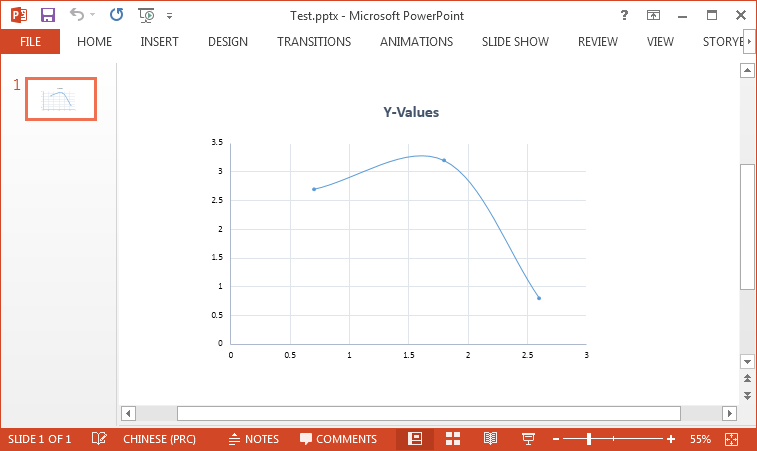
Axis is a significant part of charts. In order to make the data easier to read, we may need to modify the axis values or display the minor grid lines. This article demonstrates how to format axis of chart in PowerPoint using Spire.Presenation.
Here is the test document:
Code Snippet:
Step 1: Initialize a new instance of Presentation class and load a sample PowerPoint document.
Presentation ppt = new Presentation(@"C:\Users\Administrator\Desktop\Test.pptx", FileFormat.Pptx2010);
Step 2: Get the chart from the document.
IChart chart = ppt.Slides[0].Shapes[0] as IChart;
Step 3: Set bounds of axis value. Before we assign values, we must set IsAutoMax and IsAutoMin as false, otherwise MS PowerPoint will automatically set the values.
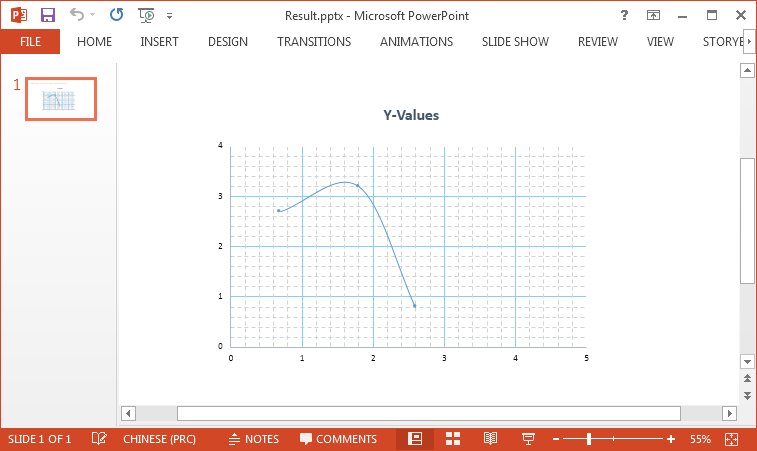
chart.PrimaryValueAxis.IsAutoMax = false;
chart.PrimaryValueAxis.IsAutoMin= false;
chart.SecondaryValueAxis.IsAutoMax = false;
chart.SecondaryValueAxis.IsAutoMin= false;
chart.PrimaryValueAxis.MinValue = 0f;
chart.PrimaryValueAxis.MaxValue = 5.0f;
chart.SecondaryValueAxis.MinValue = 0f;
chart.SecondaryValueAxis.MaxValue = 4.0f;
Step 4: For the same reason, IsAutoMajor and IsAutoMinor must be set as false before assigning values to MajorUnit and MinorUnit.
chart.PrimaryValueAxis.IsAutoMajor = false;
chart.PrimaryValueAxis.IsAutoMinor= false;
chart.SecondaryValueAxis.IsAutoMajor = false;
chart.SecondaryValueAxis.IsAutoMinor = false;
chart.PrimaryValueAxis.MajorUnit = 1.0f;
chart.PrimaryValueAxis.MinorUnit = 0.2f;
chart.SecondaryValueAxis.MajorUnit = 1.0f;
chart.SecondaryValueAxis.MinorUnit =0.2f;
Step 5: Set and format minor grid lines.
chart.PrimaryValueAxis.MinorGridLines.FillType = FillFormatType.Solid;
chart.SecondaryValueAxis.MinorGridLines.FillType = FillFormatType.Solid;
chart.PrimaryValueAxis.MinorGridLines.Width = 0.1f;
chart.SecondaryValueAxis.MinorGridLines.Width = 0.1f;
chart.PrimaryValueAxis.MinorGridLines.SolidFillColor.Color = Color.LightGray;
chart.SecondaryValueAxis.MinorGridLines.SolidFillColor.Color = Color.LightGray;
chart.PrimaryValueAxis.MinorGridLines.DashStyle = LineDashStyleType.Dash;
chart.SecondaryValueAxis.MinorGridLines.DashStyle = LineDashStyleType.Dash;
Step 6: Set and format major grid lines.
chart.PrimaryValueAxis.MajorGridTextLines.Width = 0.3f;
chart.PrimaryValueAxis.MajorGridTextLines.SolidFillColor.Color = Color.LightSkyBlue;
chart.SecondaryValueAxis.MajorGridTextLines.Width = 0.3f;
chart.SecondaryValueAxis.MajorGridTextLines.SolidFillColor.Color = Color.LightSkyBlue;
Step 7: Save the file.
ppt.SaveToFile("Result.pptx", FileFormat.Pptx2010);
Output:
Full Code:
using Spire.Presentation;
using Spire.Presentation.Charts;
using Spire.Presentation.Drawing;
using System.Drawing;

namespace FormatAxis
{
    class Program
    {
        static void Main(string[] args)
        {
            Presentation ppt = new Presentation(@"C:\Users\Administrator\Desktop\Test.pptx", FileFormat.Pptx2010);
            IChart chart = ppt.Slides[0].Shapes[0] as IChart;

            chart.PrimaryValueAxis.IsAutoMax = false;
            chart.PrimaryValueAxis.IsAutoMin = false;
            chart.SecondaryValueAxis.IsAutoMax = false;
            chart.SecondaryValueAxis.IsAutoMin = false;
            chart.PrimaryValueAxis.MinValue = 0f;
            chart.PrimaryValueAxis.MaxValue = 5.0f;
            chart.SecondaryValueAxis.MinValue = 0f;
            chart.SecondaryValueAxis.MaxValue = 4.0f;

            chart.PrimaryValueAxis.IsAutoMajor = false;
            chart.PrimaryValueAxis.IsAutoMinor = false;
            chart.SecondaryValueAxis.IsAutoMajor = false;
            chart.SecondaryValueAxis.IsAutoMinor = false;
            chart.PrimaryValueAxis.MajorUnit = 1.0f;
            chart.PrimaryValueAxis.MinorUnit = 0.2f;
            chart.SecondaryValueAxis.MajorUnit = 1.0f;
            chart.SecondaryValueAxis.MinorUnit = 0.2f;

            chart.PrimaryValueAxis.MinorGridLines.FillType = FillFormatType.Solid;
            chart.SecondaryValueAxis.MinorGridLines.FillType = FillFormatType.Solid;
            chart.PrimaryValueAxis.MinorGridLines.Width = 0.1f;
            chart.SecondaryValueAxis.MinorGridLines.Width = 0.1f;
            chart.PrimaryValueAxis.MinorGridLines.SolidFillColor.Color = Color.LightGray;
            chart.SecondaryValueAxis.MinorGridLines.SolidFillColor.Color = Color.LightGray;
            chart.PrimaryValueAxis.MinorGridLines.DashStyle = LineDashStyleType.Dash;
            chart.SecondaryValueAxis.MinorGridLines.DashStyle = LineDashStyleType.Dash;

            chart.PrimaryValueAxis.MajorGridTextLines.Width = 0.3f;
            chart.PrimaryValueAxis.MajorGridTextLines.SolidFillColor.Color = Color.LightSkyBlue;
            chart.SecondaryValueAxis.MajorGridTextLines.Width = 0.3f;
            chart.SecondaryValueAxis.MajorGridTextLines.SolidFillColor.Color = Color.LightSkyBlue;

            ppt.SaveToFile("Result.pptx", FileFormat.Pptx2010);
            System.Diagnostics.Process.Start("Result.pptx");

        }
    }
}
Imports Spire.Presentation
Imports Spire.Presentation.Charts
Imports Spire.Presentation.Drawing
Imports System.Drawing

Namespace FormatAxis
	Class Program
		Private Shared Sub Main(args As String())
			Dim ppt As New Presentation("C:\Users\Administrator\Desktop\Test.pptx", FileFormat.Pptx2010)
			Dim chart As IChart = TryCast(ppt.Slides(0).Shapes(0), IChart)

			chart.PrimaryValueAxis.IsAutoMax = False
			chart.PrimaryValueAxis.IsAutoMin = False
			chart.SecondaryValueAxis.IsAutoMax = False
			chart.SecondaryValueAxis.IsAutoMin = False
			chart.PrimaryValueAxis.MinValue = 0F
			chart.PrimaryValueAxis.MaxValue = 5F
			chart.SecondaryValueAxis.MinValue = 0F
			chart.SecondaryValueAxis.MaxValue = 4F

			chart.PrimaryValueAxis.IsAutoMajor = False
			chart.PrimaryValueAxis.IsAutoMinor = False
			chart.SecondaryValueAxis.IsAutoMajor = False
			chart.SecondaryValueAxis.IsAutoMinor = False
			chart.PrimaryValueAxis.MajorUnit = 1F
			chart.PrimaryValueAxis.MinorUnit = 0.2F
			chart.SecondaryValueAxis.MajorUnit = 1F
			chart.SecondaryValueAxis.MinorUnit = 0.2F

			chart.PrimaryValueAxis.MinorGridLines.FillType = FillFormatType.Solid
			chart.SecondaryValueAxis.MinorGridLines.FillType = FillFormatType.Solid
			chart.PrimaryValueAxis.MinorGridLines.Width = 0.1F
			chart.SecondaryValueAxis.MinorGridLines.Width = 0.1F
			chart.PrimaryValueAxis.MinorGridLines.SolidFillColor.Color = Color.LightGray
			chart.SecondaryValueAxis.MinorGridLines.SolidFillColor.Color = Color.LightGray
			chart.PrimaryValueAxis.MinorGridLines.DashStyle = LineDashStyleType.Dash
			chart.SecondaryValueAxis.MinorGridLines.DashStyle = LineDashStyleType.Dash

			chart.PrimaryValueAxis.MajorGridTextLines.Width = 0.3F
			chart.PrimaryValueAxis.MajorGridTextLines.SolidFillColor.Color = Color.LightSkyBlue
			chart.SecondaryValueAxis.MajorGridTextLines.Width = 0.3F
			chart.SecondaryValueAxis.MajorGridTextLines.SolidFillColor.Color = Color.LightSkyBlue

			ppt.SaveToFile("Result.pptx", FileFormat.Pptx2010)
			System.Diagnostics.Process.Start("Result.pptx")

		End Sub
	End Class
End Namespace
How to Copy a Page within a PDF File or between PDF Files in WPF
2016-04-29 08:43:03 Written by KoohjiIn some cases, we need to copy one or more pages of a pdf file, while copy pdf pages can be classified into two categories: copy pages within a pdf file and copy pages between pdf files. With the help of Spire.PDF, we can easily achieve this task programmatically instead of using Adobe Acrobat and dragging the page to copy it manually.
This article will demonstrate how to copy a page within a pdf file or between pdf files in WPF using Spire.PDF for WPF.
Before using the code, please add the following namespace first:
using System.Drawing;
using System.Windows;
using Spire.Pdf;
using Spire.Pdf.Graphics;
Copy Page within a PDF File
Step 1: Initialize a new instance of PdfDocument class and load the sample pdf file.
PdfDocument doc1 = new PdfDocument();
doc1.LoadFromFile("Stories.pdf");
Step 2: Get the first page of the pdf file, then get its page size and call CreateTemplate() method to create a new pdf template based on the first page.
PdfPageBase page = doc1.Pages[0];
SizeF size = page.Size;
PdfTemplate template = page.CreateTemplate();
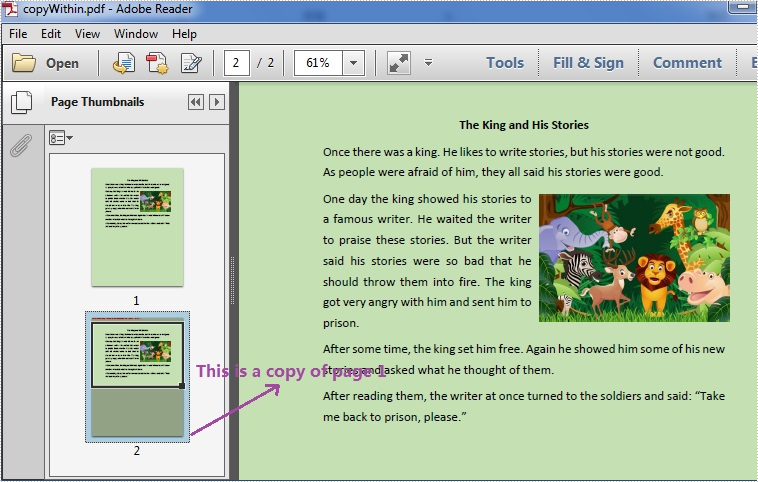
Step 3: Copy the first page within the pdf file.
Add a new page that is the same size as the first page to the pdf file, draw the template to the new page by invoking DrawTemplate(PdfTemplate template, PointF location) method.
page = doc1.Pages.Add(size, new PdfMargins(0,0));
page.Canvas.DrawTemplate(template,new PointF(0,0));
Step 4: Save and launch the file.
doc1.SaveToFile("copyWithin.pdf");
System.Diagnostics.Process.Start("copyWithin.pdf");
Effective Screenshot:
Copy Page between PDF Files
Step 1: Initialize a new instance of PdfDocument class named doc1 and load the first pdf file.
PdfDocument doc1 = new PdfDocument();
doc1.LoadFromFile("Stories.pdf");
Step 2: Initialize a new instance of PdfDocument class named doc2 and load the second pdf file.
PdfDocument doc2 = new PdfDocument();
doc2.LoadFromFile("Instruction.pdf");
Step 3: Get the first page of doc1, then get its page size and create a new template based on the first page.
PdfPageBase page = doc1.Pages[0];
SizeF size = page.Size;
PdfTemplate template = page.CreateTemplate();
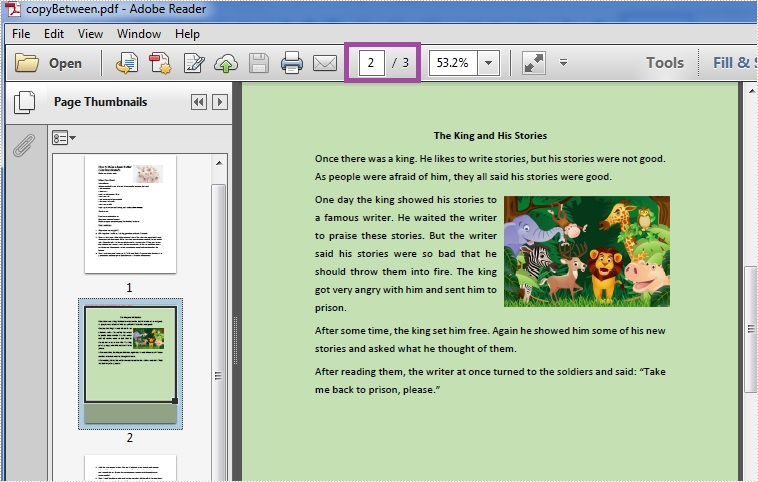
Step 4: Copy the first page from doc1 to doc2.
Invoking Insert(int index, SizeF size, PdfMargins margins) method to insert a new page that is the same size as the first page to the specified location of doc2, next draw the template to the new page.
doc2.Pages.Insert(1, size, new PdfMargins(0,0));
doc2.Pages[1].Canvas.DrawTemplate(template,new PointF(0,0));
If you want to copy the page to doc2 as its last page, please use the following code to add a new page to the end of doc2, then draw the template to the new page.
doc2.Pages.Add(size, new PdfMargins(0, 0));
Step 5: Save and launch the file.
doc2.SaveToFile("copyBetween.pdf");
System.Diagnostics.Process.Start("copyBetween.pdf");
Effective Screenshot:
Full codes:
Copy page within a pdf file:
private void button1_Click(object sender, RoutedEventArgs e)
{
    PdfDocument doc1 = new PdfDocument();
    doc1.LoadFromFile("Stories.pdf");

    PdfPageBase page = doc1.Pages[0];
    SizeF size = page.Size;
    PdfTemplate template = page.CreateTemplate();

    page = doc1.Pages.Add(size, new PdfMargins(0,0));
    page.Canvas.DrawTemplate(template, new PointF(0,0));

    doc1.SaveToFile("copyWithin.pdf");
    System.Diagnostics.Process.Start("copyWithin.pdf");
}
Copy page between pdf files:
private void button1_Click(object sender, RoutedEventArgs e)
{
    PdfDocument doc1 = new PdfDocument();
    doc1.LoadFromFile("Stories.pdf");

    PdfDocument doc2 = new PdfDocument();
    doc2.LoadFromFile("Instruction.pdf");

    PdfPageBase page = doc1.Pages[0];
    SizeF size = page.Size;
    PdfTemplate template = page.CreateTemplate();

doc2.Pages.Insert(1, size, new PdfMargins(0,0));
    doc2.Pages[1].Canvas.DrawTemplate(template, new PointF(0,0));

    doc2.SaveToFile("copyBetween.pdf");
    System.Diagnostics.Process.Start("copyBetween.pdf");
}
How to highlight different searched texts with different colors in WPF
2016-04-28 01:44:46 Written by KoohjiNowadays, many files are saved as PDF format. PDF has many advantages and its Find and Highlight feature makes it easier for us to find important information inside a lengthy PDF document.
In the following sections, I will demonstrate how to highlight different searched texts with different colors in WPF.
The code snippets are as followed:
Step 1: Initialize a new instance of PdfDocument class and load the PDF document from the file.
PdfDocument pdf = new PdfDocument("ToHelen.pdf");
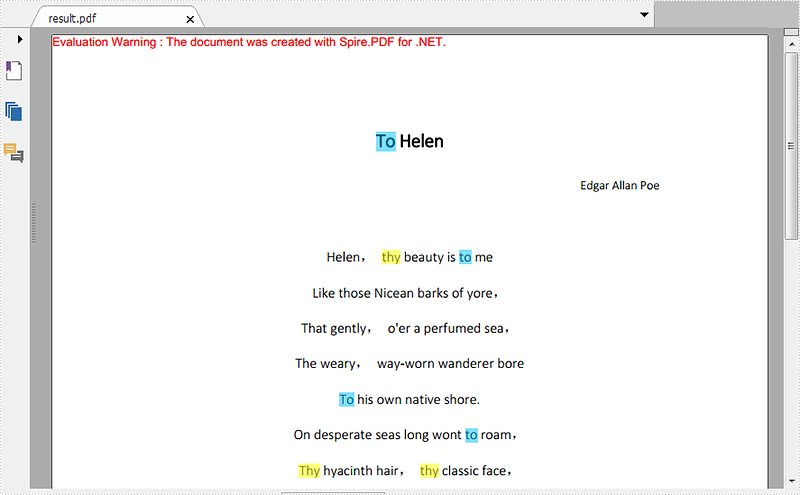
Step 2: Call FindText() method to search the string "thy" in the first page of the file, then return to Result1. Traverse result1 and call ApplyHighLight() method to highlight all elements in result1. Set the highlight color as yellow.
PdfTextFind[] result1 = null;
result1 = pdf.Pages[0].FindText("thy").Finds;
foreach (PdfTextFind find in result1)
{
    find.ApplyHighLight(System.Drawing.Color.Yellow);
}
Step 3: Repeat step 2 to highlight all the texts "to" on Page 1 with the color of DeepSkyBlue.
PdfTextFind[] result2 = null;
result2 = pdf.Pages[0].FindText("to").Finds;
foreach (PdfTextFind find in result2)
{
    find.ApplyHighLight(System.Drawing.Color.DeepSkyBlue);
}
Step 4: Save the PDF document and launch the file.
pdf.SaveToFile("HighlightedToHelen.pdf", Spire.Pdf.FileFormat.PDF);
System.Diagnostics.Process.Start("HighlightedToHelen.pdf");
Effective screenshot:
Full Codes:
//load the PDF document from the file
PdfDocument pdf = new PdfDocument("ToHelen.pdf");

//highlight searched text "thy" with Yellow
PdfTextFind[] result1 = null;
result1 = pdf.Pages[0].FindText("thy").Finds;
foreach (PdfTextFind find in result1)
{
    find.ApplyHighLight(System.Drawing.Color.Yellow);
}

//highlight searched text “to” with DeepSkyBlue
PdfTextFind[] result2 = null;
result2 = pdf.Pages[0].FindText("to").Finds;
foreach (PdfTextFind find in result2)
{
    find.ApplyHighLight(System.Drawing.Color.DeepSkyBlue);
}

//save and launch the file
pdf.SaveToFile("HighlightedToHelen.pdf", Spire.Pdf.FileFormat.PDF);
System.Diagnostics.Process.Start("HighlightedToHelen.pdf");
'load the PDF document from the file
Dim pdf As New PdfDocument("ToHelen.pdf")

'highlight searched text "thy" with Yellow
Dim result1 As PdfTextFind() = Nothing
result1 = pdf.Pages(0).FindText("thy").Finds
For Each find As PdfTextFind In result1
	 find.ApplyHighLight(System.Drawing.Color.Yellow)
Next

'highlight searched text "to" with DeepSkyBlue
Dim result2 As PdfTextFind() = Nothing
result2 = pdf.Pages(0).FindText("to").Finds
For Each find As PdfTextFind In result2
	 find.ApplyHighLight(System.Drawing.Color.DeepSkyBlue)
Next

'save and launch the file
pdf.SaveToFile("HighlightedToHelen.pdf", Spire.Pdf.FileFormat.PDF)
System.Diagnostics.Process.Start("HighlightedToHelen.pdf")
