
Knowledgebase (2370)
Children categories
Excel comments in individual cells are extra information that explain more about the data in these cells. The information can be notes for readers, reminders for yourself, and cross-references to other reports. In this article, I am going to introduce how to add and format Excel comments using Spire.XLS for WPF.
Before start, please download Spire.XLS Pack and add the Spire.XLS.Wpf.dll and Spire.License.dll from Bin folder to reference of your WPF project.
Code Snippets:
Step 1: Initialize a new Workbook, get the first worksheet from workbook.
Workbook wb = new Workbook();
Worksheet sheet = wb.Worksheets[0];
Step 2: Create a font style that will be used to format comment.
ExcelFont font = wb.CreateFont();
font.FontName = "Calibri";
font.Color = Color.Blue;
font.Size = 10;
font.IsBold = true;
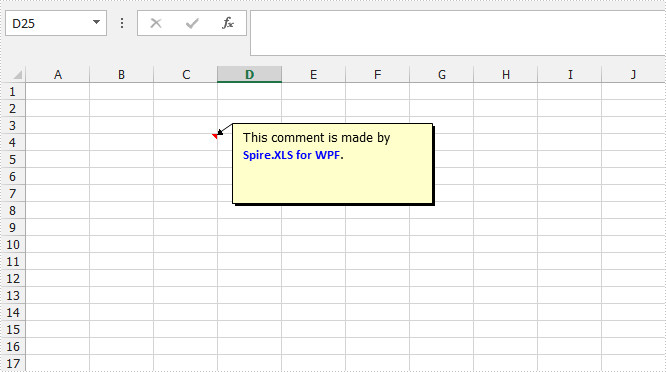
Step 3: Add a comment to C4 and set the size of comment box, set the text and set font for specified range of characters.
ExcelComment comment = sheet.Range["C4"].Comment;
comment.Height = 80;
comment.Width = 200;
comment.RichText.Text = "This comment is made by Spire.XLS for WPF.";
comment.RichText.SetFont(23, 40, font);
Step 4: Save and launch the file.
wb.SaveToFile("result.xlsx", ExcelVersion.Version2013);
System.Diagnostics.Process.Start("result.xlsx");
Output:
Full Code:
using Spire.Xls;
using System.Drawing;
using System.Windows;

namespace WpfApplication1
{
    public partial class MainWindow : Window
    {
        public MainWindow()
        {
            InitializeComponent();
        }
        private void button1_Click(object sender, RoutedEventArgs e)
        {
            Workbook wb = new Workbook();
            Worksheet sheet = wb.Worksheets[0];

            ExcelFont font = wb.CreateFont();
            font.FontName = "Calibri";
            font.Color = Color.Blue;
            font.Size = 10;
            font.IsBold = true;

            ExcelComment comment = sheet.Range["C4"].Comment;
            comment.Height = 80;
            comment.Width = 200;
            comment.RichText.Text = "This comment is made by Spire.XLS for WPF.";
            comment.RichText.SetFont(23, 40, font);

            wb.SaveToFile("result.xlsx", ExcelVersion.Version2013);
            System.Diagnostics.Process.Start("result.xlsx");

        }
    }
}
Imports Spire.Xls
Imports System.Drawing
Imports System.Windows

Namespace WpfApplication1
	Public Partial Class MainWindow
		Inherits Window
		Public Sub New()
			InitializeComponent()
		End Sub
		Private Sub button1_Click(sender As Object, e As RoutedEventArgs)
			Dim wb As New Workbook()
			Dim sheet As Worksheet = wb.Worksheets(0)

			Dim font As ExcelFont = wb.CreateFont()
			font.FontName = "Calibri"
			font.Color = Color.Blue
			font.Size = 10
			font.IsBold = True

			Dim comment As ExcelComment = sheet.Range("C4").Comment
			comment.Height = 80
			comment.Width = 200
			comment.RichText.Text = "This comment is made by Spire.XLS for WPF."
			comment.RichText.SetFont(23, 40, font)

			wb.SaveToFile("result.xlsx", ExcelVersion.Version2013)
			System.Diagnostics.Process.Start("result.xlsx")

		End Sub
	End Class
End Namespace
Word hyperlink gives a large amount of information of the original word and image. The text and image with hyperlinks can guides readers to a Web page, e-mail address, or the other files and documents. In this article, we’re focusing on how to insert hyperlink into the text in C# on WPF applications with the help of Spire.Doc for WPF.
Note: Before Start, please download the latest version of Spire.Doc and add Spire.Doc.Wpf.dll in the bin folder as the reference of Visual Studio.
Here comes to the code snippets:
Step 1: Create a word document and add a section and paragraph to it.
Document document = new Document();
Section Sec = document.AddSection();
Paragraph Para = Sec.AddParagraph();
Step 2: Set the styles for the text and hyperlinks on the paragraph.
ParagraphStyle txtStyle = new ParagraphStyle(document);
txtStyle.Name = "Style";
txtStyle.CharacterFormat.FontName = "Calibri";
txtStyle.CharacterFormat.FontSize = 16;
txtStyle.CharacterFormat.TextColor = System.Drawing.Color.RosyBrown;
document.Styles.Add(txtStyle);
ParagraphStyle hyperlinkstyle = new ParagraphStyle(document);
hyperlinkstyle.Name = "linkStyle";
hyperlinkstyle.CharacterFormat.FontName = "Calibri";
hyperlinkstyle.CharacterFormat.FontSize = 14;
document.Styles.Add(hyperlinkstyle);
Step 3: Add the text to the paragraph with style and link it to a web page.
Para = Sec.AddParagraph();
Para.AppendText("Home page");
Para.ApplyStyle(txtStyle.Name);
Para = Sec.AddParagraph();
Para.AppendHyperlink("HomePage", "www.e-iceblue.com",HyperlinkType.WebLink);
Para.ApplyStyle(hyperlinkstyle.Name);
Step 4: Add the text to the paragraph with style and link it to an email address.
Para = Sec.AddParagraph();
Para.AppendText("Contact US");
Para.ApplyStyle(txtStyle.Name);
Para = Sec.AddParagraph();
Para.AppendHyperlink("mailto:support@e-iceblue.com", "support@e-iceblue.com",HyperlinkType.EMailLink);
Para.ApplyStyle(hyperlinkstyle.Name);
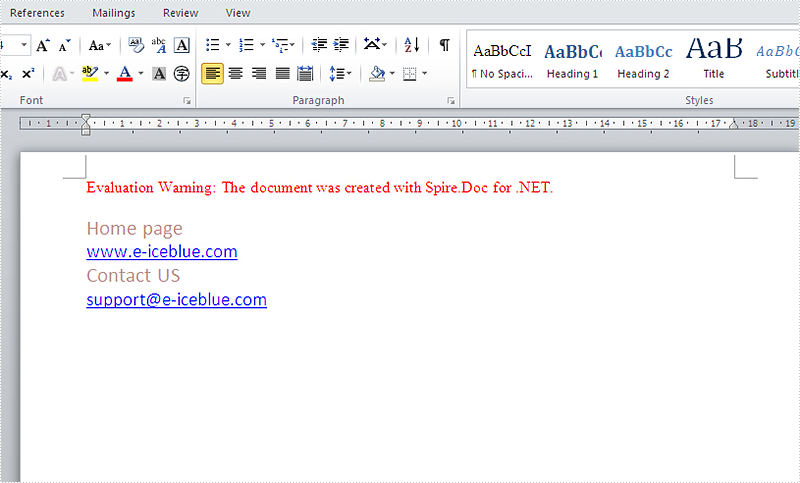
Step 5: Save the document to file and launch to preview it.
document.SaveToFile("Hyperlink.docx", FileFormat.Docx);
System.Diagnostics.Process.Start("Hyperlink.docx");
Effective screenshot of adding hyperlinks to the word document in C#:
Full codes:
using Spire.Doc;
using Spire.Doc.Documents;
using System.Windows;

namespace WpfApplication1
{
    public partial class MainWindow : Window
    {
        public MainWindow()
        {
            InitializeComponent();
        }
        private void button1_Click(object sender, RoutedEventArgs e)
        {
            Document document = new Document();
            Section Sec = document.AddSection();
            Paragraph Para = Sec.AddParagraph();

            ParagraphStyle txtStyle = new ParagraphStyle(document);
            txtStyle.Name = "Style";
            txtStyle.CharacterFormat.FontName = "Calibri";
            txtStyle.CharacterFormat.FontSize = 16;
            txtStyle.CharacterFormat.TextColor = System.Drawing.Color.RosyBrown;
            document.Styles.Add(txtStyle);
            ParagraphStyle hyperlinkstyle = new ParagraphStyle(document);
            hyperlinkstyle.Name = "linkStyle";
            hyperlinkstyle.CharacterFormat.FontName = "Calibri";
            hyperlinkstyle.CharacterFormat.FontSize = 14;
            document.Styles.Add(hyperlinkstyle);

            Para = Sec.AddParagraph();
            Para.AppendText("Home page");
            Para.ApplyStyle(txtStyle.Name);

            Para = Sec.AddParagraph();
            Para.AppendHyperlink("www.e-iceblue.com", "www.e-iceblue.com", HyperlinkType.WebLink);
            Para.ApplyStyle(hyperlinkstyle.Name);

            Para = Sec.AddParagraph();
            Para.AppendText("Contact US");
            Para.ApplyStyle(txtStyle.Name);

            Para = Sec.AddParagraph();
            Para.AppendHyperlink("mailto:support@e-iceblue.com", "support@e-iceblue.com", HyperlinkType.EMailLink);
            Para.ApplyStyle(hyperlinkstyle.Name);

            document.SaveToFile("Hyperlink.docx", FileFormat.Docx);
            System.Diagnostics.Process.Start("Hyperlink.docx");
        }


    }
}
By default, the font color of a word document is black. To achieve a more distinctive visual effect, we can change it to red, green or any other colors we like.
This article describes how to change word font color with Spire.Doc for WPF in C#, VB.NET.
At first, please download Spire.Doc and install it correctly, then add Spire.Doc. Wpf.dll and Spire.License.dll from the installation folder as reference.
Below is the screenshot of the original word document:

Detail steps:
Use namespace:
using System.Drawing;
using System.Windows;
using Spire.Doc;
using Spire.Doc.Documents;
Step 1: Initialize a new instance of Document class and load the sample document from file.
Document document = new Document();
document.LoadFromFile("Story.docx");
Step 2: Get its first section and first paragraph (the Title), then set text color for paragraph 1.
Section section = document.Sections[0];
Paragraph p1 = section.Paragraphs[0];
ParagraphStyle s1 = new ParagraphStyle(document);
s1.Name = "TitleTextColor";
s1.CharacterFormat.TextColor = Color.RosyBrown;
document.Styles.Add(s1);
p1.ApplyStyle(s1.Name);
Step 3: Get the second paragraph and set text color for paragraph 2.
Paragraph p2 = section.Paragraphs[1];
ParagraphStyle s2 = new ParagraphStyle(document);
s2.Name = "BodyTextColor";
s2.CharacterFormat.TextColor = Color.DarkBlue;
document.Styles.Add(s2);
p2.ApplyStyle(s2.Name);
Step 4: Save and launch the file.
document.SaveToFile("FontColor.docx", FileFormat.Docx);
System.Diagnostics.Process.Start("FontColor.docx");
Output:

Full codes:
using Spire.Doc;
using Spire.Doc.Documents;
using System.Drawing;
using System.Windows;

namespace WpfApplication1
{
    public partial class MainWindow : Window
    {
        public MainWindow()
        {
            InitializeComponent();
        }
        private void button1_Click(object sender, RoutedEventArgs e)
        {
            //Load Document
            Document document = new Document();
            document.LoadFromFile("Story.docx");

            //Set Text Color for Paragraph 1(the Title)
            Section section = document.Sections[0];
            Paragraph p1 = section.Paragraphs[0];
            ParagraphStyle s1 = new ParagraphStyle(document);
            s1.Name = "TitleTextColor";
            s1.CharacterFormat.TextColor = Color.RosyBrown;
            document.Styles.Add(s1);
            p1.ApplyStyle(s1.Name);

            //Set Text Color for Paragraph 2
            Paragraph p2 = section.Paragraphs[1];
            ParagraphStyle s2 = new ParagraphStyle(document);
            s2.Name = "BodyTextColor";
            s2.CharacterFormat.TextColor = Color.DarkBlue;
            document.Styles.Add(s2);
            p2.ApplyStyle(s2.Name);

            //Save and Launch
            document.SaveToFile("FontColor.docx", FileFormat.Docx);
            System.Diagnostics.Process.Start("FontColor.docx");
        }


    }
}
Imports Spire.Doc
Imports Spire.Doc.Documents
Imports System.Drawing
Imports System.Windows

Namespace WpfApplication1
	Public Partial Class MainWindow
		Inherits Window
		Public Sub New()
			InitializeComponent()
		End Sub
		Private Sub button1_Click(sender As Object, e As RoutedEventArgs)
			'Load Document
			Dim document As New Document()
			document.LoadFromFile("Story.docx")

			'Set Text Color for Paragraph 1(the Title)
			Dim section As Section = document.Sections(0)
			Dim p1 As Paragraph = section.Paragraphs(0)
			Dim s1 As New ParagraphStyle(document)
			s1.Name = "TitleTextColor"
			s1.CharacterFormat.TextColor = Color.RosyBrown
			document.Styles.Add(s1)
			p1.ApplyStyle(s1.Name)

			'Set Text Color for Paragraph 2
			Dim p2 As Paragraph = section.Paragraphs(1)
			Dim s2 As New ParagraphStyle(document)
			s2.Name = "BodyTextColor"
			s2.CharacterFormat.TextColor = Color.DarkBlue
			document.Styles.Add(s2)
			p2.ApplyStyle(s2.Name)

			'Save and Launch
			document.SaveToFile("FontColor.docx", FileFormat.Docx)
			System.Diagnostics.Process.Start("FontColor.docx")
		End Sub


	End Class
End Namespace
