
Knowledgebase (2370)
Children categories
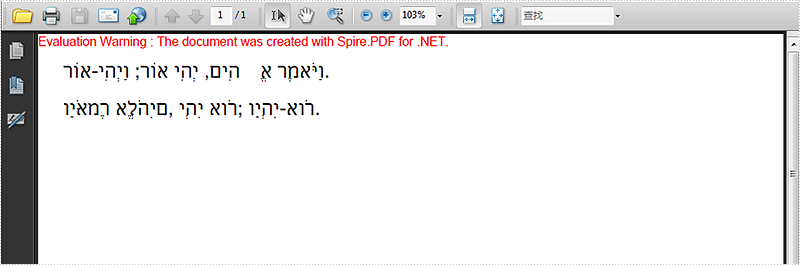
With the help of Spire.PDF, developers can easily draw texts on the PDF files in C#. We have already introduced how to draw text in PDF with different styles. Usually the texts are left to right format, for some languages, such as Hebrew, Arabic, etc. the texts are from right to left. Spire.PDF offers a property to enable developers to set RightToLeft as true to draw right to left text on PDF in C#. Here comes to the steps of how to draw the Hebrew texts from right to left.
Step 1: Define the text string in Hebrew:
string value = "וַיֹּאמֶר אֱלֹהִים, יְהִי אוֹר; וַיְהִי-אוֹר.";
Step 2: Create a new PDF document.
PdfDocument doc = new PdfDocument();
Step 3: Add a new page to the PDF document.
PdfPageBase page = doc.Pages.Add(PdfPageSize.A4, new PdfMargins());
Step 4: Set the font and position for the text.
PdfTrueTypeFont font = new PdfTrueTypeFont(new Font("Alef-Regular.ttf", 16f, FontStyle.Bold), true);
RectangleF labelBounds = new RectangleF(20, 20, 400, font.Height);
Step 5: Draw the text and set the value to indicate the text direction mode.
page.Canvas.DrawString(value, font, PdfBrushes.Black, labelBounds, new PdfStringFormat() { RightToLeft = true });
Step 6: Save the document to file.
doc.SaveToFile("result.pdf");
Effective screenshot:
Full codes:
using Spire.Pdf;
using Spire.Pdf.Graphics;
using System.Drawing;


namespace RightToLeftText
{
    class Program
    {
        static void Main(string[] args)
        {
            string value = "וַיֹּאמֶר אֱלֹהִים, יְהִי אוֹר; וַיְהִי-אוֹר.";
            PdfDocument doc = new PdfDocument();

            PdfPageBase page = doc.Pages.Add(PdfPageSize.A4, new PdfMargins());

            PdfTrueTypeFont font = new PdfTrueTypeFont(new Font("Alef-Regular.ttf", 16f, FontStyle.Bold), true);

            RectangleF labelBounds = new RectangleF(20, 20, 400, font.Height);
            page.Canvas.DrawString(value, font, PdfBrushes.Black, labelBounds, new PdfStringFormat() { RightToLeft = true });

            labelBounds = new RectangleF(20, 50, 400, font.Height);
            page.Canvas.DrawString(value, font, PdfBrushes.Black, labelBounds, new PdfStringFormat() { RightToLeft = false });

            doc.SaveToFile("result.pdf");
        }
    }
}
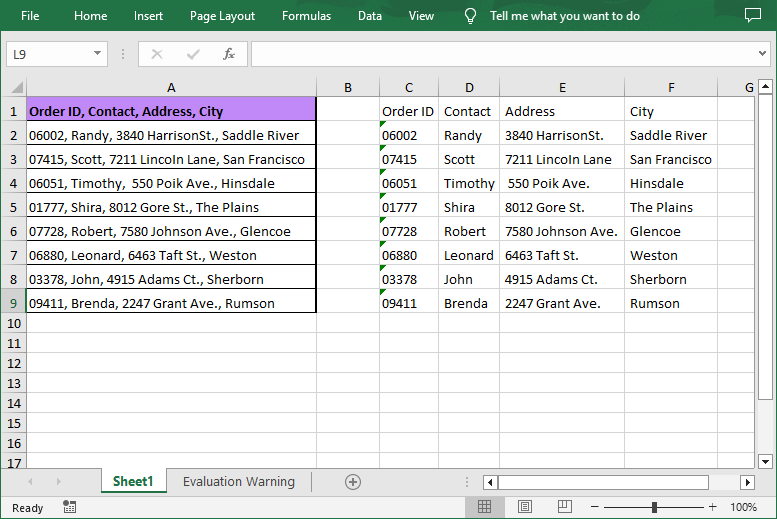
When working with spreadsheets, you may find that certain cells contain combined information that need to be split for further sorting, filtering, or analyzing. MS Excel provides the “Text to Columns” feature to help users handle such situation, but manually processing large datasets is tedious and error prone. Using Spire.XLS, a robust .NET library, you can automate splitting data into columns efficiently.
This article will guide you through the process of splitting Excel data into multiple columns with C#, saving you time and ensuring accuracy.
- Why Use Spire.XLS for Splitting Excel Data?
- How to Install the .NET Excel Library?
- Split Excel Data into Multiple Columns with C# (Steps & Code)
Why Use Spire.XLS for Splitting Excel Data?
- No Office Dependency: Manipulate Excel files without installing Microsoft Office.
- Rich Features: Beyond splitting data, Spire.XLS also allows to edit, format, or export split data to other formats.
- .NET Integration: Seamlessly embed Excel automation into .NET applications.
How to Install the .NET Excel Library?
To follow along with the examples in this article, you'll need to have the Spire.XLS for .NET library installed. The product package can be downloaded from the official website and then imported manually. Or you can install it directly via NuGet:
PM> Install-Package Spire.XLS
Split Excel Data into Multiple Columns with C# (Steps & Code)
With Spire.XLS, you can first retrieve the content in a cell, then split the cell content based on specific delimiter, and finally write the split data into different columns. The detailed steps are as follows:
- Load Excel and get a worksheet.
- Create a Workbook object and use its LoadFromFile() method to load an Excel file.
- Access a specified worksheet through the Workbook.Worksheets[index] property.
- Retrieve and split cell data.
- Iterate through each row in the sheet.
- Access a specified cell and then get its content using the CellRange.Text property.
- Call the string.Split(params char[] separator) method to split the content based on a specified separator (e.g., comma, space, semicolon, etc.).
- Write data into multiple columns and save.
- Iterate through each split data.
- Write the split data into different columns.
- Save the modified workbook to a new file using the Workbook.SaveToFile() method.
Below is the sample code:
- C#
using Spire.Xls;

namespace ConvertTextToColumns
{
    class Program
    {
        static void Main(string[] args)
        {
            // Create a Workbook object
            Workbook workbook = new Workbook();

            // Load an Excel file
            workbook.LoadFromFile("Data.xlsx");

            // Get the first worksheet
            Worksheet sheet = workbook.Worksheets[0];

            // Loop through each row in the worksheet
            for (int i = 0; i < sheet.LastRow; i++)
            {
                // Get the text of the first cell in the current row
                string cellText = sheet.Range[i + 1, 1].Text;

                // Split the text by comma
                string[] splitText = cellText.Split(',');

                // Iterate through each split value
                for (int j = 0; j < splitText.Length; j++)
                {
                    // Write the split data into different columns
                    sheet.Range[i + 1, j + 3].Text = splitText[j];
                }
            }

            // Autofit column widths
            sheet.AllocatedRange.AutoFitColumns();

            // Save the result file
            workbook.SaveToFile("SplitExcelData.xlsx", ExcelVersion.Version2016);
        }
    }
}
Get a Free License
To fully experience the capabilities of Spire.XLS for .NET without any evaluation limitations, you can request a free 30-day trial license.
Conclusion
Splitting text into columns in Excel using C# streamlines data processing and reduces the risk of errors. With Spire.XLS, you can automate complex tasks while maintaining data integrity, making data management easier.
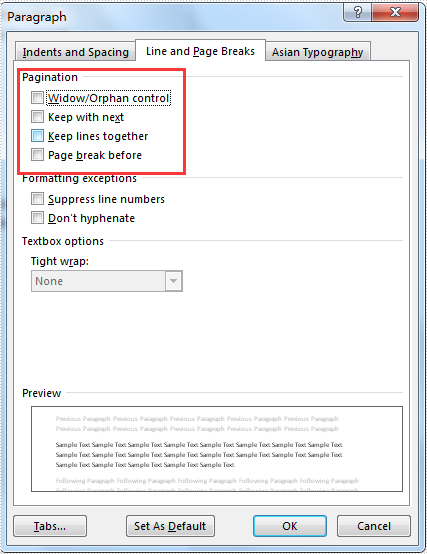
When we want to manage the pagination for the paragraphs, we can insert a page break directly. But later we may find that it is hard to add or remove text above the page break and then we have to remove the whole page break. With Microsoft word, we can also use the Paragraph dialog to manage the pagination flexible for the word paragraph as below:
We have already shown you how to insert page break to the word document, this article we will show you how to manage the pagination by using the Paragraph.Format offered by Spire.Doc. Here comes to the steps of how to manage the pagination for the word document paragraph in C#:
Step 1: Create a new word document and load the document from file.
Document doc = new Document();
doc.LoadFromFile("sample.docx");
Step 2: Get the first section and the paragraph we want to manage the pagination
Section sec = doc.Sections[0];
Paragraph para = sec.Paragraphs[4];
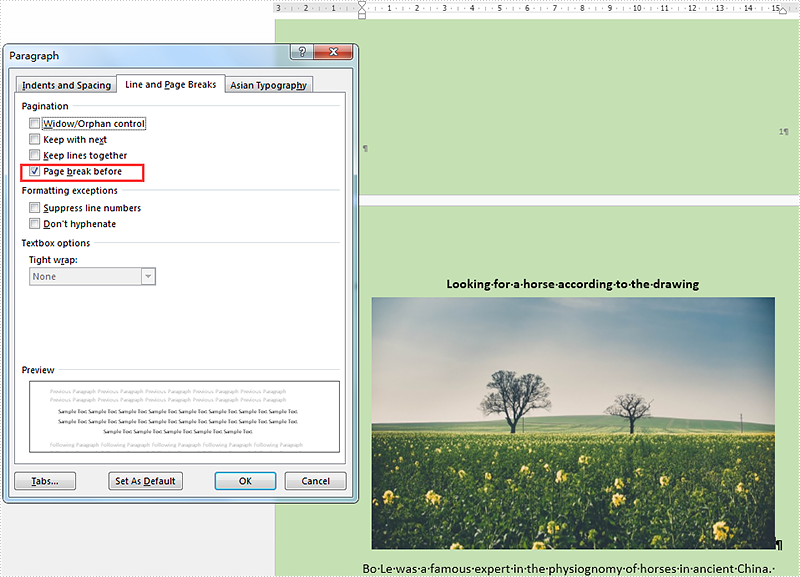
Step 3: Set the pagination format as Format.PageBreakBefore for the checked paragraph.
para.Format.PageBreakBefore = true;
Step 4: Save the document to file.
doc.SaveToFile("result.docx",FileFormat.Docx2010);
Effective screenshot after managing the pagination for the word document:
Full codes:
using Spire.Doc;
using Spire.Doc.Documents;
namespace ManagePage
{
 class Program
    {

     static void Main(string[] args)
     {
         Document doc = new Document();
         doc.LoadFromFile("sample.docx");

         Section sec = doc.Sections[0];
         Paragraph para = sec.Paragraphs[4];
         para.Format.PageBreakBefore = true;

         doc.SaveToFile("result.docx", FileFormat.Docx2010);

     }

    }
}
