
Knowledgebase (2370)
Children categories
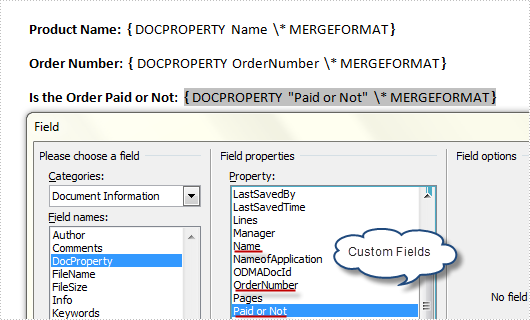
In our daily work, we may have the requirement to add custom properties with fields to a Word document. As is shown in the following Word document, I have created three custom property fields for easily inserting or updating information.
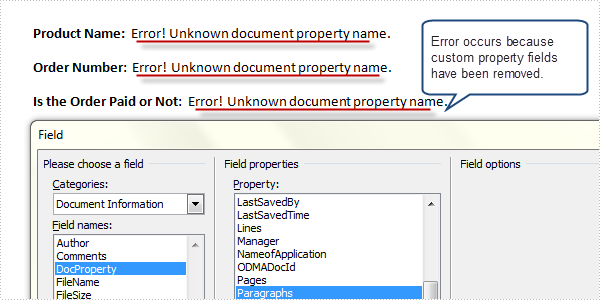
However, a custom property field may lose its value if we don’t want to use it any more, or a custom field might be created with wrong information, in such cases, we can choose to delete these fields manually and programmatically. In this article, I’ll introduce a C# and VB.NET solution to remove custom property fields using Spire.Doc.
Detailed Steps
Step 1: Create a new instance of Spire.Doc.Document class and load the sample file with specified path.
Document doc = new Document();
doc.LoadFromFile("FieldSample.docx", FileFormat.Docx);
Step 2: Get custom document properties object.
CustomDocumentProperties cdp = doc.CustomDocumentProperties;
Step 3: Use a for sentence and CustomDocumentProperties.Remove(string name) method to remove all custom property fields in the document.
for (int i = 0; i < cdp.Count; )
{
  cdp.Remove(cdp[i].Name);
}
doc.IsUpdateFields = true;
Step 4: Save the file.
doc.SaveToFile("Result.docx", FileFormat.Docx);
Output:
Full Code:
using Spire.Doc;
namespace RemoveProperties
{
    class Program
    {
        static void Main(string[] args)
        {
            Document doc = new Document();
            doc.LoadFromFile("FieldSample.docx", FileFormat.Docx);
            CustomDocumentProperties cdp = doc.CustomDocumentProperties;
            for (int i = 0; i < cdp.Count; )
            {
                cdp.Remove(cdp[i].Name);
            }
            doc.IsUpdateFields = true;
            doc.SaveToFile("Result.docx", FileFormat.Docx);
        }
    }
}
Imports Spire.Doc
Namespace RemoveProperties
	Class Program
		Private Shared Sub Main(args As String())
			Dim doc As New Document()
			doc.LoadFromFile("FieldSample.docx", FileFormat.Docx)
			Dim cdp As CustomDocumentProperties = doc.CustomDocumentProperties
			Dim i As Integer = 0
			While i < cdp.Count
				cdp.Remove(cdp(i).Name)
			End While
			doc.IsUpdateFields = True
			doc.SaveToFile("Result.docx", FileFormat.Docx)
		End Sub
	End Class
End Namespace
A gradient is a smooth transition from one color to another, and the gradient backgrounds make your presentation very cool. This article will show you how to create a shape with gradient effects by using Spire.Presentation. With the help of Spire.Presentation, you can not only insert gradient shapes into the slides, but also insert solid shapes in PowerPoint in C# easily.
The following steps will give you clear information of how to fill a shape with gradient effects. We will use rectangle shape in this example.
Step 1: Create an instance of presentation.
Presentation ppt = new Presentation();
Step 2: Add a rectangle to the slide.
IAutoShape GradientShape = (IAutoShape)ppt.Slides[0].Shapes.AppendShape(ShapeType.Rectangle, new RectangleF(200, 100, 287, 100));
Step 3: Set the Fill Type of the Shape to Gradient.
GradientShape.Fill.FillType = FillFormatType.Gradient;
Step 4: Set the start and end color for the gradient effects.
GradientShape.Fill.Gradient.GradientStops.Append(0, Color.Purple);
GradientShape.Fill.Gradient.GradientStops.Append(1, Color.Red);
Step 5: Save and Launch to view the resulted PPTX file.
ppt.SaveToFile("CreateGradientShape.pptx", FileFormat.Pptx2010);
System.Diagnostics.Process.Start("CreateGradientShape.pptx");
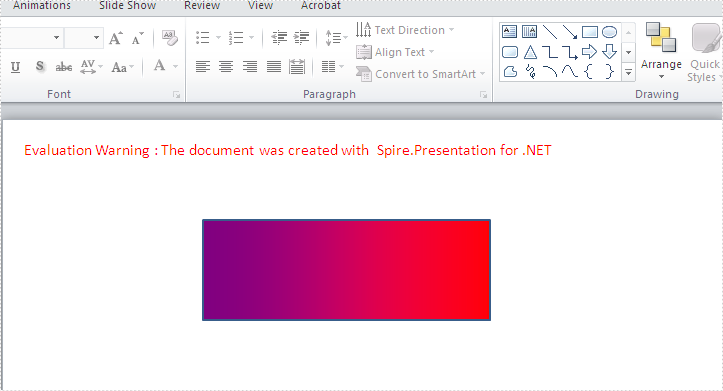
Effective screenshot of the resulted gradient shape:
Full codes:
using Spire.Presentation;
using Spire.Presentation.Drawing;
using System.Drawing;

namespace createGradientshape
{
    class Program
    {
        static void Main(string[] args)
        {
            Presentation ppt = new Presentation();
            IAutoShape GradientShape = (IAutoShape)ppt.Slides[0].Shapes.AppendShape(ShapeType.Rectangle, new RectangleF(200, 100, 287, 100));

            GradientShape.Fill.FillType = FillFormatType.Gradient;
            GradientShape.Fill.Gradient.GradientStops.Append(0, Color.Purple);
            GradientShape.Fill.Gradient.GradientStops.Append(1, Color.Red);
            ppt.SaveToFile("CreateGradientShape.pptx", FileFormat.Pptx2010);
            System.Diagnostics.Process.Start("CreateGradientShape.pptx");
        }
    }
}
A barcode is a small image of lines and spaces that is often used in a store to reflect the description and price of a product, moreover, barcodes can be used in many other aspects in our daily life, such as tickets, medicine prescriptions, library books. In this article, I'll introduce you a way to add extra information in TopText of a barcode using Spire.Barcode in WinForm.
By default, 'E-iceblue' will be shown as TopText in a barcode if you don't request a key to remove it. Click here to see how to remove 'E-iceblue' logo in barcode. In this sample, more than one line of text will be added in TopText to replace 'E-iceblue'. Let's see detailed steps.
Step 1: Add Spire.Barcode controls to Visual Studio Toolbox.
Step 2: Create a Windows Forms project. Drag 'BarCodeControl' to your Form1. Here I changed the barcode type as EAN13.

Step 3: Double click 'button1' to write code. Customized TopText can be saved in BarCodeControl.TopText string.
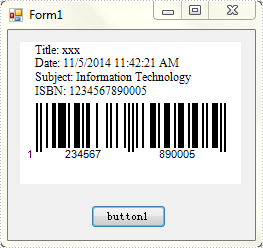
string title = "Title: xxx" + Environment.NewLine;
string subject = "Subject: Information Technology" + Environment.NewLine;
string date = "Date: " + DateTime.Now.ToString() + Environment.NewLine;
string isbn = "ISBN: 1234567890005";
this.barCodeControl1.TopText = title + date + subject + isbn;
Step 4: Run the sample code and click 'button1' to get the new barcode. In addition, you can call BarCodeControl.SaveToFile() method to save the barcode as an image.
Full Code:
using System;
using System.Collections.Generic;
using System.ComponentModel;
using System.Data;
using System.Drawing;
using System.Linq;
using System.Text;
using System.Windows.Forms;
using System.Drawing.Imaging;

namespace SetTopText
{
    public partial class Form1 : Form
    {
        public Form1()
        {
            InitializeComponent();
        }

        private void button1_Click(object sender, EventArgs e)
        {
            string title = "Title: xxx" + Environment.NewLine;
            string date = "Date: " + DateTime.Now.ToString() + Environment.NewLine;
            string subject = "Subject: Information Technology" + Environment.NewLine;
            string isbn = "ISBN: 1234567890005";
            this.barCodeControl1.TopText = title + date + subject + isbn;

        }
    }
}
