
Knowledgebase (2370)
Children categories
Digital signatures are vital for maintaining the authenticity and integrity of PDF documents. They provide a reliable way to verify the signer's identity and ensure that the document's content has not been tampered with since the signature was applied. By using digital signatures, you can enhance the security and trustworthiness of your documents. In this article, we will explore how to add and remove digital signatures in PDF files in Python using Spire.PDF for Python.
- Add a Digital Signature to PDF in Python
- Add an Invisible Digital Signature to PDF in Python
- Remove Digital Signature from PDF in Python
Install Spire.PDF for Python
This scenario requires Spire.PDF for Python and plum-dispatch v1.7.4. They can be easily installed in your Windows through the following pip command.
pip install Spire.PDF
If you are unsure how to install, please refer to this tutorial: How to Install Spire.PDF for Python on Windows
Add a Digital Signature to PDF in Python
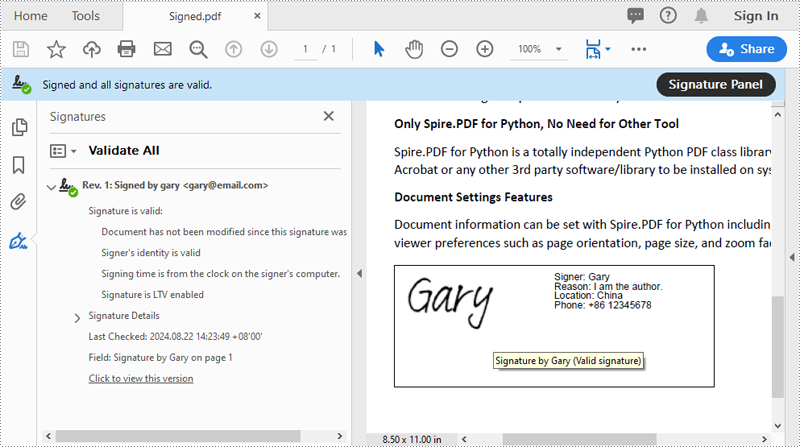
You can use the PdfOrdinarySignatureMaker.MakeSignature(sigFieldName: str, page: PdfPageBase, x: float, y: float, width: float, height: float, signatureAppearance: IPdfSignatureAppearance) method to add a visible digital signature with a custom appearance to a specific page of a PDF document. The detailed steps are as follows.
- Create a PdfDocument instance.
- Load a PDF document using PdfDocument.LoadFromFile() method.
- Create a PdfOrdinarySignatureMaker instance and pass the PdfDocument object, certificate (.pfx) file path and certificate password to the class instructor as parameters.
- Set signature details, such as the signer’s name, contact information, location, and signature reason, using the properties of the PdfOrdinarySignatureMaker class.
- Create a PdfSignatureAppearance instance for the signature, and then customize the labels for the signature and set the signature image.
- Get a specific page in the PDF document using PdfDocument.Pages[] property.
- Call the PdfOrdinarySignatureMaker.MakeSignature(sigFieldName: str, page: PdfPageBase, x: float, y: float, width: float, height: float, signatureAppearance: IPdfSignatureAppearance) method to add the digital signature to a specific location of the page.
- Save the result document using the PdfDocument.SaveToFile() method.
- Python
from spire.pdf.common import *
from spire.pdf import *

# Create a PdfDocument instance
doc = PdfDocument()
# Load a PDF file
doc.LoadFromFile("Sample.pdf")

# Create a signature maker
signatureMaker = PdfOrdinarySignatureMaker(doc, "gary.pfx", "e-iceblue")

# Configure the signature properties like the signer's name, contact information, location and signature reason
signature = signatureMaker.Signature
signature.Name = "Gary"
signature.ContactInfo = "+86 12345678"
signature.Location = "China"
signature.Reason = "I am the author."

# Create a custom signature appearance
appearance = PdfSignatureAppearance(signature)
# Set label for the signer's name
appearance.NameLabel = "Signer: "
# Set label for the contact information
appearance.ContactInfoLabel = "Phone: "
# Set label for the location
appearance.LocationLabel = "Location: "
# Set label for the signature reason
appearance.ReasonLabel = "Reason: "
# Set signature image
appearance.SignatureImage = PdfImage.FromFile("SigImg.png")
# Set the graphic render/display mode for the signature
appearance.GraphicMode = GraphicMode.SignImageAndSignDetail
# Set the layout for the signature image
appearance.SignImageLayout = SignImageLayout.none

# Get the first page
page = doc.Pages.get_Item(0)

# Add the signature to a specified location of the page
signatureMaker.MakeSignature("Signature by Gary", page, 90.0, 600.0, 260.0, 100.0, appearance)

# Save the signed document
doc.SaveToFile("Signed.pdf")
doc.Close()
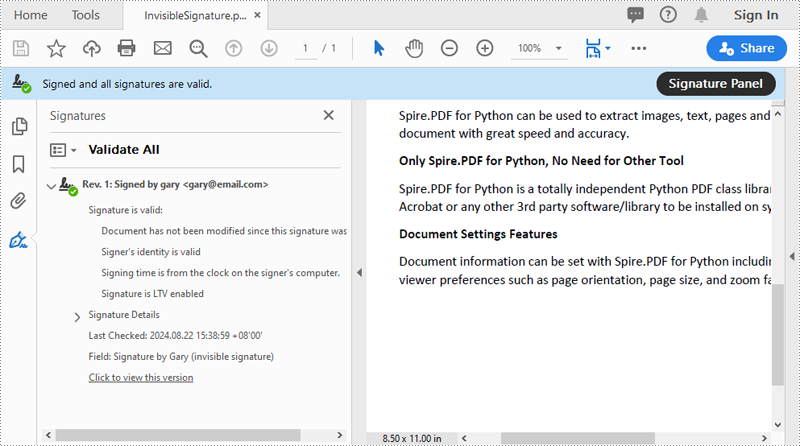
Add an Invisible Digital Signature to PDF in Python
An invisible signature in a PDF is a type of digital signature that provides all the security and authentication benefits of a standard digital signature but does not appear visibly on the document itself. Using the PdfOrdinarySignatureMaker.MakeSignature(sigFieldName: str) method of Spire.PDF for Python, you can add an invisible digital signature to a PDF document. The detailed steps are as follows.
- Create a PdfDocument instance.
- Load a PDF document using PdfDocument.LoadFromFile() method.
- Create a PdfOrdinarySignatureMaker instance and pass the PdfDocument object, certificate (.pfx) file path and password to the class instructor as parameters.
- Add an invisible digital signature to a PDF document using the PdfOrdinarySignatureMaker.MakeSignature(sigFieldName: str) method
- Save the result document using the PdfDocument.SaveToFile() method.
- Python
from spire.pdf.common import *
from spire.pdf import *

# Create a PdfDocument instance
doc = PdfDocument()
# Load a PDF document
doc.LoadFromFile("test2.pdf")

# Create a signature maker
signatureMaker = PdfOrdinarySignatureMaker(doc, "gary.pfx", "e-iceblue")

# Add an invisible signature to the document
signatureMaker.MakeSignature("Signature by Gary")

# Save the signed document
doc.SaveToFile("InvisibleSignature.pdf")
doc.Close()
Remove Digital Signature from PDF in Python
To remove digital signatures from a PDF document, you need to iterate through all form fields in the document, find the form fields that are of PdfSignatureFieldWidget type and then remove them from the document. The detailed steps are as follows.
- Create a PdfDocument instance.
- Load a PDF document using PdfDocument.LoadFromFile() method.
- Get the form field collection of the document using PdfDocument.Form property.
- Iterate through the form fields in the collection from the last to the first.
- Check if the field is a PdfSignatureFieldWidget object.
- If the result is True, remove the field from the document using PdfFormFieldWidgetCollection.FieldsWidget.RemoveAt(index) method.
- Save the result document using the PdfDocument.SaveToFile() method.
- Python
from spire.pdf.common import *
from spire.pdf import *

# Create a PdfDocument instance
doc = PdfDocument()
# Load a PDF document
doc.LoadFromFile("Signed.pdf")

# Get form field collection from the document
pdfForm = doc.Form
formWidget = PdfFormWidget(pdfForm)

# Check if there are any form fields in the collection
if formWidget.FieldsWidget.Count > 0:
    # Loop through all form fields from the last to the first
    for i in range(formWidget.FieldsWidget.Count - 1, -1, -1):
        field = formWidget.FieldsWidget.get_Item(i)
        # Check if the field is a PdfSignatureFieldWidget
        if isinstance(field, PdfSignatureFieldWidget):
            # Remove the field
            formWidget.FieldsWidget.RemoveAt(i)

# Save the document
doc.SaveToFile("RemoveSignature.pdf")
doc.Close()
Apply for a Temporary License
If you'd like to remove the evaluation message from the generated documents, or to get rid of the function limitations, please request a 30-day trial license for yourself.
In Microsoft PowerPoint, animations are not limited to just text; they can also be applied to shapes or other objects to create dynamic and engaging slides. Animations can be used to achieve various effects, such as drawing attention to a specific shape, demonstrating a process, or simply adding a touch of flair to your presentation. For instance, you might want to animate a shape to make it appear, disappear, or move in a particular sequence. Additionally, extracting and reusing animations can save time and ensure consistency across multiple presentations. In this article, we will demonstrate how to add animations to shapes in PowerPoint along with how to extract animation information from slides in PowerPoint in Python using Spire.Presentation for Python.
- Add Animations to Shapes and Text within Shapes in PowerPoint in Python
- Add Exit Animations to Shapes in PowerPoint in Python
- Extract the Animation Information from PowerPoint Slides in Python
Install Spire.Presentation for Python
This scenario requires Spire.Presentation for Python and plum-dispatch v1.7.4. They can be easily installed in your Windows through the following pip command.
pip install Spire.Presentation
If you are unsure how to install, please refer to this tutorial: How to Install Spire.Presentation for Python on Windows
Add Animations to Shapes and Text within Shapes in PowerPoint in Python
You can use the IShape.Slide.Timeline.MainSequence.AddEffect(shape:IShape, animationEffectType:AnimationEffectType) method to add an animation effect to a shape. If you want to apply the animation effect to the text of a specific paragraph(s) within a shape, you can use the AnimationEffect.SetStartEndParagraph(startParaIndex:int, endParaIndex:int) method. The detailed steps are as follows.
- Create an instance of the Presentation class.
- Load a PowerPoint presentation using the Presentation.LoadFromFile() method.
- Access a specific slide using the Presentation.Slides[] property.
- Add a rectangle shape to the slide using the ISlide.Shapes.AppendShape(shapeType:ShapeType, rectangle:RectangleF) method.
- Set the fill type, fill color, and border color for the rectangle.
- Add a text frame to the rectangle using the IShape.AppendTextFrame() method.
- Add an animation effect to the rectangle using IShape.Slide.Timeline.MainSequence.AddEffect(shape:IShape, animationEffectType:AnimationEffectType) method.
- Add another animation effect to the rectangle. Then apply the animation effect to specific paragraph(s) within the rectangle using the AnimationEffect.SetStartEndParagraph(startParaIndex:int, endParaIndex:int) method.
- Save the result presentation using the Presentation.SaveToFile() method.
- Python
from spire.presentation.common import *
from spire.presentation import *

# Create an object of the Presentation class
ppt = Presentation()
# Get the first slide in the presentation
slide = ppt.Slides[0]

# Add a rectangle shape to the slide
shape = slide.Shapes.AppendShape(ShapeType.Rectangle, RectangleF.FromLTRB(100, 150, 300, 230))
# Set an alternative title for the shape (optional)
shape.AlternativeTitle = "Rectangle"

# Set the fill type, fill color and border color for the shape
shape.Fill.FillType = FillFormatType.Solid
shape.Fill.SolidColor.Color = Color.get_LightBlue()
shape.ShapeStyle.LineColor.Color = Color.get_White()

# Add a text frame to the shape and set the text content
shape.AppendTextFrame("Animated Shape")

# Add the 'fade-out swivel' animation effect to the shape
shape.Slide.Timeline.MainSequence.AddEffect(shape, AnimationEffectType.FadedSwivel)

# Add the 'float' animation effect to the shape
animation = shape.Slide.Timeline.MainSequence.AddEffect(shape, AnimationEffectType.Float)
# Set the start and end index of the paragraph(s) to apply the 'float' animation
animation.SetStartEndParagraphs(0, 0)

# Save the presentation to a new file
ppt.SaveToFile("ApplyAnimation.pptx", FileFormat.Pptx2013)
ppt.Dispose()
Add Exit Animations to Shapes in PowerPoint in Python
In PowerPoint, animations are categorized into four main types: entrance, emphasis, exit, and motion paths. Some animations, like "fly in" or "fade", can be used as both entrance and exit effects. When using Spire.Presentation to add these animations to shapes in your presentations, these animations are typically set as entrance effects by default. If you want to change the type of the animation to exit, you can use the AnimationEffect.PresetClassType property. The detailed steps are as follows.
- Create an instance of the Presentation class.
- Load a PowerPoint presentation using the Presentation.LoadFromFile() method.
- Access a specific slide using the Presentation.Slides[] property.
- Add a cube shape to the slide using the ISlide.Shapes.AppendShape(shapeType:ShapeType, rectangle:RectangleF) method.
- Set the fill type, fill color, and border color for the cube.
- Add a text frame to the cube using the IShape.AppendTextFrame() method.
- Add an animation effect to the cube using the IShape.Slide.Timeline.MainSequence.AddEffect(shape:IShape, animationEffectType:AnimationEffectType) method.
- Change the animation effect type to exit using the AnimationEffect.PresetClassType property.
- Save the presentation using the Presentation.SaveToFile() method.
- Python
from spire.presentation.common import *
from spire.presentation import *

# Create an object of the Presentation class
ppt = Presentation()
# Get the first slide in the presentation
slide = ppt.Slides[0]

# Add a cube shape to the slide
shape = slide.Shapes.AppendShape(ShapeType.Cube, RectangleF.FromLTRB(100, 150, 300, 230))
# Set an alternative title for the shape (optional)
shape.AlternativeTitle = "Cube"

# Set the fill type, fill color and border color for the shape
shape.Fill.FillType = FillFormatType.Solid
shape.Fill.SolidColor.Color = Color.get_LightBlue()
shape.ShapeStyle.LineColor.Color = Color.get_White()

# Add a text frame to the shape and set the text content
shape.AppendTextFrame("Exit Animation")

# Add a 'random bars' animation effect to the shape
effect = shape.Slide.Timeline.MainSequence.AddEffect(shape, AnimationEffectType.RandomBars)
# Set the animation effect type to exit animation
effect.PresetClassType = TimeNodePresetClassType.Exit

# Save the presentation to a new file
ppt.SaveToFile("ExitAnimation.pptx", FileFormat.Pptx2013)
ppt.Dispose()
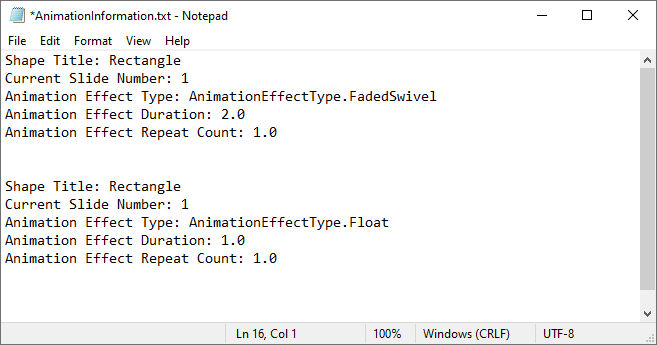
Extract the Animation Information from PowerPoint Slides in Python
To extract animation information from slides in a PowerPoint presentation, you need to iterate through all slides and all animations within each slide, then use the properties of the AnimationEffect class to retrieve the information of the animations. The detailed steps are as follows.
- Create an instance of the Presentation class.
- Load a PowerPoint presentation using the Presentation.LoadFromFile() method.
- Iterate through all slides in the presentation and all animations within each slide.
- Use the AnimationEffect.ShapeTarget.AlternativeTitle property to get the title of the shape affected by the animation.
- Use the ISlide.SlideNumber property to get the number of the current slide.
- Use the AnimationEffect.AnimationEffectType property to get the type of animation effect.
- Use the AnimationEffect.Timing.Duration property to get the duration of the animation effect.
- Use the AnimationEffect.Timing.RepeatCount property to get the number of repetitions of the animation effect.
- Save the retrieved information to a text file.
- Python
from spire.presentation.common import *
from spire.presentation import *

# Create an object of the Presentation class
ppt = Presentation()
# Load a PowerPoint presentation
ppt.LoadFromFile("ApplyAnimation.pptx")

# Create a list to store the extracted animation information
sb = []

# Iterate through all slides in the presentation
for slide in ppt.Slides:
    # Iterate through all animation effects in the slide
    for effect in slide.Timeline.MainSequence:
        # Get the alternative title of the shape affected by the animation
        shapeTitle = effect.ShapeTarget.AlternativeTitle
        sb.append("Shape Title: " + shapeTitle)
        # Get the number of the current slide
        slideNumber = slide.SlideNumber
        sb.append("Current Slide Number: " + str(slideNumber))
        # Get the type of the animation effect
        animationEffectType = effect.AnimationEffectType
        sb.append("Animation Effect Type: " + str(animationEffectType))
        # Get the duration of the animation effect
        duration = effect.Timing.Duration
        sb.append("Animation Effect Duration: " + str(duration))
        # Get the number of repetitions of the animation effect
        count = effect.Timing.RepeatCount
        sb.append("Animation Effect Repeat Count: " + str(count))
        sb.append("\n")

# Save the extracted animation information to a text file
with open("AnimationInformation.txt", "w") as fp:
    for s in sb:
        fp.write(s + "\n")

ppt.Dispose()
Apply for a Temporary License
If you'd like to remove the evaluation message from the generated documents, or to get rid of the function limitations, please request a 30-day trial license for yourself.
Adding annotations to PDFs is a common practice for adding comments, highlighting text, drawing shapes, and more. This feature is beneficial for collaborative document review, education, and professional presentations. It allows users to mark up documents digitally, enhancing communication and productivity.
In this article, you will learn how to add various types of annotations to a PDF document in Python using Spire.PDF for Python.
- Add a Text Markup Annotation to PDF
- Add a Free Text Annotation to PDF
- Add a Popup Annotation to PDF
- Add a Stamp Annotation to PDF
- Add a Shape Annotation to PDF
- Add a Web Link Annotation to PDF
- Add a File Link Annotation to PDF
- Add a Document Link Annotation to PDF
Install Spire.PDF for Python
This scenario requires Spire.PDF for Python and plum-dispatch v1.7.4. They can be easily installed in your Windows through the following pip command.
pip install Spire.PDF
If you are unsure how to install, please refer to this tutorial: How to Install Spire.PDF for Python on Windows
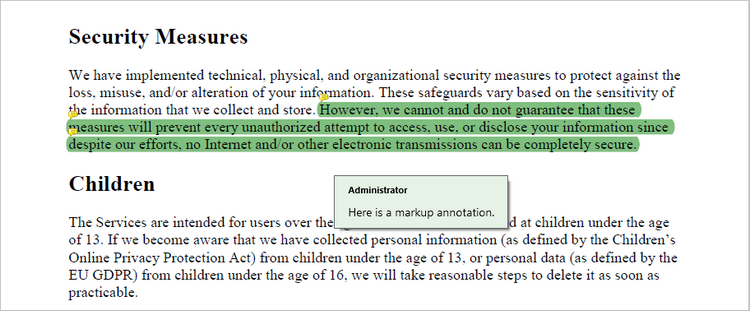
Add a Text Markup Annotation to PDF in Python
Text markup in PDF refers to the ability to emphasize important text by selecting and highlighting it. To add a text markup annotation to a PDF, you first need to locate the specific text within the document with the help of the PdfTextFinder class. Once the text is identified, you can create a PdfTextMarkupAnnotation object and apply it to the document.
The following are the steps to add a text markup annotation to PDF using Python:
- Create a PdfDocument object.
- Load a PDF file from the specified location.
- Get a page from the document.
- Find a specific piece of text within the page using PdfTextFinder class.
- Create a PdfTextMarkupAnnotation object based on the text found.
- Add the annotation to the page using PdfPageBase.AnnotationsWidget.Add() method.
- Save the modified document to a different PDF file.
- Python
from spire.pdf.common import *
from spire.pdf import *

# Create a PdfDocument object
doc = PdfDocument()

# Load a PDF file
doc.LoadFromFile("C:\\Users\\Administrator\\Desktop\\Input.pdf")

# Get a specific page
page = doc.Pages.get_Item(0)

# Create a PdfTextFinder object based on the page
finder = PdfTextFinder(page)

# Set the find options
finder.Options.Parameter = TextFindParameter.WholeWord
finder.Options.Parameter = TextFindParameter.IgnoreCase

# Find the instances of the specified text
fragments = finder.Find("However, we cannot and do not guarantee that these measures will prevent "+
                        "every unauthorized attempt to access, use, or disclose your information since "+
                         "despite our efforts, no Internet and/or other electronic transmissions can be completely secure.");

# Get the first instance
textFragment = fragments[0]

# Specify annotation text
text = "Here is a markup annotation."

# Iterate through the text bounds
for i in range(len(textFragment.Bounds)):

    # Get a specific bound
    rect = textFragment.Bounds[i]

    # Create a text markup annotation
    annotation = PdfTextMarkupAnnotation("Administrator", text, rect)

    # Set the markup color
    annotation.TextMarkupColor = PdfRGBColor(Color.get_Green())

    # Add the annotation to the collection of the annotations
    page.AnnotationsWidget.Add(annotation)

# Save result to file
doc.SaveToFile("output/MarkupAnnotation.pdf")

# Dispose resources
doc.Dispose()
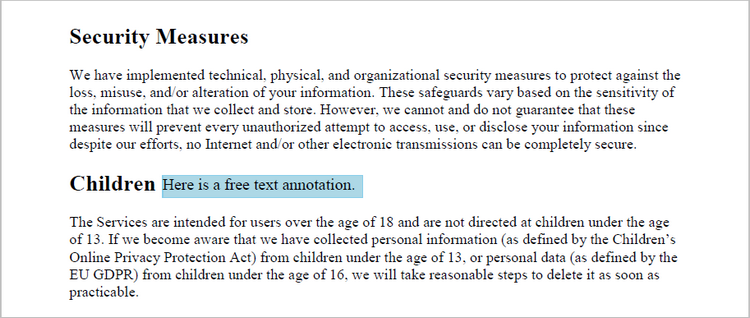
Add a Free Text Annotation to PDF in Python
Free text annotations allow adding freeform text comments directly on a PDF. To add a free text annotation at a specific location, you can use the PdfTextFinder class to obtain the coordinate information of the searched text, then create a PdfFreeTextAnnotation object based on that coordinates and add it to the document.
The following are the steps to add a free text annotation to PDF using Python:
- Create a PdfDocument object.
- Load a PDF file from the specified location.
- Get a page from the document.
- Find a specific piece of text within the page using PdfTextFinder class.
- Create a PdfFreeTextAnnotation object based on the coordinate information of the text found.
- Set the annotation content using PdfFreeTextAnnotation.Text property.
- Add the annotation to the page using PdfPageBase.AnnotationsWidget.Add() method.
- Save the modified document to a different PDF file.
- Python
from spire.pdf.common import *
from spire.pdf import *

# Create a PdfDocument object
doc = PdfDocument()

# Load a PDF file
doc.LoadFromFile("C:\\Users\\Administrator\\Desktop\\Input.pdf")

# Get a specific page
page = doc.Pages.get_Item(0)

# Create a PdfTextFinder object based on the page
finder = PdfTextFinder(page)

# Set the find options
finder.Options.Parameter = TextFindParameter.WholeWord
finder.Options.Parameter = TextFindParameter.IgnoreCase

# Find the instances of the specified text
fragments = finder.Find("Children");

# Get the first instance
textFragment = fragments[0]

# Get the text bound
rect = textFragment.Bounds[0]

# Get the coordinates to add annotation
right = bound.Right
top = bound.Top

# Create a free text annotation
rectangle = RectangleF(right + 5, top + 2, 160.0, 18.0)
textAnnotation = PdfFreeTextAnnotation(rectangle)

# Set the content of the annotation
textAnnotation.Text = "Here is a free text annotation."

# Set other properties of annotation
font = PdfFont(PdfFontFamily.TimesRoman, 13.0, PdfFontStyle.Regular)
border = PdfAnnotationBorder(1.0)
textAnnotation.Font = font
textAnnotation.Border = border
textAnnotation.BorderColor = PdfRGBColor(Color.get_SkyBlue())
textAnnotation.Color = PdfRGBColor(Color.get_LightBlue())
textAnnotation.Opacity = 1.0

# Add the annotation to the collection of the annotations
page.AnnotationsWidget.Add(textAnnotation)

# Save result to file
doc.SaveToFile("output/FreeTextAnnotation.pdf")

# Dispose resources
doc.Dispose()
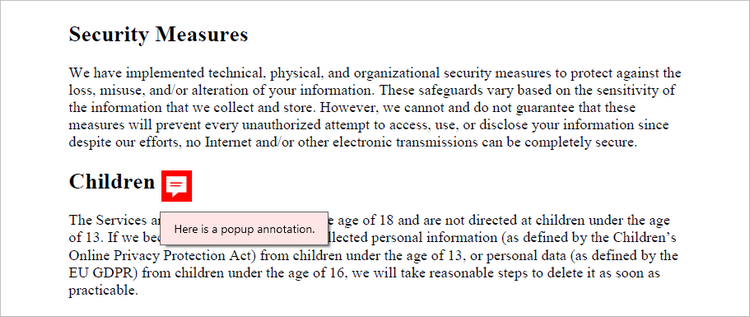
Add a Popup Annotation to PDF in Python
A popup annotation allows for the display of additional information or content in a pop-up window. To get a specific position to add a popup annotation, you can still use the PdfTextFinder class. Once the coordinate information is obtained, you can create a PdfPopupAnnotation object and add it to the document.
The steps to add a popup annotation to PDF using Python are as follows:
- Create a PdfDocument object.
- Load a PDF file from the specified location.
- Get a page from the document.
- Find a specific piece of text within the page using PdfTextFinder class.
- Create a PdfPopupAnnotation object based on the coordinate information of the text found.
- Set the annotation content using PdfPopupAnnotation.Text property.
- Add the annotation to the page using PdfPageBase.AnnotationsWidget.Add() method.
- Save the modified document to a different PDF file.
- Python
from spire.pdf.common import *
from spire.pdf import *

# Create a PdfDocument object
doc = PdfDocument()

# Load a PDF file
doc.LoadFromFile("C:\\Users\\Administrator\\Desktop\\Input.pdf")

# Get a specific page
page = doc.Pages.get_Item(0)

# Create a PdfTextFinder object based on the page
finder = PdfTextFinder(page)

# Set the find options
finder.Options.Parameter = TextFindParameter.WholeWord
finder.Options.Parameter = TextFindParameter.IgnoreCase

# Find the instances of the specified text
fragments = finder.Find("Children");

# Get the first instance
textFragment = fragments[0]

# Get the text bound
bound = textFragment.Bounds[0]

# Get the coordinates to add annotation
right = bound.Right
top = bound.Top

# Create a free text annotation
rectangle = RectangleF(right + 5, top, 30.0, 30.0)
popupAnnotation = PdfPopupAnnotation(rectangle)

# Set the content of the annotation
popupAnnotation.Text = "Here is a popup annotation."

# Set the icon and color of the annotation
popupAnnotation.Icon = PdfPopupIcon.Comment
popupAnnotation.Color = PdfRGBColor(Color.get_Red())

# Add the annotation to the collection of the annotations
page.AnnotationsWidget.Add(popupAnnotation)

# Save result to file
doc.SaveToFile("output/PopupAnnotation.pdf")

# Dispose resources
doc.Dispose()
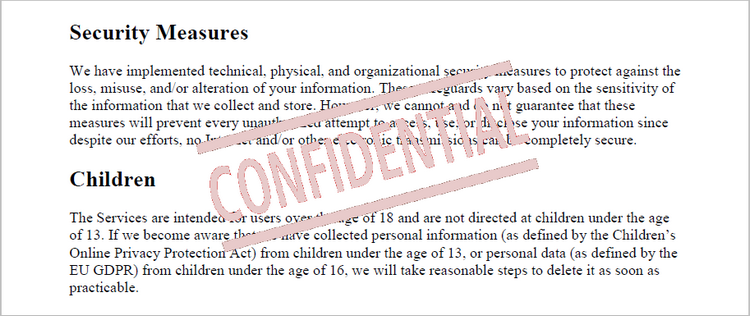
Add a Stamp Annotation to PDF in Python
Stamp annotations in PDF documents are a type of annotation that allow users to add custom "stamps" or symbols to a PDF file. To define the appearance of a stamp annotation, use the PdfTemplate class. Then, create a PdfRubberStampAnnotation object and apply the previously defined template as its appearance. Finally, add the annotation to the PDF document.
The steps to add a stamp annotation to PDF using Python are as follows:
- Create a PdfDocument object.
- Load a PDF file from the specified location.
- Get a page from the document.
- Create a PdfTemplate object and draw an image on the template.
- Create a PdfRubberStampAnnotation object and apply the template as its appearance.
- Add the annotation to the page using PdfPageBase.AnnotationsWidget.Add() method.
- Save the modified document to a different PDF file.
- Python
from spire.pdf.common import *
from spire.pdf import *

# Create a PdfDocument object
doc = PdfDocument()

# Load a PDF document
doc.LoadFromFile("C:\\Users\\Administrator\\Desktop\\Input.pdf")

# Get a specific page
page = doc.Pages.get_Item(0)

# Load an image file
image = PdfImage.FromFile("C:\\Users\\Administrator\\Desktop\\confidential.png")

# Get the width and height of the image
width = (float)(image.Width)
height = (float)(image.Height)

# Create a PdfTemplate object based on the size of the image
template = PdfTemplate(width, height, True)

# Draw image on the template
template.Graphics.DrawImage(image, 0.0, 0.0, width, height)

# Create a rubber stamp annotation, specifying its location and position
rect = RectangleF((float) (page.ActualSize.Width/2 - width/2), 90.0, width, height)
stamp = PdfRubberStampAnnotation(rect)

# Create a PdfAppearance object
pdfAppearance = PdfAppearance(stamp)

# Set the template as the normal state of the appearance
pdfAppearance.Normal = template

# Apply the appearance to the stamp
stamp.Appearance = pdfAppearance

# Add the stamp annotation to PDF
page.AnnotationsWidget.Add(stamp)

# Save the file
doc.SaveToFile("output/StampAnnotation.pdf")

# Dispose resources
doc.Dispose()
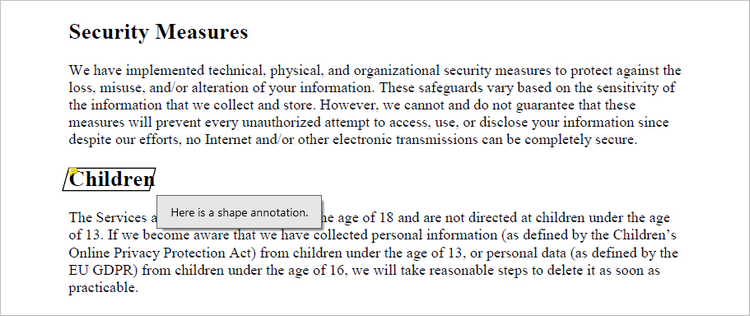
Add a Shape Annotation to PDF in Python
Shape annotations in PDF documents are a type of annotation that allow users to add various geometric shapes to the PDF file. Spire.PDF for Python offers the classes such as PdfPolyLineAnnotation, PdfLineAnnotation, and PdfPolygonAnnotation, allowing developers to add different types of shape annotations to PDF.
The steps to add a shape annotation to PDF using Python are as follows:
- Create a PdfDocument object.
- Load a PDF file from the specified location.
- Get a page from the document.
- Find a specific piece of text within the page using PdfTextFinder class.
- Create a PdfPolyLineAnnotation object based on the coordinate information of the text found.
- Set the annotation content using PdfPolyLineAnnotation.Text property.
- Add the annotation to the page using PdfPageBase.AnnotationsWidget.Add() method.
- Save the modified document to a different PDF file.
- Python
from spire.pdf.common import *
from spire.pdf import *

# Create a PdfDocument object
doc = PdfDocument()

# Load a PDF file
doc.LoadFromFile("C:\\Users\\Administrator\\Desktop\\Input.pdf")

# Get a specific page
page = doc.Pages.get_Item(0)

# Create a PdfTextFinder object based on the page
finder = PdfTextFinder(page)

# Set the find options
finder.Options.Parameter = TextFindParameter.WholeWord
finder.Options.Parameter = TextFindParameter.IgnoreCase

# Find the instances of the specified text
fragments = finder.Find("Children");

# Get the first instance
textFragment = fragments[0]

# Get the text bound
bound = textFragment.Bounds[0]

# Get the coordinates to add annotation
left = bound.Left
top = bound.Top
right = bound.Right
bottom = bound.Bottom

# Create a shape annotation
polyLineAnnotation = PdfPolyLineAnnotation(page, [PointF(left, top), PointF(right, top), PointF(right - 5, bottom), PointF(left - 5, bottom), PointF(left, top)])

# Set the annotation text
polyLineAnnotation.Text = "Here is a shape annotation."

# Add the annotation to the collection of the annotations
page.AnnotationsWidget.Add(polyLineAnnotation)

# Save result to file
doc.SaveToFile("output/ShapeAnnotation.pdf")

# Dispose resources
doc.Dispose()
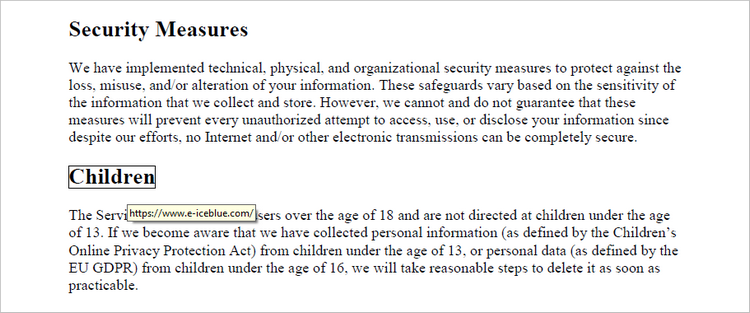
Add a Web Link Annotation to PDF in Python
Web link annotations in PDF documents enable users to embed clickable links to webpages, providing easy access to additional resources or related information online. You can use the PdfTextFinder class to find the specified text in a PDF document, and then create a PdfUriAnnotation object based on that text.
The following are the steps to add a web link annotation to PDF using Python:
- Create a PdfDocument object.
- Load a PDF file from the specified location.
- Get a page from the document.
- Find a specific piece of text within the page using PdfTextFinder class.
- Create a PdfUriAnnotation object based on the bound of the text.
- Add the annotation to the page using PdfPageBase.AnnotationsWidget.Add() method.
- Save the modified document to a different PDF file.
- Python
from spire.pdf.common import *
from spire.pdf import *

# Create a PdfDocument object
doc = PdfDocument()

# Load a PDF file
doc.LoadFromFile("C:\\Users\\Administrator\\Desktop\\Input.pdf")

# Get a specific page
page = doc.Pages.get_Item(0)

# Create a PdfTextFinder object based on the page
finder = PdfTextFinder(page)

# Set the find options
finder.Options.Parameter = TextFindParameter.WholeWord
finder.Options.Parameter = TextFindParameter.IgnoreCase

# Find the instances of the specified text
fragments = finder.Find("Children");

# Get the first instance
textFragment = fragments[0]

# Get the text bound
bound = textFragment.Bounds[0]

# Create a Url annotation
urlAnnotation = PdfUriAnnotation(bound, "https://www.e-iceblue.com/");

# Add the annotation to the collection of the annotations
page.AnnotationsWidget.Add(urlAnnotation)

# Save result to file
doc.SaveToFile("output/WebLinkAnnotation.pdf")

# Dispose resources
doc.Dispose()
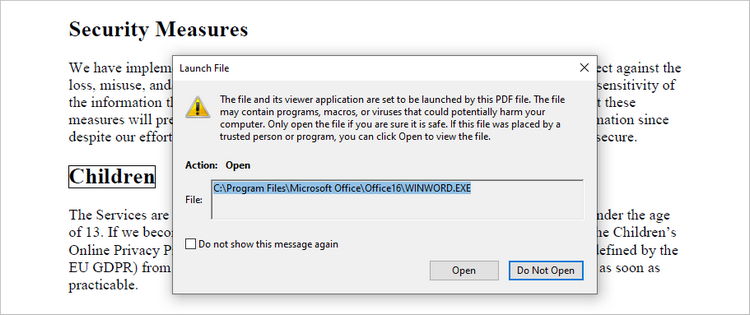
Add a File Link Annotation to PDF in Python
A file link annotation in a PDF document is a type of annotation that allows users to create a clickable link to an external file, such as another PDF, image, or document. Still, you can use the PdfTextFinder class to find the specified text in a PDF document, and then create a PdfFileLinkAnnotation object based on that text.
The following are the steps to add a file link annotation to PDF using Python:
- Create a PdfDocument object.
- Load a PDF file from the specified location.
- Get a page from the document.
- Find a specific piece of text within the page using PdfTextFinder class.
- Create a PdfFileLinkAnnotation object based on the bound of the text.
- Add the annotation to the page using PdfPageBase.AnnotationsWidget.Add() method.
- Save the modified document to a different PDF file.
- Python
from spire.pdf.common import *
from spire.pdf import *

# Create a PdfDocument object
doc = PdfDocument()

# Load a PDF file
doc.LoadFromFile("C:\\Users\\Administrator\\Desktop\\Input.pdf")

# Get a specific page
page = doc.Pages.get_Item(0)

# Create a PdfTextFinder object based on the page
finder = PdfTextFinder(page)

# Set the find options
finder.Options.Parameter = TextFindParameter.WholeWord
finder.Options.Parameter = TextFindParameter.IgnoreCase

# Find the instances of the specified text
fragments = finder.Find("Children");

# Get the first instance
textFragment = fragments[0]

# Get the text bound
bound = textFragment.Bounds[0]

# Create a file link annotation
fileLinkAnnotation = PdfFileLinkAnnotation(bound, "C:\\Users\\Administrator\\Desktop\\Report.docx")

# Add the annotation to the collection of the annotations
page.AnnotationsWidget.Add(fileLinkAnnotation)

# Save result to file
doc.SaveToFile("output/FileLinkAnnotation.pdf")

# Dispose resources
doc.Dispose()
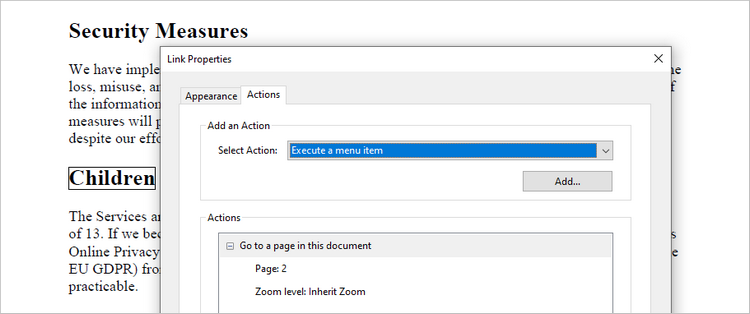
Add a Document Link Annotation to PDF in Python
A document link annotation in a PDF document is a type of annotation that creates a clickable link to a specific location within the same PDF file. To create a document link annotation, you can first use the PdfTextFinder class to identify the target text in the PDF document. Then, a PdfDocumentLinkAnnotation object is instantiated, and its destination property is configured to redirect the user to the specified location in the PDF.
The steps to add a document link annotation to PDF using Python are as follows:
- Create a PdfDocument object.
- Load a PDF file from the specified location.
- Get a page from the document.
- Find a specific piece of text within the page using PdfTextFinder class.
- Create a PdfDocumentLinkAnnotation object based on the bound of the text.
- Set the destination of the annotation using PdfDocumentLinkAnnotation.Destination property.
- Add the annotation to the page using PdfPageBase.AnnotationsWidget.Add() method.
- Save the modified document to a different PDF file.
- Python
from spire.pdf.common import *
from spire.pdf import *

# Create a PdfDocument object
doc = PdfDocument()

# Load a PDF file
doc.LoadFromFile("C:\\Users\\Administrator\\Desktop\\Input.pdf")

# Get a specific page
page = doc.Pages.get_Item(0)

# Create a PdfTextFinder object based on the page
finder = PdfTextFinder(page)

# Set the find options
finder.Options.Parameter = TextFindParameter.WholeWord
finder.Options.Parameter = TextFindParameter.IgnoreCase

# Find the instances of the specified text
fragments = finder.Find("Children");

# Get the first instance
textFragment = fragments[0]

# Get the text bound
bound = textFragment.Bounds[0]

# Create a document link annotation
documentLinkAnnotation = PdfDocumentLinkAnnotation(bound)

# Set the destination of the annotation
documentLinkAnnotation.Destination = PdfDestination(doc.Pages[1]);

# Add the annotation to the collection of the annotations
page.AnnotationsWidget.Add(documentLinkAnnotation)

# Save result to file
doc.SaveToFile("output/DocumentLinkAnnotation.pdf")

# Dispose resources
doc.Dispose()
Apply for a Temporary License
If you'd like to remove the evaluation message from the generated documents, or to get rid of the function limitations, please request a 30-day trial license for yourself.
