
Knowledgebase (2370)
Children categories
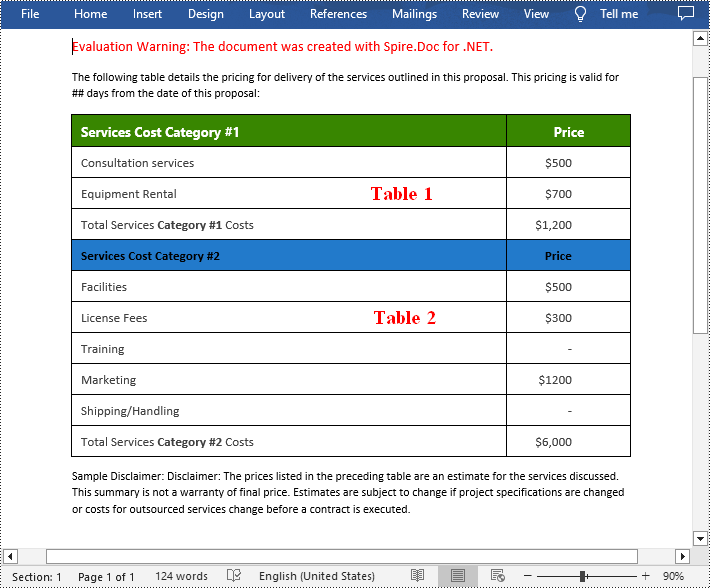
Tables in Word documents allow users to organize data in a clear and structured manner. However, as documents grow in complexity, the need to adjust table structures often arises. Whether you need to combine multiple tables for a comprehensive view or divide a large table for better readability, mastering the art of merging and splitting tables in Word can significantly improve the presentation of your data. In this article, you will learn how to merge or split tables in Word in C# using Spire.Doc for .NET.
Install Spire.Doc for .NET
To begin with, you need to add the DLL files included in the Spire.Doc for.NET package as references in your .NET project. The DLL files can be either downloaded from this link or installed via NuGet.
PM> Install-Package Spire.Doc
Merge Tables in Word in C#
With Spire.Doc for .NET, you can combine two or more tables into one by copying all rows from other tables to the target table and then deleting the other tables. The following are the detailed steps.
- Create a Document instance.
- Load a Word document using Document.LoadFromFile() method.
- Get a specified section using Document.Sections[] property.
- Get two tables in the section using section.Tables[] property.
- Iterate through all rows in the second table and copy them using Table.Rows[].Clone() method.
- Add the rows of the second table to the first table using Table.Rows.Add() method.
- Save the result document using Document.SaveToFile() method.
- C#
using Spire.Doc;

namespace CombineTables
{
    class Program
    {
        static void Main(string[] args)
        {
            //Create a Document instance
            Document doc = new Document();

            //Load a Word document
            doc.LoadFromFile("Cost.docx");

            //Get the first section
            Section section = doc.Sections[0];

            //Get the first and second table in the section
            Table table1 = section.Tables[0] as Table;
            Table table2 = section.Tables[1] as Table;

            //Add the rows of table2 to table1
            for (int i = 0; i < table2.Rows.Count; i++)
            {
                table1.Rows.Add(table2.Rows[i].Clone());
            }

            //Remove the table2
            section.Tables.Remove(table2);

            //Save the result document
            doc.SaveToFile("CombineTables.docx", FileFormat.Docx);
        }
    }
}
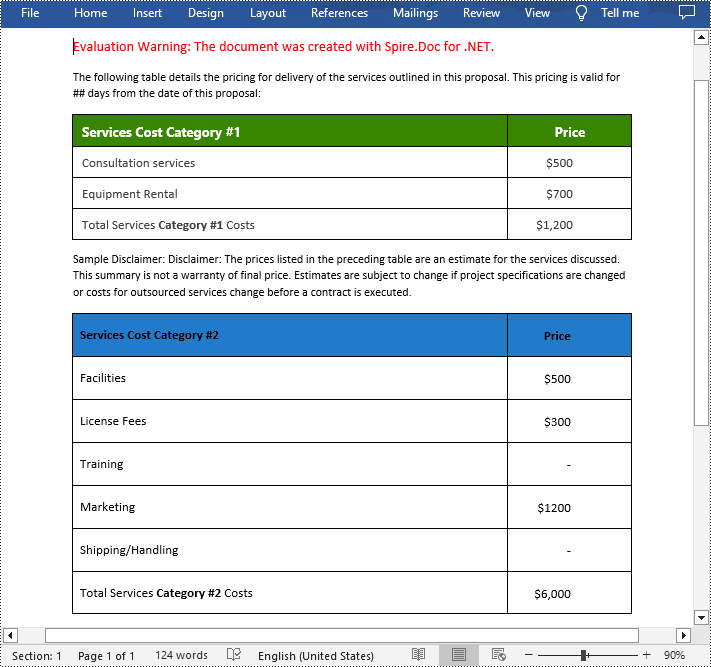
Split Tables in Word in C#
To split a table into two or more tables, you need to create a new table, then copy the specified rows from the original table to the new table, and then delete those rows from the original table. The following are the detailed steps.
- Create a Document instance.
- Load a Word document using Document.LoadFromFile() method.
- Get a specified section using Document.Sections[] property.
- Get a specified table in the section using section.Tables[] property.
- Specify the row index where the table will be split.
- Create a new instance of the Table class.
- Iterate through the specified rows in the original table and copy them using Table.Rows[].Clone() method.
- Add the specified rows to the new table using Table.Rows.Add() method.
- Iterate through the copied rows and remove each row from the original table using Table.Rows.RemoveAt() method.
- Add the new table to the section using Section.Tables.Add() method.
- Save the result document using Document.SaveToFile() method.
- C#
using Spire.Doc;

namespace SplitWordTable
{
    class Program
    {
        static void Main(string[] args)
        {
            //Create a Document instance
            Document doc = new Document();

            //Load a Word document
            doc.LoadFromFile("CombineTables.docx");

            //Get the first section
            Section section = doc.Sections[0];

            //Get the first table in the section
            Table table = section.Tables[0] as Table;

            //Specify to split the table from the fifth row
            int splitIndex = 4;

            //Create a new table
            Table newTable = new Table(section.Document);

            //Adds rows (from the 5th to the last row) to the new table
            for (int i = splitIndex; i < table.Rows.Count; i++)
            {
                newTable.Rows.Add(table.Rows[i].Clone());
            }

            //Delete rows from the original table
            for (int i = table.Rows.Count - 1; i >= splitIndex; i--)
            {
                table.Rows.RemoveAt(i);
            }

            //Add the new table to the section
            section.Tables.Add(newTable);

            //Save the result document
            doc.SaveToFile("SplitTable.docx", FileFormat.Docx);
        }
    }
}
Apply for a Temporary License
If you'd like to remove the evaluation message from the generated documents, or to get rid of the function limitations, please request a 30-day trial license for yourself.
Python: Remove Images from Slides and Slide Masters in PowerPoint
2024-07-31 00:55:55 Written by KoohjiRemoving images from slides and slide masters can be essential for many reasons, such as decluttering slides, maintaining uniformity, preparing templates, or modifying a template. Using Python, you can easily handle this task in seconds.
This guide will demonstrate removing images from slides and slide masters in PowerPoint documents in Python with Spire.Presentation for Python. Check this page and make a clean presentation.
- Remove Images from Slides
- Remove Images from Slide Masters
- Remove Specified Images from Slides
- Remove Specified Images from Slide Masters
Install Spire.Presentation for Python
This scenario requires Spire.Presentation for Python and plum-dispatch v1.7.4. They can be easily installed in your Windows through the following pip command.
pip install Spire.Presentation
If you are unsure how to install it, please refer to this tutorial: How to Install Spire. Presentation for Python on Windows.
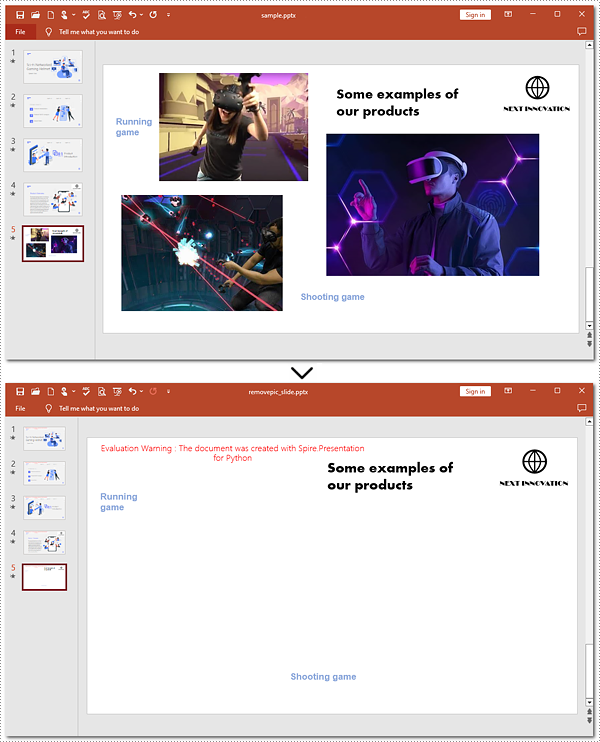
Remove Images from Slides of PowerPoint in Python
Removing images from PowerPoint slides can be efficiently managed using Python. The Presentation.Shapes.RemoveAt() method published by Spire. Presentation for Python allows users to delete pictures from a PowerPoint presentation without effort. The following instructions will guide you through the whole process.
Steps to remove images from a slide:
- Create an object for the Presentation class.
- Load the target PowerPoint document to be operated with the Presentation.LoadFromFile() method.
- Get the slide that you want to modify using the Presentation.Slides[] property.
- Loop through shapes on the slide.
- Determine if these shapes are images.
- Remove images from the slide using the Presentation.Shapes.RemoveAt() method.
- Save the resulting PowerPoint document with the Presentation.SaveToFile() method.
Here's the code example for reference:
- Python
from spire.presentation.common import *
from spire.presentation import *


# Create a Presentation object
ppt = Presentation()
# Load the PowerPoint document to be modified from the disk
ppt.LoadFromFile("sample.pptx")

# Get the fifth slide
slide = ppt.Slides[4]

# Loop through shapes on the slide
for i in range(slide.Shapes.Count - 1, -1, -1):
    # Check if those shapes are images
    if isinstance(slide.Shapes[i], SlidePicture):
        # Remove pictures on the fifth slide
        slide.Shapes.RemoveAt(i)


# Save to file
ppt.SaveToFile("removepic_slide.pptx", FileFormat.Pptx2013)

# Release the resources
ppt.Dispose()
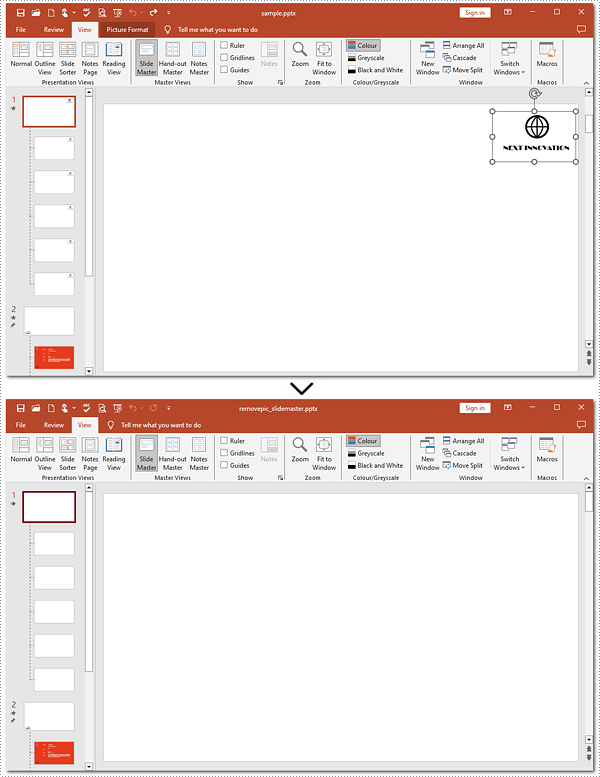
Remove Images from Slide Masters of PowerPoint Using Python
Removing images from slide masters is basically the same as doing that from a slide. To apply this action, you can use Presentation.Shapes.RemoveAt() method provided by Spire.Presentation for Python. Check out the steps below and make a nice and clean presentation.
Steps to remove images from Slide Masters:
- Instantiate a Presentation object.
- Read the PowerPoint document from disk using the Presentation.LoadFromFile() method.
- Get the second Slide Master with the Presentation.Masters[] property.
- Iterate through images on the second Slide Master.
- Confirm whether these shapes are images.
- Remove images from the second Slide Master using the Shapes.RemoveAt() method.
- Save the modified document with the Presentation.SaveToFile() method.
Here's the code example:
- Python
from spire.presentation.common import *
from spire.presentation import *


# Create an instance of the Presentation class
pre = Presentation()
# Open the sample PowerPoint document from the disk
pre.LoadFromFile("sample.pptx")

# Retrieve the first Slide Master
master = pre.Masters[0]

# Loop through shapes on the slide master
for i in range(master.Shapes.Count - 1, -1, -1):
    # Check whether these shapes are images
    if isinstance(master.Shapes[i], SlidePicture):
        # Remove images on the first slide master
        master.Shapes.RemoveAt(i)


# Save the generated file
pre.SaveToFile("removepic_slidemaster.pptx", FileFormat.Pptx2013)

# Release the resources
pre.Dispose()
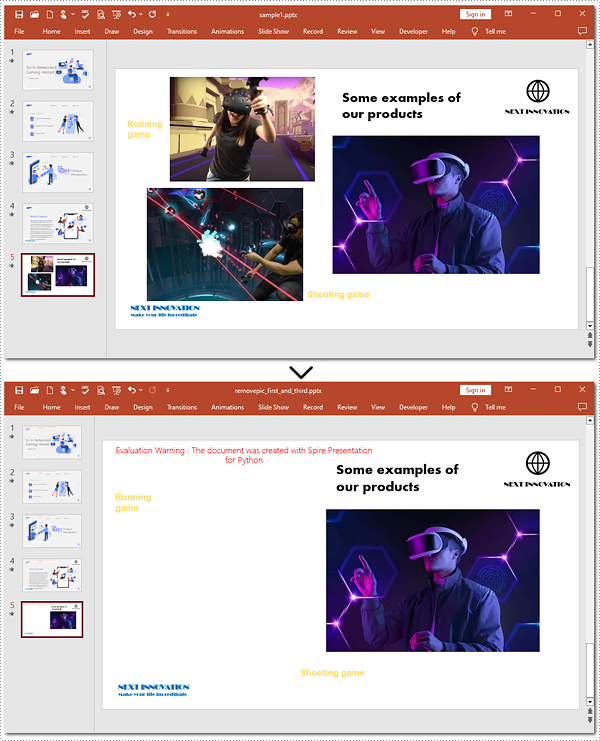
Delete Specified Images from Slides with Python
When working with PowerPoint presentations, you may need to remove specific images from your slides to refine your content. The guide below will walk you through targeting and removing specified images from a slide.
Steps to delete specified images:
- Instantiate an object of the Presentation class.
- Load the target file from the disk with the Presentation.LoadFromFile() method.
- Create a list to store image indexes.
- Get the 5th slide using the Presentation.Slides[] property.
- Loop through shapes on the slide.
- Verify whether these shapes are images.
- Find the 1st and 3rd pictures.
- Delete these two pictures by the Shapes.RemoveAt() method.
- Save the generated presentation using the Presentation.SaveToFile() method.
Below is the code example to refer to:
- Python
from spire.presentation.common import *
from spire.presentation import *


# Create a Presentation object
ppt = Presentation()
# Load the PowerPoint document from the disk
ppt.LoadFromFile("sample1.pptx")

# Create a list to keep track of image indexes to delete
indexes = []

# Get the fifth slide
slide = ppt.Slides[4]

# Iterate through shapes on the slide
image_index = 0
for i in range(slide.Shapes.Count - 1, -1, -1):
    # Check if shapes are pictures
    if isinstance(slide.Shapes[i], SlidePicture):
        image_index += 1
        # Record indexes of the first and third images
        if image_index in (1, 3):
            indexes.append(i)


# Remove the first and third images
for index in indexes:
    slide.Shapes.RemoveAt(index)

# Save to file
ppt.SaveToFile("removepic_first_and_third.pptx", FileFormat.Pptx2013)

# Release the resources
ppt.Dispose()
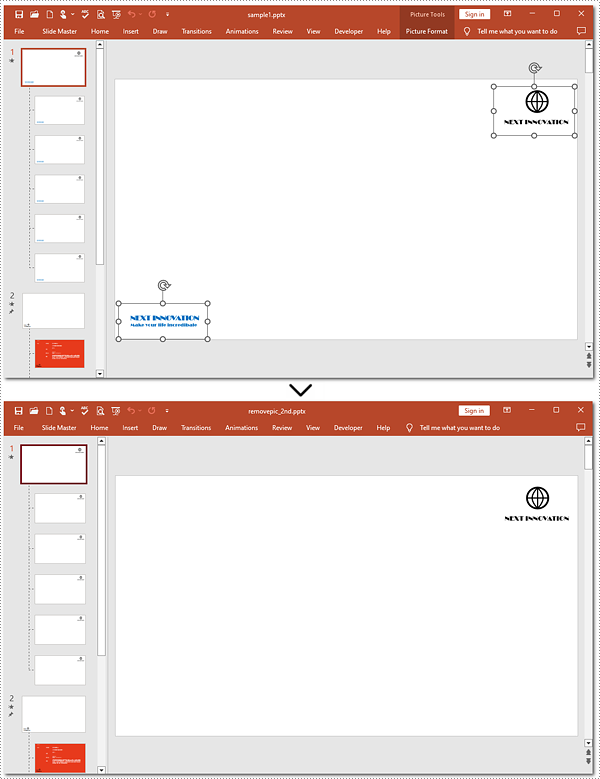
Delete Specified Images from Slide Masters in Python
Shapes.RemoveAt() method also supports removing a specified image from a slide master. To complete the task, you need to target the picture to be deleted. Refer to the detailed steps and a code example to finish the process.
Steps to remove a specified picture from a slide master:
- Create a new object for the Presentation class.
- Read the document from the disk using the Presentation.LoadFromFlie() method.
- Retrieve the 1st slide master by the Presentation.Masters[] property.
- Iterate through shapes on the slide master.
- Check if these shapes are images.
- Remove the 2nd picture with the Shapes.RemoveAt() method.
- Save the resulting presentation to the disk using the Presentation.SaveToFile() method.
Here is the code example:
- Python
from spire.presentation.common import *
from spire.presentation import *

# Create an instance of the Presentation class
pre = Presentation()
# Open the sample PowerPoint document from the disk
pre.LoadFromFile("sample1.pptx")

# Retrieve the first Slide Master
master = pre.Masters[0]

# Loop through the shapes in reverse order
for i in range(master.Shapes.Count - 1, -1, -1):
    # Check whether shapes are images
    if isinstance(master.Shapes[i], SlidePicture):
        # Remove the second image from the slide master
        if i == 1:
            master.Shapes.RemoveAt(i)
            break


# Save the generated file
pre.SaveToFile("removepic_2nd.pptx", FileFormat.Pptx2013)

# Release the resources
pre.Dispose()
Apply for a Temporary License
If you'd like to remove the evaluation message from the generated documents, or to get rid of the function limitations, please request a 30-day trial license for yourself.
Converting XLS files to various formats is necessary for data management and presentation. ODS, XPS, PostScript, and PDF/A-1b offer unique advantages and are suitable for different scenarios.
ODS is widely used for compatibility with many office suites. XPS preserves document fidelity and is ideal for sharing and archiving. PostScript is a versatile page description language often used for printing and graphic design. PDF/A-1b ensures long-term archiving by complying with strict preservation standards.
This guide will illustrate how to convert Excel to ODS, XPS, PostScript, and PDF/A-1b with Python using Spire.XLS for Python, leveraging their specific strengths to meet diverse needs.
Install Spire.XLS for Python
This scenario requires Spire.XLS for Python and plum-dispatch v1.7.4. They can be easily installed in your Windows through the following pip command.
pip install Spire.XLS
If you are unsure how to install it, please refer to this tutorial: How to Install Spire.XLS for Python on Windows.
Convert Excel to ODS, XPS, and PostScript with Python
To convert Excel to ODS, XPS, and PostScript documents, you can utilize Workbook.SaveToFile() method. It supports converting CSV to Excel and PDF, Excel to PDF and XLSX, etc. By using this method provided by Spire.XLS for Python, you can seamlessly transform your documents into these formats while maintaining accuracy without data loss. Read the following steps to learn more:
Steps to convert Excel to ODS, XPS, and PostScript:
- Create a new Workbook object.
- Import the file to be converted from the disk using Workbook.LoadFromFile() method.
- Convert it to ODS, XPS, or PostScript with Workbook.SaveToFile() method.
Here is the code example for reference:
- Python
from spire.xls import *
from spire.xls.common import *

# Create a Workbook object
workbook = Workbook()

# Load the file from the disk
workbook.LoadFromFile("sample.xlsx")

# Save the document to an ODS file
workbook.SaveToFile("to_ods.ods", FileFormat.ODS)
# Save the document as an XPS file
workbook.SaveToFile("to_xps.xps", FileFormat.XPS)
# Save the document as a PostScript file
workbook.SaveToFile("to_postscript.ps", FileFormat.PostScript)

workbook.Dispose()
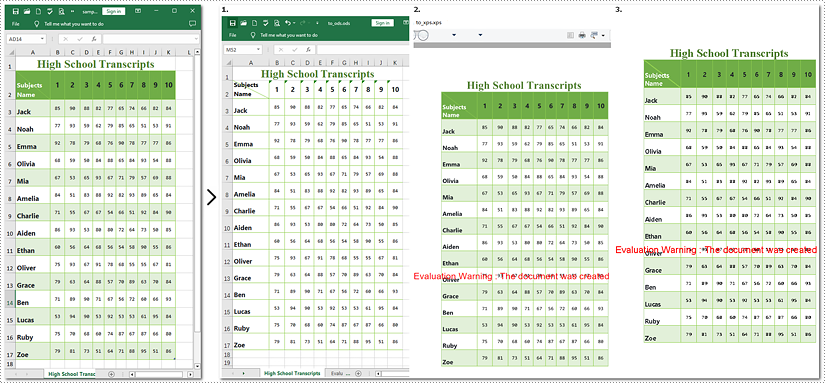
Note: Images 1, 2, and 3 show the results of converting Excel files to ODS, XPS, and PostScript formats, respectively.
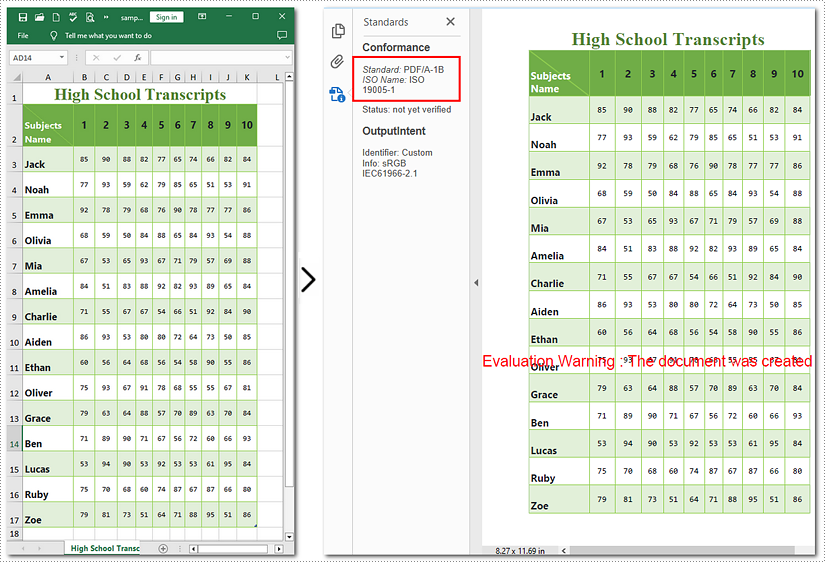
How to Convert Excel Documents to PDF/A-1b Format
If you need to convert Excel to PDF/A-1b Format with Python, call Workbook.SaveToFile will help you. The steps to transform Excel documents to PDF/A-1b are similar to those above, except the former involves an additional step. This tutorial will guide you through the process with detailed steps and a code example.
Steps to convert Excel to PDF/A-1b
- Instantiate a new Workbook object.
- Read the Excel document from the disk using Workbook.LoadFromFile() method.
- Set the PDF conformance level to PDF/A-1b.
- Save the generated document as PDF with Workbook.SaveToFile() method.
Here is the code example for you:
- Python
from spire.xls import *
from spire.xls.common import *

# Create a Workbook object
workbook = Workbook()

# Open the file from the disk
workbook.LoadFromFile("sample.xlsx")

# Set the PDF conformance to PDF/A-1b
workbook.ConverterSetting.PdfConformanceLevel = PdfConformanceLevel.Pdf_A1B
# Convert the Excel document to PDF/A-1b
workbook.SaveToFile("to_pdfa1b", FileFormat.PDF)

workbook.Dispose()
Apply for a Temporary License
If you'd like to remove the evaluation message from the generated documents, or to get rid of the function limitations, please request a 30-day trial license for yourself.
