
Knowledgebase (2370)
Children categories
Python: Get Coordinates of the Specified Text or Image in PDF
2024-05-21 01:58:08 Written by AdministratorRetrieving the coordinates of text or images within a PDF document can quickly locate specific elements, which is valuable for extracting content from PDFs. This capability also enables adding annotations, marks, or stamps to the desired locations in a PDF, allowing for more advanced document processing and manipulation.
In this article, you will learn how to get coordinates of the specified text or image in a PDF document using Spire.PDF for Python.
- Get Coordinates of the Specified Text in PDF in Python
- Get Coordinates of the Specified Image in PDF in Python
Install Spire.PDF for Python
This scenario requires Spire.PDF for Python and plum-dispatch v1.7.4. They can be easily installed in your Windows through the following pip command.
pip install Spire.PDF
If you are unsure how to install, please refer to this tutorial: How to Install Spire.PDF for Python on Windows
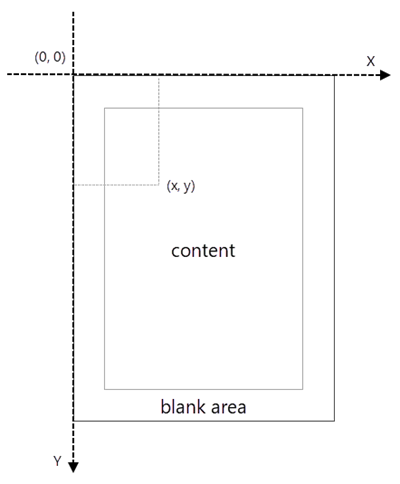
Coordinate System in Spire.PDF
When using Spire.PDF to process an existing PDF document, the origin of the coordinate system is located at the top left corner of the page. The X-axis extends horizontally from the origin to the right, and the Y-axis extends vertically downward from the origin (shown as below).
Get Coordinates of the Specified Text in PDF in Python
To find the coordinates of a specific piece of text within a PDF document, you must first use the PdfTextFinder.Find() method to locate all instances of the target text on a particular page. Once you have found these instances, you can then access the PdfTextFragment.Positions property to retrieve the precise (X, Y) coordinates for each instance of the text.
The steps to get coordinates of the specified text in PDF are as follows.
- Create a PdfDocument object.
- Load a PDF document from a specified path.
- Get a specific page from the document.
- Create a PdfTextFinder object.
- Specify find options through PdfTextFinder.Options property.
- Search for a string within the page using PdfTextFinder.Find() method.
- Get a specific instance of the search results.
- Get X and Y coordinates of the text through PdfTextFragment.Positions[0].X and PdfTextFragment.Positions[0].Y properties.
- Python
from spire.pdf.common import *
from spire.pdf import *
# Create a PdfDocument object
doc = PdfDocument()
# Load a PDF document
doc.LoadFromFile("C:\\Users\\Administrator\\Desktop\\Privacy Policy.pdf")
# Get a specific page
page = doc.Pages.get_Item(0)
# Create a PdfTextFinder object
textFinder = PdfTextFinder(page)
# Specify find options
findOptions = PdfTextFindOptions()
findOptions.Parameter = TextFindParameter.IgnoreCase
findOptions.Parameter = TextFindParameter.WholeWord
textFinder.Options = findOptions
# Search for the string "PRIVACY POLICY" within the page
findResults = textFinder.Find("PRIVACY POLICY")
# Get the first instance of the results
result = findResults[0]
# Get X/Y coordinates of the found text
x = int(result.Positions[0].X)
y = int(result.Positions[0].Y)
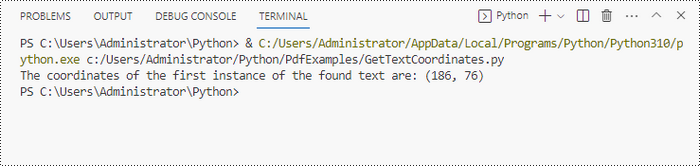
print("The coordinates of the first instance of the found text are:", (x, y))
# Dispose resources
doc.Dispose()
Get Coordinates of the Specified Image in PDF in Python
Spire.PDF for Python provides the PdfImageHelper class, which allows users to extract image details from a specific page within a PDF file. By doing so, you can leverage the PdfImageInfo.Bounds property to retrieve the (X, Y) coordinates of an individual image.
The steps to get coordinates of the specified image in PDF are as follows.
- Create a PdfDocument object.
- Load a PDF document from a specified path.
- Get a specific page from the document.
- Create a PdfImageHelper object.
- Get the image information from the page using PdfImageHelper.GetImagesInfo() method.
- Get X and Y coordinates of a specific image through PdfImageInfo.Bounds property.
- Python
from spire.pdf.common import *
from spire.pdf import *
# Create a PdfDocument object
doc = PdfDocument()
# Load a PDF document
doc.LoadFromFile("C:\\Users\\Administrator\\Desktop\\Privacy Policy.pdf")
# Get a specific page
page = doc.Pages.get_Item(0)
# Create a PdfImageHelper object
imageHelper = PdfImageHelper()
# Get image information from the page
imageInformation = imageHelper.GetImagesInfo(page)
# Get X/Y coordinates of a specific image
x = int(imageInformation[0].Bounds.X)
y = int(imageInformation[0].Bounds.Y)
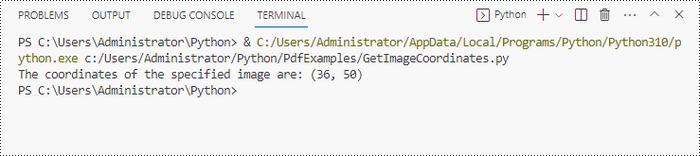
print("The coordinates of the specified image are:", (x, y))
# Dispose resources
doc.Dispose()
Apply for a Temporary License
If you'd like to remove the evaluation message from the generated documents, or to get rid of the function limitations, please request a 30-day trial license for yourself.

Large PDF files can slow down email delivery, break upload limits, and consume unnecessary storage. This is especially common in PDFs that include high-resolution scans, images, or embedded fonts. If you're working with Python and need to automate PDF compression without compromising quality, this guide will help you get started.
In this tutorial, you’ll learn how to compress PDF files in Python using the Spire.PDF for Python library. We'll cover several effective techniques, including image recompression, font optimization, metadata removal, and batch compression—perfect for web, backend, or desktop applications.
Table of Contents
- Common Scenarios Requiring PDF Compression
- Prerequisites
- Practical PDF Compression Techniques in Python
- Summary
Common Scenarios Requiring PDF Compression
Reducing the size of PDF documents is often essential in the following situations:
| Use Case | Benefit |
|---|---|
| Email Attachments | Avoid size limits and improve deliverability |
| Web Uploads | Reduce upload time and server storage |
| Mobile Access | Faster loading and less data consumption |
| Cloud Archiving | Lower storage cost for backups |
| App Submissions | Meet strict file size limits |
Prerequisites
Before you begin compressing PDFs with Python, make sure the following requirements are met:
- Python 3.7 or above
Ensure that Python (version 3.7 or later) is installed on your system. You can download it from the official Python website. - Spire.PDF for Python
This is a powerful PDF library that allows you to programmatically create, manipulate, and compress PDF documents—without relying on external software like Adobe Acrobat.
To install Spire.PDF for Python, run the following command in your terminal or command prompt:
pip install spire.pdf
Need help with the installation? See our step-by-step guide: How to Install Spire.PDF for Python on Windows_
Practical PDF Compression Techniques in Python
In this section, you'll explore five practical techniques for reducing PDF file size:
- Font compression and unembedding
- Image compression
- Full-document compression
- Metadata and attachment removal
- Batch compressing multiple PDFs
Font Compression and Unembedding
Fonts embedded in a PDF—especially those from large font libraries or multilingual character sets—can significantly increase the file size. Spire.PDF allows you to:
- Compress embedded fonts to minimize space usage
- Unembed fonts that are not essential for rendering
from spire.pdf import *

# Create a PdfCompressor object and load the PDF file
compressor = PdfCompressor("C:/Users/Administrator/Documents/Example.pdf")

# Get the OptimizationOptions object
compression_options = compressor.OptimizationOptions

# Enable font compression
compression_options.SetIsCompressFonts(True)

# Optional: unembed fonts to further reduce size
# compression_options.SetIsUnembedFonts(True)

# Compress the PDF and save the result
compressor.CompressToFile("CompressFonts.pdf")
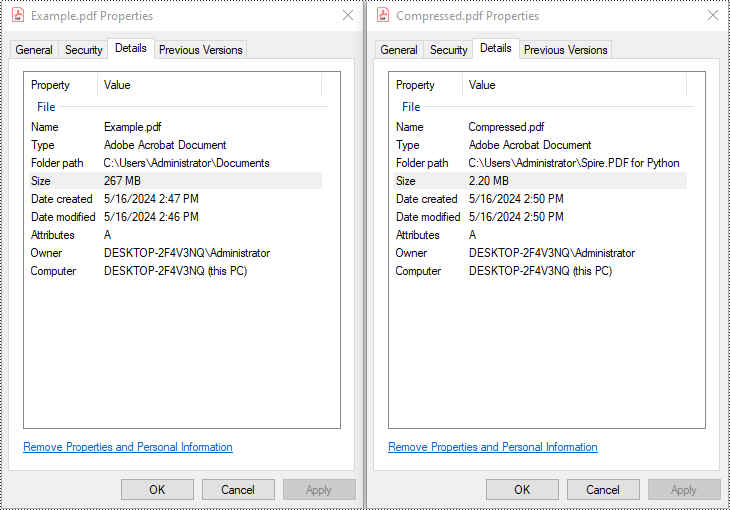
Image Compression
Spire.PDF lets you reduce the size of all images in a PDF by creating a PdfCompressor instance, enabling the image resizing and compression options, and specifying the image quality level. This approach applies compression uniformly across the entire document.
from spire.pdf import *

# Create a PdfCompressor object and load the PDF file
compressor = PdfCompressor("C:/Users/Administrator/Documents/Example.pdf")

# Get the OptimizationOptions object
compression_options = compressor.OptimizationOptions

# Enable image resizing
compression_options.SetResizeImages(True)

# Enable image compression
compression_options.SetIsCompressImage(True)

# Set image quality (available options: Low, Medium, High)
compression_options.SetImageQuality(ImageQuality.Medium)

# Compress and save the PDF file
compressor.CompressToFile("Compressed.pdf")
Full Document Compression
Beyond optimizing individual elements, Spire.PDF also supports full-document compression. By adjusting the document's CompressionLevel and disabling incremental updates, you can apply comprehensive optimization to reduce overall file size.
from spire.pdf import *

# Create a PdfDocument object
pdf = PdfDocument()

# Load the PDF file
pdf.LoadFromFile("C:/Users/Administrator/Documents/Example.pdf")

# Disable incremental update
pdf.FileInfo.IncrementalUpdate = False

# Set the compression level to the highest
pdf.CompressionLevel = PdfCompressionLevel.Best

# Save the optimized PDF
pdf.SaveToFile("OptimizeDocumentContent.pdf")
pdf.Close()
Removing Metadata and Attachments
Cleaning up metadata and removing embedded attachments is a quick way to reduce PDF size. Spire.PDF lets you remove unnecessary information like author/title fields and attached files:
from spire.pdf import *

# Load the PDF
pdf = PdfDocument()
pdf.LoadFromFile("Example.pdf")

# Disable the incremental update
pdf.FileInfo.IncrementalUpdate = False

# Remove metadata
pdf.DocumentInformation.Author = ""
pdf.DocumentInformation.Title = ""

# Remove attachments
pdf.Attachments.Clear()

# Save the optimized PDF
pdf.SaveToFile("Cleaned.pdf")
pdf.Close()
Batch Compressing Multiple PDFs
You can compress multiple PDFs at once by looping through files in a folder and applying the same optimization settings:
import os
from spire.pdf import *

# Folder containing the PDF files to compress
input_folder = "C:/PDFs/"

# Loop through all files in the input folder
for file in os.listdir(input_folder):
    # Process only PDF files
    if file.endswith(".pdf"):
        # Create a PdfCompressor instance and load the file
        compressor = PdfCompressor(os.path.join(input_folder, file))

        # Access compression options
        opt = compressor.OptimizationOptions
        # Enable image resizing
        opt.SetResizeImages(True)
        # Enable image compression
        opt.SetIsCompressImage(True)
        # Set image quality to medium (options: Low, Medium, High)
        opt.SetImageQuality(ImageQuality.Medium)

        # Define output file path with "compressed_" prefix
        output_path = os.path.join(input_folder, "compressed_" + file)
        # Perform compression and save the result
        compressor.CompressToFile(output_path)
Summary
Reducing the size of PDF files is a practical step toward faster workflows, especially when dealing with email sharing, web uploads, and large-scale archiving. With Spire.PDF for Python, developers can implement smart compression techniques—ranging from optimizing images and fonts to stripping unnecessary elements like metadata and attachments.
Whether you're building automation scripts, integrating PDF handling into backend services, or preparing documents for long-term storage, these tools give you the flexibility to control file size without losing visual quality. By combining multiple strategies—like full-document compression and batch processing—you can keep your PDFs lightweight, efficient, and ready for distribution across platforms.
Want to explore more ways to work with PDFs in Python? Explore the full range of Spire.PDF for Python tutorials to learn how to merge/split PDFs, convert PDF to PDF/A, add password protection, and more.
Frequently Asked Questions
Q1: Can I use Spire.PDF for Python on Linux or macOS?
A1: Yes. Spire.PDF for Python is compatible with Windows, Linux, and macOS.
Q2: Is Spire.PDF for Python free?
A2: Spire.PDF for Python offers a free version suitable for small-scale and non-commercial use. For full functionality, including unrestricted use in commercial applications, a commercial version is available. You can request a free 30-day trial license to explore all its premium features.
Q3: Will compressing the PDF reduce the visual quality?
A3: Not necessarily. Spire.PDF’s compression methods are designed to preserve visual fidelity while optimizing file size. You can fine-tune image quality or leave it to the default settings.
Python: Add, Read, and Remove Built-in Document Properties in Word Documents
2024-05-16 01:17:49 Written by KoohjiWord documents often contain metadata known as document properties, which include information like title, author, subject, and keywords. Manipulating these properties is invaluable for maintaining organized documentation, enhancing searchability, and ensuring proper attribution in collaborative environments. With Spire.Doc for Python, developers can automate the tasks of adding, reading, and removing document properties in Word documents to streamline document management workflows and enable the integration of these processes into larger automated systems. This article provides detailed steps and code examples that demonstrate how to utilize Spire.Doc for Python to effectively manage document properties within Word files.
- Add Built-in Document Properties to Word Documents with Python
- Read Built-in Document Properties from Word Documents with Python
- Remove Built-in Document Properties from Word Documents with Python
Install Spire.Doc for Python
This scenario requires Spire.Doc for Python and plum-dispatch v1.7.4. They can be easily installed in your Windows through the following pip commands.
pip install Spire.Doc
If you are unsure how to install, please refer to: How to Install Spire.Doc for Python on Windows
Add Built-in Document Properties to Word Documents with Python
Spire.Doc for Python provides developers with the Document.BuiltinDocumentProperties property to access the built-in properties of Word documents. The value of these properties can be set using the corresponding properties under the BuiltinDocumentProperties class.
The following steps show how to add the main built-in properties in Word documents:
- Create an object of Document class.
- Load a Word document using Document.LoadFromFile() method.
- Get the built-in properties through Document.BuiltinDocumentProperties property.
- Add values to the properties with properties under BuiltinDocumentProperties property.
- Save the document using Document.SaveToFile() method.
- Python
from spire.doc import *
from spire.doc.common import *
# Create an object of Document
doc = Document()
# Load a Word document
doc.LoadFromFile("Sample.docx")
# Set the built-in property
builtinProperty = doc.BuiltinDocumentProperties
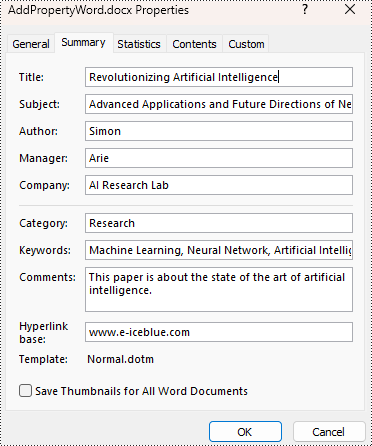
builtinProperty.Title = "Revolutionizing Artificial Intelligence"
builtinProperty.Subject = "Advanced Applications and Future Directions of Neural Networks in Artificial Intelligence"
builtinProperty.Author = "Simon"
builtinProperty.Manager = "Arie"
builtinProperty.Company = "AI Research Lab"
builtinProperty.Category = "Research"
builtinProperty.Keywords = "Machine Learning, Neural Network, Artificial Intelligence"
builtinProperty.Comments = "This paper is about the state of the art of artificial intelligence."
builtinProperty.HyperLinkBase = "www.e-iceblue.com"
# Save the document
doc.SaveToFile("output/AddPropertyWord.docx", FileFormat.Docx2019)
doc.Close()
Read Built-in Document Properties from Word Documents with Python
Besides adding values, the properties under the BuiltinDocumentProperties class also empower developers to read existing built-in properties of Word documents. This enables various functionalities like document search, information extraction, and document analysis.
The detailed steps for reading document built-in properties using Spire.Doc for Python are as follows:
- Create an object of Document class.
- Load a Word document using Document.LoadFromFile() method.
- Get the built-in properties of Document using Document.BuiltinDocumentProperties property.
- Get the value of the properties using properties under BuiltinDocumentProperties class.
- Output the built-in properties of the document.
- Python
from spire.doc import *
from spire.doc.common import *
# Create an object of Document
doc = Document()
# Load a Word document
doc.LoadFromFile("output/AddPropertyWord.docx")
# Get the built-in properties of the document
builtinProperties = doc.BuiltinDocumentProperties
# Get the value of the built-in properties
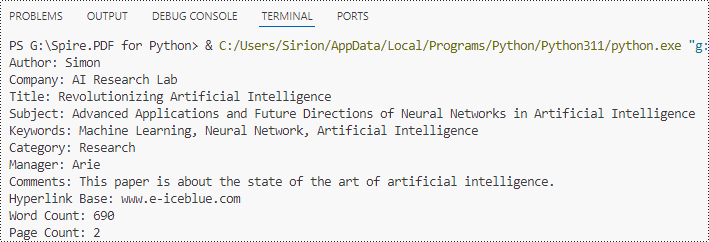
properties = [
"Author: " + builtinProperties.Author,
"Company: " + builtinProperties.Company,
"Title: " + builtinProperties.Title,
"Subject: " + builtinProperties.Subject,
"Keywords: " + builtinProperties.Keywords,
"Category: " + builtinProperties.Category,
"Manager: " + builtinProperties.Manager,
"Comments: " + builtinProperties.Comments,
"Hyperlink Base: " + builtinProperties.HyperLinkBase,
"Word Count: " + str(builtinProperties.WordCount),
"Page Count: " + str(builtinProperties.PageCount),
]
# Output the built-in properties
for i in range(0, len(properties)):
print(properties[i])
doc.Close()
Remove Built-in Document Properties from Word Documents with Python
The built-in document properties of a Word document that contain specific content can be removed by setting them to null values. This protects private information while retaining necessary details.
The detailed steps for removing specific built-in document properties from Word documents are as follows:
- Create an object of Document class.
- Load a Word document using Document.LoadFromFile() method.
- Get the built-in properties of the document through Document.BuiltinDocumentProperties property.
- Set the value of some properties to none to remove the properties with properties under BuiltinDocumentProperties class.
- Save the document using Document.SaveToFile() method.
- Python
from spire.doc import *
from spire.doc.common import *
# Create an instance of the Document class
doc = Document()
# Load the Word document
doc.LoadFromFile("output/AddPropertyWord.docx")
# Get the document's built-in properties
builtinProperties = doc.BuiltinDocumentProperties
# Remove the built-in properties by setting them to None
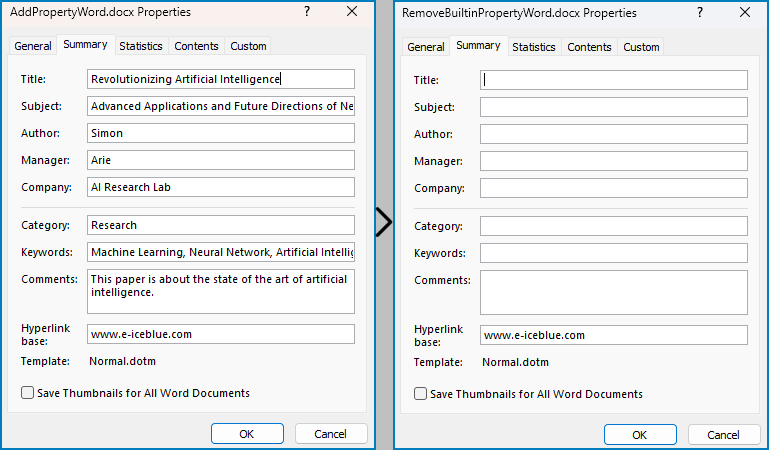
builtinProperties.Author = None
builtinProperties.Company = None
builtinProperties.Title = None
builtinProperties.Subject = None
builtinProperties.Keywords = None
builtinProperties.Comments = None
builtinProperties.Category = None
builtinProperties.Manager = None
# Save the document
doc.SaveToFile("output/RemovePropertyWord.docx", FileFormat.Docx)
doc.Close()
Apply for a Temporary License
If you'd like to remove the evaluation message from the generated documents, or to get rid of the function limitations, please request a 30-day trial license for yourself.
