
Knowledgebase (2370)
Children categories
OCR (Optical Character Recognition) technology is the primary method to extract text from images. Spire.OCR for Java provides developers with a quick and efficient solution to scan and extract text from images in Java projects. This article will guide you on how to use Spire.OCR for Java to recognize and extract text from images in Java projects.
Obtaining Spire.OCR for Java
To scan and recognize text in images using Spire.OCR for Java, you need to first import the Spire.OCR.jar file along with other relevant dependencies into your Java project.
You can download Spire.OCR for Java from our website. If you are using Maven, you can add the following code to your project's pom.xml file to import the JAR file into your application.
<repositories>
    <repository>
        <id>com.e-iceblue</id>
        <name>e-iceblue</name>
        <url>https://repo.e-iceblue.com/nexus/content/groups/public/</url>
    </repository>
</repositories>
<dependencies>
    <dependency>
        <groupId>e-iceblue</groupId>
        <artifactId>spire.ocr</artifactId>
        <version>2.1.5</version>
    </dependency>
</dependencies>
Please download the other dependencies based on your operating system:
Install Dependencies
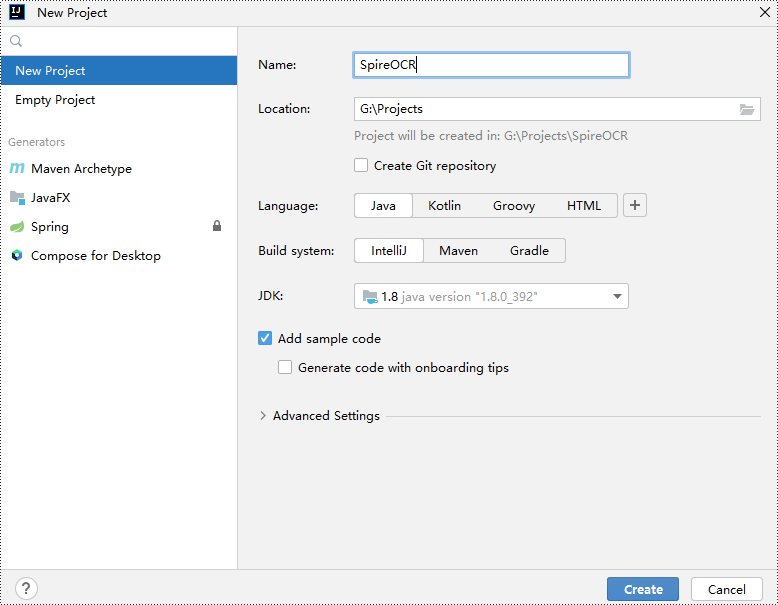
Step 1: Create a Java project in IntelliJ IDEA.
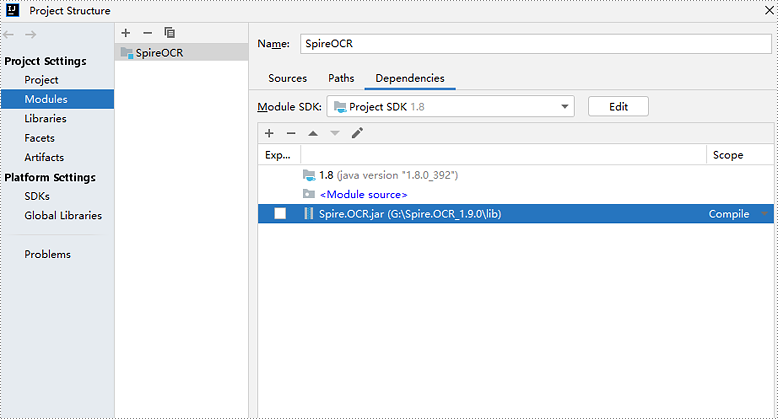
Step 2: Go to File > Project Structure > Modules > Dependencies in the menu and add Spire.OCR.jar as a project dependency.
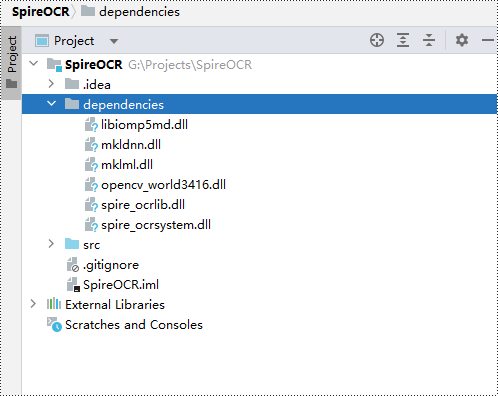
Step 3: Download and extract the other dependency files. Copy all the files from the extracted "dependencies" folder to your project directory.
Scanning and Recognizing Text from a Local Image
- Java
import com.spire.ocr.OcrScanner;
import java.io.*;

public class ScanLocalImage {
    public static void main(String[] args) throws Exception {
        // Specify the path to the dependency files
        String dependencies = "dependencies/";
        // Specify the path to the image file to be scanned
        String imageFile = "data/Sample.png";
        // Specify the path to the output file
        String outputFile = "ScanLocalImage_out.txt";

        // Create an OcrScanner object
        OcrScanner scanner = new OcrScanner();
        // Set the dependency file path for the OcrScanner object
        scanner.setDependencies(dependencies);

        // Use the OcrScanner object to scan the specified image file
        scanner.scan(imageFile);

        // Get the scanned text content
        String scannedText = scanner.getText().toString();

        // Create an output file object
        File output = new File(outputFile);
        // If the output file already exists, delete it
        if (output.exists()) {
            output.delete();
        }
        // Create a BufferedWriter object to write content to the output file
        BufferedWriter writer = new BufferedWriter(new FileWriter(outputFile));
        // Write the scanned text content to the output file
        writer.write(scannedText);
        // Close the BufferedWriter object to release resources
        writer.close();
    }
}
Specify the Language File to Scan and Recognize Text from an Image
- Java
import com.spire.ocr.OcrScanner;
import java.io.*;

public class ScanImageWithLanguageSelection {
    public static void main(String[] args) throws Exception {
        // Specify the path to the dependency files
        String dependencies = "dependencies/";
        // Specify the path to the language file
        String languageFile = "data/japandata";
        // Specify the path to the image file to be scanned
        String imageFile = "data/JapaneseSample.png";
        // Specify the path to the output file
        String outputFile = "ScanImageWithLanguageSelection_out.txt";

        // Create an OcrScanner object
        OcrScanner scanner = new OcrScanner();
        // Set the dependency file path for the OcrScanner object
        scanner.setDependencies(dependencies);
        // Load the specified language file
        scanner.loadLanguageFile(languageFile);

        // Use the OcrScanner object to scan the specified image file
        scanner.scan(imageFile);
        // Get the scanned text content
        String scannedText = scanner.getText().toString();

        // Create an output file object
        File output = new File(outputFile);
        // If the output file already exists, delete it
        if (output.exists()) {
            output.delete();
        }

        // Create a BufferedWriter object to write content to the output file
        BufferedWriter writer = new BufferedWriter(new FileWriter(outputFile));
        // Write the scanned text content to the output file
        writer.write(scannedText);
        // Close the BufferedWriter object to release resources
        writer.close();
    }
}
Apply for a Temporary License
If you'd like to remove the evaluation message from the generated documents, or to get rid of the function limitations, please request a 30-day trial license for yourself.
Making PDF content accessible on the web enhances usability, searchability, and compatibility across devices. Whether you're developing a PDF viewer, automating document workflows, or republishing content online, converting PDF to HTML using Python can significantly improve the user experience.
This comprehensive guide demonstrates how to convert PDF to HTML using Python. It covers everything from basic conversions and advanced customization to stream-based output—each section includes practical, easy-to-follow code snippets to help you get started quickly.
Table of Contents
- Why Export PDF as HTML
- Install Python PDF to HTML Converter Library
- Basic PDF to HTML Conversion in Python
- Customize the HTML Output
- Save PDF to HTML Stream
- Conclusion
- FAQs
Why Export PDF as HTML?
HTML (HyperText Markup Language) is the foundation of web content. By exporting PDFs into HTML, you enable seamless viewing, editing, and indexing of document content online. Key advantages include:
- Improved Web Accessibility: HTML renders natively in all browsers.
- Search Engine Optimization (SEO): Search engines can index content better than in PDFs.
- Responsive Layouts: HTML adjusts to different screen sizes.
- Interactive Enhancements: HTML allows for styling, scripts, and better user interaction.
- Plugin-Free Viewing: No need for third-party PDF viewers.
Install Python PDF to HTML Converter Library
To start exporting PDFs to HTML using Python, you’ll need a reliable library that supports PDF processing and HTML export. For this tutorial, we’re using Spire.PDF for Python, a high-performance PDF library that supports reading, editing, and converting PDF files in various formats, including HTML, with minimal effort.
Installation
The library can be installed easily via pip. Open your terminal and run the following command:
pip install Spire.PDF
This will download and install the latest version of the package along with its dependencies.
Need help with the installation? Follow this step-by-step guide: How to Install Spire.PDF for Python on Windows
Basic PDF to HTML Conversion in Python
Spire.PDF makes it easy to export an entire PDF document to HTML using the SaveToFile() method.
from spire.pdf.common import *
from spire.pdf import *

# Initialize a PdfDocument object
doc = PdfDocument()

# Load your PDF file
doc.LoadFromFile("Sample.pdf")

# Convert and save it as HTML
doc.SaveToFile("PdfToHtml.html", FileFormat.HTML)

# Close the document
doc.Close()
This approach generates a single HTML file that preserves the layout and structure of the original PDF.
The screenshot below showcases the input PDF and the output HTML file:

Customize the HTML Output
If you need more control over the conversion process, the SetPdfToHtmlOptions() method lets you fine-tune the HTML output.
You can customize various aspects of the conversion—such as image embedding, page splitting, and SVG quality—using the following parameters:
| Parameter | Type | Description |
|---|---|---|
| useEmbeddedSvg | bool | If True, embeds SVG for vector content. |
| useEmbeddedImg | bool | If True, embeds images. Effective only if useEmbeddedSvg is False. |
| maxPageOneFile | bool | Limits HTML output to one page per file (if not using SVG). |
| useHighQualityEmbeddedSvg | bool | Enables high-resolution SVG (only when useEmbeddedSvg is True). |
Example Code
from spire.pdf.common import *
from spire.pdf import *

# Initialize a PdfDocument object
doc = PdfDocument()
# Load your PDF file
doc.LoadFromFile("Sample.pdf")

# Access conversion settings
options = doc.ConvertOptions

# Customize conversion: use image embedding, one page per file
options.SetPdfToHtmlOptions(False, True, 1, False)

# Save the PDF to HTML with the custom options
doc.SaveToFile("PdfToHtmlWithOptions.html", FileFormat.HTML)
# Close the document
doc.Close()
This configuration disables SVG and instead embeds images, outputting each page as a separate HTML file.
Save PDF to HTML Stream
In web or cloud-based applications, you might prefer to write the HTML output to a stream (e.g., for serving over HTTP) instead of saving directly to the file system. This can be achieved with the SaveToStream() method.
Example Code
from spire.pdf.common import *
from spire.pdf import *

# Initialize a PdfDocument object
doc = PdfDocument()
# Load your PDF file
doc.LoadFromFile("Sample.pdf")

# Create a stream to save the HTML output
fileStream = Stream("PdfToHtmlStream.html")

# Save the PDF to HTML stream
doc.SaveToStream(fileStream, FileFormat.HTML)

# Close the stream and the document
fileStream.Close()
doc.Close()
This approach is ideal for web servers, APIs, or any application that handles files dynamically in memory or over the network.
Conclusion
Converting PDF to HTML using Python is an effective way to make your documents web-compatible and more interactive. With Spire.PDF for Python, you get full control over the conversion process, from simple exports to advanced configurations like embedded images or SVGs and stream output.
Ready to transform your PDFs into interactive web content? Give Spire.PDF for Python a try and streamline your document-to-HTML workflow today.
FAQs
Q1: Can I convert password-protected PDFs to HTML?
A1: Yes, Spire.PDF allows you to open encrypted PDFs using doc.LoadFromFile("file.pdf", "password").
Q2: Does this method support multi-page PDFs?
A2: Yes. By default, it converts all pages. You can control how many pages appear per HTML file using the maxPageOneFile parameter.
Q3: Are images and fonts preserved in HTML output?
A3: Yes, depending on the conversion settings (e.g., embedding images or SVGs), visual fidelity is preserved as closely as possible.
Get a Free License
To fully experience the capabilities of Spire.PDF for Python without any evaluation limitations, you can request a free 30-day trial license.
RTF is a flexible file format that preserves formatting and basic styling while offering compatibility with various word processing software. Converting Word to RTF enables users to retain document structure, fonts, hyperlinks, and other essential elements without the need for specialized software. Similarly, converting RTF back to Word format provides the flexibility to edit and enhance documents using the powerful features of Microsoft Word. In this article, you will learn how to convert Word to RTF and vice versa in Python using Spire.Doc for Python.
Install Spire.Doc for Python
This scenario requires Spire.Doc for Python and plum-dispatch v1.7.4. They can be easily installed in your Windows through the following pip command.
pip install Spire.Doc
If you are unsure how to install, please refer to this tutorial: How to Install Spire.Doc for Python on Windows
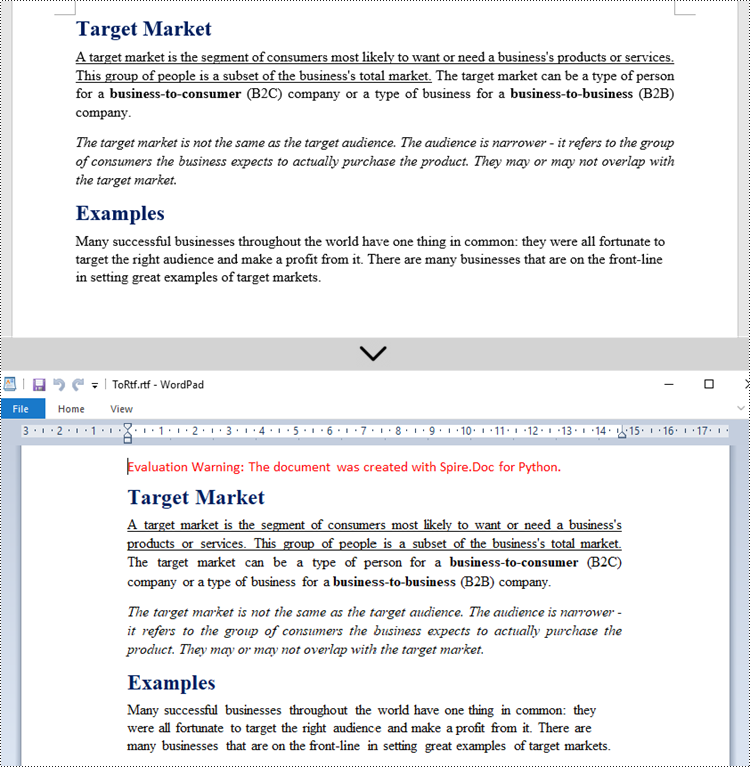
Convert Word to RTF in Python
With Spire.Doc for Python, you can load a Word file using the Document.LoadFromFile() method and convert it to a different format, such as RTF, using the Document.SaveToFile() method; Conversely, you can load an RTF file in the same way and save it as a Word file.
The following are the steps to convert Word to RTF using Spire.Doc for Python.
- Create a Document object.
- Load a Word file using Document.LoadFromFile() method.
- Convert it to an RTF file using Document.SaveToFile() method.
- Python
from spire.doc import *
from spire.doc.common import *

# Create a Document object
document = Document()

# Load a Word file
document.LoadFromFile("C:\\Users\\Administrator\\Desktop\\input.docx")

# Convert to a RTF file
document.SaveToFile("output/ToRtf.rtf", FileFormat.Rtf)
document.Close()
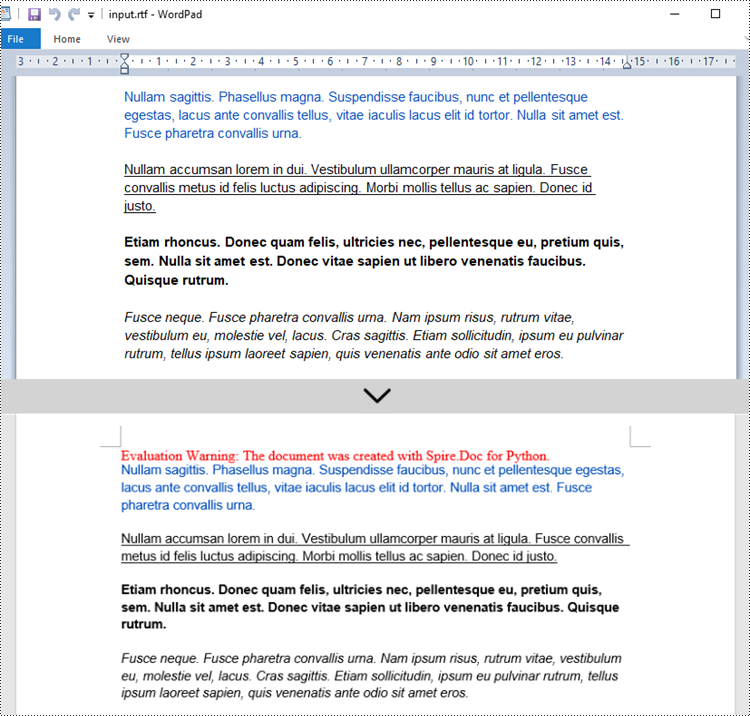
Convert RTF to Word in Python
The code for converting RTF to Word is quite simply, too. Follow the steps below.
- Create a Document object.
- Load an RTF file using Document.LoadFromFile() method.
- Convert it to a Word file using Document.SaveToFile() method.
- Python
from spire.doc import *
from spire.doc.common import *

# Create a Document object
document = Document()

# Load a Rtf file
document.LoadFromFile("C:\\Users\\Administrator\\Desktop\\input.rtf")

# Convert to a Word file
document.SaveToFile("output/ToWord.docx", FileFormat.Docx2019)
document.Close()
Get a Free License
To fully experience the capabilities of Spire.Doc for Python without any evaluation limitations, you can request a free 30-day trial license.
