
Knowledgebase (2370)
Children categories
Accepting and rejecting tracked changes in Excel are essential features that empower users to effectively manage and control modifications made by multiple contributors. Accepting changes allows users to include modifications in the spreadsheet, facilitating collaboration and ensuring that the final version reflects collective input. Conversely, rejecting changes enables users to maintain the original content and avoid incorporating incorrect or unnecessary modifications. These functions provide users with the ability to maintain data integrity, ensure document accuracy, and streamline the collaborative process in Excel. In this article, we will demonstrate how to accept and reject tracked changes in Excel in Python using Spire.XLS for Python.
Install Spire.XLS for Python
This scenario requires Spire.XLS for Python and plum-dispatch v1.7.4. They can be easily installed in your Windows through the following pip command.
pip install Spire.XLS
If you are unsure how to install, please refer to this tutorial: How to Install Spire.XLS for Python on Windows
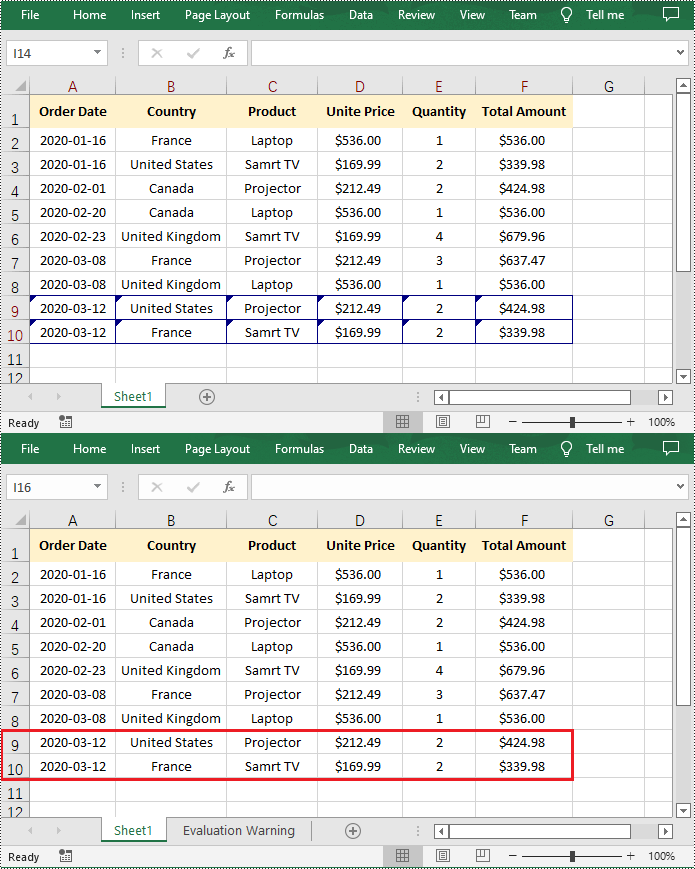
Accept Tracked Changes in Excel in Python
Spire.XLS for Python provides the Workbook.HasTrackedChanges property to determine whether an Excel workbook has tracked changes or not. If the property returns True, you can use the Workbook.AcceptAllTrackedChanges() method to accept these changes at once.
The following steps explain how to accept all tracked changes in an Excel workbook using Spire.XLS for Python:
- Create a Workbook object.
- Load a sample Excel workbook using Workbook.LoadFromFile() method.
- Check if the workbook has tracked changes using Workbook.HasTrackedChanges property.
- Accept all tracked changes in the workbook using Workbook.AcceptAllTrackedChanges() method.
- Save the result workbook using Workbook.SaveToFile() method.
- Python
from spire.xls.common import *
from spire.xls import *

# Specify the input and output file paths
inputFile = "Sample.xlsx"
outputFile = "AcceptChanges.xlsx"

# Create a Workbook object
workbook = Workbook()
# Load an Excel file
workbook.LoadFromFile(inputFile)

# Check if the file has tracked changes
if workbook.HasTrackedChanges:
    # Accept all tracked changes in the file
    workbook.AcceptAllTrackedChanges()

# Save the result file
workbook.SaveToFile(outputFile, FileFormat.Version2013)
workbook.Dispose()
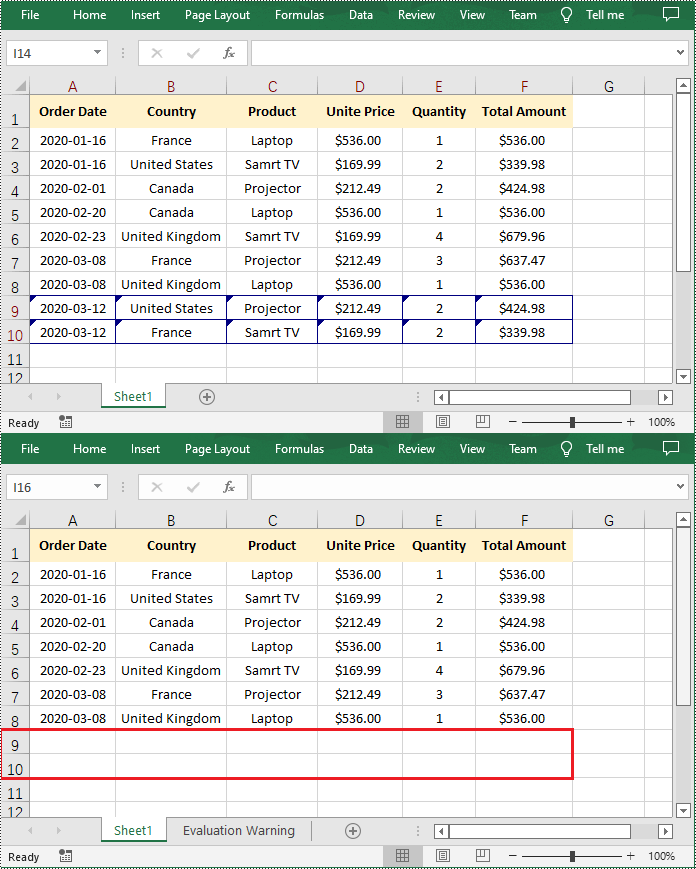
Reject Tracked Changes in Excel in Python
If the changes made to a workbook compromise the integrity of the data, such as introducing errors, inconsistencies, or inaccuracies, you can reject these changes by using the Workbook.RejectAllTrackedChanges() method.
The following steps explain how to reject all tracked changes in an Excel workbook using Spire.XLS for Python:
- Create a Workbook object.
- Load a sample Excel workbook using Workbook.LoadFromFile() method.
- Check if the workbook has tracked changes using Workbook.HasTrackedChanges property.
- Reject all tracked changes in the workbook using Workbook.RejectAllTrackedChanges() method.
- Save the result workbook using Workbook.SaveToFile() method.
- Python
from spire.xls.common import *
from spire.xls import *

# Specify the input and output file paths
inputFile = "Sample.xlsx"
outputFile = "RejectChanges.xlsx"

# Create a Workbook object
workbook = Workbook()
# Load an Excel file
workbook.LoadFromFile(inputFile)

# Check if the file has tracked changes
if workbook.HasTrackedChanges:
    # Reject all tracked changes in the file
    workbook.RejectAllTrackedChanges()

# Save the result file
workbook.SaveToFile(outputFile, FileFormat.Version2013)
workbook.Dispose()
Apply for a Temporary License
If you'd like to remove the evaluation message from the generated documents, or to get rid of the function limitations, please request a 30-day trial license for yourself.
The inclusion of attachments in a PDF can be useful for sharing related files or providing additional context and resources alongside the main document. However, there may be instances when you need to remove attachments from a PDF for reasons like reducing file size, protecting sensitive information, or simply decluttering the document. In this article, you will learn how to remove attachments from a PDF document in Python using Spire.PDF for Python.
- Remove Document-Level Attachments from PDF in Python
- Remove Annotation Attachments from PDF in Python
Install Spire.PDF for Python
This scenario requires Spire.PDF for Python and plum-dispatch v1.7.4. They can be easily installed in your Windows through the following pip command.
pip install Spire.PDF
If you are unsure how to install, please refer to this tutorial: How to Install Spire.PDF for Python on Windows
Prerequisite Knowledge
There are typically two types of attachments in PDF, document-level attachments and annotation attachments. The following table lists the differences between them and their representations in Spire.PDF.
| Attachment type | Represented by | Definition |
| Document level attachment | PdfAttachment class | A file attached to a PDF at the document level won't appear on a page, but can be viewed in the "Attachments" panel of a PDF reader. |
| Annotation attachment | PdfAnnotationAttachment class | A file attached as an annotation can be found on a page or in the "Attachment" panel. An annotation attachment is shown as a paper clip icon on the page; reviewers can double-click the icon to open the file. |
Remove Document-Level Attachments from PDF in Python
To obtain all document-level attachments of a PDF document, use the PdfDocument.Attachments property. Then, you can remove all of them using the Clear() method or selectively remove a specific attachment using the RemoveAt() method. The following are the steps to remove document-level attachments from PDF in Python.
- Create a PdfDocument object.
- Load a PDF document using PdfDocument.LoadFromFile() method.
- Get the attachment collection from the document using PdfDocument.Attachments property.
- Remove all attachments using PdfAttachmentCollection.Clear() method. To remove a specific attachment, use PdfAttachmentCollection.RemoveAt() method.
- Save the changes to a different PDF file using PdfDocument.SaveToFile() method.
- Python
from spire.pdf import *
from spire.pdf.common import *

# Create a PdfDocument object
doc = PdfDocument()

# Load a PDF file
doc.LoadFromFile("C:\\Users\\Administrator\\Desktop\\Attachments.pdf")

# Get the attachment collection from the document
attachments = doc.Attachments

# Remove all attachments
attachments.Clear()

# Remove a specific attachment
# attachments.RemoveAt(0)

# Save the changes to file
doc.SaveToFile("output/DeleteAttachments.pdf")

# Close the document
doc.Close()
Remove Annotation Attachments from PDF in Python
Annotations are page-based elements, and to retrieve all annotations from a document, you need to iterate through the pages and obtain the annotations from each page. Next, identify if a particular annotation is an attachment annotation, and finally remove it from the annotation collection using the RemoveAt() method.
The following are the steps to remove annotation attachments from PDF in Python.
- Create a PdfDocument object.
- Load a PDF document using PdfDocument.LoadFromFile() method.
- Iterate through the pages in the document
- Get the annotation collection from a specific page through PdfPageBase.AnnotationsWidget property.
- Iterate through the annotations in the collection.
- Determine if a specific annotation is an instance of PdfAttachmentAnnotationWidget.
- Remove the attachment annotation using PdfAnnotationCollection.RemoveAt() method.
- Save the changes to a different PDF file using PdfDocument.SaveToFile() method.
- Python
from spire.pdf import *
from spire.pdf.common import *

# Create a PdfDocument object
doc = PdfDocument()

# Load a PDF file
doc.LoadFromFile("C:\\Users\\Administrator\\Desktop\\AnnotationAttachment.pdf")

# Iterate through the pages in the document
for i in range(doc.Pages.Count):

    # Get annotation collection from a certain page
    annotationCollection = doc.Pages.get_Item(i).AnnotationsWidget

    if annotationCollection.Count > 0:

        # Iterate through the annotation in the collection
        for j in range(annotationCollection.Count):

            # Get a specific annotation
            annotation = annotationCollection.get_Item(j)

            # Determine if it is an attachment annotation
            if isinstance(annotation, PdfAttachmentAnnotationWidget):

                # Remove the annotation
                annotationCollection.RemoveAt(j)

# Save the changes to file
doc.SaveToFile("output/DeleteAnnotationAttachment.pdf")

# Close the document
doc.Close()
Apply for a Temporary License
If you'd like to remove the evaluation message from the generated documents, or to get rid of the function limitations, please request a 30-day trial license for yourself.
In PowerPoint, sections are a powerful tool for organizing and managing slides. By dividing slides into different sections, you can better organize content, navigate through your presentation, and present information in a more structured manner. This article will demonstrate how to add and remove sections in a PowerPoint presentation using Spire.Presentation for Python.
- Add a Section at the End of a PowerPoint
- Insert a Section Before a Specified Section
- Add a Section Before a Specified Slide in PowerPoint
- Remove a Section from a PowerPoint
Install Spire.PDF for Python
This scenario requires Spire.Presentation for Python and plum-dispatch v1.7.4. They can be easily installed in your Windows through the following pip command.
pip install Spire.Presentation
If you are unsure how to install, please refer to this tutorial: How to Install Spire.Presentation for Python on Windows
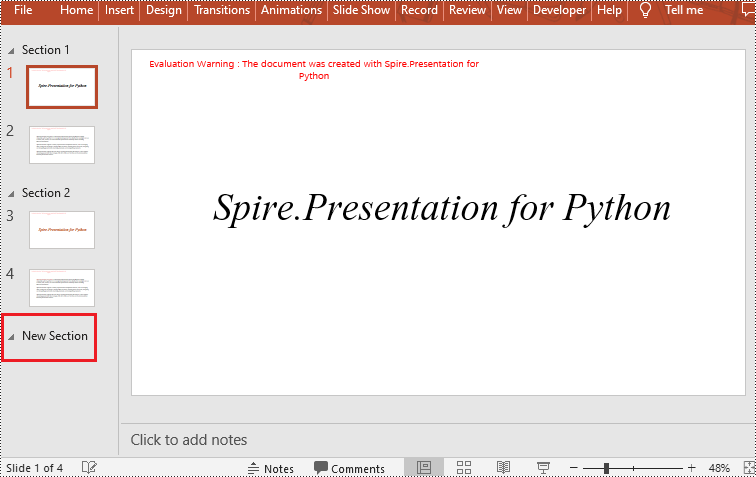
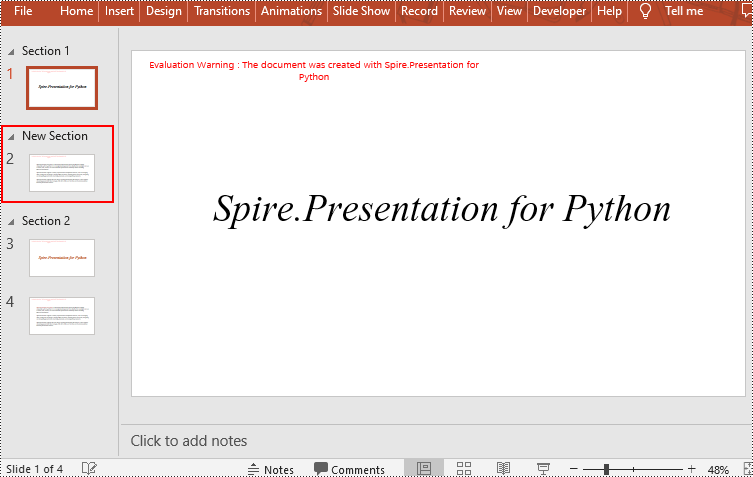
Add a Section at the End of a PowerPoint in Python
Spire.Presentation for Python provides the Presentation.SectionList.Append(section_name) method to add a section at the end of a presentation. Here are the specific steps to perform this operation:
- Create a Presentation class instance.
- Load a PowerPoint document using Presentation.LoadFromFile() method.
- Add a section at the end using the Presentation.SectionList.Append() method.
- Save the document using Presentation.SaveToFile() method.
- Python
from spire.presentation.common import *
from spire.presentation import *

# Create a new presentation object
presentation = Presentation()

# Load a sample PowerPoint presentation
presentation.LoadFromFile("sample.pptx")

# Append a new section
presentation.SectionList.Append("New Section")

# Save the presentation
presentation.SaveToFile("AddSection.pptx", FileFormat.Pptx2013)

# Dispose of the presentation object
presentation.Dispose()
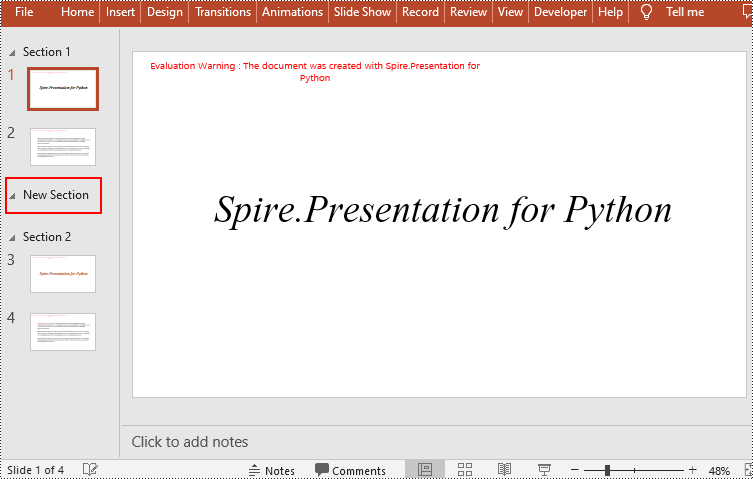
Insert a Section Before a Specified Section in Python
You can also use the Presentation.SectionList.Insert(index, section_name) method to insert a new section before a specific section. Here are the detailed steps:
- Create a Presentation class instance.
- Load a PowerPoint document using Presentation.LoadFromFile() method.
- Insert a new section before a specific section using the Presentation.SectionList.Insert() method, where index is the position of the specific section.
- Save the document using Presentation.SaveToFile() method.
- Python
from spire.presentation.common import *
from spire.presentation import *

# Create a new presentation object
presentation = Presentation()

# Load a sample PowerPoint presentation
presentation.LoadFromFile("sample.pptx")

# Insert a new section before the second section
presentation.SectionList.Insert(1," New Section")

# Save the presentation
presentation.SaveToFile("AddSection.pptx", FileFormat.Pptx2013)

# Dispose of the presentation object
presentation.Dispose()
Add a Section Before a Specified Slide in Python
You can also use the Presentation.SectionList.Add(section_name, slide) method to insert a new section before a specific slide. Here are the detailed steps:
- Create a Presentation class instance.
- Load a PowerPoint document using Presentation.LoadFromFile() method.
- Insert a new section before a specific slide using the Presentation.SectionList.Add() method
- Save the document using Presentation.SaveToFile() method.
- Python
from spire.presentation.common import *
from spire.presentation import *

# Create a new presentation object
presentation = Presentation()

# Load a sample PowerPoint presentation
presentation.LoadFromFile("sample.pptx")

# Get the second slide
slide=presentation.Slides[1]

# Add a new section before the second slide
presentation.SectionList.Add("New Section",slide)

# Save the presentation
presentation.SaveToFile("AddSection.pptx", FileFormat.Pptx2013)

# Dispose of the presentation object
presentation.Dispose()
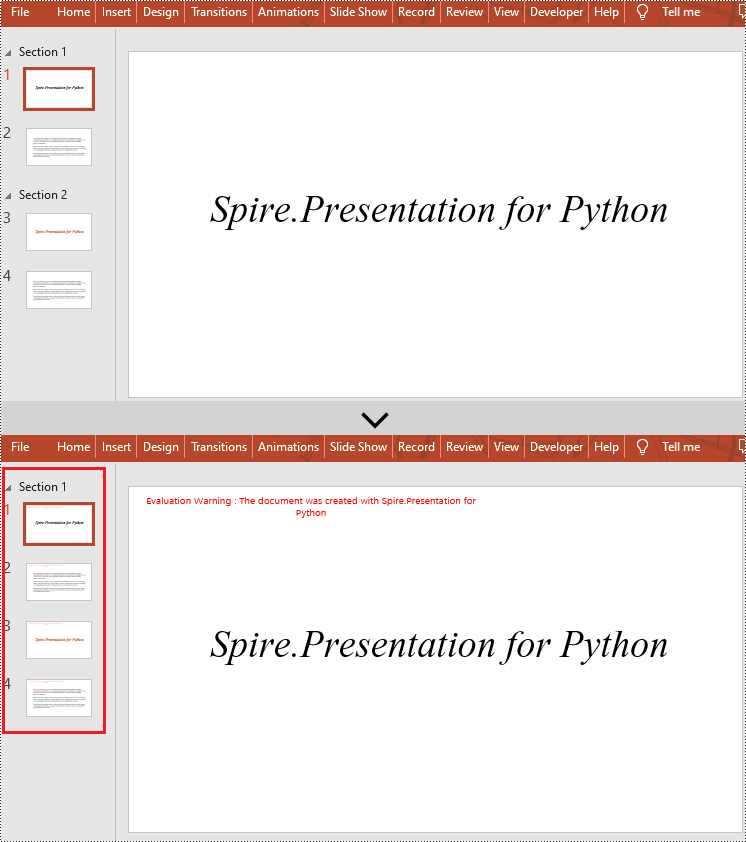
Remove a Section from a PowerPoint in Python
If you don't need a specific section, you can simply remove it using the Presentation.SectionList.RemoveAt(index_to_remove) method. Please note that removing a section does not delete the slides within that section. Here are the steps to delete a specific section while preserving its slides:
- Create a Presentation class instance.
- Load a PowerPoint document using Presentation.LoadFromFile() method.
- Remove a specific section using the Presentation.SectionList.RemoveAt(index_to_remove) method, which takes an integer index as a parameter. You can also remove all sections using the Presentation.Slides.RemoveAll() method.
- Save the document using Presentation.SaveToFile() method.
- Python
from spire.presentation.common import *
from spire.presentation import *

# Create a new presentation object
presentation = Presentation()

# Load a sample PowerPoint presentation
presentation.LoadFromFile("sample.pptx")

# Remove the second section
presentation.SectionList.RemoveAt(1)

# # Remove all sections
# presentation.SectionList.RemoveAll()

# Save the presentation
presentation.SaveToFile("RemoveSection.pptx", FileFormat.Pptx2013)

# Dispose of the presentation object
presentation.Dispose()
Apply for a Temporary License
If you'd like to remove the evaluation message from the generated documents, or to get rid of the function limitations, please request a 30-day trial license for yourself.
