
Knowledgebase (2370)
Children categories
OLE enables users to incorporate diverse file types-such as images, charts, documents, and multimedia-directly into Excel workbooks, fostering a more dynamic and comprehensive representation of information. By inserting OLE objects, users can create interactive and engaging spreadsheets that integrate a variety of data formats to simplify analyses and presentations in a single Excel environment. In this article, you will learn how to insert linked or embedded OLE objects to Excel in Python as well as how to extract OLE objects from Excel in Python using Spire.XLS for Python.
- Insert a Linked OLE Object to Excel in Python
- Insert an Embedded Object to Excel in Python
- Extract OLE Objects from Excel in Python
Install Spire.XLS for Python
This scenario requires Spire.XLS for Python and plum-dispatch v1.7.4. They can be easily installed in your Windows through the following pip command.
pip install Spire.XLS
If you are unsure how to install, please refer to this tutorial: How to Install Spire.XLS for Python on Windows
Insert a Linked OLE Object to Excel in Python
To insert an OLE object to a worksheet, you use the Worksheet.OleObjects.Add(fileName, image, linkType) method, in which:
- the fileName parameter specifies the path of an external file to be inserted,
- the image parameter specifies a thumbnail of the first page or a document icon that the OLE object will be displayed as,
- the linkType parameter determines whether the OLE object is inserted to the document as an embedded source or a linked source.
The following are the steps to insert a linked OEL object to Excel using Spire.XLS for Python.
- Create a Workbook object.
- Get the first worksheet through Workbook.Worksheet[index] property.
- Load an image using Image.FromFile() method.
- Insert an OLE object to the worksheet using Worksheet.OleObjects.Add() method, and specify the link type as OleLinkType.Link.
- Specify the OLE object location through IOleObject.Location property.
- Specify the OLE object type through IOleObject.ObjectType property.
- Save the workbook to an Excel file using Workbook.SaveToFile() method.
- Python
from spire.xls import *
from spire.xls.common import *
# Create a Workbook object
workbook = Workbook()
# Get the first worksheet
sheet = workbook.Worksheets[0]
# Add text to A1
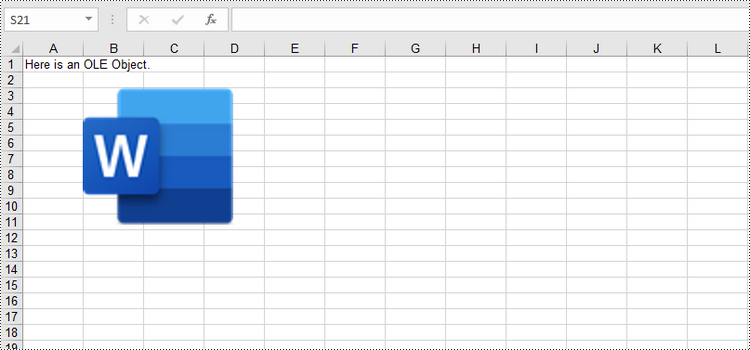
sheet.Range["A1"].Text = "Here is an OLE Object."
# Load an image to be displayed as an icon of ole object
image = Image.FromFile("C:/Users/Administrator/Desktop/word_icon.png")
with Stream() as stream:
image.Save(stream,ImageFormat.get_Png())
# Add an ole object to the worksheet that links to an external file
oleObject = sheet.OleObjects.Add("C:/Users/Administrator/Desktop/invoice.docx", stream, OleLinkType.Link)
# Specify ole object location
oleObject.Location = sheet.Range["B3"]
# Specify ole object type
oleObject.ObjectType = OleObjectType.WordDocument
# Save to file
workbook.SaveToFile("output/OleObject.xlsx", ExcelVersion.Version2016)
workbook.Dispose()
Insert an Embedded OLE Object to Excel in Python
To insert an embedded OEL object to Excel, you specify the link type as OleLinkType.Embed while invoking the Worksheet.OleObjects.Add() method. The detailed steps are as follows.
- Create a Workbook object.
- Get the first worksheet through Workbook.Worksheet[index] property.
- Load an image using Image.FromFile() method.
- Insert an OLE object to the worksheet using Worksheet.OleObjects.Add() method, and specify the link type as OleLinkType.Embed.
- Specify the OLE object location through IOleObject.Location property.
- Specify the OLE object type through IOleObject.ObjectType property.
- Save the workbook to an Excel file using Workbook.SaveToFile() method.
- Python
from spire.xls import *
from spire.xls.common import *
# Create a Workbook object
workbook = Workbook()
# Get the first worksheet
sheet = workbook.Worksheets[0]
# Add text to A1
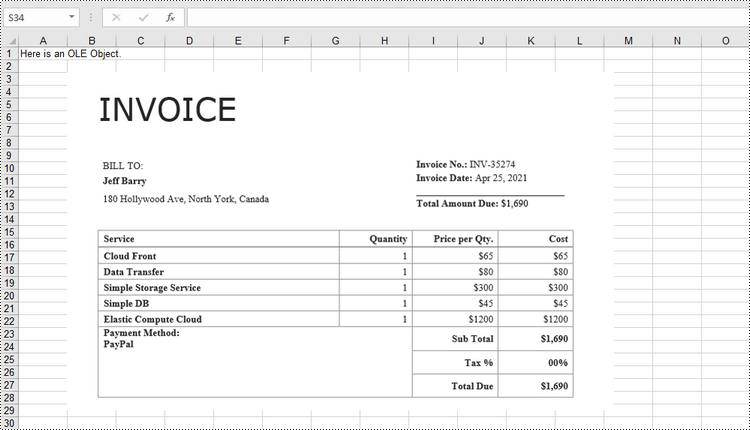
sheet.Range["A1"].Text = "Here is an OLE Object."
# Load an image that represents ole object
image = Image.FromFile("C:/Users/Administrator/Desktop/screenshot.png")
with Stream() as stream:
image.Save(stream,ImageFormat.get_Png())
# Add an ole object to the worksheet as embedded source
oleObject = sheet.OleObjects.Add("C:/Users/Administrator/Desktop/invoice.docx", stream, OleLinkType.Embed)
# Specify ole object location
oleObject.Location = sheet.Range["B3"]
# Specify ole object type
oleObject.ObjectType = OleObjectType.WordDocument
# Save to file
workbook.SaveToFile("output/OleObject.xlsx", ExcelVersion.Version2016)
workbook.Dispose()
Extract OLE Objects from Excel in Python
Spire.XLS for Python provides the Worksheet.HasOleObjects property to determine whether a worksheet has OLE objects. If it does, get all the objects through the Worksheet.OleObjects property. Then, determine the type of a particular OEL object and save the OEL as a file of the appropriate document type. The following are the steps to extract OLE objects from Excel using Spire.XLS for Python.
- Create a Workbook object.
- Get a specific worksheet through Workbook.Worksheet[index] property.
- Determine if the worksheet contains OLE objects through Worksheet.HasOleObjects property.
- Get all the OLE objects from the worksheet through Worksheet.OleObjects property.
- Determine the type of a particular OEL object and save the OEL as a file of the appropriate document type.
- Python
from spire.xls import *
from spire.xls.common import *
# Write data to file
def WriteAllBytes(fname:str,data):
fp = open(fname,"wb")
for d in data:
fp.write(d)
fp.close()
# Create a Workbook object
workbook = Workbook()
# Load an Excel document
workbook.LoadFromFile("C:\\Users\\Administrator\\Desktop\\OleObjects.xlsx")
# Get the first worksheet
sheet = workbook.Worksheets[0]
# Determine if the worksheet has ole objects
if sheet.HasOleObjects:
# Iterate through the found objects
for obj in sheet.OleObjects:
# If the object type is a Word document, save it to a .docx file
type = obj.ObjectType
if type is OleObjectType.WordDocument:
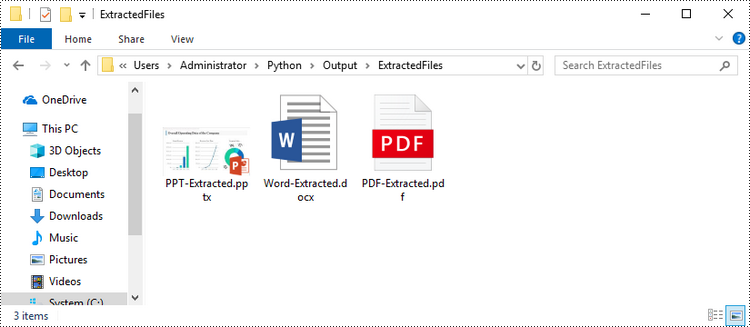
WriteAllBytes("output/ExtractedFiles/Word-Extracted.docx", obj.OleData)
# If the object type is an Adobe Acrobat document, save it to a .pdf file
if type is OleObjectType.AdobeAcrobatDocument:
WriteAllBytes("output/ExtractedFiles/PDF-Extracted.pdf", obj.OleData)
# If the object type is a PowerPoint document, save it to a .pptx file
if type is OleObjectType.PowerPointPresentation:
WriteAllBytes("output/ExtractedFiles/PPT-Extracted.pptx", obj.OleData)
workbook.Dispose()
Apply for a Temporary License
If you'd like to remove the evaluation message from the generated documents, or to get rid of the function limitations, please request a 30-day trial license for yourself.
PDF has become the standard format for sharing and preserving documents across different platforms, playing a ubiquitous role in both professional and personal settings. However, creating high-quality PDF documents requires multiple checks and revisions. In this context, knowing how to efficiently compare PDF files and pinpoint their differences becomes crucial, which enables document editors to quickly identify discrepancies between different versions of a document, resulting in significant time savings during the document creation and review process. This article aims to demonstrate how to compare PDF documents effortlessly using Spire.PDF for .NET in C# programs.
Install Spire.PDF for .NET
To begin with, you need to add the DLL files included in the Spire.PDF for.NET package as references in your .NET project. The DLL files can be either downloaded from this link or installed via NuGet.
PM> Install-Package Spire.PDF
Compare Two PDF Documents in C#
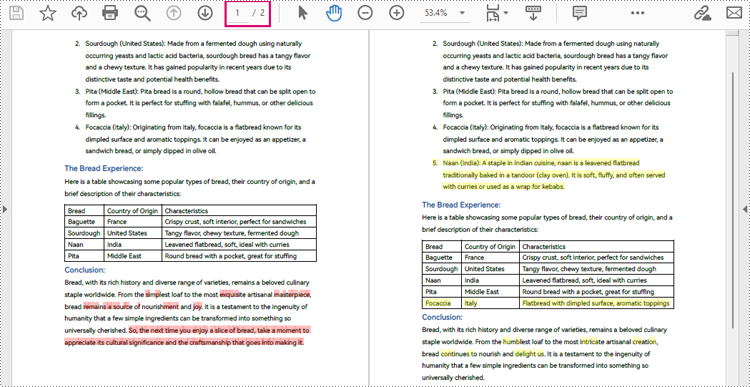
With Spire.PDF for .NET, developers can create an instance of the PdfComparer class, passing two PdfDocument objects as parameters, and then utilize the PdfComparer.Compare(String fileName) method to compare the two documents. The resulting comparison is saved as a new PDF document, allowing for further analysis or review of the differences between the two PDFs.
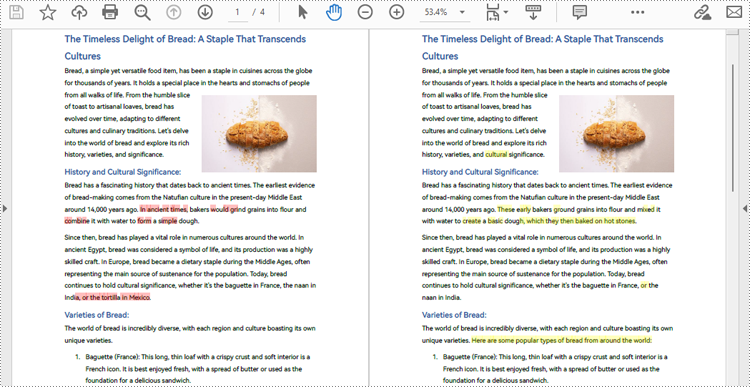
The resulting PDF document displays the two original documents on the left and the right, with the deleted items in red and the added items in yellow.
The following are the detailed steps for comparing two PDF documents:
- Create two objects of PdfDocument class and load two PDF documents using PdfDocument.LoadFromFile() method.
- Create an instance of PdfComparer class and pass the two PdfDocument objects as parameters.
- Compare the two documents and save the result as another PDF document using PdfComparer.Compare() method.
- C#
using Spire.Pdf;
using Spire.Pdf.Comparison;

namespace ExtractTablesToExcel
{
    class Program
    {
        static void Main(string[] args)
        {
            //Create an object of PdfDocument class and load a PDF document
            PdfDocument pdf1 = new PdfDocument();
            pdf1.LoadFromFile("Sample1.pdf");

            //Create another object of PdfDocument class and load another PDF document
            PdfDocument pdf2 = new PdfDocument();
            pdf2.LoadFromFile("Sample2.pdf");

            //Create an object of PdfComparer class with the two document
            PdfComparer comparer = new PdfComparer(pdf1, pdf2);

            //Compare the two document and save the comparing result to another PDF document
            comparer.Compare("output/ComparingResult.pdf");
            pdf1.Close();
            pdf2.Close();
        }
    }
}
Compare a Specific Page Range of Two PDF Documents
After creating an instance of PdfComparer class, developers can also use the PdfComparer.Options.SetPageRange() method to set the page range to be compared. This allows for comparing only the specified page range in two PDF documents. The detailed steps are as follows:
- Create two objects of PdfDocument class and load two PDF documents using PdfDocument.LoadFromFile() method.
- Create an instance of PdfComparer class and pass the two PdfDocument objects as parameters.
- Set the page range to be compared using PdfComparer.Options.SetPageRange() method.
- Compare the specified page range in the two PDF documents and save the result as another PDF document using PdfComparer.Compare() method.
- C#
using Spire.Pdf;
using Spire.Pdf.Comparison;

namespace ExtractTablesToExcel
{
    class Program
    {
        static void Main(string[] args)
        {
            //Create an object of PdfDocument class and load a PDF document
            PdfDocument pdf1 = new PdfDocument();
            pdf1.LoadFromFile("Sample1.pdf");

            //Create another object of PdfDocument class and load another PDF document
            PdfDocument pdf2 = new PdfDocument();
            pdf2.LoadFromFile("Sample2.pdf");

            //Create an object of PdfComparer class with the two document
            PdfComparer comparer = new PdfComparer(pdf1, pdf2);

            //Set the page range to be compared
            comparer.Options.SetPageRanges(1, 1, 1, 1);

            //Compare the specified page range and save the comparing result to another PDF document
            comparer.Compare("output/PageRangeComparingResult.pdf");
            pdf1.Close();
            pdf2.Close();
        }
    }
}
Apply for a Temporary License
If you'd like to remove the evaluation message from the generated documents, or to get rid of the function limitations, please request a 30-day trial license for yourself.
When editing or updating a large presentation, manually locating and modifying specific text elements can be a tedious and time-consuming process. By using the replace feature in PowerPoint, you can quickly and accurately make updates throughout the presentation, ensuring that the information remains accurate and consistent. In this article, we will demonstrate how to replace text in PowerPoint presentations in Python using Spire.Presentation for Python.
- Replace the First Occurrence of a Specific Text in PowerPoint in Python
- Replace All Occurrences of a Specific Text in PowerPoint in Python
- Replace Text Using a Regular Expression in PowerPoint in Python
Install Spire.Presentation for Python
This scenario requires Spire.Presentation for Python and plum-dispatch v1.7.4. They can be easily installed in your Windows through the following pip command.
pip install Spire.Presentation
If you are unsure how to install, please refer to this tutorial: How to Install Spire.Presentation for Python on Windows
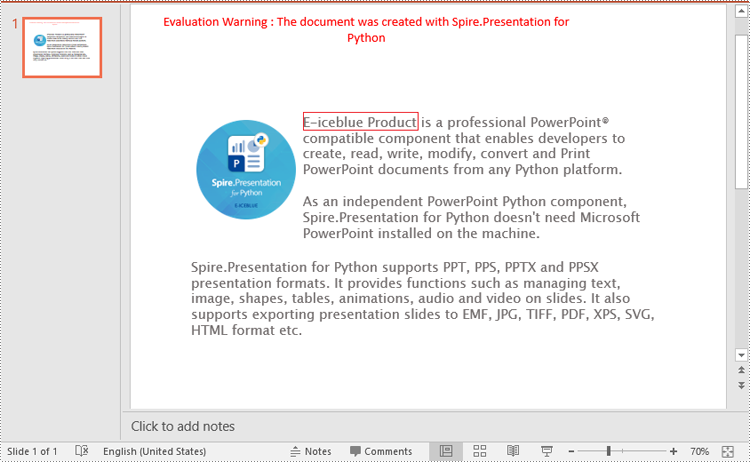
Replace the First Occurrence of a Specific Text in PowerPoint in Python
To replace the first occurrence of a specific text in a PowerPoint document, you can loop through all slides in the document, and then call the ISlide.ReplaceFirstText() method. The detailed steps are as follows.
- Create an object of the Presentation class.
- Load a PowerPoint document using Presentation.LoadFromFile() method.
- Loop through all slides in the PowerPoint document.
- Replace the first occurrence of a specific text with new text using ISlide.ReplaceFirstText() method.
- Save the result document using Presentation.SaveToFile() method.
- Python
from spire.presentation.common import *
from spire.presentation import *

# Create an object of the Presentation class
ppt = Presentation()
# Load a PowerPoint document
ppt.LoadFromFile("Sample.pptx")

# Loop through all slides in the document
for slide in ppt.Slides:
    # Replace the first occurrence of "Spire.Presentation for Python" with "E-iceblue Product"
    slide.ReplaceFirstText("Spire.Presentation for Python", "E-iceblue Product", False)
    break

# Save the result document
ppt.SaveToFile("ReplaceFirstTextOccurrence.pptx", FileFormat.Pptx2013)
ppt.Dispose()
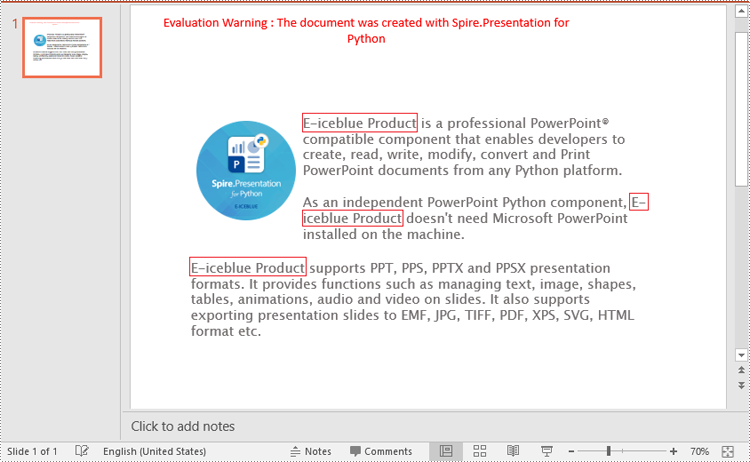
Replace All Occurrences of a Specific Text in PowerPoint in Python
To replace all occurrences of a specific text in a PowerPoint document, you can loop through all slides in the document, and then use the ISlide.ReplaceAllText() method. The detailed steps are as follows.
- Create an object of the Presentation class.
- Load a PowerPoint document using Presentation.LoadFromFile() method.
- Loop through all slides in the PowerPoint document.
- Replace all occurrences of a specific text with new text using ISlide.ReplaceAllText() method.
- Save the result document using Presentation.SaveToFile() method.
- Python
from spire.presentation.common import *
from spire.presentation import *

# Create an object of the Presentation class
ppt = Presentation()
# Load a PowerPoint document
ppt.LoadFromFile("Sample.pptx")

# Loop through all slides in the document
for slide in ppt.Slides:
    # Replace all occurrences of "Spire.Presentation for Python" with "E-iceblue Product"
    slide.ReplaceAllText("Spire.Presentation for Python", "E-iceblue Product", False)

# Save the result document
ppt.SaveToFile("ReplaceAllTextOccurrences.pptx", FileFormat.Pptx2013)
ppt.Dispose()
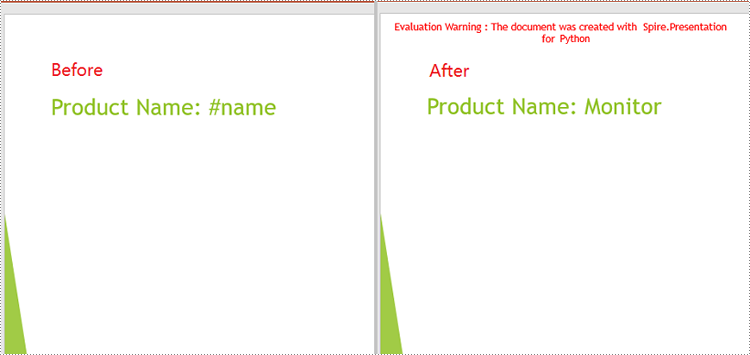
Replace Text Using a Regular Expression in PowerPoint in Python
Spire.Presentation for Python provides the IShape.ReplaceTextWithRegex() method to replace text matching a regular expression pattern. The detailed steps are as follows.
- Create an object of the Presentation class.
- Load a PowerPoint document using Presentation.LoadFromFile() method.
- Loop through all slides in the PowerPoint document.
- Loop through all shapes on each slide.
- Replace text matching a regular expression pattern using IShape.ReplaceTextWithRegex() method.
- Save the result document using Presentation.SaveToFile() method.
- Python
from spire.presentation.common import *
from spire.presentation import *

# Create an object of the Presentation class
ppt = Presentation()
# Load a PowerPoint document
ppt.LoadFromFile("Sample1.pptx")

# Loop through all slides in the document
for slide in ppt.Slides:
    # Loop through all shapes on each slide
    for shape in slide.Shapes:
        # Replace text starting with # on the slide to "Monitor"
        shape.ReplaceTextWithRegex(Regex("#\w+"), "Monitor")

# Save the result document
ppt.SaveToFile("ReplaceTextUsingRegex.pptx", FileFormat.Pptx2013)
ppt.Dispose()
Apply for a Temporary License
If you'd like to remove the evaluation message from the generated documents, or to get rid of the function limitations, please request a 30-day trial license for yourself.
