
Knowledgebase (2370)
Children categories
Adding, inserting, and deleting pages in a Word document is crucial for managing and presenting content. By adding or inserting a new page in Word, you can expand the document to accommodate more content, making it more structured and readable. Deleting pages can help streamline the document by removing unnecessary information or erroneous content. This article will explain how to use Spire.Doc for .NET to add, insert, or delete a page in a Word document within a C# project.
- Add a Page in a Word Document using C#
- Insert a Page in a Word Document using C#
- Delete a Page from a Word Document using C#
Install Spire.Doc for .NET
To begin with, you need to add the DLL files included in the Spire.Doc for .NET package as references in your .NET project. The DLL files can be either downloaded from this link or installed via NuGet.
PM> Install-Package Spire.Doc
Add a Page in a Word Document using C#
The steps to add a new page at the end of a Word document involve first obtaining the last section, then inserting a page break at the end of the last paragraph of that section to ensure that subsequently added content appears on a new page. Here are the detailed steps:
- Create a Document object.
- Load a Word document using the Document.LoadFromFile() method.
- Get the body of the last section of the document using Document.LastSection.Body.
- Add a page break by calling Paragraph.AppendBreak(BreakType.PageBreak) method.
- Create a new ParagraphStyle object.
- Add the new paragraph style to the document's style collection using Document.Styles.Add() method.
- Create a new Paragraph object and set the text content.
- Apply the previously created paragraph style to the new paragraph using Paragraph.ApplyStyle(ParagraphStyle.Name) method.
- Add the new paragraph to the document using Body.ChildObjects.Add(Paragraph) method.
- Save the resulting document using the Document.SaveToFile() method.
- C#
// Create a new document object
Document document = new Document();
// Load a document
document.LoadFromFile("Sample.docx");
// Get the body of the last section of the document
Body body = document.LastSection.Body;
// Insert a page break after the last paragraph in the body
body.LastParagraph.AppendBreak(BreakType.PageBreak);
// Create a new paragraph style
ParagraphStyle paragraphStyle = new ParagraphStyle(document);
paragraphStyle.Name = "CustomParagraphStyle1";
paragraphStyle.ParagraphFormat.LineSpacing = 12;
paragraphStyle.ParagraphFormat.AfterSpacing = 8;
paragraphStyle.CharacterFormat.FontName = "Microsoft YaHei";
paragraphStyle.CharacterFormat.FontSize = 12;
// Add the paragraph style to the document's style collection
document.Styles.Add(paragraphStyle);
// Create a new paragraph and set the text content
Paragraph paragraph = new Paragraph(document);
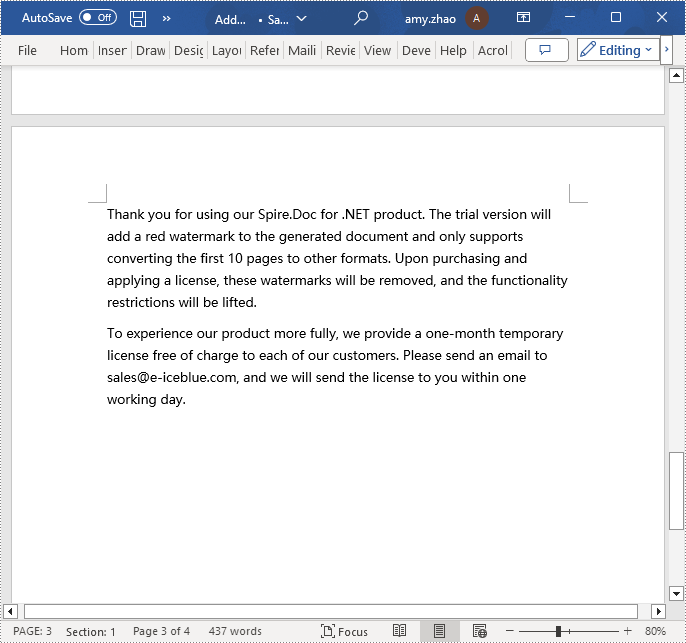
paragraph.AppendText("Thank you for using our Spire.Doc for .NET product. The trial version will add a red watermark to the generated document and only supports converting the first 10 pages to other formats. Upon purchasing and applying a license, these watermarks will be removed, and the functionality restrictions will be lifted.");
// Apply the paragraph style
paragraph.ApplyStyle(paragraphStyle.Name);
// Add the paragraph to the body's content collection
body.ChildObjects.Add(paragraph);
// Create another new paragraph and set the text content
paragraph = new Paragraph(document);
paragraph.AppendText("To experience our product more fully, we provide a one-month temporary license free of charge to each of our customers. Please send an email to sales@e-iceblue.com, and we will send the license to you within one working day.");
// Apply the paragraph style
paragraph.ApplyStyle(paragraphStyle.Name);
// Add the paragraph to the body's content collection
body.ChildObjects.Add(paragraph);
// Save the document to the specified path
document.SaveToFile("Add a Page.docx", FileFormat.Docx);
// Close the document
document.Close();
// Release the resources of the document object
document.Dispose();
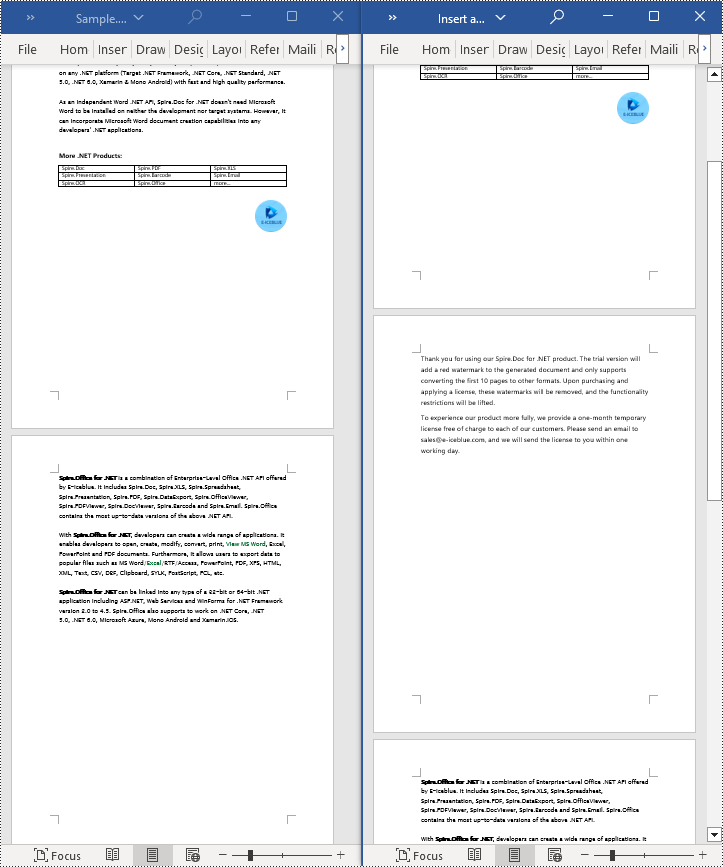
Insert a Page in a Word Document using C#
Before inserting a new page, it is necessary to determine the ending position index of the specified page content within the section. Subsequently, add the content of the new page to the document one by one after this position. Finally, to separate the content from the following pages, adding a page break is essential. The detailed steps are as follows:
- Create a Document object.
- Load a Word document using the Document.LoadFromFile() method.
- Create a FixedLayoutDocument object.
- Obtain the FixedLayoutPage object of a page in the document.
- Determine the index position of the last paragraph on the page within the section.
- Create a new ParagraphStyle object.
- Add the new paragraph style to the document's style collection using Document.Styles.Add() method.
- Create a new Paragraph object and set the text content.
- Apply the previously created paragraph style to the new paragraph using the Paragraph.ApplyStyle(ParagraphStyle.Name) method.
- Insert the new paragraph at the specified using the Body.ChildObjects.Insert(index, Paragraph) method.
- Create another new paragraph object, set its text content, add a page break by calling the Paragraph.AppendBreak(BreakType.PageBreak) method, apply the previously created paragraph style, and then insert this paragraph into the document.
- Save the resulting document using the Document.SaveToFile() method.
- C#
using Spire.Doc;
using Spire.Doc.Pages;
using Spire.Doc.Documents;

namespace SpireDocDemo
{
    internal class Program
    {
        static void Main(string[] args)
        {
           // Create a new document object
            Document document = new Document();

            // Load the sample document from a file
            document.LoadFromFile("Sample.docx");

            // Create a fixed layout document object
            FixedLayoutDocument layoutDoc = new FixedLayoutDocument(document);

            // Get the first page
            FixedLayoutPage page = layoutDoc.Pages[0];

            // Get the body of the document
            Body body = page.Section.Body;

            // Get the last paragraph of the current page
            Paragraph paragraphEnd = page.Columns[0].Lines[page.Columns[0].Lines.Count - 1].Paragraph;

            // Initialize the end index
            int endIndex = 0;
            if (paragraphEnd != null)
            {
                // Get the index of the last paragraph
                endIndex = body.ChildObjects.IndexOf(paragraphEnd);
            }

            // Create a new paragraph style
            ParagraphStyle paragraphStyle = new ParagraphStyle(document);
            paragraphStyle.Name = "CustomParagraphStyle1";
            paragraphStyle.ParagraphFormat.LineSpacing = 12;
            paragraphStyle.ParagraphFormat.AfterSpacing = 8;
            paragraphStyle.CharacterFormat.FontName = "Microsoft YaHei";
            paragraphStyle.CharacterFormat.FontSize = 12;

            // Add the paragraph style to the document's style collection
            document.Styles.Add(paragraphStyle);

            // Create a new paragraph and set the text content
            Paragraph paragraph = new Paragraph(document);
            paragraph.AppendText("Thank you for using our Spire.Doc for .NET product. The trial version will add a red watermark to the generated document and only supports converting the first 10 pages to other formats. Upon purchasing and applying a license, these watermarks will be removed, and the functionality restrictions will be lifted.");

            // Apply the paragraph style
            paragraph.ApplyStyle(paragraphStyle.Name);

            // Insert the paragraph at the specified position
            body.ChildObjects.Insert(endIndex + 1, paragraph);

            // Create another new paragraph
            paragraph = new Paragraph(document);
            paragraph.AppendText("To experience our product more fully, we provide a one-month temporary license free of charge to each of our customers. Please send an email to sales@e-iceblue.com, and we will send the license to you within one working day.");

            // Apply the paragraph style
            paragraph.ApplyStyle(paragraphStyle.Name);

            // Add a page break
            paragraph.AppendBreak(BreakType.PageBreak);

            // Insert the paragraph at the specified position
            body.ChildObjects.Insert(endIndex + 2, paragraph);

            // Save the document to the specified path
            document.SaveToFile("Insert a Page.docx", Spire.Doc.FileFormat.Docx);

            // Close and release the original document
            document.Close();
            document.Dispose();
        }
    }
}
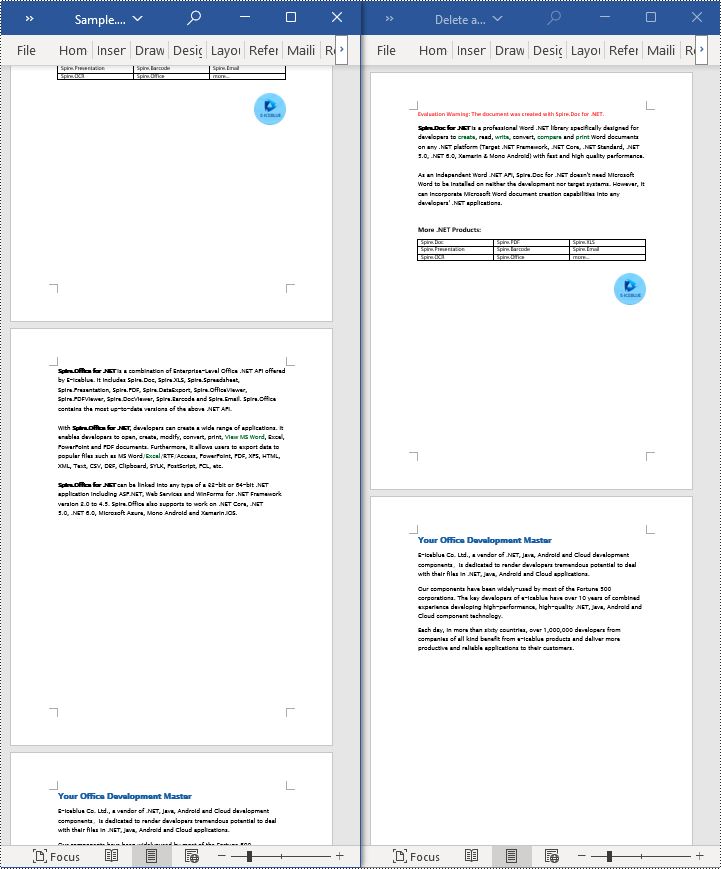
Delete a Page from a Word Document using C#
To delete the content of a page, first determine the index positions of the starting and ending elements of that page in the document. Then, you can utilize a loop to systematically remove these elements one by one. The detailed steps are as follows:
- Create a Document object.
- Load a Word document using the Document.LoadFromFile() method.
- Create a FixedLayoutDocument object.
- Obtain the FixedLayoutPage object of the first page in the document.
- Use the FixedLayoutPage.Section property to get the section where the page is located.
- Determine the index position of the first paragraph on the page within the section.
- Determine the index position of the last paragraph on the page within the section.
- Use a for loop to remove the content of the page one by one.
- Save the resulting document using the Document.SaveToFile() method.
- C#
using Spire.Doc;
using Spire.Doc.Pages;
using Spire.Doc.Documents;

namespace SpireDocDemo
{
    internal class Program
    {
        static void Main(string[] args)
        {
           // Create a new document object
            Document document = new Document();

            // Load the sample document from a file
            document.LoadFromFile("Sample.docx");

            // Create a fixed layout document object
            FixedLayoutDocument layoutDoc = new FixedLayoutDocument(document);

            // Get the second page
            FixedLayoutPage page = layoutDoc.Pages[1];

            // Get the section of the page
            Section section = page.Section;

            // Get the first paragraph on the first page
            Paragraph paragraphStart = page.Columns[0].Lines[0].Paragraph;
            int startIndex = 0;
            if (paragraphStart != null)
            {
                // Get the index of the starting paragraph
                startIndex = section.Body.ChildObjects.IndexOf(paragraphStart);
            }

            // Get the last paragraph on the last page
            Paragraph paragraphEnd = page.Columns[0].Lines[page.Columns[0].Lines.Count - 1].Paragraph;

            int endIndex = 0;
            if (paragraphEnd != null)
            {
                // Get the index of the ending paragraph
                endIndex = section.Body.ChildObjects.IndexOf(paragraphEnd);
            }

            // Delete all content within the specified range
            for (int i = 0; i <= (endIndex - startIndex); i++)
            {
                section.Body.ChildObjects.RemoveAt(startIndex);
            }

            // Save the document to the specified path
            document.SaveToFile("Delete a Page.docx", Spire.Doc.FileFormat.Docx);

            // Close and release the original document
            document.Close();
            document.Dispose();
        }
    }
}
Apply for a Temporary License
If you'd like to remove the evaluation message from the generated documents, or to get rid of the function limitations, please request a 30-day trial license for yourself.
Modifying PDF documents to suit various usage scenarios is a common task for PDF document creators and managers. Among these operations, splitting and merging PDF pages can assist in reorganizing PDF content for printing, typesetting, etc. By using Python programs, developers can easily split one page from a PDF document to several pages or merge multiple PDF pages into a single page. This article will demonstrate how to use Spire.PDF for Python for splitting and merging PDF pages in Python programs.
- Split One PDF Page into Several PDF Pages with Python
- Merge Multiple PDF Pages into a Single Page with Python
Install Spire.PDF for Python
This scenario requires Spire.PDF for Python and plum-dispatch v1.7.4. They can be easily installed in your Windows through the following pip command.
pip install Spire.PDF
If you are unsure how to install, please refer to: How to Install Spire.PDF for Python on Windows
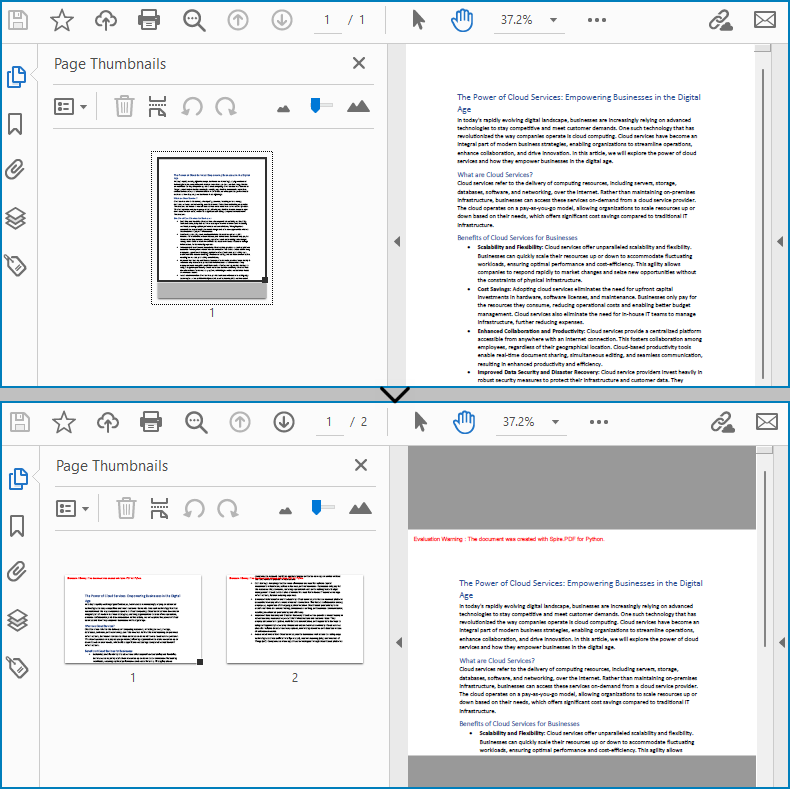
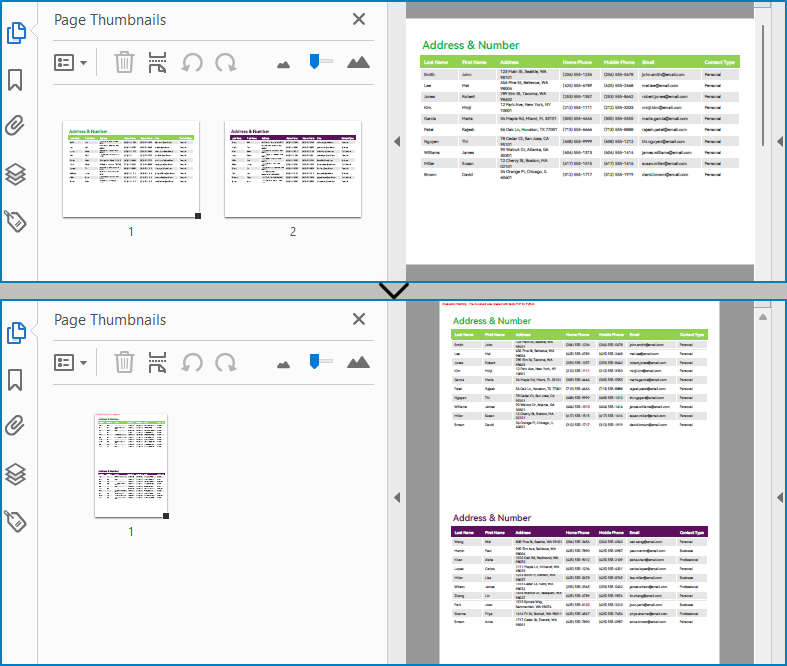
Split One PDF Page into Several PDF Pages with Python
With Spire.PDF for Python, developers draw a PDF page on a new PDF page using the PdfPageBase.CreateTemplate().Draw(newPage PdfPageBase, PointF) method. When drawing, if the current new page cannot fully accommodate the content of the original page, a new page is automatically created, and the remaining content is drawn on it. Therefore, we can create a new PDF document and control the drawing result by specifying the page size to achieve specified division of PDF pages horizontally or vertically.
Here are the steps to vertically split a PDF page into two separate PDF pages:
- Create an object of PdfDocument class and load a PDF document using PdfDocument.LoadFromFile() method.
- Get the first page of the document using PdfDocument.Pages.get_Item() method.
- Create a new PDF document by creating an object of PdfDocument class.
- Set the margins of the new document to 0 through PdfDocument.PageSettings.Margins.All property.
- Get the width and height of the retrieved page through PdfPageBase.Size.Width property and PdfPageBase.Size.Height property.
- Set the width of the new PDF document to the same as the retrieved page through PdfDocument.PageSettings.Width property and its height to half of the retrieved page's height through PdfDocument.PageSettings.Height property.
- Add a new page in the new document using PdfDocument.Pages.Add() method.
- Draw the content of the retrieved page onto the new page using PdfPageBase.CreateTemplate().Draw() method.
- Save the new document using PdfDocument.SaveToFile() method.
- Python
from spire.pdf import *
from spire.pdf.common import *

# Create an object of PdfDocument class and load a PDF document
pdf = PdfDocument()
pdf.LoadFromFile("Sample.pdf")

# Get the first page of the document
page = pdf.Pages.get_Item(0)

# Create a new PDF document
newPdf = PdfDocument()

# Set the margins of the new PDF document to 0
newPdf.PageSettings.Margins.All = 0.0

# Get the width and height of the retrieved page
width = page.Size.Width
height = page.Size.Height

# Set the width of the new PDF document to the same as the retrieved page and its height to half of the retrieved page's height
newPdf.PageSettings.Width = width
newPdf.PageSettings.Height = height / 2

# Add a new page to the new PDF document
newPage = newPdf.Pages.Add()

# Draw the content of the retrieved page onto the new page
page.CreateTemplate().Draw(newPage, PointF(0.0, 0.0))

# Save the new PDF document
newPdf.SaveToFile("output/SplitPDFPage.pdf")
pdf.Close()
newPdf.Close()
Merge Multiple PDF Pages into a Single Page with Python
Similarly, developers can merge PDF pages by drawing different pages on the same PDF page. It should be noted that the pages to be merged are preferably in the same width or height, otherwise it is necessary to take the maximum value to ensure correct drawing.
The detailed steps for merging two PDF pages into a single PDF page are as follows:
- Create an object of PdfDocument class and load a PDF document using PdfDocument.LoadFromFile() method.
- Get the first and second pages of the document using PdfDocument.Pages.get_Item() method.
- Create a new PDF document by creating an object of PdfDocument class.
- Set the margins of the new document to 0 through PdfDocument.PageSettings.Margins.All property.
- Get the width and height of the two retrieved pages through PdfPageBase.Size.Width property and PdfPageBase.Size.Height property.
- Set the width of the new PDF document to the same as the retrieved pages through PdfDocument.PageSettings.Width property and its height to the sum of the two retrieved pages' heights through PdfDocument.PageSettings.Height property.
- Draw the content of the two retrieved pages onto the new page using PdfPageBase.CreateTemplate().Draw() method.
- Save the new document using PdfDocument.SaveToFile() method.
- Python
from spire.pdf import *
from spire.pdf.common import *

# Create an object of PdfDocument class and load a PDF document
pdf = PdfDocument()
pdf.LoadFromFile("Sample1.pdf")

# Get the first page and the second page of the document
page = pdf.Pages.get_Item(0)
page1 = pdf.Pages.get_Item(0)

# Create a new PDF document
newPdf = PdfDocument()

# Set the margins of the new PDF document to 0
newPdf.PageSettings.Margins.All = 0.0

# Set the page width of the new document to the same as the retrieved page
newPdf.PageSettings.Width = page.Size.Width

# Set the page height of the new document to the sum of the heights of the two retrieved pages
newPdf.PageSettings.Height = page.Size.Height + page1.Size.Height

# Add a new page to the new PDF document
newPage = newPdf.Pages.Add()

# Draw the content of the retrieved pages onto the new page
page.CreateTemplate().Draw(newPage, PointF(0.0, 0.0))
page1.CreateTemplate().Draw(newPage, PointF(0.0, page.Size.Height))

# Save the new document
newPdf.SaveToFile("output/MergePDFPages.pdf")
pdf.Close()
newPdf.Close()
Apply for a Temporary License
If you'd like to remove the evaluation message from the generated documents, or to get rid of the function limitations, please request a 30-day trial license for yourself.
Python: Add, Read, or Remove Document Properties in PowerPoint
2024-02-23 07:10:20 Written by KoohjiManaging document properties in PowerPoint is an essential aspect of presentation creation. These properties serve as metadata that provides important information about the file, such as the author, subject, and keywords. By being able to add, retrieve, or remove document properties, users gain control over the organization and customization of their presentations. Whether it's adding relevant tags for easy categorization, accessing authorship details, or removing sensitive data, effectively managing document properties in PowerPoint ensures seamless collaboration and professionalism in your slide decks.
In this article, you will learn how to add, read, and remove document properties in a PowerPoint file in Python by using the Spire.Presentation for Python library.
- Add Document Properties to a PowerPoint File
- Read Document Properties of a PowerPoint File
- Remove Document Properties from a PowerPoint File
Install Spire.Presentation for Python
This scenario requires Spire.Presentation for Python and plum-dispatch v1.7.4. They can be easily installed in your Windows through the following pip commands.
pip install Spire.Presentation
If you are unsure how to install, please refer to this tutorial: How to Install Spire.Presentation for Python on Windows
Prerequisite Knowledge
Document properties can be divided into two types: standard document properties and custom document properties.
- Standard document properties are pre-defined properties that are commonly used across various PowerPoint presentations. Some examples of standard document properties include title, author, subject, keywords and company. Standard document properties are useful for providing general information and metadata about the presentation.
- Custom document properties are user-defined properties that allow you to add specific information to a PowerPoint presentation. Unlike standard document properties, custom properties are not predefined and can be tailored to suit your specific needs. Custom properties usually provide information relevant to your presentation that may not be covered by the default properties.
Spire.Presentation for Python offers the DocumentProperty class to work with both standard document properties and custom document properties. The standard document properties can be accessed using the properties like Title, Subject, Author, Manager, Company, etc. of the DocumentProperty class. To add or retrieve custom properties, you can use the set_Item() method and the GetPropertyName() method of the DocumentProperty class.
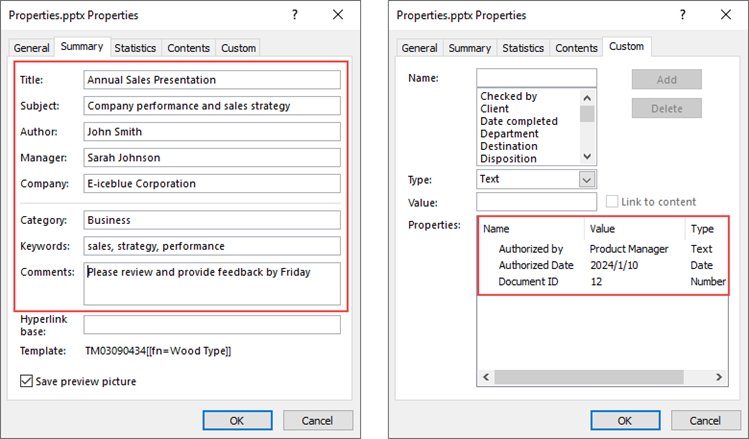
Add Document Properties to a PowerPoint File in Python
To add or change the standard document properties, you can assign values to the DocumentProperty.Title proerpty, DocumentProperty.Subject property and other similar properties. To add custom properties to a presentation, use the DocumentProperty.set_Item(name: str, value: SpireObject) method. The detailed steps are as follows.
- Create a Presentation object.
- Load a PowerPoint document using Presentation.LoadFromFile() method.
- Get the DocumentProperty object.
- Add standard document properties to the presentation by assigning values to the Title, Subject, Author, Manager, Company and Keywords properties of the object.
- Add custom properties to the presentation using set_Item() of the object.
- Save the presentation to a PPTX file using Presentation.SaveToFile() method.
- Python
from spire.presentation.common import *
from spire.presentation import *

# Create a Presentation object
presentation = Presentation()

# Load a PowerPoint document
presentation.LoadFromFile("C:\\Users\\Administrator\\Desktop\\input.pptx")

# Get the DocumentProperty object
documentProperty = presentation.DocumentProperty

# Set built-in document properties
documentProperty.Title = "Annual Sales Presentation"
documentProperty.Subject = "Company performance and sales strategy"
documentProperty.Author = "John Smith"
documentProperty.Manager = "Sarah Johnson"
documentProperty.Company = "E-iceblue Corporation"
documentProperty.Category = "Business"
documentProperty.Keywords = "sales, strategy, performance"
documentProperty.Comments = "Please review and provide feedback by Friday"

# Add custom document properties
documentProperty.set_Item("Document ID", Int32(12))
documentProperty.set_Item("Authorized by", String("Product Manager"))
documentProperty.set_Item("Authorized Date", DateTime(2024, 1, 10, 0, 0, 0, 0))

# Save to file
presentation.SaveToFile("output/Properties.pptx", FileFormat.Pptx2019)
presentation.Dispose()
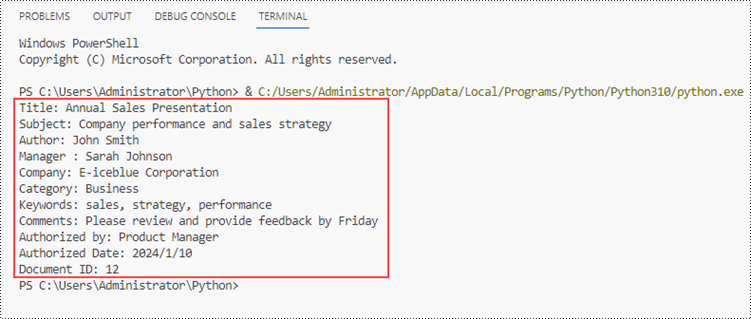
Read Document Properties of a PowerPoint File in Python
The DocumentProperty.Title and the similar properties are not only used to set standard properties but can return the values of standard properties as well. Since the name of a custom property is not constant, we need to get the name using the DocumentProperty.GetPropertyName(index: int) method. And then, we're able to get the property's value using the DocumentProperty.get_Item(name: str) method.
The steps to read document properties of a PowerPoint file are as follows.
- Create a Presentation object.
- Load a PowerPoint document using Presentation.LoadFromFile() method.
- Get the DocumentProperty object.
- Get the standard document properties by using the Title, Subject, Author, Manager, Company, and Keywords properties of the object.
- Get the count of the custom properties, and iterate through the custom properties.
- Get the name of a specific custom property by its index using DocumentProperty.GetPropertyName() method.
- Get the value of the property using DocumentProperty.get_Item() method.
- Python
from spire.presentation.common import *
from spire.presentation import *

# Create a Presentation object
presentation = Presentation()

# Load a PowerPoint document
presentation.LoadFromFile("C:\\Users\\Administrator\\Desktop\\Properties.pptx")

# Get the DocumentProperty object
documentProperty = presentation.DocumentProperty

# Get the built-in document properties
print("Title: " + documentProperty.Title)
print("Subject: " + documentProperty.Subject)
print("Author: " + documentProperty.Author)
print("Manager : " + documentProperty.Manager)
print("Company: " + documentProperty.Company)
print("Category: " + documentProperty.Category)
print("Keywords: " + documentProperty.Keywords)
print("Comments: " + documentProperty.Comments)

# Get the count of the custom document properties
count = documentProperty.Count

# Iterate through the custom properties
for i in range(count):

    # Get the name of a specific custom property
    customPropertyName = documentProperty.GetPropertyName(i)

    # Get the value of the custom property
    customPropertyValue = documentProperty.get_Item(customPropertyName)

    # Print the result
    print(customPropertyName + ": " + str(customPropertyValue))
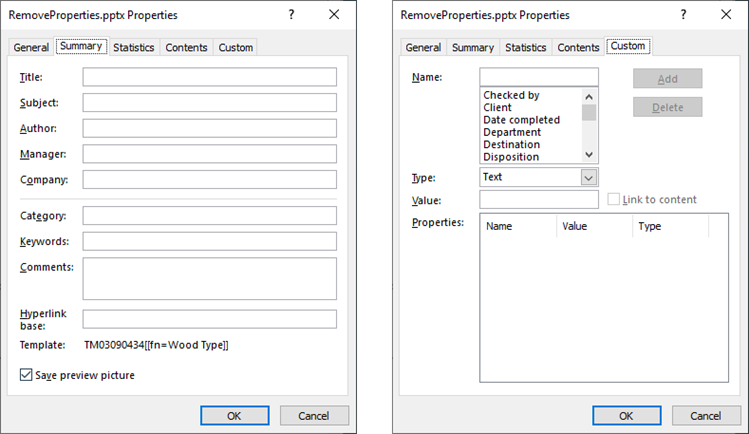
Remove Document Properties from a PowerPoint File in Python
Removing a standard property means assigning an empty string to a property like DocumentProperty.Title. To remove the custom properties, Spire.Presentation provides the DocumentProperty.Remove(name: str) method. The following are the steps to remove document properties from a PowerPoint file in Python.
- Create a Presentation object.
- Load a PowerPoint document using Presentation.LoadFromFile() method.
- Get the DocumentProperty object.
- Set the Title, Subject, Author, Manager, Company, and Keywords properties of the object to empty strings.
- Get the count of the custom properties.
- Get the name of a specific custom property by its index using DocumentProperty.GetPropertyName() method.
- Remove the custom property using DocumentProperty.Remove() method.
- Save the presentation to a PPTX file using Presentation.SaveToFile() method.
- Python
from spire.presentation.common import *
from spire.presentation import *

# Create a Presentation object
presentation = Presentation()

# Load a PowerPoint document
presentation.LoadFromFile("C:\\Users\\Administrator\\Desktop\\Properties.pptx")

# Get the DocumentProperty object
documentProperty = presentation.DocumentProperty

# Set built-in document properties to empty strings
documentProperty.Title = ""
documentProperty.Subject = ""
documentProperty.Author = ""
documentProperty.Manager = ""
documentProperty.Company = ""
documentProperty.Category = ""
documentProperty.Keywords = ""
documentProperty.Comments = ""

# Get the count of the custom document properties
i = documentProperty.Count
while i > 0:

    # Get the name of a specific custom property
    customPropertyName = documentProperty.GetPropertyName(i - 1)

    # Remove the custom property
    documentProperty.Remove(customPropertyName)
    i = i - 1

# Save the presentation to a different pptx file
presentation.SaveToFile("Output/RemoveProperties.pptx",FileFormat.Pptx2019)
Apply for a Temporary License
If you'd like to remove the evaluation message from the generated documents, or to get rid of the function limitations, please request a 30-day trial license for yourself.
