
Knowledgebase (2370)
Children categories
Using lists in PowerPoint allows you to present information in a structured and visually appealing way. They help break down complex ideas into digestible points, making it easier for your audience to understand and retain key concepts. Whether you're creating a slide deck for a business presentation, educational workshop, or conference talk, incorporating lists can enhance the visual appeal and effectiveness of your content. In this article, we will demonstrate how to create numbered lists and bulleted lists in PowerPoint presentations in Python using Spire.Presentation for Python.
- Create a Numbered List in PowerPoint in Python
- Create a Bulleted List with Symbol Bullets in PowerPoint in Python
- Create a Bulleted List with Image Bullets in PowerPoint in Python
Install Spire.Presentation for Python
This scenario requires Spire.Presentation for Python and plum-dispatch v1.7.4. They can be easily installed in your Windows through the following pip command.
pip install Spire.Presentation
If you are unsure how to install, please refer to this tutorial: How to Install Spire.Presentation for Python on Windows
Create a Numbered List in PowerPoint in Python
Spire.Presentation supports adding numerals or bullet points in front of paragraphs to create a numbered or bulleted list. To specify the bullet type, you can use the ParagraphProperties.BulletType property. The following are the steps to create a numbered list in a PowerPoint slide using Spire.Presentation for Python.
- Create a Presentation object.
- Get the first slide using Presentation.Slides[0] property.
- Append a shape to the slide using ISlide.Shapes.AppendShape() method and set the shape style.
- Specify the items of the numbered list inside a list.
- Create paragraphs based on the list items, and set the bullet type of these paragraphs to Numbered using ParagraphProperties.BulletType property.
- Set the numbered bullet style of these paragraphs using ParagraphProperties.BulletStyle property.
- Add these paragraphs to the shape using IAutoShape.TextFrame.Paragraphs.Append() method.
- Save the document to a PowerPoint file using Presentation.SaveToFile() method.
- Python
from spire.presentation.common import *
from spire.presentation import *
# Create an object of the Presentation class
presentation = Presentation()
# Get the first slide
slide = presentation.Slides[0]
# Add a shape to the slide and set the shape style
shape = slide.Shapes.AppendShape(ShapeType.Rectangle, RectangleF(50.0, 50.0, 300.0, 200.0))
shape.Fill.FillType = FillFormatType.none
shape.Line.FillType= FillFormatType.none
# Add text to the default paragraph
paragraph = shape.TextFrame.Paragraphs[0]
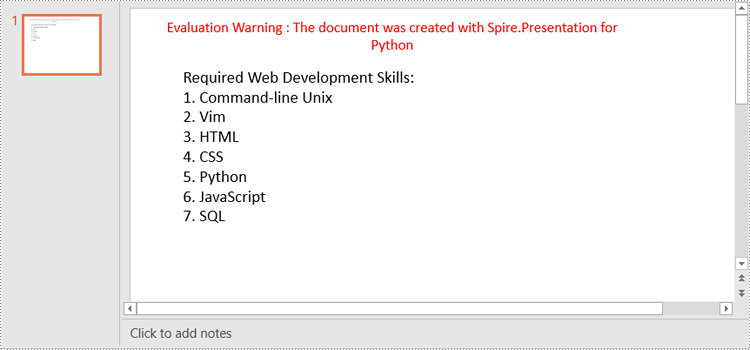
paragraph.Text = "Required Web Development Skills:"
paragraph.Alignment = TextAlignmentType.Left
paragraph.TextRanges[0].Fill.FillType = FillFormatType.Solid
paragraph.TextRanges[0].Fill.SolidColor.Color = Color.get_Black()
# Specify the list items
listItems = [
" Command-line Unix",
" Vim",
" HTML",
" CSS",
" Python",
" JavaScript",
" SQL"
]
# Create a numbered list
for item in listItems:
textParagraph = TextParagraph()
textParagraph.Text = item
textParagraph.Alignment = TextAlignmentType.Left
textParagraph.TextRanges[0].Fill.FillType = FillFormatType.Solid
textParagraph.TextRanges[0].Fill.SolidColor.Color = Color.get_Black()
textParagraph.BulletType = TextBulletType.Numbered
textParagraph.BulletStyle = NumberedBulletStyle.BulletArabicPeriod
shape.TextFrame.Paragraphs.Append(textParagraph)
# Save the result document
presentation.SaveToFile("NumberedList.pptx", FileFormat.Pptx2013)
presentation.Dispose()
Create a Bulleted List with Symbol Bullets in PowerPoint in Python
The process of creating a bulleted list with symbol bullets is very similar to that of creating a numbered list. The only difference is that you need to set the bullet type of the paragraphs to Symbol. The following are the steps.
- Create a Presentation object.
- Get the first slide using Presentation.Slides[0] property.
- Append a shape to the slide using ISlide.Shapes.AppendShape() method and set the shape style.
- Specify the items of the bulleted list inside a list.
- Create paragraphs based on the list items, and set the bullet type of these paragraphs to Symbol using ParagraphProperties.BulletType property.
- Add these paragraphs to the shape using IAutoShape.TextFrame.Paragraphs.Append() method.
- Save the document to a PowerPoint file using Presentation.SaveToFile() method.
- Python
from spire.presentation.common import *
from spire.presentation import *
# Create an object of the Presentation class
presentation = Presentation()
# Get the first slide
slide = presentation.Slides[0]
# Add a shape to the slide and set the shape style
shape = slide.Shapes.AppendShape(ShapeType.Rectangle, RectangleF(50.0, 50.0, 350.0, 200.0))
shape.Fill.FillType = FillFormatType.none
shape.Line.FillType = FillFormatType.none
# Add text to the default paragraph
paragraph = shape.TextFrame.Paragraphs[0]
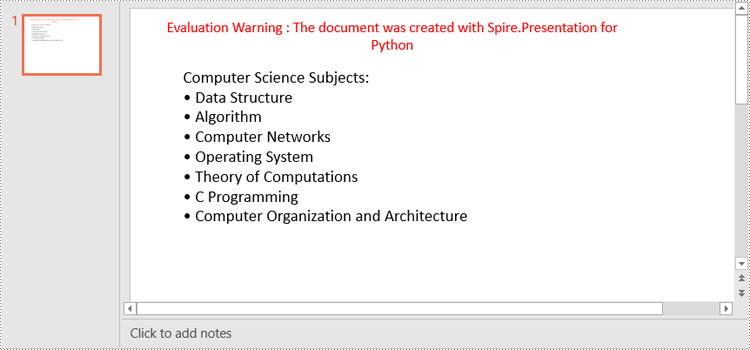
paragraph.Text = "Computer Science Subjects:"
paragraph.Alignment = TextAlignmentType.Left
paragraph.TextRanges[0].Fill.FillType = FillFormatType.Solid
paragraph.TextRanges[0].Fill.SolidColor.Color = Color.get_Black()
# Specify the list items
listItems = [
" Data Structure",
" Algorithm",
" Computer Networks",
" Operating System",
" Theory of Computations",
" C Programming",
" Computer Organization and Architecture"
]
# Create a symbol bulleted list
for item in listItems:
textParagraph = TextParagraph()
textParagraph.Text = item
textParagraph.Alignment = TextAlignmentType.Left
textParagraph.TextRanges[0].Fill.FillType = FillFormatType.Solid
textParagraph.TextRanges[0].Fill.SolidColor.Color = Color.get_Black()
textParagraph.BulletType = TextBulletType.Symbol
shape.TextFrame.Paragraphs.Append(textParagraph)
# Save the result document
presentation.SaveToFile("SymbolBulletedList.pptx", FileFormat.Pptx2013)
presentation.Dispose()
Create a Bulleted List with Image Bullets in PowerPoint in Python
To use an image as bullets, you need to set the bullet type of the paragraphs to Picture and then set the image as bullet points using the ParagraphProperties.BulletPicture.EmbedImage property. The following are the detailed steps.
- Create a Presentation object.
- Get the first slide using Presentation.Slides[0] property.
- Append a shape to the slide using ISlide.Shapes.AppendShape() method and set the shape style.
- Specify the items of the bulleted list inside a list.
- Create paragraphs based on the list items, and set the bullet type of these paragraphs to Picture using ParagraphProperties.BulletType property.
- Set an image as bullet points using ParagraphProperties.BulletPicture.EmbedImage property.
- Add these paragraphs to the shape using IAutoShape.TextFrame.Paragraphs.Append() method.
- Save the document to a PowerPoint file using Presentation.SaveToFile() method.
- Python
from spire.presentation.common import *
from spire.presentation import *
# Create an object of the Presentation class
presentation = Presentation()
# Get the first slide
slide = presentation.Slides[0]
# Add a shape to the slide and set the shape style
shape = slide.Shapes.AppendShape(ShapeType.Rectangle, RectangleF(50.0, 50.0, 400.0, 180.0))
shape.Fill.FillType = FillFormatType.none
shape.Line.FillType = FillFormatType.none
# Add text to the default paragraph
paragraph = shape.TextFrame.Paragraphs[0]
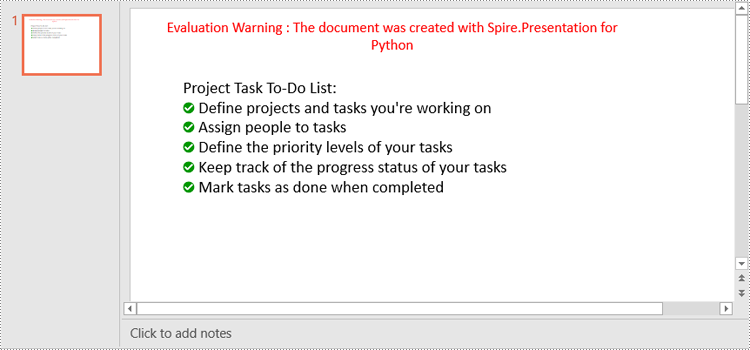
paragraph.Text = "Project Task To-Do List:"
paragraph.Alignment = TextAlignmentType.Left
paragraph.TextRanges[0].Fill.FillType = FillFormatType.Solid
paragraph.TextRanges[0].Fill.SolidColor.Color = Color.get_Black()
# Specify the list items
listItems = [
" Define projects and tasks you're working on",
" Assign people to tasks",
" Define the priority levels of your tasks",
" Keep track of the progress status of your tasks",
" Mark tasks as done when completed"
]
# Create an image bulleted list
for item in listItems:
textParagraph = TextParagraph()
textParagraph.Text = item
textParagraph.Alignment = TextAlignmentType.Left
textParagraph.TextRanges[0].Fill.FillType = FillFormatType.Solid
textParagraph.TextRanges[0].Fill.SolidColor.Color = Color.get_Black()
textParagraph.BulletType = TextBulletType.Picture
stream = Stream("icon.png")
imageData = presentation.Images.AppendStream(stream)
textParagraph.BulletPicture.EmbedImage = imageData
shape.TextFrame.Paragraphs.Append(textParagraph)
stream.Close()
# Save the result document
presentation.SaveToFile("ImageBulletedList.pptx", FileFormat.Pptx2013)
presentation.Dispose()
Apply for a Temporary License
If you'd like to remove the evaluation message from the generated documents, or to get rid of the function limitations, please request a 30-day trial license for yourself.
In Excel, document properties refer to the metadata or information associated with an Excel file. These properties provide details about the workbook itself, such as author, title, subject, keywords, and other descriptive information. Document properties are useful for organizing and categorizing Excel files, making it easier to search, sort, and manage a collection of workbooks. In this article, you will learn how to add document properties in Excel in Python using Spire.XLS for Python.
- Add Built-in Document Properties in Excel in Python
- Add Custom Document Properties in Excel in Python
Install Spire.XLS for Python
This scenario requires Spire.XLS for Python and plum-dispatch v1.7.4. They can be easily installed in your Windows through the following pip command.
pip install Spire.XLS
If you are unsure how to install, please refer to this tutorial: How to Install Spire.XLS for Python on Windows
Add Built-in Document Properties in Excel in Python
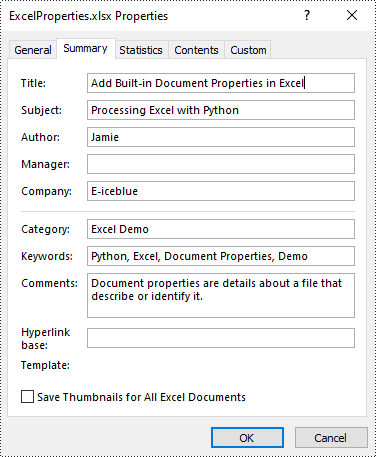
Built-in document properties are basic information about a document such as title, subject, author, category, etc. The names of these properties are predefined that cannot be edited, but Spire.XLS for Python allows you to set specific values for these properties. The following are the detailed steps.
- Create a Workbook object.
- Load an Excel document using Workbook.LoadFromFile() method.
- Get the built-in document properties of the document using Workbook.DocumentProperties property.
- Set specific document properties such as title, author, keywords and comments using the properties of BuiltInDocumentProperties class.
- Save the result document using Workbook.SaveToFile() method.
- Python
from spire.xls import *
from spire.xls.common import *

inputFile = "sample.xlsx"
outputFile = "ExcelProperties.xlsx"

# Create a Workbook object
workbook = Workbook()

# Load a sample Excel document
workbook.LoadFromFile(inputFile)

# Set built-in document properties for the Excel workbook
workbook.DocumentProperties.Author = "Jamie"
workbook.DocumentProperties.Title = "Add Built-in Document Properties in Excel"
workbook.DocumentProperties.Subject = "Processing Excel with Python"
workbook.DocumentProperties.Keywords = "Python, Excel, Document Properties, Demo"
workbook.DocumentProperties.Category = "Excel Demo"
workbook.DocumentProperties.Company = "E-iceblue"
workbook.DocumentProperties.Comments = "Document properties are details about a file that describe or identify it."

# Save the result document
workbook.SaveToFile(outputFile, FileFormat.Version2016)
workbook.Dispose()
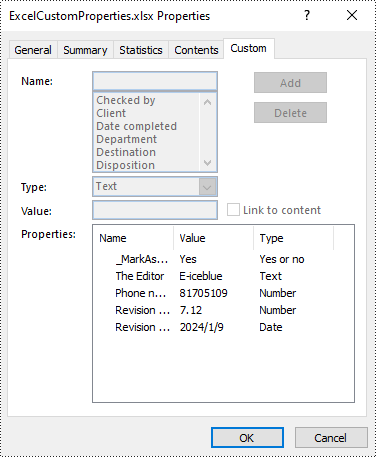
Add Custom Document Properties in Excel in Python
Custom document properties are additional properties that you can define for an Excel document. With Spire.XLS for Python, you can add custom properties with specified names and values through the ICustomDocumentProperties.Add() method. The following are the detailed steps.
- Create a Workbook object.
- Load an Excel document using Workbook.LoadFromFile() method.
- Get the custom document properties of the document using Workbook.CustomDocumentProperties property.
- Add custom document properties with different data types to the document using ICustomDocumentProperties.Add() method.
- Save the result document using Workbook.SaveToFile() method.
- Python
from spire.xls import *
from spire.xls.common import *

inputFile = "sample.xlsx"
outputFile = "ExcelCustomProperties.xlsx"

# Create a Workbook object
workbook = Workbook()

# Load a sample Excel document
workbook.LoadFromFile(inputFile)

# Add a custom property to make the document as final
workbook.CustomDocumentProperties.Add("_MarkAsFinal", True)

# Add other custom properties to the document
workbook.CustomDocumentProperties.Add("The Editor", "E-iceblue")
workbook.CustomDocumentProperties.Add("Phone number", 81705109)
workbook.CustomDocumentProperties.Add("Revision number", 7.12)
workbook.CustomDocumentProperties.Add("Revision date", DateTime.get_Now())

# Save the result document
workbook.SaveToFile(outputFile, FileFormat.Version2016)
workbook.Dispose()
Apply for a Temporary License
If you'd like to remove the evaluation message from the generated documents, or to get rid of the function limitations, please request a 30-day trial license for yourself.
PDF bookmarks are key tools for optimizing reading navigation. When expanded, users can click on the titles to jump to the corresponding chapters and display sub-level directories, enabling intuitive access and positioning within the document's deep structure. Collapsing bookmarks, on the other hand, allows users to hide all sub-bookmark information at the current level with a single click, simplifying the view and focusing on higher-level structure. These two operations work together to significantly enhance the efficiency and experience of reading complex, multi-level PDF documents. This article will introduce how to programmatically expand and collapse bookmarks in a PDF using Spire.PDF for Python.
Install Spire.PDF for Python
This scenario requires Spire.PDF for Python and plum-dispatch v1.7.4. They can be easily installed in your Windows through the following pip command.
pip install Spire.PDF
If you are unsure how to install, please refer to this tutorial: How to Install Spire.PDF for Python on Windows
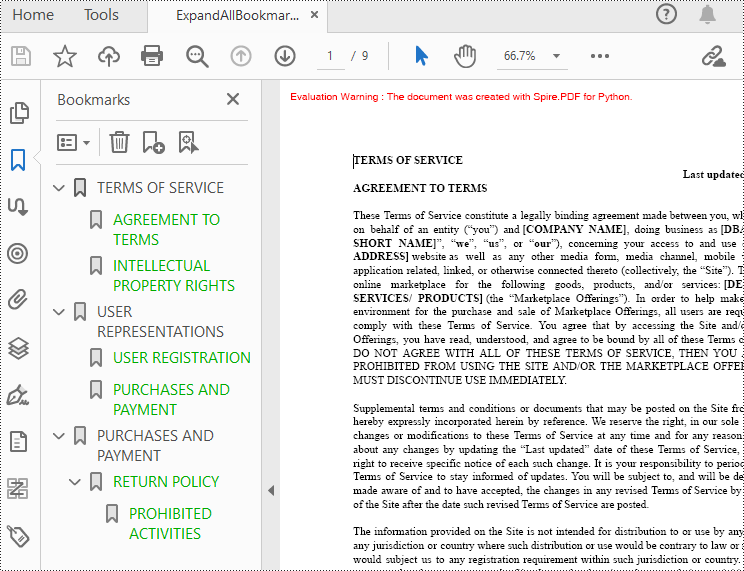
Expand or Collapse all Bookmarks in Python
Spire.PDF for Python provides the property BookMarkExpandOrCollapse to expand or collapse bookmarks, when set to True, it expands all bookmarks. Conversely, setting it to False will collapses all bookmarks. The following are the detailed steps for expanding bookmarks in a PDF document.
- Create a PdfDocument class instance.
- Load a PDF document using PdfDocument.LoadFromFile() method.
- Expand all bookmarks using BookMarkExpandOrCollapse property.
- Save the document using PdfDocument.SaveToFile() method.
- Python
from spire.pdf.common import *
from spire.pdf import *

# Create a PdfDocument object
doc = PdfDocument()

# Load a PDF file
doc.LoadFromFile("Terms of service.pdf")

# Set BookMarkExpandOrCollapse as True to expand all bookmarks, set False to collapse all bookmarks
doc.ViewerPreferences.BookMarkExpandOrCollapse = True

# Save the document
outputFile="ExpandAllBookmarks.pdf"
doc.SaveToFile(outputFile)

# Close the document
doc.Close()
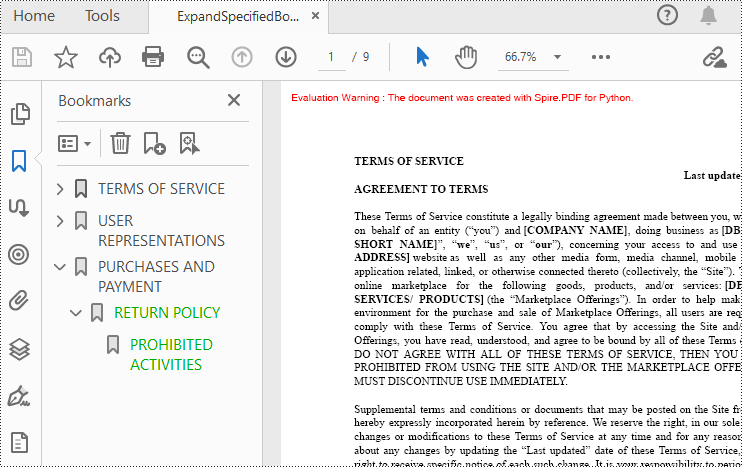
Expand or Collapse a specific Bookmark in Python
If you need to expand or collapse only a specific bookmark, you can use the property ExpandBookmark. The following are the detailed steps.
- Create a PdfDocument class instance.
- Load a PDF document using PdfDocument.LoadFromFile() method.
- Get a specific bookmark using PdfDocument.Bookmarks.get_Item() method.
- Expand the bookmark using ExpandBookmark property.
- Save the result document using PdfDocument.SaveToFile() method.
- Python
from spire.pdf.common import *
from spire.pdf import *

# Create a PdfDocument object
doc = PdfDocument()

# Load a PDF file
doc.LoadFromFile("Terms of service.pdf")

# Set ExpandBookmark as True for the third bookmark
doc.Bookmarks.get_Item(2).ExpandBookmark = True

# Save the document
outputFile="ExpandSpecifiedBookmarks.pdf"
doc.SaveToFile(outputFile)

# Close the document
doc.Close()
Apply for a Temporary License
If you'd like to remove the evaluation message from the generated documents, or to get rid of the function limitations, please request a 30-day trial license for yourself.
