
Knowledgebase (2370)
Children categories
Shapes play a vital role in PDF documents. By drawing graphics, defining outlines, filling colors, setting border styles, and applying geometric transformations, shapes provide rich visual effects and design options for documents. The properties of shapes such as color, line type, and fill effects can be customized according to requirements to meet personalized design needs. They can be used to create charts, decorations, logos, and other elements that enhance the readability and appeal of the document. This article will introduce how to use Spire.PDF for Python to draw shapes into PDF documents from Python.
- Draw Lines in PDF Documents in Python
- Draw Pies in PDF Documents in Python
- Draw Rectangles in PDF Documents in Python
- Draw Ellipses in PDF Documents in Python
Install Spire.PDF for Python
This scenario requires Spire.PDF for Python and plum-dispatch v1.7.4. They can be easily installed in your Windows through the following pip command.
pip install Spire.PDF
If you are unsure how to install, please refer to this tutorial: How to Install Spire.PDF for Python on Windows
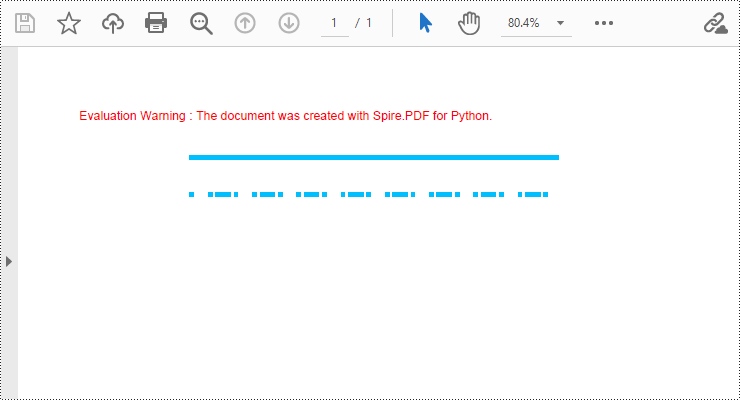
Draw Lines in PDF Documents in Python
Spire.PDF for Python provides the PdfPageBase.Canvas.DrawLine() method to draw lines by specifying the coordinates of the starting point and end point and a brush object. Here is a detailed step-by-step guide on how to draw lines:
- Create a PdfDocument object.
- Use the PdfDocument.Pages.Add() method to add a blank page to the PDF document.
- Save the current drawing state using the PdfPageBase.Canvas.Save() method so it can be restored later.
- Define the start point coordinate (x, y) and the length of a solid line segment.
- Create a PdfPen object.
- Draw a solid line segment using the PdfPageBase.Canvas.DrawLine() method with the previously created pen object.
- Set the DashStyle property of the pen to PdfDashStyle.Dash to create a dashed line style.
- Draw a dashed line segment using the pen with a dashed line style via the PdfPageBase.Canvas.DrawLine() method.
- Restore the previous drawing state using the PdfPageBase.Canvas.Restore(state) method.
- Save the document to a file using the PdfDocument.SaveToFile() method.
- Python
from spire.pdf.common import *
from spire.pdf import *

# Create PDF Document Object
doc = PdfDocument()

# Add a Page
page = doc.Pages.Add()

# Save the current drawing state
state = page.Canvas.Save()

# The starting X coordinate of the line
x = 100.0

# The starting Y coordinate of the line
y = 50.0

# The length of the line
width = 300.0

# Create a pen object with deep sky blue color and a line width of 3.0
pen = PdfPen(PdfRGBColor(Color.get_DeepSkyBlue()), 3.0)

# Draw a solid line
page.Canvas.DrawLine(pen, x, y, x + width, y)

# Set the pen style to dashed
pen.DashStyle = PdfDashStyle.Dash

# Set the dashed pattern to [1, 4, 1]
pen.DashPattern = [1, 4, 1]

# The Y coordinate for the start of the dashed line
y = 80.0

# Draw a dashed line
page.Canvas.DrawLine(pen, x, y, x + width, y)

# Restore the previously saved drawing state
page.Canvas.Restore(state)

# Save the document to a file
doc.SaveToFile("Drawing Lines.pdf")

# Close the document and release resources
doc.Close()
doc.Dispose()
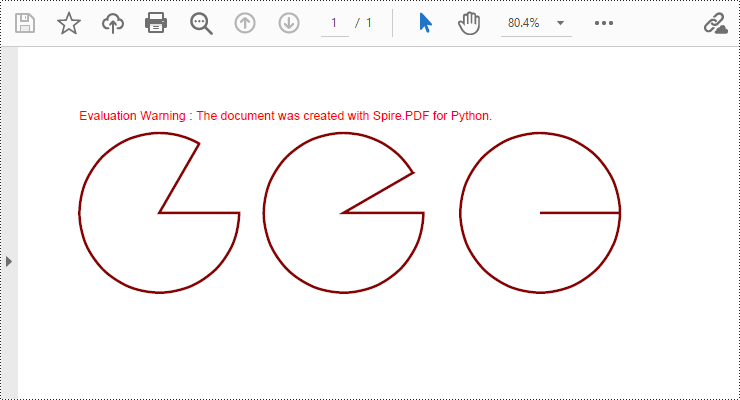
Draw Pies in PDF Documents in Python
To draw pie charts with different positions, sizes, and angles on a specified page, call the PdfPageBase.Canvas.DrawPie() method and pass appropriate parameters. The detailed steps are as follows:
- Create a PdfDocument object.
- Add a blank page to the PDF document using the PdfDocument.Pages.Add() method.
- Save the current drawing state using the PdfPageBase.Canvas.Save() method so it can be restored later.
- Create a PdfPen object.
- Call the PdfPageBase.Canvas.DrawPie() method and pass various position, size, and angle parameters to draw three pie charts.
- Restore the previous drawing state using the PdfPageBase.Canvas.Restore(state) method.
- Save the document to a file using the PdfDocument.SaveToFile() method.
- Python
from spire.pdf.common import *
from spire.pdf import *

# Create PDF Document Object
doc = PdfDocument()

# Add a Page
page = doc.Pages.Add()

# Save the current drawing state
state = page.Canvas.Save()

# Create a pen object with dark red color and a line width of 2.0
pen = PdfPen(PdfRGBColor(Color.get_DarkRed()), 2.0)

# Draw the first pie chart
page.Canvas.DrawPie(pen, 10.0, 30.0, 130.0, 130.0, 360.0, 300.0)

# Draw the second pie chart
page.Canvas.DrawPie(pen, 160.0, 30.0, 130.0, 130.0, 360.0, 330.0)

# Draw the third pie chart
page.Canvas.DrawPie(pen, 320.0, 30.0, 130.0, 130.0, 360.0, 360.0)

# Restore the previously saved drawing state
page.Canvas.Restore(state)

# Save the document to a file
doc.SaveToFile("Drawing Pie Charts.pdf")

# Close the document and release resources
doc.Close()
doc.Dispose()
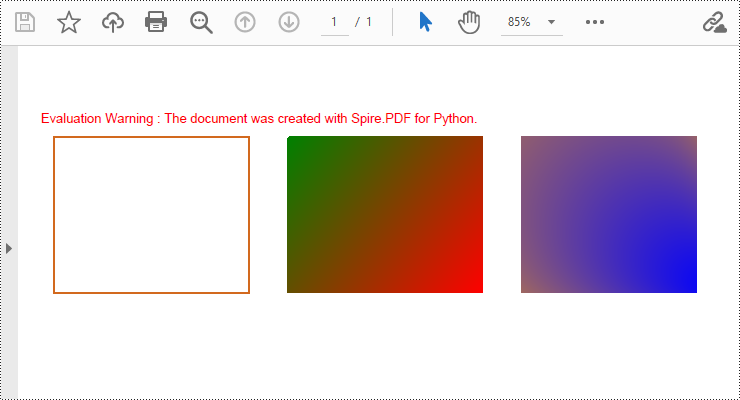
Draw Rectangles in PDF Documents in Python
Spire.PDF for Python provides the PdfPageBase.Canvas.DrawRectangle() method to draw rectangular shapes. By passing position and size parameters, you can define the position and dimensions of the rectangle. Here are the detailed steps for drawing a rectangle:
- Create a PdfDocument object.
- Use the PdfDocument.Pages.Add() method to add a blank page to the PDF document.
- Use the PdfPageBase.Canvas.Save() method to save the current drawing state for later restoration.
- Create a PdfPen object.
- Use the PdfPageBase.Canvas.DrawRectangle() method with the pen to draw the outline of a rectangle.
- Create a PdfLinearGradientBrush object for linear gradient filling.
- Use the PdfPageBase.Canvas.DrawRectangle() method with the linear gradient brush to draw a filled rectangle.
- Create a PdfRadialGradientBrush object for radial gradient filling.
- Use the PdfPageBase.Canvas.DrawRectangle() method with the radial gradient brush to draw a filled rectangle.
- Use the PdfPageBase.Canvas.Restore(state) method to restore the previously saved drawing state.
- Use the PdfDocument.SaveToFile() method to save the document to a file.
- Python
from spire.pdf.common import *
from spire.pdf import *

# Create PDF Document Object
doc = PdfDocument()

# Add a Page
page = doc.Pages.Add()

# Save the current drawing state
state = page.Canvas.Save()

# Create a Pen object with chocolate color and line width of 1.5
pen = PdfPen(PdfRGBColor(Color.get_Chocolate()), 1.5)

# Draw the outline of a rectangle using the pen
page.Canvas.DrawRectangle(pen, RectangleF(PointF(20.0, 30.0), SizeF(150.0, 120.0)))

# Create a linear gradient brush
linearGradientBrush = PdfLinearGradientBrush(PointF(200.0, 30.0), PointF(350.0, 150.0), PdfRGBColor(Color.get_Green()), PdfRGBColor(Color.get_Red()))

# Draw a filled rectangle using the linear gradient brush
page.Canvas.DrawRectangle(linearGradientBrush, RectangleF(PointF(200.0, 30.0), SizeF(150.0, 120.0)))

# Create a radial gradient brush
radialGradientBrush = PdfRadialGradientBrush(PointF(380.0, 30.0), 150.0, PointF(530.0, 150.0), 150.0, PdfRGBColor(Color.get_Orange()) , PdfRGBColor(Color.get_Blue()))

# Draw a filled rectangle using the radial gradient brush
page.Canvas.DrawRectangle(radialGradientBrush, RectangleF(PointF(380.0, 30.0), SizeF(150.0, 120.0)))

# Restore the previously saved drawing state
page.Canvas.Restore(state)

# Save the document to a file
doc.SaveToFile("Drawing Rectangle Shapes.pdf")

# Close the document and release resources
doc.Close()
doc.Dispose()
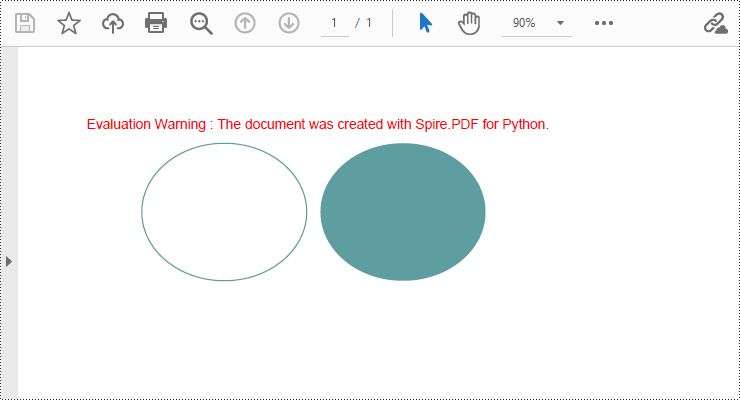
Draw Ellipses in PDF Documents in Python
Spire.PDF for Python provides the PdfPageBase.Canvas.DrawEllipse() method to draw elliptical shapes. You can use either a pen or a fill brush to draw ellipses in different styles. Here are the detailed steps for drawing an ellipse:
- Create a PdfDocument object.
- Use the PdfDocument.Pages.Add() method to add a blank page to the PDF document.
- Use the PdfPageBase.Canvas.Save() method to save the current drawing state for later restoration.
- Create a PdfPen object.
- Use the PdfPageBase.Canvas.DrawEllipse() method with the pen object to draw the outline of an ellipse, specifying the position and size of the ellipse.
- Create a PdfSolidBrush object.
- Use the PdfPageBase.Canvas.DrawEllipse() method with the fill brush object to draw a filled ellipse, specifying the position and size of the ellipse.
- Use the PdfPageBase.Canvas.Restore(state) method to restore the previously saved drawing state.
- Use the PdfDocument.SaveToFile() method to save the document to a file.
- Python
from spire.pdf.common import *
from spire.pdf import *

# Create PDF Document Object
doc = PdfDocument()

# Add a Page
page = doc.Pages.Add()

# Save the current drawing state
state = page.Canvas.Save()

# Create a Pen object
pen = PdfPens.get_CadetBlue()

# Draw the outline of an ellipse shape
page.Canvas.DrawEllipse(pen, 50.0, 30.0, 120.0, 100.0)

# Create a Brush object for filling
brush = PdfSolidBrush(PdfRGBColor(Color.get_CadetBlue()))

# Draw the filled ellipse shape
page.Canvas.DrawEllipse(brush, 180.0, 30.0, 120.0, 100.0)

# Restore the previously saved drawing state
page.Canvas.Restore(state)

# Save the document to a file
doc.SaveToFile("Drawing Ellipse Shape.pdf")

# Close the document and release resources
doc.Close()
doc.Dispose()
Apply for a Temporary License
If you'd like to remove the evaluation message from the generated documents, or to get rid of the function limitations, please request a 30-day trial license for yourself.
Finding and replacing text is a common need in document editing, as it helps users correct minor errors or make adjustments to terms appearing in the document. Although PDF documents have a fixed layout and editing can be challenging, users can still perform small modifications such as replacing text with Python, and achieve a satisfactory editing result. In this article, we will explore how to utilize Spire.PDF for Python to find and replace text in PDF documents within a Python program.
- Find Text and Replace the First Match in PDF with Python
- Find Text and Replace All Matches in PDF with Python
Install Spire.PDF for Python
This scenario requires Spire.PDF for Python and plum-dispatch v1.7.4. They can be easily installed in your Windows through the following pip commands.
pip install Spire.PDF
If you are unsure how to install, please refer to: How to Install Spire.PDF for Python on Windows
Find Text and Replace the First Match in PDF with Python
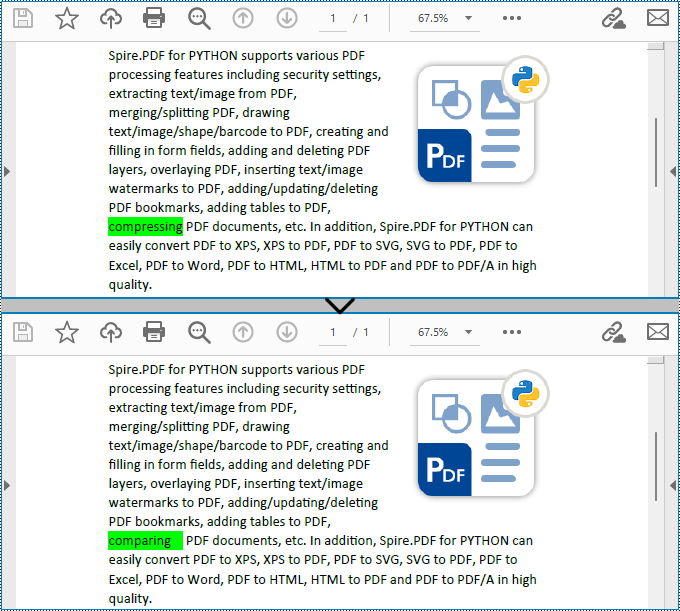
Spire.PDF for Python enables users to find text and replace the first match in PDF documents with the PdfTextReplacer.ReplaceText(string originalText, string newText) method. This replacement method is great for making simple replacements for words or phrases that only appear once on a single page of a document.
The detailed steps for finding text and replacing the first match are as follows:
- Create an object of PdfDocument class and load a PDF document using PdfDocument.LoadFromFile() method.
- Get a page of the document using PdfDocument.Pages.get_Item() method.
- Create an object of PdfTextReplacer class based on the page.
- Find specific text and replace the first match on the page using PdfTextReplacer.ReplaceText() method.
- Save the document using PdfDocument.SaveToFile() method.
- Python
from spire.pdf import *
from spire.pdf.common import *

# Create an object of PdfDocument
pdf = PdfDocument()

# Load a PDF document
pdf.LoadFromFile("Sample.pdf")

# Get a page
page = pdf.Pages.get_Item(0)

# Create an object of PdfTextReplacer class
replacer = PdfTextReplacer(page)

# Find and replace the first matched text
replacer.ReplaceText("compressing", "comparing")

# Save the document
pdf.SaveToFile("output/ReplaceFirstMatch.pdf")
pdf.Close()
Find Text and Replace All Matches in PDF with Python
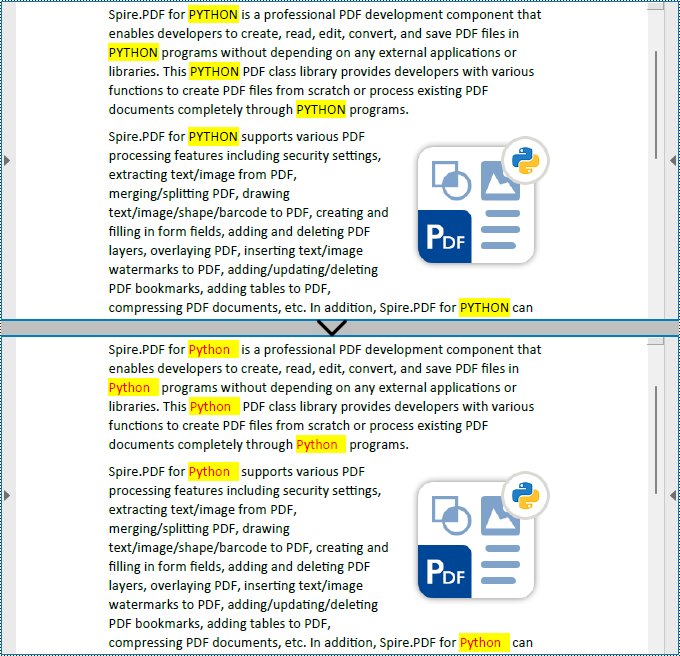
Spire.PDF for Python also provides the PdfTextReplacer.ReplaceAllText(string originalText, string newText, Color textColor) method to find specific text and replace all matches with new text (optionally resetting the text color). The detailed steps are as follows:
- Create an object of PdfDocument class and load a PDF document using PdfDocument.LoadFromFile() method.
- Loop through the pages in the document.
- Get a page using PdfDocument.Pages.get_Item() method.
- Create an object of PdfTextReplacer class based on the page.
- Find specific text and replace all the matches with new text in a new color using PdfTextReplacer.ReplaceAllText() method.
- Save the document using PdfDocument.SaveToFile() method.
- Python
from spire.pdf import *
from spire.pdf.common import *

# Create an object of PdfDocument
pdf = PdfDocument()

# Load a PDF document
pdf.LoadFromFile("Sample.pdf")

# Loop through the pages in the document
for i in range(pdf.Pages.Count):
    # Get a page
    page = pdf.Pages.get_Item(0)
    # Create an object of PdfTextReplacer class based on the page
    replacer = PdfTextReplacer(page)
    # Find and replace all matched text with a new color
    replacer.ReplaceAllText("PYTHON", "Python", Color.get_Red())

# Save the document
pdf.SaveToFile("output/ReplaceAllMatches.pdf")
pdf.Close()
Apply for a Temporary License
If you'd like to remove the evaluation message from the generated documents, or to get rid of the function limitations, please request a 30-day trial license for yourself.
Merging and splitting table cells in PowerPoint are essential features that enable users to effectively organize and present data. By merging cells, users can create larger cells to accommodate more information or establish header rows for better categorization. On the other hand, splitting cells allows users to divide a cell into smaller units to showcase specific details, such as individual data points or subcategories. These operations enhance the visual appeal and clarity of slides, helping the audience better understand and analyze the presented data. In this article, we will demonstrate how to merge and split table cells in PowerPoint in Python using Spire.Presentation for Python.
Install Spire.Presentation for Python
This scenario requires Spire.Presentation for Python and plum-dispatch v1.7.4. They can be easily installed in your Windows through the following pip command.
pip install Spire.Presentation
If you are unsure how to install, please refer to this tutorial: How to Install Spire.Presentation for Python on Windows
Merge Table Cells in PowerPoint in Python
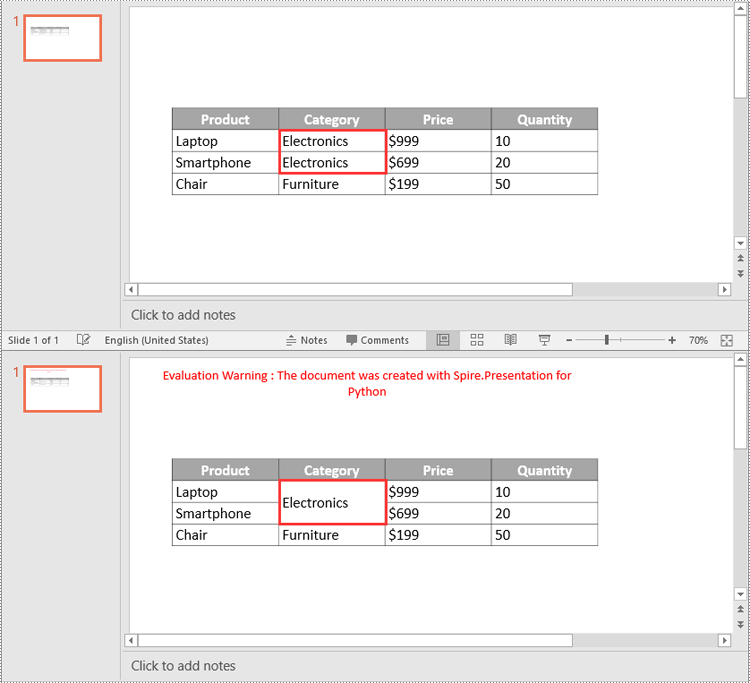
Spire.Presentation for Python offers the ITable[columnIndex, rowIndex] property to access specific table cells. Once accessed, you can use the ITable.MergeCells(startCell, endCell, allowSplitting) method to merge them into a larger cell. The detailed steps are as follows.
- Create an object of the Presentation class.
- Load a PowerPoint presentation using Presentation.LoadFromFile() method.
- Get a specific slide using Presentation.Slides[index] property.
- Find the table on the slide by looping through all shapes.
- Get the cells you want to merge using ITable[columnIndex, rowIndex] property.
- Merge the cells using ITable.MergeCells(startCell, endCell, allowSplitting) method.
- Save the result presentation using Presentation.SaveToFile() method.
- Python
from spire.presentation.common import *
from spire.presentation import *

# Create a Presentation object
ppt = Presentation()

# Load a PowerPoint presentation
ppt.LoadFromFile("Table1.pptx")

# Get the first slide
slide = ppt.Slides[0]

# Find the table on the first slide
table = None
for shape in slide.Shapes:
    if isinstance(shape, ITable):
        table = shape
        # Get the cell at column 2, row 2
        cell1 = table[1, 1]
        # Get the cell at column 2, row 3
        cell2 = table[1, 2]
        # Check if the content of the cells is the same
        if cell1.TextFrame.Text == cell2.TextFrame.Text:
            # Clear the text in the second cell
            cell2.TextFrame.Paragraphs.Clear()
        # Merge the cells
        table.MergeCells(cell1, cell2, True)

# Save the result presentation to a new file
ppt.SaveToFile("MergeCells.pptx", FileFormat.Pptx2016)
ppt.Dispose()
Split Table Cells in PowerPoint in Python
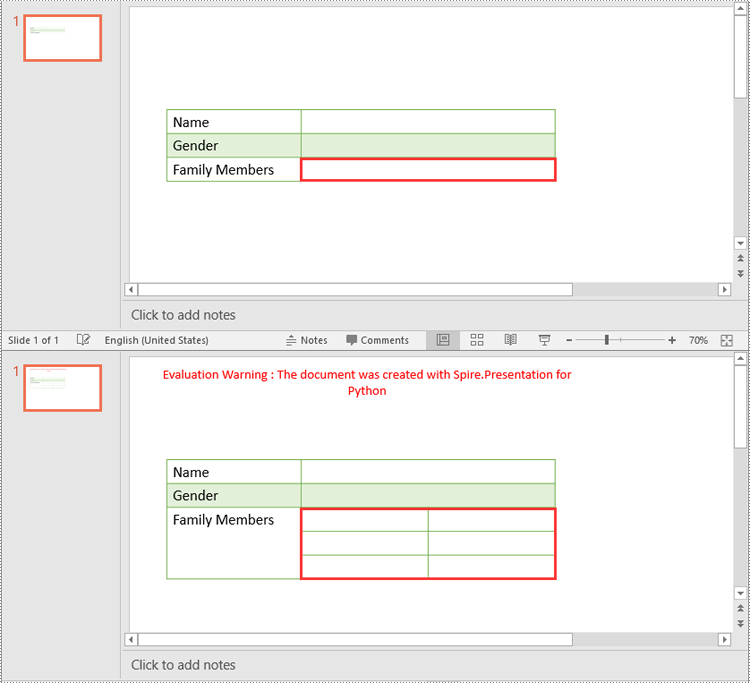
In addition to merging specific table cells, Spire.Presentation for Python also empowers you to split a specific table cell into smaller cells by using the Cell.Split(rowCount, colunmCount) method. The detailed steps are as follows.
- Create an object of the Presentation class.
- Load a PowerPoint presentation using Presentation.LoadFromFile() method.
- Get a specific slide using Presentation.Slides[index] property.
- Find the table on the slide by looping through all shapes.
- Get the cell you want to split using ITable[columnIndex, rowIndex] property.
- Split the cell into smaller cells using Cell.Split(rowCount, columnCount) method.
- Save the result presentation using Presentation.SaveToFile() method.
- Python
from spire.presentation.common import *
from spire.presentation import *

# Create a Presentation object
ppt = Presentation()

# Load a PowerPoint presentation
ppt.LoadFromFile("Table2.pptx")

# Get the first slide
slide = ppt.Slides[0]

# Find the table on the first slide
table = None
for shape in slide.Shapes:
    if isinstance(shape, ITable):
        table = shape
        # Get the cell at column 2, row 3
        cell = table[1, 2]
        # Split the cell into 3 rows and 2 columns
        cell.Split(3, 2)

# Save the result presentation to a new file
ppt.SaveToFile("SplitCells.pptx", FileFormat.Pptx2016)
ppt.Dispose()
Apply for a Temporary License
If you'd like to remove the evaluation message from the generated documents, or to get rid of the function limitations, please request a 30-day trial license for yourself.
