
Python (365)
When preparing multiple PowerPoint presentations with similar themes, copying slides helps to maintain consistency in terms of design, layout and content. This ensures that all presentations have a uniform appearance, which can enhance the aesthetics of your document. In this article, you will learn how to copy or clone slides in PowerPoint presentations in Python using Spire.Presentation for Python.
- Copy Slides Within the Same Presentation with Python
- Copy Slides to Another Presentation with Python
Install Spire.Presentation for Python
This scenario requires Spire.Presentation for Python and plum-dispatch v1.7.4. They can be easily installed in your Windows through the following pip command.
pip install Spire.Presentation
If you are unsure how to install, please refer to this tutorial: How to Install Spire.Presentation for Python on Windows
Copy Slides Within the Same Presentation with Python
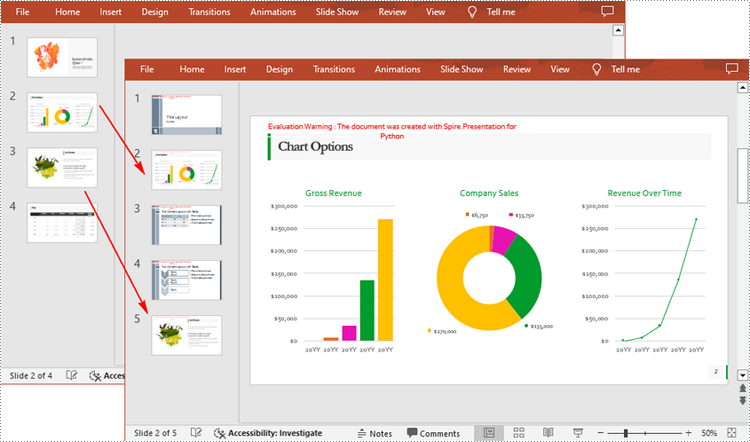
You can clone a slide either at a specified location or at the end of a PowerPoint presentation through the Presentation.Slides.Insert(Index: int, slide: ISlide) or Presentation.Slides.AppendBySlide(slide: ISlide) methods. The following are the detailed steps.
- Create a Presentation instance.
- Load a PowerPoint presentation using Presentation.LoadFromFile() method.
- Get a specified slide using Prenstion.Slides[] property.
- Clone the slide to the end of the same presentation using Presentation.Slides.AppendBySlide() method.
- Clone the slide to a specific position within the same presentation using Presentation.Slides.Insert() method.
- Save the result file using Presentation.SaveToFile() method.
- Python
from spire.presentation.common import *
from spire.presentation import *

inputFile ="Input1.pptx"
outputFile ="CloneSlidesWithinTheSame.pptx"

# Create a Presentation instance
ppt = Presentation()

#Load a PowerPoint presentation
ppt.LoadFromFile(inputFile)

# Get the first slide in the presentation
slide = ppt.Slides[0]

# Clone the slide to the end of the presentation
ppt.Slides.AppendBySlide(slide)

# Clone the slide to the third position within the presentation
ppt.Slides.Insert(2, slide)

# Save the result file
ppt.SaveToFile(outputFile, FileFormat.Pptx2016)
ppt.Dispose()

Copy Slides to Another Presentation with Python
Spire.Presentation for Python also allows you to load two PowerPoint files and then clone the slides from one presentation to another presentation. The following are the detailed steps.
- Create a Presentation instance.
- Load two PowerPoint presentations using Presentation.LoadFromFile() method.
- Get two slides in the first presentation using Prenstion.Slides[] property.
- Clone the first slide to a specific position in the second presentation using Presentation.Slides.Insert() method.
- Clone the second slide to the end of the second presentation using Presentation.Slides.AppendBySlide() method.
- Save the result file using Presentation.SaveToFile() method.
- Python
from spire.presentation.common import *
from spire.presentation import *

inputFile_1 = "Input1.pptx"
inputFile_2 = "Input2.pptx"
outputFile ="CloneSlidesToAnother.pptx"

# Load the first PowerPoint presentation
sourcePPT = Presentation()
sourcePPT.LoadFromFile(inputFile_1)

# Load the second PowerPoint presentation
destPPT = Presentation()
destPPT.LoadFromFile(inputFile_2)

# Get two slides in the first presentation
slide1 =sourcePPT.Slides[1]
slide2 =sourcePPT.Slides[2]

# Clone slide1 to the second position in the second presentation
destPPT.Slides.Insert(1, slide1)

# Clone slide2 to the end of the second presentation
destPPT.Slides.AppendBySlide(slide2)

# Save the second presentation
destPPT.SaveToFile(outputFile, FileFormat.Pptx2016)
destPPT.Dispose()
Apply for a Temporary License
If you'd like to remove the evaluation message from the generated documents, or to get rid of the function limitations, please request a 30-day trial license for yourself.
Charts and shapes in Excel are vital tools for clear and effective data presentation. Sometimes, it's beneficial to convert these visual elements into images. Perhaps you need to include a specific chart in a report or presentation outside of Excel. Or maybe you want to use an Excel-created infographic on your company's website. Regardless of the use case, knowing how to export these visuals as standalone image files can be invaluable. In this guide, we will explore how to convert charts and shapes in Excel to images in Python using Spire.XLS for Python.
- Convert a Specific Chart in an Excel Worksheet to Image in Python
- Convert All Charts in an Excel Worksheet to Images in Python
- Convert a Chart Sheet in Excel to Image in Python
- Convert Shapes in Excel to Images in Python
Install Spire.XLS for Python
This scenario requires Spire.XLS for Python and plum-dispatch v1.7.4. They can be easily installed in your Windows through the following pip command.
pip install Spire.XLS
If you are unsure how to install, please refer to this tutorial: How to Install Spire.XLS for Python on Windows
Convert a Specific Chart in an Excel Worksheet to Image in Python
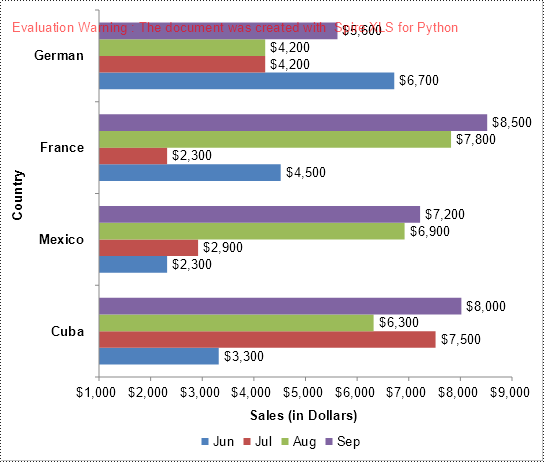
Spire.XLS for Python offers the Workbook.SaveChartAsImage(worksheet: Worksheet, chartIndex: int) method, allowing you to convert a specific chart within a worksheet into an image stream. This image stream can then be saved as an image file in various formats, including PNG, JPG, BMP, and more. The detailed steps are as follows.
- Create an object of the Workbook class.
- Load an Excel file using the Workbook.LoadFromFile() method.
- Get a specific worksheet in the file using the Workbook.Worksheets[] property.
- Save a specific chart in the worksheet to an image stream using the Workbook.SaveChartAsImage(worksheet: Worksheet, chartIndex: int) method.
- Save the image stream to an image file using the Stream.Save() method.
- Python
from spire.xls import *
from spire.xls.common import *

# Create a Workbook object
workbook = Workbook()
# Load an Excel file
workbook.LoadFromFile("Charts.xlsx")

# Get the first worksheet
sheet = workbook.Worksheets[0]

# Save the first chart in the worksheet to an image stream
image_stream = workbook.SaveChartAsImage(sheet, 0)

# Save the image stream to a PNG image file
image_stream.Save("Output/chart.png")

workbook.Dispose()
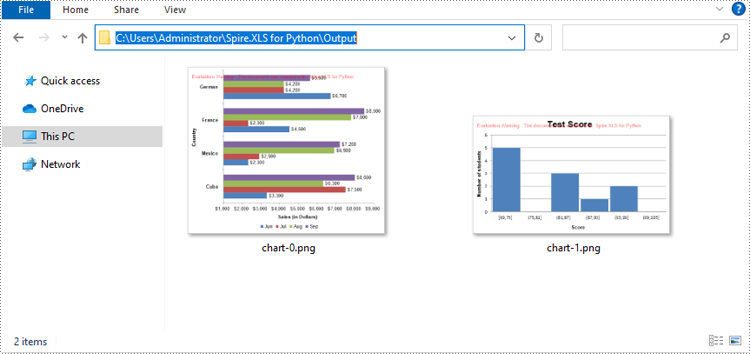
Convert All Charts in an Excel Worksheet to Images in Python
To convert all charts in an Excel worksheet to images, you can use the Workbook.SaveChartAsImage(worksheet: Worksheet) method. The detailed steps are as follows.
- Create an object of the Workbook class.
- Load an Excel file using the Workbook.LoadFromFile() method.
- Get a specific worksheet in the file using the Workbook.Worksheets[] property.
- Save all charts in the worksheet to a list of image streams using the Workbook.SaveChartAsImage(worksheet: Worksheet) method.
- Iterate through the image streams in the list and save them to separate image files.
- Python
from spire.xls import *
from spire.xls.common import *

# Create a Workbook object
workbook = Workbook()
# Load an Excel file
workbook.LoadFromFile("Charts.xlsx")

# Get the first worksheet
sheet = workbook.Worksheets[0]

image_streams = []
# Save the charts in the worksheet to a list of image streams
image_streams = workbook.SaveChartAsImage(sheet)

# Save the image streams to PNG image files
for i, image_stream in enumerate(image_streams):
    image_stream.Save(f"Output/chart-{i}.png")

workbook.Dispose()
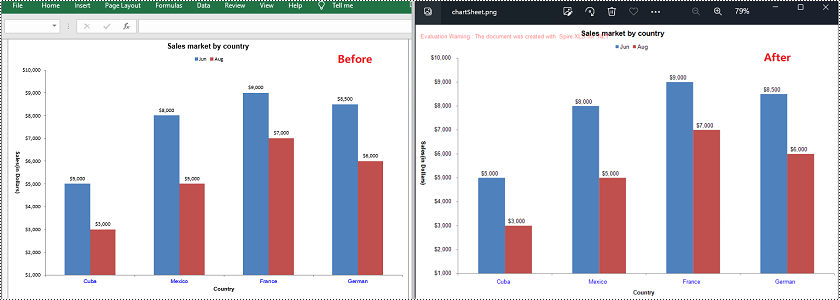
Convert a Chart Sheet in Excel to Image in Python
In Microsoft Excel, a chart sheet is a special type of sheet that is dedicated to displaying a single chart or graph. You can convert a chart sheet in an Excel workbook to an image using the Workbook.SaveChartAsImage(chartSheet: ChartSheet) method. The detailed steps are as follows.
- Create an object of the Workbook class.
- Load an Excel file using the Workbook.LoadFromFile() method.
- Get a specific chart sheet in the file using the Workbook.Chartsheets[] property.
- Save the chart sheet to an image stream using the Workbook.SaveChartAsImage(chartSheet: ChartSheet) method.
- Save the image stream to an image file.
- Python
from spire.xls import *
from spire.xls.common import *

# Create a Workbook object
workbook = Workbook()
# Load an Excel file
workbook.LoadFromFile("ChartSheet.xlsx")

# Get the first chart sheet
chart_sheet = workbook.Chartsheets[0]

# Save the chart sheet to an image stream
image_stream = workbook.SaveChartAsImage(chart_sheet)

# Save the image stream to a PNG image file
image_stream.Save("Output/chartSheet.png")

workbook.Dispose()
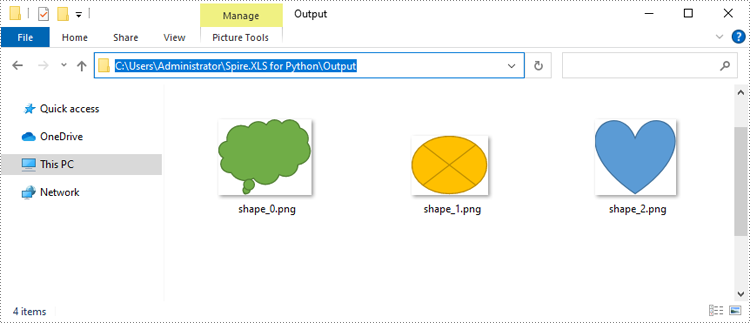
Convert Shapes in Excel to Images in Python
In addition to converting charts or chart sheets to images, you can also convert shapes in an Excel worksheet to images by using the XlsShape.SaveToImage() method. The detailed steps are as follows.
- Create an object of the Workbook class.
- Load an Excel file using the Workbook.LoadFromFile() method.
- Get a specific worksheet in the file using the Workbook.Worksheets[] property.
- Iterate through all the shapes in the worksheet.
- Typecast the shape to an XlsShape object.
- Save the shape to an image stream using the XlsShape.SaveToImage() method.
- Save the image stream to an image file.
- Python
from spire.xls import *
from spire.xls.common import *

# Create a Workbook object
workbook = Workbook()
# Load an Excel file
workbook.LoadFromFile("Shapes.xlsx")

# Get the first worksheet
sheet = workbook.Worksheets[0]

# Iterate through all the shapes in the worksheet
for i, shape in enumerate(sheet.PrstGeomShapes):
    xls_shape = XlsShape(shape)
    # Save the shape to an image stream
    image_stream = shape.SaveToImage()
    # Save the image stream to a PNG image file
    image_stream.Save(f"Output/shape_{i}.png")

workbook.Dispose()
Apply for a Temporary License
If you'd like to remove the evaluation message from the generated documents, or to get rid of the function limitations, please request a 30-day trial license for yourself.
Python: Create and Execute Conditional Mail Merges in Word Documents
2024-08-09 00:54:29 Written by KoohjiConditional mail merge in Word documents is a powerful method for personalized communication at scale. Unlike other mail merges that apply the same template to all recipients, conditional mail merge allows users to customize content based on specific criteria or conditions, ensuring that each recipient receives information that is directly relevant to them. By leveraging Python, users can automate the creation and execution of conditional mail merges.
This article will show how to create and execute conditional mail merges in Word documents through Python code using Spire.Doc for Python.
- Create Conditional Mail Merge in a Word Document with Python
- Execute Conditional Mail Merge in a Word Document with Python
Install Spire.Doc for Python
This scenario requires Spire.Doc for Python and plum-dispatch v1.7.4. They can be easily installed in your Windows through the following pip command.
pip install Spire.Doc
If you are unsure how to install, please refer to: How to Install Spire.Doc for Python on Windows
Create Conditional Mail Merge in a Word Document with Python
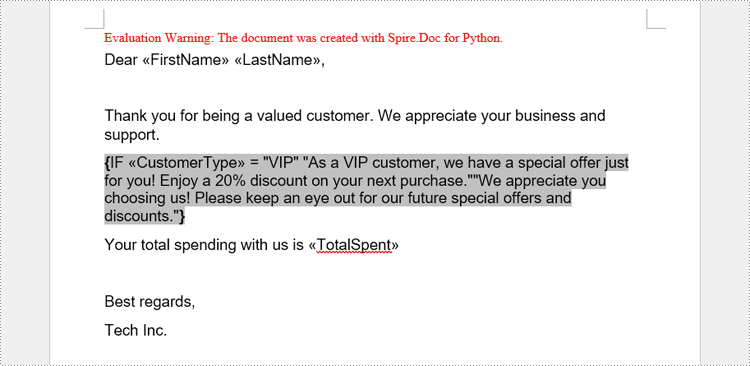
A conditional mail merge uses an If field containing a mail merge field, which alters the merge results based on the data. To add a conditional mail merge to a Word document, insert an If field, then include a mail merge field within the If field’s code, and finish by adding the field end mark to complete the setup. The condition is controlled by the code within the If field.
The detailed steps for adding a conditional mail merge to a Word document are as follows:
- Create an instance of the Document class to generate a Word document.
- Add a section to the document and configure the page setup.
- Create paragraph styles, add paragraphs, and set their formats.
- Create an IfField object, set its starting code through the IfField.Code property, and insert it into a paragraph using the Paragraph.Items.Add() method.
- Append a mail merge field to the paragraph using the Paragraph.AppendField() method.
- Append the remaining code to the paragraph using the Paragraph.AppendText() method.
- Append a field end mark to end the If field using the Paragraph.AppendFieldMark() method.
- Set the end mark as the end mark of the If field through the IfField.End property.
- Save the document using the Document.SaveToFile() method.
- Python
from spire.doc import *

# Create an instance of Document
doc = Document()

# Add a section to the document
section = doc.AddSection()

# Set the page size and margins
section.PageSetup.PageSize = PageSize.A4()
section.PageSetup.Margins.All = 50

# Create a paragraph style
style = ParagraphStyle(doc)
style.Name = "Style1"
style.CharacterFormat.FontName = "Arial"
style.CharacterFormat.FontSize = 14
style.ParagraphFormat.BeforeSpacing = 5
style.ParagraphFormat.AfterSpacing = 10
doc.Styles.Add(style)

# Add paragraphs and set the style
paragraph = section.AddParagraph()
paragraph.AppendText("Dear ")
paragraph.AppendField("FirstName", FieldType.FieldMergeField)
paragraph.AppendText(" ")
paragraph.AppendField("LastName", FieldType.FieldMergeField)
paragraph.AppendText(",")
paragraph.ApplyStyle(style.Name)
paragraph = section.AddParagraph()
paragraph.AppendText("\r\nThank you for being a valued customer. We appreciate your business and support.")
paragraph.ApplyStyle(style.Name)

# Add an If field to a paragraph
paragraph = section.AddParagraph()
ifField = IfField(doc)
ifField.Type = FieldType.FieldIf
ifField.Code = "IF "
paragraph.Items.Add(ifField)
# Add a mail merge field in the code of the If field
paragraph.AppendField("CustomerType", FieldType.FieldMergeField)
paragraph.AppendText(" = ")
paragraph.AppendText("\"VIP\"")
paragraph.AppendText(" \"As a VIP customer, we have a special offer just for you! Enjoy a 20% discount on your next "
                     "purchase.\"")
paragraph.AppendText("\"We appreciate you choosing us! Please keep an eye out for our future special offers and "
                     "discounts.\"")
# Add a field end mark at the end to end the If field
endIf = paragraph.AppendFieldMark(FieldMarkType.FieldEnd)
ifField.End = endIf
paragraph.ApplyStyle(style.Name)

# Add paragraphs and set the style
paragraph = section.AddParagraph()
paragraph.AppendText("Your total spending with us is ")
paragraph.AppendField("TotalSpent", FieldType.FieldMergeField)
paragraph.ApplyStyle(style.Name)
paragraph = section.AddParagraph()
paragraph.AppendText("\r\nBest regards,\r\nTech Inc.")
paragraph.ApplyStyle(style.Name)

# Save the document
doc.SaveToFile("output/ConditionalMailMerge.docx", FileFormat.Docx)
doc.Close()
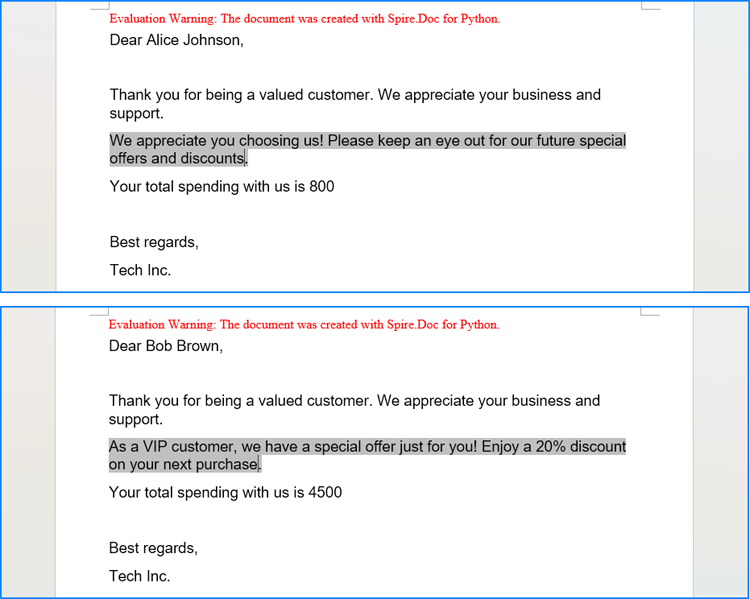
Execute Conditional Mail Merge in a Word Document with Python
The Document.MailMerge.Execute(fieldNames: list[str], fieldValues: list[str]) method provided by Spire.Doc for Python allows for mail merge operations within Word documents. After the merge, you can update the results of conditional mail merges by setting the Document.IsUpdateFields property to True. The detailed steps are as follows:
- Read the data in the table used for the merge as a two-dimensional list.
- Iterate through the data rows, skipping the header:
- Create an instance of the Document class and load the Word document to be merged.
- Get the names of the mail merge fields as a list using the Document.MailMerge.GetMergeFieldNames() method.
- Execute the mail merge with the data using the Document.MailMerge.Execute() method.
- Update the If field by setting the Document.IsUpdateFields property to True.
- Save the document using the Document.SaveToFile() method.
- Python
from spire.doc import *
import csv

# Read the data from a CSV file
data = []
with open("Customers.csv", "r") as csvfile:
    read = csv.reader(csvfile)
    for row in read:
        data.append(row)

# Iterate through the data rows by skipping the header
for i in range(1, len(data)):
    # Create an instance of Document and load a Word document
    doc = Document("output/ConditionalMailMerge.docx")
    # Get the field names from the document
    fieldNames = doc.MailMerge.GetMergeFieldNames()
    # Execute the mail merge
    doc.MailMerge.Execute(fieldNames, data[i])
    # Update the If field
    doc.IsUpdateFields = True
    # Save the document
    doc.SaveToFile(f"output/Customers/{data[i][0]} {data[i][1]}.docx", FileFormat.Docx2019)

doc.Close()
Apply for a Temporary License
If you'd like to remove the evaluation message from the generated documents, or to get rid of the function limitations, please request a 30-day trial license for yourself.
Managing PDF documents often involves removing annotations. Whether you're preparing documents for a presentation, sharing the final files with clients when questions are settled down, or archiving important records, deleting annotations can be essential.
Spire.PDF for Python allows users to delete annotations from PDFs in Python efficiently. Follow the instructions below to clean up your PDF files seamlessly.
- Delete Specified Annotations
- Delete All Annotations from a Page
- Delete All Annotations from the PDF Document
Install Spire.PDF for Python
This scenario requires Spire.PDF for Python and plum-dispatch v1.7.4. They can be easily installed in your Windows through the following pip command.
pip install Spire.PDF
If you are unsure how to install it, please refer to this tutorial: How to Install Spire.PDF for Python on Windows.
Delete Specified Annotations from PDF in Python
To delete a specified annotation from PDF documents, you need to target the annotation to be removed at first. Then you can remove it by calling the Page.AnnotationsWidget.RemoveAt() method offered by Spire.PDF for Python. This section will guide you through the whole process step by step.
Steps to remove an annotation from a page:
- Create a new PdfDocument object.
- Load a PDF document from files using PdfDocument.LoadFromFile() method.
- Get the specific page of the PDF with PdfDocument.Pages.get_Item() method.
- Delete the annotation from the page by calling Page.AnnotationsWidget.RemoveAt() method.
- Save the resulting document using PdfDocument.SaveToFile() method.
Here's the code example for you to refer to:
- Python
from spire.pdf.common import *
from spire.pdf import *

# Create a new PDF document
doc = PdfDocument()

# Open the PDF document to be modified from the disk
doc.LoadFromFile("sample1.pdf")

# Get the first page of the document
page = doc.Pages.get_Item(0)

# Remove the 2nd annotation from the page
page.AnnotationsWidget.RemoveAt(1)

# Save the PDF document
doc.SaveToFile("output/delete_2nd_annotation.pdf", FileFormat.PDF)

doc.Close()
Delete All Annotations from a PDF Page in Python
The Pages.AnnotationsWidget.Clear() method provided by Spire.PDF for Python helps you to complete the task of removing each annotation from a page. This part will demonstrate how to delete all annotations from a page in Python with a detailed guide and a code example.
Steps to delete all annotations from a page:
- Create an instance of the PdfDocument class.
- Read the PDF document from the disk by PdfDocument.LoadFromFile() method.
- Remove annotations on the page using Pages.AnnotationsWidget.Clear() method.
- Write the document to disk with PdfDocument.SaveToFile() method.
Below is the code example of deleting annotations from the first page:
- Python
from spire.pdf.common import *
from spire.pdf import *


# Create a new PDF document
document = PdfDocument()

# Load the file from the disk
document.LoadFromFile("sample1.pdf")

# Remove all annotations from the first page
document.Pages[0].AnnotationsWidget.Clear()

# Save the document
document.SaveToFile("output/delete_annotations_page.pdf", FileFormat.PDF)

document.Close()
Delete All Annotations of PDF Documents in Python
Removing all annotations from a PDF document involves retrieving the annotations first, which means you need to loop through each page to ensure that every annotation is deleted. The section will introduce how to accomplish the task in Python, providing detailed steps and an example to assist in cleaning up PDF documents.
Steps to remove all annotations of the whole PDF document:
- Instantiate a PdfDocument object.
- Open the document from files using PdfDocument.LoadFromFile() method.
- Loop through pages of the PDF document.
- Get each page of the PDF document with PdfDocument.Pages.get_Item() method.
- Remove all annotations from each page using Page.AnnotationsWidget.Clear() method.
- Save the document to your local file with PdfDocument.SaveToFile() method.
Here is the example for reference:
- Python
from spire.pdf.common import *
from spire.pdf import *


# Create an object of PDF class
document = PdfDocument()

# Load the file to be operated from the disk
document.LoadFromFile("sample1.pdf")

# Loop through all pages in the PDF document
for i in range(document.Pages.Count):
    # Get a specific page
    page = document.Pages.get_Item(i)
    # Remove all annotations from the page
    page.AnnotationsWidget.Clear()

# Save the resulting document
document.SaveToFile("output/delete_all_annotations.pdf", FileFormat.PDF)

document.Close()
Apply for a Temporary License
If you'd like to remove the evaluation message from the generated documents, or to get rid of the function limitations, please request a 30-day trial license for yourself.
Page setup in Excel refers to the various settings that control how an Excel worksheet will be printed or displayed in a print preview. These settings determine the appearance and layout of the printed document, ensuring that it meets the desired formatting and readability standards. Page setup options include page margins, orientation, paper size, print area, headers, footers, scaling, and other print-related settings. In this article, we will explain how to set page setup options in Excel in Python using Spire.XLS for Python.
- Set Page Margins in Excel in Python
- Set Page Orientation in Excel in Python
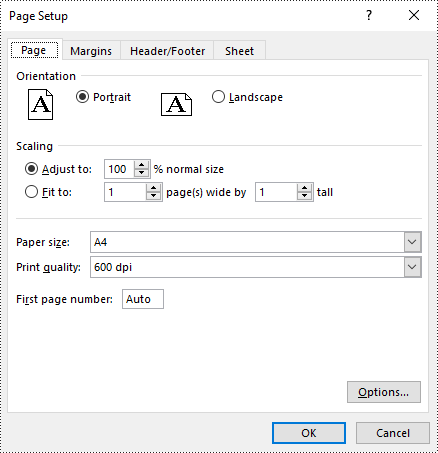
- Set Paper Size in Excel in Python
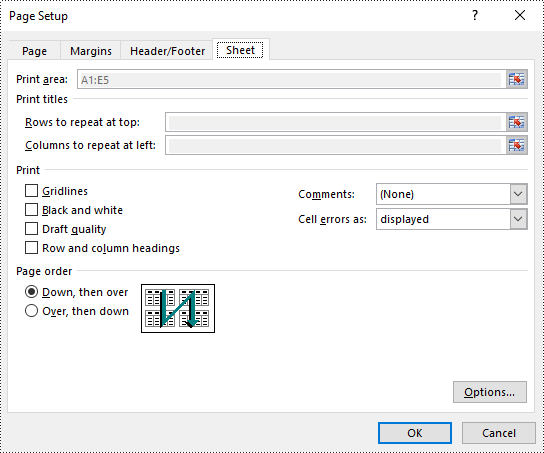
- Set Print Area in Excel in Python
- Set Scaling Factor in Excel in Python
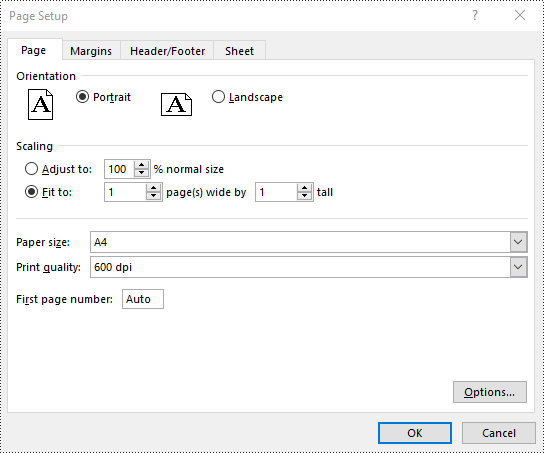
- Set FitToPages Options in Excel in Python
- Set Headers and Footers in Excel in Python
Install Spire.XLS for Python
This scenario requires Spire.XLS for Python and plum-dispatch v1.7.4. They can be easily installed in your Windows through the following pip command.
pip install Spire.XLS
If you are unsure how to install, please refer to this tutorial: How to Install Spire.XLS for Python on Windows
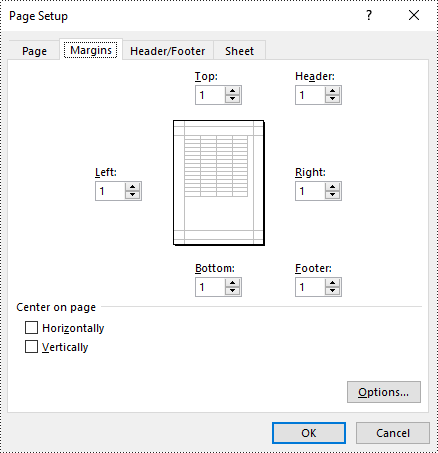
Set Page Margins in Excel in Python
In Spire.XLS for Python, the PageSetup class is used to configure page setup options for Excel worksheets. You can access the PageSetup object of a worksheet through the Worksheet.PageSetup property. Then, you can use properties like PageSetup.TopMargin, PageSetup.BottomMargin, PageSetup.LeftMargin, PageSetup.RightMargin, PageSetup.HeaderMarginInch, and PageSetup.FooterMarginInch to set the respective margins for the worksheet. The detailed steps are as follows:
- Create an object of the Workbook class.
- Load an Excel file using Workbook.LoadFromFile() method.
- Get a specific worksheet using Workbook.Worksheets[index] property.
- Access the PageSetup object of the worksheet using Worksheet.PageSetup property.
- Set the top, bottom, left, right, header, and footer margins using PageSetup.TopMargin, PageSetup.BottomMargin, PageSetup.LeftMargin, PageSetup.RightMargin, PageSetup.HeaderMarginInch, and PageSetup.FooterMarginInch properties.
- Save the modified workbook to a new file using Workbook.SaveToFile() method.
- Python
from spire.xls import *
from spire.xls.common import *

# Create a Workbook object
workbook = Workbook()
# Load an Excel file
workbook.LoadFromFile("Sample.xlsx")

# Get the first worksheet
sheet = workbook.Worksheets[0]

# Get the PageSetup object of the worksheet
pageSetup = sheet.PageSetup

# Set top, bottom, left, and right page margins for the worksheet
# The measure of the unit is Inch (1 inch = 2.54 cm)
pageSetup.TopMargin = 1
pageSetup.BottomMargin = 1
pageSetup.LeftMargin = 1
pageSetup.RightMargin = 1
pageSetup.HeaderMarginInch= 1
pageSetup.FooterMarginInch= 1

# Save the modified workbook to a new file
workbook.SaveToFile("SetPageMargins.xlsx", ExcelVersion.Version2016)
workbook.Dispose()
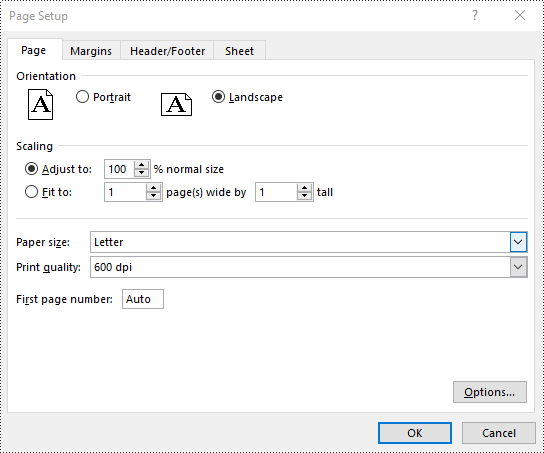
Set Page Orientation in Excel in Python
To set the page orientation for an Excel worksheet, you can use the PageSetup.Orientation property. The detailed steps are as follows.
- Create an object of the Workbook class.
- Load an Excel file using Workbook.LoadFromFile() method.
- Get a specific worksheet using Workbook.Worksheets[index] property.
- Access the PageSetup object of the worksheet using Worksheet.PageSetup property.
- Set the page orientation using PageSetup.Orientation property.
- Save the modified workbook to a new file using Workbook.SaveToFile() method.
- Python
from spire.xls import *
from spire.xls.common import *

# Create a Workbook object
workbook = Workbook()
# Load an Excel file
workbook.LoadFromFile("Sample.xlsx")

# Get the first worksheet
sheet = workbook.Worksheets[0]

# Get the PageSetup object of the worksheet
pageSetup = sheet.PageSetup

# Set the page orientation for printing the worksheet to landscape mode
pageSetup.Orientation = PageOrientationType.Landscape

# Save the modified workbook to a new file
workbook.SaveToFile("SetPageOrientation.xlsx", ExcelVersion.Version2016)
workbook.Dispose()
Set Paper Size in Excel in Python
You can set a wide range of paper sizes, such as A3, A4, A5, B4, B5, Letter, Legal, and Tabloid for printing an Excel worksheet using the PageSetup.PaperSize property. The detailed steps are as follows:
- Create an object of the Workbook class.
- Load an Excel file using Workbook.LoadFromFile() method.
- Get a specific worksheet using Workbook.Worksheets[index] property.
- Access the PageSetup object of the worksheet using Worksheet.PageSetup property.
- Set the paper size using PageSetup.PaperSize property.
- Save the modified workbook to a new file using Workbook.SaveToFile() method.
- Python
from spire.xls import *
from spire.xls.common import *

# Create a Workbook object
workbook = Workbook()
# Load an Excel file
workbook.LoadFromFile("Sample.xlsx")

# Get the first worksheet
sheet = workbook.Worksheets[0]

# Get the PageSetup object of the worksheet
pageSetup = sheet.PageSetup

# Set the paper size to A4
pageSetup.PaperSize = PaperSizeType.PaperA4

# Save the modified workbook to a new file
workbook.SaveToFile("SetPaperSize.xlsx", ExcelVersion.Version2016)
workbook.Dispose()
Set Print Area in Excel in Python
The print area of an Excel worksheet can be customized using the PageSetup.PringArea property. The detailed steps are as follows.
- Create an object of the Workbook class.
- Load an Excel file using Workbook.LoadFromFile() method.
- Get a specific worksheet using Workbook.Worksheets[index] property.
- Access the PageSetup object of the worksheet using Worksheet.PageSetup property.
- Set the print area using PageSetup.PringArea property.
- Save the modified workbook to a new file using Workbook.SaveToFile() method.
- Python
from spire.xls import *
from spire.xls.common import *

# Create a Workbook object
workbook = Workbook()
# Load an Excel file
workbook.LoadFromFile("Sample.xlsx")

# Get the first worksheet
sheet = workbook.Worksheets[0]

# Get the PageSetup object of the worksheet
pageSetup = sheet.PageSetup

# Set the print area of the worksheet to "A1:E5"
pageSetup.PrintArea = "A1:E5"

# Save the modified workbook to a new file
workbook.SaveToFile("SetPrintArea.xlsx", ExcelVersion.Version2016)
workbook.Dispose()
Set Scaling Factor in Excel in Python
You can scale the content of a worksheet to a specific percentage of its original size with the PageSetup.Zoom property. The detailed steps are as follows.
- Create an object of the Workbook class.
- Load an Excel file using Workbook.LoadFromFile() method.
- Get a specific worksheet using Workbook.Worksheets[index] property.
- Access the PageSetup object of the worksheet using Worksheet.PageSetup property.
- Set the scaling factor using PageSetup.Zoom property.
- Save the modified workbook to a new file using Workbook.SaveToFile() method.
- Python
from spire.xls import *
from spire.xls.common import *

# Create a Workbook object
workbook = Workbook()
# Load an Excel file
workbook.LoadFromFile("Sample.xlsx")

# Get the first worksheet
sheet = workbook.Worksheets[0]

# Get the PageSetup object of the worksheet
pageSetup = sheet.PageSetup

# Set the scaling factor of the worksheet to 90%
pageSetup.Zoom = 90

# Save the modified workbook to a new file
workbook.SaveToFile("SetScalingFactor.xlsx", ExcelVersion.Version2016)
workbook.Dispose()

Set FitToPages Options in Excel in Python
In addition to scaling the content of a worksheet to a specific percentage of its original size, you can also fit the content of a worksheet to a specific number of pages using PageSetup.FitToPagesTall and PageSetup.FitToPagesWide properties. The detailed steps are as follows.
- Create an object of the Workbook class.
- Load an Excel file using Workbook.LoadFromFile() method.
- Get a specific worksheet using Workbook.Worksheets[index] property.
- Access the PageSetup object of the worksheet using Worksheet.PageSetup property.
- Fit the content of the worksheet to one page using PageSetup.FitToPagesTall and PageSetup.FitToPagesWide properties.
- Save the modified workbook to a new file using Workbook.SaveToFile() method.
- Python
from spire.xls import *
from spire.xls.common import *

# Create a Workbook object
workbook = Workbook()
# Load an Excel file
workbook.LoadFromFile("Sample.xlsx")

# Get the first worksheet
sheet = workbook.Worksheets[0]

# Get the PageSetup object of the worksheet
pageSetup = sheet.PageSetup

# Fit the content of the worksheet within one page vertically (i.e., all rows will fit on a single page)
pageSetup.FitToPagesTall = 1
# Fit the content of the worksheet within one page horizontally (i.e., all columns will fit on a single page)
pageSetup.FitToPagesWide = 1

# Save the modified workbook to a new file
workbook.SaveToFile("FitToPages.xlsx", ExcelVersion.Version2016)
workbook.Dispose()
Set Headers and Footers in Excel in Python
For setting headers and footers in Excel, please check this article: Python: Add Headers and Footers to Excel.
Apply for a Temporary License
If you'd like to remove the evaluation message from the generated documents, or to get rid of the function limitations, please request a 30-day trial license for yourself.
Python: Remove Images from Slides and Slide Masters in PowerPoint
2024-07-31 00:55:55 Written by KoohjiRemoving images from slides and slide masters can be essential for many reasons, such as decluttering slides, maintaining uniformity, preparing templates, or modifying a template. Using Python, you can easily handle this task in seconds.
This guide will demonstrate removing images from slides and slide masters in PowerPoint documents in Python with Spire.Presentation for Python. Check this page and make a clean presentation.
- Remove Images from Slides
- Remove Images from Slide Masters
- Remove Specified Images from Slides
- Remove Specified Images from Slide Masters
Install Spire.Presentation for Python
This scenario requires Spire.Presentation for Python and plum-dispatch v1.7.4. They can be easily installed in your Windows through the following pip command.
pip install Spire.Presentation
If you are unsure how to install it, please refer to this tutorial: How to Install Spire. Presentation for Python on Windows.
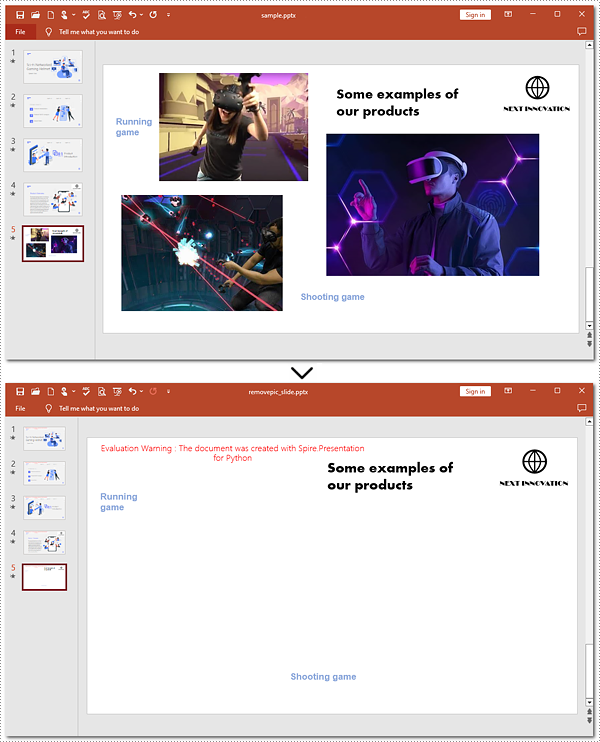
Remove Images from Slides of PowerPoint in Python
Removing images from PowerPoint slides can be efficiently managed using Python. The Presentation.Shapes.RemoveAt() method published by Spire. Presentation for Python allows users to delete pictures from a PowerPoint presentation without effort. The following instructions will guide you through the whole process.
Steps to remove images from a slide:
- Create an object for the Presentation class.
- Load the target PowerPoint document to be operated with the Presentation.LoadFromFile() method.
- Get the slide that you want to modify using the Presentation.Slides[] property.
- Loop through shapes on the slide.
- Determine if these shapes are images.
- Remove images from the slide using the Presentation.Shapes.RemoveAt() method.
- Save the resulting PowerPoint document with the Presentation.SaveToFile() method.
Here's the code example for reference:
- Python
from spire.presentation.common import *
from spire.presentation import *


# Create a Presentation object
ppt = Presentation()
# Load the PowerPoint document to be modified from the disk
ppt.LoadFromFile("sample.pptx")

# Get the fifth slide
slide = ppt.Slides[4]

# Loop through shapes on the slide
for i in range(slide.Shapes.Count - 1, -1, -1):
    # Check if those shapes are images
    if isinstance(slide.Shapes[i], SlidePicture):
        # Remove pictures on the fifth slide
        slide.Shapes.RemoveAt(i)


# Save to file
ppt.SaveToFile("removepic_slide.pptx", FileFormat.Pptx2013)

# Release the resources
ppt.Dispose()
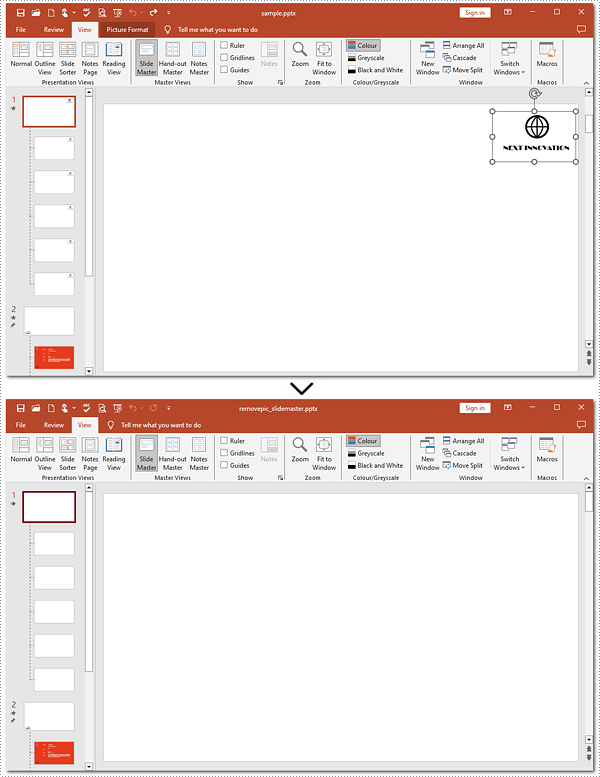
Remove Images from Slide Masters of PowerPoint Using Python
Removing images from slide masters is basically the same as doing that from a slide. To apply this action, you can use Presentation.Shapes.RemoveAt() method provided by Spire.Presentation for Python. Check out the steps below and make a nice and clean presentation.
Steps to remove images from Slide Masters:
- Instantiate a Presentation object.
- Read the PowerPoint document from disk using the Presentation.LoadFromFile() method.
- Get the second Slide Master with the Presentation.Masters[] property.
- Iterate through images on the second Slide Master.
- Confirm whether these shapes are images.
- Remove images from the second Slide Master using the Shapes.RemoveAt() method.
- Save the modified document with the Presentation.SaveToFile() method.
Here's the code example:
- Python
from spire.presentation.common import *
from spire.presentation import *


# Create an instance of the Presentation class
pre = Presentation()
# Open the sample PowerPoint document from the disk
pre.LoadFromFile("sample.pptx")

# Retrieve the first Slide Master
master = pre.Masters[0]

# Loop through shapes on the slide master
for i in range(master.Shapes.Count - 1, -1, -1):
    # Check whether these shapes are images
    if isinstance(master.Shapes[i], SlidePicture):
        # Remove images on the first slide master
        master.Shapes.RemoveAt(i)


# Save the generated file
pre.SaveToFile("removepic_slidemaster.pptx", FileFormat.Pptx2013)

# Release the resources
pre.Dispose()
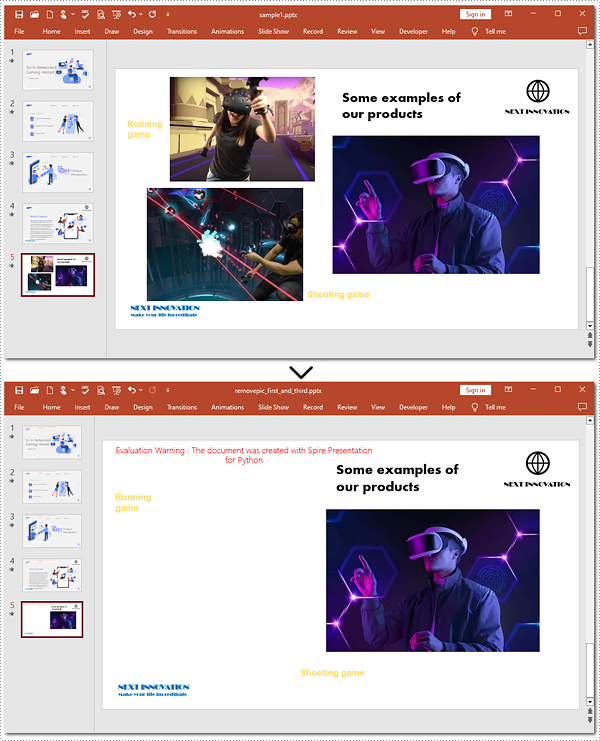
Delete Specified Images from Slides with Python
When working with PowerPoint presentations, you may need to remove specific images from your slides to refine your content. The guide below will walk you through targeting and removing specified images from a slide.
Steps to delete specified images:
- Instantiate an object of the Presentation class.
- Load the target file from the disk with the Presentation.LoadFromFile() method.
- Create a list to store image indexes.
- Get the 5th slide using the Presentation.Slides[] property.
- Loop through shapes on the slide.
- Verify whether these shapes are images.
- Find the 1st and 3rd pictures.
- Delete these two pictures by the Shapes.RemoveAt() method.
- Save the generated presentation using the Presentation.SaveToFile() method.
Below is the code example to refer to:
- Python
from spire.presentation.common import *
from spire.presentation import *


# Create a Presentation object
ppt = Presentation()
# Load the PowerPoint document from the disk
ppt.LoadFromFile("sample1.pptx")

# Create a list to keep track of image indexes to delete
indexes = []

# Get the fifth slide
slide = ppt.Slides[4]

# Iterate through shapes on the slide
image_index = 0
for i in range(slide.Shapes.Count - 1, -1, -1):
    # Check if shapes are pictures
    if isinstance(slide.Shapes[i], SlidePicture):
        image_index += 1
        # Record indexes of the first and third images
        if image_index in (1, 3):
            indexes.append(i)


# Remove the first and third images
for index in indexes:
    slide.Shapes.RemoveAt(index)

# Save to file
ppt.SaveToFile("removepic_first_and_third.pptx", FileFormat.Pptx2013)

# Release the resources
ppt.Dispose()
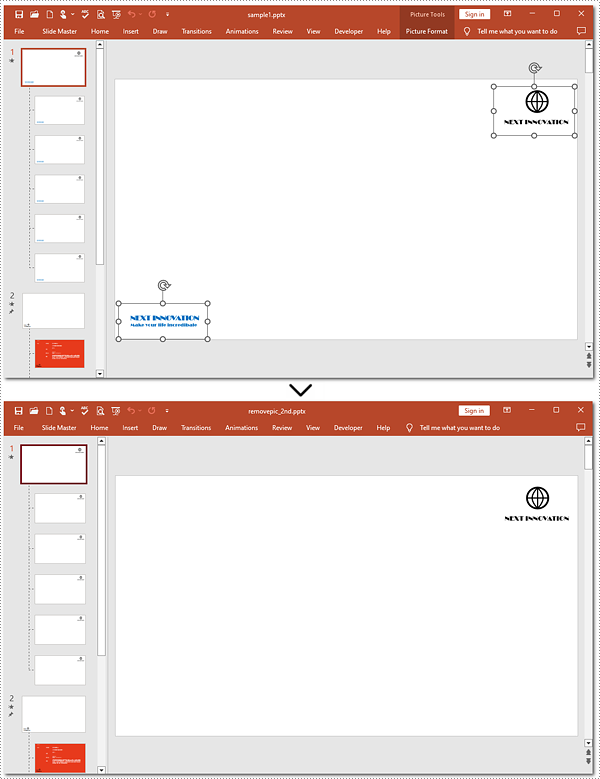
Delete Specified Images from Slide Masters in Python
Shapes.RemoveAt() method also supports removing a specified image from a slide master. To complete the task, you need to target the picture to be deleted. Refer to the detailed steps and a code example to finish the process.
Steps to remove a specified picture from a slide master:
- Create a new object for the Presentation class.
- Read the document from the disk using the Presentation.LoadFromFlie() method.
- Retrieve the 1st slide master by the Presentation.Masters[] property.
- Iterate through shapes on the slide master.
- Check if these shapes are images.
- Remove the 2nd picture with the Shapes.RemoveAt() method.
- Save the resulting presentation to the disk using the Presentation.SaveToFile() method.
Here is the code example:
- Python
from spire.presentation.common import *
from spire.presentation import *

# Create an instance of the Presentation class
pre = Presentation()
# Open the sample PowerPoint document from the disk
pre.LoadFromFile("sample1.pptx")

# Retrieve the first Slide Master
master = pre.Masters[0]

# Loop through the shapes in reverse order
for i in range(master.Shapes.Count - 1, -1, -1):
    # Check whether shapes are images
    if isinstance(master.Shapes[i], SlidePicture):
        # Remove the second image from the slide master
        if i == 1:
            master.Shapes.RemoveAt(i)
            break


# Save the generated file
pre.SaveToFile("removepic_2nd.pptx", FileFormat.Pptx2013)

# Release the resources
pre.Dispose()
Apply for a Temporary License
If you'd like to remove the evaluation message from the generated documents, or to get rid of the function limitations, please request a 30-day trial license for yourself.
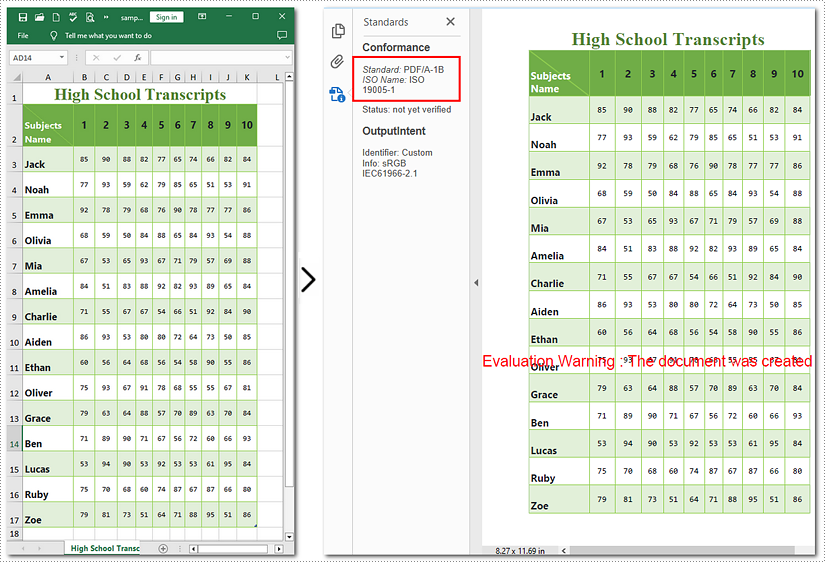
Converting XLS files to various formats is necessary for data management and presentation. ODS, XPS, PostScript, and PDF/A-1b offer unique advantages and are suitable for different scenarios.
ODS is widely used for compatibility with many office suites. XPS preserves document fidelity and is ideal for sharing and archiving. PostScript is a versatile page description language often used for printing and graphic design. PDF/A-1b ensures long-term archiving by complying with strict preservation standards.
This guide will illustrate how to convert Excel to ODS, XPS, PostScript, and PDF/A-1b with Python using Spire.XLS for Python, leveraging their specific strengths to meet diverse needs.
Install Spire.XLS for Python
This scenario requires Spire.XLS for Python and plum-dispatch v1.7.4. They can be easily installed in your Windows through the following pip command.
pip install Spire.XLS
If you are unsure how to install it, please refer to this tutorial: How to Install Spire.XLS for Python on Windows.
Convert Excel to ODS, XPS, and PostScript with Python
To convert Excel to ODS, XPS, and PostScript documents, you can utilize Workbook.SaveToFile() method. It supports converting CSV to Excel and PDF, Excel to PDF and XLSX, etc. By using this method provided by Spire.XLS for Python, you can seamlessly transform your documents into these formats while maintaining accuracy without data loss. Read the following steps to learn more:
Steps to convert Excel to ODS, XPS, and PostScript:
- Create a new Workbook object.
- Import the file to be converted from the disk using Workbook.LoadFromFile() method.
- Convert it to ODS, XPS, or PostScript with Workbook.SaveToFile() method.
Here is the code example for reference:
- Python
from spire.xls import *
from spire.xls.common import *

# Create a Workbook object
workbook = Workbook()

# Load the file from the disk
workbook.LoadFromFile("sample.xlsx")

# Save the document to an ODS file
workbook.SaveToFile("to_ods.ods", FileFormat.ODS)
# Save the document as an XPS file
workbook.SaveToFile("to_xps.xps", FileFormat.XPS)
# Save the document as a PostScript file
workbook.SaveToFile("to_postscript.ps", FileFormat.PostScript)

workbook.Dispose()
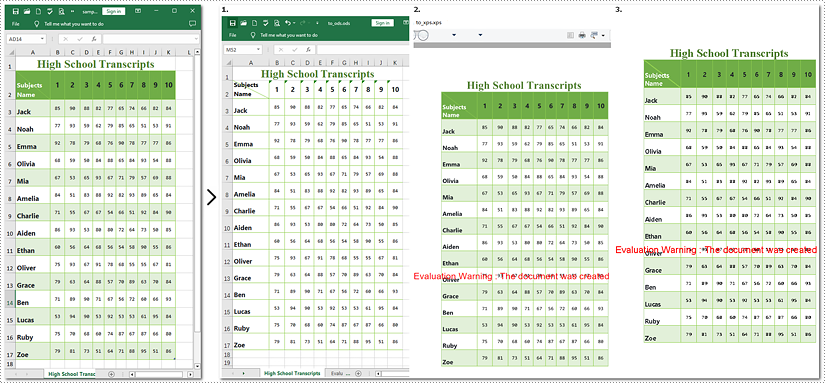
Note: Images 1, 2, and 3 show the results of converting Excel files to ODS, XPS, and PostScript formats, respectively.
How to Convert Excel Documents to PDF/A-1b Format
If you need to convert Excel to PDF/A-1b Format with Python, call Workbook.SaveToFile will help you. The steps to transform Excel documents to PDF/A-1b are similar to those above, except the former involves an additional step. This tutorial will guide you through the process with detailed steps and a code example.
Steps to convert Excel to PDF/A-1b
- Instantiate a new Workbook object.
- Read the Excel document from the disk using Workbook.LoadFromFile() method.
- Set the PDF conformance level to PDF/A-1b.
- Save the generated document as PDF with Workbook.SaveToFile() method.
Here is the code example for you:
- Python
from spire.xls import *
from spire.xls.common import *

# Create a Workbook object
workbook = Workbook()

# Open the file from the disk
workbook.LoadFromFile("sample.xlsx")

# Set the PDF conformance to PDF/A-1b
workbook.ConverterSetting.PdfConformanceLevel = PdfConformanceLevel.Pdf_A1B
# Convert the Excel document to PDF/A-1b
workbook.SaveToFile("to_pdfa1b", FileFormat.PDF)

workbook.Dispose()
Apply for a Temporary License
If you'd like to remove the evaluation message from the generated documents, or to get rid of the function limitations, please request a 30-day trial license for yourself.
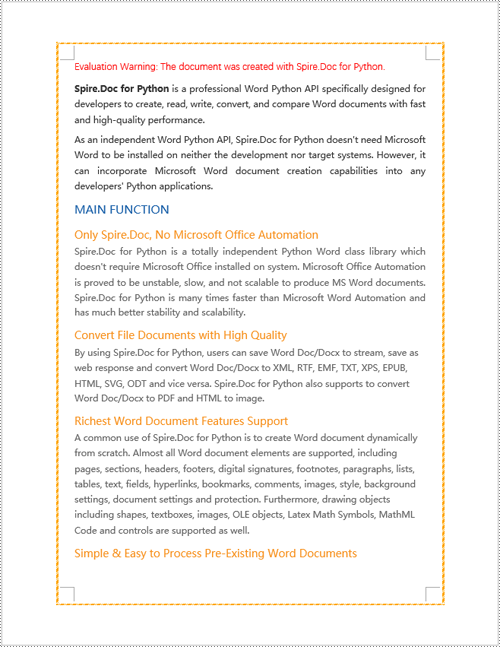
In Microsoft Word, adding, adjusting, and removing page borders is an effective strategy to enhance the aesthetics and professionalism of your documents. The inclusion of borders can lend a page a more refined and dignified appearance, particularly suitable for formal contexts such as reports, certificates, or invitations, conveying a sense of meticulous elegance. By customizing the color, pattern, and thickness of borders, users can ingeniously integrate personal creativity according to the document theme, crafting a unique design style that makes the content more captivating. Conversely, opting to remove borders can achieve a streamlined page layout, effectively eliminating unnecessary visual clutter—a practice especially fitting for those pursuing minimalist aesthetics or aiming to save on printing costs. This article will introduce how to add, modify, or remove Word page borders in Python projects using Spire.Doc for Python.
Install Spire.Doc for Python
This scenario requires Spire.Doc for Python and plum-dispatch v1.7.4. They can be easily installed in your VS Code through the following pip command.
pip install Spire.Doc
Python Add Word Page Borders
When setting page borders in a Word document using the Spire.Doc library, you can achieve this by invoking the Section.PageSetup.Borders property. Here are the detailed steps:
- Create a Document object.
- Load a document using the Document.LoadFromFile() method.
- Use a for loop to iterate through each section (Section) in the document.
- Apply borders to all pages by setting the Section.PageSetup.PageBordersApplyType property to PageBordersApplyType.AllPages.
- Set the page border style using the Secton.PageSetup.Borders.BorderType(BorderStyle.DashDotStroker) method.
- Define the border width using the Section.PageSetup.Borders.LineWidth(2) method.
- Set the border color using the Section.PageSetup.Borders.Color(Color.get_Orange()) method.
- Set the distance between the border and the page content using the Section.PageSetup.Borders.Top.Space, Bottom.Space, Left.Space, and Right.Space properties.
- Save the changes to a Word document using the Document.SaveToFile() method.
- Python
from spire.doc import *
from spire.doc.common import *

# Create a Document object
doc = Document()

# Load an existing Word document
doc.LoadFromFile("Sample01.docx")

# Iterate through all sections in the document
for i in range(doc.Sections.Count):
    # Set borders for all pages in the current section
    doc.Sections.get_Item(i).PageSetup.PageBordersApplyType = PageBordersApplyType.AllPages

    # Set border style
    doc.Sections.get_Item(i).PageSetup.Borders.BorderType(BorderStyle.DashDotStroker)

    # Set border width
    doc.Sections.get_Item(i).PageSetup.Borders.LineWidth(2)

    # Set border color
    doc.Sections.get_Item(i).PageSetup.Borders.Color(Color.get_Orange())

    # Set the distance between the top border and page content
    doc.Sections.get_Item(i).PageSetup.Borders.Top.Space = 20.0

    # Set the distance between the bottom border and page content
    doc.Sections.get_Item(i).PageSetup.Borders.Bottom.Space = 20.0

    # Set the distance between the left border and page content
    doc.Sections.get_Item(i).PageSetup.Borders.Left.Space = 20.0

    # Set the distance between the right border and page content
    doc.Sections.get_Item(i).PageSetup.Borders.Right.Space = 20.0

# Save the modified document to a new file
doc.SaveToFile("AddWordPageBorders.docx", FileFormat.Docx)

# Release resources used by the Document object
doc.Dispose()
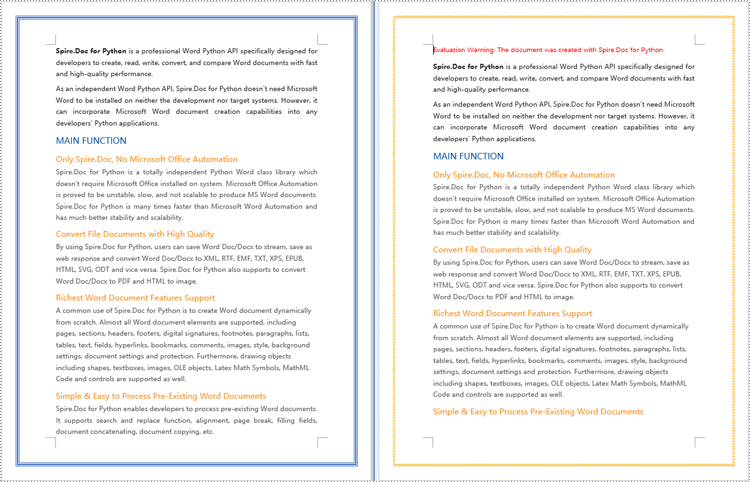
Python Modify Word Page Borders
Leveraging the Spire.Doc library, we can extensively customize the page borders in Word documents, including the style, hue, width, and other visual attributes of the borders. By tweaking these properties, achieving the desired visual presentation becomes effortless. Here are the detailed steps:
- Create a Document object.
- Load a document using the Document.LoadFromFile() method.
- Retrieve the first section of the document using Document.Sections.get_Item(0).
- Alter the page border style using the Section.PageSetup.Borders.BorderType(BorderStyle.DoubleWave) method.
- Change the color of the page border with the Section.PageSetup.Borders.Color(Color.get_Orange()) method.
- Adjust the width of the page border through the Section.PageSetup.Borders.LineWidth(2) method.
- Save the changes to a Word document using the Document.SaveToFile() method.
- Python
from spire.doc import *
from spire.doc.common import *

# Create a Document object
doc = Document()

# Load an existing Word document
doc.LoadFromFile("Sample02.docx")

# Get the first section
section = doc.Sections.get_Item(0)

# Set border style
section.PageSetup.Borders.BorderType(BorderStyle.DoubleWave)

# Set border color
section.PageSetup.Borders.Color(Color.get_Orange())

# Set border width
section.PageSetup.Borders.LineWidth(2)

# Save the modified document to a new file
doc.SaveToFile("ModifyWordPageBorders.docx", FileFormat.Docx)

# Release resources occupied by the Document object
doc.Dispose()
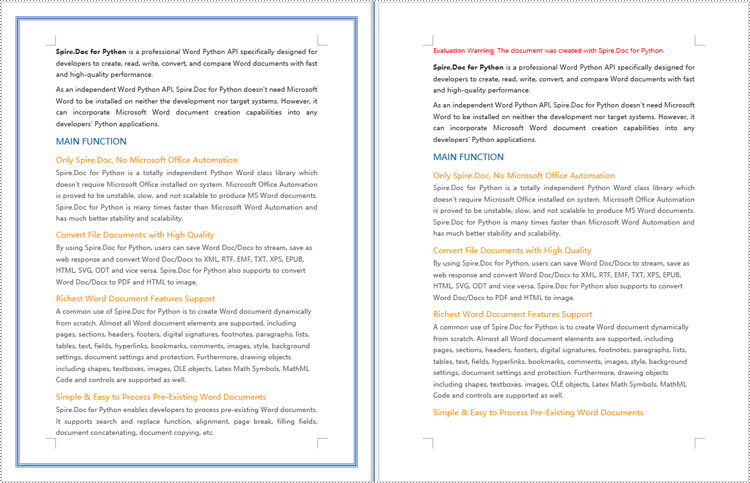
Python Remove Word Page Borders
To remove page borders in Word, you can use the Section.PageSetup.Borders.BorderType(BorderStyle.none) method. Here are the detailed steps:
- Create a Document object.
- Load a document using the Document.LoadFromFile() method.
- Use a for loop to iterate through each section (Section) in the document.
- Apply the Section.PageSetup.Borders.BorderType(BorderStyle.none) method to remove the page borders.
- Save the document using the Document.SaveToFile() method.
- Python
from spire.doc import *
from spire.doc.common import *

# Create a Document object
doc = Document()

# Load an existing Word document
doc.LoadFromFile("Sample02.docx")

# Iterate through all sections in the document
for i in range(doc.Sections.Count):
    # Remove page borders
    doc.Sections.get_Item(i).PageSetup.Borders.BorderType(BorderStyle.none)

# Save the modified document to a new file
doc.SaveToFile("RemoveWordPageBorders.docx", FileFormat.Docx)

# Release the resources occupied by the Document object
doc.Dispose()
Apply for a Temporary License
If you'd like to remove the evaluation message from the generated documents, or to get rid of the function limitations, please request a 30-day trial license for yourself.
Converting between presentation documents is a common task, especially when dealing with different versions of Microsoft PowerPoint. PPS is used to display presentations directly as finalized documents. PPT is an older format compatible with PowerPoint 97-2003. PPTX, the default editable format in the latest version of PowerPoint, offers better data recovery capabilities, smaller file sizes, and enhanced security.
Whether you need to edit PPS documents or ensure compatibility with modern tools and features, converting them to PPTX is essential. This article will demonstrate how to convert PPS and PPT to PPTX documents using Python with Spire.Presentation for Python. Read on to learn more.
Install Spire.Presentation
This scenario requires Spire.Presentation for Python and plum-dispatch v1.7.4. They can be easily installed in your Windows through the following pip commands.
pip install Spire.Presentation
If you are unsure how to install, please refer to this tutorial: How to Install Spire.Presentation for Python on Windows.
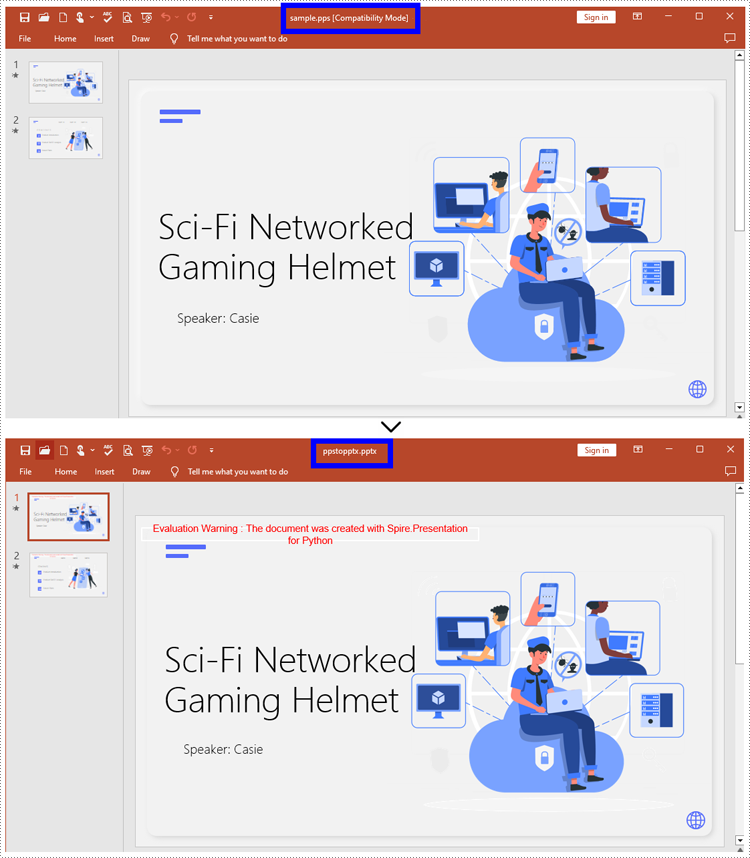
How to Convert PPS to PPTX with Python
To convert PPS to PPTX format, you can call Document.SaveToFile() method offered by Spire.Presentation for Python. It supports converting various formats to PPT(X), such as PPS and PPT, as well as converting PPT documents to other formats like PDF and images (PNG, JPG, BMP, SVG).
Steps to convert PPS to PPTX:
- Create an object for the Presentation class.
- Import the document to be converted with Document.LoadFromFile() method.
- Convert it to a PPTX document using Document.SaveToFile() method.
Here is the code example for you:
- Python
from spire.presentation.common import *
from spire.presentation import *
# Create a Presentation document object
pre = Presentation()
# Load the file from the disk
pre.LoadFromFile("input/sample.pps")
# Save the document as PPTX
pre.SaveToFile("ppstopptx.pptx", FileFormat.Pptx2010)
pre.Dispose()
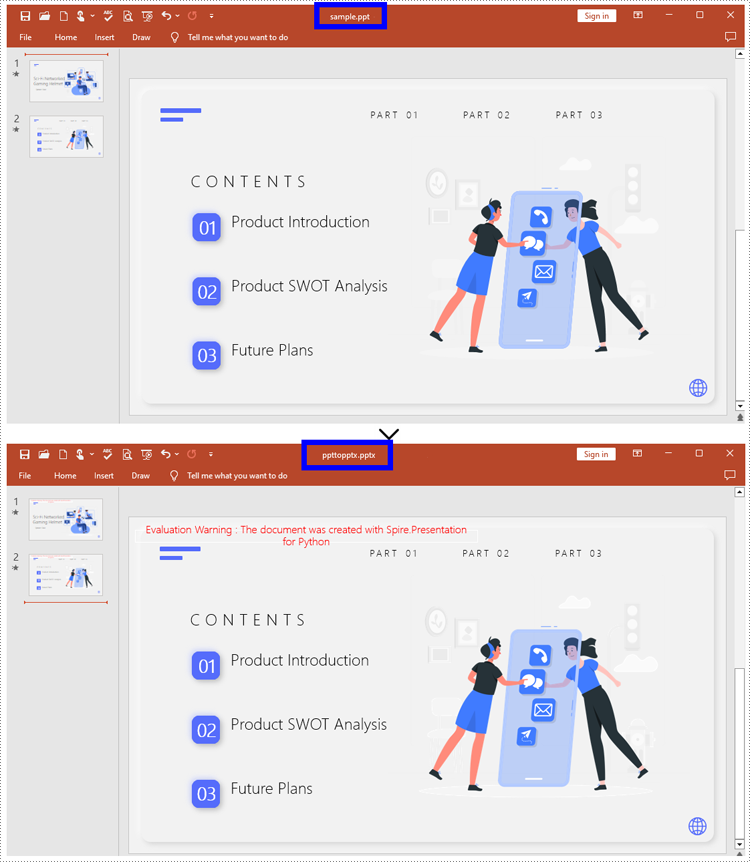
How to Convert PPT to PPTX with Python
Compared with PPT, PPTX has many advantages. Despite being mentioned above, it supports inserting more multimedia content and advanced formats, thereby improving the overall quality and performance of presentations. Spire.Presentation for Python provides Document.SaveToFile() to convert PPT to PPTX without data loss.
Steps to convert PPT to PPTX:
- Instantiate a new Presentation object.
- Load the document from the files with Document.LoadFromFile().
- Save the PPT document as a PPTX document by Document.SaveToFile().
Below is the code example to refer to:
- Python
from spire.presentation.common import *
from spire.presentation import *

# Create an instance of the Presentation class
pre = Presentation()

# Load the file to be converted
pre.LoadFromFile("input/Sample1.ppt")

# Convert the document to PPTX format
pre.SaveToFile("ppttopptx.pptx", FileFormat.Pptx2010)

pre.Dispose()
Apply for a Temporary License
If you'd like to remove the evaluation message from the generated documents, or to get rid of the function limitations, please request a 30-day trial license for yourself.
While watermarks are a common design element used in many types of documents to convey ownership, confidentiality, or branding, Microsoft Excel does not provide a built-in watermark feature. However, there are workaround methods to achieve a watermark effect in Excel spreadsheets.
One approach is to add an image to the header or footer of the worksheet, and another approach is to add an image to a worksheet as the background. In this article, you will learn how to add a header or background image watermark to Excel in Python using Spire.XLS for Python.
- Add a Watermark to Excel Using a Header Image in Python
- Add a Watermark to Excel Using a Background Image in Python
Install Spire.XLS for Python
This scenario requires Spire.XLS for Python and plum-dispatch v1.7.4. They can be easily installed in your Windows through the following pip command.
pip install Spire.XLS
If you are unsure how to install, please refer to this tutorial: How to Install Spire.XLS for Python on Windows
Header vs Background Image Watermarks
Header Image Watermark:
Advantages:
- The watermark is preserved on the printed sheet, ensuring it appears in the final output.
Disadvantages:
- The watermark is invisible under the "Normal" view mode in Excel, only becoming visible in "Page Layout" or "Page Break Preview" views.
- To centrally position the watermark graphic on the Excel page, you need to carefully adjust the white margins, especially on the top and left sides of the image.
Background Image Watermark:
Advantages:
- The watermark image covers the entire worksheet area, providing a consistent background appearance.
Disadvantages:
- The watermark is not preserved on the printed sheet, meaning it will not appear in the final printed output.
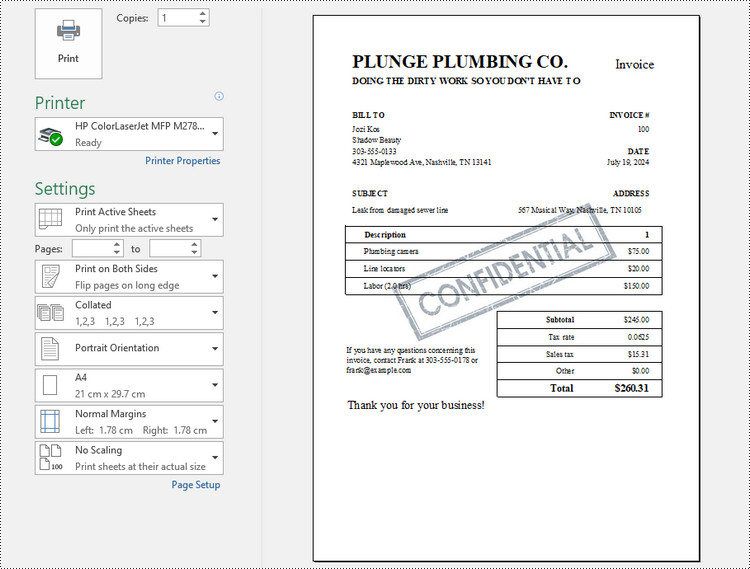
Add a Watermark to Excel Using a Header Image in Python
Spire.XLS for Python offers the PageSetup class to control various settings related to the appearance and layout of the printed worksheet. Under this class, you can find the CenterHeader and CenterHeaderImage properties, allowing you set an image for the center section of the header.
Here are the steps to add a header image watermark to Excel using Python.
- Create a Workbook object.
- Load an Excel document from a give file path.
- Load an image while initialing the Stream class.
- Get a specific worksheet from the workbook.
- Add an image field to the header center by setting Worksheet.PageSetup.CenterHeader property to "&G".
- Apply the image to the header center through Worksheet.PageSetup.CenterHeaderImage property.
- Save the workbook to a different Excel file.
- Python
from spire.xls import *
from spire.xls.common import *

# Create a Workbook object
workbook = Workbook()

# Load an Excel document
workbook.LoadFromFile("C:\\Users\\Administrator\\Desktop\\Input.xlsx")

# Load an image file
stream = Stream("C:\\Users\\Administrator\\Desktop\\confidential.png")

# Loop through all worksheets in the file
for i in range(workbook.Worksheets.Count):

    # Get a specific worksheet
    worksheet = workbook.Worksheets[i]

    # Add an image field to the header center
    worksheet.PageSetup.CenterHeader = "&G"

    # Add the image to the header center
    worksheet.PageSetup.CenterHeaderImage = stream

# Save the result file
workbook.SaveToFile("output/AddWatermark.xlsx", ExcelVersion.Version2016)

# Dispose resources
workbook.Dispose()
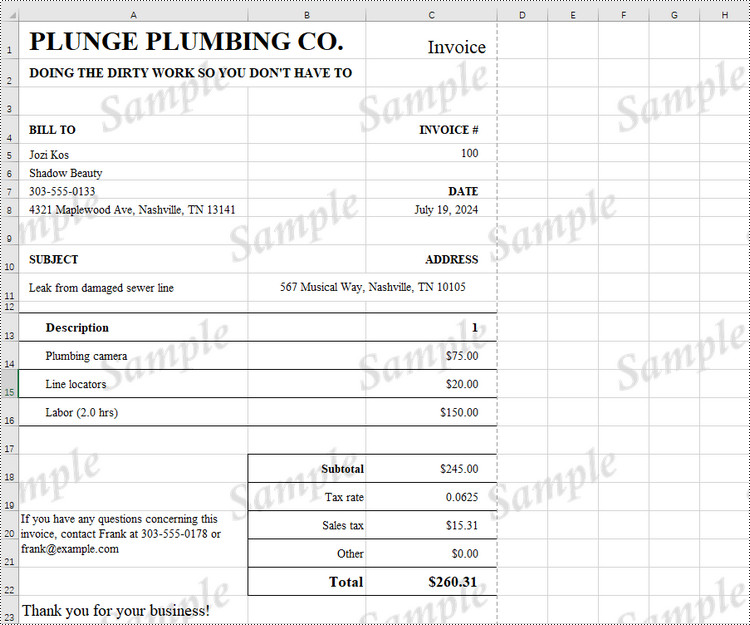
Add a Watermark to Excel Using a Background Image in Python
The PageSetup class provides the BackgroundImage property to get or set the image for the background. Below are the steps to add a background image watermark to Excel using Python.
- Create a Workbook object.
- Load an Excel document from a give file path.
- Load an image while initialing the Stream class.
- Get a specific worksheet from the workbook.
- Apply the image to the worksheet as the background through Worksheet.PageSetup.BackgroundImage property.
- Save the workbook to a different Excel file.
- Python
from spire.xls import *
from spire.xls.common import *

# Create a Workbook object
workbook = Workbook()

# Load an Excel document
workbook.LoadFromFile("C:\\Users\\Administrator\\Desktop\\Input.xlsx")

# Load an image file
stream = Stream("C:\\Users\\Administrator\\Desktop\\sample-background.png")

# Loop through all worksheets in the file
for i in range(workbook.Worksheets.Count):

    # Get a specific worksheet
    worksheet = workbook.Worksheets[i]

    # Set the image as the background of the worksheet
    worksheet.PageSetup.BackgoundImage = stream

# Save the result file
workbook.SaveToFile("output/AddWatermark.xlsx", ExcelVersion.Version2016)

# Dispose resources
workbook.Dispose()
Apply for a Temporary License
If you'd like to remove the evaluation message from the generated documents, or to get rid of the function limitations, please request a 30-day trial license for yourself.
