
Knowledgebase (2370)
Children categories

Creating PDFs in ASP.NET applications is a common requirement, whether you're generating invoices, reports, forms, or exporting dynamic content. To streamline this process, you can utilize Spire.PDF for .NET, a professional and lightweight library that enables developers to easily create and manipulate PDF documents programmatically, without the need for complex APIs or third-party printer drivers.
In this tutorial, we’ll show you how to create PDF documents in an ASP.NET Core Web application using Spire.PDF for .NET, with examples of creating a PDF from scratch and converting HTML to PDF.
On this page:
- Why Use Spire.PDF for .NET?
- Step-by-Step: Generate PDF in ASP.NET Core Web App
- Create PDF from HTML in ASP.NET Core
- Best Practices for ASP.NET PDF Generation
- Conclusion
- FAQs
Why Use Spire.PDF for .NET?
There are many ways to create PDF in ASP.NET, but most involve trade-offs: some depend on printer drivers, others have limited layout control, and many require heavy third-party frameworks. Spire.PDF for .NET offers a more streamlined approach. It’s a dedicated .NET library that handles the majority of PDF creation and manipulation tasks on its own, without external tools.
Key advantages include:
- No Adobe dependency – Generate and manage PDFs without Acrobat installed.
- Full-featured PDF toolkit – Beyond creation, you can edit, merge, split, protect, or annotate PDFs.
- High-fidelity rendering – Preserve fonts, CSS, images, and layouts when exporting content.
- ASP.NET ready – Compatible with both ASP.NET Web Forms/MVC and ASP.NET Core projects.
- Flexible generation options – Create PDFs from scratch, images, or streams.
(Note: HTML-to-PDF conversion requires a lightweight external plugin such as Qt WebEngine.)
Step-by-Step: Generate PDF in ASP.NET Core Web App
Step 1. Create a New ASP.NET Core Web App
- Open Visual Studio .
- Select Create a new project .
- Choose ASP.NET Core Web App (Model-View-Controller) → Click Next .
- Enter a project name, e.g., PdfDemoApp.
- Select your target framework (e.g., . NET 6 , 7 , or 8 ).
- Click Create .
Step 2. Install Spire.PDF via NuGet
- Right-click on your project → Manage NuGet Packages .
- Search for Spire.PDF .
- Install the package Spire.PDF (latest stable version).
Or install using the Package Manager Console :
Install-Package Spire.PDF
Step 3. Add a Controller for PDF Generation
- Right-click on the Controllers folder → Add → Controller → MVC Controller – Empty .
- Name it: PdfController.cs.
- Replace the default code with this:
using Microsoft.AspNetCore.Mvc;
using Spire.Pdf;
using Spire.Pdf.Graphics;
using System.Drawing;

namespace PdfDemoApp.Controllers
{
    public class PdfController : Controller
    {
        public IActionResult CreatePdf()
        {
            // Create a new PDF document
            PdfDocument doc = new PdfDocument();
            PdfPageBase page = doc.Pages.Add(PdfPageSize.A4, new PdfMargins(40));

            // Draw text on the page
            PdfFont font = new PdfFont(PdfFontFamily.Helvetica, 25f);
            PdfSolidBrush brush = new PdfSolidBrush(Color.Black);
            page.Canvas.DrawString("Hello from ASP.NET Core!", font, brush, 10, 50);

            // Save to memory stream
            using (MemoryStream ms = new MemoryStream())
            {
                doc.SaveToStream(ms);
                doc.Close();
                ms.Position = 0;

                // Return PDF file
                return File(ms.ToArray(), "application/pdf", "Generated.pdf");
            }
        }
    }
}
Step 4: (Optional) Add a Button or Link in Your View
Open Views/Home/Index.cshtml (or whichever view is your homepage).
Add a button or link like this:
<div>
    <a asp-controller="Pdf" asp-action="CreatePdf" class="btn btn-primary">
        Create PDF from Scratch
    </a>
</div>
This uses ASP.NET Core tag helpers to generate the correct route (/Pdf/CreatePdf).
Step 5. Run and Test
- Press F5 to run your app.
- On the home page, click the "Create PDF from Scratch" button. This will call the CreatePdf method in PdfController and trigger a download of the generated PDF.
- If you didn’t add the button, you can still run the CreatePdf method directly by visiting this URL in your browser:
https://localhost:xxxx/Pdf/CreatePdf
(where xxxx is your local port number).
Output:

In addition to text, Spire.PDF supports adding a wide range of elements to PDF, such as images, shapes, tables, lists, hyperlinks, annotations, and watermarks. For more details and advanced usage, check the .NET PDF Tutorials.
Create PDF from HTML in ASP.NET Core
Spire.PDF allows you to convert HTML content directly into PDF files. This feature is particularly useful for generating invoices, reports, receipts, or exporting styled web pages with consistent formatting.
To render HTML as PDF, Spire.PDF relies on an external rendering engine. You can choose between Qt WebEngine or Google Chrome . In this guide, we’ll use Qt WebEngine .
Setup the Qt plugin:
-
Download the Qt WebEngine plugin for your operating system:
-
Extract the package to obtain the plugins directory, e.g.: C:\plugins-windows-x64\plugins
-
Register the plugin path inyour code:
HtmlConverter.PluginPath = @"C:\plugins-windows-x64\plugins";
Once the plugin is ready, you can follow the steps from the previous section and add the code snippet below to your controller to generate PDF output from HTML content.
using Microsoft.AspNetCore.Mvc;
using Spire.Additions.Qt;
using Spire.Pdf.Graphics;
using System.Drawing;

namespace PdfDemoApp.Controllers
{
    public class PdfController : Controller
    {
        [HttpGet]
        public IActionResult HtmlToPdf()
        {
            // Example HTML string
            string html = @"
                <html>
                  <head>
                    <style>
                      body { font-family: Arial, sans-serif; }
                      h1 { color: #2563eb; }
                    </style>
                  </head>
                  <body>
                    <h1>ASP.NET Core: Create PDF from HTML</h1>
                    <p>This PDF was generated using the Qt-based converter.</p>
                  </body>
                </html>";

            // Path to the Qt plugin folder
            // ⚠️ Ensure this folder exists on your server/deployment environment
            string pluginPath = @"C:\plugins-windows-x64\plugins";
            HtmlConverter.PluginPath = pluginPath;

            // Create a temp file path (on server side)
            string tempFile = Path.GetTempFileName();

            // Convert HTML string → PDF using Qt
            HtmlConverter.Convert(
                html,
                tempFile,
                enableJavaScript: true,
                timeout: 100000,                        // milliseconds
                pageSize: new SizeF(595, 842),          // A4 page size in points
                margins: new PdfMargins(40),            // 40pt margins
                LoadHtmlType.SourceCode                 // Load from HTML string
            );

            // Read the generated PDF into memory
            byte[] fileBytes = System.IO.File.ReadAllBytes(tempFile);

            // Clean up temp file
            System.IO.File.Delete(tempFile);

            // Return PDF to browser as download
            return File(fileBytes, "application/pdf", "HtmlToPdf.pdf");
        }
    }
}
Output:
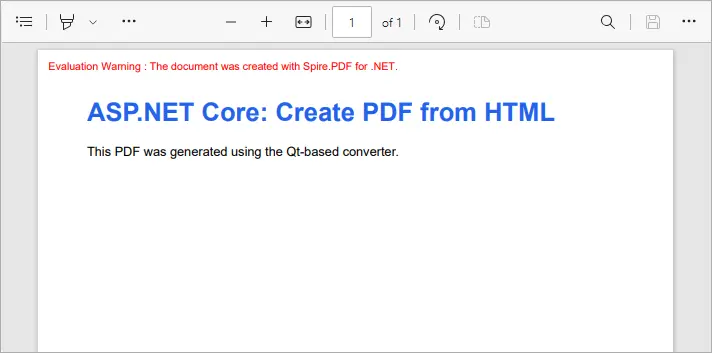
This example converts inline HTML into a properly formatted PDF. You can also load external HTML files or URLs - see our detailed guide on Convert HTML to PDF in C# for more information.
Best Practices for ASP.NET PDF Generation
- Use memory streams instead of disk storage for performance and scalability.
- Cache static PDFs (like terms & conditions or forms) to reduce server load.
- Use HTML-to-PDF for dynamic reports with CSS styling.
- Consider templates (like Word-to-PDF with Spire.Doc) when documents have complex layouts.
- Secure sensitive PDFs with password protection or access permissions.
Conclusion
With Spire.PDF for .NET, you can easily generate PDF in ASP.NET Core applications. Whether you’re creating PDFs from scratch or performing HTML-to-PDF conversion in C# , Spire.PDF provides a reliable, developer-friendly solution—no external dependencies required.
If you also need to generate PDFs from Word documents, that feature is available via Spire.Doc for .NET, another product in the Spire family. Together, they cover the full range of PDF document generation scenarios.
By integrating these tools, developers can streamline workflows, reduce reliance on Adobe or other third-party components, and ensure consistent, professional-quality output. This makes your ASP.NET PDF solutions more scalable, maintainable, and ready for enterprise use.
FAQs
Q1. Do I need Adobe Acrobat installed on the server?
No. Spire.PDF is a standalone library and works independently of Adobe Acrobat.
Q2. Can I generate PDFs from both raw content and HTML?
Yes. You can build documents programmatically (drawing text, shapes, tables) or convert HTML pages to PDF.
Q3. Can I convert Word documents to PDF with Spire.PDF?
No. Word-to-PDF is supported by Spire.Doc for .NET, not Spire.PDF. You can use them together if your project requires it.
Q4. How can I protect generated PDFs?
Spire.PDF supports setting passwords, permissions, and digital signatures for document security.
Q5. Does Spire.PDF support ASP.NET Framework?
Yes. It works with both ASP.NET Core and ASP.NET Framework.
Get a Free License
To fully experience the capabilities of Spire.PDF for .NET without any evaluation limitations, you can request a free 30-day trial license.
Convert HTML to Text in Python | Simple Plain Text Output
2025-09-03 01:16:17 Written by Administrator
HTML (HyperText Markup Language) is a markup language used to create web pages, allowing developers to build rich and visually appealing layouts. However, HTML files often contain a large number of tags, which makes them difficult to read if you only need the main content. By using Python to convert HTML to text, this problem can be easily solved. Unlike raw HTML, the converted text file strips away all unnecessary markup, leaving only clean and readable content that is easier to store, analyze, or process further.
- Install HTML to Text Converter in Python
- Python Convert HTML File to Text
- Python Convert HTML String to Text
- The Conclusion
- FAQs
Install HTML to Text Converter in Python
To simplify the task, we recommend using Spire.Doc for Python. This Python Word library allows you to quickly remove HTML markup and extract clean plain text with ease. It not only works as an HTML-to-text converter, but also offers a wide range of features—covering almost everything you can do in Microsoft Word.
To install it, you can run the following pip command:
pip install spire.doc
Alternatively, you can download the Spire.Doc package and install it manually.
Python Convert HTML Files to Text in 3 Steps
After preparing the necessary tools, let's dive into today's main topic: how to convert HTML to plain text using Python. With the help of Spire.Doc, this task can be accomplished in just three simple steps: create a new document object, load the HTML file, and save it as a text file. It’s straightforward and efficient, even for beginners. Let’s take a closer look at how this process can be implemented in code!
Code Example – Converting an HTML File to a Text File:
from spire.doc import *
from spire.doc.common import *

# Open an html file
document = Document()
document.LoadFromFile("/input/htmlsample.html", FileFormat.Html, XHTMLValidationType.none)
# Save it as a Text document.
document.SaveToFile("/output/HtmlFileTotext.txt", FileFormat.Txt)

document.Close()
The following is a preview comparison between the source document (.html) and the output document (.txt):

Note that if the HTML file contains tables, the output text file will only retain the values within the tables and cannot preserve the original table formatting. If you want to keep certain styles while removing markup, it is recommended to convert HTML to a Word document . This way, you can retain headings, tables, and other formatting, making the content easier to edit and use.
How to Convert an HTML String to Text in Python
Sometimes, we don’t need the entire content of a web page and only want to extract specific parts. In such cases, you can convert an HTML string directly to text. This approach allows you to precisely control the information you need without further editing. Using Python to convert an HTML string to a text file is also straightforward. Here’s a detailed step-by-step guide:
Steps to convert an HTML string to a text document using Spire.Doc:
- Input the HTML string directly or read it from a local file.
- Create a Document object and add sections and paragraphs.
- Use Paragraph.AppendHTML() method to insert the HTML string into a paragraph.
- Save the document as a .txt file using Document.SaveToFile() method.
The following code demonstrates how to convert an HTML string to a text file using Python:
from spire.doc import *
from spire.doc.common import *

#Get html string.
#with open(inputFile) as fp:
    #HTML = fp.read()

# Load HTML from string
html = """<!DOCTYPE html>
<html lang="en">
<head>
  <meta charset="UTF-8">
  <title>HTML to Text Example</title>
  <style>
    body { font-family: Arial, sans-serif; margin: 20px; }
    header { background: #f4f4f4; padding: 10px; }
    nav a { margin: 0 10px; text-decoration: none; color: #333; }
    main { margin-top: 20px; }
  </style>
</head>
<body>
  <header>
    <h1>My Demo Page</h1>
    <nav>
      <a href="#">Home</a>
      <a href="#">About</a>
      <a href="#">Contact</a>
    </nav>
  </header>

  <main>
    <h2>Convert HTML to Text</h2>
    <p>This is a simple demo showing how HTML content can be displayed before converting it to plain text.</p>
  </main>
</body>
</html>
"""

# Create a new document
document = Document()
section = document.AddSection()
section.AddParagraph().AppendHTML(html)

# Save directly as TXT
document.SaveToFile("/output/HtmlStringTotext.txt", FileFormat.Txt)
document.Close()
Here's the preview of the converted .txt file: 
The Conclusion
In today’s tutorial, we focused on how to use Python to convert HTML to a text file. With the help of Spire.Doc, you can handle both HTML files and HTML strings in just a few lines of code, easily generating clean plain text files. If you’re interested in the other powerful features of the Python Word library, you can request a 30-day free trial license and explore its full capabilities for yourself.
FAQs about Converting HTML to Text in Python
Q1: How can I convert HTML to plain text using Python?
A: Use Spire.Doc to load an HTML file or string, insert it into a Document object with AppendHTML(), and save it as a .txt file.
Q2: Can I keep some formatting when converting HTML to text?
A: To retain styles like headings or tables, convert HTML to a Word document first, then export to text if needed.
Q3: Is it possible to convert only part of an HTML page to text?
A: Yes, extract the specific HTML segment as a string and convert it to text using Python for precise control.
How to Convert PDF to CSV in Java (Easily Extract PDF Tables)
2025-08-28 05:43:27 Written by jie zou
When working with reports, invoices, or datasets stored in PDF format, developers often need a way to reuse the tabular data in spreadsheets, databases, or analytical tools. A common solution is to convert PDF to CSV using Java, since CSV is lightweight, structured, and compatible with almost every platform.
Unlike text or image export, a PDF-to-CSV conversion is mainly about extracting tables from PDF and saving them as CSV. With the help of Spire.PDF for Java, you can detect table structures in PDFs and export them programmatically with just a few lines of code.
In this article, you’ll learn step by step how to perform a PDF to CSV conversion in Java—from setting up the environment, to extracting tables, and even handling more complex scenarios like multi-page documents or multiple tables per page.
Overview of This Tutorial
Environment Setup for PDF to CSV Conversion in Java
Before extracting tables and converting PDF to CSV using Java, you need to set up the development environment. This involves choosing a suitable library and adding it to your project.
Why Choose Spire.PDF for Java
Since PDF files do not provide a built-in export to CSV, extracting tables programmatically is the practical approach. Spire.PDF for Java offers APIs to detect table structures in PDF documents and save them directly as CSV files, making the conversion process simple and efficient.
Install Spire.PDF for Java
Add Spire.PDF for Java to your project using Maven:
<repositories>
    <repository>
        <id>com.e-iceblue</id>
        <name>e-iceblue</name>
        <url>https://repo.e-iceblue.com/nexus/content/groups/public/</url>
    </repository>
</repositories>
<dependencies>
    <dependency>
        <groupId>e-iceblue</groupId>
        <artifactId>spire.pdf</artifactId>
        <version>12.7.0</version>
    </dependency>
</dependencies>
If you are not using Maven, you can download the Spire.PDF for Java package and add the JAR files to your project’s classpath.
Extract Tables from PDF and Save as CSV
The most practical way to perform PDF to CSV conversion is by extracting tables. With Spire.PDF for Java, this can be done with just a few steps:
- Load the PDF document.
- Use PdfTableExtractor to find tables on each page.
- Collect cell values row by row.
- Write the output into a CSV file.
Here is a Java example that shows the process from start to finish:
Java Code Example for PDF to CSV Conversion
import com.spire.pdf.*;
import com.spire.pdf.utilities.*;

import java.io.*;

public class PdfToCsvExample {
    public static void main(String[] args) throws Exception {
        // Load the PDF document
        PdfDocument pdf = new PdfDocument();
        pdf.loadFromFile("Sample.pdf");

        // Create a StringBuilder to store extracted text
        StringBuilder sb = new StringBuilder();

        // Iterate through each page
        for (int i = 0; i < pdf.getPages().getCount(); i++) {
            PdfTableExtractor extractor = new PdfTableExtractor(pdf);
            PdfTable[] tableLists = extractor.extractTable(i);

            if (tableLists != null) {
                for (PdfTable table : tableLists) {
                    for (int row = 0; row < table.getRowCount(); row++) {
                        for (int col = 0; col < table.getColumnCount(); col++) {
                            // Escape the cell text safely
                            String cellText = escapeCsvField(table.getText(row, col));
                            sb.append(cellText);

                            if (col < table.getColumnCount() - 1) {
                                sb.append(",");
                            }
                        }
                        sb.append("\n");
                    }
                }
            }
        }

        // Write the output to a CSV file
        FileWriter writer = new FileWriter("output/PDFTable.csv");
        writer.write(sb.toString());
        writer.close();

        pdf.close();
        System.out.println("PDF tables successfully exported to CSV.");
    }

    // Utility method to escape CSV fields
    private static String escapeCsvField(String text) {
        if (text == null) return "";

        // Remove line breaks
        text = text.replaceAll("[\\n\\r]", "");

        // Escape if contains special characters
        if (text.contains(",") || text.contains(";") || text.contains("\"") || text.contains("\n")) {
            text = text.replace("\"", "\"\"");  // Escape double quotes
            text = "\"" + text + "\"";          // Wrap with quotes
        }

        return text;
    }
}
Code Walkthrough
- PdfDocument loads the PDF file into memory.
- PdfTableExtractor checks each page for tables.
- PdfTable provides access to rows and columns.
- escapeCsvField() removes line breaks and safely quotes/escapes text if needed.
- StringBuilder accumulates cell text, separated by commas.
- The result is written into Output.csv, which you can open in Excel or any editor.
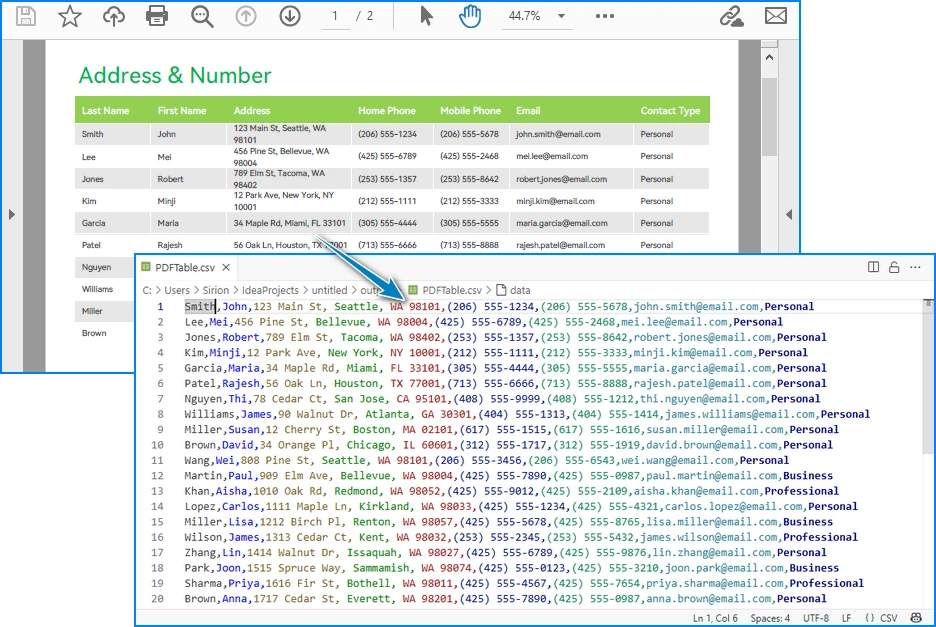
CSV file generated from a PDF table after running the Java code.
Handling Complex PDF-to-CSV Conversion Cases
In practice, PDFs often contain multiple tables, span multiple pages, or have irregular structures. Let’s see how to extend the solution to handle these scenarios.
1. Multiple Tables per Page
The PdfTable[] returned by extractTable(i) contains all tables detected on a page. You can process each one separately. For example, to save each table as a different CSV file:
for (int i = 0; i < pdf.getPages().getCount(); i++) {
    PdfTableExtractor extractor = new PdfTableExtractor(pdf);
    PdfTable[] tableLists = extractor.extractTable(i);

    if (tableLists != null) {
        for (int t = 0; t < tableLists.length; t++) {
            PdfTable table = tableLists[t];
            StringBuilder tableContent = new StringBuilder();

            for (int row = 0; row < table.getRowCount(); row++) {
                for (int col = 0; col < table.getColumnCount(); col++) {
                    tableContent.append(escapeCsvField(table.getText(row, col)));
                    if (col < table.getColumnCount() - 1) {
                        tableContent.append(",");
                    }
                }
                tableContent.append("\n");
            }

            FileWriter writer = new FileWriter("Table_Page" + i + "_Index" + t + ".csv");
            writer.write(tableContent.toString());
            writer.close();
        }
    }
}
Example of multiple tables in one PDF page exported into separate CSV files.

This way, every table is saved as an independent CSV file for better organization.
2. Multi-page or Large Tables
If a table spans across multiple pages, iterating page by page ensures that all data is collected. The key is to append data instead of overwriting:
StringBuilder sb = new StringBuilder();

for (int i = 0; i < pdf.getPages().getCount(); i++) {
    PdfTableExtractor extractor = new PdfTableExtractor(pdf);
    PdfTable[] tables = extractor.extractTable(i);

    if (tables != null) {
        for (PdfTable table : tables) {
            for (int row = 0; row < table.getRowCount(); row++) {
                for (int col = 0; col < table.getColumnCount(); col++) {
                    sb.append(escapeCsvField(table.getText(row, col)));
                    if (col < table.getColumnCount() - 1) sb.append(",");
                }
                sb.append("\n");
            }
        }
    }
}

FileWriter writer = new FileWriter("MergedTables.csv");
writer.write(sb.toString());
writer.close();
Example of a large table across multiple PDF pages merged into one CSV file.
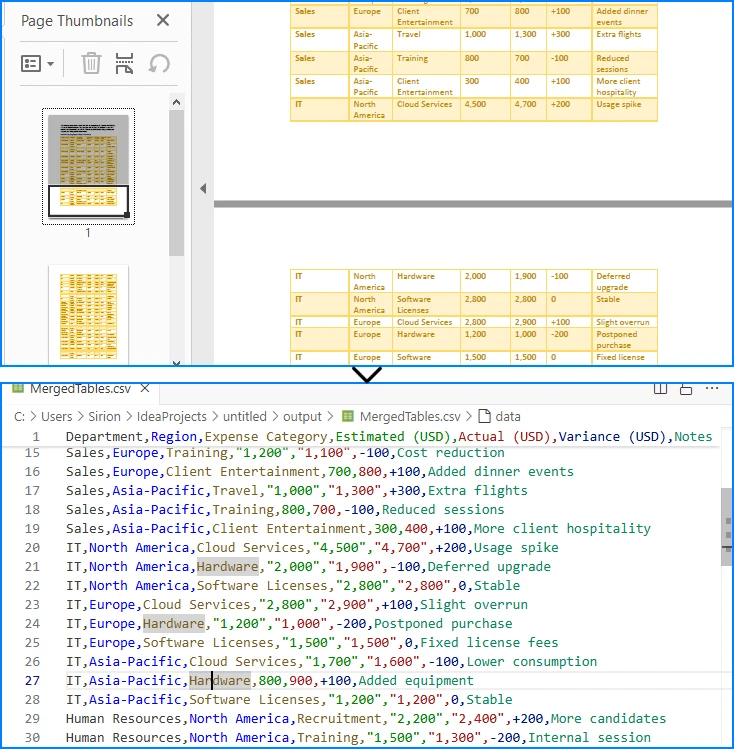
Here, all tables across pages are merged into one CSV file, useful when dealing with continuous reports.
3. Limitations with Formatting
CSV only stores plain text values. Elements like merged cells, fonts, or images are discarded. If preserving styling is critical, exporting to Excel (.xlsx) is a better alternative, which the same library also supports. See How to Export PDF Table to Excel in Java for more details.
4. CSV Special Characters Handling
When writing tables to CSV, certain characters like commas, semicolons, double quotes, or line breaks can break the file structure if not handled properly.
In the Java examples above, the escapeCsvField method removes line breaks and safely quotes or escapes text when needed.
For more advanced scenarios, you can also use Spire.XLS for Java to write data into worksheets and then save as CSV, which automatically handles special characters and ensures correct CSV formatting without manual processing.
Alternatively, for open-source options, libraries like OpenCSV or Apache Commons CSV also automatically handle special characters and CSV formatting, reducing potential issues and simplifying code.
Conclusion
Converting PDF to CSV in Java essentially means extracting tables and saving them in a structured format. CSV is widely supported, lightweight, and ideal for storing and analyzing tabular data. By setting up Spire.PDF for Java and following the code example, you can automate this process, saving time and reducing manual effort.
If you want to explore more advanced features of Spire.PDF for Java, please apply for a free trial license. You can also use Free Spire.PDF for Java for small projects.
FAQ
Q: Can I turn a PDF into a CSV file? A: Yes. While images and styled text cannot be exported, you can extract tables and save them as CSV files using Java.
Q: How to extract data from a PDF file in Java? A: Use a PDF library like Spire.PDF for Java to parse the document, detect tables, and export them to CSV or Excel.
Q: What is the best PDF to CSV converter? A: For Java developers, programmatic solutions such as Spire.PDF for Java offer more flexibility and automation than manual converters.
Q: How to convert PDF to Excel using Java code? A: The process is similar to CSV export. Instead of writing data as comma-separated text, you can export tables into Excel format for richer features.
