
Knowledgebase (2370)
Children categories
In the tutorials part of Spire.Doc, we have introduced the simple and easy method to "Replace text in Word with Table in C#" and "Replace images in Word with Texts in C#". Sometimes, we need to replace text in Word with image. Spire.Doc also provides a quick and effective solution to achieve this function with a little bit different codes. This article is going to introduce the method to replace text in Word with image.
Note: Before start, please download the latest version of Spire.Doc and add Spire.Doc .dll in the bin folder as the reference of visual studio.
Sample document:

Step 1: Load the sample Word document and the image used to replace the text.
Document document = new Document();
document.LoadFromFile("s.docx");
Image image = Image.FromFile("2.bmp");
Step 2: Find the string "E-iceblue" in the document.
TextSelection[] selections = document.FindAllString("E-iceblue", true, true);
int index = 0;
TextRange range = null;
Step 3: Remove the text and replace it with Image
foreach (TextSelection selection in selections)
            {
                DocPicture pic = new DocPicture(document);
                pic.LoadImage(image);

                range = selection.GetAsOneRange();
                index = range.OwnerParagraph.ChildObjects.IndexOf(range);
                range.OwnerParagraph.ChildObjects.Insert(index, pic);
                range.OwnerParagraph.ChildObjects.Remove(range);

            }
Step 4: Save and launch the document to see effects.
document.SaveToFile("Sample.doc", FileFormat.Doc);
System.Diagnostics.Process.Start("Sample.doc");
Effects:

Full codes:
using System;
using System.Collections.Generic;
using System.Linq;
using System.Text;
using Spire.Doc;
using Spire.Doc.Documents;
using Spire.Doc.Fields;
using System.Drawing;

namespace Replace_Text_with_Image
{
    class Program
    {
        static void Main(string[] args)
        {
            Document document = new Document();
            document.LoadFromFile("s.docx");
            Image image = Image.FromFile("2.bmp");

            TextSelection[] selections = document.FindAllString("E-iceblue", true, true);
            int index = 0;
            TextRange range = null;

            foreach (TextSelection selection in selections)
            {
                DocPicture pic = new DocPicture(document);
                pic.LoadImage(image);

                range = selection.GetAsOneRange();
                index = range.OwnerParagraph.ChildObjects.IndexOf(range);
                range.OwnerParagraph.ChildObjects.Insert(index, pic);
                range.OwnerParagraph.ChildObjects.Remove(range);

            }

            document.SaveToFile("Sample.doc", FileFormat.Doc);
            System.Diagnostics.Process.Start("Sample.doc");

        }
    }
}
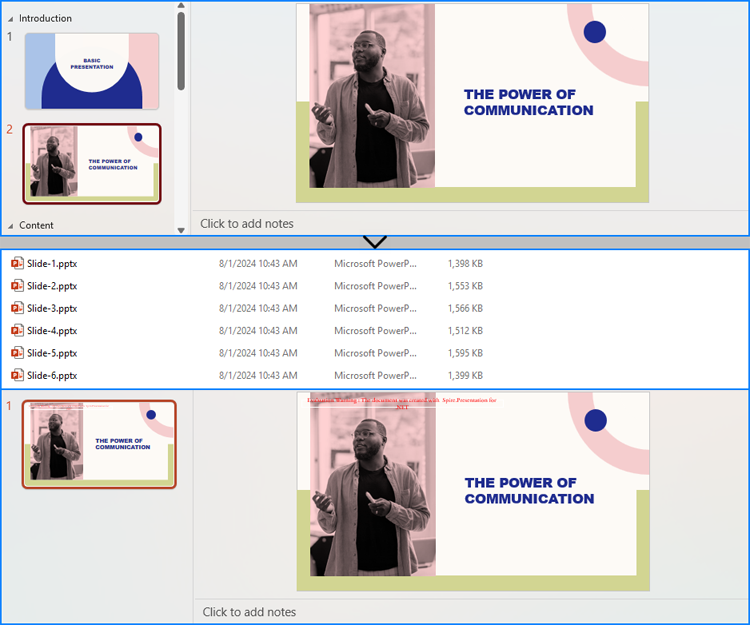
PowerPoint presentations are a fundamental tool for communication across various fields. As these presentations grow in size and complexity, managing them effectively becomes crucial. One practical solution is to split larger presentations into smaller and more manageable ones. Whether for adapting presentations to specific audiences, breaking down training modules, or optimizing file sizes for distribution, the ability to split PowerPoint presentations using C# in .NET significantly enhances workflow efficiency. This article will show how to split PowerPoint presentations by slides, slide ranges, and sections with C# using Spire.Presentation for .NET.
- Split PowerPoint Presentations by Slides using C#
- Split PowerPoint Presentations by Slide Ranges using C#
- Split PowerPoint Presentations by Sections using C#
Install Spire.Presentation for .NET
To begin with, you need to add the DLL files included in the Spire.Presentation for.NET package as references in your .NET project. The DLL files can be either downloaded from this link or installed via NuGet.
PM> Install-Package Spire.Presentation
Split PowerPoint Presentations by Slides using C#
Using Spire.Presentation for .NET, developers can split a presentation into individual slide presentations by iterating through the slides in the original presentation, adding each slide to a new presentation, and then saving it.
Here are the detailed steps:
- Create an instance of Presentation class.
- Load a PowerPoint file using Presentation.LoadFromFile() method.
- Iterate through the slides in the presentation:
- Get a slide through Presentation.Slides[] property.
- Create a new instance of Presentation class and remove the default slide using Presentation.Slides.RemoveAt(0) method.
- Append the slide to the new presentation using Presentation.Slides.Append() method.
- Save the new presentation using ISlide.SaveToFile() method.
- C#
using Spire.Presentation;

namespace SplitPresentationSlide
{
    class Program
    {
        static void Main(string[] args)
        {
            // Create an instance of Presentation class
            Presentation presentation = new Presentation();

            // Load a PowerPoint presentation
            presentation.LoadFromFile("Sample.pptx");

            // Iterate through all slides
            for (int i = 0; i < presentation.Slides.Count; i++)
            {
                // Get a slide
                ISlide slide = presentation.Slides[i];
                // Create a new presentation and remove the default slide
                Presentation newPresentation = new Presentation();
                newPresentation.Slides.RemoveAt(0);
                // Append the slide to the new presentation
                newPresentation.Slides.Append(slide);
                // Save the new presentation
                newPresentation.SaveToFile("output/Presentations/Slide-" + (i +1).ToString() + ".pptx", FileFormat.Pptx2013);
                newPresentation.Dispose();
            }
            presentation.Dispose();
        }
    }
}
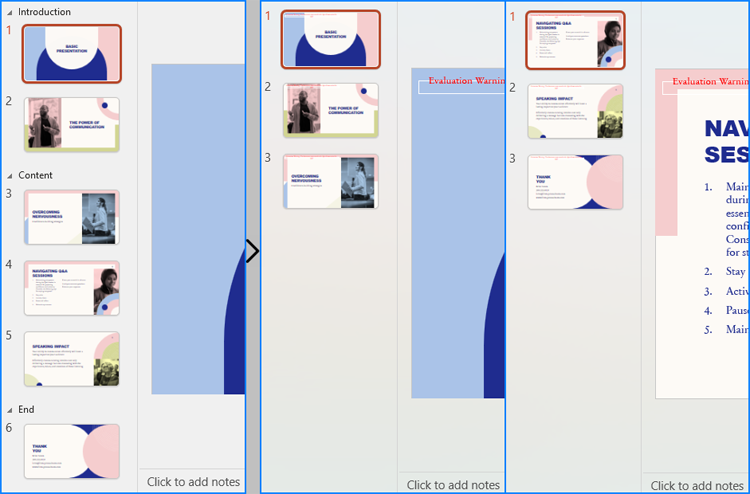
Split PowerPoint Presentations by Slide Ranges using C#
In addition to splitting PowerPoint presentations into individual slide presentations, developers can also split presentations into slide ranges by copying specified ranges of slides to new presentations and saving them.
Here are the detailed steps:
- Create an instance of Presentation class.
- Load a PowerPoint presentation using Presentation.LoadFromFile() method.
- Create new instances of Presentation class and remove the default slides.
- Append specified ranges of slides to the new presentations using Presentation.Slides.Append() method.
- Save the new presentations using Presentation.SaveToFile() method.
- C#
using Spire.Presentation;

namespace SplitPresentationSlide
{
    class Program
    {
        static void Main(string[] args)
        {
            // Create an instance of Presentation class
            Presentation presentation = new Presentation();

            // Load the original PowerPoint presentation
            presentation.LoadFromFile("Sample.pptx");

            // Create two new instances of Presentation class
            Presentation presentation1 = new Presentation();
            Presentation presentation2 = new Presentation();

            // Remove the default blank slides
            presentation1.Slides.RemoveAt(0);
            presentation2.Slides.RemoveAt(0);

            // Append specific ranges of slides to the new presentations
            for (int i = 0; i < 3; i++)
            {
                presentation1.Slides.Append(presentation.Slides[i]);
            }
            for (int i = 3; i < presentation.Slides.Count; i++)
            {
                presentation2.Slides.Append(presentation.Slides[i]);
            }

            // Save the new presentation
            presentation1.SaveToFile("output/Presentations/SLideRange1.pptx", FileFormat.Pptx2013);
            presentation2.SaveToFile("output/Presentations/SLideRange2.pptx", FileFormat.Pptx2013);

            presentation1.Dispose();
            presentation2.Dispose();
            presentation.Dispose();
        }
    }
}
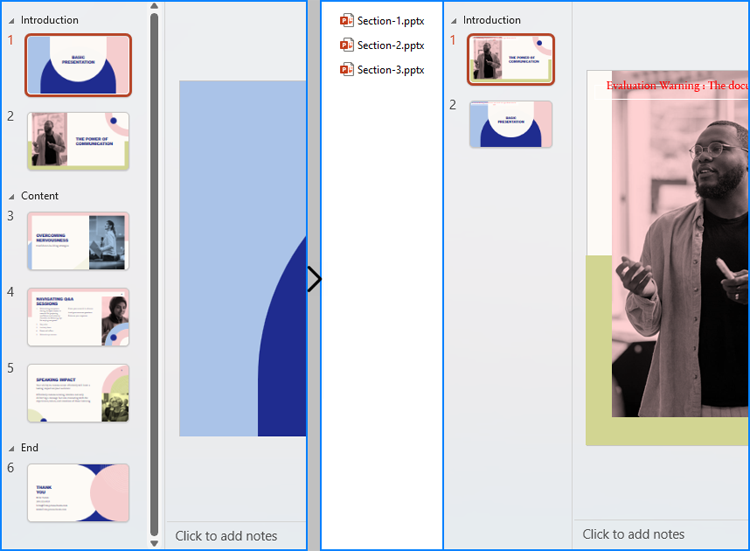
Split PowerPoint Presentations by Sections using C#
Developers also can split a presentation into sections by iterating through the sections in the presentation, adding each slide within those sections to a new PowerPoint presentation, and then saving it.
Here are the detailed steps:
- Create an instance of Presentation class and load a PowerPoint presentation using Presentation.LoadFromFile() method.
- Iterate through the sections in the presentation:
- Get a section through Presentation.SectionList[] property.
- Create a new Presentation instance and remove the default slide.
- Add a section to the new presentation with the same name using Presentation.SectionList.Append() method.
- Get the slides in the original section using Section.GetSlides() method.
- Iterate through the slides and add them to the new section using Presentation.SectionList[].Insert() method.
- Save the new presentation using Presentation.SaveToFile() method.
- C#
using Spire.Presentation;

namespace SplitPresentationSlide
{
    class Program
    {
        static void Main(string[] args)
        {
            // Create an instance of Presentation class
            Presentation presentation = new Presentation();

            // Load a PowerPoint presentation
            presentation.LoadFromFile("Sample.pptx");

            for (int i = 0; i < presentation.SectionList.Count; i++)
            {
                // Get the current section
                Section section = presentation.SectionList[i];
                // Create a new instance of Presentation class and remove the default slide
                Presentation newPresentation = new Presentation();
                newPresentation.Slides.RemoveAt(0);
                // Add a section to the new presentation
                newPresentation.SectionList.Append(section.Name);
                // Get the slides in the section
                ISlide[] slides = section.GetSlides();
                foreach (ISlide slide in slides)
                {
                    // Insert the slide to the new section in the new presentation
                    newPresentation.SectionList[0].Insert(0, slide);
                }
                // Save the new presentation
                newPresentation.SaveToFile("output/Presentations/Section-" + (i + 1).ToString() + ".pptx", FileFormat.Pptx2019);
                newPresentation.Dispose();
            }
            presentation.Dispose();
        }
    }
}
Apply for a Temporary License
If you'd like to remove the evaluation message from the generated documents, or to get rid of the function limitations, please request a 30-day trial license for yourself.
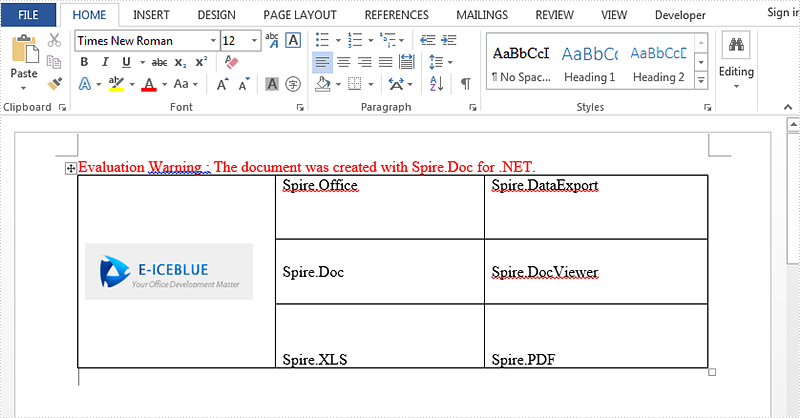
Set vertical alignment for table can show contents in different positions. There are three options including Top, Bottom, Middle. Default is Middle. This article talk about how to set vertical alignment for tables via Spire.Doc, the following is the detailed steps:
Step 1: Create a new Word document and add a new section.
Document document = new Document();
Section section = document.AddSection();
Step 2: Add a table with 3 columns and 3 rows. You can set showBoder property as true when you creating the table. Merge the first column as one cell.
Table table = section.AddTable(true);
table.ResetCells(3, 3);
table.ApplyVerticalMerge(0, 0, 2);
Step 3: Set the vertical alignment for each cell, default is top. Here we set the first row as Top, second row as Middle, third row as Bottom.
table.Rows[0].Cells[0].CellFormat.VerticalAlignment = VerticalAlignment.Middle;
table.Rows[0].Cells[1].CellFormat.VerticalAlignment = VerticalAlignment.Top;
table.Rows[0].Cells[2].CellFormat.VerticalAlignment = VerticalAlignment.Top;
table.Rows[1].Cells[1].CellFormat.VerticalAlignment = VerticalAlignment.Middle;
table.Rows[1].Cells[2].CellFormat.VerticalAlignment = VerticalAlignment.Middle;
table.Rows[2].Cells[1].CellFormat.VerticalAlignment = VerticalAlignment.Bottom;
table.Rows[2].Cells[2].CellFormat.VerticalAlignment = VerticalAlignment.Bottom;
Step 4: Append data to table.
Paragraph paraPic = table.Rows[0].Cells[0].AddParagraph();
DocPicture pic = paraPic.AppendPicture(Image.FromFile("1.png"));

String[][] data = {
                       new string[] {"","Spire.Office","Spire.DataExport"},
                       new string[] {"","Spire.Doc","Spire.DocViewer"},
                       new string[] {"","Spire.XLS","Spire.PDF"}
                            };

      for (int r = 0; r < 3; r++)
      {
        TableRow dataRow = table.Rows[r];
        dataRow.Height = 50;
        for (int c = 0; c < 3; c++)
           {
             if (c == 1)
               {
                  Paragraph par = dataRow.Cells[c].AddParagraph();
                  par.AppendText(data[r][c]);
                  dataRow.Cells[c].Width = (section.PageSetup.ClientWidth) / 2;
                }
             if (c == 2)
                {
                  Paragraph par = dataRow.Cells[c].AddParagraph();
                  par.AppendText(data[r][c]);
                  dataRow.Cells[c].Width = (section.PageSetup.ClientWidth) / 2;
                 }
              }
         }
Step 5: Save and review.
document.SaveToFile(@"result.docx", FileFormat.Docx2013);
System.Diagnostics.Process.Start(@"result.docx");
Result screenshot:
Full code:
using Spire.Doc;
using Spire.Doc.Documents;
using Spire.Doc.Fields;
using System;
using System.Drawing;
namespace SetVerticalAlignment
{
    class Program
    {

        static void Main(string[] args)
        {

            Document document = new Document();
            Section section = document.AddSection();

            Table table = section.AddTable(true);
            table.ResetCells(3, 3);

            table.ApplyVerticalMerge(0, 0, 2);

            table.Rows[0].Cells[0].CellFormat.VerticalAlignment = VerticalAlignment.Middle;
            table.Rows[0].Cells[1].CellFormat.VerticalAlignment = VerticalAlignment.Top;
            table.Rows[0].Cells[2].CellFormat.VerticalAlignment = VerticalAlignment.Top;
            table.Rows[1].Cells[1].CellFormat.VerticalAlignment = VerticalAlignment.Middle;
            table.Rows[1].Cells[2].CellFormat.VerticalAlignment = VerticalAlignment.Middle;
            table.Rows[2].Cells[1].CellFormat.VerticalAlignment = VerticalAlignment.Bottom;
            table.Rows[2].Cells[2].CellFormat.VerticalAlignment = VerticalAlignment.Bottom;

            Paragraph paraPic = table.Rows[0].Cells[0].AddParagraph();
            DocPicture pic = paraPic.AppendPicture(Image.FromFile("1.png"));

            String[][] data = {
                       new string[] {"","Spire.Office","Spire.DataExport"},
                       new string[] {"","Spire.Doc","Spire.DocViewer"},
                       new string[] {"","Spire.XLS","Spire.PDF"}
                            };

            for (int r = 0; r < 3; r++)
            {
                TableRow dataRow = table.Rows[r];
                dataRow.Height = 50;
                for (int c = 0; c < 3; c++)
                {
                    if (c == 1)
                    {
                        Paragraph par = dataRow.Cells[c].AddParagraph();
                        par.AppendText(data[r][c]);
                        dataRow.Cells[c].Width = (section.PageSetup.ClientWidth) / 2;
                    }
                    if (c == 2)
                    {
                        Paragraph par = dataRow.Cells[c].AddParagraph();
                        par.AppendText(data[r][c]);
                        dataRow.Cells[c].Width = (section.PageSetup.ClientWidth) / 2;
                    }
                }
            }
            document.SaveToFile(@"result.docx", FileFormat.Docx2013);
            System.Diagnostics.Process.Start(@"result.docx");
        }
    }
}
