Knowledgebase (2370)
Children categories
A bubble chart is generally used to display the relationship between 3 parameters. For example, you can use bubble chart to show relation between Number of product, Sales volume and Market share. Unlike other charts, a bubble chart does not use a category axis - both horizontal and vertical axes are value axes.
As a powerful component, Spire.Presentation supports to insert various kinds of charts in PowerPoint including bubble chart. In this article, I made an example to show how to create bubble chart with custom data using Spire.Presentation in C#, VB.NET.
Main Steps:
Step 1: Initialize a new instance of Presentation class.
Presentation pres = new Presentation();
Step 2: Insert chart, set chart title and set the type of chart as Bubble.
RectangleF rect1 = new RectangleF(40, 40, 550, 320);
IChart chart = pres.Slides[0].Shapes.AppendChart(ChartType.Bubble, rect1, false);
chart.ChartTitle.TextProperties.Text = "Bubble Chart";
chart.ChartTitle.TextProperties.IsCentered = true;
chart.ChartTitle.Height = 30;
chart.HasTitle = true;
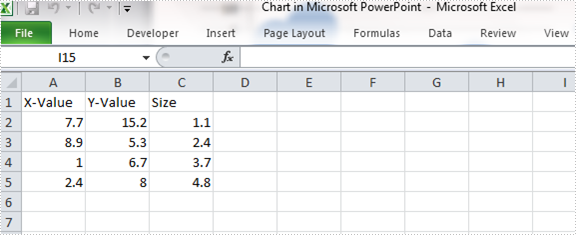
Step 3: Define a group of arrays.
Double[] xdata = new Double[] { 7.7, 8.9, 1.0, 2.4 };
Double[] ydata = new Double[] { 15.2, 5.3, 6.7, 8 };
Double[] size = new Double[] { 1.1, 2.4, 3.7, 4.8 };
Step 4: Attach the data to chart. You can use the property chart.ChartData[rowIndex, columnIndex].Text to get/set the text value, use the property chart.ChartData[rowIndex, columnIndex].Value to get/set numeric value. Here I insert values in predefined arrays to the data chart.
chart.ChartData[0, 0].Text = "X-Value";
chart.ChartData[0, 1].Text = "Y-Value";
chart.ChartData[0, 2].Text = "Size";

for (Int32 i = 0; i < xdata.Length; ++i)
{
    chart.ChartData[i + 1, 0].Value = xdata[i];
    chart.ChartData[i + 1, 1].Value = ydata[i];
    chart.ChartData[i + 1, 2].Value = size[i];
}
Step 5: Set the Series label.
chart.Series.SeriesLabel = chart.ChartData["B1","B1"];
Step 6: Assign data to X axis, Y axis and Bubbles.
chart.Series[0].XValues = chart.ChartData["A2", "A5"];
chart.Series[0].YValues = chart.ChartData["B2", "B5"];
chart.Series[0].Bubbles.Add(chart.ChartData["C2"]);
chart.Series[0].Bubbles.Add(chart.ChartData["C3"]);
chart.Series[0].Bubbles.Add(chart.ChartData["C4"]);
chart.Series[0].Bubbles.Add(chart.ChartData["C5"]);
Step 7: Save and launch the file.
pres.SaveToFile(@"result.pptx", FileFormat.Pptx2010);
System.Diagnostics.Process.Start("result.pptx");
Output:

Chart data:
Full Code:
using Spire.Presentation;
using Spire.Presentation.Charts;
using System;
using System.Drawing;

     namespace CreateBubbleChart
{
    class Program
    {
        static void Main(string[] args)
        {
            Presentation pres = new Presentation();
            RectangleF rect1 = new RectangleF(40, 40, 550, 320);
            IChart chart = pres.Slides[0].Shapes.AppendChart(ChartType.Bubble, rect1, false);
            chart.ChartTitle.TextProperties.Text = "Bubble Chart";
            chart.ChartTitle.TextProperties.IsCentered = true;
            chart.ChartTitle.Height = 30;
            chart.HasTitle = true;

            Double[] xdata = new Double[] { 7.7, 8.9, 1.0, 2.4 };
            Double[] ydata = new Double[] { 15.2, 5.3, 6.7, 8 };
            Double[] size = new Double[] { 1.1, 2.4, 3.7, 4.8 };

            chart.ChartData[0, 0].Text = "X-Value";
            chart.ChartData[0, 1].Text = "Y-Value";
            chart.ChartData[0, 2].Text = "Size";

            for (Int32 i = 0; i < xdata.Length; ++i)
            {
                chart.ChartData[i + 1, 0].Value = xdata[i];
                chart.ChartData[i + 1, 1].Value = ydata[i];
                chart.ChartData[i + 1, 2].Value = size[i];
            }

            chart.Series.SeriesLabel = chart.ChartData["B1", "B1"];

            chart.Series[0].XValues = chart.ChartData["A2", "A5"];
            chart.Series[0].YValues = chart.ChartData["B2", "B5"];
            chart.Series[0].Bubbles.Add(chart.ChartData["C2"]);
            chart.Series[0].Bubbles.Add(chart.ChartData["C3"]);
            chart.Series[0].Bubbles.Add(chart.ChartData["C4"]);
            chart.Series[0].Bubbles.Add(chart.ChartData["C5"]);

            pres.SaveToFile(@"result.pptx", FileFormat.Pptx2010);
            System.Diagnostics.Process.Start("result.pptx");

        }
    }
}
Imports Spire.Presentation
Imports Spire.Presentation.Charts
Imports System.Drawing

Namespace CreateBubbleChart
	Class Program
		Private Shared Sub Main(args As String())
			Dim pres As New Presentation()
			Dim rect1 As New RectangleF(40, 40, 550, 320)
			Dim chart As IChart = pres.Slides(0).Shapes.AppendChart(ChartType.Bubble, rect1, False)
			chart.ChartTitle.TextProperties.Text = "Bubble Chart"
			chart.ChartTitle.TextProperties.IsCentered = True
			chart.ChartTitle.Height = 30
			chart.HasTitle = True

			Dim xdata As [Double]() = New [Double]() {7.7, 8.9, 1.0, 2.4}
			Dim ydata As [Double]() = New [Double]() {15.2, 5.3, 6.7, 8}
			Dim size As [Double]() = New [Double]() {1.1, 2.4, 3.7, 4.8}

			chart.ChartData(0, 0).Text = "X-Value"
			chart.ChartData(0, 1).Text = "Y-Value"
			chart.ChartData(0, 2).Text = "Size"

			For i As Int32 = 0 To xdata.Length - 1
				chart.ChartData(i + 1, 0).Value = xdata(i)
				chart.ChartData(i + 1, 1).Value = ydata(i)
				chart.ChartData(i + 1, 2).Value = size(i)
			Next

			chart.Series.SeriesLabel = chart.ChartData("B1", "B1")

			chart.Series(0).XValues = chart.ChartData("A2", "A5")
			chart.Series(0).YValues = chart.ChartData("B2", "B5")
			chart.Series(0).Bubbles.Add(chart.ChartData("C2"))
			chart.Series(0).Bubbles.Add(chart.ChartData("C3"))
			chart.Series(0).Bubbles.Add(chart.ChartData("C4"))
			chart.Series(0).Bubbles.Add(chart.ChartData("C5"))

			pres.SaveToFile("result.pptx", FileFormat.Pptx2010)
			System.Diagnostics.Process.Start("result.pptx")

		End Sub
	End Class
End Namespace
If you are preparing a large number of presentations, cloning slides can help you save resources. Instead of creating new slides from scratch for each presentation, it is more efficient and less time-consuming to modify existing slides. In this article, you will learn how to copy slides in PowerPoint presentations in C# using Spire.Presentation for .NET.
Install Spire.Presentation for .NET
To begin with, you need to add the DLL files included in the Spire.Presentation for.NET package as references in your .NET project. The DLL files can be either downloaded from this link or installed via NuGet.
PM> Install-Package Spire.Presentation
Copy Slides Within the Same Presentation in C#
You can clone a slide either at a specified location or at the end of a PowerPoint presentation through the Presentation.Slides.Insert(intIndex, ISlide slide) or Presentation.Slides.Append(ISlide slide) methods. The following are the detailed steps.
- Create a Presentation instance.
- Load a PowerPoint presentation using Presentation.LoadFromFile() method.
- Get a specified slide using Prenstion.Slides[] property.
- Clone the slide to the end of the same presentation using Presentation.Slides.Append() method.
- Clone the slide to a specific position within the same presentation using Presentation.Slides.Insert() method.
- Save the result file using Presentation.SaveToFile() method.
- C#
using Spire.Presentation;

namespace CopySlides
{
    class Program
    {
        static void Main(string[] args)
        {
            //Create a Presentation instance
            Presentation ppt = new Presentation();

            //Load a PowerPoint presentation
            ppt.LoadFromFile("Input1.pptx");

            //Get the first slide in the presentation
            ISlide slide = ppt.Slides[0];

            //Clone the slide to the end of the presentation
            ppt.Slides.Append(slide);

            //Clone the slide to the third position within the presentation
            ppt.Slides.Insert(2, slide);

            //Save the result file
            ppt.SaveToFile("CloneSlidesWithinTheSame.pptx", FileFormat.Pptx2013);

        }
    }
}
Copy Slides to Another Presentation in C#
Spire.Presentation for .NET also allows you to load two PowerPoint files and then clone the slides from one presentation to another presentation. The following are the detailed steps.
- Create a Presentation instance.
- Load two PowerPoint presentations using Presentation.LoadFromFile() method.
- Get two slides in the first presentation using Prenstion.Slides[] property.
- Clone the first slide to a specific position in the second presentation using Presentation.Slides.Insert() method.
- Clone the second slide to the end of the second presentation using Presentation.Slides.Append() method.
- Save the result file using Presentation.SaveToFile() method.
- C#
using Spire.Presentation;

namespace CopySlidesToAnother
{
    class Program
    {
        static void Main(string[] args)
        {
            //Load the first PowerPoint presentation
            Presentation sourcePPT = new Presentation();
            sourcePPT.LoadFromFile("Input1.pptx");

            //Load the second PowerPoint presentation
            Presentation destPPT = new Presentation();
            destPPT.LoadFromFile("Input2.pptx");

            //Get two slides in the first presentation
            ISlide slide1 = sourcePPT.Slides[1];
            ISlide slide2 = sourcePPT.Slides[2];

            //Clone slide1 to the second position in the second presentation
            destPPT.Slides.Insert(1, slide1);

            //Clone slide2 to the end of the second presentation
            destPPT.Slides.Append(slide2);

            //Save the result file
            destPPT.SaveToFile("CloneSlidesToAnother.pptx", FileFormat.Pptx2013);

        }
    }
}
Apply for a Temporary License
If you'd like to remove the evaluation message from the generated documents, or to get rid of the function limitations, please request a 30-day trial license for yourself.
Add page numbers in different sections in Word document via Spire.Doc
2015-06-25 08:04:08 Written by KoohjiSometimes in one Word document developers need to add page numbers for different sections, for example cover, directory and content are in different sections. This article talks about how to add page numbers for different sections via Spire.Doc.
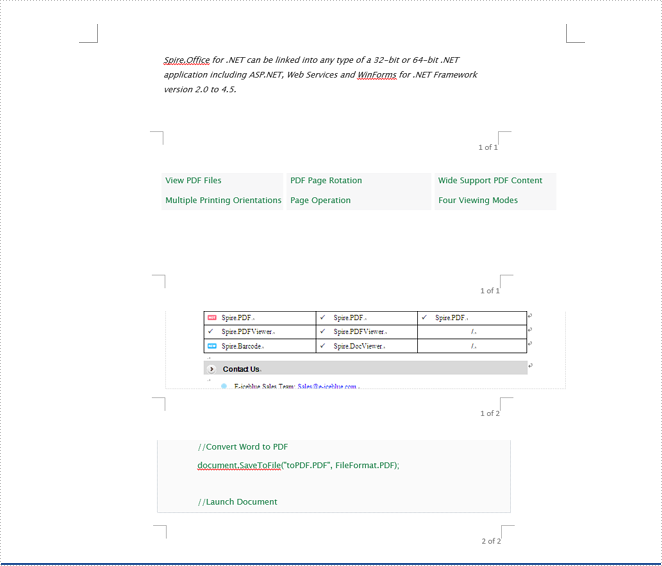
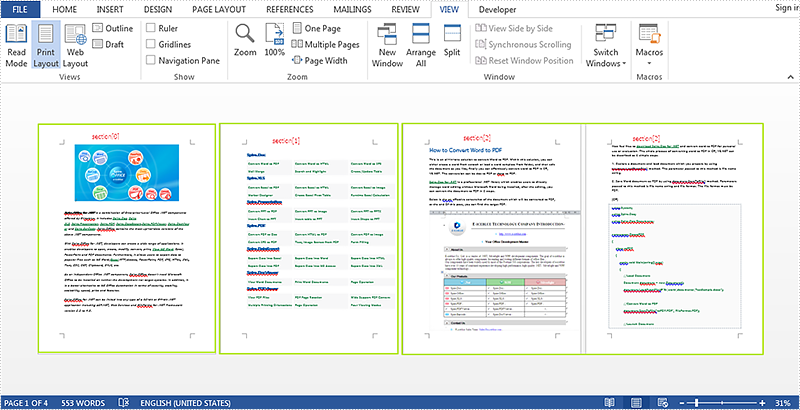
Here will import a test document within 3 sections inside as followed screenshot.
Here are the detailed steps:
Step 1: Create a new document and load the test word file.
Document document = new Document("test.docx");
Step 2: Create footer for the first section and add page number inside.
HeaderFooter footer = document.Sections[0].HeadersFooters.Footer;
Paragraph footerParagraph = footer.AddParagraph();
footerParagraph.AppendField("page number", FieldType.FieldPage);
footerParagraph.AppendText(" of ");
footerParagraph.AppendField("number of pages", FieldType.FieldSectionPages);
footerParagraph.Format.HorizontalAlignment = HorizontalAlignment.Right;
Step 3: Restart page number of next section and set the starting page number to 1.
document.Sections[1].PageSetup.RestartPageNumbering = true;
document.Sections[1].PageSetup.PageStartingNumber = 1;
Step 4: Repeat step2 and Step3 for the rest sections, so change the code with for loop.
for (int i = 0; i < 3; i++)
            {
                HeaderFooter footer = document.Sections[i].HeadersFooters.Footer;
                Paragraph footerParagraph = footer.AddParagraph();
                footerParagraph.AppendField("page number", FieldType.FieldPage);
                footerParagraph.AppendText(" of ");
                footerParagraph.AppendField("number of pages", FieldType.FieldSectionPages);
                footerParagraph.Format.HorizontalAlignment = HorizontalAlignment.Right;

                if (i == 2)
                    break;
                else
                {
                    document.Sections[i + 1].PageSetup.RestartPageNumbering = true;
                    document.Sections[i + 1].PageSetup.PageStartingNumber = 1;
                }
            }
Step 5: Save and review.
document.SaveToFile("result.docx", FileFormat.Docx);
System.Diagnostics.Process.Start("result.docx");
Result screenshot: