
Knowledgebase (2370)
Children categories
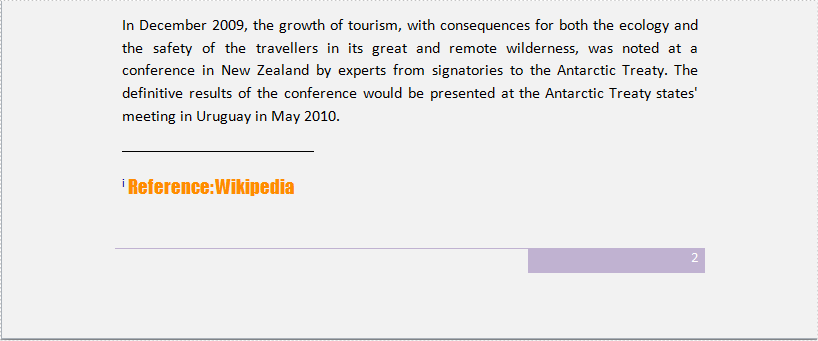
Word endnote is often put in the end of the document, which presents references of referred words/sentences/paragraphs. It includes two parts, marker and text. Marker can be customized or ordered automatically (i, ii, iii…). When one endnote is added, deleted or moved, the marker will be reordered automatically.
Spire.Doc for .NET, a stand-alone component used to manipulate Word document for .NET applications, enables users to insert endnote in Word by using C#, VB.NET. This guide introduces a method about how to realize this function via Spire.Doc for .NET.
Because endnote is included in footnote class, so invoke p.AppendFootnote(FootnoteType.Endnote) method to insert endnote. Then, use endnote.TextBody.AddParagraph().AppendText(string) method to add text and set CharacterFormat and MarkerCharacterFormat properties for endnote text and marker format. Download and install Spire.Doc for .NET and use the following code to insert endnote in Word.
using System.Drawing;
using Spire.Doc;
using Spire.Doc.Documents;
using Spire.Doc.Fields;

namespace WordEndnote
{
    class InsertEndnote
    {
        static void Main(string[] args)
        {
            //Load Document
            Document doc = new Document();
            doc.LoadFromFile(@"E:\Work\Documents\WordDocuments\Antarctic.docx", FileFormat.Docx);
            Section s = doc.Sections[0];
            Paragraph p = s.Paragraphs[3];

            //Add Footnote
            Footnote endnote = p.AppendFootnote(FootnoteType.Endnote);

            //Append Text
            TextRange text = endnote.TextBody.AddParagraph().AppendText("Reference: Wikipedia");

            //Text Format
            text.CharacterFormat.FontName = "Impact";
            text.CharacterFormat.FontSize = 14;
            text.CharacterFormat.TextColor = Color.DarkOrange;

            //Marker Format
            endnote.MarkerCharacterFormat.FontName = "Calibri";
            endnote.MarkerCharacterFormat.FontSize = 14;
            endnote.MarkerCharacterFormat.TextColor = Color.DarkBlue;

            //Save and Launch
            doc.SaveToFile("Endnote.docx", FileFormat.Docx);
            System.Diagnostics.Process.Start("Endnote.docx");
        }
    }
}
Imports System.Drawing
Imports Spire.Doc
Imports Spire.Doc.Documents
Imports Spire.Doc.Fields

Namespace WordEndnote
    Friend Class InsertEndnote
        Shared Sub Main(ByVal args() As String)
            'Load Document
            Dim doc As New Document()
            doc.LoadFromFile("E:\Work\Documents\WordDocuments\Antarctic.docx", FileFormat.Docx)
            Dim s As Section = doc.Sections(0)
            Dim p As Paragraph = s.Paragraphs(3)

            'Add Footnote
            Dim endnote As Footnote = p.AppendFootnote(FootnoteType.Endnote)

            'Append Text
            Dim text As TextRange = endnote.TextBody.AddParagraph().AppendText("Reference: Wikipedia")

            'Text Format
            text.CharacterFormat.FontName = "Impact"
            text.CharacterFormat.FontSize = 14
            text.CharacterFormat.TextColor = Color.DarkOrange

            'Marker Format
            endnote.MarkerCharacterFormat.FontName = "Calibri"
            endnote.MarkerCharacterFormat.FontSize = 14
            endnote.MarkerCharacterFormat.TextColor = Color.DarkBlue

            'Save and Launch
            doc.SaveToFile("Endnote.docx", FileFormat.Docx)
            System.Diagnostics.Process.Start("Endnote.docx")
        End Sub
    End Class
End Namespace
Spire.Doc is a Microsoft Word component, which enables users to perform a wide range of Word document processing tasks directly, such as generate, read, write and modify Word document in WPF, .NET and Silverlight.
When creating an Excel worksheet, you may enter some data or formulas that you don't wish other users to modify. Locking the corresponding cells can be essential to maintain the integrity of the data and formulas. In this article, you will learn how to lock specific cells in Excel in C# and VB.NET using Spire.XLS for .NET library.
Install Spire.XLS for .NET
To begin with, you need to add the DLL files included in the Spire.XLS for .NET package as references in your .NET project. The DLL files can be either downloaded from this link or installed via NuGet.
PM> Install-Package Spire.XLS
Lock Specific Cells in Excel in C# and VB.NET
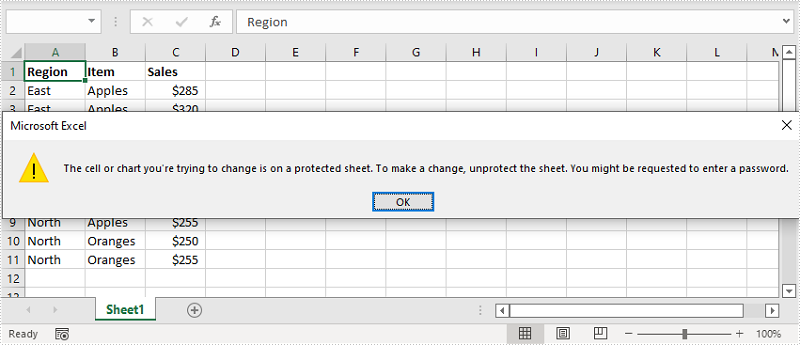
Normally, the locked option is enabled for all cells in a worksheet. Therefore, before locking a cell or range of cells, all cells must be unlocked. Keep in mind that locking cells doesn’t take effect until the worksheet is protected.
The following are the main steps to lock cells in Excel:
- Create an instance of Workbook class.
- Load the Excel file using Workbook.LoadFromFile() method.
- Get the desired worksheet using Workbook.Worksheet[sheetIndex] property.
- Access the used range in the worksheet and then unlock all the cells in the range by setting the CellRange.Style.Locked property as false.
- Access specific cells and then lock them by setting the CellRange.Style.Locked property as true.
- Protect the worksheet using XlsWorksheetBase.Protect() method.
- Save the result file using Workbook.SaveToFile() method.
- C#
- VB.NET
using Spire.Xls;

namespace LockCells
{
    class Program
    {
        static void Main(string[] args)
        {
            //Create a Workbook instance
            Workbook workbook = new Workbook();
            //Load an Excel file
            workbook.LoadFromFile("Input.xlsx");

            //Get the first worksheet
            Worksheet sheet = workbook.Worksheets[0];

            //Unlock all cells in the used range of the worksheet
            CellRange usedRange = sheet.Range;
            usedRange.Style.Locked = false;

            //Lock specific cells
            CellRange cells = sheet.Range["A1:C3"];
            cells.Style.Locked = true;

            //Protect the worksheet with password
            sheet.Protect("123456", SheetProtectionType.All);

            //Save the result file
            workbook.SaveToFile("LockCells.xlsx", ExcelVersion.Version2016);
        }
    }
}
Apply for a Temporary License
If you'd like to remove the evaluation message from the generated documents, or to get rid of the function limitations, please request a 30-day trial license for yourself.
Optimizing the viewer preferences and zoom factors is crucial for improving the viewing experience of PDF documents. By using the appropriate viewer preferences and zoom factors, you can make your PDF documents more user-friendly, viewable and suitable for different devices and platforms. In this article, we will demonstrate how to set viewer preferences and zoom factors for PDF documents in C# and VB.NET using Spire.PDF for .NET.
Install Spire.PDF for .NET
To begin with, you need to add the DLL files included in the Spire.PDF for.NET package as references in your .NET project. The DLL files can be either downloaded from this link or installed via NuGet.
PM> Install-Package Spire.PDF
Set Viewer Preferences for PDF in C# and VB.NET
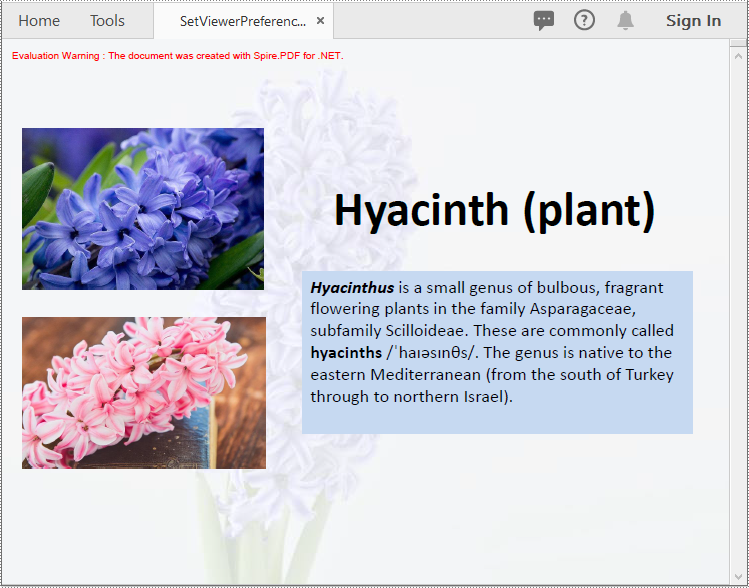
Viewer preferences are settings that can be applied to a PDF document to control how it is displayed when it is opened in a PDF viewer. These preferences can affect various aspects of the viewing experience, such as the initial view, page layout, and navigation tabs.
To set the viewer preference for a PDF document using Spire.PDF for .NET, you can follow these steps:
- Initialize an instance of PdfDocument class.
- Load a PDF document using PdfDocument.LoadFromFile() method.
- Get the PdfViewerPreferences object.
- Set viewer preference for the document using the properties provided by the PdfViewerPreferences class.
- Save the result document using PdfDocument.SaveToFile() method.
- C#
- VB.NET
using Spire.Pdf;

namespace SetViewerPreference
{
    internal class Program
    {
        static void Main(string[] args)
        {
            //Initialize an instance of PdfDocument class
            PdfDocument pdf = new PdfDocument();
            //Load a PDF document
            pdf.LoadFromFile(@"Example.pdf");

            //Get the PdfViewerPreferences object
            PdfViewerPreferences viewerPreferences = pdf.ViewerPreferences;

            //Set viewer preference
            viewerPreferences.FitWindow = false;
            viewerPreferences.HideMenubar = true;
            viewerPreferences.HideToolbar = true;
            viewerPreferences.CenterWindow= true;
            viewerPreferences.DisplayTitle = false;
            viewerPreferences.PageLayout = PdfPageLayout.SinglePage;
            viewerPreferences.PageMode = PdfPageMode.UseNone;

            //Save the result document
            pdf.SaveToFile("SetViewerPreference.pdf");
            pdf.Close();
        }
    }
}
Set Zoom Factors for PDF in C# and VB.NET
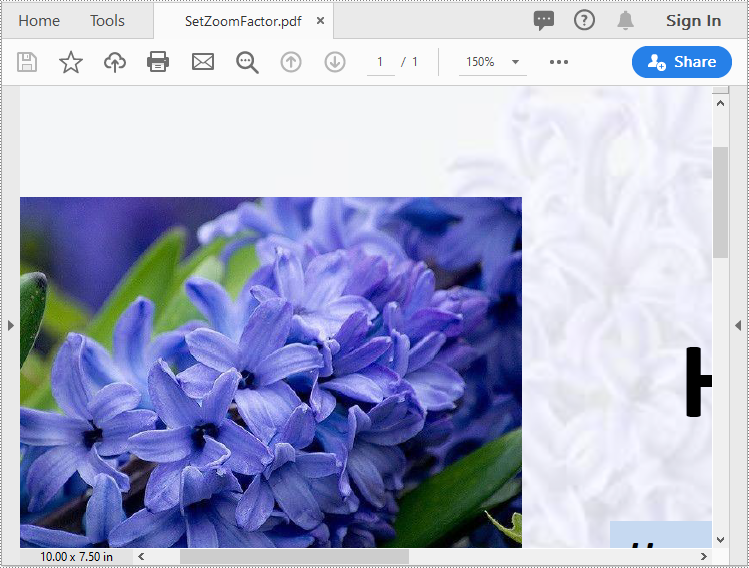
The zoom factor determines the zoom level of the PDF document when it is opened. By default, most PDF viewers set the zoom factor to "Fit Page," which scales the document to fit the width of the viewer window. However, you can also set a specific zoom factor, such as 60%, 150% or 200%, depending on your needs.
To set the zoom factor for a PDF document using Spire.PDF for .NET, you can follow these steps:
- Initialize an instance of PdfDocument class.
- Load a PDF document using PdfDocument.LoadFromFile() method.
- Get a specific page using PdfDocument.Pages[int index] property.
- Initialize an instance of the PdfDestination class.
- Set the destination mode, location and zoom factor using PdfDestination.Mode and PdfDestination.Location and PdfDestination.Zoom properties.
- Initialize an instance of the PdfGoToAction class and pass the PdfDestination instance to the constructor of the class as a parameter.
- Set the action to be executed when the document is opened using PdfDocument.AfterOpenAction property.
- Save the result document using PdfDocument.SaveToFile() method.
- C#
- VB.NET
using Spire.Pdf;
using Spire.Pdf.Actions;
using Spire.Pdf.General;
using System.Drawing;

namespace SetZoomFactor
{
    internal class Program
    {
        static void Main(string[] args)
        {
            //Initialize an instance of the PdfDocument class
            PdfDocument pdf = new PdfDocument();
            //Load a PDF document
            pdf.LoadFromFile(@"Example.pdf");

            //Get the first page
            PdfPageBase page = pdf.Pages[0];

            //Initialize an instance of the PdfDestination class
            PdfDestination dest = new PdfDestination(page);
            //Set the destination mode
            dest.Mode = PdfDestinationMode.Location;
            //Set the destination location
            dest.Location = new PointF(40f, 40f);
            //Set the zoom factor
            dest.Zoom = 1.5f;

            //Initialize an instance of the PdfGoToAction class
            PdfGoToAction gotoAction = new PdfGoToAction(dest);
            //Set the action to be executed when the document is opened
            pdf.AfterOpenAction = gotoAction;

            //Save the result document
            pdf.SaveToFile("SetZoomFactor.pdf");
            pdf.Close();
        }
    }
}
Apply for a Temporary License
If you'd like to remove the evaluation message from the generated documents, or to get rid of the function limitations, please request a 30-day trial license for yourself.
